

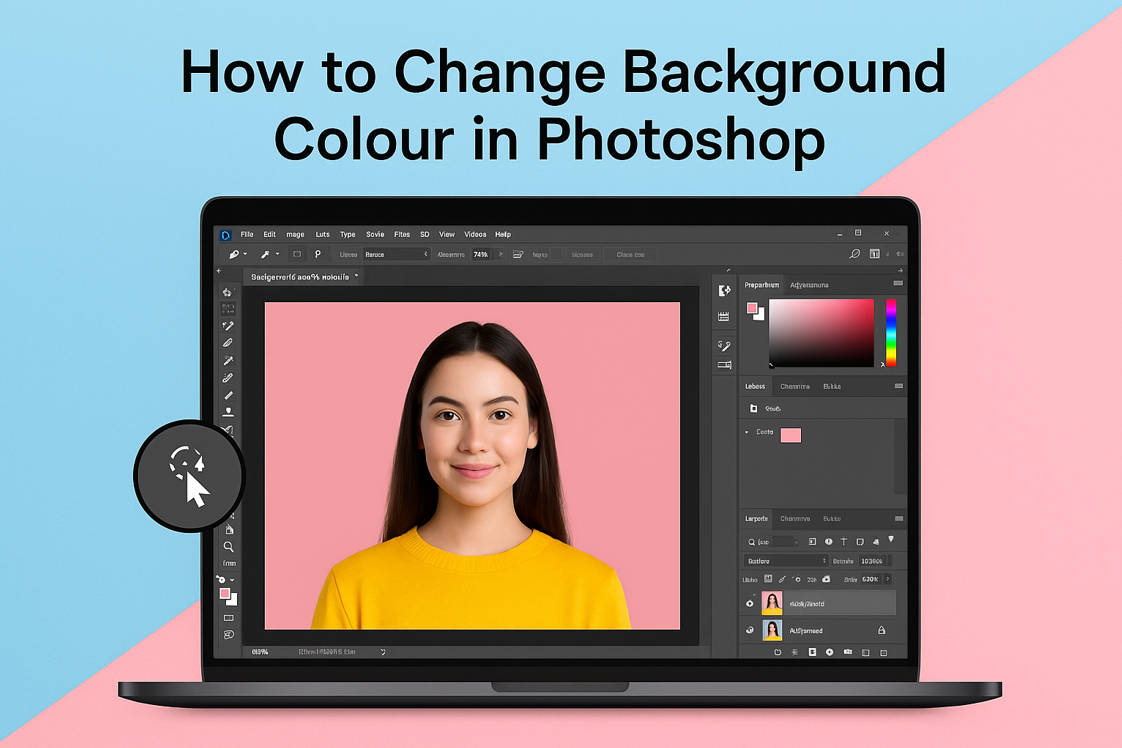
Photoshop is a powerful image editing tool used by photographers, designers and creatives worldwide. One of its popular features is the ability to change an image’s background with ease. Whether you’re creating a clean product shot, artistic portrait or social media graphic, knowing how to change background colour in Photoshop can level up your visual content.
Photoshop has several tools like Magic Wand, Quick Selection and Object Selection tools, from simple colour swaps to more advanced subject isolation, for all skill levels. Even beginners can get pro results with a bit of practice. This guide will walk you through the easiest ways to edit, replace or enhance background colours quickly and efficiently.
In this article
Part 1: How to Change Background Colour in Photoshop with the Selection Tool
Using selection methods to modify the background color of a photo in Adobe Photoshop puts you in full control of the editing. Whether you're editing a product image, a portrait, or a digital composition, this approach enables you to isolate and colorize the background precisely.
Step 1: Open and Duplicate Your Image
Begin by opening your image within Photoshop. Always duplicate your background layer. Press Command + J on a Mac or Ctrl + J on Windows to do this. This will create a copy of your image layer from which you can work, leaving your original image free from any potential mistakes.
Step 2: Select a Selection Tool
Photoshop provides a few selection tools designed for different subjects. Your selection depends upon your image's complexity and against-which it sits.
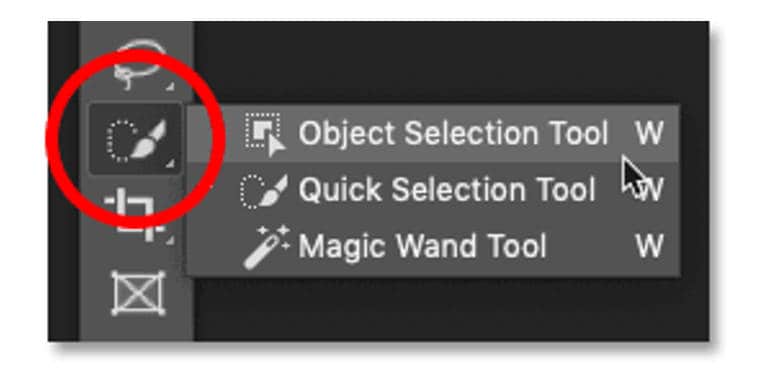
- Quick Selection Tool: Found in the left-hand toolbar (or press W) and is best for backgrounds with high contrast from the subject. Drag the cursor over the background and Photoshop will intelligently detect and select the edges.
- Magic Wand Tool: It’s located in the toolbar, typically alongside the Quick Selection Tool. Best for solid or evenly coloured backgrounds. Click on the background and adjust the “Tolerance” in the options bar to control how much of a similar color range gets selected. Lower values select fewer tones, higher values select more variations.
- Lasso Tool: This tool is for manual selections. Use it for freehand outlines or the "Polygonal Lasso Tool" for straight-edged selections.
Step 3: Refine Your Selection
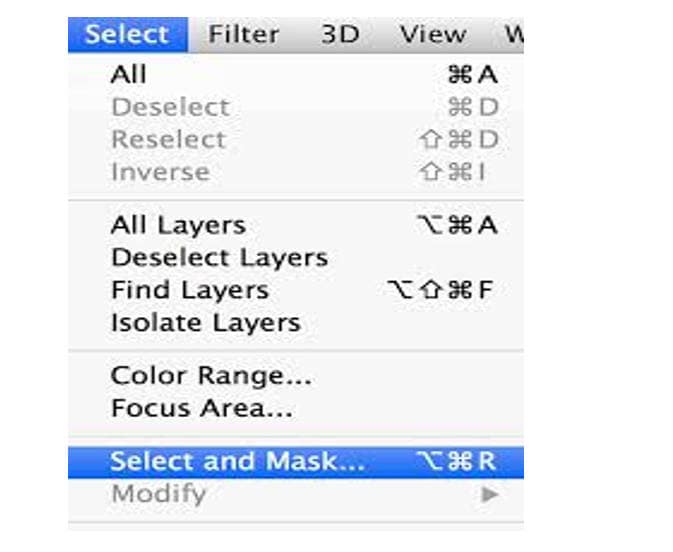
Once you’ve made the initial selection, it’s time to fine-tune it. Hold Shift to add to your selection. Hold Alt/Option to subtract areas. Click on the "Select" menu, then choose "Select and Mask" to open more detailed editing options. Here you can smooth edges, feather them and adjust the selection using sliders for perfect precision.
Step 4: Change the Background Colour
With this background chosen, you can now modify its color in one of two ways.
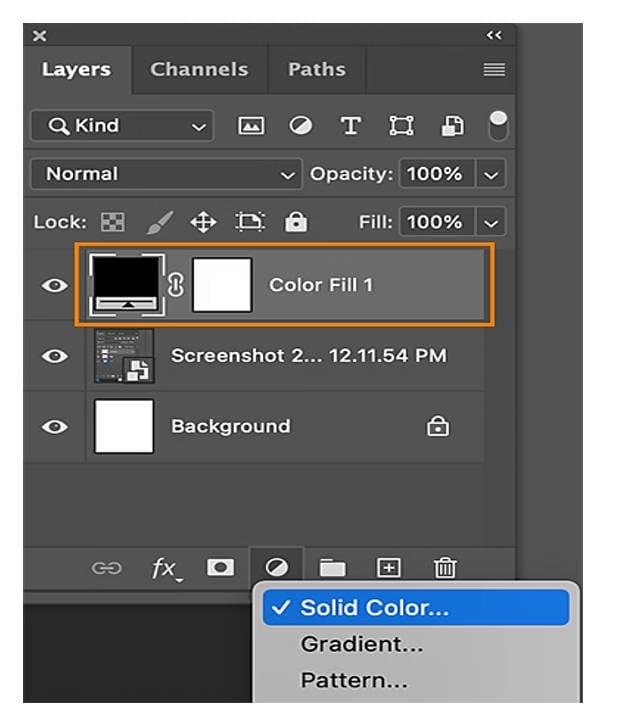
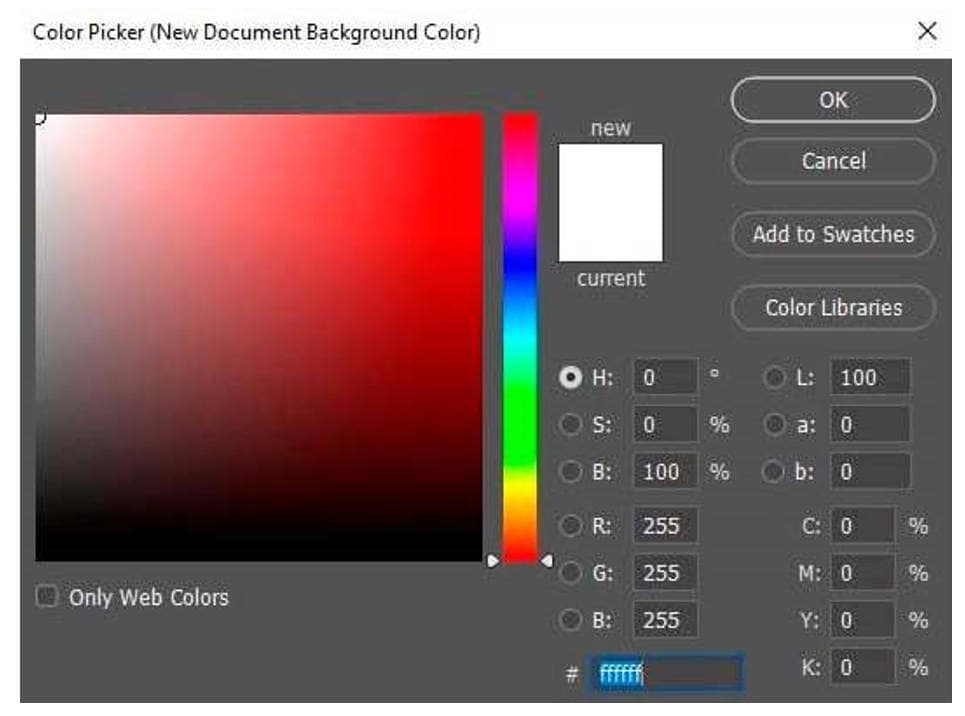
- Apply a Solid Color Adjustment Layer: Click the “Adjustment Layer” icon in the Layers panel. Select "Solid Color," then pick your desired color from the "Color Picker."The layer mask will automatically apply your selection, keeping the subject untouched.
- Use Edit then Fill: With the background still selected, go to "Edit," then choose "Fill." Under "Contents," choose "Color," pick a new colour and click OK. This fills the selected background directly on the layer.
Step 5: Optional – Use Hue/Saturation for Subtle Changes
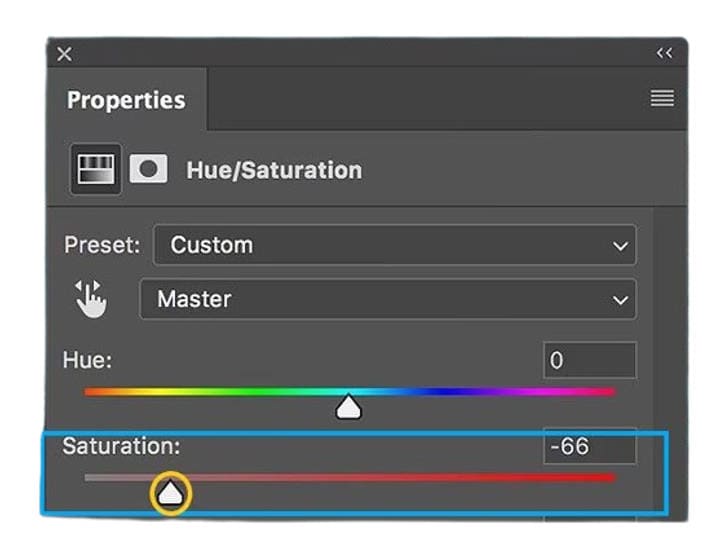
For more natural adjustments (like colour tone shifts), go to "Layer," then "New Adjustment Layer," and choose "Hue/Saturation." Make sure the background is still selected. Adjust the sliders to modify the hue, saturation and brightness while keeping the background’s texture.
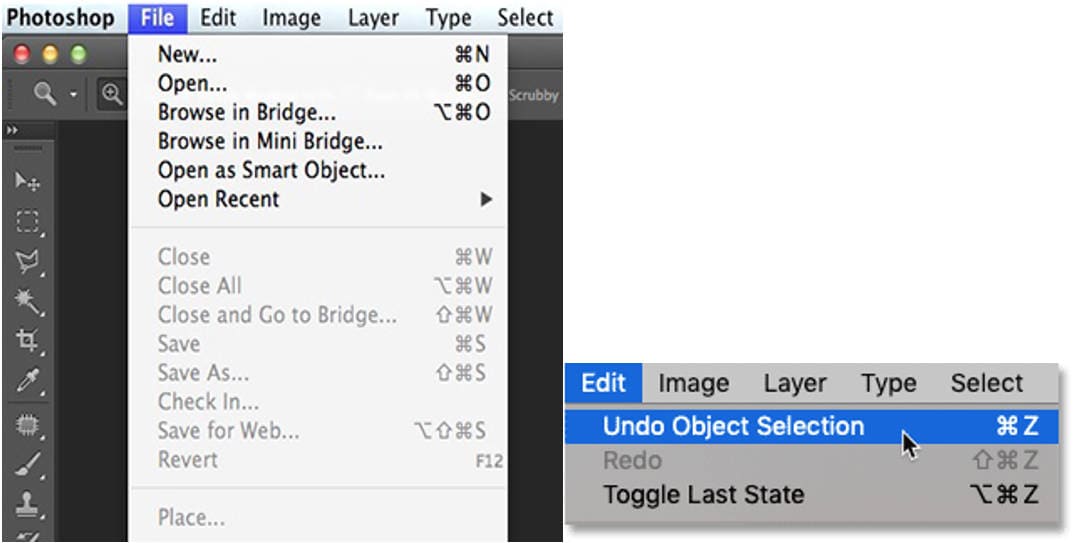
Step 6: Save Your Work
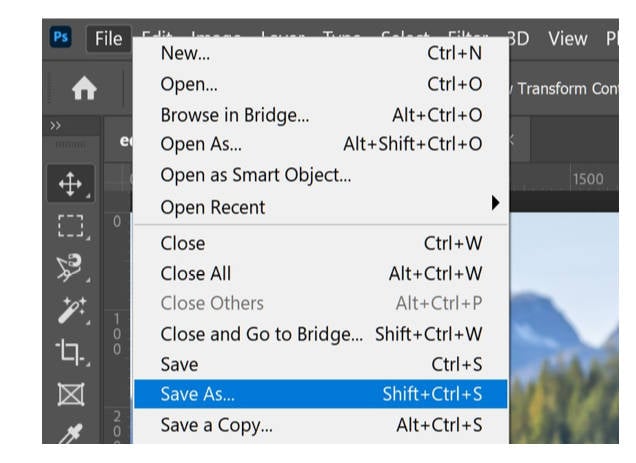
When you're satisfied with the new background, save your work. Go to "File," then "Save As." Choose a new name for your file and a new format to preserve your original image.

Batch Image Background Remover on Win and Mac
Part 2: How to Change Background Picture In Photoshop
Photoshop has powerful tools to help you change the background of any photo. Replacing an image background completely is different from just changing its colour. This method allows photographers to move subjects to entirely new environments or create imaginative composite images that wouldn’t otherwise be possible.
Here is how you can change Photoshop background color with a brand-new photo background.
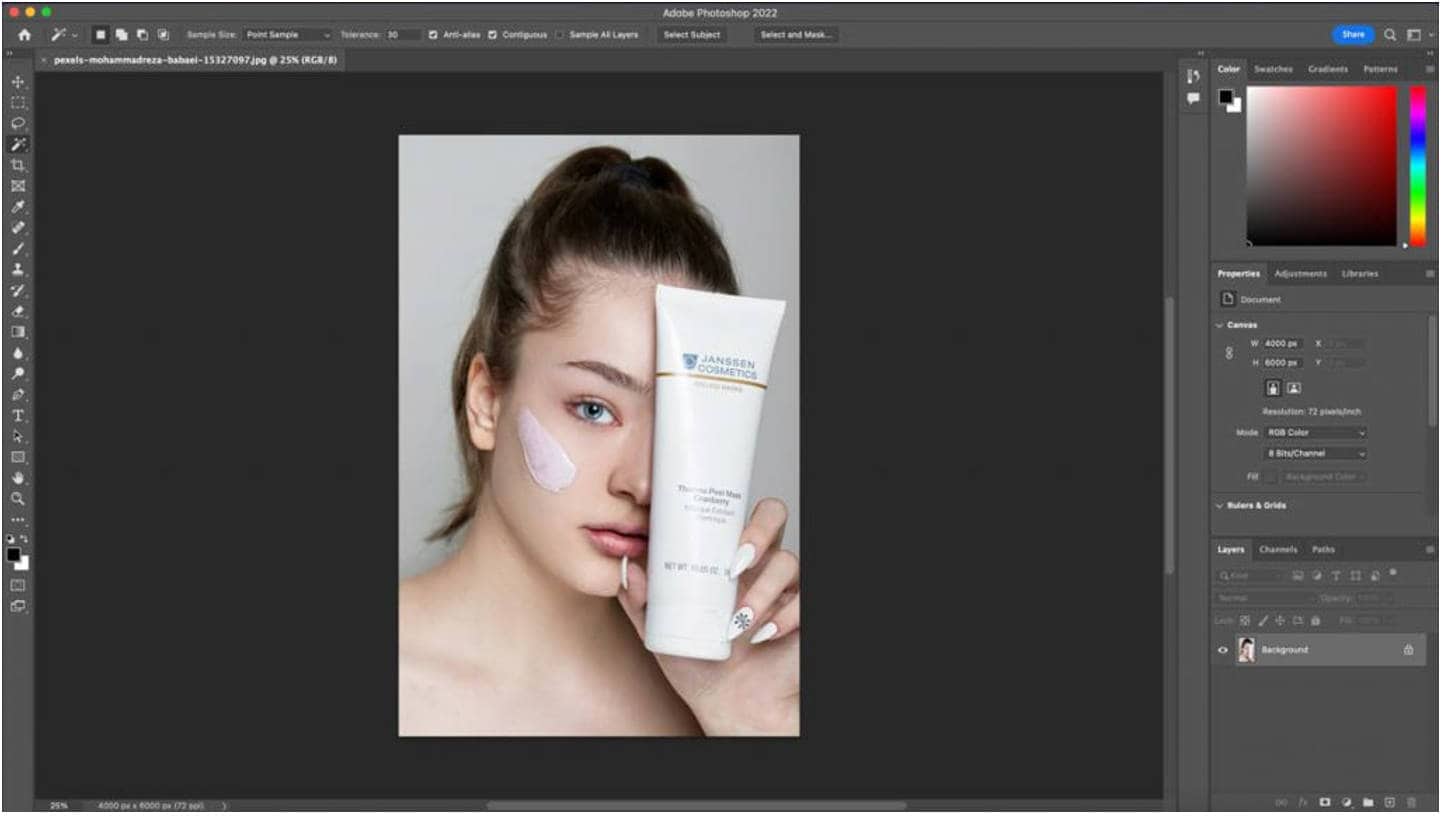
Step 1: Open Your Image in Photoshop
Begin by opening Adobe Photoshop. Go to “File,” then select “Open.” Choose the image you would like to correct and open it.
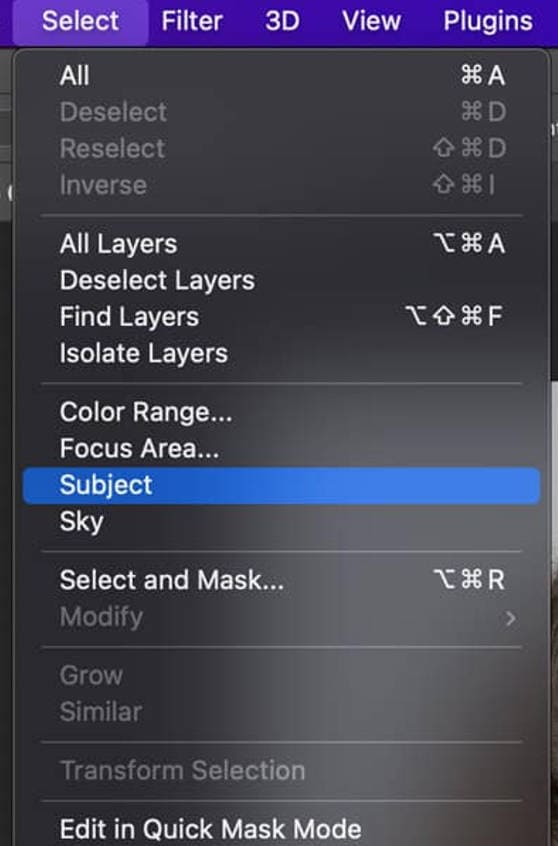
Step 2: Select the Subject
You need to separate the main subject from the background. Photoshop makes this easy with a tool called Select Subject. Click on the “Select” menu at the top, then choose “Subject.” Photoshop will use AI to find and highlight "the main subject automatically".
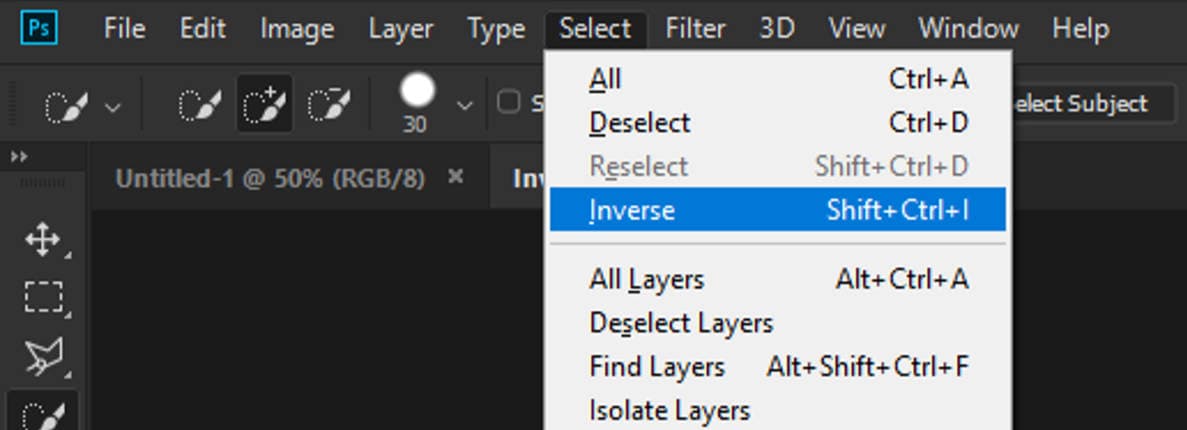
Step 3: Invert the Selection
To edit or remove the background, you need to select everything except the subject. Click the "Select" menu again, then choose "Inverse" to change the selection from the subject to the background.
Step 4: Add a Solid Color Layer
Now let’s add a new background colour. Click the “Adjustment Layer” button down at the bottom of the Layers panel. Choose “Solid Color” from the list. Pick any colour you want. Don’t worry—you can change it later. Click OK to apply.
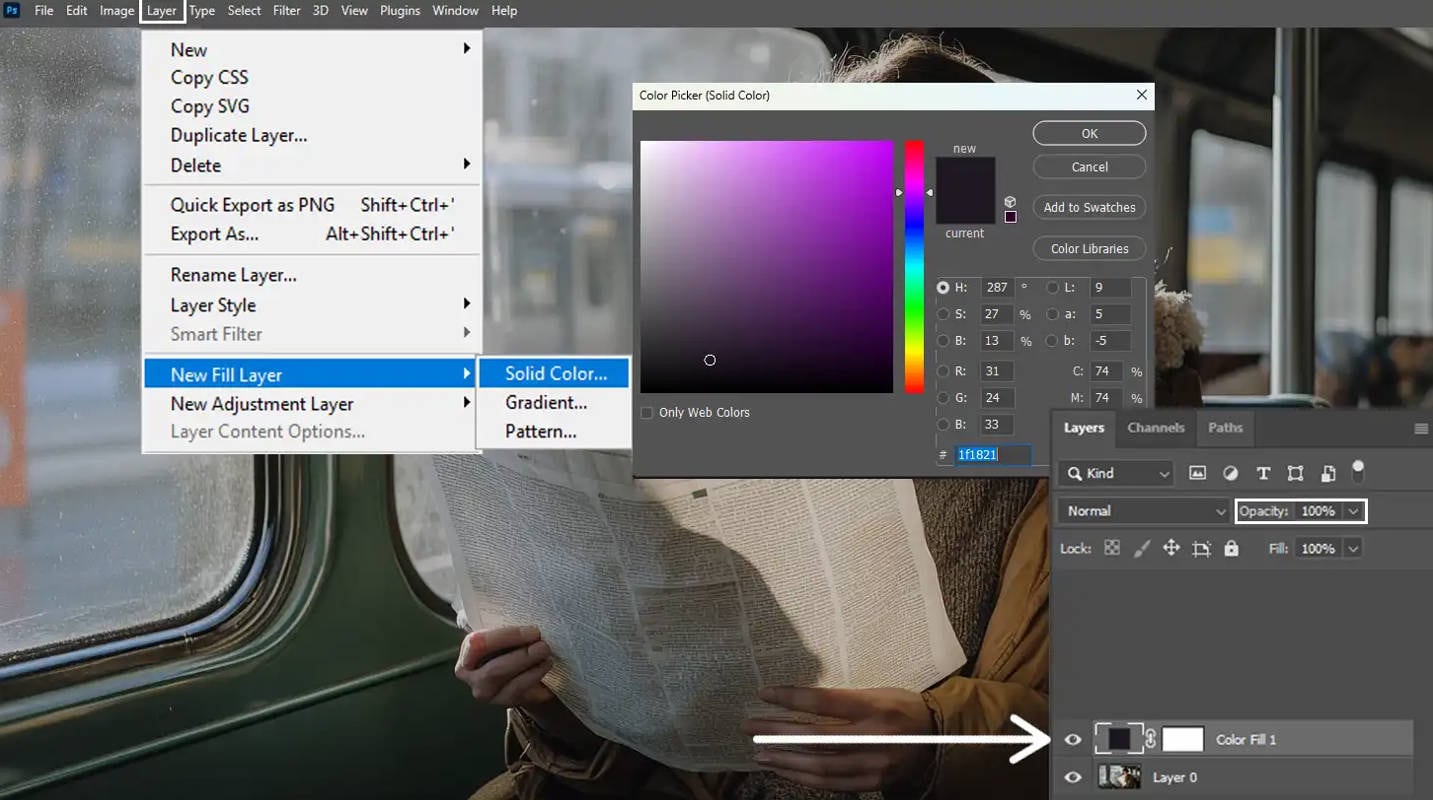
Step 5: Change the Blending Mode
You need to change the Blending Mode of the solid color layer to get a more natural background. You can do this through the dropdown in the “Layers panel”, where it currently says “Normal”. You'll want to change this to "Multiply". This blends the color with any shadows from the original background.
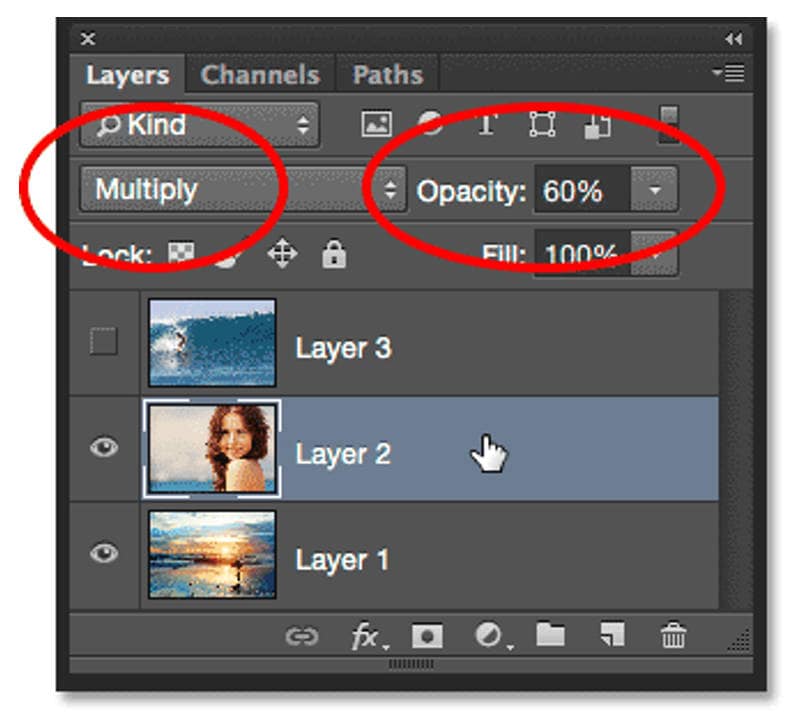
Step 6: Adjust the Background Colour (Optional)
To change the background color, simply double-click the color box (thumbnail) on the Solid Color layer in the “Layers panel”. This will open the colour picker. Choose your “new colour” and click “OK.”
Tips: Use Select and Mask to sharpen edges for more elaborate backgrounds. You can also swap out the background entirely for a new image by dragging in a fresh photo and putting it below the subject layer.
*Tips:
For web usage, dimensions typically range from 320 to 480 pixels wide, depending on the platform and intended use.
If you are looking for how to alter the background color in Photoshop, this is one of the speediest and uncluttered ways possible today. This approach provides you with complete control over your image's backdrop, be it for profile pictures, product images, or art projects.
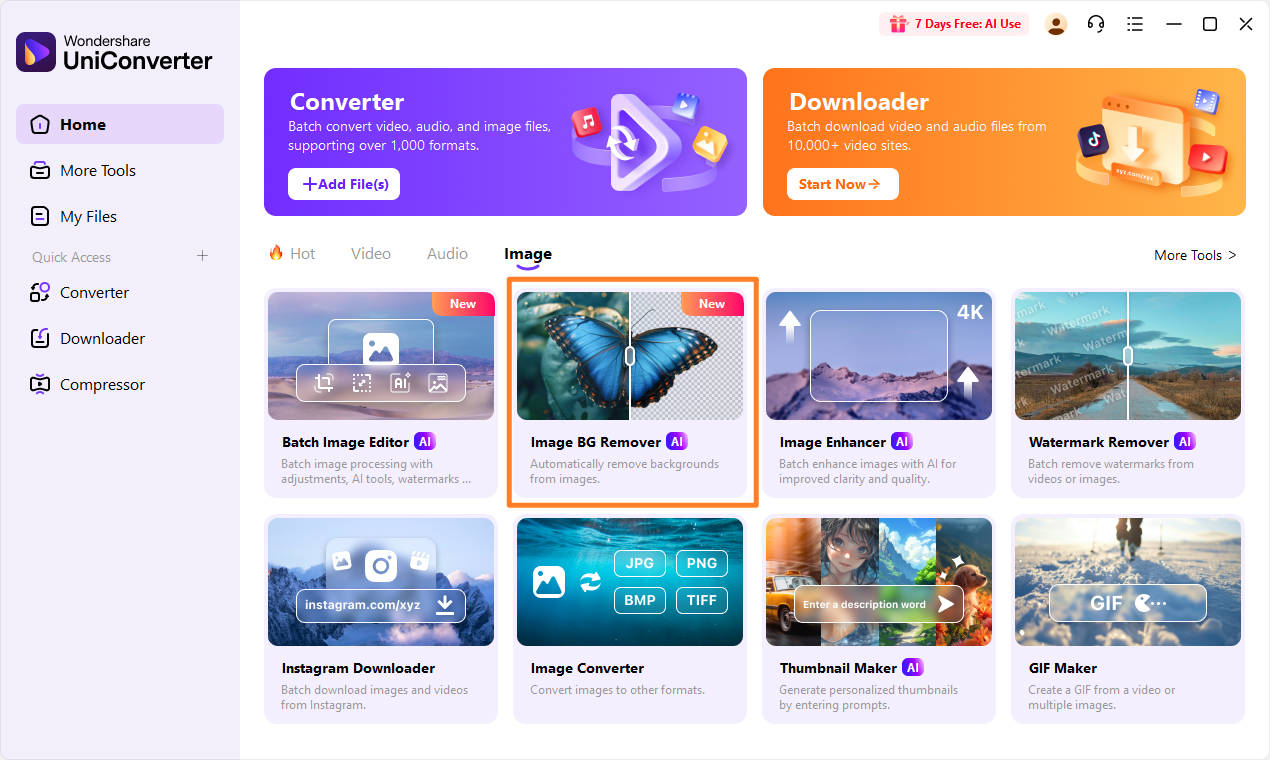
Part 3: Bonus: One-Click to Remove or Change Background Color with UniConverter
Looking for a quick and easy way to remove image backgrounds or change them to any color you want? Wondershare UniConverter offers a powerful AI-based background remover that makes it super easy, even for beginners. With just one click, you can automatically remove the background or replace it with a solid color or even a new image.
Whether you’re editing logos, portraits, product images, car photos or pet pictures, UniConverter Image Editor delivers high-quality results in seconds without any loss of detail.
Key Features:
- One-click AI background removal
- Batch processing with no quantity limits
- Supports JPG, PNG, BMP and GIF formats
- Export images as high-quality transparent PNG
- Option to replace background with white, blue, black or any custom color
- No quality loss during background removal
- Free to use for the first 10 images
Batch Image Background Remover on Win and Mac
How to Change Background colour of Image in UniConverter
Step 1: Open Background Remover
Open Wondershare UniConverter. Go to the “Home” screen, then select “AI Lab,” then “Background Remover.”
Step 2: Add Images
Click the “+ icon” at the top-left corner to add all images you want to edit.
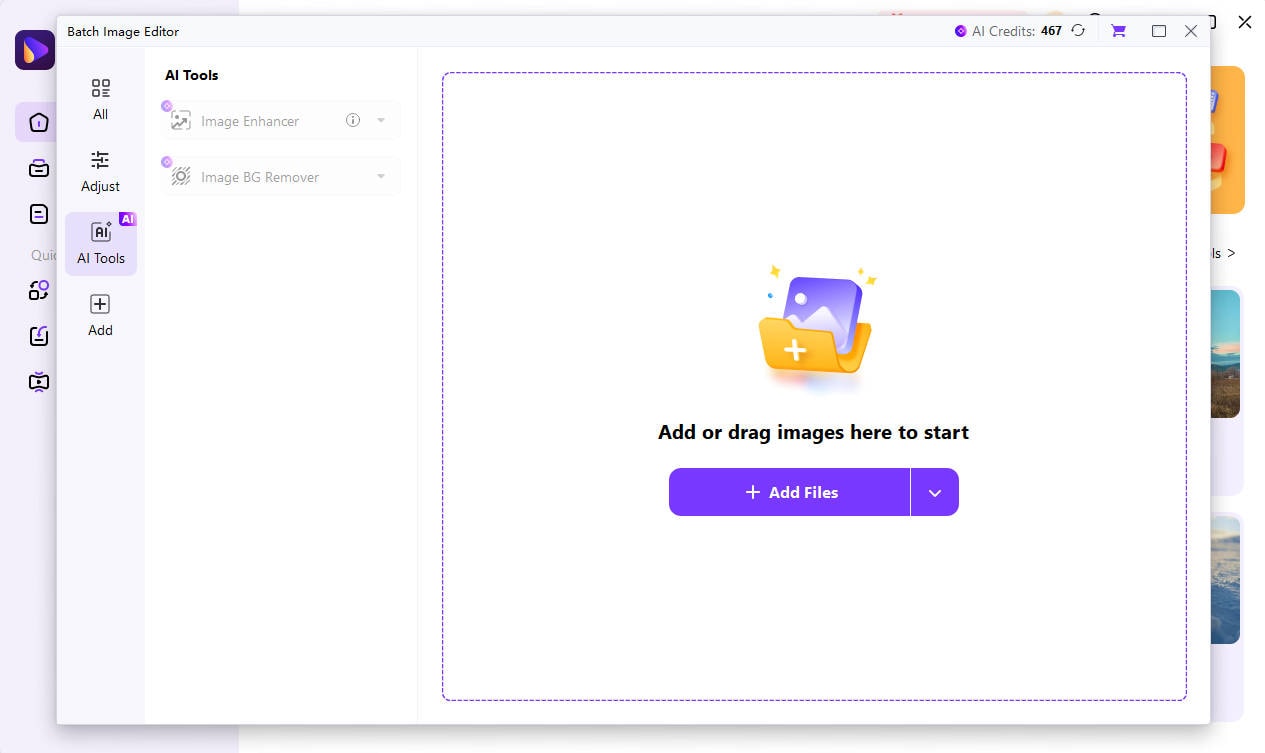
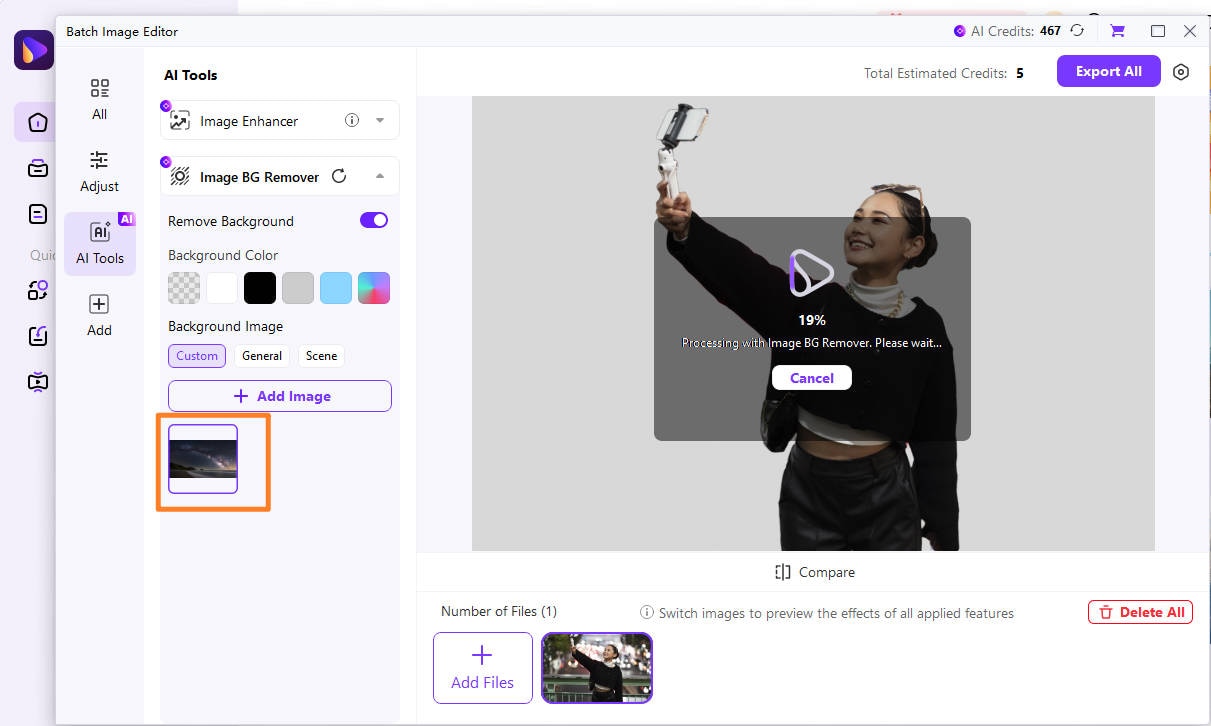
Step 3: Start Removal
Select an image and click “Start” to remove the background using AI.
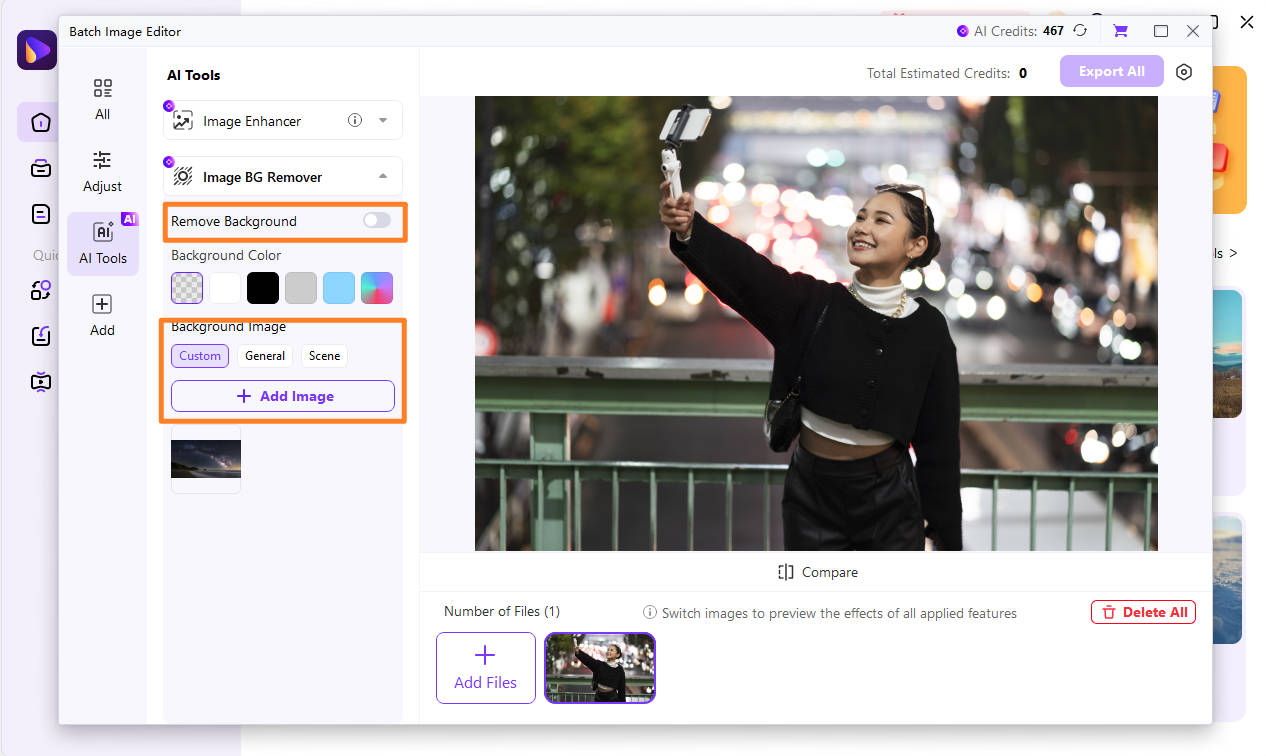
Step 4: Change Background (Optional)
After removing the background, select a “Solid color” (white, black, blue, etc.) or a “Custom background image.” Apply to all images at once.
Step 5: Preview and Save
Once done, click “Export All” to preview results. Use the folder icon at the bottom to open the saved location.

This is a quick and easy way for beginners to learn how to change background color in Photoshop style without the learning curve.
Part 4.Tips for Changing the Background of Images
Changing the background color in Photoshop often requires small adjustments that can turn simple edits into professional results. These tips will help you achieve polished results regardless of your method.
1. Match Lighting and Shadows: For a convincing composite, match the lighting direction of the subject and the new background. If your subject is lit from the left, ensure the background reflects the same light source. Make a copy of the subject layer, fill it with black, add a Gaussian blur, and move it slightly to create a drop shadow. Adjust the opacity to blend with the new scene.
2. Preserve Edge Details: Hair, fur and other soft edges can be tricky. In the Select and Mask workspace, use the Refine Edge Brush to keep the edges looking smooth and natural. Increase the Radius to capture semi-transparent details and enable Smart Radius to adapt between soft and hard edges for cleaner selections.
3. Use Adjustment Layers: Non-destructive editing is key. Use Hue/Saturation or Color Balance adjustment layers to fine-tune background colors without altering original pixels. This way you can revisit and revise your edits anytime without degrading quality.
4. Create Custom Gradients: Solid backgrounds can be flat. Instead, create gradients using the Gradient Editor to add depth and visual interest. Radial gradients focus attention on the subject, while vignette effects subtly highlight the center, making them perfect for product shots or portraits.
These tips turn basic background changes into professional-quality edits that look natural and intentional rather than obviously edited.
Part 5.Conclusion: How to Change Background Colour Photoshop
Changing or removing background colours in Photoshop opens up creative, professional-looking edits for your images. Whether you’re editing portraits, updating product photos, or creating eye-catching designs, the right tools and techniques make all the difference.
For a faster and beginner-friendly solution, use UniConverter background remover. Its AI-powered background remover lets you batch process multiple images, apply new backgrounds, and export high-quality results all with one click.
Ready to simplify your editing workflow? Try Wondershare UniConverter background remover now and transform your photos with ease!
Batch Image Background Remover on Win and Mac
FAQ about How to Change Background Colour in Photoshop
-
1. Can I change the background color of a PDF in Photoshop?
Yes, you can change how a PDF displays on screen in Photoshop. But this only affects screen display, not how it would look if printed on colored paper. -
2. How do I change the background colour on Photoshop using shortcuts?
Yes! Press Alt + Backspace (Windows) or Option + Delete (Mac) to fill a layer with your foreground color. -
3. How to edit background colour in Photoshop using layer groups?
Either add a new layer above the group and fill it or apply a Layer Style and then select Color Overlay. -
4. How to change the color background in Photoshop to an image instead?
You're not limited to a change in color for a background. You can replace it with an entirely new image. First, isolate the foreground object and define its edge. Once you're happy with the result, go to the “File” menu and choose “Place Embedded” to insert your image. Select your new image.After placing the new image, ensure it is below the foreground in the Layers panel to keep it at the back. You can then resize or move the background image as required.

