How to Record Screen with All Ways
by Christine Smith • 2026-06-23 14:39:47 • Proven solutions
There are different ways to record the screen of different devices, and if you don’t know how to record your computer screen, don’t worry because it’s quite easy, to say the least. You might have come across with questions like how to record TV screen or mobile screen on tech forums. Nowadays, a majority of devices and operating systems come with their own screen recorder, but they don’t have any extra features that can help to tweak the recording by a little bit. There are online as well as offline and free or paid recording tools that you can use for such requirements whenever you want.
- Part 1. Easiest Way to Record Screen on Windows & Mac
- Part 2. How to Record Screen with Online Screen Recorder
- Part 3. How to Record TV Screen
Part 1. Easiest Way to Record Screen on Windows & Mac
Wondershare UniConverter is the all-in-one tool to help you record a computer screen effortlessly and with high quality. It’s straightforward to use and records computer screens in full-screen or customized modes. Not only that, but this software also lets you record screens with annotations like shapes, lines, texts, drawings, and arrows. Oh, lest I forget, Wondershare Screen Recorder allows you to add voice narrations, system sounds, and webcams as you record a video.
Wondershare UniConverter – Best Computer Screen Recorder
 Wondershare UniConverter - Best Video Converter for Mac/Windows

- It can capture a computer screen in custom or full-screen mode.
- Users can apply voice narrations using a mic and a video overlay using a webcam.
- It allows you to highlight subjects using texts, shapes, lines, drawings, and arrows as you record.
- You can preset the output frame rate, quality, format, folder path, recording timer, and keyboard shortcuts.
- It features a robust video editor for cropping, compressing, cutting, adding subtitles, and so on.
- Users can convert the captured computer screen to MP4, VOB, MTS, WebM, and other media formats.
- The best method to record a computer screen on Win 10/8/7 & Mac OS X 10.9+ (Catalina included).
Steps to grab a computer screen using Wondershare Screen Recorder:
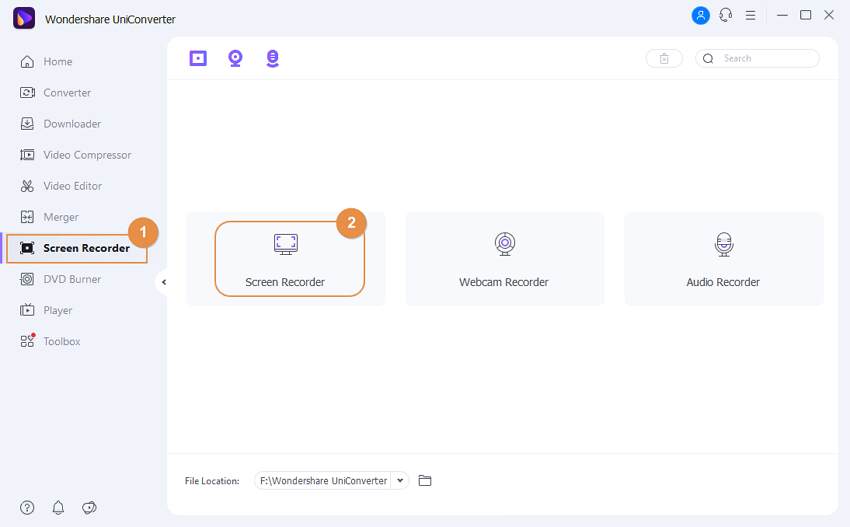
Step 1Launch the Screen Capture tool.
Install and run Wondershare UniConverter, then tap the Screen Recorder tab. Now proceed to press the Screen Recorder button to launch the Screen Capture function.
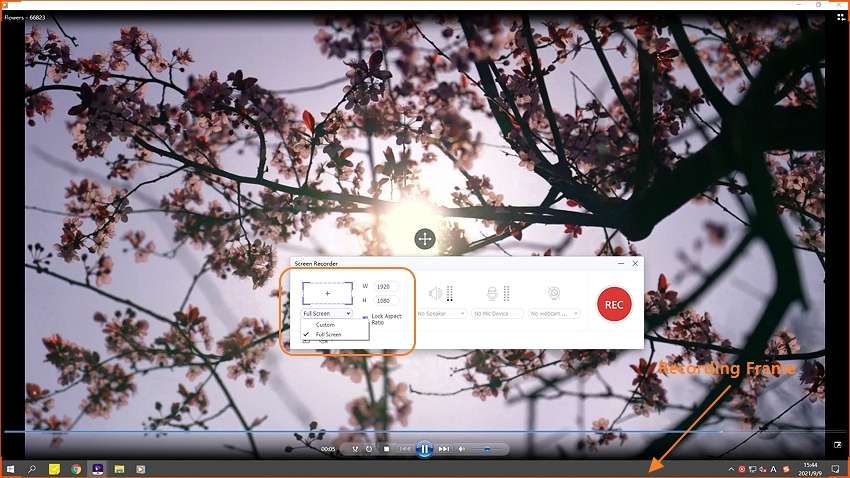
Step 2Configure a capture area.
Do you want to record the computer screen in Custom or Full-Screen mode? In that case, open the recording mode menu, then choose a capture method. If you want to record a video with specific frame dimensions, select Custom, then click Lock Aspect Ratio.
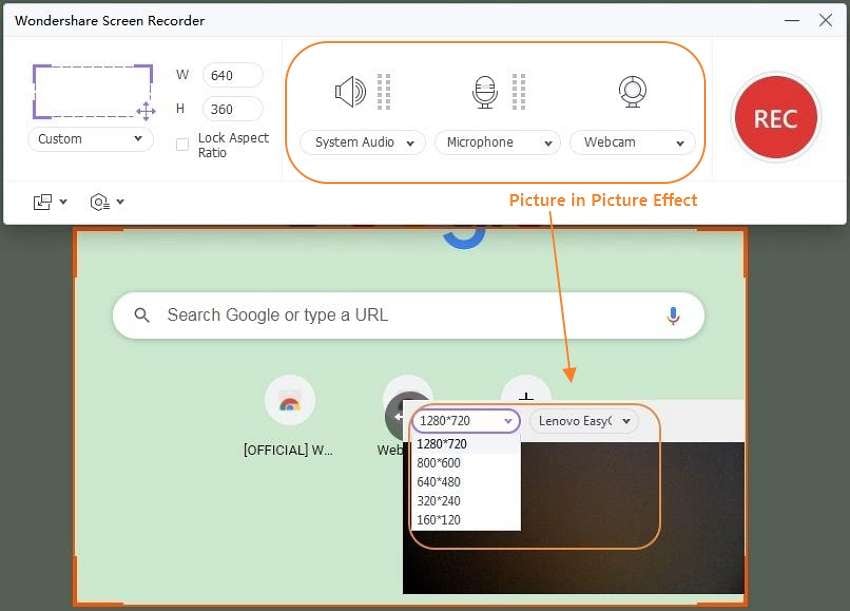
Step 3Choose your recording preferences.
First of all, choose a device on the System Audio section for capturing all computer sounds, including mouse clicks. Next, choose a mic under Microphone and a camera under Webcam for recording voice narrations and a video overlay.
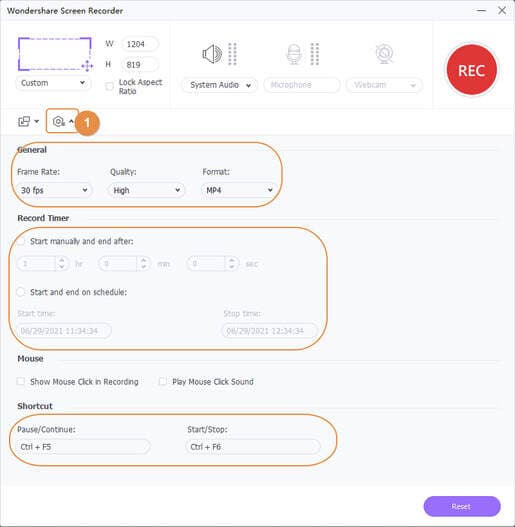
Now click the Advanced Settings button, then choose MP4, FLV, or AVI as your target format. You can also customize the frame rate, quality, keyboard shortcuts, recording timer, and folder path.
Step 4Start recording the computer screen.
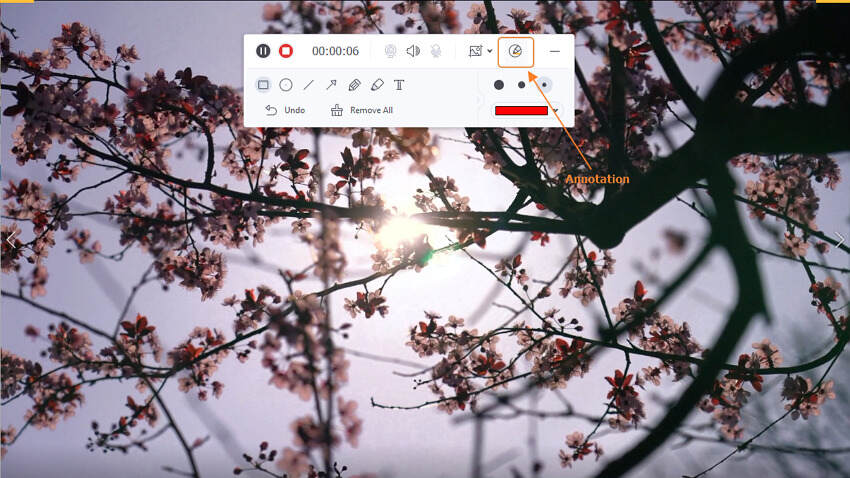
Preview the area you want to record, then click REC. Wondershare UniConverter will begin grabbing your computer screen with all original quality. Now open the taskbar, then click the Annotation icon to start adding colorful texts, shapes, lines, arrows, and drawings as you record. Lastly, click Stop to finish recording. Isn’t that so easy?
Part 2. How to Record Screen with Online Screen Recorder
While professionals make use of offline third-party recorders to get high-quality content, for occasional users, online tools can be a quick and simple way to record your screen. If you don’t know how to record and are unaware of the tools that can be useful, consider trying out ScreeApp.io. It is a very popular online screen recorder that can be used for high-quality video recording without needing to download any files and software on your device. They offer equally excellent video recording capabilities without any issues in the final output.
The below steps will teach you to record your screen on Windows 10 by using online tools.
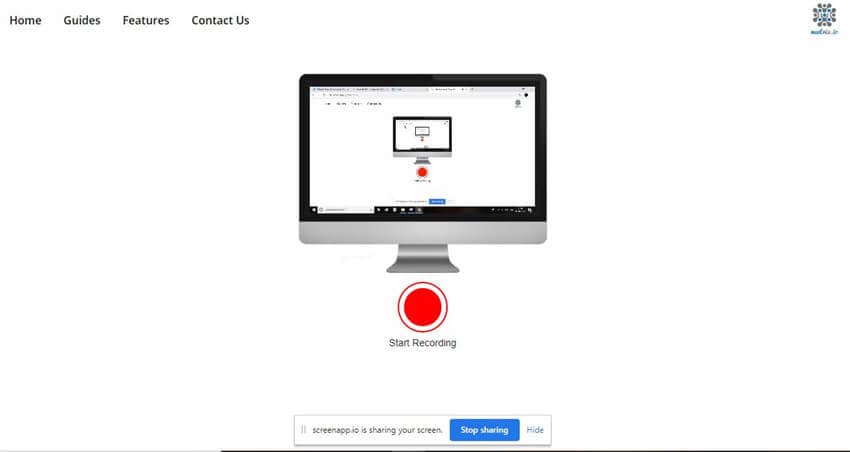
Step 1 Open the website and click on the Get Started button to start your recording process.

Step 2 Provide the web app with all the necessary permissions.

Step 3 After that, click on the circular red button, and your recording will start instantly.
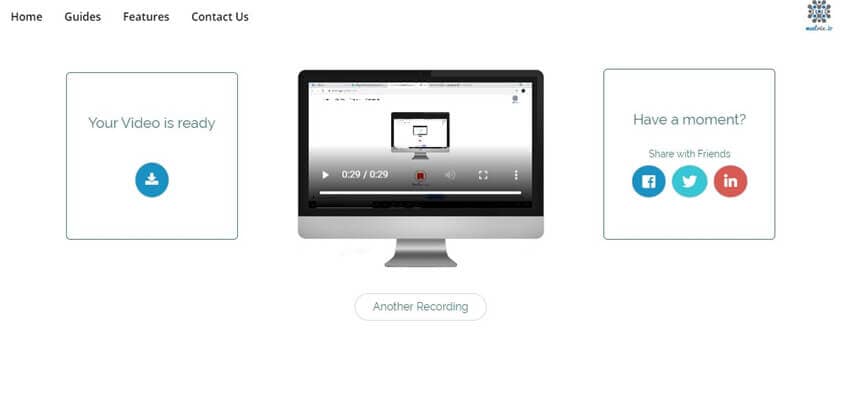
Step 4 Once the recording is done, press the red circular button again. After that, you can download the recorded file on your device.
Part 3. How to Record TV Screen
If you are willing to record your favorite online shows so that they could be watched later with comfort, you will need to have software. There are lots of software available in the market that you can avail of to record your favorite TV show that you might watch online and movies from your streaming websites. The recording is usually high quality and is exported in standard video formats like MP4, AVI, etc. so that it can easily be supported and accessed across various devices and operating systems. One of the best software you can use is OBS (Open Broadcaster Software). The following steps will help you to understand how to record TV screen in easy steps.
Step 1 Download OBS
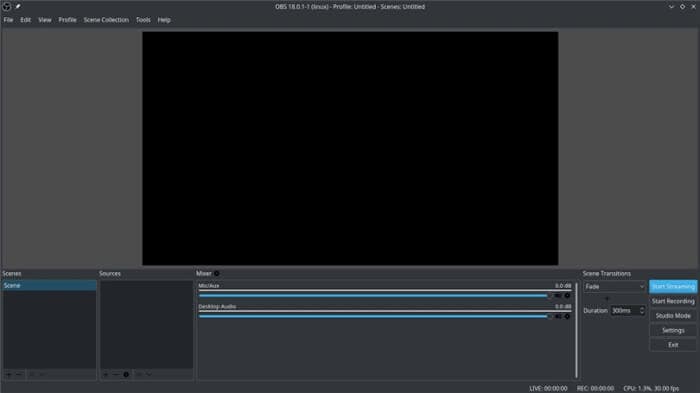
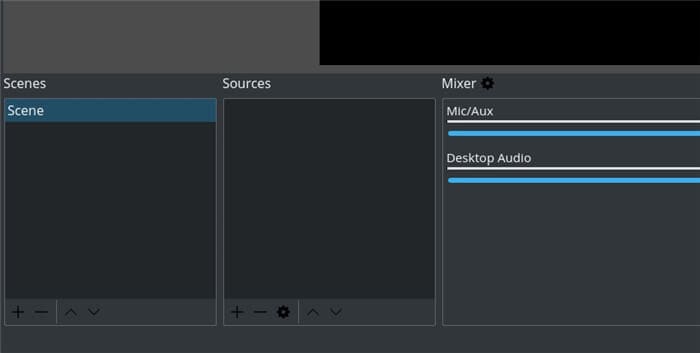
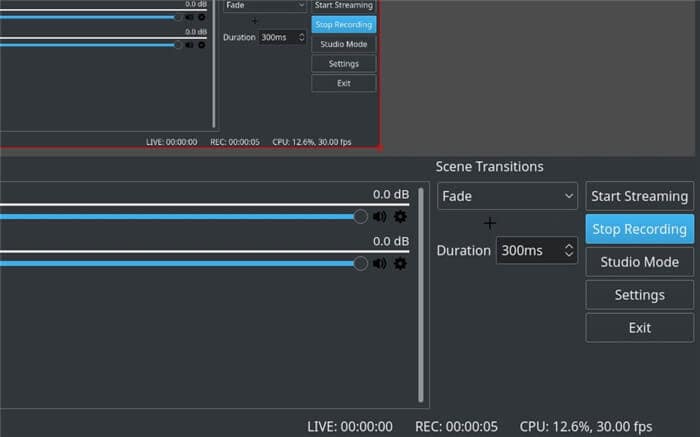
Go to the official website and download the tools. Once the download is completed, install, and launch it as well. You will see the screen as below after you launch it.
Step 2 Set up the settings as you require
Now, you will have to set up the recorder and adjust the various settings related to it. You will have to adjust the scene primarily, and you will be able to see that there is already one scene mentioned there.
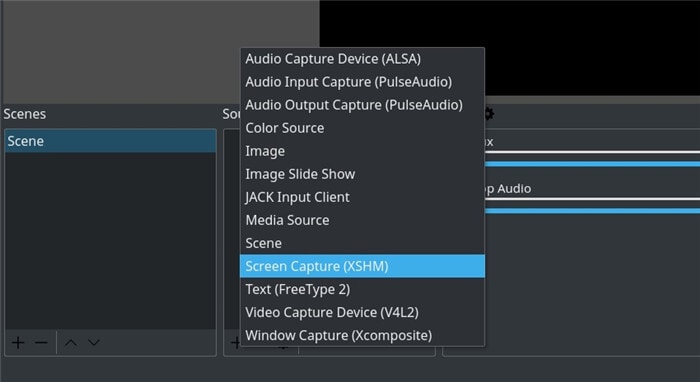
Before you can initiate a recording, you will have to set a source as well. Click on the + option beside the area labeled as sources and select display capture and click on the OK button that pops up.
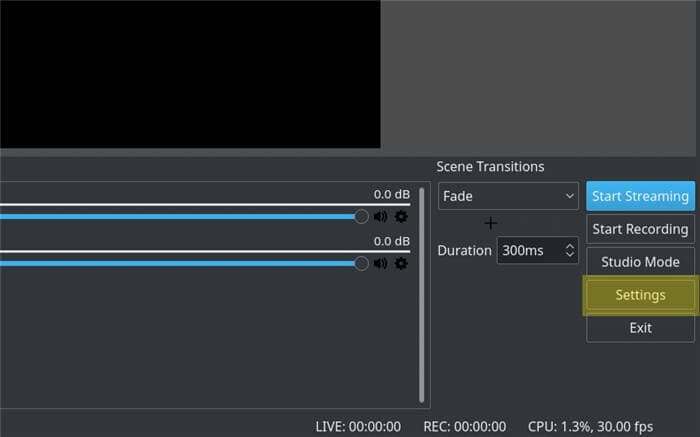
Now look at the bottom right side of the screen and click on the Settings options.
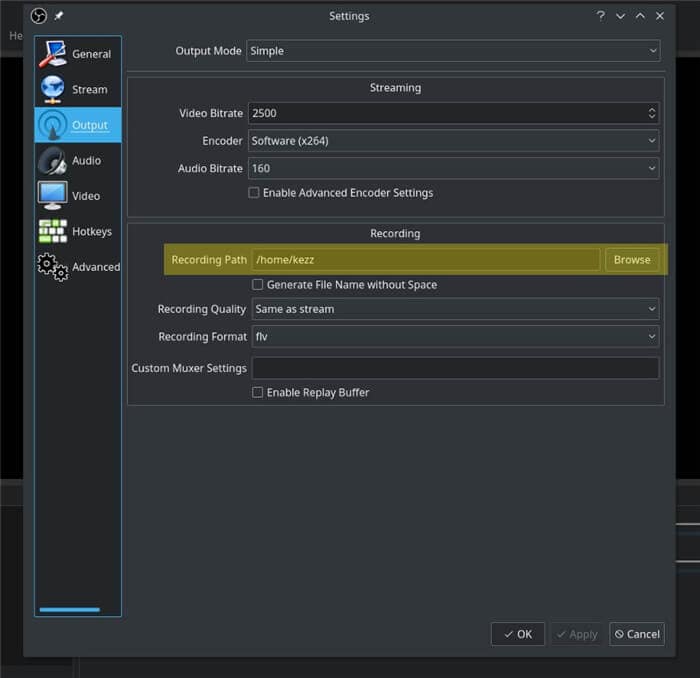
Click on the Output tab and select the Recording Path field. Please set it to the location where you want to save the recorded videos.
Step 3 Initiate recording process
Once everything is done, open the streaming website where your TV show or movie is present and select the movie. As soon as it starts to play, pause it and come back to OBS and click on the Start Recording option on the bottom right side of your screen, go back to the streaming website, play the movie, and your video will start getting recorded.

After you have recorded the entire duration that you needed, come back to OBS and click on the Stop Recording button. Your recording will then be exported to your set location.
Conclusion
For those who do not have any idea about how to record your screen on windows 10, there are actually a lot of tools that can help you to do so. If you are an occasional user and have to record screens rarely, you are better off using the online tool, as they can record high-quality videos but won’t be able to provide advanced features used by professionals. Although if you want to become a professional in the field or want to publish your own content to the audience, it is better to go for offline third-party tools like Wondershare Uniconverter as it is a very powerful and versatile tool.
- Alternative Ways to Record Black Myth Wukong on PC
- Best Way To Record Black Myth Wukong For YouTube
- Top 10 reliable PUBG screen recorders in 2026 (added)
- Top 10 Audio Recorders for Windows and Mac
- How to Easily Screenshot on All HP Devices
- How to record Discord with obs
- How to Screen Record on a Laptop Windows 7
- [Highly Recommended] 12 Best Game Recorders for PC in 2026
- How to Record Video in Zoom Meeting [Editing zoom video files Included]
- How to Record a Skype Meeting on Windows and Mac


Christine Smith
chief Editor