Subtitles
- Try It Free Try It Free
- 1. Add Subtitles+
- 2. Extract Subtitles+
- 3. Download Subtitles+
- 4. Tips and Tricks+
-
- 4.1 Top 10 Subtitles Players
- 4.2 Play Dual Subtitles
- 4.3 Video Players with Subtitles
- 4.4 Convert IDX to SRT
- 4.5 Convert TXT to SRT
- 4.6 Convert SUB to SRT
- 4.7 Convert Video with subtitle
- 4.8 Best Subtitle Converters
- 4.9 Subtitle Editor Tools
- 4.1 Adjust Subtitle Delay in VLC
- 4.11 Best Subtitle Maker
- 4.12 Tips about Subtitle Editing
- 4.13 Synchronize Subtitle Tool
- 4.14 Best Font for Subtitles
- 4.15 How to Create SRT File
- 4.16 Turn On/Off Subtitles
- 4.17 Several Tips about Subtitles in Windows Media Player
How to Add Subtitles to Your Video in VLC
by Kayla Morrison • 2026-01-21 18:53:20 • Proven solutions
Are you finding difficulty in understanding or grasping the words in the video that you are watching? Well, you might not be a fluent speaker of a certain language, and you have just come up with a video that you want to share online. To let your viewers understand it, you need to add subtitles. Other reasons for adding subtitles to videos are merely for transcribing or targeting people with hearing loss. Therefore, how do you add subtitles to your video? In this article, we will give you two ways in which you can use to add subtitles to your video. One is by using VLC Media Player to add subtitle in VLC, and another is by using s third party tool known as Subtitle Editor in Wondershare UniConverter.
How to Extract Subtitles From Video
- Part 1. Easy Tutorial On How to Add Subtitles in VLC
- Part 2. Best VLC Alternative to Add Subtitles to Video
- Part 3. VLC Media Player vs. Wondershare UniConverter
Part 1. Easy Tutorial On How to Add Subtitles in VLC
VLC is a media player that supports nearly all file formats, but it can also be used to add subtitles to videos freely. Below is a quick guide on how you can how to put subtitles in VLC.
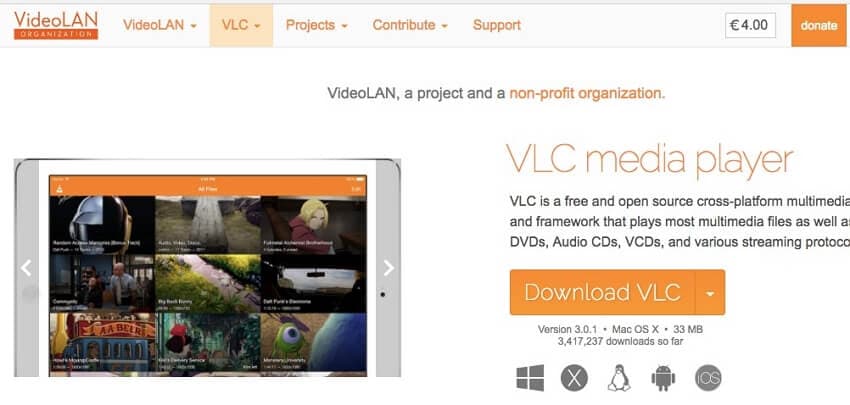
Step 1. Begin by downloading the VLC media player from its official website. This media player is cross-platform; thus, you can install it on Mac, Windows, Linux, and even mobile platforms. After installing it, you can then launch the app.
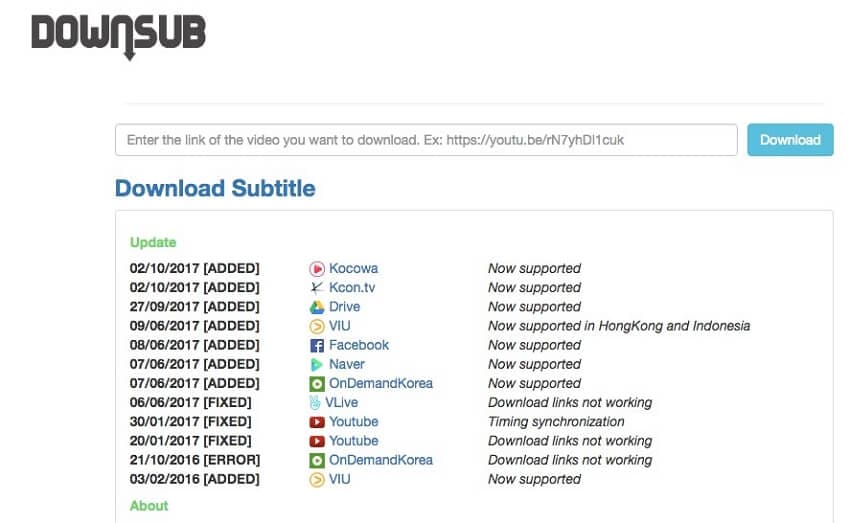
Step 2. Download the subtitle and video that you want to add subtitles to a movie permanently in VLC on a preferred video site such as DownSub. If you have them already, you can skip and move to step 3.
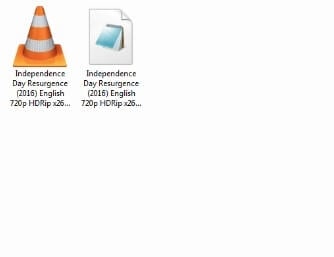
Step 3. Organize the subtitle and the corresponding video in the same folder on your computer.
Step 4. Next, you need to open the video with VLC. You can drag and drop the files to the VLC, or double click on the movie and select Open with VLC media player button. You can also click on File and then Open File to upload the video.
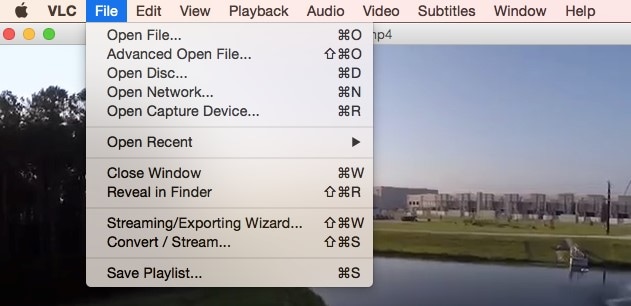
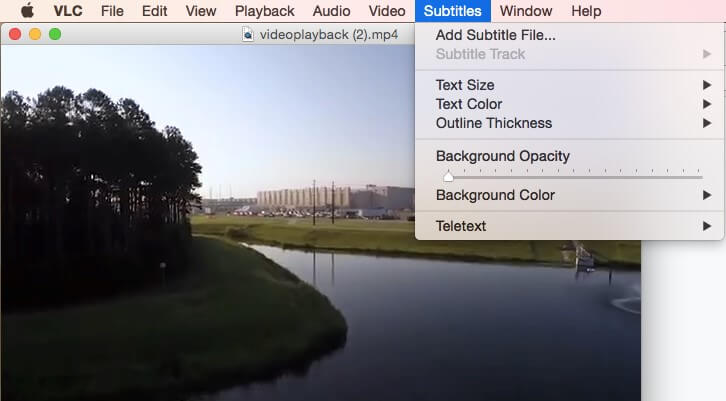
Step 5. The video will appear on the VLC window and play it. Now head to the main menu, click on Subtitles, and then click on Add Subtitles button. Upload the .srt file and load it.
Part 2. Best VLC Alternative to Add Subtitles to Video
Despite letting users add subtitles, VLC can’t adjust the subtitle timing. Therefore, get the best VLC alternative - Wondershare UniConverter. This media converter software supports over 1000 file formats, including MOV, DVD, MTS, MP4, etc. It can burn DVDs, transfer music to mobile devices, edit music videos, and download music from a preferred online platform. With its subtitle editing feature, you can add subtitles to a video, adjust subtitle timing, download SRT subtitles, and preview the result before saving it.
 Wondershare UniConverter - Best Subtitle Tool MOV Mac/Windows (Catalina Included)
- Add subtitles from a local PC or the Internet online.
- Extract subtitles from MP4, MKV, DVD, and any video file in .srt, .ssa and .ass.
- Edit subtitles by adjusting font, font color, font size, transparency, position, and more.
- Support multiple audio track and subtitles and freely switch on/off subtitles.
- Convert video to MP4, MOV, MKV, AVI, and over 1000 video/audio formats with subtitles.
- Burn and customize your video to DVD with free DVD menu templates.
- Download or record videos from 10,000+ video sharing sites.
- Versatile toolbox includes GIF maker, image converter, video compressor, screen recorder, CD burner, fix video metadata, etc.
- Supported OS: Windows 10/8/7/XP/Vista, macOS 11 Big Sur, 10.15 (Catalina), 10.14, 10.13, 10.12, 10.11, 10.10, 10.9, 10.8, 10.7, 10.6.
Below is how to use it:
Step 1 Upload the video file to edit.
Run Wondershare Subtitle Tool, then press the Toolbox. You’ll see multiple video editing functions. Click the Subtitle Editor to open local storage and upload the video file without subtitles. As I’ve said, this app supports all video file formats. After uploading, the subtitle window will launch with your playing video file.
![]()
Step 2 Download, import, create, and edit subtitles.
You will see four subtitle buttons located on the bottom-left corner just below the preview window. You can use them to do the following:
![]()
- #1. Manual Subtitles – By clicking the Add button, users can make their own custom-made subtitles. Just click the timer above the preview pane, then enter a subtitle text on the textbox located in the upper-right corner. You can also enter the appropriate start and stop time. If satisfied, click the Add icon next to your newly created subtitle to create another subtitle track.
![]()
- #2. Import Subtitle File – The Import function allows users to add their local or downloaded subtitles to videos. Just click the button, tap Add, and upload the downloaded subtitle file.
![]()
- #3. Auto Subtitle Generator – If you hope to add subtitle effortlessly, you can try this feature. Its smart voice recognition function will directly and accurately transfer the audio in the video into words.
- #4. Text to Subtitle – This feature enables you to turn text to subtitle auto and quickly.
![]()
Step 3 Edit subtitle settings (Optional).
Do you want to edit the subtitle text and timing? Simple! Just select a particular subtitle text under the preview window and then edit the content and timing. You can also choose a new font style, color, size, subtitle opacity, subtitle positioning, and outline width. If satisfied, press the Apply All, then tap the OK to close the window.
![]()

Tips
At the bottom is a Reset button, which restores the subtitle settings. When you are not pleased with the settings, you can simply click on Reset to restore the subtitle settings and then start afresh.
Step 4 Convert and save your new video.
Sometimes you may want to convert the video to another video format before saving it. To do that, open the Output Format, click the Video, and then select a video format to use. You can also set an output resolution before clicking the Save button beside your edited video. Wondershare Subtitle Tool will convert the subtitled video in no time.
![]()

Tips
With Wondershare UniConverter, you can convert M4V to MKV as well. Move to How to Convert M4V to MKV Quickly>> to learn more.
Part 3. VLC Media Player vs. Wondershare UniConverter
[VLC Media Player] Using the VLC media player to add subtitles to videos is quite simple. The media player performs well, but it is quite cumbersome when you have large files. Also, with VLC Media Player, you cannot adjust subtitles timing, font, transparency, and others.
[Wondershare UniConverter] On the other hand, adding subtitles to video with Wondershare UniConverter is fast and effective. With this software, you will be able to adjust timings, font, transparency, and subtitle position, unlike the VLC. The steps are quite simple, and its user interface is straightforward. The only disadvantage of this tool is that it is not free, and thus you have purchased it.
Conclusion
All in all, these two methods are helpful, but with Wondershare UniConverter, you will find subtitle editing options. Moreover, you will be able to convert your videos to other file formats, include device formats, and transfer them to mobile phones. Therefore, this software is worth purchasing and using it due to its exemplary features.


Kayla Morrison
staff Editor