Transfer Tips
- TRY FREE TRY FREE
- 1. Transfer to Phone+
-
- 1.1 The Easiest Way to Transfer Audio Files to iPhone in 2026
- 1.2 The Most Simple Way to Transfer YouTube Video to Phone Gallery in 2026
- 1.3 Simple Ways to Transfer Videos Between iPhone and Android in 2026
- 1.4 One-Click to Transfer Media Files Between Your Computer and Android in 2026
- 1.5 Top 10 Apps for Video Transfer from PC to iPhone in 2026
- 1.6 Recommended Ways to Transfer Videos to Mobile Phone in 2026
- 1.7 The Easiest Way to Transfer Videos from Computer to iPhone in 2026
- 1.8 Best 6 Third-Party Apps to Transfer Videos from Mac to iPhone in 2026
- 1.9 What Is the Best Way to Transfer Videos from PS4 to Phone in 2026
- 1.10 10 Tips for Transferring Video to Android Devices in 2026
- 2. Transfer to Computer+
-
- 2.1 Simple Ways to Transfer YouTube Offline Videos from Mobile to Laptop in 2026
- 2.2 8 Recommended Ways to Transfer Video from Android to Mac in 2026
- 2.3 Easy Ways to Transfer GoPro Videos to Computer in 2026
- 2.4 Best Ways to Transfer Media Files from Android to PC in 2026
- 2.5 Best Way to Transfer 4K Videos from iPhone to PC in 2026
- 2.6 3 Simple Ways to Transfer Videos from iPhone to Windows 10 without iTunes in 2026
- 2.7 7 Ways to Transfer Videos from iPhone to Computer in 2026
- 2.8 Best Ways to Transfer Videos from Phone to PC in 2026
- 2.9 5 Solutions to Video Transfer from iPad to PC in 2026
- 3. Transfer to iPad+
- 4. Other Transferring Tips+
-
- 4.1 Best Ways to Watch Videos from Your Phone on A TV in 2026
- 4.2 5 Simple Methods to Transfer Videos to SD Card in 2026
- 4.3 Best Methods to Transfer Music Between iTunes and Windows Media Player on PC 2026
- 4.4 Fast Way to Transfer Video from DJI Osmo Pocket in 2026
- 4.5 Best Way to Transfer A YouTube Video to iMovie in 2026
- 4.6 Best Choices to Transfer Large Video Files in 2026
- 4.7 Easy Ways to Transfer Video to MP4 Device in 2026
- 4.8 Simple 4 Ways to Transfer Videos to DVD in 2026
- 4.9 Easy Ways to Transfer Videos from iPhone to USB Flash Drive in 2026
3 Simple Ways to Transfer Videos from iPhone to Windows 10 without iTunes in 2026
by Christine Smith • 2026-06-23 14:39:32 • Proven solutions
You may have come across how to transfer videos from Windows 10 to iPhone, but did you ever consider transferring videos from your iPhone to the computer? We love to play movies and videos on our iPhones. But, what happens when your phone runs out of storage?
You may think of deleting some of them. However, you should instead not perform that. There are several solutions that you can use to get rid of videos without removing it. The most obvious solution is to transfer the video files to your computer. And you can perform this without using iTunes.
You can also edit your iPhone videos in this way. Once you have transferred the video from the iPhone to the PC, you can modify it using third-party applications.
Here are described three methods about how to transfer videos from iPhone to computer Windows 10. With this, you can transfer the files, to reduce storage as well as to edit the video the way you want.
- Part 1. Transfer Videos from iPhone to Windows 10 with AutoPlay
- Part 2. Transfer Videos from iPhone to Windows 10 with Photos App
- Part 3. Transfer Videos from iPhone to Windows 10 with File Explorer
- Part 4. How to Edit Videos from iPhone with Wondershare UniConverter?
Part 1. Transfer Videos from iPhone to Windows 10 with AutoPlay
AutoPlay is a feature in Windows that appears whenever you connect an external device with your computer. These external devices can be CD, DVD, memory card, USB Drive, and all. This feature is highly beneficial for transferring data and files.
Using Autoplay, you can transfer videos from iPhone to Windows 10. Here is how to perform this task.
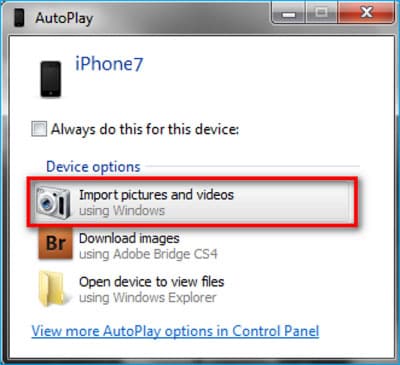
First and foremost, you have to connect your phone with your computer using a USB cable. Once the phone is connected, the AutoPlay window will show up automatically.
In the AutoPlay window, you are required to click on the Import pictures and videos under the Device options section.
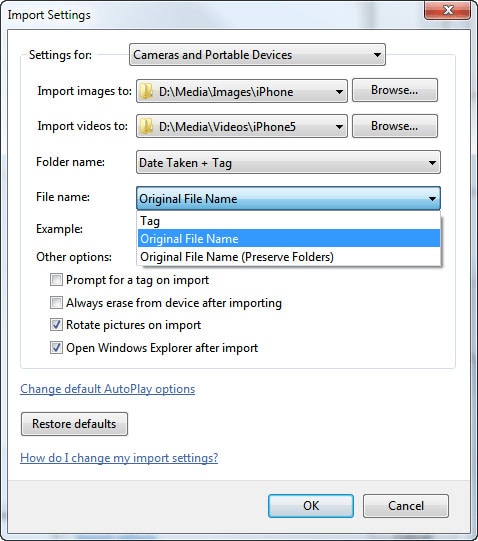
In the Import Settings, you have to choose a folder or create a new one. In this folder, you can save the videos that you would want to transfer.
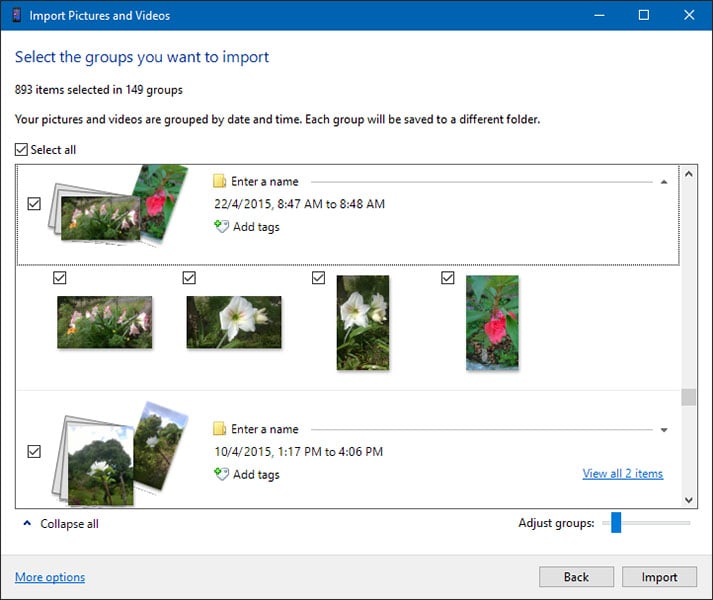
Now, you have to select the videos you want to import. After that, you need to click Import. This way, you can get videos from your iPhone to your computer.
Part 2. Transfer Videos from iPhone to Windows 10 with Photos App
The “Photos” in Windows 10 is beneficial for gathers photos in one place. You can gather pictures and videos from your computer, phone, and other devices. In this app, you can find the files even more quickly.
If you want to transfer iPhone video to Windows 10, this app might come handy. To transfer the files, you can follow the given instruction.
Firstly, you need to connect your iPhone to the Windows Computer. In this case, you are required to use the USB cable.
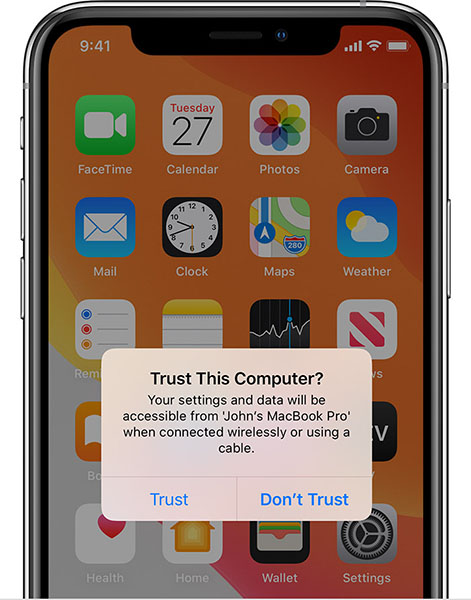
Now, you have to unlock your iPhone by entering the passcode. You will get a notification tab saying, Trust This Computer. Then, you have to click on the Trust option on your iPhone.
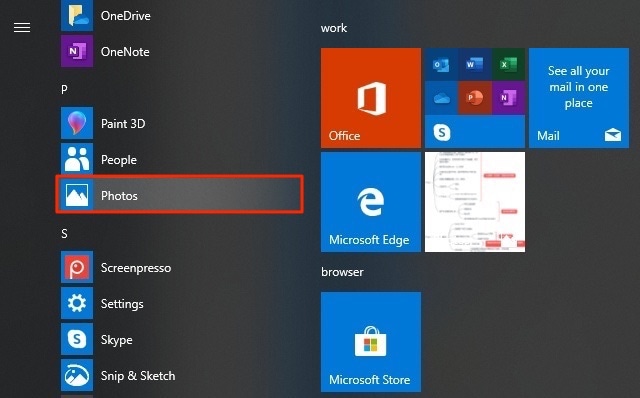
Now, on your computer, the “Photos” will appear. If not, then you have to open the Photos App from the Start menu.
Next, you have to choose From a USB device under the Import section.
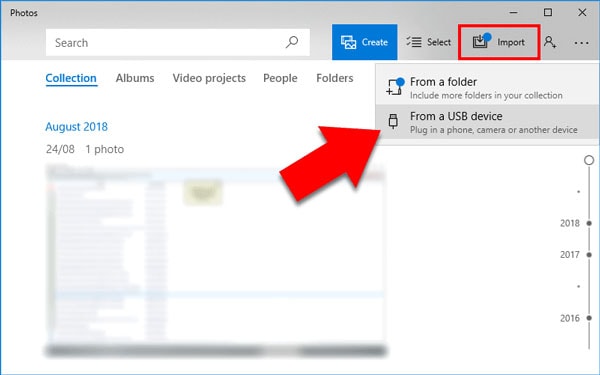
Now, this will enable searching for videos and photos on your iPhone.
You need to select the videos you want to transfer. For this, you have to set the import destination (by creating or selecting a folder). Then, you have to click Import Selected.
Thus, you can transfer videos from your iPhone to the PC.
Part 3. Transfer Videos from iPhone to Windows 10 with File Explorer
File Explorer in your Windows 10 functions as a management application, where you can browse folders and files. If you want to transfer video from iPhone to pc windows 10, you can do that using the “File Explorer.” To do this, you are required to follow the given instruction.
You need to connect your iPhone to the computer using a USB cable first.
After that, you are required to open File Explorer from the Start menu.
Now, you need to open the This PC option, and from there, you have to find your iPhone.
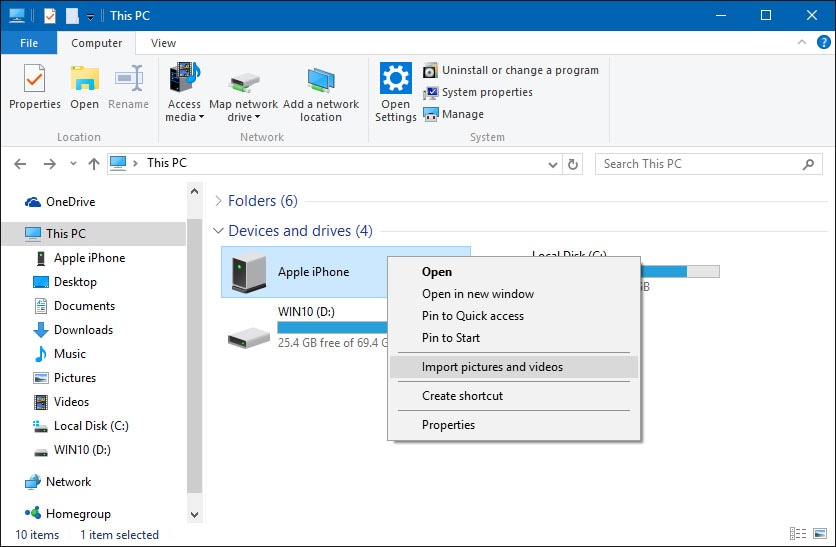
Once you have done this, you need to right-click on your device name and then select the Import pictures and videos option.
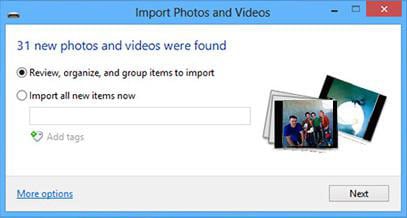
Now, you need to select Review, organize, and group items to import. And then, you need to click on Next to continue.
Then, you have to select the video or videos that you want to transfer to your computer. And now, you have to click on Import, which will start transferring the selected videos.

Also, you can go to your iPhone from This PC and then enter the Internal storage. There you will find your videos 100Apple portion under DCIM. You can copy and paste your videos to the PC.
Part 4. How to Edit Videos from iPhone with Wondershare UniConverter?
Now that you are well versed in how to transfer videos from iPhone to Windows 10, you can edit videos with Wondershare UniConverter (originally Wondershare Video Converter Ultimate). This application is highly appreciated by the users for its ability to convert videos to 1000 formats at 90X faster speed. In addition, the video quality remains the same while using the tool.
With Wondershare UniConverter, you can trim, crop, apply effects, add watermark, edit subtitles, and merge videos. Apart from editing, you can download, compress, burn, transfer videos, and so on. It is a versatile application that runs on Windows 10/8/7/Vista/XP and also in some Mac versions.
Different types of editing have become easy with UniConverter. Here is how you can do the task.
 Wondershare UniConverter - The Best Video Editor

- Convert videos to 1,000+ formats, including AVI, MKV, MOV, MP4, etc.
- It has a 90X faster conversion speed than other common converters.
- Edit videos with trimming, cropping, merging, adding subtitles, and more.
- Burn video to playable DVD with an attractive free DVD template.
- Versatile toolbox includes fixing video metadata, GIF maker, and screen recorder.
- Supported OS: Windows 10/8/7/XP/Vista, macOS 11 Big Sur, 10.15 (Catalina), 10.14, 10.13, 10.12, 10.11, 10.10, 10.9, 10.8, 10.7, 10.6.
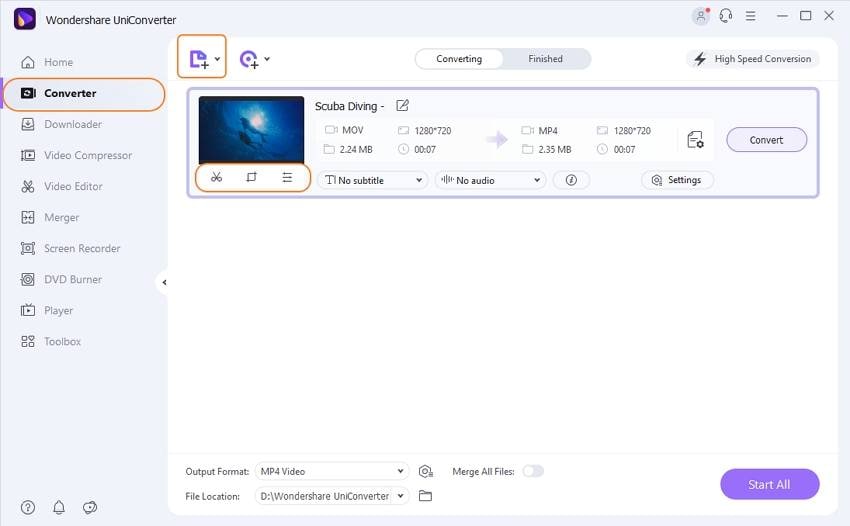
Step 1 Run the UniConverter
At first, launch UniConverter, and in the Converter, add the video files to the program.
You will get the editing options Crop, Trim, and Effects under the video thumbnail.
Step 2 Trim Video
To trim the video, you have to click on the Trim button.
Now, you can trim the end or the start of the video. For that, you have to hang your mouse at the end/front of the clip. Now, you need to click on the Cut button to cut the video into two parts. Choose the unwanted part and click Delete and click on OK then.
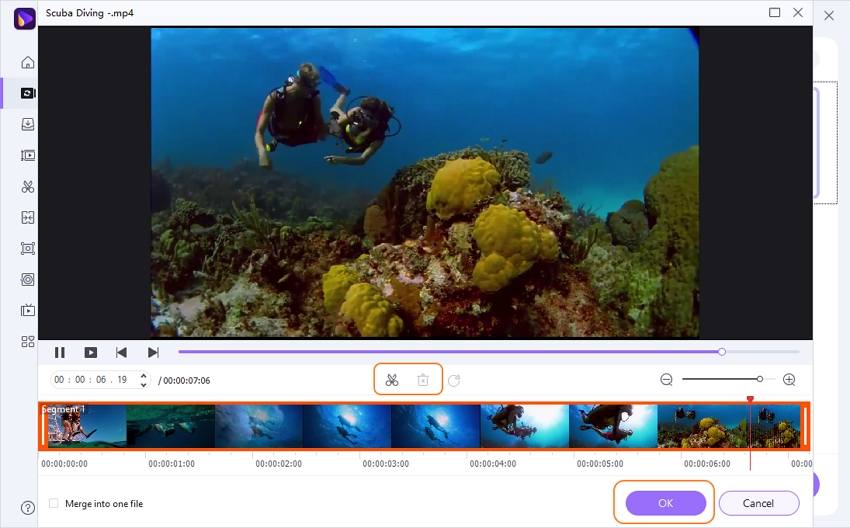
To cut the middle of the video, drag the slider to the start point, and click Cut. Now, drag the slider to the endpoint and click Cut again. You have to press Delete to remove the selected part, and then save it.
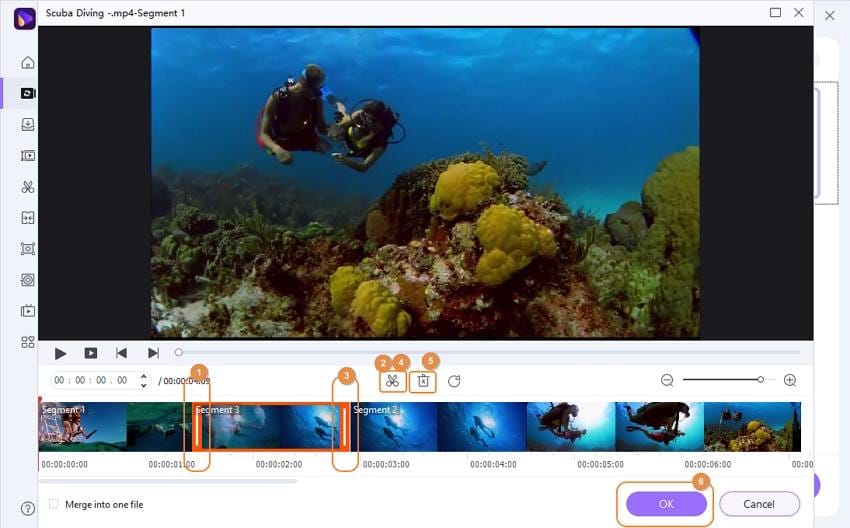
If you want to cut one part and merge the rest, you can delete the selected portion by following the previous point. Only before saving the video, check the option Merge into one file and save it.
You can also trim a lengthy video into various clips. For that, you need to drag the time slider to the position you wish to trim and click Cut. Repeat this process to get separate segments. Now, you need to hit on OK to finish the process.
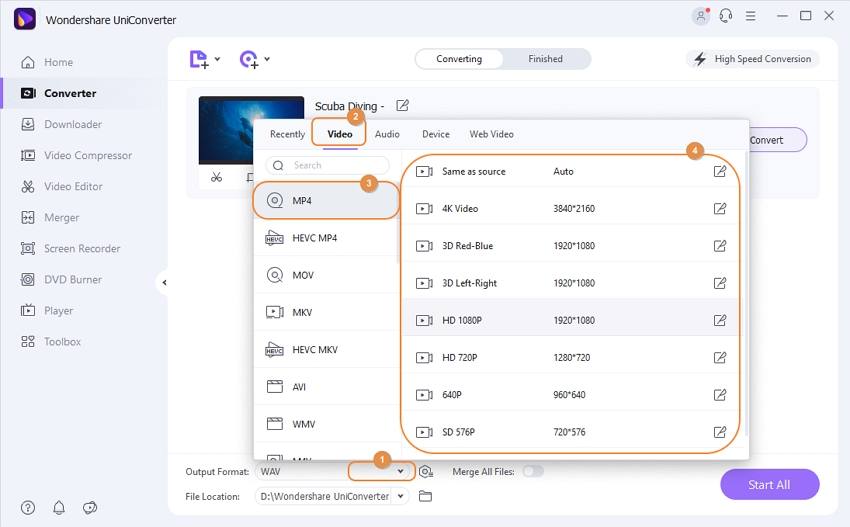
To save the video, you have to click the drop-down button beside Output Format and choose the format. Now, you need to click Start All to continue.
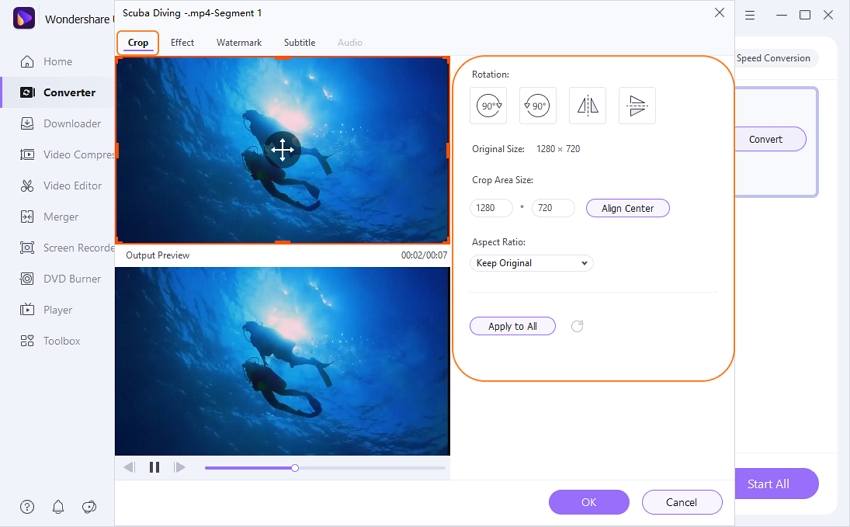
Step 3 Crop Video
For this, you are required to click on the Crop icon.
Then, you can rotate the video clockwise, anticlockwise, flip horizontally, and flip vertically.
To crop the video size, you have to drag the corner of the video frame or enter the specific width and height. Then, you can set the video ratio by clicking on the drop-down button under the Aspect Ratio.
You are required to click OK to save the file.
Now in the primary interface, you need to choose the format and click Start All.
Apply Effects:
In this case, you need to click on the Effect button.
Now, you can apply video effects and filters. You have to adjust the preferred effect and filters under Video effects and Filters, respectively. Besides, you can also check the Audio Box. After setting the effects, you have to click the OK button.
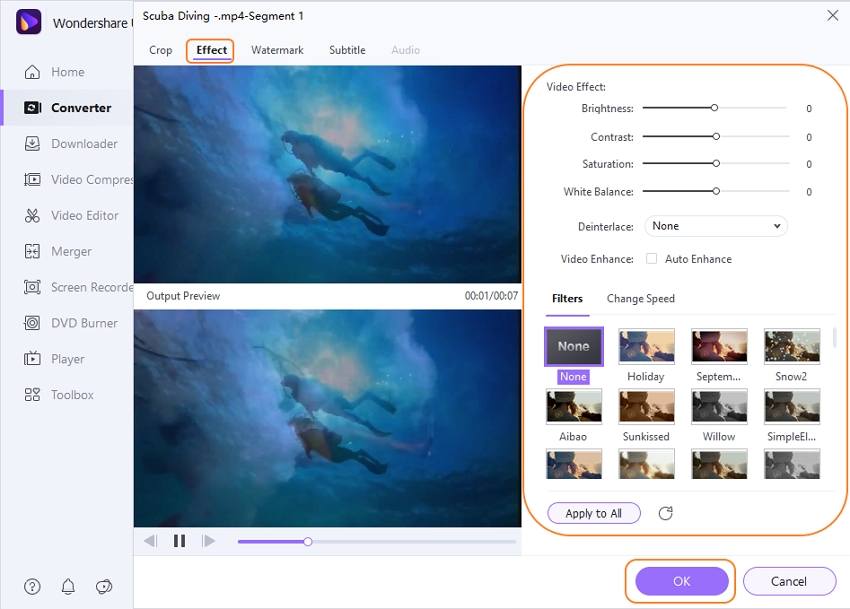
Then, choose the video format first. And then, you can save the video by clicking Start All.
Step 4 Add Watermark
To go to the Watermark tab, click on the Effect button and select Watermark.
Now, you are required to choose the console for the watermark type that you wish: image watermark type or text watermark type.
For image watermark, hit on ... to pick out an image from your computer. You need to drag the selected image watermark to the preferred place.
For a text watermark, write the text in the blank box and adjust the font. Then, you can place it wherever you want.
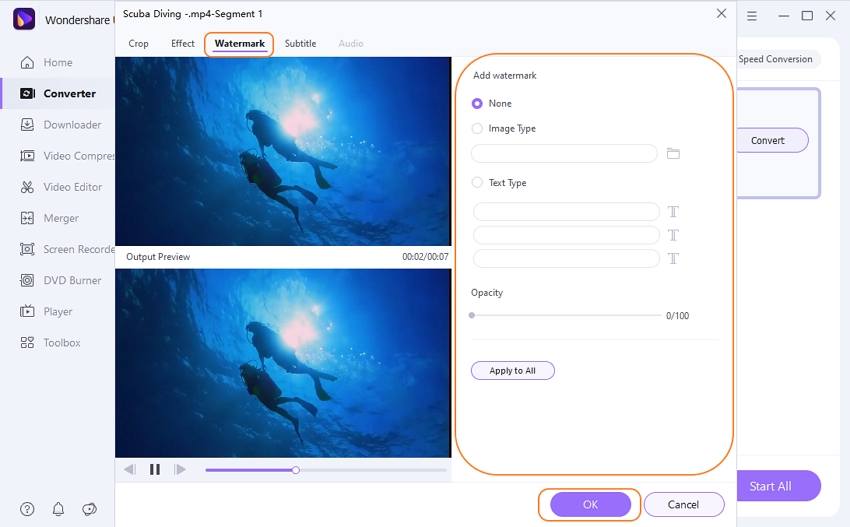
Then, you have to click OK and choose the format. To proceed, you have to click Start All.
Step 5 Edit Subtitles
To open the Subtitle tab, click on the Effect button and choose Subtitle.
At first, click on the ... button, and you will see an Add button. Through this, you can import the subtitle from your PC. You can also click on the Search icon to get it online.
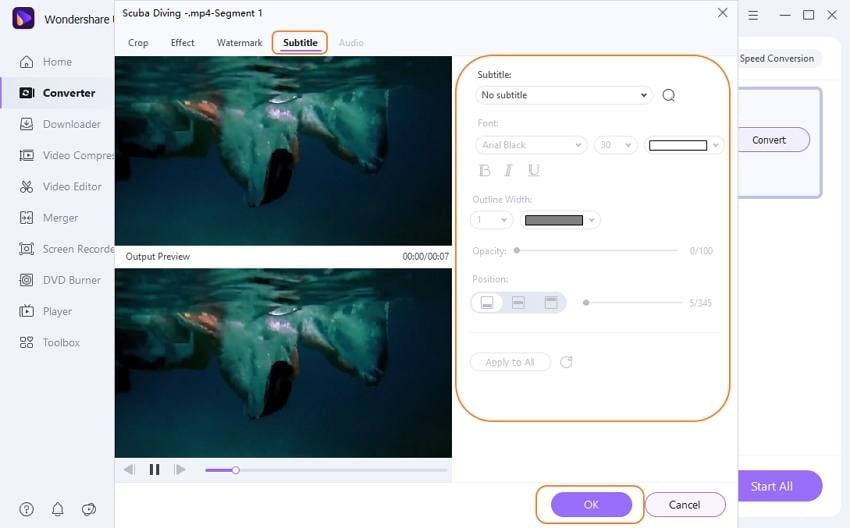
After that, you can customize your subtitle as you prefer.
Once that is done, you have to click OK to save all changes.
Besides, you can click the Audio tab to adjust the volume and click OK.
Now, you have to choose the output format and proceed by clicking on Start All.
Conclusion
This article discusses how to transfer videos from iPhone to pc windows 10 and how to edit the video using UniConverter. With the instructions given above, you can easily transfer videos from your iPhone to PC and edit the videos. Editing is easy now with UniConverter. Download this high-tech application from Wondershare’s official website and enjoy your video editing.
- The Easiest Way to Transfer Audio Files to iPhone in 2026
- Top 6 Methods to Transfer Video from PC to iPad in 2026
- Best Ways to Watch Videos from Your Phone on A TV in 2026
- 8 Recommended Ways to Transfer Video from Android to Mac in 2026
- Best Choices to Transfer Large Video Files in 2026
- Recommended Ways to Transfer Videos to Mobile Phone in 2026
- Best Way to Transfer Video to iPhone Photo Gallery in 2026
- Fast Way to Transfer Video from DJI Osmo Pocket in 2026


Christine Smith
chief Editor