Transfer Tips
- TRY FREE TRY FREE
- 1. Transfer to Phone+
-
- 1.1 The Easiest Way to Transfer Audio Files to iPhone in 2026
- 1.2 Best Way to Transfer Video to iPhone Photo Gallery in 2026
- 1.3 The Most Simple Way to Transfer YouTube Video to Phone Gallery in 2026
- 1.4 Simple Ways to Transfer Videos Between iPhone and Android in 2026
- 1.5 One-Click to Transfer Media Files Between Your Computer and Android in 2026
- 1.6 Top 10 Apps for Video Transfer from PC to iPhone in 2026
- 1.7 Recommended Ways to Transfer Videos to Mobile Phone in 2026
- 1.8 The Easiest Way to Transfer Videos from Computer to iPhone in 2026
- 1.9 Best 6 Third-Party Apps to Transfer Videos from Mac to iPhone in 2026
- 1.10 What Is the Best Way to Transfer Videos from PS4 to Phone in 2026
- 1.11 10 Tips for Transferring Video to Android Devices in 2026
- 2. Transfer to Computer+
-
- 2.1 Simple Ways to Transfer YouTube Offline Videos from Mobile to Laptop in 2026
- 2.2 8 Recommended Ways to Transfer Video from Android to Mac in 2026
- 2.3 Easy Ways to Transfer GoPro Videos to Computer in 2026
- 2.4 Best Ways to Transfer Media Files from Android to PC in 2026
- 2.5 Best Way to Transfer 4K Videos from iPhone to PC in 2026
- 2.6 3 Simple Ways to Transfer Videos from iPhone to Windows 10 without iTunes in 2026
- 2.7 7 Ways to Transfer Videos from iPhone to Computer in 2026
- 2.8 Best Ways to Transfer Videos from Phone to PC in 2026
- 2.9 5 Solutions to Video Transfer from iPad to PC in 2026
- 3. Transfer to iPad+
- 4. Other Transferring Tips+
-
- 4.1 Best Ways to Watch Videos from Your Phone on A TV in 2026
- 4.2 5 Simple Methods to Transfer Videos to SD Card in 2026
- 4.3 Best Methods to Transfer Music Between iTunes and Windows Media Player on PC 2026
- 4.4 Fast Way to Transfer Video from DJI Osmo Pocket in 2026
- 4.5 Best Way to Transfer A YouTube Video to iMovie in 2026
- 4.6 Best Choices to Transfer Large Video Files in 2026
- 4.7 Easy Ways to Transfer Video to MP4 Device in 2026
- 4.8 Simple 4 Ways to Transfer Videos to DVD in 2026
- 4.9 Easy Ways to Transfer Videos from iPhone to USB Flash Drive in 2026
7 Ways to Transfer Videos from iPhone to Computer in 2026
by Christine Smith • 2026-01-21 18:55:55 • Proven solutions
Being an iPhone owner, it is obvious that you would record videos to keep sweet memories of your family vacations, birthday parties, anniversaries, etc. Since your iPhone has limited built-in space and the phone doesn’t even have any memory slot to add a micro SD card to, it becomes essential to learn how to transfer videos from iPhone to PC, to make room for the new clips that you would capture on different occasions.
With that in mind, the following sections explain simple processes to transfer videos from iPhone to a laptop, and also how to transfer video from laptop to iPhone efficiently.
- Part 1. How to Transfer Videos from iPhone to Windows Laptop
- Part 2. How to Transfer Videos from iPhone to Mac
- Part 3. How to Transfer Video from PC to iPhone with Wondershare UniConverter
Part 1. How to Transfer Videos from iPhone to Windows Laptop
Moving videos from your iOS device to any Windows computer is simple and can be done with or without any tool. In the absence of any third-party software to transfer large video from iPhone to PC, a simple Copy and Paste method can be used. On the other hand, if you have any particular program to do so, you may need to understand its app-specific process on how to transfer videos from iPhone to the laptop.
That said, the following are the three most natural methods on how to transfer video from iPhone to Windows laptop.
Note: Before proceeding, confirm that iTunes is installed to ensure that your Windows computer has all the necessary drivers to recognize the iPhone that you connect. If iTunes isn’t installed, you can download it manually from Apple’s official website, and follow the installation process.
Simple Copy-and-Paste Method
For this method, all you need to do is to use the lightning cable to connect your iPhone to one of the USB ports on your Windows PC. As you do so, Windows will automatically launch iTunes. If this is the first time your phone is connected to this computer, you may need to tap and click on the prompts that appear on your iPhone and computer screens to make the two devices trust each other. Once this is done, on the computer, you can:
● Launch File Explorer from the Taskbar.
● Go to This PC from the navigation bar on the left.
● On the main window, double-click to go to the Apple iPhone> Internal Storage> DICM folder that Windows automatically created after you connected your phone.
● Go to the sub-folder that contains the videos you want to transfer to your computer (if you are unsure of the location, you may need to check each of the available directories to find the target footage).
● Select the clips you are interested in, and press Ctrl + C on the keyboard.
● Go to the Drive and folder on your computer’s local hard drive and press Ctrl + V to transfer videos from iPhone to the laptop.
3uTools
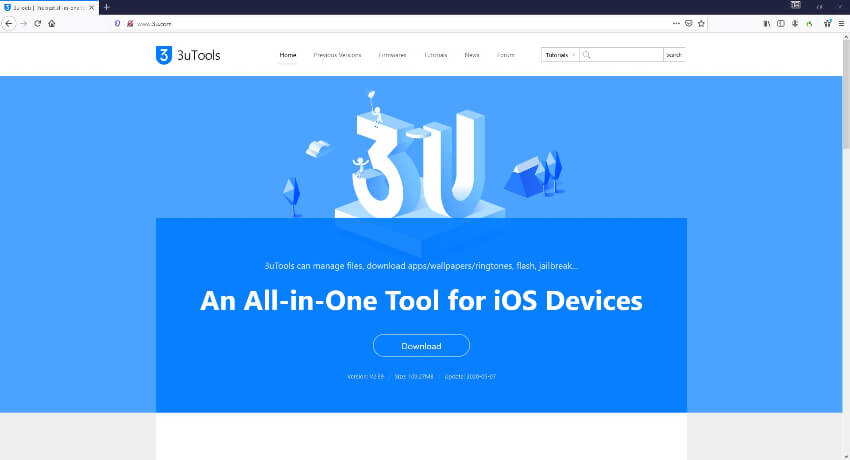
A free tool available only for Windows computers at the time of this writing, 3uTools can recognize almost all iOS devices and allows you to access the files in their internal storage. In order to use 3uTools to transfer large video from iPhone to PC (or even the small ones), you must connect your iPhone to one of the USB ports of your Windows computer using the lightning cable. Once connected, you must do the following steps.
● Launch 3uTools.
● Wait while it recognizes your iPhone.
● Select the Files category from the left bar.
● Ensure that the File System (User) is selected in the center pane.
● Double-click the DICM folder from the right pane.
● Locate and select the videos you are interested in.
● Click Export from the toolbar at the top.
● Select a folder on your computer using the Please Select Export Directory box that appears next
● Click OK to transfer videos from iPhone to a laptop.
OneDrive
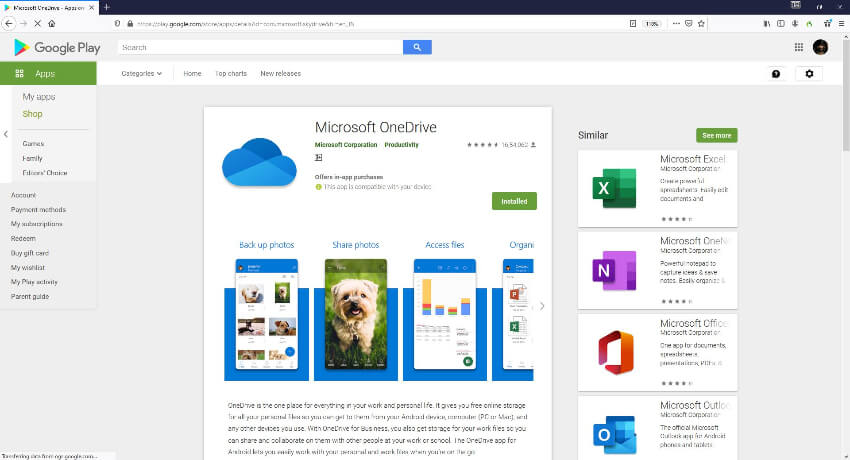
Being a product of Microsoft, OneDrive automatically synchronizes the files through all the devices that use the same account to sign in to the Cloud. Because OneDrive is available for iOS as well, you can install the app on your iPhone, upload the videos, and can access and them directly on your Windows PC. To do so, after you have installed OneDrive on your iPhone and signed in to it with your Microsoft account, you must:
● Ensure that you are on the Files window.
● Tap the + icon from the top-right corner.
● Tap Upload.
● Tap Photos and Videos.
● Tap OK when a confirmation box appears to seek your permission to access photos on your iPhone.
● Locate and select the videos you want to transfer to your Windows computer.
● Tap Done from the top-right corner, and wait while the clips are uploaded to OneDrive.
● On your PC, launch OneDrive from the notification area at the bottom-right corner to access the videos.
Part 2: How to Transfer Videos from iPhone to Mac
Transferring videos from your iPhone to your Mac computer is even simpler. Since the two devices are from the same vendor, they are highly compatible with each other and require less effort during data transfers, videos in this case. Some of the most commonly used methods to transfer video from iPhone to MacBook are listed below:
With the Photos App
The default Photos app that is common in both iPhone and macOS, automatically synchronizes the files as soon as your phone is connected to a Mac. To make things even simpler, the app on your macOS will automatically launch when it detects an iOS device and displays all the images and videos that you have captured using the smartphone’s camera. To learn how to transfer videos from iPhone to Mac, connect the two with the USB cable and:
● Wait while the Photos app starts automatically on your Mac PC (open by yourself if it doesn’t).
● Select your iPhone name from the navigation bar on the left of the Photos app.
● Click and drag the target videos to the desktop or any other folder on your Mac.

iCloud Drive
This is the simplest way of transferring where all you need to do is to ensure that your iPhone can upload the photos and videos to iCloud as soon as they are captured. These contents can then be accessed seamlessly on your Mac when you sign in to your iCloud account using the same ID. To check if your iPhone is configured to upload the videos to iCloud automatically, on your smartphone, you must:
● Get to the Settings window.
● Scroll down and tap Photos.
● Make sure that the iCloud Photos toggle switch under the iCloud section is turned on (if it isn’t, enable the switch manually, and wait while your media files are uploaded to iCloud).
● To access the data on Mac, launch Finder from the Dock, and select iCloud Drive from under the iCloud section in the navigation bar on the left.

Third-Party Cloud Service
There are many third-party Cloud services available today (e.g., Dropbox, 4Shared, etc.) that offer free online space anywhere from 2GB to 15GB. Depending on the reputation of the service provider and the level of trust you have on them, you can choose any among those. Dropbox is selected here for a demonstration. To use Dropbox to transfer video from iPhone to MacBook, you must:
● Install the Dropbox app on your iPhone.
● Create an account and sign in to it.
● Upload the videos from your iPhone to Dropbox, and wait while the process completes successfully.
● On your Mac, launch your favorite web browser (Safari is the default).
● Go to Dropbox’s official website.
● Sign in to the account you created earlier.
● Access and download the videos on your Mac.

Part 3: How to Transfer Video from PC to iPhone with Wondershare UniConverter
If you want to reverse the process, i.e., transfer video from laptop to iPhone, there is a robust app called Wondershare UniConverter (originally Wondershare Video Converter Ultimate) that can make the task easy.
Wondershare UniConverter is a post-production tool with a lot of features that come in handy during media manipulations. Some essential features that UniConverter has included a format converter, video compressor, screen recorder, disc burner, etc.
 Wondershare UniConverter - The Easy Way to Transfer Video from PC

- Transfer videos to iPhone quite quick
- The excellent user interface assists you in reaching out to necessary controls quickly.
- Make the videos realistic using the edit options like trim, crop, filter effects, subtitle, etc.
- Transfer the media files to your desired external storage with the help of this channel.
- Compatible with more than 1000 file formats and the file conversion speed overruns your expectations.
- An innovative toolbox is comprising of necessary controls like video compressor, screen recorder, image converter, VR converter, GIF maker, etc.
To learn how to transfer video from laptop to iPhone with Wondershare UniConverter that is available for both Mac and Windows computers, you can follow the steps given below:
Step 1 Add a video.
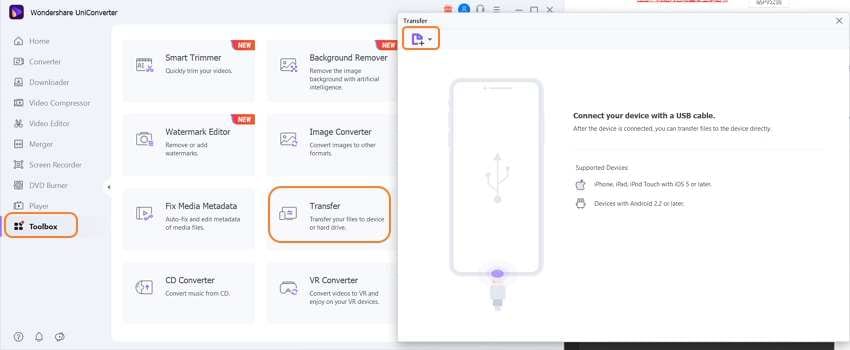
Launch Wondershare UniConverter on your Windows or Mac PC, go to the Toolbox > Transfer tile from the top, click  from the upper-left corner of the Transfer window, and import the video you want to transfer to your iPhone.

Step 2 Connect your iPhone.
Use the lightning cable to connect your iPhone to the USB port of your computer, and wait while Wondershare UniConverter detects your smartphone.
Step 3 Transfer the Video
Ensure that your iPhone appears at the top-right corner of the Transfer window, and click Transfer to transfer video from laptop to iPhone.
![]()
Conclusion
Many built-in tools can be used to transfer video from iPhone to PC, be it Mac or Windows. However, if you want to make your data accessible from anywhere and any device, saving it on the Cloud could be a solution for you. Where OneDrive can be used if you have a Windows PC, iCloud Drive is suitable for Mac owners. On the other hand, if you want to transfer video from laptop to iPhone, being a robust and efficient program that is also 90x faster than other apps, Wondershare UniConverter would be your best choice.


Christine Smith
chief Editor