FCP
- TRY IT FREE TRY IT FREE
- 1. Convert Videos to FCP+
- 2. Tips for FCP+
-
- 2.1 FCP iPad Alternatives
- 2.2 Export FCP Videos
- 2.3 FCP vs Sony Vegas
- 2.4 final cut pro alternative
- 2.5 final cut pro android
- 2.6 apple video editing
- 2.7 final cut pro free
- 2.8 final cut pro apk
- 2.9 final cut pro review
- 2.10 final cut pro rotate video
- 2.11 Adobe Premiere vs Final Cut Pro
- 2.12 how to split clip in final cut pro
- 2.13 imovie vs final cut pro
- 2.14 prores codec for windows
- 2.15 prores 4k
- 2.16 prores mp4
- 2.17 quicktime prores
- 2.18 premiere prores
- 2.19 prores
- 2.20 final cut express
How to Transcode 4K Video to ProRes at Top Speed
by Christine Smith • 2026-06-23 14:38:58 • Proven solutions
ProRes 4K videos are either the transcoded versions of 4K clips that have been recorded and compressed with other codecs such as , , etc. or are the footages that have been captured directly using any of the latest devices that are capable of recording in ProRes 4K format. Since or offers a higher compression rate, even though the video clips recorded using these codecs are smaller in size, they require more processing while editing in any post-production tool for professional distribution. Here you will learn in detail how ProRes works, why do you need to transcode a video to ProRes or ProRes 422 4K if need be, and how can it be done using one of the best conversion tools available in the market.
- Part 1. Basic Introduction to ProRes for You
- Part 2. How to Transcode 4K Video to ProRes with Wondershare UniConverter
Part 1. Basic Introduction to ProRes for You
Intro
Initially developed by Apple and now adopted by almost all major video editing programs, ProRes is a codec that contains detailed color information in the footages in uncompressed form, thus ending up generating the gigantic files.
Benefits
Because the data in ProRes is uncompressed, these files are easy to edit as compared to other formats like , , etc. as the processor doesn’t need to decompress them before allowing the post-production tools to make any modifications. Also, even if you are editing a large file like ProRes 422 4K, the rendering time is significantly reduced as the GPU experiences no overhead during the process.
Workflow
Since the info of the ProRes files contain are in detail, especially the ProRes 4K videos, many latest recording devices are capable of capturing the footage in this format. Such recordings are technically known as ProRes RAW footages. Post capturing, the clips are transferred to an Apple or Windows computer for the post-production tasks. Once the editing is done, the modified clips are exported to a different format, e.g., MP4 or MOV that uses a separate codec such as or to compress the files, thus making them smaller in size.
General Terms Used in Post-Production Environment
Media Proxies
In the post-production field, many professionals create media proxies. When a video proxy is created, the original footage is fragmented into multiple segments of ProRes 422 (or ProRes 422 4K if the file has 4K resolution) format. This is done to make the editing process easy and to reduce the rendering time, which is much higher when working the files in compressed form (generated using other codecs).
Transcoding
Transcoding is a process when a Full HD or 4K video that has been compressed with a high compression-oriented codec such as or is converted to a ProRes 422 or ProRes 422 4K format respectively using any conversion application. When a program transcodes a file, a separate copy of the footage is created and stored on your computer, thus leaving the original (source) clip intact.
ProRes RAW
ProRes RAW was unveiled in the year 2018. As mentioned above, this codec is used by the advanced devices that can capture the footages in ProRes format. However, in order to accommodate ProRes RAW files, the recorders must have a huge amount of storage space.
Part 2. How to Transcode 4K Video to ProRes with Wondershare UniConverter
Developed by Wondershare and unveiled in the year 2009, UniConverter is an application that is capable of converting almost all media files to their relevant format. With the ability to recognize more than 1000 extensions, Wondershare UniConverter (originally Wondershare Video Converter Ultimate) has been developed for Mac and Windows platforms. And offering an almost identical interface for both the operating systems, the tool works equally efficiently. However, when it comes to transcoding a 4K video to ProRes, the option is available only on the Mac version of UniConverter.
 Wondershare UniConverter - Best ProRes Converter
- Convert videos to ProRes codec and other 1000+ video formats like MP4, MOV, AVI, etc.
- Convert video files with optimized presets for Final Cut Pro, iMovie, iPhone, iPad, and more devices.
- 30X faster conversion speed than any conventional converters.
- Edit video files with trimming, cropping, cutting, merging, adding subtitles, etc.
- Burn videos to DVD with customized free DVD menu templates.
- Download or record videos from 10,000+ video sharing sites.
- Industry-leading APEXTRANS technology converts videos with zero quality loss or video compression.
- Versatile toolbox combines video metadata editor, GIF maker, video compressor and screen recorder.
- Supported OS: Windows 10/8/7/XP/Vista, macOS 11 Big Sur, 10.15 (Catalina), 10.14, 10.13, 10.12, 10.11, 10.10, 10.9, 10.8, 10.7, 10.6.
The step-by-step instructions are given below explain how you can use Wondershare UniConverter to transcode a 4K video to ProRes or to be more precise, 4K to ProRes 422 4K:
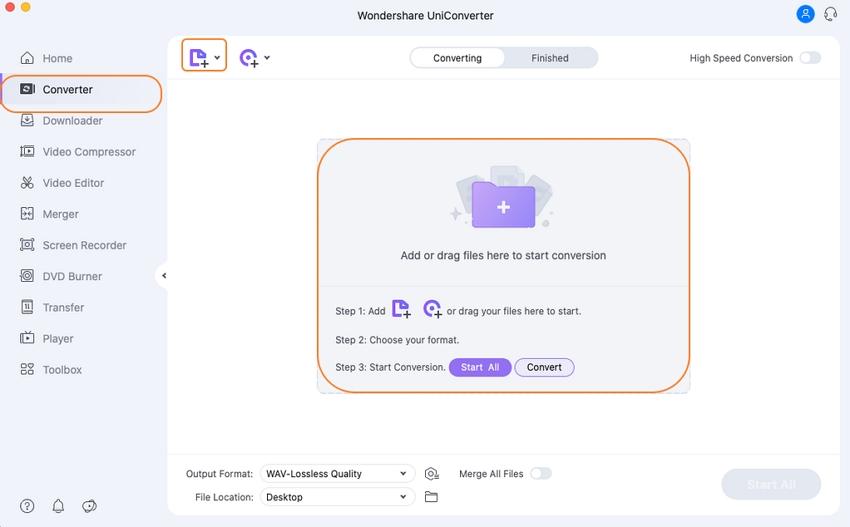
Step 1 Click Add Files and Import a 4K Video to UniConverter on Mac.
Launch Wondershare UniConverter on your Mac computer, click the +Add Files icon from the Video Converter tile, use the box that opens next to locate and select the 4K file you want to transcode to ProRes, and click Load.
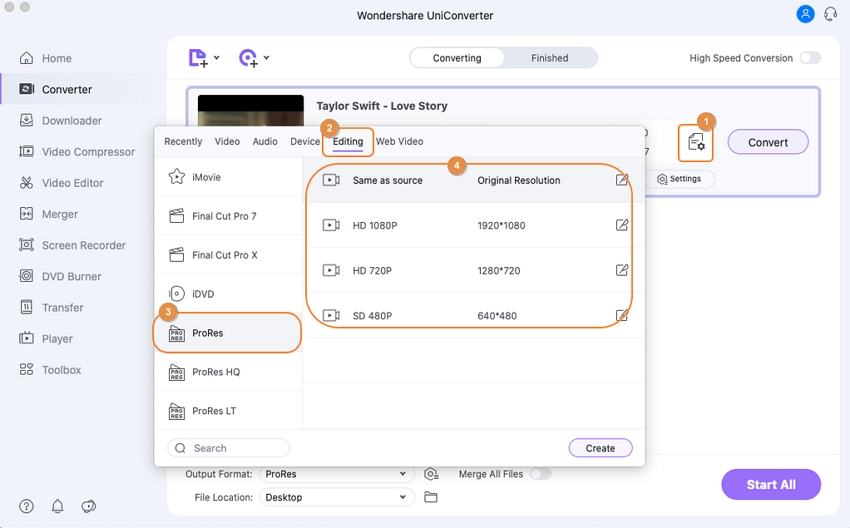
Step 2 Select ProRes Format and a Resolution.
Click the Setting icon, go to the Editing tab from the top, select ProRes from the left pane, and select the Same as source from the right. This ensures that the source 4K video is transcoded to the ProRes 422 4K format.
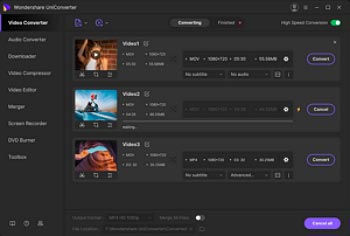
Step 3 Set Output Folder and Begin Transcoding.
Once you are back on the main window, define a destination location in the File Location field at the bottom (or leave the default Finished folder selected), and click Convert from the right side of the 4K file you added to transcode to ProRes 422 4K. Note: You can add multiple files to transcode all of them in one go. When performing the bulk conversion, you must click Start All from the bottom-right corner of the window.

More Info
Since Wondershare UniConverter is lightweight, it renders the files around 30 times faster than any other conversion software in the market. When it comes to transcoding to ProRes 4K, many times, UniConverter outperforms its competitors like Adobe Premiere Pro and Final Cut Pro X that are mostly preferred by professional video editors for their post-production tasks.
Conclusion
If RAW footage is captured using any compressed format such as or , you may experience some lagging after it has been imported to a post-production program like Final Cut Pro X or Adobe Premiere Pro. Although these professional video editing tools can create media proxies, the process may still take time, unless you have access to a high-end computer that has enormous GPU, speedy processor, and a lot of RAM. If this is not the case with you, it becomes important to transcode the video to ProRes format using an efficient tool like Wondershare UniConverter, especially in case of a 4K file that needs to be transcoded to ProRes 4K in order have smooth and flawless video editing experience without touching the original footage.
* Some of the above codec formats may need to be supported by system.
- How to Create DVD Using Final Cut Pro on Mac
- 2 Simple Ways to Burn VLC Files to DVD
- How to Play and Convert MTS Files with VLC
- 3 VRO to AVI Converters to Convert VRO Files to AVI Easily and Free Online
- MXF YouTube: Upload MXF Video to YouTube
- How to Export 4K Videos in Adobe Premiere Pro 2026
- What is the Best YouTube Video Format for Uploading
- Final Cut Pro iPad: Complete Review & Best Alternatives
- How to Convert Torrent to AVI


Christine Smith
chief Editor