Your All-in-One GoPro Video Solution
Wondershare UniConverter
- Convert GoPro videos to 1000+ formats like MP4, MOV, WMV, AVI, MKV, FLV, etc.
- Edit GoPro videos by trimming, cutting, merging, changing resolution, and more others.
- Compress GoPro video size smaller without losing quality.
- Customize GoPro 4K videos by changing resolution, bit rate, encoder, frame rate, etc.
- Burn GoPro videos to DVD or Blu-ray disc with free DVD menu templates.
- All-in-one tool: GIF maker, DVD converter, fix video metadata, and more.
GoPro Tips
- TRY IT FREE TRY IT FREE
- 1. Edit GoPro+
-
- 1.1 Download GoPro Videos
- 1.2 Rotate Gopro Video
- 1.3 Gopro Photo Editor
- 1.4 GoPro Video Format
- 1.5 GoPro Quik
- 1.6 GoPro Cineform Studio
- 1.7 GoPro Quik Alternative
- 1.8 GoPro Tutorial
- 1.9 How to Connect GoPro to Mac
- 1.10 GoPro Instagram
- 1.11 How to Flip GoPro Video
- 1.12 GoPro Video Player
- 1.13 GoPro Time Lapse Video
- 1.14 GoPro Live Stream Youtube
- 2. GoPro Software+
- 3. Other Tips& Tricks+
How to Use GoPro CineForm Studio with Simple Steps
by Christine Smith • 2026-06-23 14:38:18 • Proven solutions
So, how many of you know about the GoPro CineForm studio? Well, most of us like to use GoPro cameras. They are the most versatile action cameras invented to date. But these raw videos look somewhat crude to the viewer’s eyes. That is why we edit them before sharing them with our friends and family. Here is where GoPro CineForm studio comes into the picture. In this article below, we will read in detail about the GoPro CineForm studio time-lapse tutorial and its best alternative.
- Part 1. What is GoPro CineForm Studio
- Part 2. How to Use GoPro CineForm Studio
- Part 3. Best Alternative to GoPro CineForm Studio for Editing and Converting Video
Part 1. What is GoPro CineForm Studio
If you want to download GoPro CineForm Studio, then you should know what it is exactly. This software is a free to use video and audio editing tool, developed by Woodman Labs for Windows. It is PC software, meaning you cannot use it on your smartphone. You can get GoPro CineForm Studio for Windows 7/8/10, the Vista, XP, and Mac versions. It has some cool professional features for video and audio editing, specially designed for editing GoPro pictures and videos. You can trim videos; you can create videos from time-lapse photos, adjust various factors of your images like contrast, brightness, saturation, etc. and more.
Here are the key features of GoPro CineForm Studio:
- Create and play time-lapse videos from a sequence of such photos;
- Import your GoPro media automatically to your PC;
- Various professional editing tools like trim, crop, mix video clips, add titles to your audio tracks, motion effects, and many more;
- Ultra-slow motion speed changes in your videos;
- Full resolution video still frames exports;
- Fish-eye adjustment control available;
- Edit submerging 3D videos;
- GoPro editing templates for smoother editing operations;
- The GoPro CineForm Studio not only supports GoPro cameras but also DSLRs like Canon, Nikon, and others with a constant frame rate of mp4 as well as .mov file format.
Part 2. How to Use GoPro CineForm Studio
If you are willing to go through the GoPro CineForm Studio time lapse tutorial, keep reading it. You have your pictures and videos in your GoPro camera from your last trip, and now you want to make an exceptional video for your memories of that awesome trip. For that, you need to edit this raw footage. But you will face an initial problem without the GoPro CineForm Studio. You see, the file formats are not for editing. You will need to convert the file to a suitable format before you start editing. It is the most important and singular feature of the software that stands out above the rest. So, you need to convert your files into the GoPro CineForm file format designed for the sole purpose of editing and is compatible with most of the editing software.
Follow the steps explained below:
Step 1: Launch the GoPro CineForm Studio on your PC.
Step 2: Once you see the application window open, click on the “Import New Files” button on the top-left corner to import the camera source files.

Step 3: From the bin, select the first clip and open it in the playback window; you can use the “In” and “Out” buttons to trim the start and end parts of the clip.

Step 4: Next, you need to select a file name and location or directory to save the converted video file.
An “Advanced Settings” option allows you to customize certain features of your converted video file like the resolution, frame size, quality, and file format.

Step 5: Once you have selected a directory of your choice, click on the “Add Clip to Conversion List,” It will be added there.

Step 6: You can add more than one clip to this list; repeat steps 2 through 5.
Step 7: Once all the clips you want to convert are added to the list, click on the “Convert All” button, and the files will convert one after the other.
As the conversions finish, the converted files will get saved in the directory you selected. You can now go to the GoPro CineForm Studio EDIT room or use any other non-linear editing software of your choice.
Part 3. Best Alternative to GoPro CineForm Studio for Editing and Converting Video
Well, the best alternative to GoPro CineForm Studio should be an all-in-one tool. That is where Wondershare UniConverter enters the scene. Give that special personalized touch to your videos by adding special effects and filters, adjusting their aspect ratio, protecting them by adding watermark, or incorporating subtitles to the videos to make them look more professional. Wondershare UniConverter offers it all.
Along with editing the videos, you can do so much more with this UniConverter. Convert your videos to any format you like, compress them without compromising with their quality, download one or more videos having authorized copyright from the Internet, burn them to DVD, transfer videos in the supported format, convert images to the suitable format, record your screen activities along with voice, burn CDs, make GIFs, and what not! Wondershare UniConverter covers everything one looks into an editing tool. Keep reading the below step-by-step guide to know more.
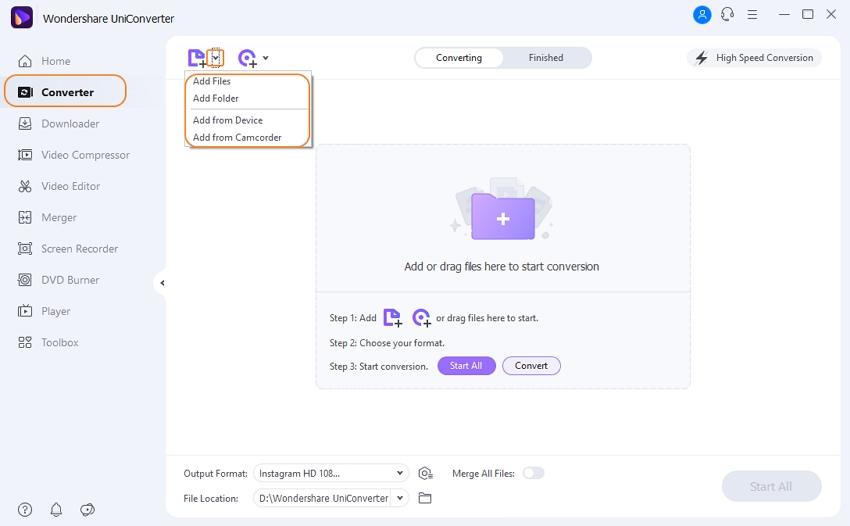
Open Wondershare UniConverter on your device. Click on + Add Files under the Video Converter tab and upload the video you want to edit. You will see three editing icons to trim, crop, and add effects in the video thumbnail.
Trimming:
Video Tutorial: How to Trim/Merge Video Using Wondershare UniConverter
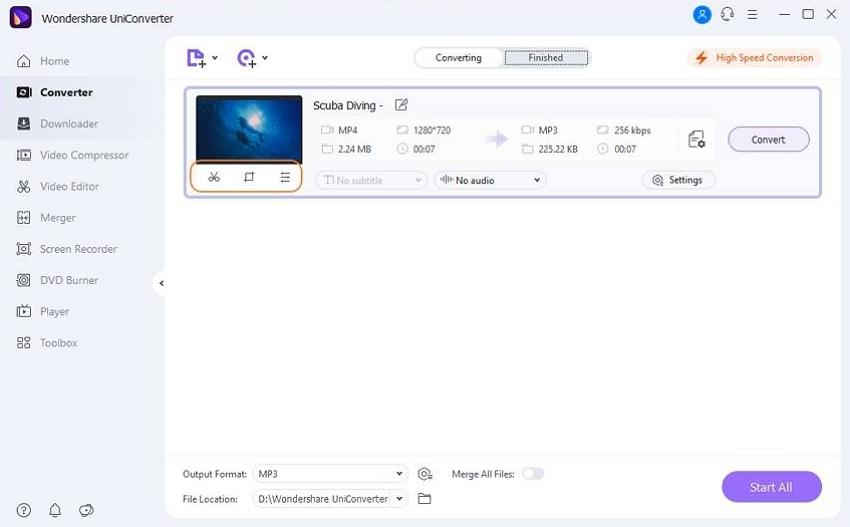
Step 1: Find the trim button.
From the left of the video thumbnail, click on the Trim icon.
Step 2: Trimming.
There are three different ways to trim the videos.
Trimming with Situation 1 - Beginning or End of the Video.
Place the cursor at the end or at the beginning of the clip to start trimming. Click on Cut to trim your video into two parts.
If you are using Wondershare UniConverter on your Windows device, you will see an editing icon on the time slider while moving the cursor. You can put the exact time there to trim the desired part.
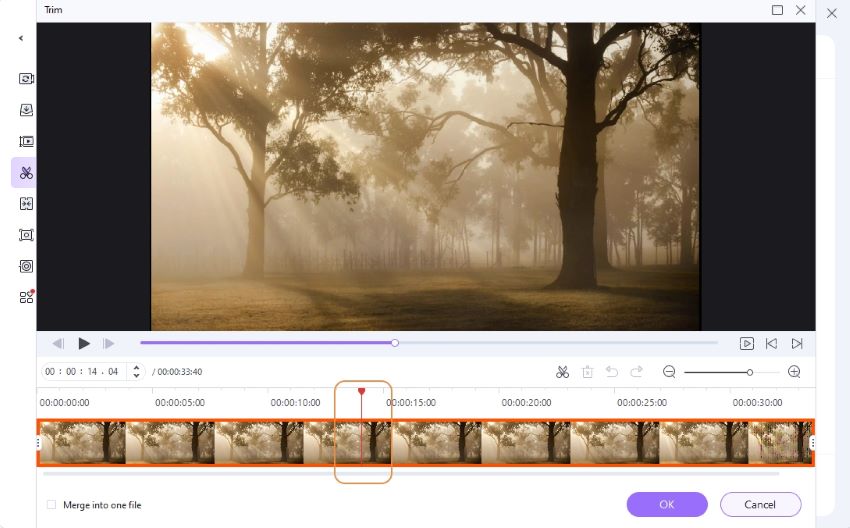
In the case of Mac, set your desired trimming time on the place marked in the below image.
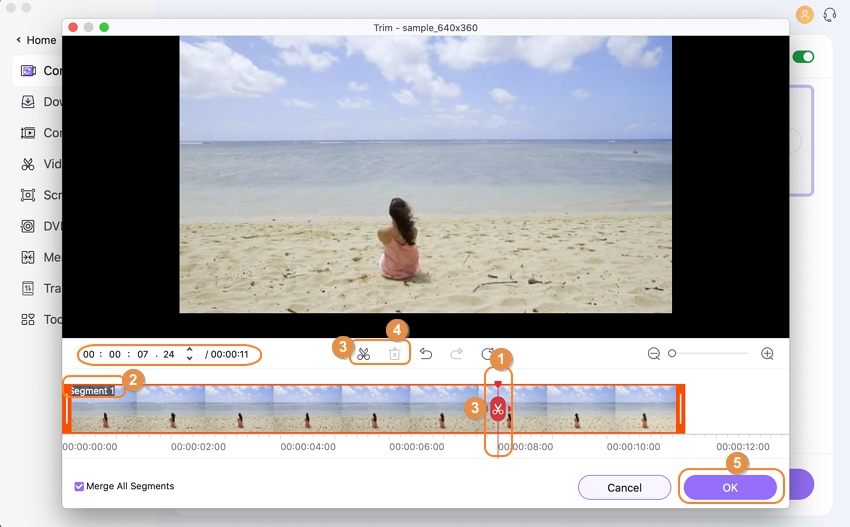
Pick out the part of the video you want to trim out and “Delete” it. Click on “OK” to finish.

Trimming with Situation 2 - Middle of the Video.
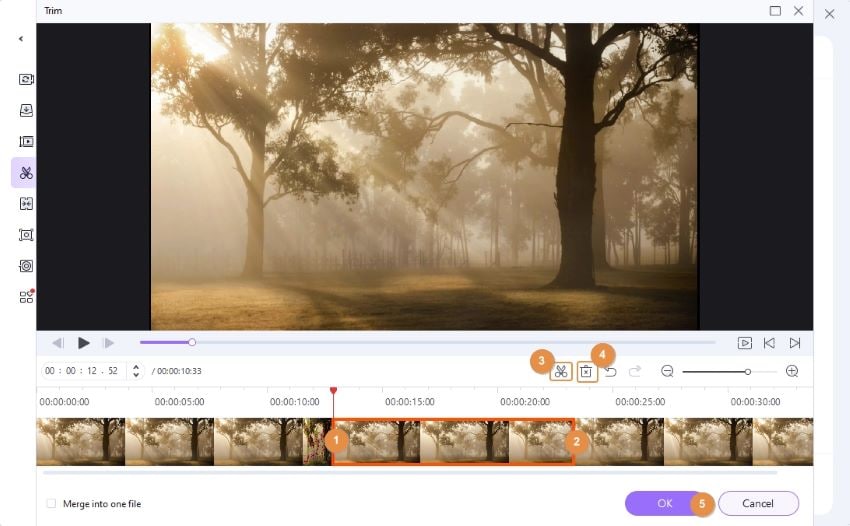
First, place the slider at the beginning of the unwanted portion of the video and select Cut. Then drag it till the part you want to remove and again press the Cut button. After that, Delete the chosen excerpt and Save the changes made. The entire operation is numbered respectively in the below image for better understanding.
Trimming with Situation 3 - Unnecessary Part of the Video.
It will let you delete the unwanted segment and merge the rest into one file. Select the required, removable chunk, and click on Delete. Next, check the Merge into one file box and click on Save to continue.
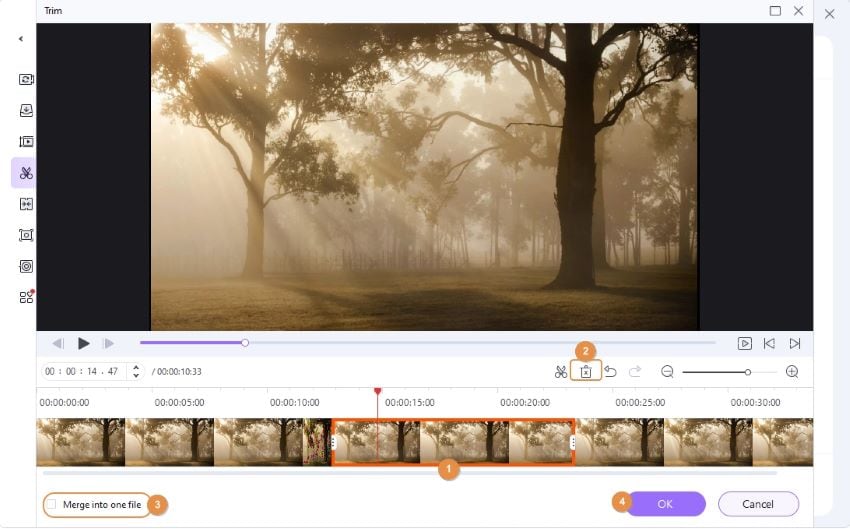
On the main window, now you will get one video clip without the deleted part.

Trimming with Situation 4 - Making Clips.
Move the time slider to the part you wish to trim and Cut them by looping the steps. You can divide the video into as many segments as you want. Once done, click on OK to finalize.

It will give you several video clips with respective segment numbers on the main interface.

NOTE: For a more precise understanding of the trimming time, select “+” or “-,” to zoom in or zoom out the interval.
Cropping
Video Tutorial: Wondershare UniConverter - Crop Video
Step 1: Find the crop button.
In the middle of the video thumbnail, you will find the Crop icon.
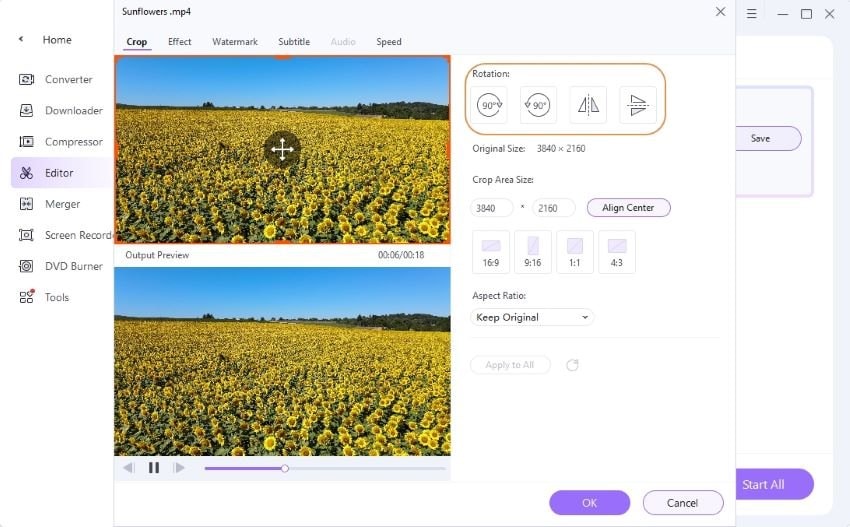
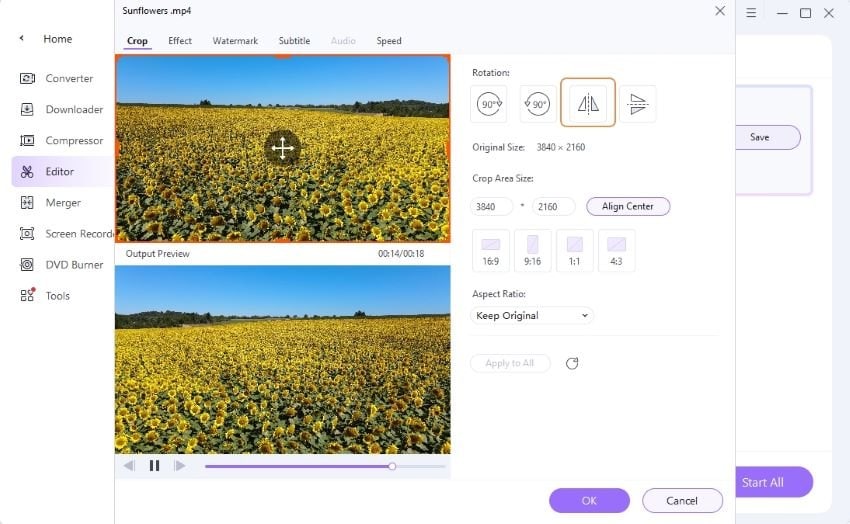
Step 2: Video rotation
You will find four different rotation options under the Crop tab:
- Clockwise
- Anticlockwise
- Horizontal flip
- Vertical flip
Below is an example of how your video will look like if you choose the Horizontal flip option.
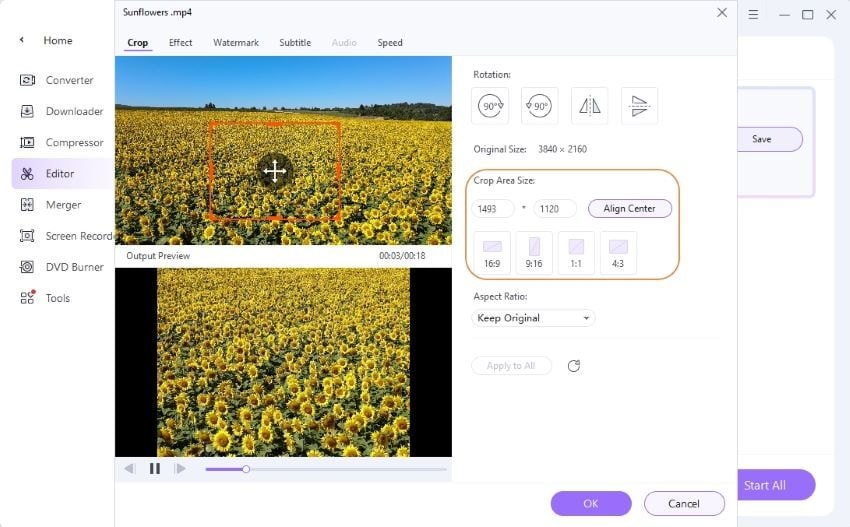
Step 3: Crop the video
There are two ways to crop your video:
- Adjust the frame by dragging the cursor from any corner of the video.
- You can choose to set the width and height of the frame under “Crop Area Size.”
You can preview the output, as well.
Step 4: Set aspect ratio.
From the drop-down menu under Aspect Ratio, choose your preferred option to get your desired quality video.
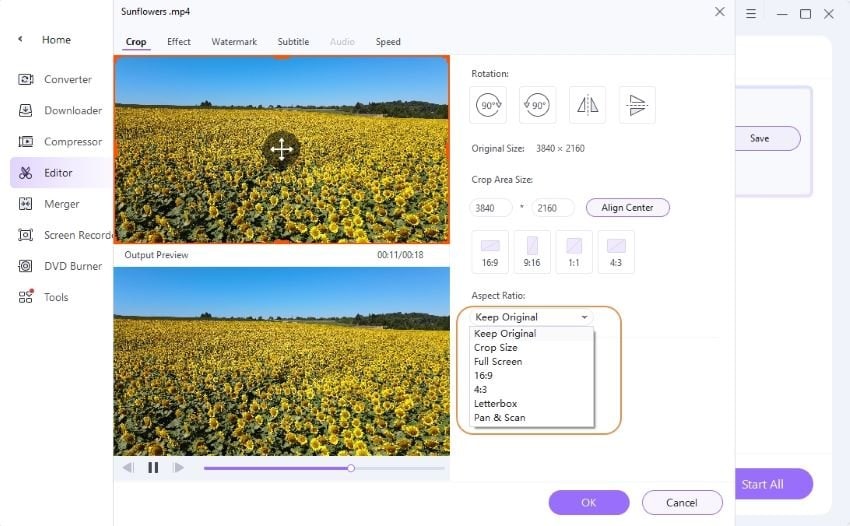
Step 5: Save the changes.
Click on OK to save your edits.
NOTE: Pressing the “Reset” button would take them back to default settings.
Adding Effects
Video Tutorial: Wondershare UniConverter - Apply Effect
Step 1: Find the effects window.
From the below-right of the video thumbnail, you will find the effect button. Click on that to open the desired window.
Step 2: Apply effects & filters.
Under the Video Effect option, you will find Brightness, Contrast, Saturation, and Deinterlace settings. Adjust them according to your necessity to get the required outcome. There is also an Auto Enhance box - check that option for automatic enhancement of your video. Under the Filters: section, you will find 19 different shades. Select your desired one to add the perfect effect.
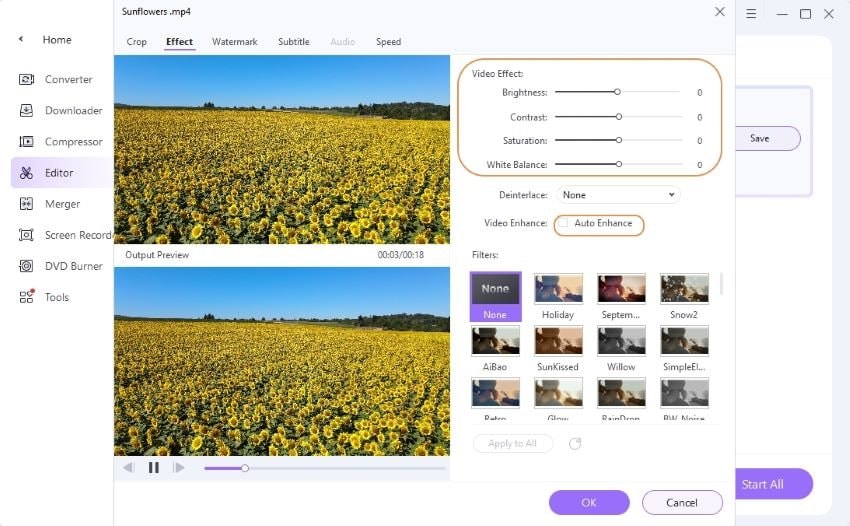
Save everything by clicking on OK.
Note: If you want, you can also add watermarks and subtitles to your video to give them an extra professional touch.
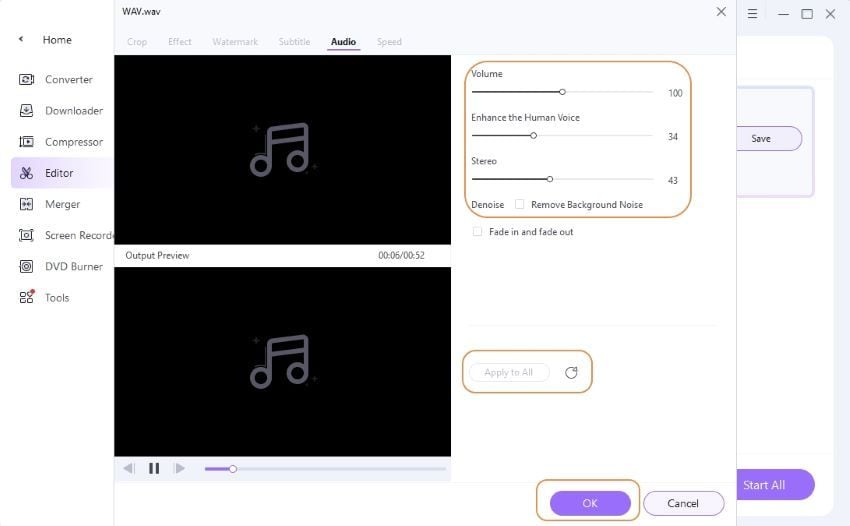
Step 3: Adjust audio.
On the extreme right of the editing window, you will find the “Audio” tab. Adjust it according to your need to give the perfect amount of volume to your video.
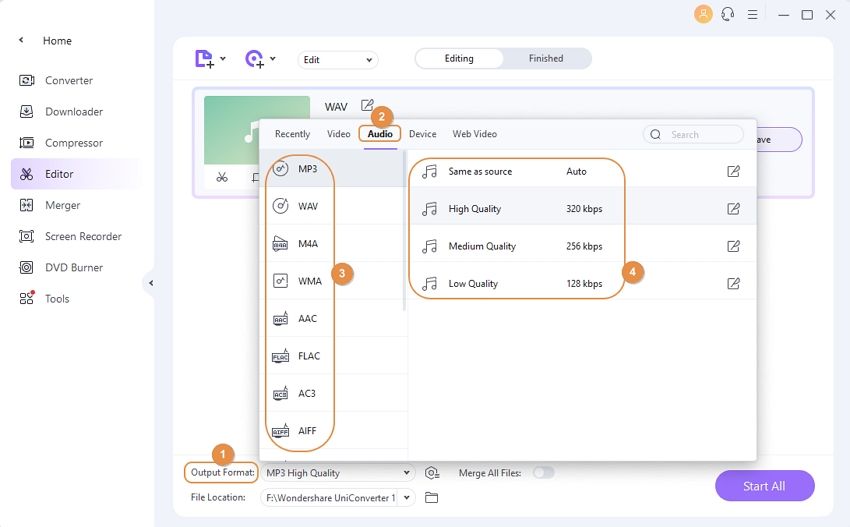
Step 4: Save your edited video.
Once trimming, cropping, and applying effects to your video is over, come back to the primary interface of Wondershare UniConverter. Select the drop-down menu beside “Output Format” and choose the format you want to save the video. Finally, click on “Start All” to save the file.
You will find the edited video file under the “Finished” tab.
Conclusion
Indeed, editing videos is not a child’s play. It requires both creativity and patience. But with tools like Wondershare UniConverter or GoPro CineForm Studio, you can do it in a jiffy. No matter how well you shoot a video, the final result's quality will depend on editing. The better you can edit your videos, the better will be the viewers’ experience. These editing tools are designed in a way to bring a flawless output in the easiest way possible. You can nurture your skills sitting at your home and turn into a master in the professional world.
* Some of the above codec formats may need to be supported by system.
- Everything You Need to Know about GoPro 1080P
- Best GoPro Video Software to Edit Videos
- Top 15 GoPro Editing Apps for Android and iOS Devices
- Top 14 GoPro Desktop Software to Edit Videos Recommended
- Top 15 GoPro Desktop App for Editing Videos Recommended
- Best GoPro Quik Alternative You Can't Miss
- Top 15 Tips for Using GoPro Underwater


Christine Smith
chief Editor