
Modern devices usually capture digital photos in large sizes that occupy a significant amount of storage space on your systems and mobile phones. This is how many people worldwide face storage issues and often wonder how to reduce JPEG file size on Mac.
Whether you want to keep JPEG/JPG photos in your system/mobile or are looking forward to sharing them digitally with your circle, reducing their size plays a key role. It is important for email compatibility, faster uploads, and storage savings.
Do you want to shrink JPEG file size on Mac without compromising its quality? Searching for feasible methods to do this job? This article presents both built-in methods and third-party tools to reduce JPEG/JPG file size on Mac. Let’s get into more specifics.
In this article
- Why Reduce JPEG File Size on Mac?
-
How to Shrink JPEG File Size on Mac with Built-in Methods
-
How to Make JPEG Smaller on Mac with Third-Party Tools
- UniConverter [Free Batch Resizing]
- Shrink.media
- ImageOptim
- Pro Tips to Maintain Quality While Reducing JPEG/JPG Size
- FAQs about Compressing JPEG on Mac
Part 1. Why Reduce JPEG File Size on Mac?
Before we get into the details of how to reduce the file size of JPEG on Mac, let’s first understand what are the benefits of shrinking your photos.
- Save Space: The most prominent benefit of reducing the image file size is that it reduces the extra burden on your data storage devices and creates more space for you to store other data.
- Easy Sharing: Once the image size reduces, you can easily share them on various digital platforms, such as WhatsApp, Facebook, Instagram, and others.
- Faster Loads: Many research studies have shown that online shoppers don’t like to buy from websites that don’t load faster. If you want your website to appear in the top search results, the images on it should load faster. It can only happen if you reduce their sizes without losing quality.
Part 2. How to Shrink JPEG File Size on Mac with Built-in Methods?
Now that you know the benefits of shrinking JPEG images, it is time to learn how you can do it effectively using built-in methods on your Mac. Below is a list of three different efficient methods you can try to shrink JPEG size on Mac.
Method 1: How to Reduce JPEG Size on Mac with Preview App
It is one of the efficient built-in methods to reduce the image size on Mac without sacrificing its quality. Here’s how you can use the Preview App to get over the line.
Step 1: Double-click on your JPEG photo. It will help you open the image in the Preview App.
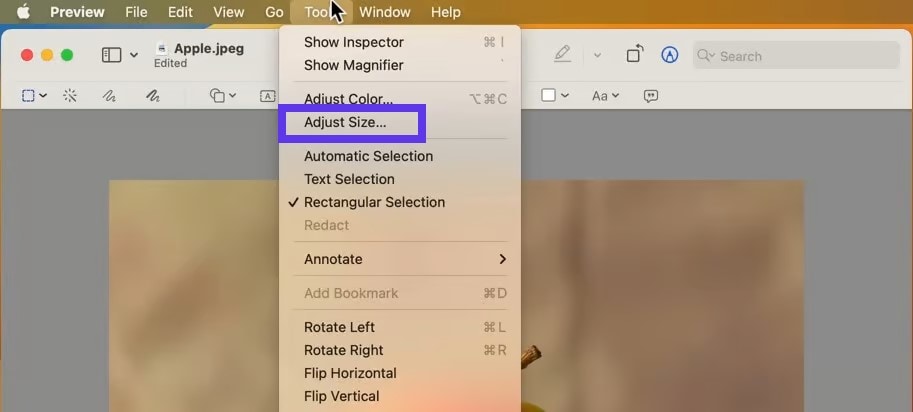
Step 2: Go to the menu bar, tap on the Tools option, and choose Adjust Size, as shown below.
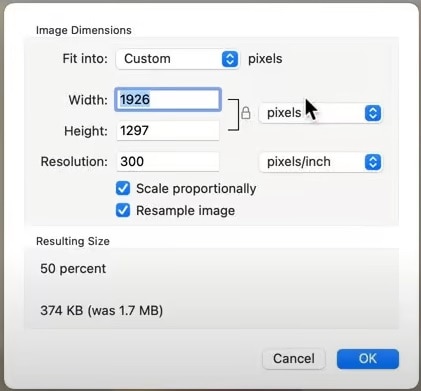
Step 3: A new Image Dimensions window will appear on your screen. There, you will find different parameters to adjust your JPEG image’s dimensions, such as Fit into, Width, Height, Resolution, and more. Once you set the dimensions, hit the OK button.
Step 4: Now, go to the File menu and tap on Save As to save your JPEG image with new dimensions. Enter the image’s name and hit the Save button.
Method 2: How to Reduce File Size of JPEG on Mac with Photos App
This is another built-in Mac application that lets you reduce JPEG size on Mac in no time. The steps required to reduce the file size with this app are as follows.
Step 1: Choose a JPEG image in the Mac Photos App.
Step 2: Go to the File menu from the top ribbon, tap on Export, and choose Export Photos.
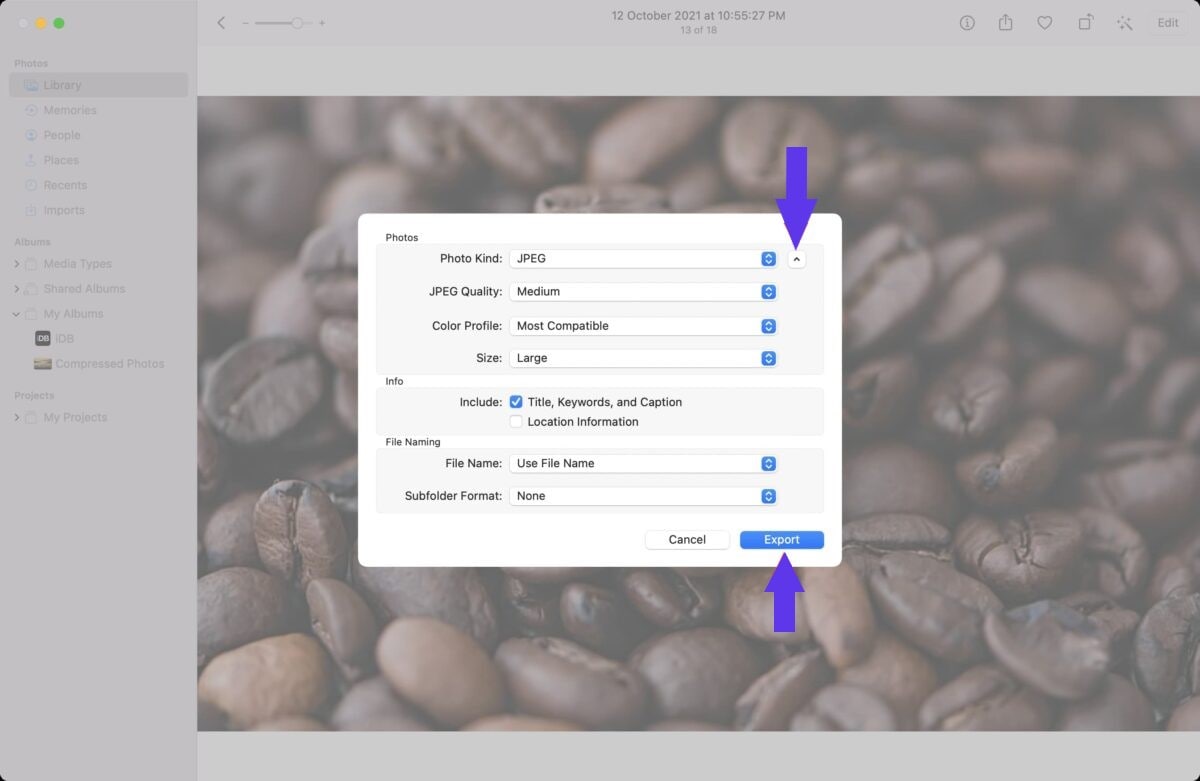
Step 3: Now, you will see a tiny arrow next to Photo Kind. Click on it to explore more options.
Step 4: Compress the JPEG image by adjusting its Size, Quality, and Photo Kind.
Step 5: Go to Export, select a specific location, and tap on the Export button.
Now you have learned how to minimize JPG file size on Mac, let’s move to the third method.
Method 3: How to Compress a JPEG Mac via Automator
Are you planning to reduce JPG size on Mac for multiple images simultaneously? Try Automator. This tool offers efficient batch compression without lowering the image quality. Below are the steps you need to follow to shrink your images with this built-in utility.
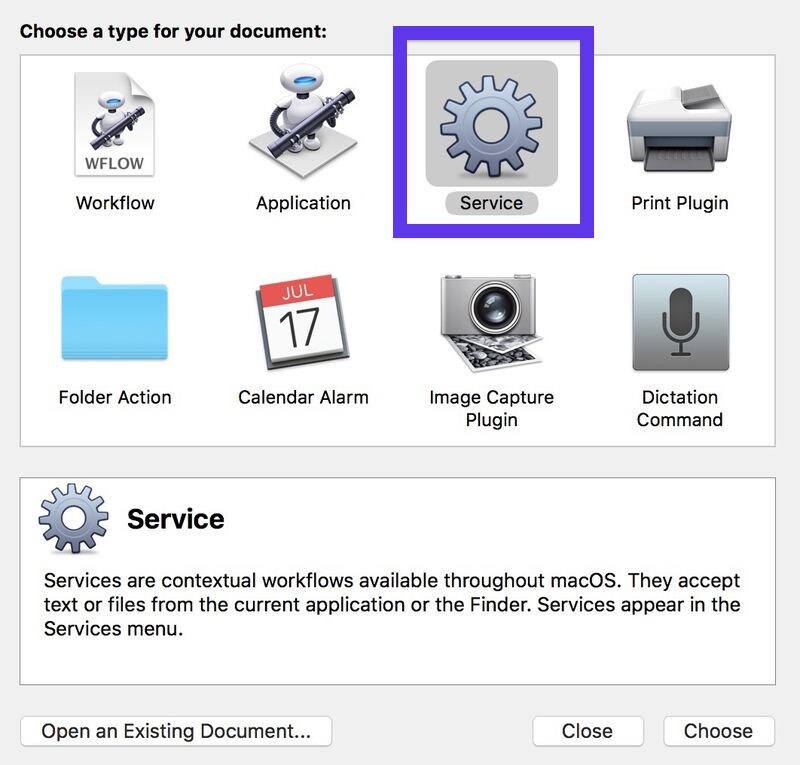
Step 1: Open Automator, choose New, and select Service as a workflow type.
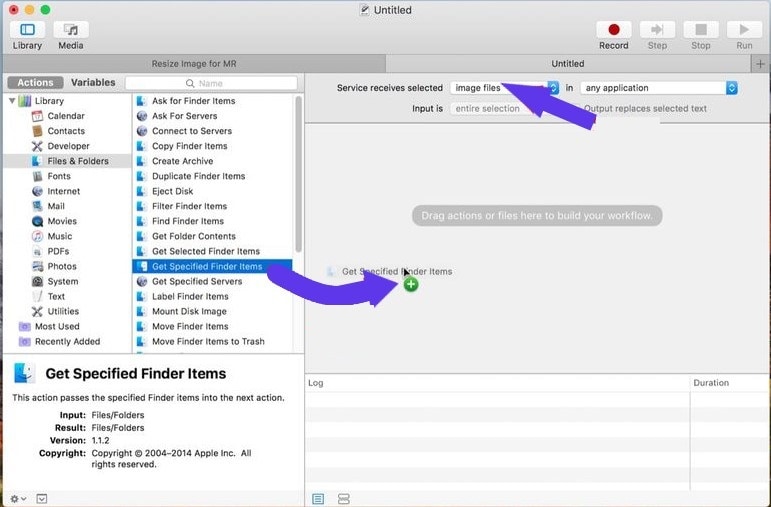
Step 2: Now, add Get Select Finder Items into your workflow. You will find it in the library on the left.
Step 3: It is time to add Change Image Size.
Step 4: Make sure the JPEG is chosen. Then, control the compression level by adjusting the Quality slider. You can also adjust the image’s height and width.
Step 5: Tap on File and choose Save. Then, name your service and choose Input as Any Item and Output as Images. Doing this will help the service process multiple JPEG images simultaneously.
Part 3. How to Make JPEG Smaller on Mac with Third-Party Tools?
Resizing or shrinking your JPEG/JPG images using the Mac’s built-in tool is good, but sometimes, you may lose clarity and sharpness. Are you worried about the same thing? Don’t be concerned, as this section presents three incredible third-party tools you can use to reduce JPEG file size on Mac.
1. How to Reduce Size of JPEG/JPG on Mac with UniConverter
It is basically a video conversion tool that also offers incredible image compression features on Mac and Windows devices. As a powerful multimedia tool, UniConverter helps you resize images according to your needs without sacrificing their original quality.
Whether you want to reduce the JPEG file size for faster uploads, sharing purposes, or emailing, UniConverter has got you covered. It efficiently and carefully adjusts the image’s parameters to play with its size.
If you are looking forward to optimizing your images for web pages, social media, storage management, or any other platform, try UniConverter for the best outcomes. Beginners love using this image compression tool due to the easy navigation it offers and the elegant interface it has.
Whether you want to shrink the size of one JPEG photo or multiple images at the same time, this tool lets you do both. The best part is that it maintains the quality of the original image. This feature makes UniConverter stand out among typical image compressors.

Best Batch Picture Resizer Mac
Steps to Use UniConverter to Shrink JPEG File Size on Mac
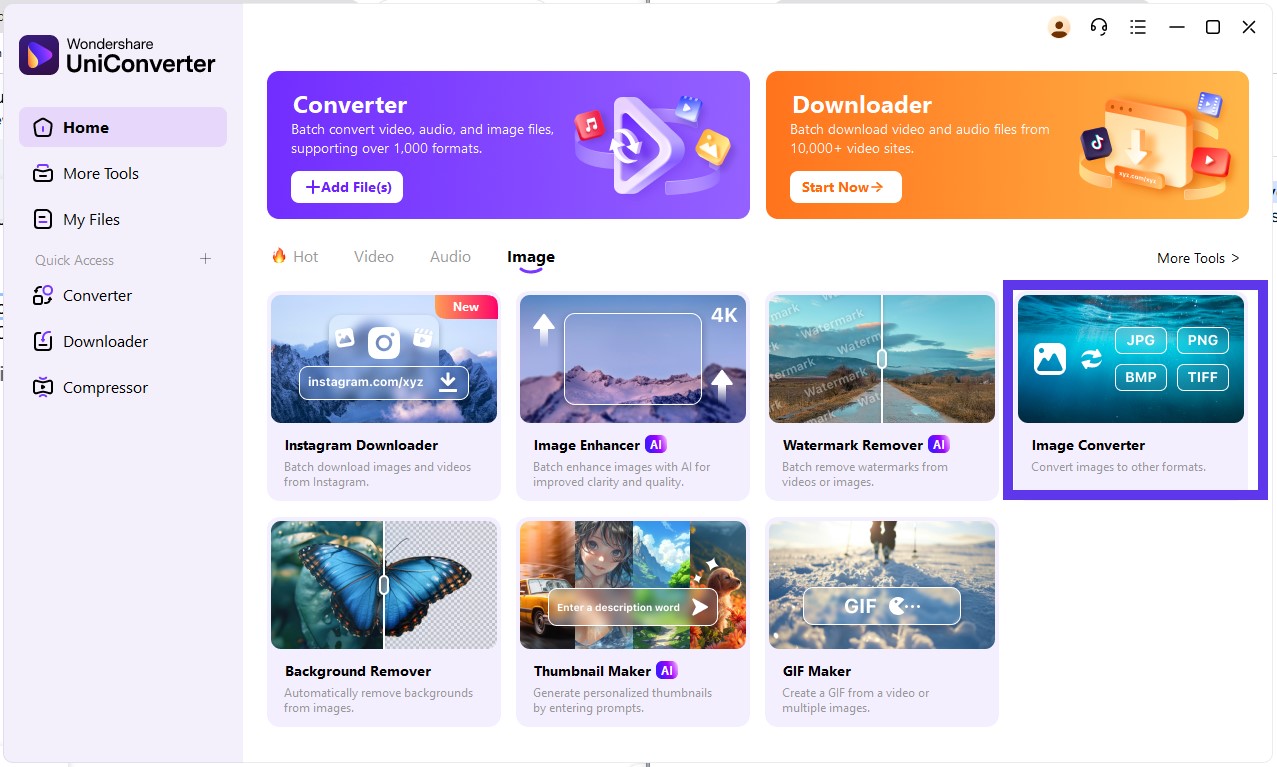
Step 1: Open UniConverter on your Mac, enter the Image tab, and click Image Converter, as shown below.
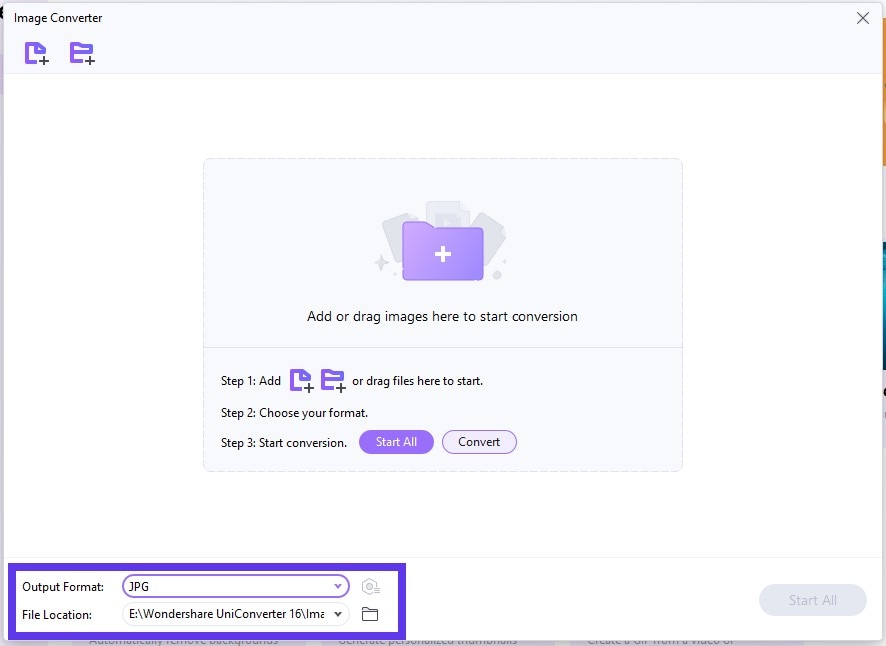
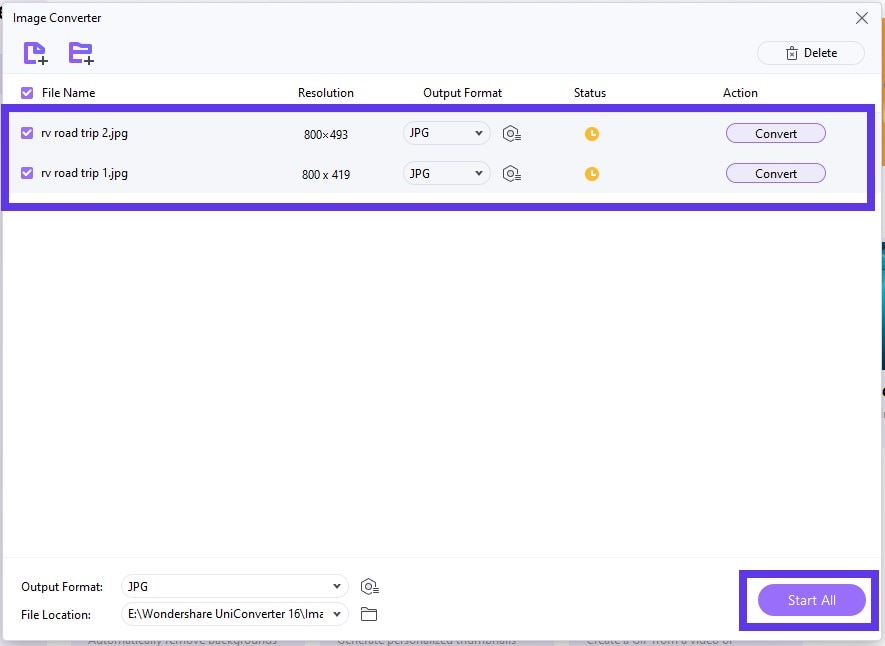
Step 2: Click the (+) Add button to load your JPEG images into the tool, select the output format, and tap on the Select All button.
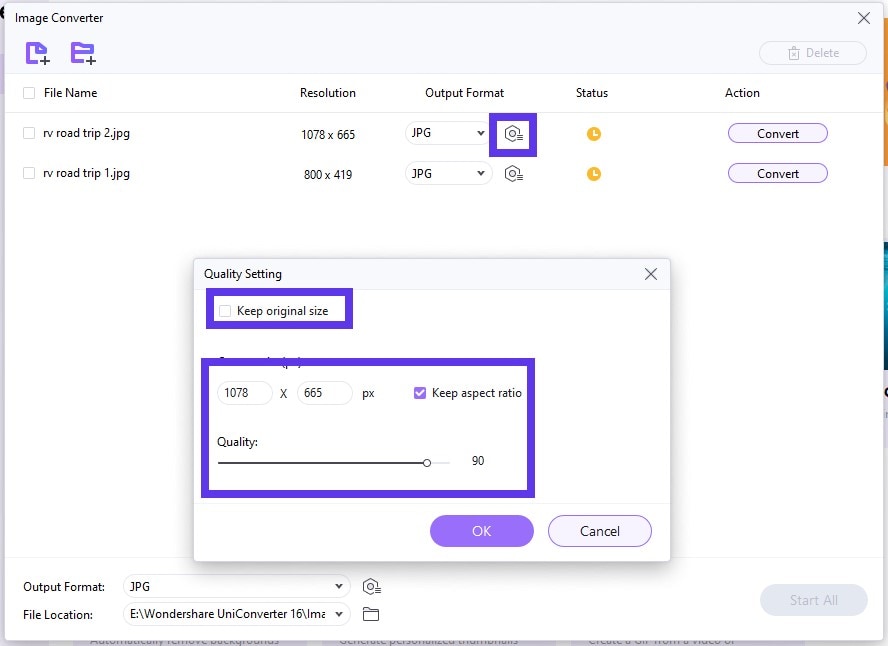
Step 3: Click the settings icon and uncheck the keep original size box. Then, adjust the width and height (in pixels) of the uploaded JPEG/JPG images. Once done, adjust the Quality slider. Then, press OK.
Step 4: Once the images are compressed, click Convert to reduce the size of one image or tap on Start All to initiate batch compression.
2. How to Make a JPEG File Smaller on Mac with Shrink.media
If you prefer using online utilities for personal or professional projects, Shrink.media will be your go-to partner. Whether you want to reduce JPG file size on Mac or are looking forward to processing WebP or PNG images. Major reason why many people love this image compression utility is that it maintains a high visual quality while reducing its dimensions.
If you are a Mac user who wants to optimize JPEG images for managing storage, social media, or web pages, Shrink.media will be worth using. Since this is a cloud-based tool, you don’t need to use any specific device to run it. You can easily access this tool from any Mac device with a browser sitting from anywhere across the globe.
Steps to Use Shrink.media to Reduce JPG File Size on Mac
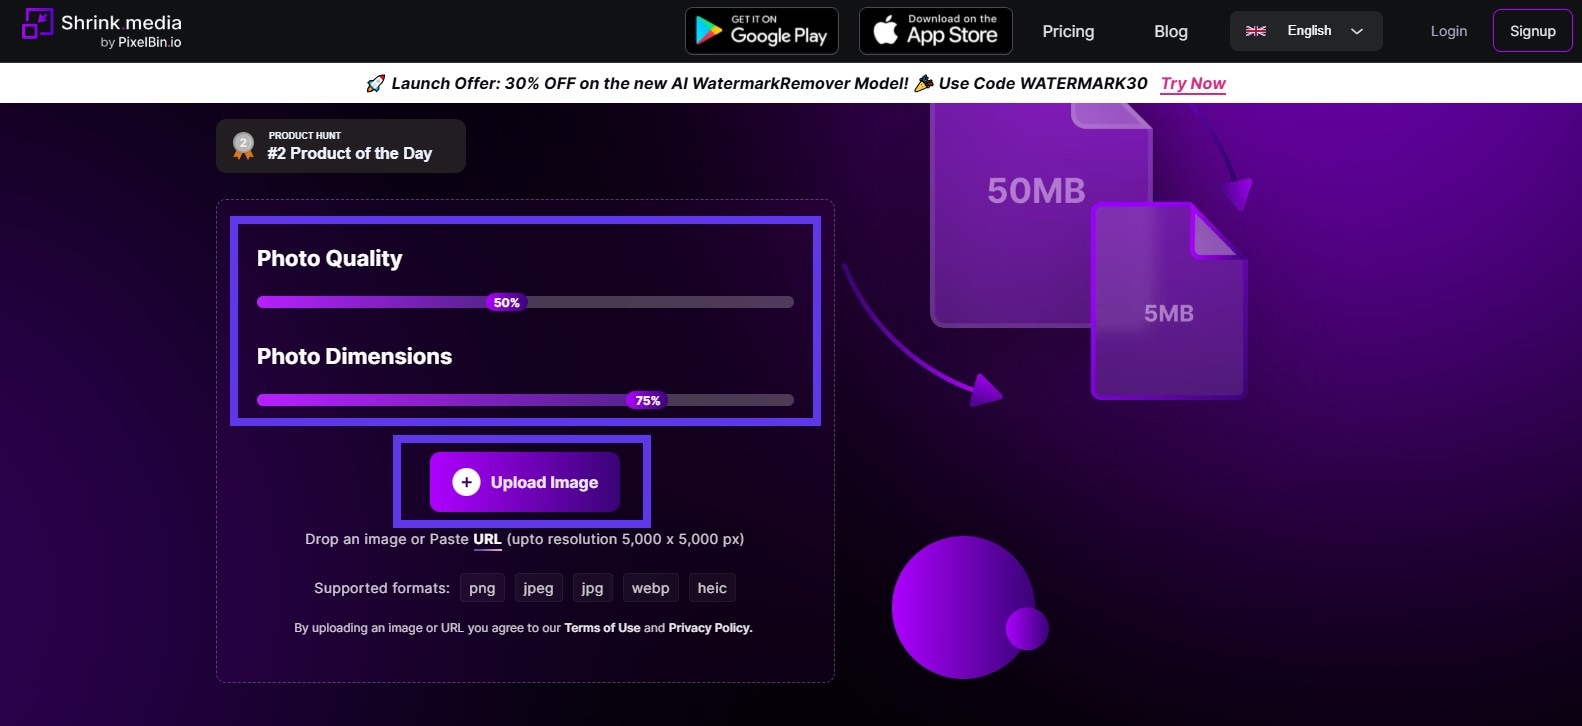
Step 1: Open the website on your Mac. Adjust the Photo Quality and Photo Dimensions sliders according to your requirements. Then, click the Upload button to load the JPEG images you want to resize.
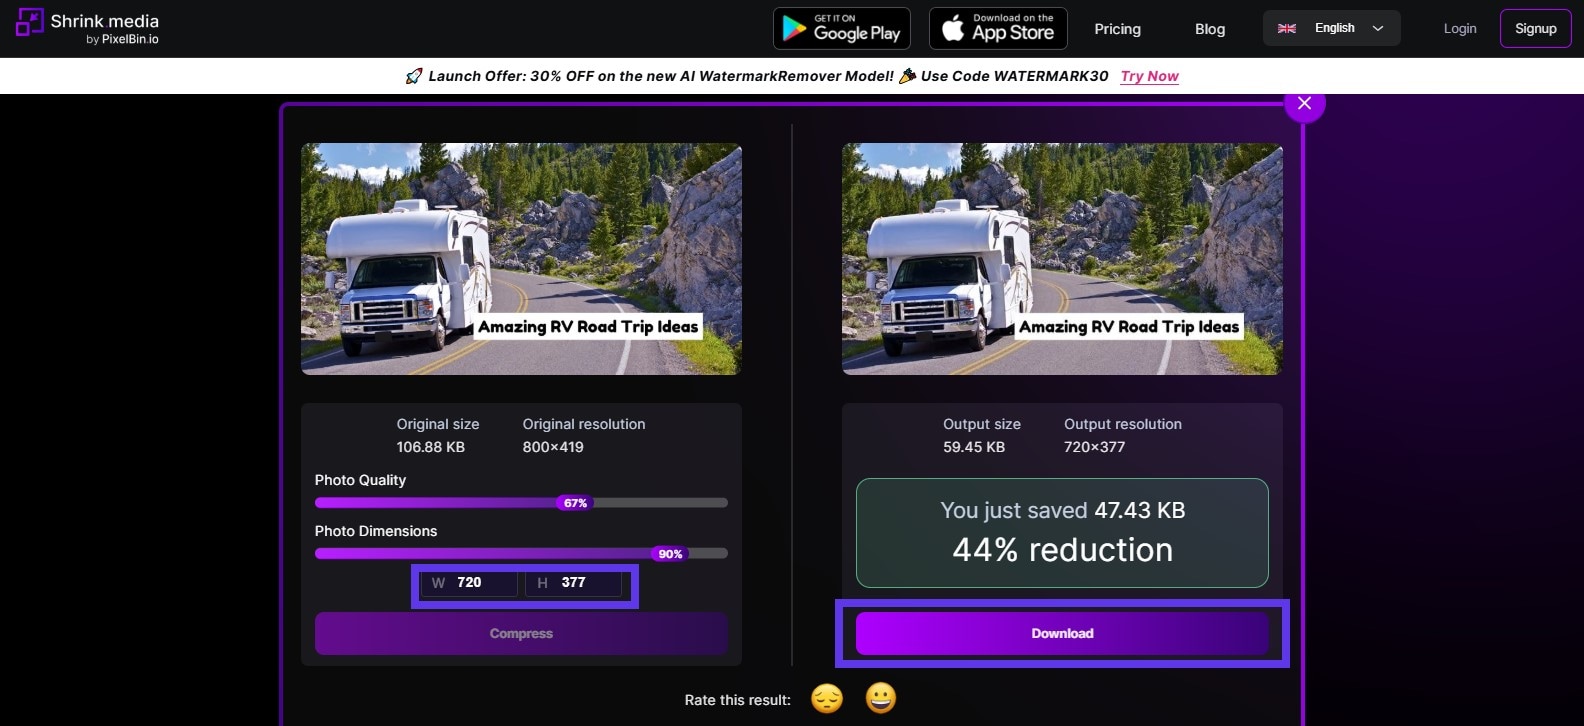
Step 2: Once the image is loaded into the tool, you can set its width and height. Then, it will resize automatically. Once done, the updated image will be shown on the right side of the screen. Hit the Download button to save it on your Mac computer.
3. How to Minimize JPG File Size Mac with ImageOptim
This tool is specifically designed for Mac users who prefer using open-source utilities. ImageOptim allows you to adjust the dimensions of images of different formats, such as JPEG, WebP, GIF, and PNG. What you will love the most about this third-party image compression utility is that the quality loss is not noticeable when it processes your image.
Unlike Shrink.media, ImageOptim works offline only. Therefore, it ensures faster processing and better privacy of your data. The advanced optimization technology it uses includes metadata removal, PNG optimization, and JPEG compression. The drag-and-drop features make this app suitable for users of all skill levels.
Steps to Use ImageOptim to Compress JPEG on Mac
Step 1: Download the tool and install it on your Mac.
Sep 2: Open the software and add JPEG images by simply dragging and dropping them.
Step 3: Tap on Preferences to adjust the strength of compression. Also, enable/disable metadata stripping.
Step 4: It will compress the loaded images in the background, and the updated image will replace the original one. It is the default setting.
Part 4. Pro Tips to Maintain Quality While Reducing JPEG/JPG Size
Here are some useful tips you should keep in mind while shrinking JPEG images on Mac. They will help you maintain the original quality of your images.
- Always select the right image resolution, e.g., 300 DPI for print and 72 DPI for web.
- Avoid overwriting the original JPEG files. Instead, use the Save As option.
- Use multiple image resizing tools to balance the compression and quality of your images.
- Remove unnecessary metadata, including creation date, GPS location, and camera settings.
- Try using AI-assisted image compression tools like ImageOptim and UniConverter.
- Use batch processing to optimize multiple images simultaneously.
Best AI Image Enhancer
FAQs about Compressing JPEG on Mac
1. How to make a JPEG file smaller on a Mac?
You can use built-in tools to reduce JPEG file size on Mac, such as Preview App and Photos App. However, using third-party, dedicated image compression tools, like UniConverter and Shrink.media, offer more precise and high-quality results.
2. Does reducing JPEG size lower quality?
Yes, the quality of an image can be compromised while reducing its size. The percentage of quality loss largely depends on the image’s compression level. Lossless compression does not sacrifice the quality of your image while processing it. In contrast, lossy compression discards some data permanently and lowers the image quality.
3. How to reduce JPEG size without apps?
You can try Mac built-in tools like Photos App and Preview app, as mentioned earlier.
4. Can I compress multiple JPEGs at once?
Yes, different image compression tools offer batch processing for faster image optimization. If you need a reliable and efficient tool to reduce the size of multiple JPEG images on Mac, try UniConverter.
Ending Note
Reducing JPEG file size on Mac is common these days. Many people wonder why reduce the size of images. Well, shrinking your image size offers a range of benefits, including easy online sharing, faster web page loading, and effective storage management. Considering these perks, millions of people worldwide reduce JPEG file size on Mac.
If you need quickly accessible features, you can use built-in utilities, like Photos App, to compress JPEG on Mac. However, these in-built tools have certain limitations. This is why third-party applications, like UniConverter, ImageOptim, and Shrink.media, stand out because they eliminate the limitations of built-in image compression functionalities on Mac.

