

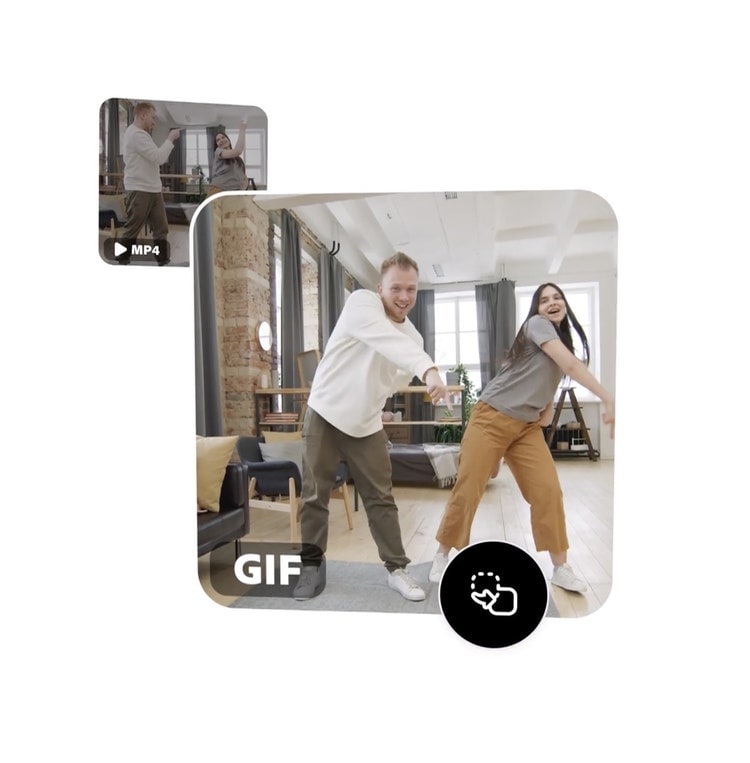
GIFs have become a staple for expressing reactions, sharing moments, or showcasing short loops of action. The ability to create GIFs from MP4 videos opens up countless possibilities, whether you're looking to highlight a funny moment or share a memorable clip. This guide covers the must-know tips, easy steps, and tools to create GIFs from MP4 files, ensuring you have the perfect animated image to share.
In this article
Part 1: Why Creating GIFs from MP4
Converting MP4 videos into GIFs offers several advantages, making it a great tool for sharing moments on social media or in presentations. Here are a few reasons why creating GIFs from MP4 is worth your time:
1. Preserving Short Clips with Impact
GIFs are ideal for capturing and showcasing short, impactful moments. When creating GIFs from MP4, you can focus on key parts of a video that can loop continuously, adding extra attention to that specific scene.
2. Better File Sharing
GIFs are smaller in size than videos, making them easier to share over messaging platforms, social media, and emails. You can compress large MP4 files into a GIF format without losing too much quality, which is ideal for quick sharing.
3. More Engaging Content for Social Media
GIFs are highly engaging on social media platforms, as they automatically play in a loop without the need for sound. This makes them more likely to capture the attention of your audience than static images or full-length videos.
4. Easy to Create and Customize
Tools for creating GIFs from MP4 videos are user-friendly and offer plenty of customization options. You can trim, resize, adjust speed, and add captions to make your GIFs more dynamic and personalized.
5. Versatile for Various Uses
Whether for marketing, educational content, or personal entertainment, GIFs made from MP4 files are versatile. You can use them for product demos, tutorials, reactions, memes, or simply for fun.
Part 2: Must Know Tips to Create GIFs from MP4
Before diving into creating GIFs from MP4 videos, there are a few essential tips to ensure you get the best result:

1. Focus on the Best Clips
Since GIFs are typically short, focus on the most impactful moment in the MP4 video. Trim the video to only the section that conveys your message effectively, whether it’s a funny moment, action shot, or important scene.
2. Adjust the Frame Rate for Smoothness
While converting MP4 videos to GIFs, pay attention to the frame rate. A higher frame rate will make the GIF smoother, but it will also increase the file size. A balance between quality and size is essential for easy sharing.
3. Keep the Size in Check
GIFs tend to be larger than other image formats, so keep the file size in mind. If you're creating GIFs for web use or social media, ensure that the final product is optimized for faster loading times and better performance.
4. Use Editing Tools to Enhance the GIF
Many tools allow you to edit your GIF by adding text, filters, or stickers. These enhancements can add a fun or professional touch to the GIF, making it stand out.
5. Select the Right Output Resolution
High-resolution GIFs look better but are larger in file size. For quicker sharing and web optimization, consider resizing the GIF to a more manageable resolution that still maintains its quality.

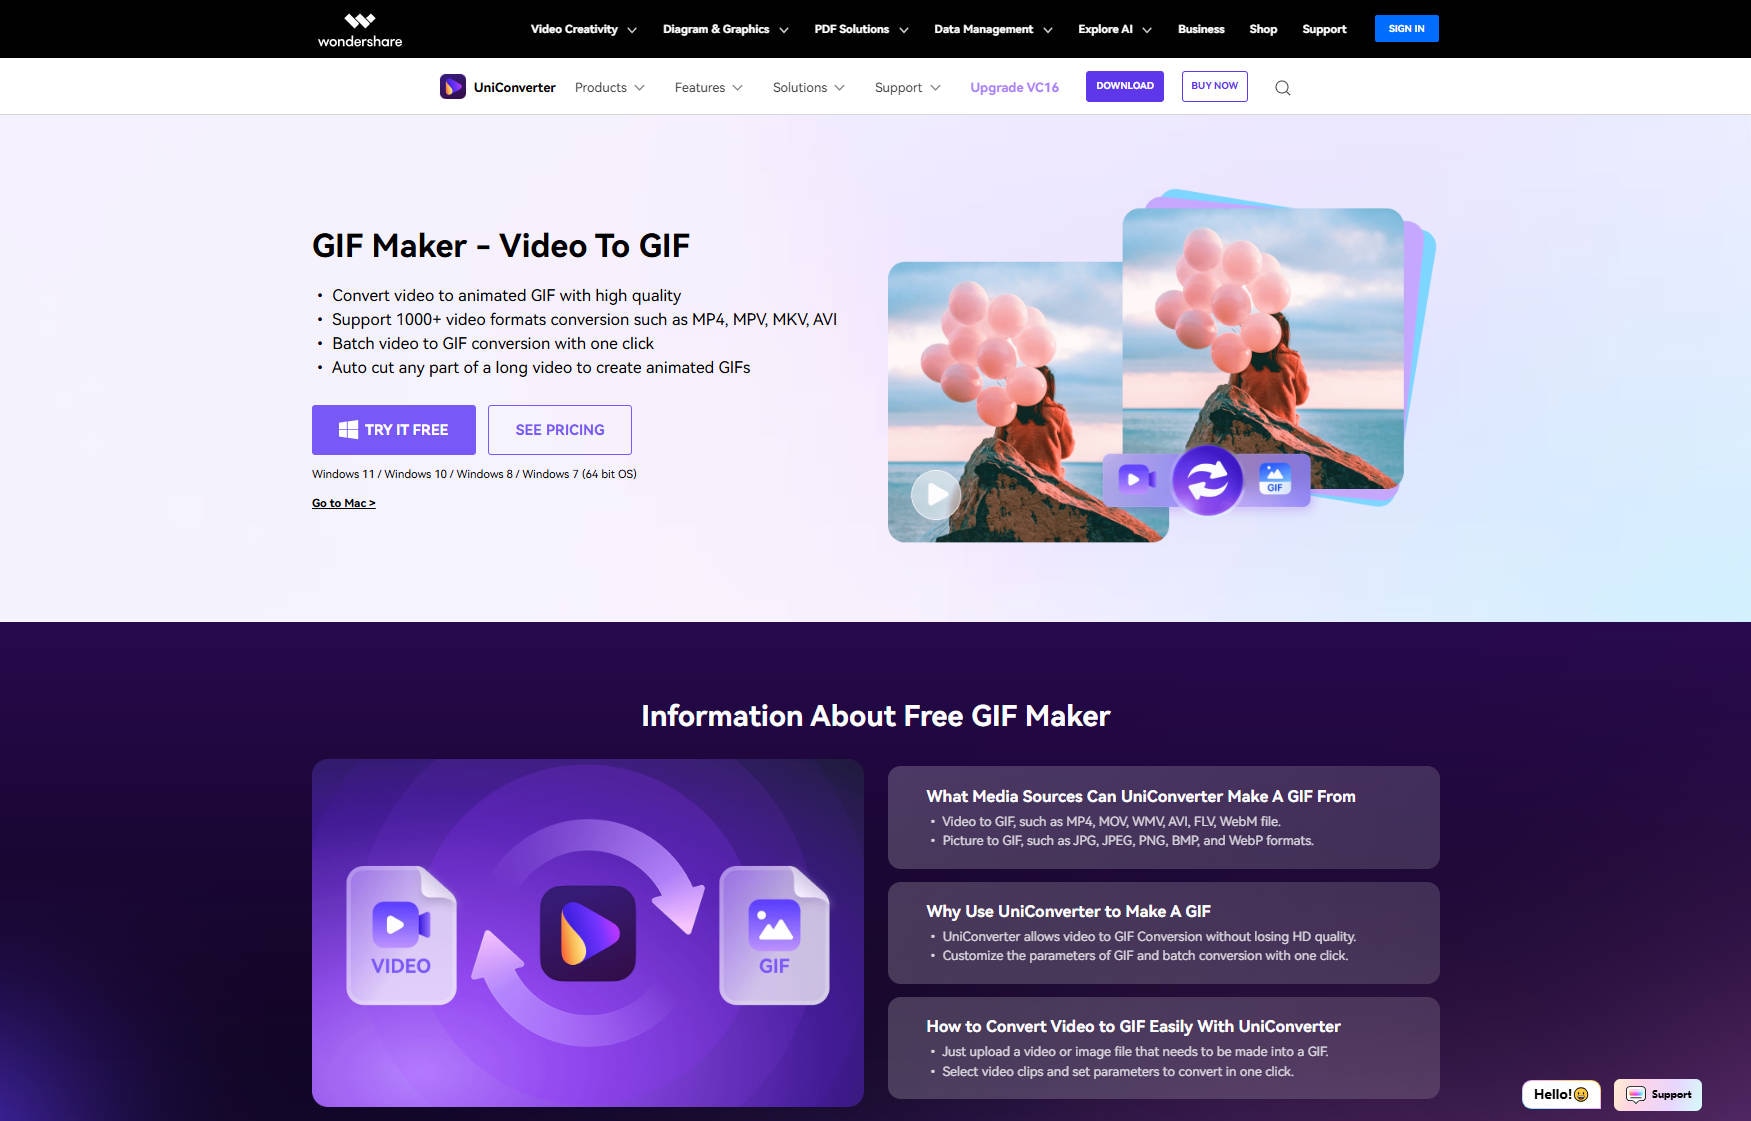
Easy to Use Versatile MP4 to GIF Covnerter
Part 3: Quick& Easy 4 Steps Create GIF from MP4
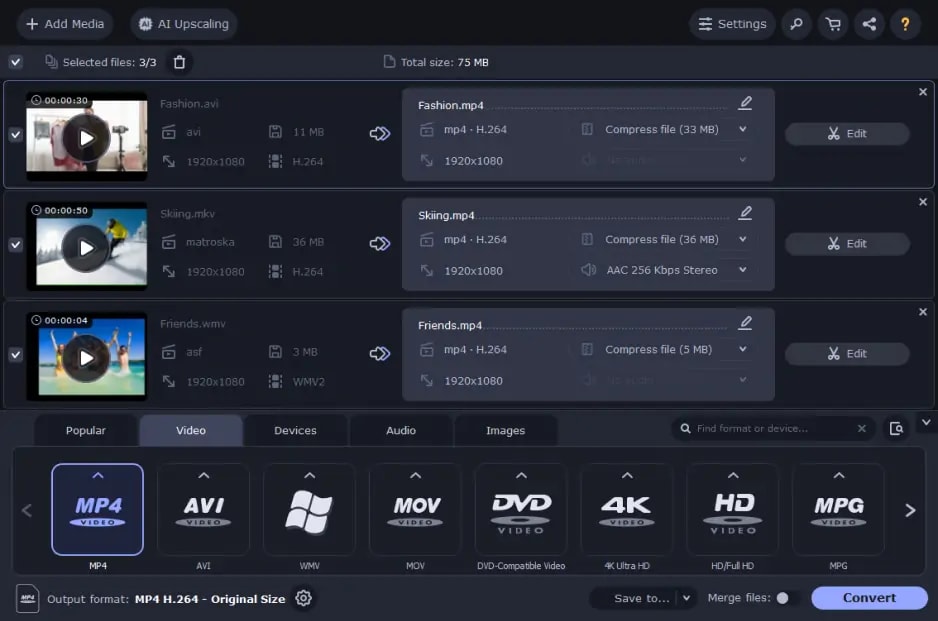
If you're looking for a quick and efficient way to create GIFs from MP4 videos, here's a step-by-step guide using UniConverter and other popular tools. Below are the steps for creating GIFs from MP4 videos using UniConverter.
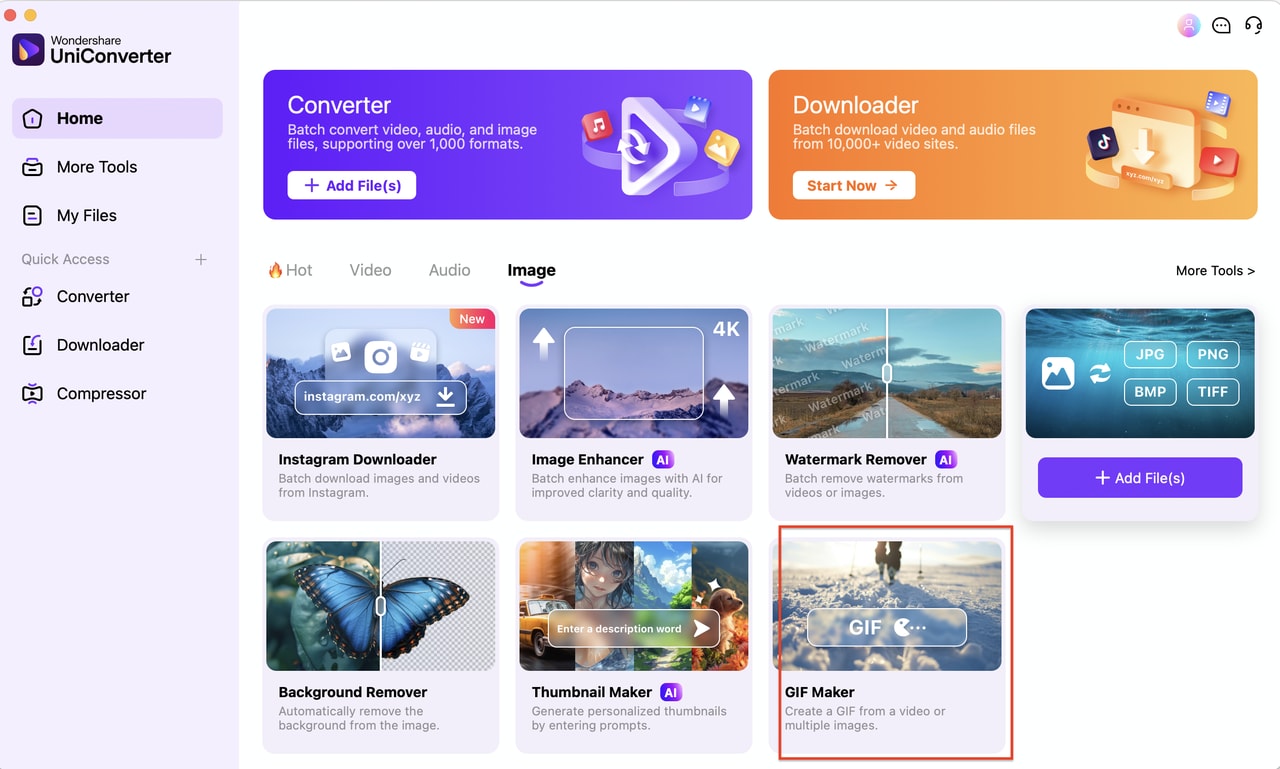
UniConverter is a powerful tool for creating high-quality GIFs from MP4 videos, offering a range of features that make it easy to convert videos into animated images. Whether you're creating GIFs for social media, presentations, or just for fun, UniConverter provides the necessary tools to make the process quick and simple. With its user-friendly interface, customizable settings, and batch processing capabilities, UniConverter is an excellent choice for both beginners and professionals.
Key Features of UniConverter GIF Maker:
- Wide Format Support: Supports various video formats such as MP4, MOV, AVI, and more for converting into GIFs.
- Batch Processing: Allows you to convert multiple videos to GIFs simultaneously, saving you time.
- Customizable GIF Settings: Adjust frame rate, resolution, and size to meet your desired output.
- High-Quality Output: Ensures smooth, high-quality GIFs with minimal quality loss during conversion.
- Built-in Video Editing: Offers basic editing tools like trimming, cropping, and adding effects before converting to GIF.
Easy to Use Versatile MP4 to GIF Covnerter
Pros & Cons:
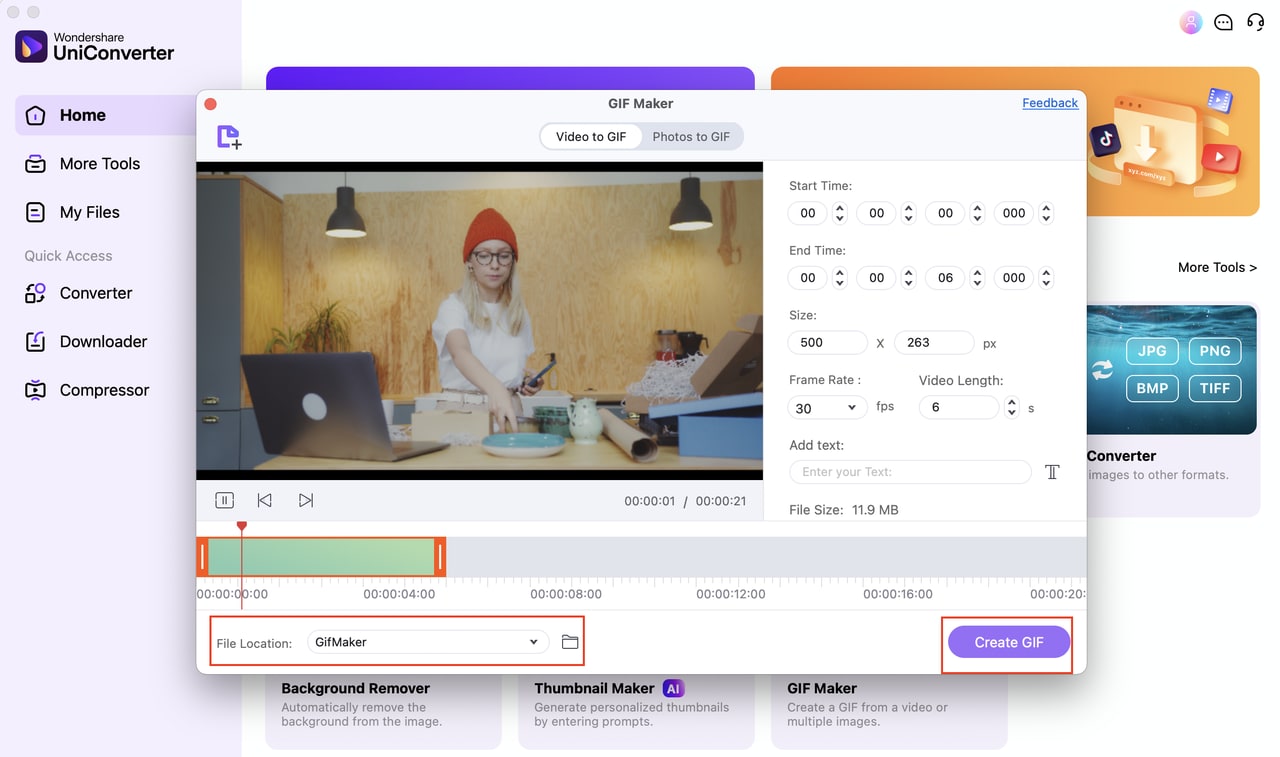
Step Guide to Create a GIF from MP4 Using UniConverter:
Step 1
Go to the official UniConverter website, download the software, and follow the installation instructions for your PC or Mac. Once installed, open the program to begin.
Step 2
Launch the UniConverter software and click the "Add Files" button to upload the MP4 video you want to convert into a GIF. You can also drag and drop the video directly into the interface.
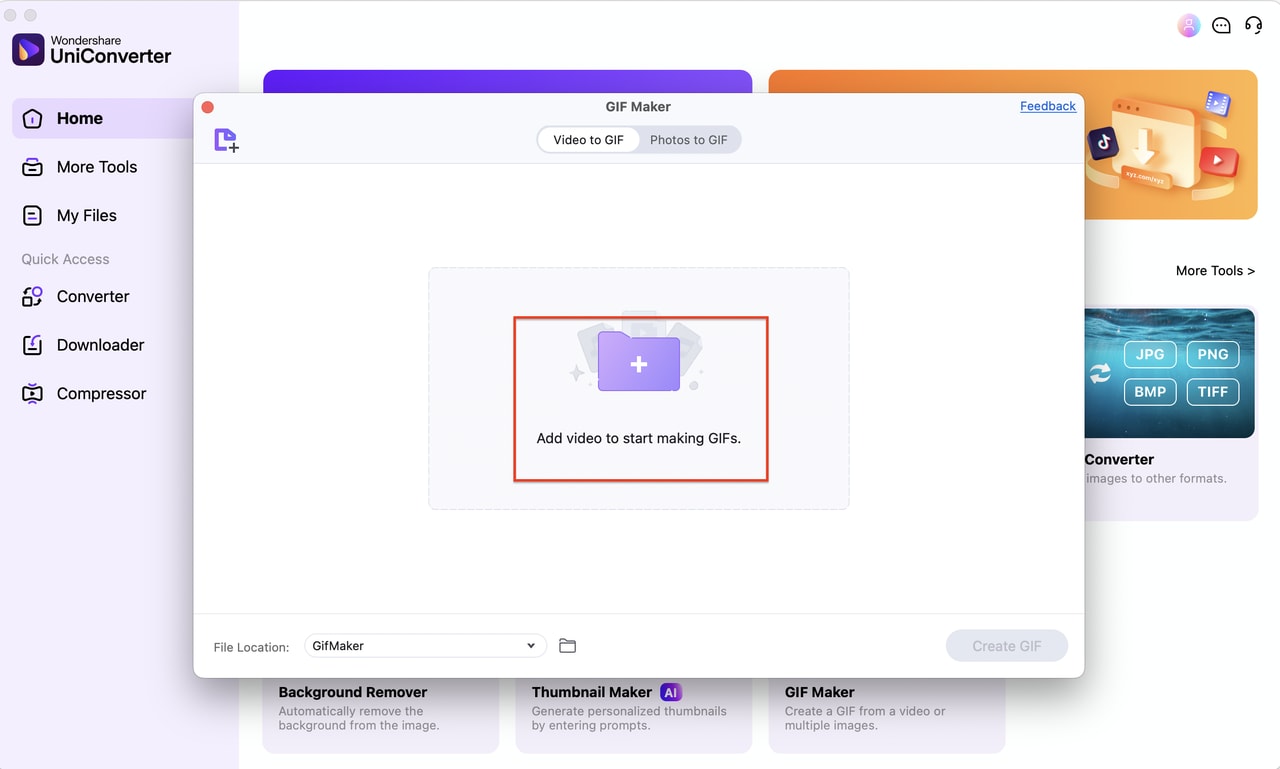
Step 3
From the list of available output formats, select "GIF." You can customize the GIF by adjusting settings like resolution, frame rate, and other options for the perfect GIF.
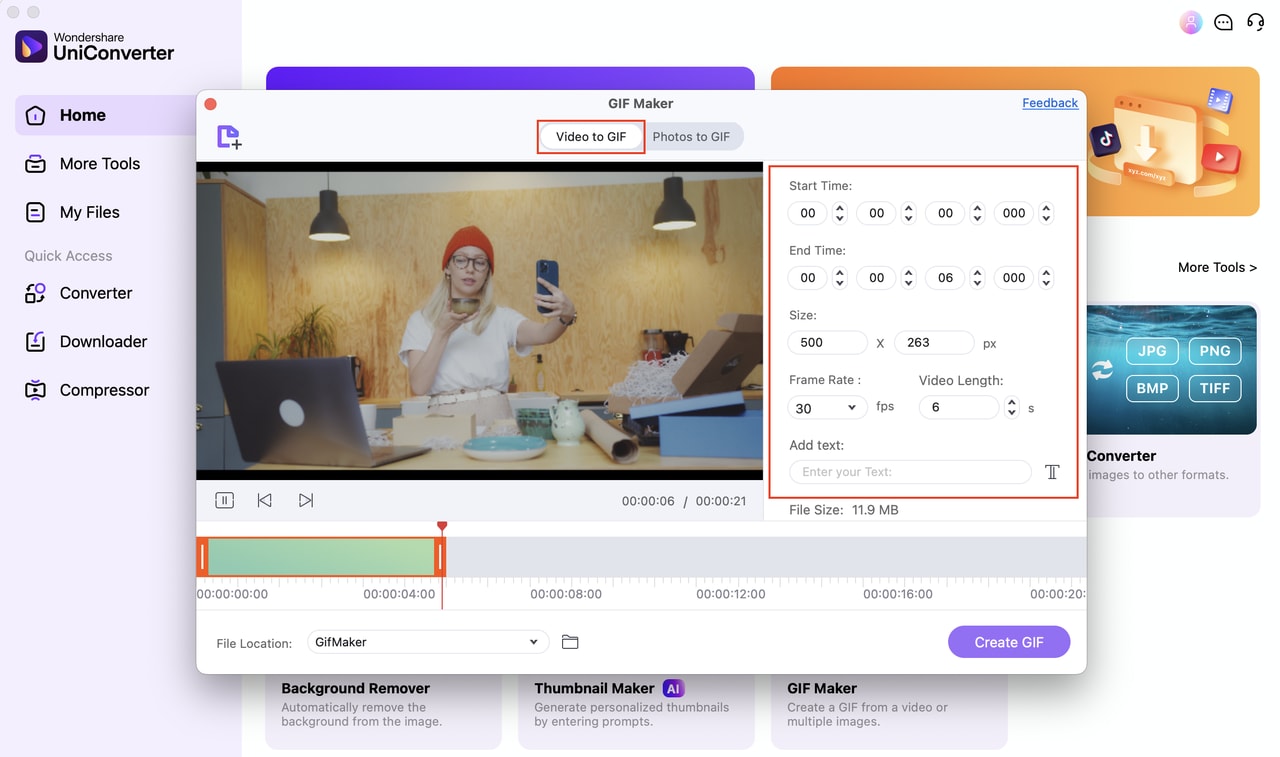
Step 4
Once you’ve selected your settings, click "Create GIF" to start the conversion process. After the GIF is generated, download it to your device for use.
Part 4: Which Type of Tool Fits You Most to Create GIF from MP4?
When it comes to creating GIFs from MP4 files, there are several desktop tools available, each suited for different needs. Whether you're a beginner looking for a simple tool or a professional requiring advanced features, there's a perfect tool for everyone. Below, we’ve divided 6 desktop tools into different levels based on user expertise, from beginners to advanced professionals.
Level 1: Beginner Tools – Easy-to-Use GIF Creation
These tools are perfect for those just getting started with GIF creation, offering simple features and easy-to-follow processes. They are designed for users who need fast results without extensive editing.
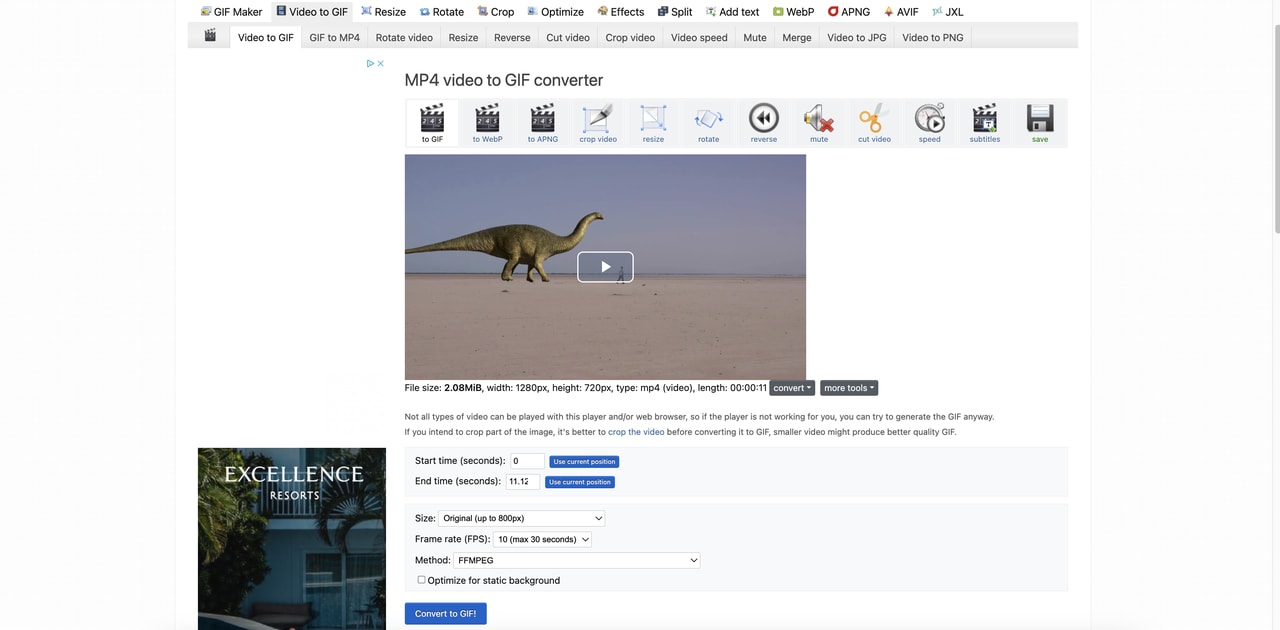
1.Ezgif
EZGIF is a popular web-based tool that simplifies the process of turning videos into GIFs. It accommodates a wide range of video formats, including MP4, AVI, and MOV, ensuring compatibility with most video files. Beyond basic conversion, EZGIF allows you to customize your GIFs by trimming, cropping, resizing, and applying a variety of effects. This gives you full creative control, making it easy to perfect your GIFs before finalizing the conversion.
Key Features:
- Wide Format Support: Converts a variety of video formats, making it versatile for most files.
- GIF Editing: Offers the ability to edit and customize GIFs easily.
- No Registration Required: Use it for free without the need to create an account.
- Easy-to-Use Interface: The intuitive design includes real-time previews for better editing control.
- GIF Adjustment Options: Trim and resize your GIFs as needed.
Pros & Cons:
Step Guide:
Step 1: Upload Your Video
Click on the "Choose File" button to select your video file (MP4, AVI, MOV, or others). After selecting the file, press "Upload Video" to continue.
Step 2: Adjust Settings
Once the video is uploaded, you can adjust settings like the start and end time, frame rate, and resolution. You can also trim the video to specify the exact portion you want to convert into a GIF.
Step 3: Convert and Download
After adjusting the settings, click "Convert to GIF" to generate your GIF. Once the conversion is complete, click "Save" to download it to your device.
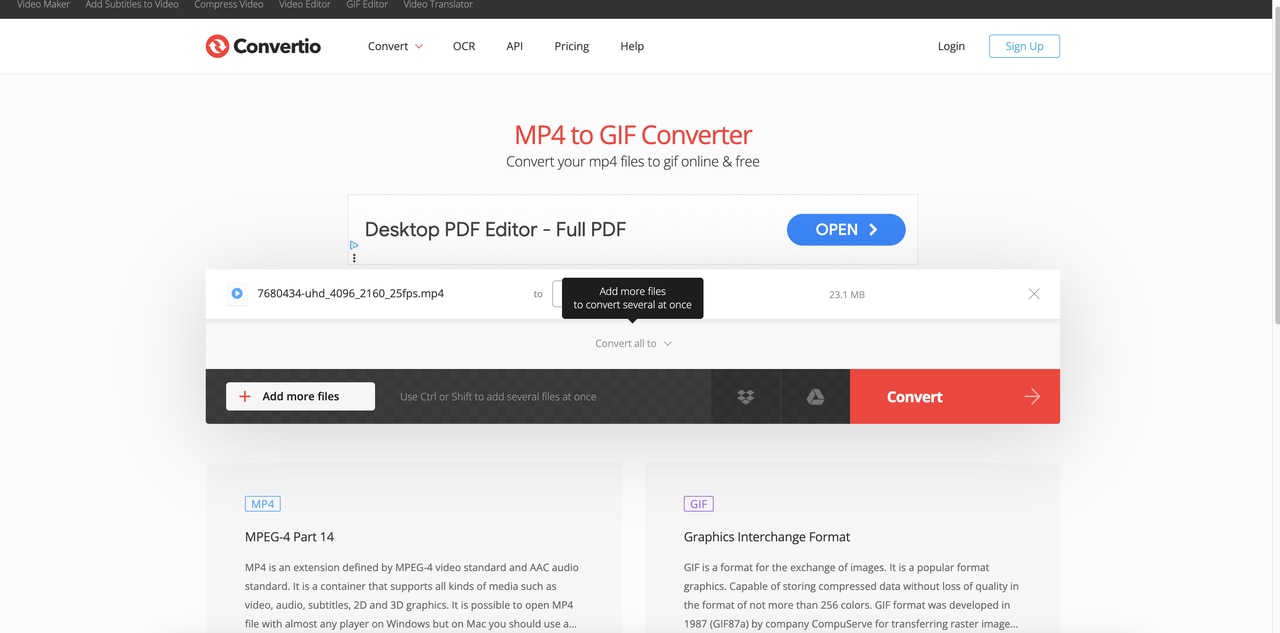
2.Convertio
Convertio is a convenient online service that lets you create GIFs from video files in just a few easy steps. Supporting a wide array of video formats, including MP4, MOV, and AVI, Convertio ensures compatibility with various file types. The tool is designed to be user-friendly, offering quick conversion times while maintaining high-quality GIF output.
Key Features:
- Supports converting videos from various formats such as MP4, MOV, and more.
- Offers customizable resolution for top-notch GIF quality.
- Easily upload videos from cloud services like Dropbox or Google Drive.
- Quickly transforms your videos into GIFs with minimal wait time.
- A no-cost option is available, though it comes with some restrictions.
Pros & Cons:
Step Guide:
Step 1: Upload Your Video
Click on the "Choose Files" button to upload your video. You can select files from your device or directly from cloud services like Dropbox and Google Drive.
Step 2: Select Output Format
From the list of available output formats, choose "GIF." You can also adjust the resolution and quality settings for a more customized result.
Step 3: Convert and Download
Once you've made your adjustments, click the "Convert" button. After the conversion is finished, simply click "Download" to save your GIF to your device.
Easy to Use Versatile MP4 to GIF Covnerter
Level 2: Intermediate Tools – More Customization Options for Casual Users
These tools offer more customization and flexibility than beginner tools, catering to casual users who want more control over the conversion process without getting too complex.
1.Filmora
Filmora is a video editing software that offers a wide array of features, including the ability to create GIFs from MP4 videos. With its simple interface and comprehensive editing options, it’s an excellent tool for casual users who want more control.
Key Features:
- Convert MP4 to GIF with multiple editing options.
- Extensive library of text, transitions, and effects.
- User-friendly interface with drag-and-drop functionality.
- High-quality GIF output.
- Works well with various video formats.
Pros & Cons:
Step Guide:
Step 1: Install Filmora
Download and install Filmora video editor.
Step 2: Import MP4 Video
Open the program and add your MP4 file to the timeline.
Step 3: Export as GIF
Select "Export" and choose "GIF" as the output format. Adjust the GIF settings and click "Create."
2.Movavi Video Converter
Movavi Video Converter is another beginner-friendly tool that allows users to convert MP4 videos into GIFs quickly. It features a simple drag-and-drop interface, making it easy to start converting.
Key Features:
- Converts videos from MP4 to GIF format.
- Simple drag-and-drop interface.
- Batch conversion for multiple videos.
- Supports a variety of file formats.
- Basic editing features for trimming and adjusting video length.
Pros & Cons:
Step Guide:
Step 1: Install Movavi Video Converter
Download and install the software on your computer.
Step 2: Add MP4 Video
Open the program and drag the MP4 video into the interface.
Step 3: Select GIF Format and Convert
Choose GIF as the output format and click "Convert" to create your GIF.
Level 3: Advanced Tools – For Professional Users Who Need Full Control
Advanced tools provide comprehensive control over GIF creation, suitable for professional users who want to work with high-quality videos and complex editing requirements.
1.GIMP
GIMP is a powerful open-source image editing software known for its advanced features. It offers deep customization for creating GIFs from MP4 files by extracting frames and making detailed adjustments.
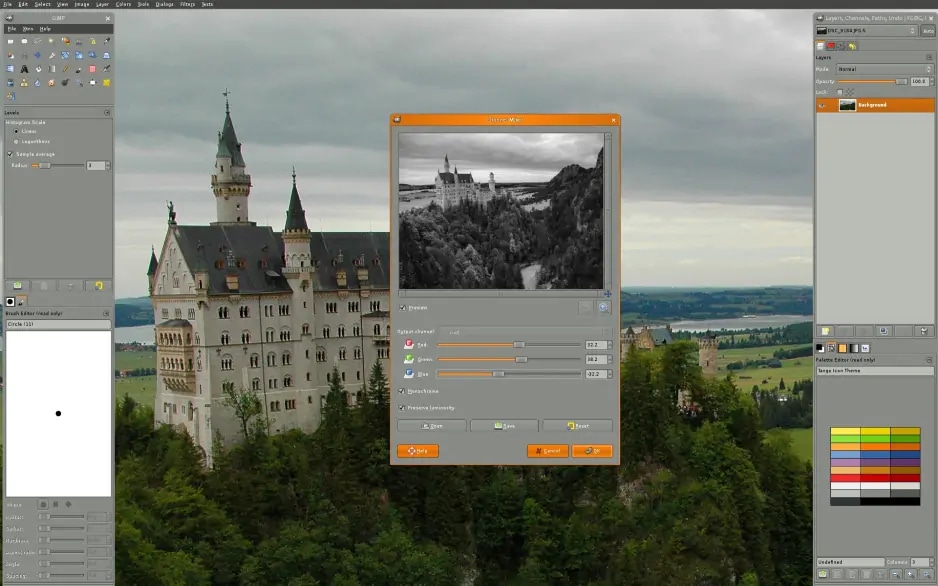
Key Features:
- Extracts frames from MP4 videos to create a GIF.
- Advanced editing tools like layers and frame timing adjustments.
- Supports multiple plugins for added functionality.
- Free and open-source software.
- Available on Windows, macOS, and Linux.
Pros & Cons:
Step Guide:
Step 1: Install GIMP and Plugins
Download and install GIMP, along with necessary plugins (like FFmpeg for video frame extraction).
Step 2: Extract Video Frames
Use an external tool or plugin to convert the MP4 video into frames.
Step 3: Create GIF
Import the frames into GIMP as layers, adjust the timing, and export the GIF.
2. Adobe Photoshop
Adobe Photoshop is a professional image editing software with advanced capabilities for GIF creation. It provides complete control over every frame of the GIF, perfect for users who want the highest level of customization.
Key Features:
- Frame-by-frame editing for precise GIF control.
- Advanced timeline editing for fine-tuning GIF animation.
- Wide array of filters, text effects, and color correction tools.
- High-quality GIF output with minimal resolution loss.
- Supports layers and animation features for complex GIF creation.
Pros & Cons:
Step Guide:
Step 1: Open Photoshop and Import Video
Open Photoshop and import your MP4 video file by selecting "Import" > "Video Frames to Layers."
Step 2: Edit Frames and Timeline
Use the Timeline panel to adjust the frame timing and add text, effects, or filters.
Step 3: Export as GIF
Go to "File" > "Export" > "Save for Web" and choose GIF format for exporting.
Easy to Use Versatile MP4 to GIF Covnerter
Part 5: Common Mistakes to Avoid When Creating GIFs from MP4
Creating GIFs from MP4 videos can be a fun and creative way to share moments, but it's important to be aware of common mistakes that can affect the quality and effectiveness of your GIF. Below are some mistakes to avoid ensuring that your GIFs turn out the way you intend:
1. Choosing Too Long Clips
Mistake: Selecting long video segments to convert into GIFs can lead to large file sizes and reduced quality.
Solution: GIFs are best when they’re short and looped seamlessly. Trim the video to the specific moment you want to highlight.
2. Ignoring File Size Optimization
Mistake: Creating GIFs with large file sizes can lead to slow loading times and difficulty sharing.
Solution: Always optimize the GIF for web use by adjusting the resolution and frame rate to balance size and quality.
3. Overloading with Effects
Mistake: Adding too many effects, filters, or text to a GIF can make it look cluttered or distract from the main action.
Solution: Keep your GIF simple and focused on the key message or action. Use minimal effects for maximum impact.
4. Using Poor-Quality Source Videos
Mistake: Starting with low-resolution or blurry MP4 files will result in poor-quality GIFs.
Solution: Always start with high-quality videos to ensure your GIF maintains clarity and smoothness when converted.
5. Not Adjusting Frame Rate and Speed
Mistake: A poor frame rate can make the GIF choppy and hard to watch, while using the wrong speed can ruin the effect.
Solution: Adjust the frame rate for smooth animation and choose the right speed to match the action or moment being highlighted.
Conclusion
Creating GIFs from MP4 videos is a simple yet effective way to highlight specific moments and share them in an engaging format. Whether you're a beginner or a professional, there's a tool out there to suit your needs, ranging from basic software like Photoscape to advanced options like Adobe Photoshop. For those seeking a versatile and high-quality solution, UniConverter is an excellent choice, offering features like Smart Trim and Auto Crop, which allow for effortless trimming and cropping of video clips before converting them into GIFs. With the right tool, creating GIFs from MP4 videos becomes a seamless process, enabling you to share memorable moments across multiple platforms with ease.
Easy to Use Versatile MP4 to GIF Covnerter
FAQs
-
1. Why are my GIFs pixelated?
GIFs may become pixelated if the original video is of low quality, or if the resolution or frame rate is too low when converting. To improve the quality, use higher resolution settings and adjust the frame rate to balance quality and file size. -
2. How do I optimize my GIF for social media sharing?
To optimize your GIF for social media, resize it to a standard dimension, reduce the file size by adjusting the resolution and frame rate, and ensure that it plays smoothly. Most GIF-making tools, like UniConverter and EZGIF, provide features to help with these optimizations. -
3.What is the best frame rate for creating a smooth GIF?
A frame rate of 15 to 20 frames per second (fps) is usually ideal for smooth GIF playback. Lower frame rates may result in choppy animations, while higher frame rates increase the file size. -
4. How can I reduce the file size of a GIF?
To reduce the file size of a GIF, you can decrease the resolution, lower the frame rate, or trim the video to shorten its length. Tools like UniConverter and EZGIF allow you to adjust these settings for optimal results.

