


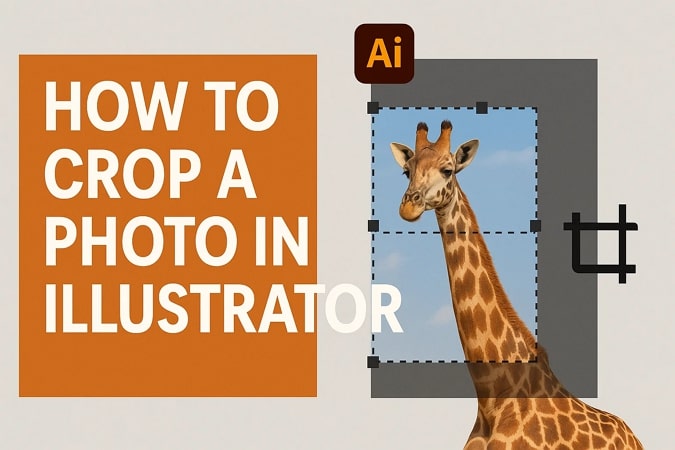
For professional photographers who might process a large number of images each day, removing unwanted corners is necessary. Users can use tools like Adobe Illustrator to perform the following tasks. Though not a dedicated photo editor, the tool offers advanced image control when used creatively, especially in workflows that combine photography and graphic design. In this article, we will discuss the top methods to crop images in Illustrator to make your photos look flawless.
In this article
Part 1. Is Adobe Illustrator the Right Tool to Crop a Picture or Image?
When you search for a tool that allows users to create logos and vector art, you should go for Adobe Illustrator. The tool offers extensive functionality for users to insert objects and shapes and create animations for various creations. Along with these functions, users also get various options to crop a photo in Illustrator using different approaches. Let us explore the abilities and limitations offered by this platform:
Capabilities of Adobe Illustrator
- The tool seamlessly crops the photos using vectors and rectangular grids.
- You can crop the images in the shape of your choice using the masking tool feature.
- The platform offers multi-layer editing to help users manage complex compositions with precision.
- Users also get the ability to add elements like text and shapes to their creations for more enhanced results.
Limitations of Using Illustrator For Cropping
- Cropping a photo in Illustrator permanently cuts the image, and you cannot go back to adjust the crop without reimporting the original.
- The tool does not offer preset aspect ratios, which makes it harder to maintain proportions.
- It can be confusing for users to use masks or clipping because it requires multiple steps and layers.
- Lacks a native batch cropping option, making it inefficient for users who need to crop multiple images at once.
- Using a clipping mask only hides parts of the image visually, and the file size remains large.
Part 2. How to Crop an Image in Illustrator Using Built-in Tools and Tricks
The tool offers various functions to remove the unwanted parts of the picture. Mentioned below are the different methods you can utilize to crop the picture using this tool. Each of the techniques provides unique options according to different design needs and skill levels of the users:
Method 1. Crop a Photo in Illustrator Using the Crop Tool
The “Crop Tool” in this editor offers a quick and straightforward way to trim images when you are looking for a clean crop. It is beneficial for basic edits where precision or shape flexibility isn't required. The method is efficient for quick edits and is often used in professional workflows for trimming unwanted edges or resizing a photo area.
Steps to Crop in Illustrator With the Crop Tool
Step 1
Import the image that you want to crop after launching the tool on your device. Next, find the “Crop Image” option located at the top of the image and click on it to open a small dialogue box. Click the “OK” button located within the dialogue box to proceed.
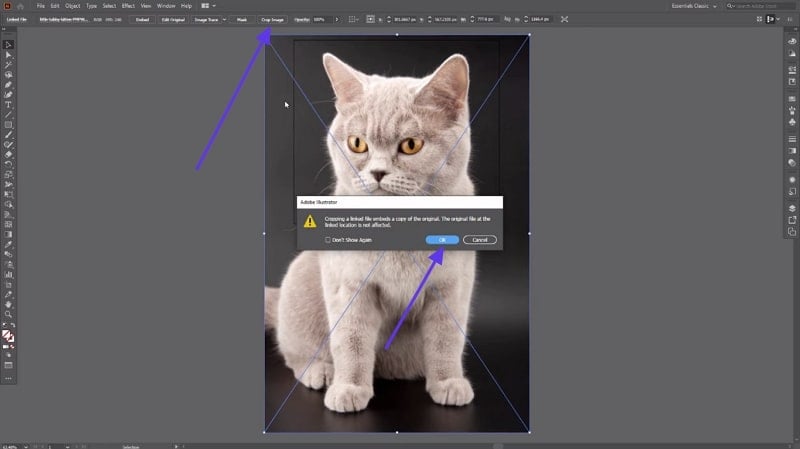
Step 2
Next, drag the cursor to select the area of the picture that you want to keep, removing the unwanted part successfully. Once done, press the “Apply” button at the top of the picture to save the changes made. Now save thecropped image in AI successfully to your device.

Method 2. Crop a Picture in Illustrator Using a Clipping Mask
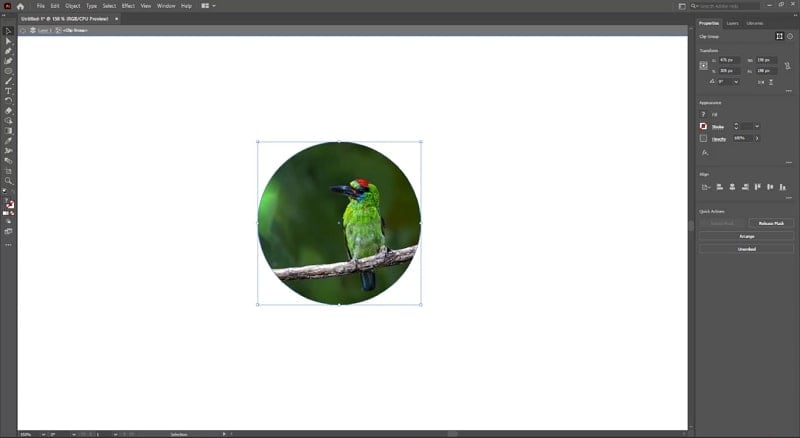
Clipping masks are one of Illustrator’s most flexible and creative ways to crop images. Instead of simply trimming the edges of a picture, clipping masks let you crop your image into virtually any shape. The original image remains fully intact behind the mask, meaning you can reposition or reshape the crop anytime without losing any data. This makes it ideal for iterative designs where changes may be needed.
Steps To Crop Images in AI Using Clipping Mask
Step 1
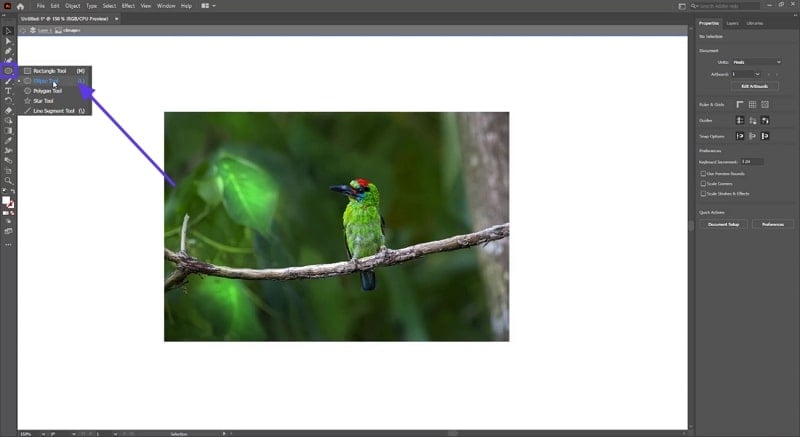
Once you have imported the picture within the tool’s interface, access the toolbar on the left side and click on the “Ellipse” icon. Now select the “Ellipse Tool” option from the expanded list.
Step 2
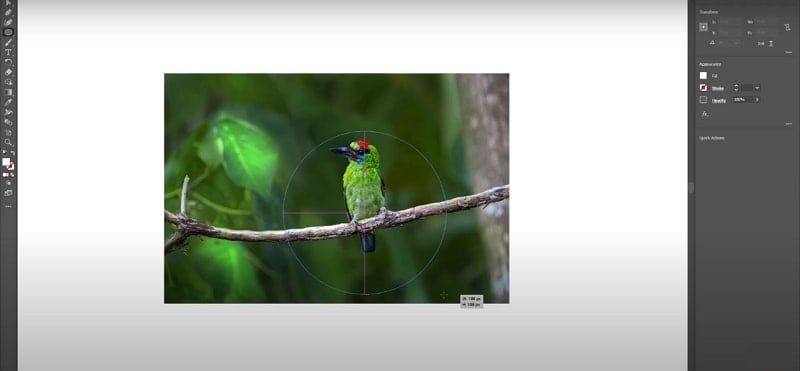
Moving forward, drag the cursor over the area of the photo you want to keep to draw the shape.
Step 3
Now, head to the toolbar at the top to enable the “Object” menu and choose the “Clipping Mask” option. Press the “Make” button to execute the process for image crop in Illustrator. You can also opt for the “Make Clipping Mask” option from the right side panel.
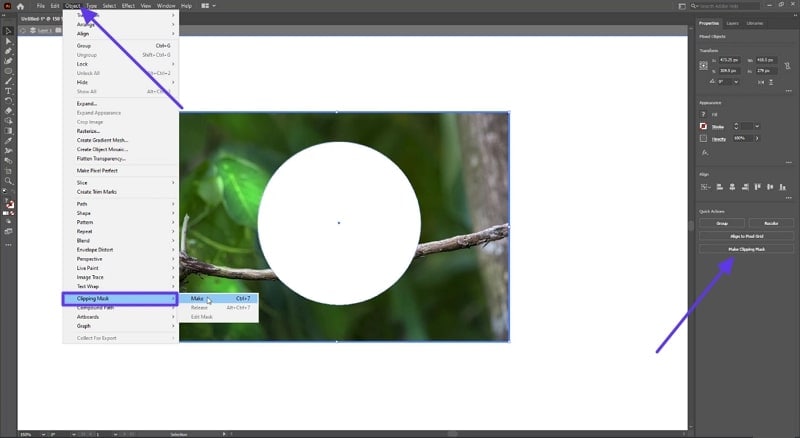
Step 4
Once the image is cropped, head to the “File” section to export the photo to your computer.
Method 3. How to Cut Pic in Illustrator With Opacity Mask
Opacity masks are a more advanced way to blend or cut an image in Illustrator. Unlike the Crop Tool or Clipping Mask, which focuses mainly on shape-based boundaries, opacity masks give you the power to control image visibility with smooth transitions, gradients, or complex grayscale designs. This method is ideal for creating soft fades, spotlight effects, or blending a photo into a background seamlessly.
Guide To Cut a Picture in Illustrator With Opacity Mask
Step 1
After importing the image to the tool’s main window, press the “Gradient” icon located on the left sidebar. Create a gradient shape to apply to the part you want to keep in the picture using the “Gradient” window.

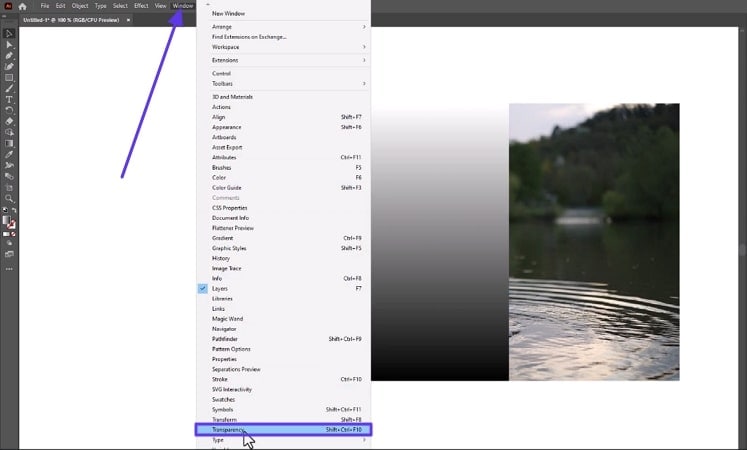
Step 2
Now, click on the “Windows” menu from the top menu bar and press the “Transparency” option from the expanded list.
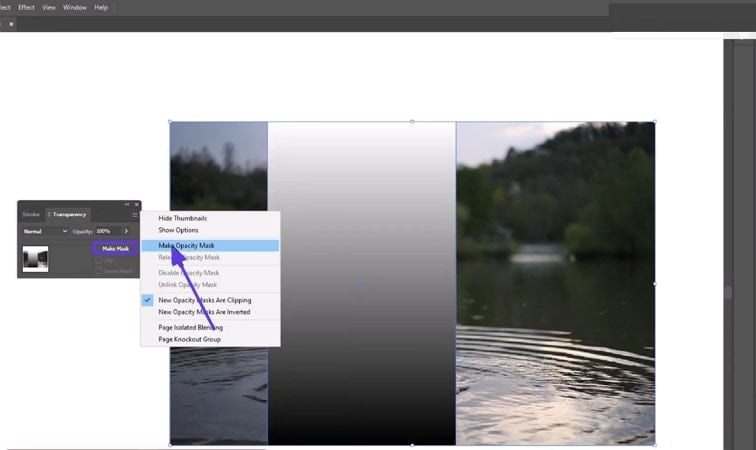
Step 3
Next, click on the “Make Mask” button from the small Transparency window and hit the “Make Opacity Mask” option after placing the gradient shape on the part of the image you want to keep.
Step 4
As soon as you press the “Make Opacity Mask,” the tool will crop the image while applying the gradient to it.

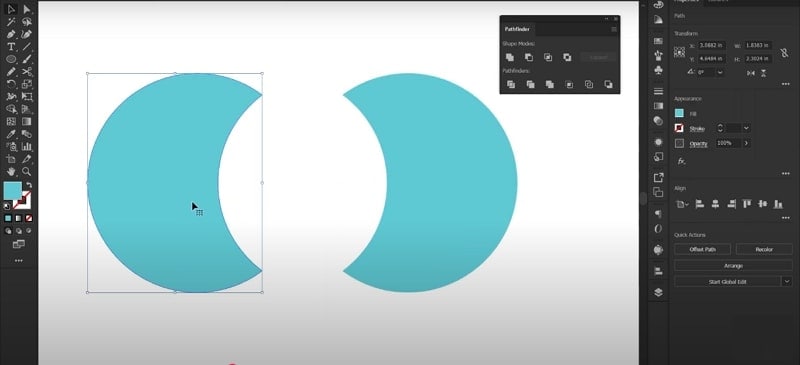
Method 4. Image Crop in Illustrator using the Pathfinder Tool
This method is usually used for cropping shapes and vectors in Illustrator. The feature offers various methods to isolate different parts of the shapes according to the user’s preferences. You can merge multiple shapes or remove the front part by accessing the Pathfinder. When images are overlapped with vector shapes, Pathfinder can help carve out sections or align photos into graphic containers. Let us explore each of the techniques for cropping shapes using this feature:
Technique 1. Minus Front
This technique lets users remove the front part of the image or shape when multiple images or objects are placed overlapping. To learn how to use this technique, read the steps mentioned below:
Step 1
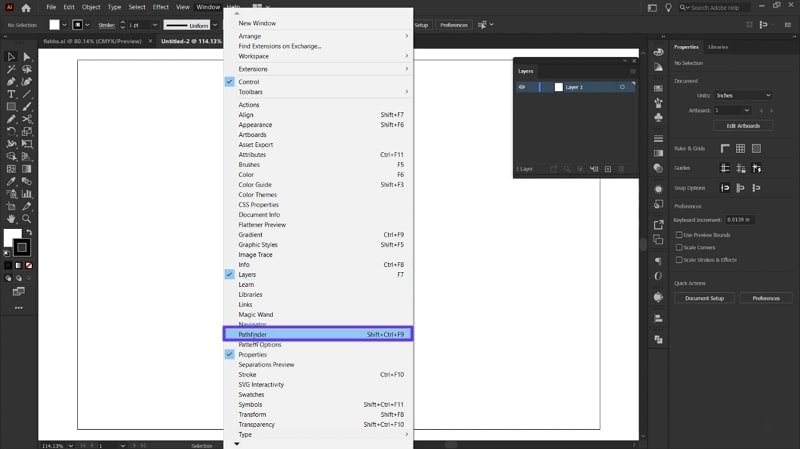
To remove the front part of objects, right-click within the tool to expand the list of options and press the “Pathfinder” option.
Step 2
Next, select the object, head to the small “Pathfinder” window, and locate the “Minus Front” icon.

Step 3
Once you press the “Minus Front” icon, the tool instantly removes the front part within the selected image.
Technique 2. Intersect Object
If you want to keep a specific part of the image, you can use the Intersect feature of this tool. Provided next are the steps to use this function within Pathfinder:
Step 1
Select the part you want to keep in the image and press the “Intersect” icon located within the Pathfinder window.
Step 2
The tool will keep the selected part, removing the other parts to let you AI crop the image.
Technique 3. Exclude Shape
This feature lets you remove the overlapping area while keeping the remaining part of the picture. Follow the steps mentioned next to see how to use it:
Step 1
Go to the “Pathfinder” window and locate the “Exclude” icon after selecting the overlapping area within the image.
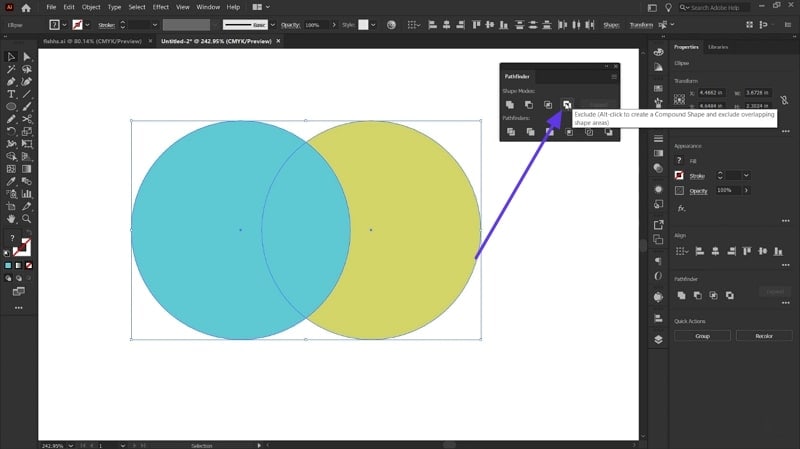
Step 2
The selected overlapping part will be cropped from the photo when you click on the Exclude icon.
Technique 4. Trim The Image
This feature lets you crop the entire selected part of the image while keeping the unselected part intact. Provided next are the steps to use this technique for easy cropping:
Step 1
After accessing the “Pathfinder” window, locate the “Trim” icon after selecting the part of the image to be removed.

Step 2
The tool will instantly crop the shape once you press the “Trim” icon within the small window.

Part 3. Best Alternative to Illustrator to AI Crop Images in Batch
One of the best alternatives to crop in Illustrator is Wondershare UniConverter. This all-in-one multimedia tool allows users to remove the unwanted ends of the picture with exclusive customization. Users can import multiple images at once as the tool supports batch processing. Moreover, users get the ability to adjust the aspect ratio of the image according to their preferences.
Apart from images, the tool offers a cutter to change and adjust the dimensions of the videos. Besides selecting from the given aspect ratios, you can manually input the numbers for the width and height for cropping the image. The tool also offers a dedicated Delete button to remove the picture from the tool’s interface instantly.

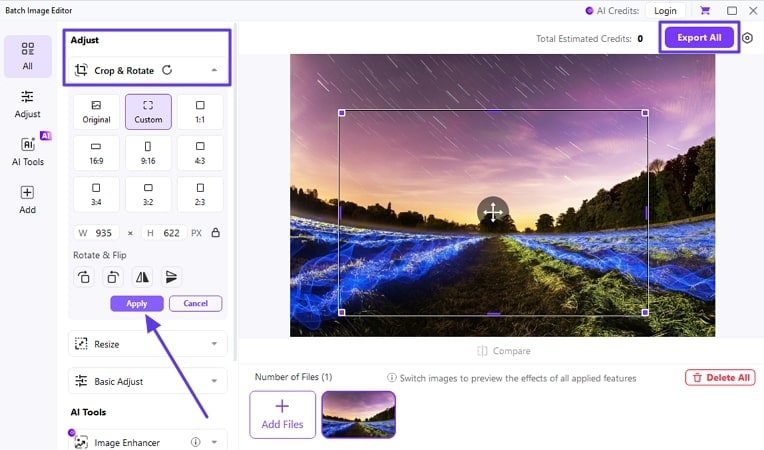
Batch Image Editor
Key Features Offered By UniConverter
- Drag and Slide Cropping: With UniConverter, you can remove unwanted parts by simply dragging the corners.
- Image Enhancements: The tool offers AI-powered image enhancement that upscales your images using AI.
- Flip and Rotate Image: Apart from cropping, you can rotate and flip pictures according to your preferences.
- Multiple AI Features: It provides a variety of other features that meets all your multimedia processing needs, like conversion, compression, watermark removal, downloading, etc.
Step-by-Step Guide to Crop Images Using UniConverter
As discussed, UniConverter offers a user-friendly interface for AI crop images. To learn how to use this tool, read the steps mentioned below:
Step 1Start By Accessing the Batch Image Editor
To begin, launch UniConverter on your device and opt for the “Batch Image Editor” feature from the homepage.

Step 2Use Add Images To Insert Pictures
In the following interface, press the “Add Files” button to insert your images into the tool’s interface for cropping.

Step 3Crop the Image and Export
Once the photo is imported, access the “Adjust” section on the right to select the aspect ratio from the provided options under “Crop and Rotate.” You can also drag the corners of the photo and adjust it within the preview window. When the image is cropped according to your preference, click on the “Export All” button to save the cropped picture to your device.
Conclusion
To sum it up, the article discussed the top methods to crop a picture in Illustrator conveniently. The article also suggested UniConverter as one of the best alternatives to crop multiple images at once. The tool offers various aspect ratio options to crop photos for different platforms with minimal effort. With the AI-powered features of UniConverter, users get the ability to create high-quality results with minimal effort.

