How can I solve audio delays when watching a movie on my computer?
Try this best video audio sync fixer for Windows/Mac to fix audio out of sync with video permanently.
“How to Sync Audio and Video in Premiere Easily? I am a novice video editor on Adobe Premiere and having some trouble syncing audio with the uploaded video.How to sync audio in Premiere, and is there any alternative editor available that can do the job efficiently?”
Poorly synced audio can ruin anyone’s viewing experience, and it is a significant problem for filmmakers when they record video and sound separately. Luckily there are different methods to fix this issue. Here, we will share why the issue occurs in the first place and the ways to sync audio and video in Premiere.
For Win 7 or later (64-bit)
For macOS 10.11 or later
Part 1. Why is Premiere audio out of sync?
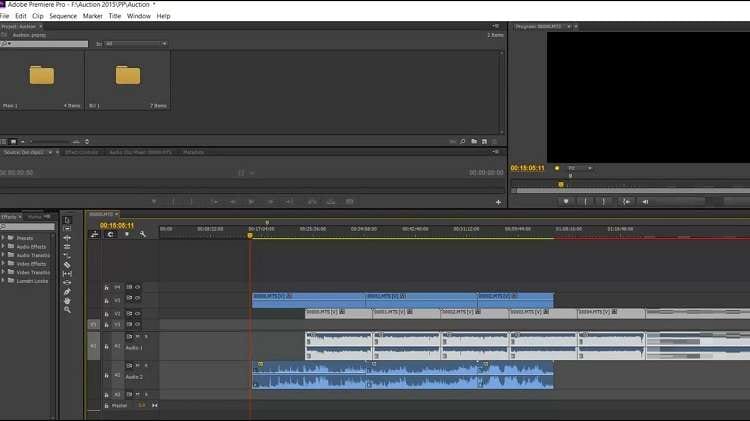
One of the common issues that occur after editing the video is that you’ll find the audio to be completely out of sync. Viewers generally find the syncing problem while playing the video on a third-party media player, such as VLC, even though the video works fine on Premiere. There may be a simple solution if you are experiencing audio sync issues with your videos in Adobe Premiere Pro.
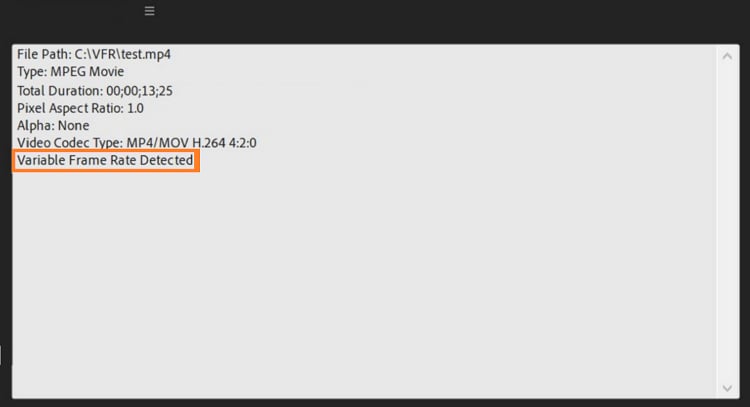
When the footage adopts variable frame rates (also known as VFR), this can cause problems for both video and sound components of an editing project. It is because they’re not synced together equally well when using different fps speeds on each individually captured clip (i.e., one @ 25fps while another is set to 50).

Full Video, Audio and Image Solutions for Camera Users
Still struggling with your shooting 4K video won't play on other devices or playing with audio and video out of sync? Wondershare UniConverter helps you out! Find your issues and get the full answer now.
Part 2. How to sync audio in Premiere?
The audio and video from two different sources can be easily synced with Premiere Pro’s merge clips function. This process restructures the way in which you’ll have to sync your recordings, sometimes called a double-system recording. It is called that because they take place separately for both audio tracks and visually captured footage on screen or camera feeds into one clip together at once instead of having each separate file.
Here’s how you can sync audio on Adobe Premiere with the merge clips utility automatically:
- Open Adobe Premiere Pro on your PC, and select both the audio and video you wish to sync in the Panel section.
- Now, right-click on one of the added files, and choose the Merge Clips option.
- Once you see a new pop-up box, you’ll need to pick a synchronize point. There, select Audio, and rename the clip before clicking on OK.
- After the previous step, a new file will be created with the external audio wholly synchronized.
- Lastly, add the external audio into the time and mute the internal file. This way, the outer audio channel will become the primary one, and it will be in sync with the video.

Part 3. How to sync audio and video without Premiere
Adobe Premiere has never been a recommended video editor for beginners. It is because the tool is expensive and quite complicated to navigate. Moreover, it requires a high-end PC to function smoothly. In that case, we suggest using an alternative video editor called the Wondershare UniConverter.
Not only does it work effortlessly on low-end systems(Windows & Mac), but it also offers two unique ways to solve the audio out-of-sync issue. Additionally, it provides the following feature that makes the whole video editing experience worth your while:
Wondershare UniConverter — All-in-one Video Toolbox for Windows and Mac.
Edit videos on Mac by trimming, cropping, adding effects, and subtitles.
Converter videos to any format at 90X faster speed.
Compress your video or audio files without quality loss.
Excellent smart trimmer for cutting and splitting videos automatically.
Nice AI-enabled subtitle editor for adding subtitles to your tutorial videos automatically.
Completed Video Editor section provides tools such as Trim, Crop, Effects, Subtitle, and watermark
Check out the following two techniques to sync audio using Wondershare UniConverter:
Method 1: sync audio directly
The first way is syncing the video directly with the video using the Audio Editing tool on the UniConverter. Here are the instructions:
Step 1 Run the UniConverter
Access the UniConverter on your PC/Mac. From the interface, click on Video Editor, and select Audio to upload the video.
Step 2 Sync Audio with Video
Head over to the Master Audio Sync section under the Audio tab, and adjust the audio settings. While managing the audio track, you can check your progress on the Output Preview window. Click OK when you are done!
Step 3 Save the Video
Now, click the Settings tab to change the Output File Format for the video. Once all is accomplished, hit the Save tab to export the video with fully synchronized audio to your computer.
Method 2: Convert VFR to CFR to fix audio and audio out of sync (convert feature)
VFR or Variable Frame Rate is the main culprit behind the audio being out of sync in a video. You can convert it to CFR/Constant Frame Rate to fix the problem with the UniConverter. Here are the steps:
Step 1 Open the UniConverter
Firstly, launch the application, then click on the Converter tab. Press the Add/+ tab or use the drag/drop option to upload the file.
Step 2 Customize the Video
Click the Choose Format button to select CFR. Adjust the file quality, resolution, and bitrate from the Settings menu.
Step 3 Convert VFR to CFR
Finally, select the File Location, and click on Convert to save the changes.
Part 4. FAQs about audio out of sync
Want to know more about adjusting out-of-sync audio in a video? If yes, this FAQ is compiled specifically for you. Check it out!
- How can I tell if a video has a variable frame rate?
You can view whether the video has VFR or not by right-clicking on the file. There, select the Properties option in Adobe Premiere, and check the information.

- Why is my TV audio out of sync?
If you’re experiencing audio and video discrepancies with your TV, there are a few possible causes. Here are some of them:
- You could have an issue with the connection from where it gets the signal or what’s playing on to the screen itself.
- Your home theater system may require changing some settings so that they work correctly together.

