
How can I solve audio delays when watching a movie on my computer?
Try this best video audio sync fixer for Windows/Mac to fix audio out of sync with video permanently.
“How to adjust audio in Premiere? I was editing a video on Premiere Pro and found out that there was no sound playing in the project. The problem is only happening with Premier Pro, as on other media players, the audio is working fine. How to get past this Premiere Pro sound not working error?”
Panicking can be a knee-jerk reaction when you find yourself in possession of a video on Adobe Premiere Pro with no sound or music. But don’t worry, there are several troubleshooting methods for fixing this issue, and we’ve compiled all the information needed right here to fix the Premiere Pro audio not playing matter.
In this article
For Win 7 or later (64-bit)
For macOS 10.11 or later
Part 1. How to Fix Premiere Pro Audio Not Playing?
There are a few things you can do if Adobe Premiere Pro won’t let you import video files into your project because it has no audio or video streams. Here, we will discuss all the quick fixes to the Premiere Pro audio not playing problem.
1. Erasing the Media File Cache
The easiest way to fix this issue is by deleting any files that may be stored in your Media Cache Database and/or Files folders. You can do so via the preferences tab on an app’s Edit menu. Next, select “Media” from the inside of the Preferences window.
Next, choose whether or not you want to delete all existing data (which will also restart it) before trying again with no luck at importing videos correctly after doing some troubleshooting steps below!
First off, make sure there aren’t other versions currently open- if another project has been opened while mine was still pending imports finish successfully, please close out everything else

2. Changing the Name of Media Cache Folder
Renaming the default folder that contains the Media Cache files and the Media Cache Database is a good way to resolve the no sound problem. You can do that after closing down every installed Adobe app on your computer. Start Premiere Pro again, and check if the issue is fixed or not!
3. Shifting the Video to a New Folder
If the fixes mentioned above do not reap any reward for you, then it is best to change the location of the media files from their default folder to a new one. However, save the files to a folder that you can easily access in the case of any emergency.
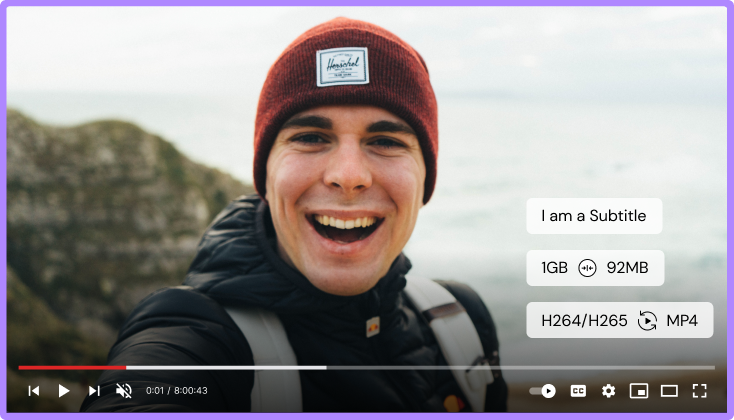
Full Video, Audio and Image Solutions for Camera Users
Still struggling with your shooting 4K video won't play on other devices or playing with audio and video out of sync? Wondershare UniConverter helps you out! Find your issues and get the full answer now.
Part 2. More Audio Solving Tips
Check out this section to learn additional helpful tips to end the audio not working in Premiere Pro issue.
1. How to add audio to video in no sound exported from editing tools?
If you still want to work on your video even though it is showing no sound issue while editing on Adobe Premiere Pro, look no further than the Wondershare UniConverter. With multiple editing tools and seamless audio management, this software can help take some of that stress off as you adjust the video’s audio.
It is accessible on all modern versions of macOS and Windows. Not only that, the UniConverter offers an incredible 90x processing/conversion speed, which separates it from its competition. Check out what more this application has to offer in the list below:

Wondershare UniConverter — All-in-one Video Toolbox for Windows and Mac.
It enables you to convert the video to 1000+ other formats. at 90X faster speed.
It can compress the video to an appropriate size without a loss in quality.
Excellent smart trimmer for cutting and splitting videos automatically.
Nice AI-enabled subtitle editor for adding subtitles to your tutorial videos automatically.
The editor section offers you to enhance the whole video by adjusting its subtitles, cropping, and trimming it. You can also add effects.
The steps on how to add audio to video using Wondershare UniConverter are as follows:
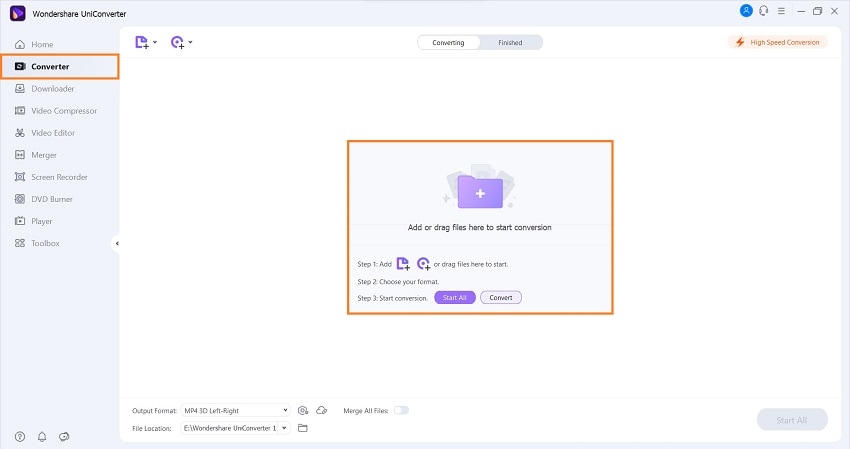
Step 1 Upload Video
Run the application and select the Converter tab on the interface’s left. Next, add the video by clicking on the +/Add button.
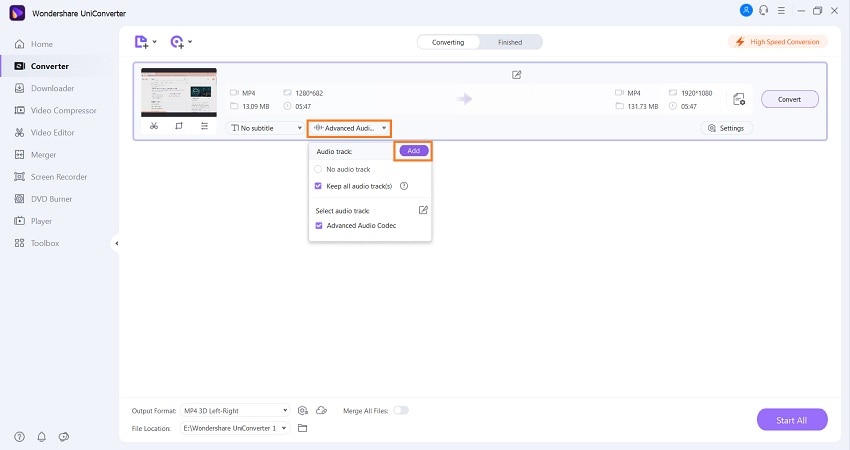
Step 2 Add Audio
Select the Audio tab underneath the uploaded video, and click on Add from the drop-down menu. Next, upload the sound file to the software.
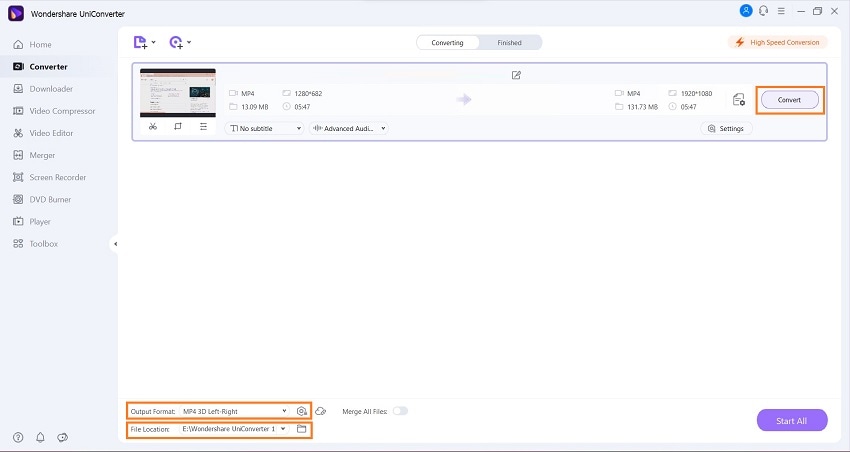
Step 3 Convert the Video
Once all is set and done, choose where you would like to save the edited video. Also, change the output file format, click on Convert to initiate the rendering.
2. How to add audio to video in Premiere Pro?
You can easily add audio to a video using the Adobe Premiere Pro, especially when you know the basic understanding of the software.
The steps are mentioned in the list below:
- Find the audio by accessing the Audio Workspace in Premiere Pro and selecting it.
- Next, add the chosen audio to the Source Panel. For that, click on Window and select Project to open the Project Panel. There, double-click on the audio to add it.
- Now, move the audio clip to the Timeline panel, and trim(optional) it accordingly.
- Adjust the audio settings, such as its volume, and export the video to the PC.
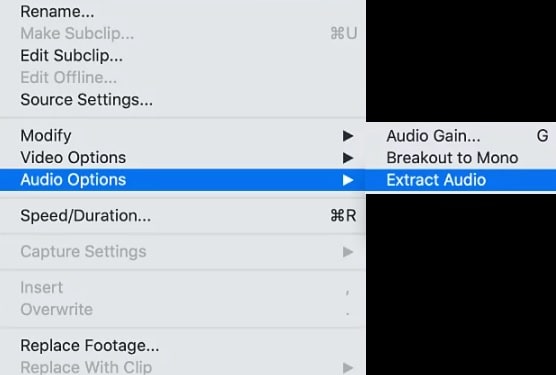
3. How to separate audio from video in Premiere Pro?
There is a straightforward way to extract audio from a video file in the Adobe Premiere Pro. It is by directly removing it from the video, using Premiere Pro’s inbuilt feature.
The steps to extract the audio directly are as follows:
- Once the video is available in the Project Panel, select the audio you want to remove.
- Click on Clip, and select Audio Options from the drop-down menu.
- Next, press Extract Audio, and that’s it!
Conclusion
After thoroughly reading this article, you have now become an expert in managing the Premiere Pro audio not playing issue. Still, if you find navigating the editor a bit too complicated, then it is better to use alternative software, such as the UniConverter, to ad

