

Resizing images on an iPhone can seem complicated if you’re doing it for the first time. Once you get the hang of it, you’ll know that the process is rather simple. Resizing images has become an unavoidable part of our digital lives. It is used to compress, crop, and modify the scales of an image.
In this blog, we will uncover the ideal methods to resize images on iPhone, starting from cropping to file size reduction. We’ll also uncover some ideal tools for resizing images on iPhone with a special recommendation at the end of the list, and eventually learn how to resize an image on iPhone.
In this article

Versatile Image Resizer
Part 1. Measures to Resize Images
There are three important measures to resize images on an iPhone. Let's understand what these measures are and their importance in various use cases:
1. Compress
Compressing an image reduces its size without altering its dimensions. It reduces the data in an image, which can shrink the file and load it faster on the webpage. There are two types of compression:
- a. Lossy Compression: This reduces the quality slightly but shrinks the file size by a great margin.
- b. Lossless compression: This does not compromise much on the quality, and hence, the size is not reduced much.
Compress images when you need to reduce the file size but retain their original quality. Images are compressed to make them ideal for faster loading and saving storage space on an iPhone.
2. Scaling
Scaling is a form of image resizing that helps to alter the dimensions of the image. Through this method you can adjust the width and height of the image. If your image does not have high resolution, then the output may be blurry.
Thus, it is important that your image has a high resolution if you are upscaling it. Downscaling keeps things sharp but makes the image smaller in pixels and file size. You can use this method to resize images when you want the same full image, just at a different size, like resizing for a website or print.
3. Crop
Cropping is a common and effective method used for resizing images. The goal of cropping is to remove unwanted parts of the image and change its frame or aspect ratio. It helps to remove unwanted elements from your image and adjust its dimensions according to social media post requirements.
Cropping cuts away parts of the image, often to highlight a specific subject or fit a shape (like a square for Instagram). Doesn’t necessarily reduce file size unless combined with compression or downscaling. This feature is best to use when you want to focus on part of an image or make it fit a certain format (like 16:9 for video thumbnails).
Part 2. Native Tools to Resize Images on iPhone
Images are resized on an iPhone using some native or built-in apps. If you are wondering, “how to resize photo on iPhone”, then these tools might be your ultimate solution. This reduces the dependency on external tools for minor tasks and may work without needing an internet connection. You can find them pre-installed on your device and start using them right away:
1. Photos App

Photos App is a native or built-in application on the iPhone. To resize an image, start by opening the application and selecting the image that you want to resize. Tap on ‘Edit’ and then select ‘Crop’ on the bottom right side of the screen. Here, you can select the aspect ratio that suits your preference, such as 9:16, 4:3, etc.
The Photos App does not help you with file resizing or scaling images. It can help you to remove certain elements by cropping and provide you with basic editing functionalities. If that is your use case, the Photos application might be the best one for you!
2. Shortcuts App
The Shortcuts app is a more powerful native tool for actual image resizing. You can create a custom shortcut that asks you to select a photo, enter new width and height values, and then resize the image accordingly. You can also set it to automatically save the resized image back to your photo library. This method is ideal when you need more control over image dimensions or want to consistently resize photos for a specific purpose.
To use this method, open the Shortcuts app and tap the ‘+’ icon to create a new shortcut. Tap “Add Action” and search for “Resize Image”. Set your desired width and height (or use “Ask Each Time” for flexibility). Add a “Save to Photo Album” or “Quick Look” action after that. Whenever you use this shortcut on your iPhone, it will prompt you to select a photo and then resize it. Finally, it will ask you to save or preview the result.
3. Mail App
The Mail app offers a quick and easy way to compress images when sharing via email. After you attach a photo and hit send, Mail gives you the option to choose a smaller file size (Small, Medium, or Large), reducing the overall file weight without altering the image’s appearance in your photo library. While it’s not a true editing tool, it’s a handy trick for quickly compressing images for sharing.
To use this trick, open the Mail app on your iPhone and compose a new email. Attach an image that you want to send and get it resized. When you hit “Send,” the app will ask for the image size that you want to send it in. Choose among the four options: Small. Medium, Large, Actual Size. It is important to note that this method does not give you any option for adjusting the dimensions or extra editing options.
If your image resizing use case is limited to social media posting and saving storage space, then using the Photos app on your iPhone would be a wise move. However, if you are seeking advanced editing options along with image resizing in multiple formats, you might need to look beyond the native tools on your iPhone.
Versatile Image Resizer
Part 3. 5 Third-Party Tools to Resize Images on an iPhone
Image Resizing is easy on iPhone, but the features are limited. You cannot resize images in bulk, nor can you generate outputs in multiple formats. Most importantly, you cannot get advanced measures of image resizing in a single native iOS app.
That is why we have identified five popular and groundbreaking tools that can be used on your iPhone for advanced image resizing and answer the popular query, “how to resize iPhone pictures?”
1.Image Size
This app lets you input exact width and height values to resize images. Here are the features for the Image Size application for resizing images:
- Enter exact dimensions in pixels, inches, cm, or mm.
- Option to maintain or ignore the aspect ratio.
- Export images in JPG or PNG formats
- Provides a preview before saving with built-in JPEG quality optimization.
Pros & Cons:
Step by Step Guide
How to Use the Image Size App
1. Open the Image Size app and select an image from your gallery. You’ll be taken to the resize screen where you can input new width and height values. Choose the measurement unit that suits your needs.
2. Decide whether to maintain the original aspect ratio. You can toggle it on or off depending on how much you want to alter the image’s shape. A live preview will show what your resized image will look like.
3. Choose the output format between JPG and PNG. The app automatically optimizes JPEG images to avoid major quality loss. You can also check the file size before exporting.
4. Tap the download icon to save the resized image to your photo library. Alternatively, share it via email, messages, or social media. The export process is quick and seamless.
2. PicTool
PicTool lets you choose multiple images at once and apply batch resizing. Here are the features of the PicTool application:
- Batch resize multiple images by dimensions or percentage.
- Compresses and converts formats (JPG, PNG, HEIC).
- Built for quick resizing to save space or for web optimization.
- Compatible with iPhones and iPads; great for large photo libraries.
Pros & Cons:
Step by Step Guide:
1. Open PicTool and tap the gallery icon to select multiple photos. The app allows you to pick as many images as you need. Once selected, continue to the batch tools screen.
2. Select the resize option and choose between setting dimensions manually or reducing them by percentage. This is ideal for preparing multiple images for websites or cloud storage. You can apply the same settings to all selected files.
3. Adjust compression or convert the format if needed. This tool allows quick format switching, which is highly useful for compatibility.
4. Tap the export button once you're done. You can save the resized images directly to your phone or share them with other apps. The process is fast and works well for large image batches.
3. Snapseed
Through its parent company, Google, Snapseed operates as a sophisticated application to resize images. Users can take advantage of the following functions offered through the Snapseed application:
- The application enables users to crop photos with preset or custom aspect ratio options.
- You should export images by lowering both their resolution and file size.
- Users can access professional editing functions, which include tune and healing tools, among others.
- Users can access Snapseed without cost, and the application operates at peak performance specifically for iOS systems.
Pros & Cons:
Step by Step Guide:
How to use:
1. You can start by loading the image from your photo library inside Snapseed. To edit photos access the options through the tools button. Once inside the Crop folder, you can start changing the image dimensions.
2. Users get options between standard aspect ratios, together with manual cropping ability. The frame can be shifted and zoomed in order to fine-tune your composition. Snapseed lacks pixel-specific image resizing, yet this cropping technique will lower the appearance of the image.
3. After modifying the image, apply brightness adjustments and sharpening filters when needed. The filters serve as optional features that improve the appearance. The professional suite of controls in Snapseed enables advanced users to work at a high level.
4. Snapseed provides advanced editing features within an interactive interface. This makes it an ideal choice for anyone seeking an easy-to-use application.
4. Resize Image
This tool provides all the necessary advanced editing features, which makes it a good choice for image resizing.. Users should understand these features available in the Resize Image application. :
- The system enables size adjustment through manual entry of specific dimensions.
- The interface includes two options to protect the aspect ratio or override it with manual dimensions.
- The application allows users to effortlessly share and save their resized content.
- Lightweight and simple interface for beginners.
Pros & Cons:
Step by Step Guide:
1. Launch the Resize Image app and tap “Select Image” to choose a photo from your library. The image will load into the workspace where you can enter specific dimensions. Choose pixels as your unit of measurement for best accuracy.
2. Type in your preferred width and height values in the designated fields. Use the toggle to lock or unlock the aspect ratio. The image preview will update in real time.
3. Once you’ve set your desired size, scroll down to set the image quality. Choose between low, medium, and high. This helps manage file size and visual clarity.
4. Tap the “Download” or “Share” icon. The app saves your resized image directly to your camera roll or lets you send it instantly. You may see a few ads before completing the action.
5. Desqueeze
Desqueeze is a fully optimized tool for iOS devices with the aim of systematically resizing images and videos. Let’s explore the highlighting features of Desqueeze:
- Resize both images and videos with presets or custom dimensions.
- Great for content creators targeting social platforms.
- Supports batch processing and multiple output formats.
- Offers social sharing, cloud export, and file transfer options.
Pros & Cons:
Step by Step Guide:
1. Open Desqueeze and select the type of file you want to resize — image or video. You can choose from your iPhone’s photo library or import from cloud storage. Then, tap to proceed to the resize interface.
2. Choose a preset for platforms like Instagram or YouTube, or input custom pixel values. The app also shows previews for social media-specific crops. This makes content optimization much easier.
3. Optionally change output format (JPG, PNG, PDF, etc.) or add compression. This helps control storage size and compatibility for different use cases. Desqueeze supports a wide range of formats.
4. Tap “Export” to finalize the process. You can save it to your gallery, upload it to cloud storage, or send it directly to other apps. The export process supports batch and single image handling.
This enables you to share your output on various social media channels, store it at custom locations, and export it for external file transfers, not limited to social media. It not only saves storage space on your iPhone but also enables you to create optimized content for websites.
Part 4. Bonus: How to Bulk Convert Images At Lossless Quality on Desktop
The common problem in resizing images through Android or iOS tools is the unavailability of batch processing. That is why we have identified the most efficient tool that supports lossless image compression and bulk image resizing.
Wondershare UniConverter
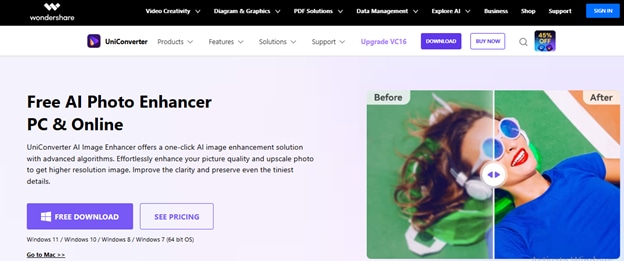
Developed by Wondershare, UniConverter is an advanced tool that helps to resize images without compromising their quality. Explore the features of the UniConverter Image Resizer :
- Offers lossless compression, which maintains the original image quality even after resizing.
- High-speed video converter and compressor with 20+ functions.
- Supports batch processing, allowing you to resize multiple images at once to save time and effort.
- Provides advanced editing tools for cropping, format conversion, and aspect ratio adjustments.
Pros & Cons:
Versatile Image Resizer
Step by Step Guide:
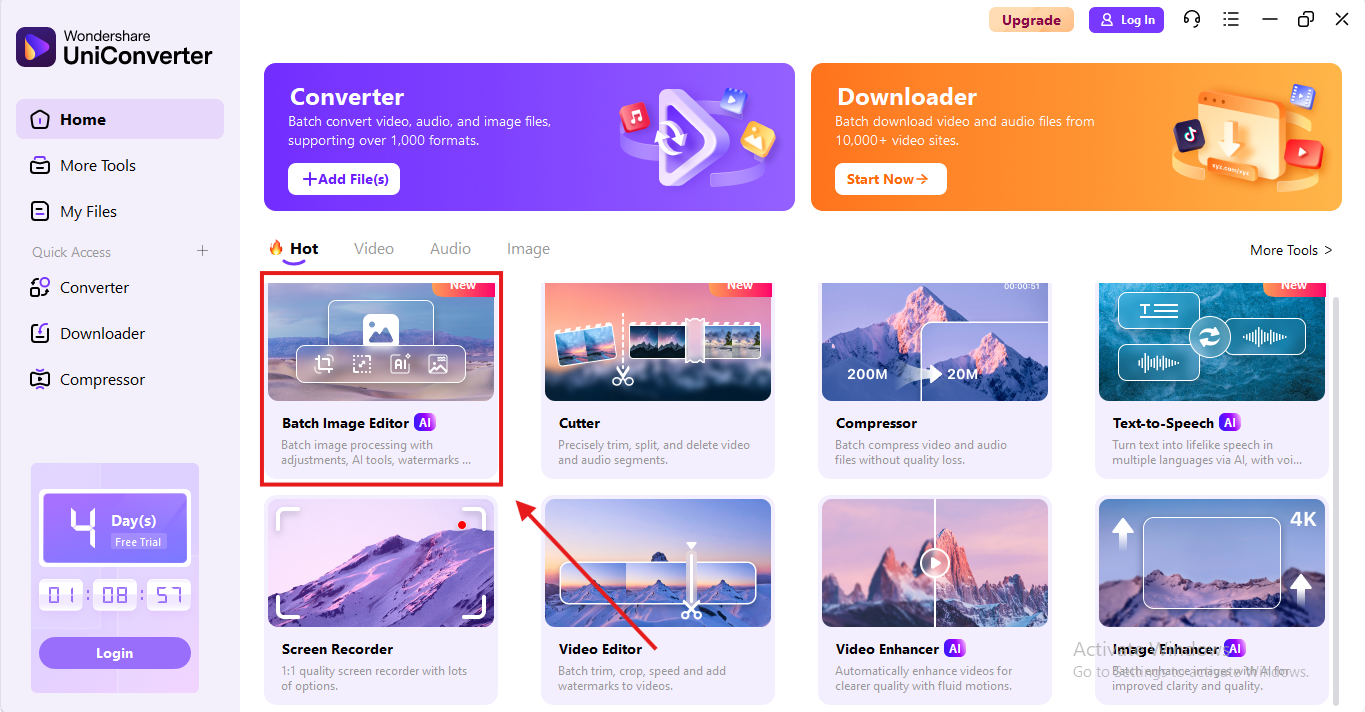
Step 1
Open UniConverter on your desktop and pick the “Batch Image Editor” tool from the menu.
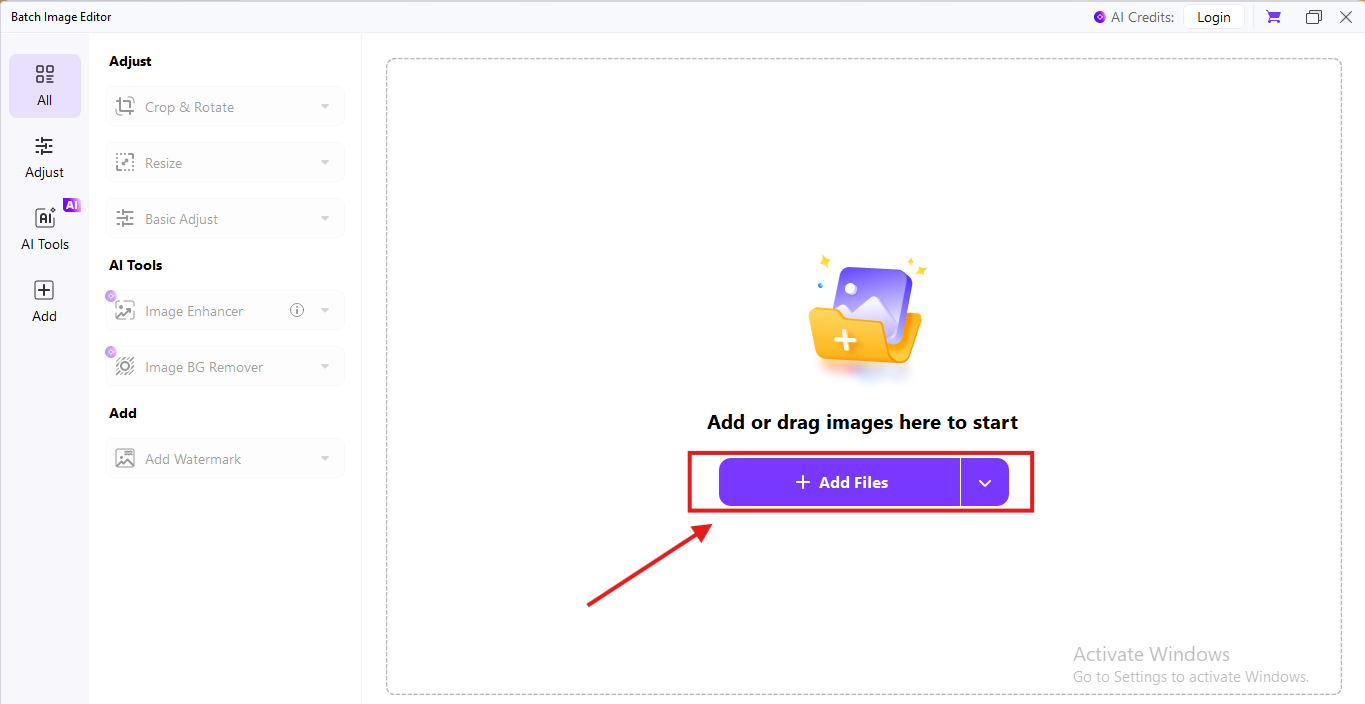
Step 2
Upload one or more images by using the ‘Add Files’ option. The interface is simple and supports quick drag-and-drop actions.
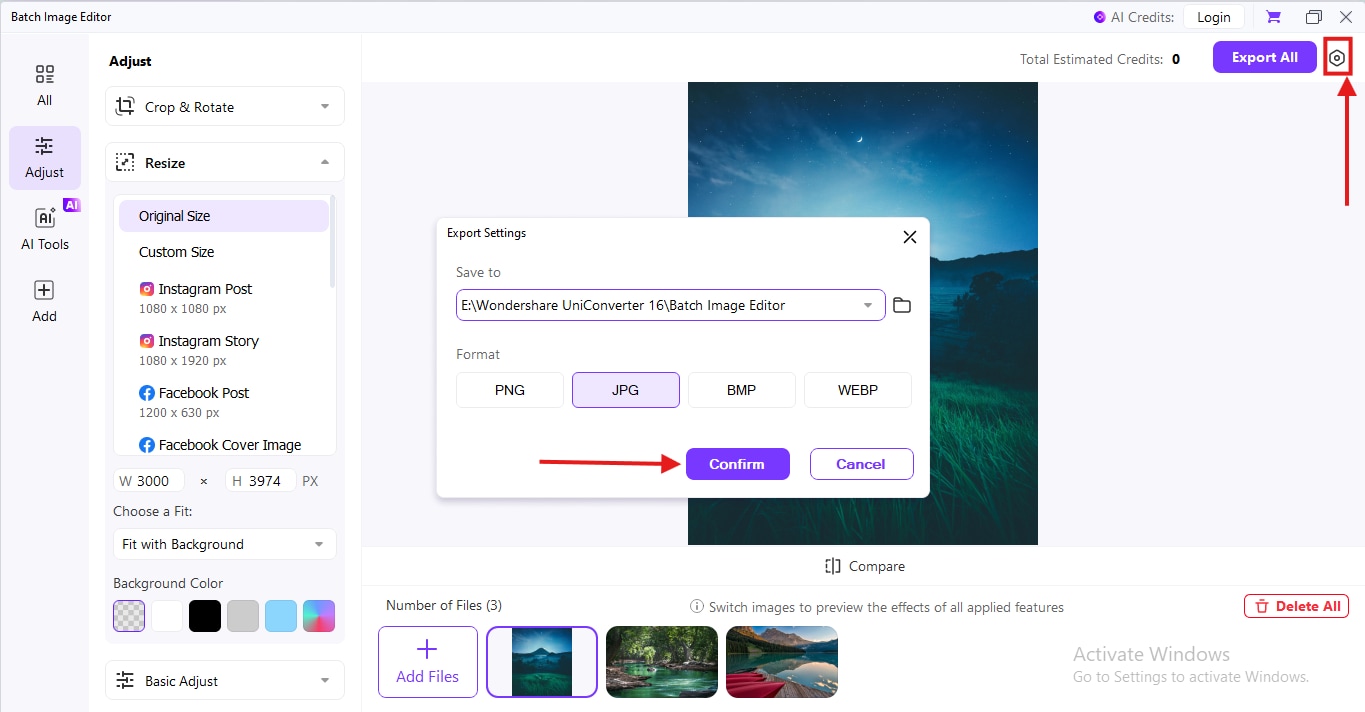
Step 3
If needed, apply additional formats like (JPG, PNG, BMP) by tapping on the settings icon in the top right corner. When finalised, click on ‘Confirm.’
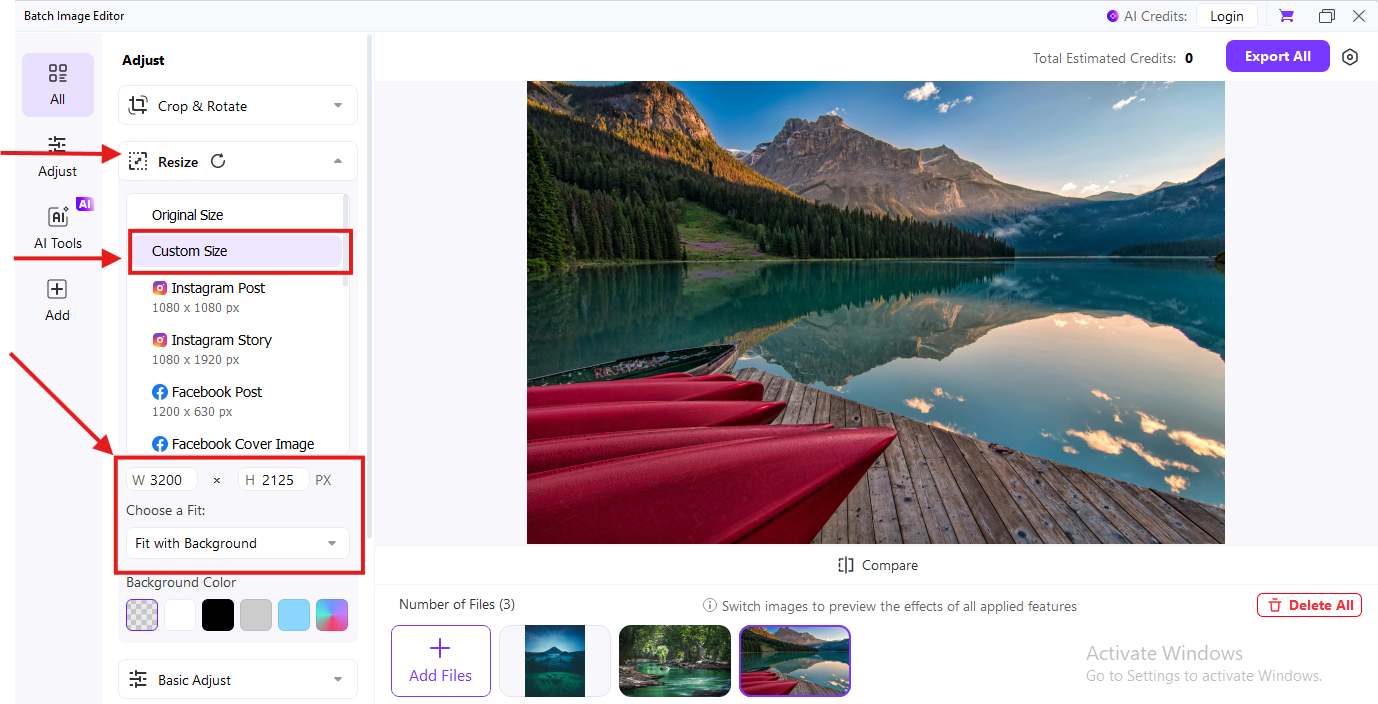
Step 4
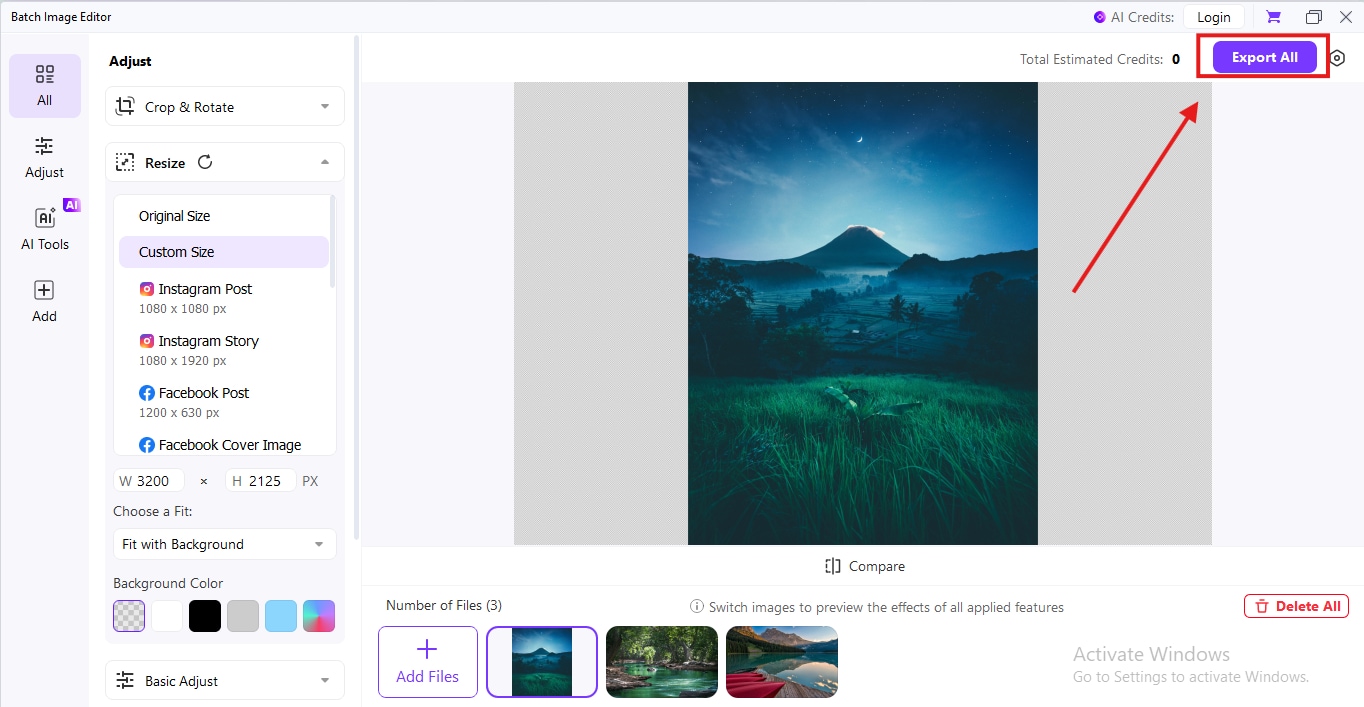
Choose your preferred image size by entering a “Custom Size” under the Resize dropdown.
Step 5
Click the “Export All” button to resize and process your selected images. Once done, save them to your desktop or transfer to your iPhone via AirDrop, email, or cloud storage. This workflow ensures quick resizing with zero quality loss.
Part 5.Tips for Best Results
Before you find which tip works best for you, determine the goal for resizing the image. It could be maintaining an aspect ratio for social media, saving storage space on your iPhone, or optimizing images for webpages. It could literally be anything!
But these tips will help you achieve your objective and maintain a decent quality output, no matter which method you opt to use to resize your images:
1. Save a Copy to Preserve the Original
Before you resize, duplicate the image so you don’t lose the original. Some apps do this automatically, but it’s a safe habit to build.
2. Don’t Go Smaller Than You Need
If you resize an image too small, it may look pixelated when viewed on larger screens or printed. Always resize based on where the image will be used, such as screens, web, or print
3. Maintain Aspect Ratio and Avoid Distortion
Always enable "Maintain Aspect Ratio" (or lock the ratio) if your resizing app offers it. This keeps your image from looking stretched or squished.
4. Select the Right Image Format
For photos, JPG is great for small size with good quality, while PNG is better for images needing transparency or sharper edges (like graphics or logos).
5. Utilize Pixel Dimensions When Possible
When resizing, enter specific pixel dimensions instead of guessing. This gives you exact control and consistency, especially for websites, apps, or templates.
These tips are applicable irrespective of your use case and will help you to resize images on an iPhone and maintain quality.
Conclusion
Image Resizing on an iPhone can seem tricky for users who have never done it before. The process is rather simple and can be completed through native apps or built-in apps within the iPhone. Resizing an image follows three primary measures: Compress, Scaling, and Cropping. For a personal use case, you might want to prefer cropping and completing it through the Photos App on your iPhone.
A concerning limitation of such native apps is that they may not contain bulk image resizing. Additionally, conversion to multiple file formats may be unavailable in multiple applications. Herein, you can use other tools such as PicTool, Snapseed, and Image Size to batch-process your images. These tools are generally free to use, but their premium features require a subscription.
To resize images on your desktop, you can try out UniConverter by Wondershare. It is the ideal software to resize images, following a lossless compression approach. The tool is free to use for iOS, Android, and Windows users alike, and you can start using it for free. The best part is that UniConverter also supports editing images, videos, and audio, as well as helps to convert bulk images to save time and storage space.
Versatile Image Resizer
FAQs
-
1. Can I resize a JPEG image?
Yes, you can resize a JPEG image on your iPhone through the Shortcuts App. Create a shortcut and select the image that you want to resize. Then, add “Resize Image” and set the width and height for it. Finally, add “Save to Photo Album”. Then, run the shortcut and select your JPEG. -
2. How do you decrease the resolution on an iPhone?
Decreasing resolution means resizing a picture or reducing its pixels. You can do it using the native apps on your iPhone, such as the Shortcuts App and the Mail App. If you just want to share it, use the Mail app and select a lower resolution when you hit “Send.” To resize bulk images, consider using UniConverter. -
3. How do I resize a photo in Apple Photos?
The Apple Photos app on iPhone does not let you resize a photo by specific dimensions, but you can still make adjustments using cropping or export tricks on the Mail app. -
4. How do I crop a picture to a specific size on my iPhone?
To crop a picture on your iPhone, either use the Photos App or a third-party tool that is compatible with iOS. In the Photos App, select the image that you want to crop, then tap “Edit.” In the bottom right corner, tap on “Crop”, then drag the frame to crop the image or choose a pre-defined aspect ratio.

