AVCHD
- TRY IT FREE TRY IT FREE
- 1. AVCHD Knowledge+
- 2. Convert & Play AVCHD+
Solved! How to Import AVCHD to iMovie Easily and Quickly
by Christine Smith • 2026-01-21 18:53:31 • Proven solutions
iMovie is a popularly used video editing tool for Mac and iOS users. Several times when you try importing your camcorder recorded AVCHD videos to your iMovie app for editing purposes, error may occur. This article can learn how to convert AVCHD to iMovie compatible formats and import AVCHD to iMovie for editing easily.
- Part 1. Why iMovie 11/10 Does Can't Open AVCHD Videos
- Part 2. How to Import AVCHD Files from Camcorder to iMovie
- Part 3. [Recommended] Easiest Way to Convert AVCHD to iMovie
Part 1. Why iMovie 11/10 Does Can't Open AVCHD Videos
The iMovie 11 and 10 versions support importing and editing only the native AVCHD files in 1080i 50/60, 720p 24/25/30, and 1080p 24/25/30. So if your recorded AVCHD videos are in AVCHD 1080p 50/60 or 720p 60, they cannot be imported or edited using the app.
Moreover, if you try to import AVCHD iMovie iPad, you will not be successful as the iMovie app for iPad and iPhone is only compatible with the files recorded by the iOS devices and are in MOV, M4V, and MP4 format.
Part 2. How to Import AVCHD Files from Camcorder to iMovie
It is also one of the best ways to ensure that the AVCHD format is transferred to the iMovie without any issue and problem. In this regard, the user should thank the Apple Inc. for the awesome tech piece that has been developed in this regard by the name of iMovie as it not only resolves the issues of the user but also make sure that the default program is used to import heavy and large files such as MTS, m2ts, and AVCHD with ease and satisfaction and it is one of those properties of the program which none other has. The process that is to be followed is explained as under:
Step 1 The USB stream or the detection is to be turned on onto the device from where the import is being made to ensure that the process triggers itself in the best way:

Step 2 The utilities and the other programs such as iPhoto are to be disabled to ensure that the iMovie can work fine. The path to be followed is iMovie > File > Import from Camera > import:

Step 3 The option shown in the screenshot below is to be manipulated as per the need and desire to make sure that the AVCHD files are shown and imported:

Step 4 The import button is then to be clicked on the next window to finish the process:

Part 3. [Recommended] Easiest Way to Convert AVCHD to iMovie
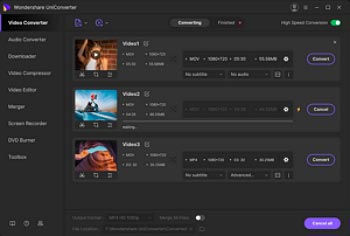
For AVCHD files that cannot be added to the app, converting it to a compatible format is the best option. To help you get the task done professionally, we recommend Wondershare UniConverter. This Windows and Mac-based desktop software supports video conversion in over 1000 formats without losing original file quality. With batch processing, multiple files at a time can be converted using the program. Additionally, AVCHD videos can be added from the system or directly from the camcorder as well. Additional supported features of the software include video editing, video compression, video download, recording, DVD burning, etc.
 Wondershare UniConverter - AVCHD to iMovie Converter for Windows/Mac

- Convert AVCHD files to iMovie supported formats like MP4, MOV, and more others.
- Convert to optimized preset for iMovie, Final Cut Pro, and other external devices.
- Support 90X faster conversion speed than any conventional converters.
- Edit AVCHD files with trimming, cropping, rotating, merging, editing subtitles, etc.
- Burn and customize AVCHD videos to DVD with free DVD menu templates.
- Support download or record videos from 10,000+ video sharing sites like YouTube.
- Transfer converted AVCHD files from PC/Mac to iPhone/iPad/Android devices.
- Versatile toolbox combines fixing video metadata, GIF maker, video compressor, and screen recorder.
- Supported OS: Windows 10/8/7/XP/Vista, macOS 11 Big Sur, 10.15 (Catalina), 10.14, 10.13, 10.12, 10.11, 10.10, 10.9, 10.8, 10.7, 10.6.
Steps on how to convert AVCHD to iMovie using Wondershare UniConverter
Step 1 Load AVCHD files to Wondershare AVCHD to iMovie converter
Run the Wondershare UniConverter software on your Mac system and import the AVCHD files by clicking on the +Add Files button. You can load the files directly from the camcorder by opening the drop-down options at +Add Files and then selecting the connected device.

Step 2 Edit added AVCHD videos (Optional)
The videos added will appear on the interface with an image. Under the thumbnail image, the icons for Cut, Crop, and Effect are present. Choose the desired option, and a pop-up window will open. Make the change from the window and click on the Save button to confirm. This is an optional step and can be skipped if there is no requirement for editing.

Step 3 Choose iMovie compatible target format for AVCHD
Open the drop-down menu at the Output Format option, and the list of supported formats and devices will appear. From the Video tab, choose the target format that is compatible with the iMovie app. Also, choose the resolution as needed.

Step 4 Convert AVCHD to iMovie
Click on the Start All button to start processing and converting the AVCHD files to iMovie compatible format. The converted files can be managed from the Converted tab at the interface while on the system, they save at the location selected at the Output tab. Once the conversion is complete, iMovie AVCHD import can be done of the compatible files without any trouble.

To import AVCHD to iMovie, either the format has to be in the native format or converted to a compatible format using professional software like Wondershare UniConverter.


Christine Smith
chief Editor