

Instagram’s cropping feature can change how photos are shown, particularly with group photos or wide landscapes. This often leads to parts of the image being cut out when uploaded.
In 2025, there are several ways to upload pictures to Instagram without cropping. These methods accommodate different preferences, allowing photos to be shown in full.
Although Instagram continues to be a popular platform for sharing photos, its size restrictions can sometimes be limiting. By using specific techniques to post full-sized images, users can display their photos as originally intended, whether for professional use or sharing personal moments with friends and family.
In this article
Part 1: Understanding Instagram's Image Size Requirements
These are the criteria set by Instagram that dictate the size and style of the images you wish to upload, and hence give the reason why your images often become cropped. Understanding these guidelines is the first step in solving this predicament.
The standard Instagram post should have a ratio of 1:1 (Square) but can go as 1.91:1 (Horizontal) or 4:5 (Vertical). Stories are best enjoyed in the 9:16 ratio, while Reels are better in the 9:16 vertical format. If your image does not meet these ratios, Instagram will automatically crop it for you.
Instagram photos have a maximum width limit of 1080 pixels; anything beyond that will be compressed and lose quality. Knowing this helps you prepare your images beforehand.
Instagram Feed Post Size Requirements
To avoid cropping issues in your feed posts, follow these specific dimensions:
- Square posts: 1080 x 1080 pixels (1:1 ratio)
- Horizontal posts: 1080 x 566 pixels (1.91:1 ratio)
- Vertical posts: 1080 x 1350 pixels (4:5 ratio)
Many photographers struggle with vertical images that exceed the 4:5 ratio limit. Instagram will automatically crop these taller images, often cutting off crucial elements. This is particularly problematic for portrait photos, architecture shots, or product images where every detail matters.
Instagram Stories and Reels Size Requirements
For Stories and Reels, Instagram follows these specifications:
- Standard size: 1080 x 1920 pixels (9:16 ratio)
- Minimum width: 500 pixels
- Maximum file size: 30MB for Stories
Part 2: Three Methods to Make Pictures Fit on Instagram without Cropping
As described above, there are several approaches to ensure your pictures fit on Instagram without losing aesthetics. Let’s look at three practical solutions proven to work best in 2025.
A. Resize Within Instagram While Posting
Just like any other social media platform, Instagram has its add-ons, and one of them includes an inbuilt tool that allows some modifications to the image before posting. However, some users are not keen on this feature.
Step 1: On Instagram, start a new post
Proceed to select the image you want to use from the gallery and click “Next” to get to the modifying screen that enables you to add filters and other changes.
Step 2: You should make changes to the bottom portion of the interface where you get access to the expand/resize icon
While in the editing view, there should be an icon shaped like double-pointed outward arrows. Once you click on it, you will be able to access image-fitting tools on Instagram.
Step 3: Resize your image with the pinch gesture
Use the pinch motion to zoom out until your entire photo is fully framed. White or black borders will be added by Instagram to the sides of the frame that have no images. Once you are happy with the outcome, click on “Next” and continue with your post.
This method is simple and does not require any extra apps, which is great for quick and easy posting. However, it does have limitations in terms of customization options.
B. Resize Using Adobe's Free Image Resizer
Adobe Express has an online tool that is free and ideal for the preparation of photos before posting on Instagram.
Step 1: Open the browser and go to Adobe Express Image Resizer.
Search for the Adobe website, and look for the free resizer tool. A paid subscription is not needed to use this feature.
Step 2: Upload the photo and select the “Instagram Post” preset for the dimensions.
After uploading the image, Adobe will automatically use the "Instagram Post" option, ensuring the correct proportions. With the available presets, the image is adjusted to fit the proper size automatically. When you select the "Instagram Post" option under the "Post On" settings, it is designed to ensure your image fits perfectly for Instagram.
Step 3: Decide how far you want to shrink the canvas and download your image
You can resize the canvas without changing your photo’s proportions, which allows you to keep the original ratio while adjusting the background color to complement the image. Once done, simply download the resized image and upload the edited version to Instagram.
Adobe's tool gives you more control over the final look of your bordered image and works well for creating a consistent aesthetic across your profile.
Creative Border Options with Adobe Express
One advantage of Adobe Express is the creative freedom it offers. You can:
- Choose custom border colors that match your Instagram aesthetic
- Add gradients to borders for a more sophisticated look
- Apply patterns or textures to borders for artistic effect
- Create branded borders with consistent colors for business accounts
C. Resize The Picture In Your Phone's Gallery
Customizing an image has become easy thanks to built-in galleries on smartphones, which offer editing features for making basic adjustments before posting to Instagram.
Step 1: Locate the Gallery and Photos App on your Mobile Device.
Most people with the health of modern-day smartphones (Android or iOS) have access to a gallery with built-in editing features. Just locate the picture you wish to post and use the editing option to open it.
Step 2: Check for the editing options, then click "Resize" or "Adjust”
The location of these features varies depending on the phone model, so first look for an edit button, then enable options related to size, crop, or aspect ratio.
Step 3: Select a preset that Instagram wishes you to use
Preselect either 1:1 (square), 4:5 (vertical), or 16:9 (horizontal), depending on your choice, and save the modified version before uploading it to Instagram.
Different Gallery Apps and Their Features
iPhone Photos App: The built-in Photos app offers basic resizing capabilities. After opening your photo, tap "Edit," then the crop icon. From there, tap the aspect ratio icon (usually looks like overlapping rectangles) and select from preset ratios. While simple, it lacks border customization.
Samsung Gallery: Samsung's Gallery app provides more options than iOS. Tap "Edit," then "Resize." You can then select Instagram-friendly ratios and adjust the canvas. Some versions even allow adding solid color borders, though customization is limited.
Google Photos: Google Photos offers a "crop" feature with aspect ratio presets. Tap "Edit," then "Crop," and select your desired ratio. While it doesn't provide border options directly, you can adjust the image position within the frame to preserve important elements.
Part 3: 2025 Best Way to Make Pictures Fit on Instagram
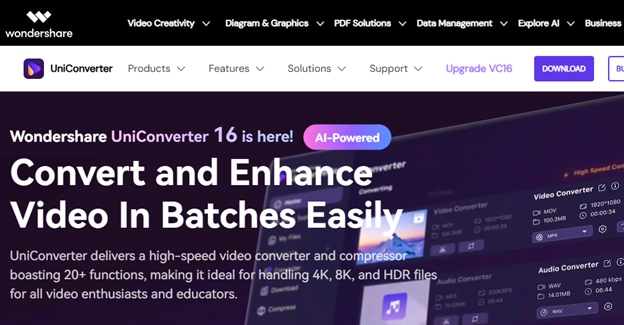
While the above methods work well, the most comprehensive solution in 2025 is using Wondershare UniConverter's Image Converter tool. This all-in-one solution offers precision and advanced features that other methods lack.
Why UniConverter Stands Out for Instagram Photos
Wondershare UniConverter's Image Converter provides several advantages over other methods:
- Batch processing: Resize multiple images at once, perfect for planning your Instagram content calendar
- Precise control: Set exact pixel dimensions or aspect ratios for perfect Instagram compatibility
- Smart borders: Automatically add aesthetically pleasing borders that complement your images
- Format conversion: Convert between image formats while maintaining quality
- No quality loss: Preserve image clarity even after resizing
UniConverter assists you in resizing images for Instagram, be it for stories or posts. Cropping issues can be avoided thanks to the maintained quality and ensured compatibility of the images with the platform.
Correctly resizing images can be done using UniConverter’s Batch Image Editor by following these steps:
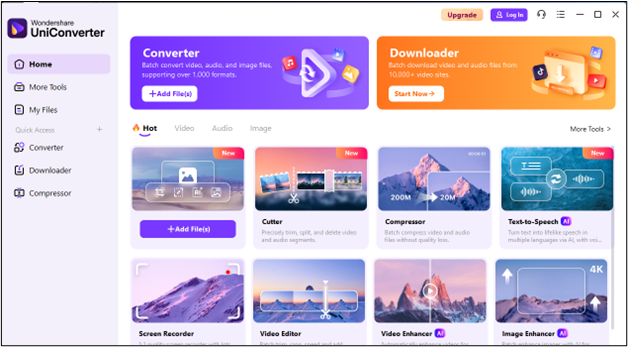
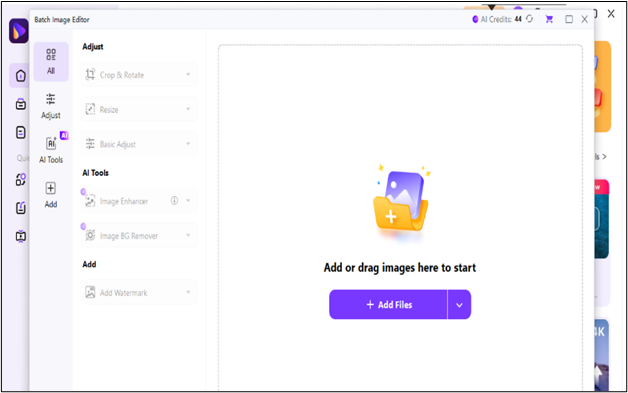
Step 1
After downloading and installing UniConverter, run the program. Several "Hot" features will appear on the homepage. Click on “Batch Image Editor” in the “Hot” category of the interface.
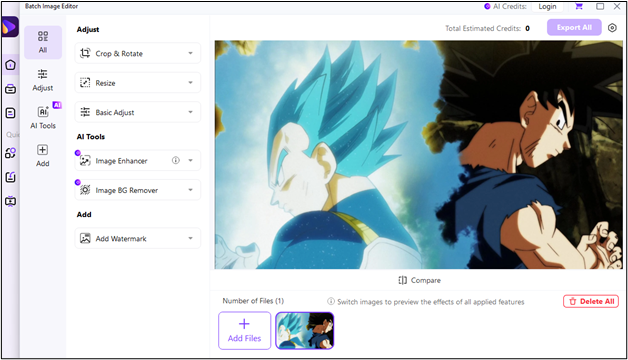
Step 2
To import images into the application, you may either click on the ‘+’ icon or simply drag and drop the files into the program's window. Forget about compatibility issues because image editing is made easier with all formatting support using UniConverter.
Step 3
You will identify the option of “Image Resizer” on the left side of the pop-up window. The preset sizes for the social media platforms, including Instagram, will be displayed upon clicking the drop-down box. Select the correct Instagram dimension (1:1 for square posts, 4:5 for vertical, and so forth) and click “Apply” to perform one-click resizing.
For even more flexibility, UniConverter supports customized image sizes. You can input your desired aspect ratio to adjust the output size of the image, ensuring it fits your specific Instagram content perfectly.
Step 4
After adjusting the preferred image sizes, click on the Export All button located on the top right side of your screen. The images will automatically be saved into the designated folder and are now ready to upload to Instagram without the need to crop.

Apart from resizing for social media, it comes with a full suite of AI tools like an AI Image Enhancer, which can refine the quality of your photo before posting. This is especially helpful when your original file is somewhat out of focus or requires some color adjustments.
For those looking to elevate their content on Instagram, UniConverter also features a Background Remover tool that can make impressive product images or portraits “pop” by placing them against a clean background. It is ideal for professional Instagram accounts centered around e-commerce or personal branding.
Conclusion
Now that you know “how to fit Instagram pictures without cropping,” it doesn't need to be complicated. In 2025, you have multiple options depending on your needs and technical comfort level.
For quick, on-the-go solutions, Instagram's built-in resizing tool or your phone's gallery editor will do the job.
However, for those who regularly post to Instagram and want complete control over how to fit your picture on Instagram without cropping, Wondershare UniConverter provides the most comprehensive solution with its batch processing capabilities and additional image enhancement tools.
Which method will you try first? The choice depends on your specific needs, but one thing's certain – no more frustration over cropped Instagram photos!

Batch Image Editor
FAQs
1. How to fit the whole picture on Instagram without border Reddit?
Many Reddit users recommend using third-party apps, but you can achieve this using Instagram's built-in expansion tool. When uploading, tap the expand icon (two outward arrows) in the bottom corner, then pinch to zoom out until your entire image fits. If you prefer a cleaner look without visible borders, use UniConverter's Image Converter to resize your image to exact Instagram dimensions while maintaining the aspect ratio.
2. How to make multiple pictures fit on Instagram without cropping?
For carousel posts with multiple images of different sizes, the best approach is batch processing. Using Wondershare UniConverter's Image Converter, import all your photos, select the same output settings for all, and process them simultaneously. This ensures consistent dimensions across your carousel, preventing Instagram from cropping any of the images differently.
3. Why does Instagram crop my photos even when I try to fit them?
Instagram crops photos that don't match its supported aspect ratios (between 1.91:1 and 4:5 for feed posts). If your photo exceeds these limits, Instagram will automatically crop it. The solution is to preemptively resize your image to fit within these parameters using one of the methods described above, particularly UniConverter's Image Converter, which can precisely match Instagram's requirements.
4. How can I fit vertical photos on Instagram without cropping the top and bottom?
For tall vertical photos that exceed Instagram's 4:5 ratio limit, use UniConverter to add borders to the sides of your image. This effectively changes the overall aspect ratio to 4:5 while keeping your entire vertical photo visible. Choose a complementary border color that enhances your image rather than distracts from it.
5. Is there a way to make pictures fit on Instagram Stories without cropping?
Yes! Instagram Stories use a 9:16 aspect ratio. To fit landscape or square photos without cropping, use UniConverter's Image Converter to resize your image to a 9:16 canvas, adding borders above and below (or to the sides) as needed.

