

Struggling with blurry social media posts or images that take forever to load on your website? The problem might be your photo’s pixel size. Getting this right can make or break your visual content. Fortunately, learning how to change pixel size of a photo is easier than you might think, with several online and offline uses.
In this article, you will three different approaches to resize your images with user-friendly online, AI-powered, and professional software with batch conversion and pre-set of aspect ratio with step-by-step guide. First, let’s understand what is pixel size and why you need to resize pixels.
In this article
Part 1: What is Pixel Size?
Pixel size is simply the physical dimensions of a single pixel, typcially about 1/96th of an image inch that is 0.26mm. You can tink of it as the tiny builiidng block that makes up digital images. Smaller pixels means more detail can fit in the same space, giving you sharper images with higher resolution.
Part 2: Why do we need to resize pixels?
Resizing pixels changes images dimensions, which is essnstion for various purposes. If you are wondering “how can I change the isze of a picture” effectively, understanding these reasons will help you achieve optimal results.
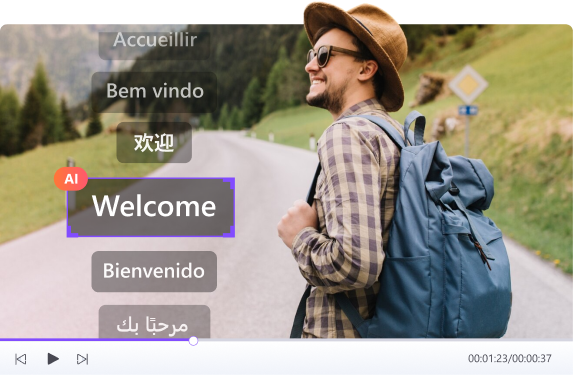
Social Media (Instagram, Facebook recommended sizes)
When sharing photos on Instagram, you will want to resize to 1080×1080 pixels for square posts pf 1080×1350 for portraits. Facebook cover phots work best at 851×315 pixels. By using these specific dimensions ensures your images disoplays properly without awkward cropping or losing the quality.
Web Page Optimization (improved loading speed, SEO friendly)
Larges images can make your website crawl like a turtle in mud. By resizing the images you can dramatically improve website load times. It is oneof the critical factor for keeping visitors engaged and boosting SEO rankings. Additionally, Google actually favors faster-loading pages.
Printing Needs (DPI vs. Pixel)
For printing pixel count translate to inches through DPI. A 300 DPI image will look crisp in print, while 72 DPI appear more fuzzy. For example, a print a sharp 8×10 photo, you will need approximately 2400×3000 pixels. Rember that unlike digital display print quality depends heavily on actual pixel density not just the dimensions.

Batch Image Editor
Part 3: Method 1-Use online tools
Online tools like Adobe Express, ResizePixel, and Img2Go are some of the best tools you can find to learn how to change the pixel size of a photo, however each tools have some limitations that you will find below.
Adobe Express
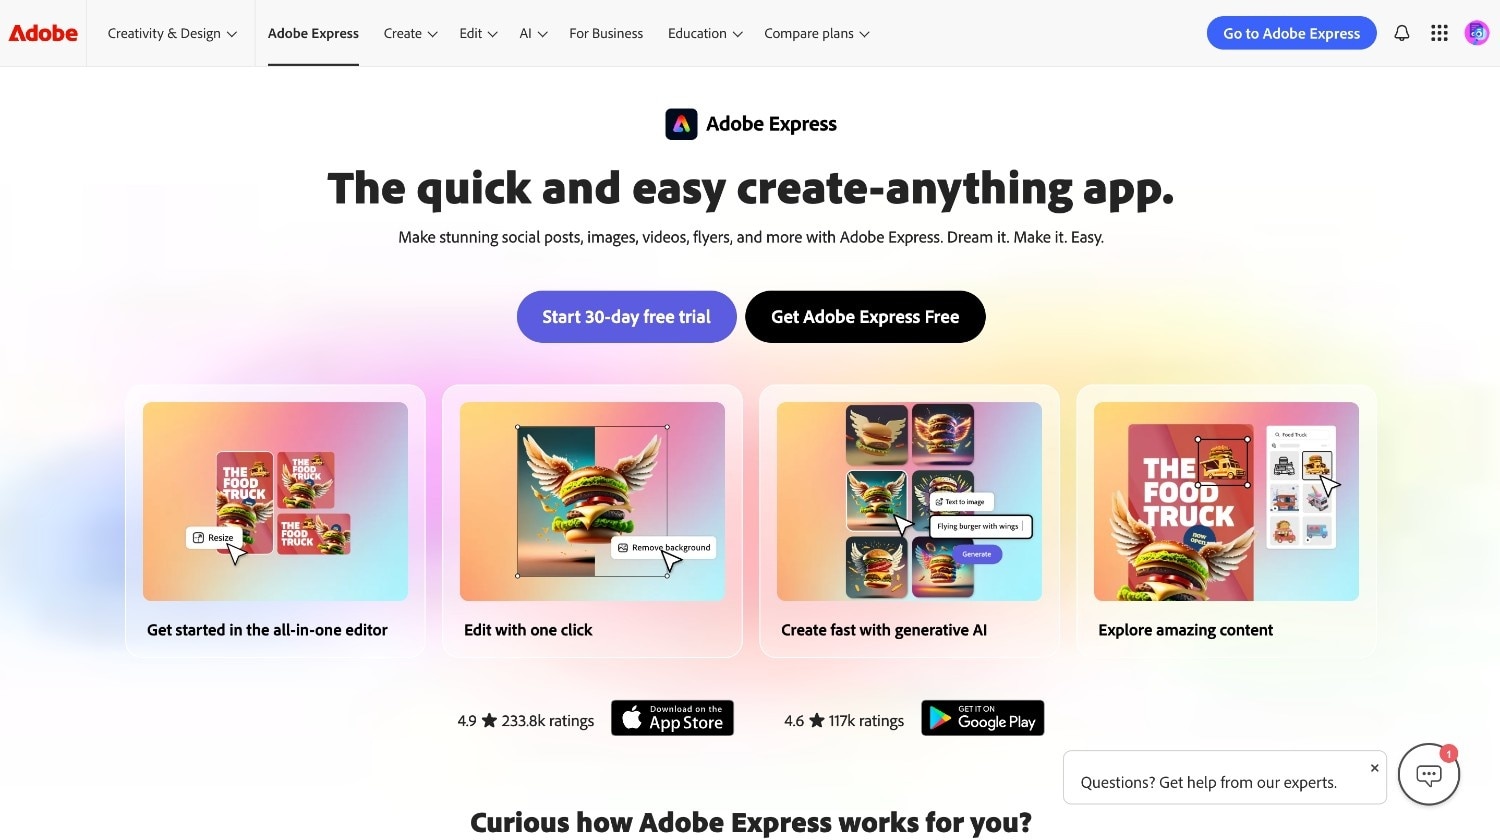
Adobe Express offers a user-friendly way to resize images with just one click. If wondering how can I change the size of a picture using online tools, then Adobe Express might be your choice. It miaintains the image quality and make your image perfect for each social media platform.
Key Features:
- Aspect ratio to fit the image for each social media platform
- Convert video to GIF quickly
- Image conversion (from JPG to PNG)
- Background remover
How to Change the Pixel Szie of a Photo With Adobe Express:
Step 1: Visit Adobe Express official website, click “Edit” from upper menu and choose “Resize Image” option. You can do this without any sign up or login process.
Step 2: Click “Upload Your Photo” and upload the image here you can see the original size of your image. Change width and height by manually mentioning the required size or you can choose from aspect ratio to fit image to your social media platforms.
Step 3: Once you are done with changes click “Download” to save image to your desktop.
Img2Go
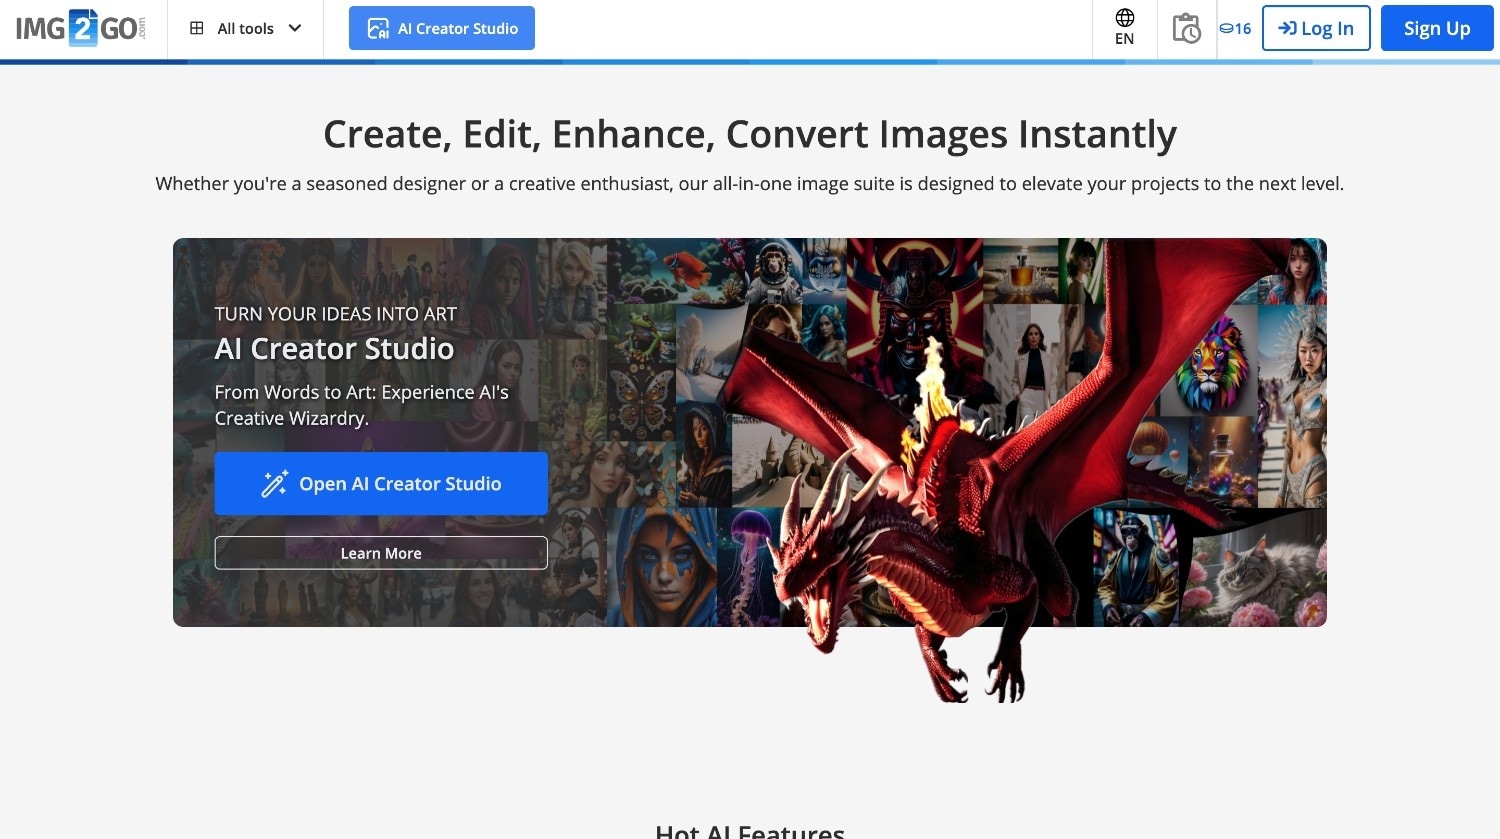
Img2Go is a comprehensive image editing tool that let you help with “how do I change the size of an image?” Its AI tools like Art Generator, AI Inpainting, Blur Faces, and similar image creation with AI further streamline your image editing work. Along with resizing the image you can crop and rotate your image at one place.
Key Features:
- Image conversion and optimization
- AI image features like restopring old images
- AI art creation
- Image cropping, rotation, and background removal
How to Chanfe Pixel Size of a Photo with Img2Go:
Step 1: Access the official Img2Go website, click “AI Tool” option in upper left corner, and select “Resize Image” option.
Step 2: Click “Drop files or click here” option to upload the image from your system and click start.
Step 3: Change the dimensions of image, DPI (Dots Per Inch) value of your image, resize by percentage, or simply resize by aspect ratio.
Step 4: Choose the target image format and click start and download the final image.
ResizePixel
ResizePixel is an online photo editing tool with easy to use features and and user-friednly interface. It not just let you know how do you change the size of a picture but also mirror, convert, compress, crop, rotate, and pixelate images. Addioanlly you can convert your colored images to black and white.
Key Features:
- Crop and rotate image
- Apply pixelization effects
- Black and white photo conversion
- Convert image to various formats such as PNG and JPG
How to Change Pixel Size of a Photo With ResizePixel:
Step 1: Heads to the ResizePixel website and first thing you will see “Upload Image.” Click and upload your image from desktop.
Step 2: Here custom the width and height of you image or can simply enable percentage method to resize your image.
Step 3: After changing the pixel of photo you can crop, mirror, rotate, or compress the image if required and click “Go to Download” in lower right side to download the final results.
Batch Image Editor
Part 4: Method 2-Use the AI resize tool
According to Future Market Insights, the AI image editor market is expected to cross the $217.9 million by 2034 which was $80.3 million in 2024. In this increasing market AI tools like Pixlr and Fotor can be very helpful for you in knowing how to change the pixel size of a photo.
Pixlr AI Image Resizer
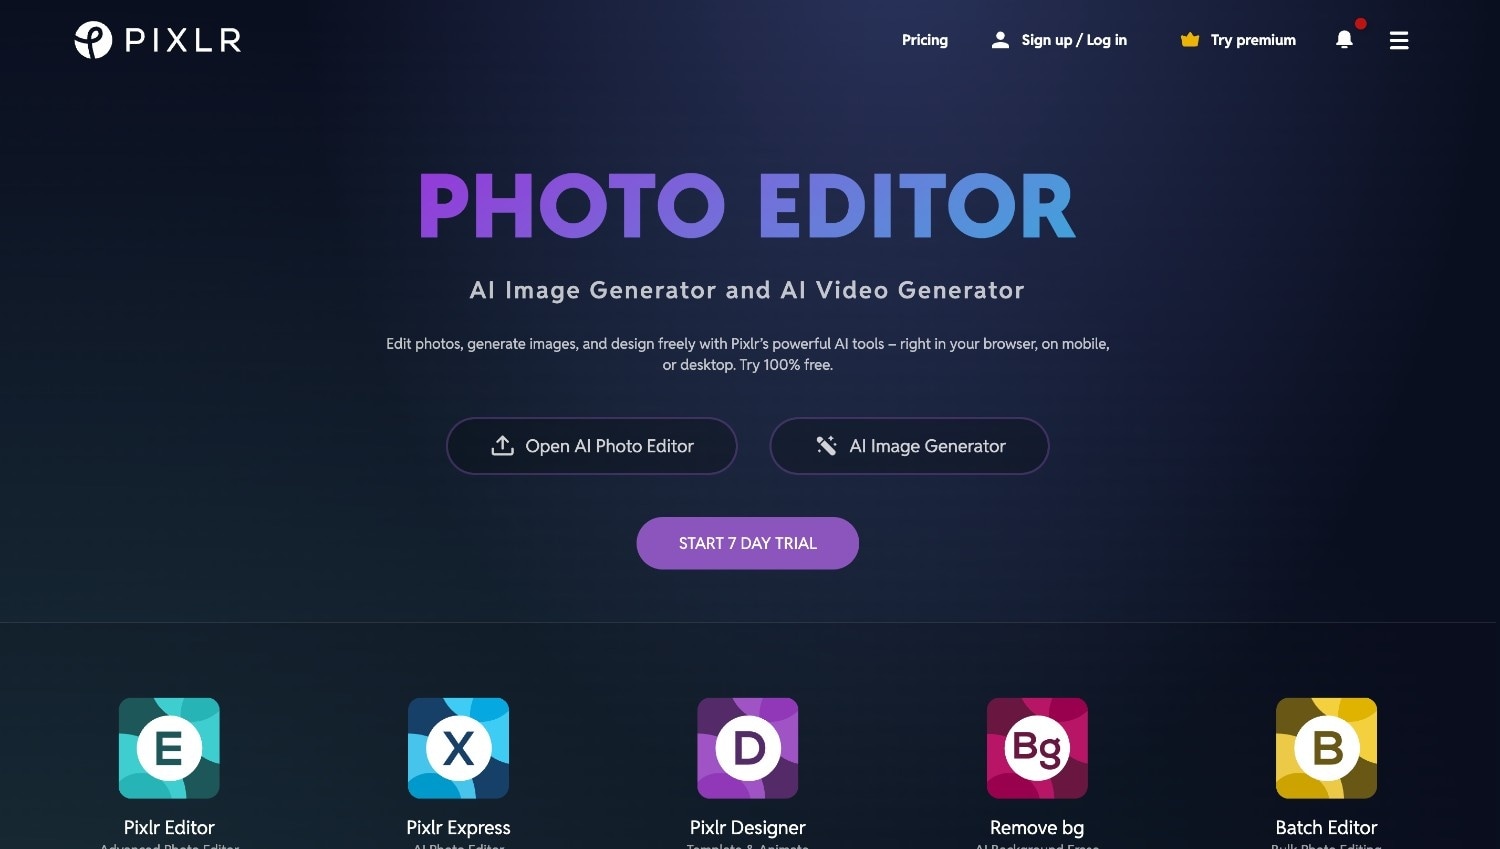
Pixler image resizing capabilities combine both flexibility with quality preservation. Its multiple AI generative AI tools like image generation, AI generative expand, object remover, and photo grid maker take the creativity out of you and streamline the work. Its 100s of filters let you add new touch to your image.
Key Features:
- AI generative fill to add content to chosen area
- Generative expand let you extend images beyond their original boundaries
- AI image upscaler
- Coprehensive filter library and reflect effects for creative transformations
How to Change the Pixel Size of a Photo with Pixlr AI:
Step 1: Visit the Pixlr website or download the tool, click “Open AI Photo Editor > Open Image” and upload the image.
Step 2: Now tap “Crop” from menu on left side and heads to the “Resize” option.
Step 3: Here you can change pixel size of photo in three ways: “Image Size” “Canvas Size” and “Smart Resize.”
Step 4: Change the width and height of image and change the canva size. You can also enable auto rotate option to automatically fir the image in “Smart resize” option. Click “Apply” to save changes and download the image by clicking “Save” option in lower right corner.
Fotor
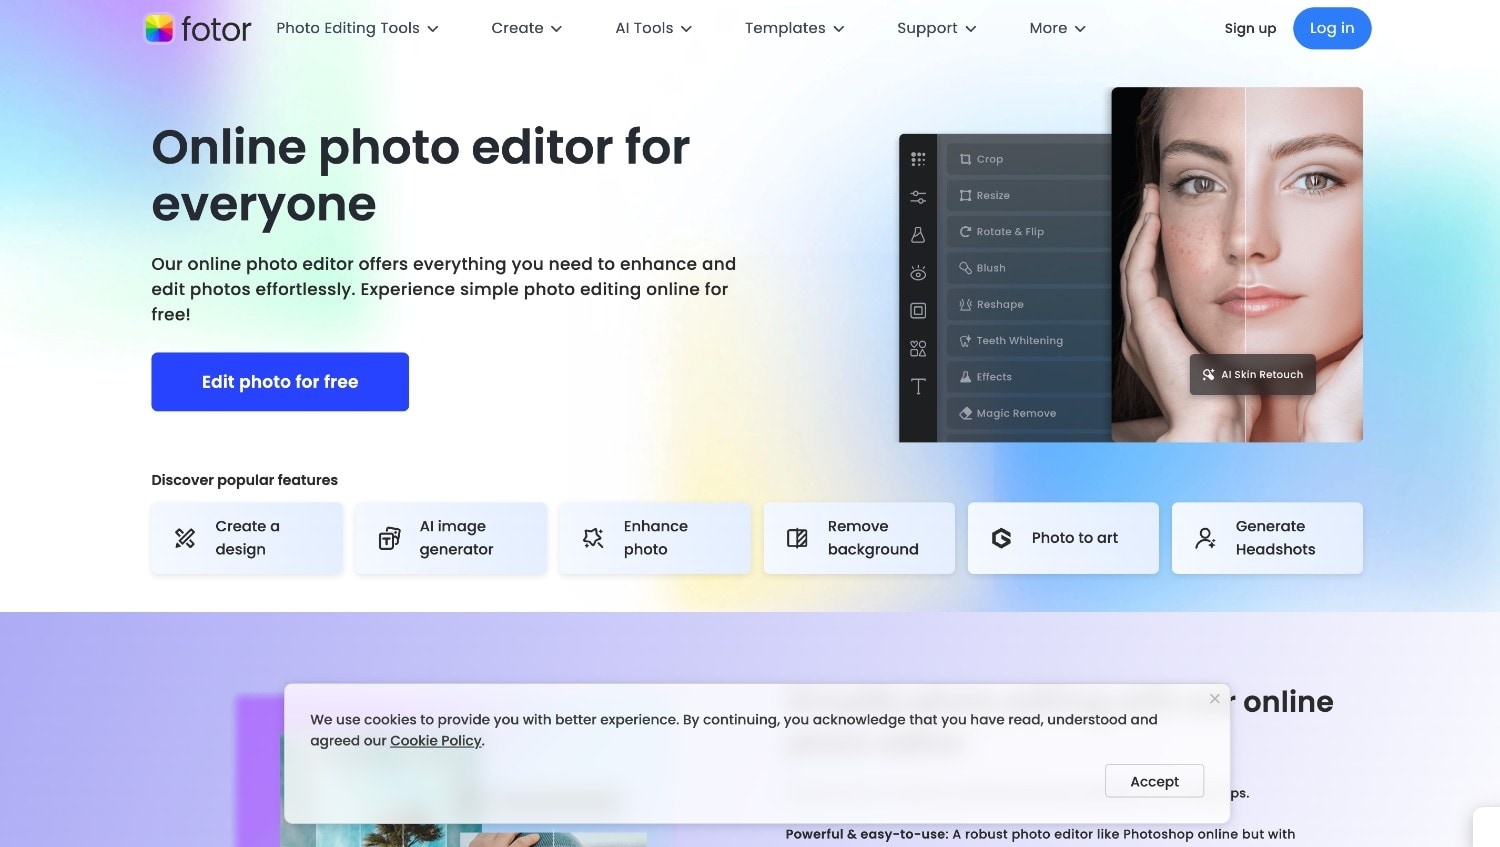
Fotor is an AI-powered photo editor tool that makes changing the pixel size of a photo easy. It offers intuitive image resizing with smart aspect ratio preservation to prevent distortion. Its user-friendly interface makes dimension adjustments easy, while the AI image enhancer maintains image quality even when the size is significantly changed.
Key Features:
- AI image enhancement that adjusts the lighting and unblurs images
- Image background remover
- A vast collection of filters and effects
- Batch photo editing capabilities
How to Change the Pixel Size of a Photo With Fotor:
Step 1: Go to the official Fotor website and click "Edit Photo for Free."
Step 2: You can drag an image from one of the templates or upload your own image by clicking "Open Image." Once the image is uploaded, go to the "Adjust" option in the tool menu on the left side.
Step 3: Click the "Resize" option to change the width and height of your image. You can also crop, rotate, or blur the image to suit your needs.
Step 4: Once the changes are done, tap "Download" and save your images in JPG or PNG formats.
Part 5: Best Professional Alternative Software - Wondershare UniConverter
Wondershare UniConverter is a powerful tool for editing images and videos on Mac and Windows. It helps you change the pixels of a photo and offers high-quality image results when downloaded. Moreover, you can add different background colors to the image and choose the aspect ratio to fit the perfect image for social media use.
What sets UniConverter apart from other online and offline tools is its batch image conversion feature. You can also compare the final image to your uploaded image and enhance the image quality with an AI enhancer.
Batch Image Editor
Key Features:
- An AI image enhancer to enhance image quality
- Batch Image conversion saves time and streamlines the work
- GIF maker, image converter, and AI image background remover
- Thumbnail maker and AI watermark remover
How to Change the Pixel Size of a Photo With Wondershare UniConverter
Step 1
Access the Wondershare UniConverter dashboard, select "Batch Image Editor," and upload the image from your desktop.
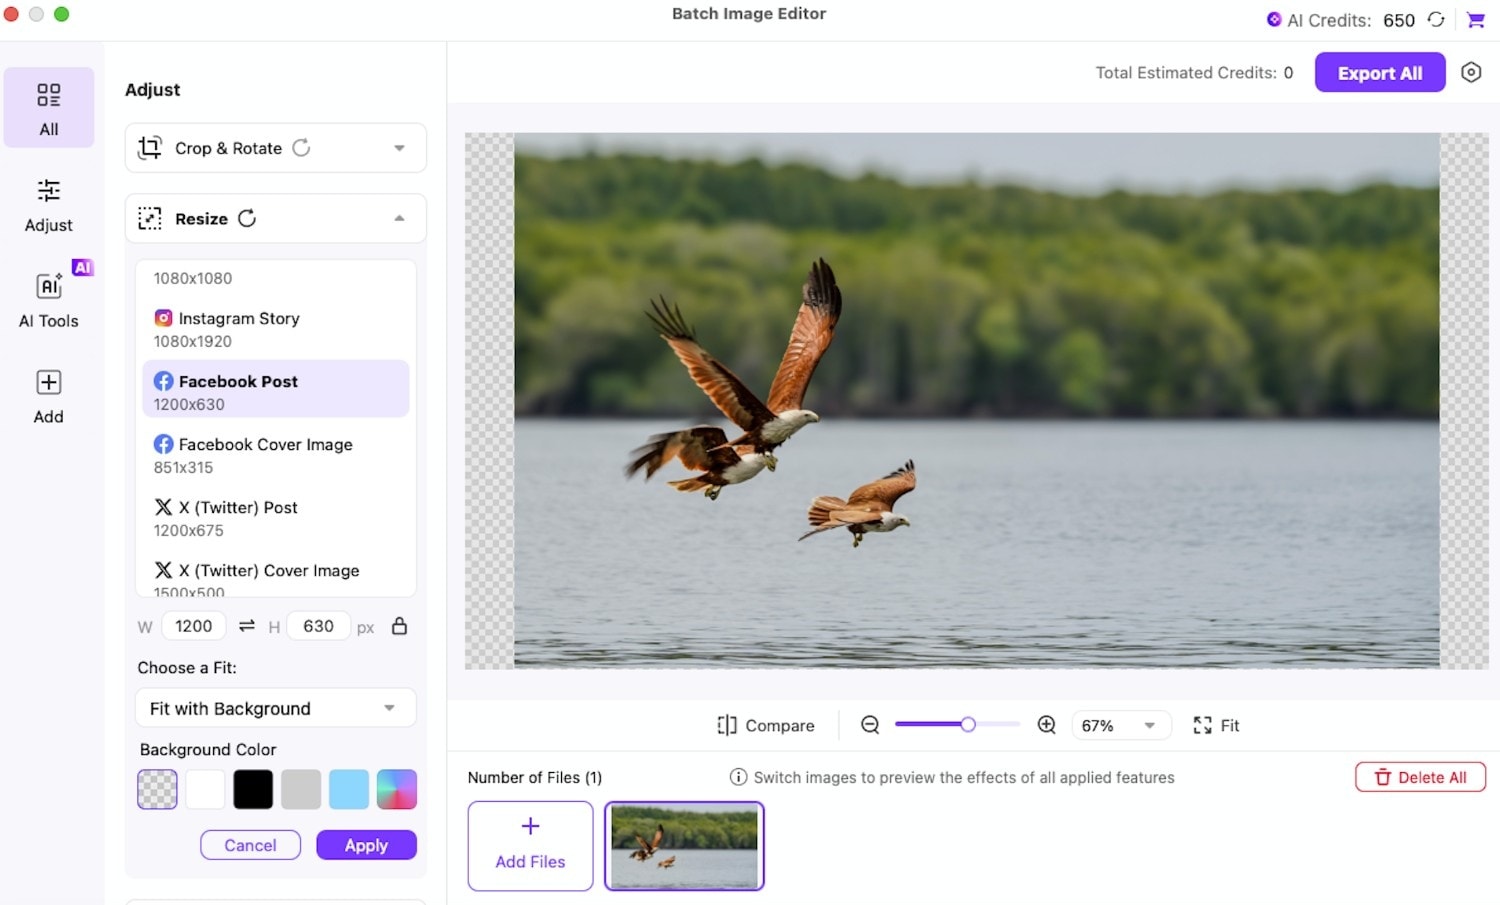
Step 2
Click the "Adjust" option on the left and then select "Resize" to change the image's dimensions. You can manually change the width and height or choose an aspect ratio to fit the image for social media.
Step 3
Once the changes are made, click the "Export all" option in the upper-right corner.
Conclusion
We've explored three effective methods of how to change the pixel size of a photo: online tools, AI-powered editors, and professional software. Each tool offers a straightforward solution for all your image pixel resizing needs, whether for social media posts, web optimization, or quality prints. These tools provide user-friendly ways to achieve sharp images and eliminate the need for technical knowledge.
Wondershare UniConverter stands out as the best professional option, thanks to its comprehensive image editing tools, which include batch processing, AI enhancement, and watermark editing capabilities. Try Wondershare UniConverter today and see how seamlessly it lets you change the pixel size of a photo and save time.
FAQs
What is the best app to resize photos?
Wondershare UniConverter is the best app for resizing photos. It allows you to resize more than one image at once quickly, rotate, crop, remove background, add an image and text as a watermark, and remove a watermark from your image. It counts among the best because it doesn't decrease image quality when downloading.
What is the best image format?
There's no single "best" image format. It depends on what you are using it for. For example, JPEGs are great for photos online, PNGs are used for graphics that require transparency, and TIFFs are ideal for high-quality printing.
How can I find the pixel size of a photo?
To find out your image's pixel size, right-click on the image file and select "Properties" on Windows or "Get Info" on Mac. You can see every detail of the image here.
What are the pixels of a JPEG?
A JPEG image can be up to 65,535 × 65,535 pixels, which is around 4 gigapixels. However, most devices and apps handle much smaller images due to memory and performance limits.
Not every tool is built to handle high-resolution resizing without sacrificing quality or aspect ratio. Some tools compress images to the point where they lose their professional touch, while others make the process complicated.
The solution? A reliable image 3000x3000 converter that maintains quality while giving you the exact dimensions you need. If you resized images in the past, you might have realized that not all converters are equal. Some are slow, others compromise image quality, and a few even make the process complex.
That’s where Image Converter comes in. With this tool, resizing images to 3000x3000 pixels is quick, easy, and painless. No more worrying about pixelation or losing image integrity.
Here, we will discuss which tool you need for resizing images without any trouble and how it enables you to produce perfect graphics for every platform. Let's jump into the finest methods for the task so you can have your pictures resized and ready.
In this article
Part 1: What is 3000*3000 Resolution?
Have you ever thought about why photographers choose these pixels for content creation? That’s because of high-quality pixel resolution. The 3000x3000 pixel corresponds to a display dimension of 3000 pixels horizontal and vertical. High-quality pictures will always need resolutions over regular HD 1920x1080 pixels.
When you need sharp, accurate photos without losing quality, resize the image to a total of 9 million pixels (3000 x 3000). This resolution provides a 1:1 aspect ratio, with equal width and height. It’s a versatile resolution, ideal for various uses, including profile images, product photos, digital art, and social media content, as it maintains the correct dimensions.
Understanding Aspect Ratio
The ratio of an image’s width and height is known as the aspect ratio, balancing both proportions. The aspect ratio of 1:1 corresponds to a 3000x3000 pixel square shape. Even on scaling, the image won’t change, preserving the quality and preventing distortion on different formats.
In the designing field, a 1:1 ratio maintains symmetry, and balance is created, which shows stability and neutrality. It is the best version for the following types of media:
- Social media posts: Platforms like Instagram optimize square images for their original interface.
- Product listings: This image version requires a resize image 3000x3000 for a clean, cohesive presentation.
- Fine art printing: Square image provides a modern and striking appearance.
Whenever designing or cropping an image, understand the aspect ratio to get accurate results.
Common Uses for 3000×3000 Resolution
Converting your standard HD into a 3000 x 3000 image isn’t challenging with the right image converter. It is specifically for some high-end applications that require sharp, clear, and formatted images, not a random technical parameter. You can achieve the desired dimensions in a compatible format within minutes.
Album Covers
Some major music services, iTunes, Spotify, and Amazon Music, require high-quality album covers, with a minimum resolution of 3000×3000 pixels. A cover of the right size not only fulfills platform criteria but also shows the artist's brand's professionalism.
Expert Printing
Resolution is closely tied to the final quality of prints. A 3000×3000 pixel image is a professional standard for printing, converting into a 10×10 inch print without losing clarity. This resolution ensures that every detail stands out, making the 3000x3000 image ideal for high-quality prints, fine art reproductions, promotional posters, and premium packaging designs.
E-commerce Product Photography
High-resolution, square-format images such as those at 3000 by 3000 pixels let customers enlarge and inspect photos without pixel damage. This not only improves the way people shop but also increases consumer confidence, which is vital for conversion.
Graphic Design and Virtual Portfolios
Creative experts, like visual artists and graphic designers, create portfolio pieces at high resolutions to guarantee their work looks professional. For both virtual displays and real exhibitions, a 3000×3000 file provides enough depth and flexibility, keeping visual impact constant across print, tablets, or big screens.
Social Media Marketing
Brands that prioritize visual quality understand the importance of future-proofing their content. Images with a 3000×3000 pixel resolution maintain sharpness across modern ultra-HD devices and continue to look great as screen technology evolves. These high-resolution images are perfect for organic publications, paid promotions, and visual storytelling projects, ensuring that marketing campaigns appear professional and polished across all platforms.
Part 2: Best Way to Convert Image to 3000 x 3000
When it comes to resizing images professionally without quality loss, Wondershare UniConverter stands out as a top solution. Here’s why you should choose Wondershare UniConverter 3000x3000 image converter:
Precise Image Resizing
Without losing quality, the 3000x3000 converter resizes your image from the standard size to 3000x3000 pixels resolution. One of the best solutions for creating social media content is to use an image converter to maintain high resolution even after resizing, preventing blurry images.
Batch Resizing
Resizing multiple images has become easy through the batch resizing feature. You just upload the image, resize it to 3000x3000 pixels, and save it to your folder. No need to select photos one by one, instead choose multiple images at once.
AI Enhancement
Want to boost your image clarity? Uniconverter does the job for you. Turn on the AI enhancement feature for a clear, sharp photo during resizing. There’s no need to go to another AI software, however, you get everything in this single software.
Supports Multiple Formats
Uniconverter supports multiple formats, including JPG, PNG, TIFF, BMP, and WebP. So, choose your photo, resize it, and download it in your preferred type.
Easy to Use Interface
With Uniconverter, resizing is a straightforward process, as a user with zero knowledge can also resize or adjust the photo.
Completely Secure
The image resizing occurs on your local device, there’s no involvement of external servers. Thus, your data stays safe and secure.
Batch Image Editor
Step-by-Step Guide to Resize an Image to 3000 x 3000 Using UniConverter
With Uniconverter, you can resize the image to 3000x3000 with a single click. Check out this step-by-step guide for image size conversion using Wondershare UniConverter:
Step 1
First, launch Wondershare UniConverter from the website and download and install it. Once the installation is complete, go to the converter tool. Make sure you’ve downloaded the latest version. Additionally, check for version updates from the DMP files downloaded from the website. If you don’t find updates, use data from the .com site to test the new version, and consider using the .net channel as a paid search channel for promotion. Keep in mind that updates may be delayed when downloading files from the .net address.
Step 2
Click on ‘Batch Image Editor’ under the section “Hot” on the homepage interface of the Uniconverter.
Step 3
Click on ‘Add a File’ to upload the image or drag the desired file onto the Uniconverter software’s interface.
Step 4
Choose a social media platform or Custom Size and set Width: 3000px and Height: 3000px to resize the desired image.
Step 5
When you’ve adjusted the image size, begin the conversion and click ‘Export All’ to download your resized image.
Part 3: How to Resize an Image to 3000x3000 Using Online Tools
Online tools are an alternative to offline software. Here are two reliable options to convert image to 3000 x 3000:
1. Pixlr
Without the requirement for complex software installations, photo editor Pixlr offers professional-quality resizing functions. You can change image dimensions and specify custom values like 3000×3000 pixels.
When rescaling photos, Pixlr lets you specify output format, quality settings, and aspect ratio. Whether enlarging photos or getting art ready for digital portfolios, print, and e-commerce listings, Pixlr offers non-destructive editing.
Key Features:
- Free and easy-to-use image editor
- Custom dimension resizing
- Advanced filters and effects
- Supports multiple file formats
- AI background removal
- Layer support
Steps:
1. Open Pixlr and click Open Image.
2. Upload your file.
3. Select Arrange > Resize Image.
4. Enter 3000 pixels for both the width and height.
5. Click Save to download your resized image.
2. Fotor
Fotor offers a free, easy-to-use image resizer 3000x3000. By focusing on quality, Fotor stands out from the rest. Even after the picture is resized, its backend processing uses automatic optimization methods to maintain contrast, sharpness, and color accuracy. This makes Fotor valuable for digital marketing materials, product photography for online retailers, and social media content creation applications where visual clarity is non-negotiable.
Furthermore, Fotor's batch processing features, image resizer 3000 x 3000, let you resize images in one workflow, benefiting businesses and designers handling projects.
Key Features:
- Photo resizing
- Batch resizing
- Format conversion options
- Built-in photo enhancement tools
- Free basic plan
Steps:
1. Visit Fotor's Resize Tool.
2. Choose Edit a Photo.
3. Upload your image and select Resize.
4. Set dimensions to 3000x3000 pixels.
5. Click Download to save the resized image.
Part 4: Best Practices for Image Resizing
Now that you know how to resize the image to 3000x3000 for the highest quality, keep these key points in mind:
Maintaining Image Quality
Maintaining image quality is easy through the right tools. Use professional tools instead of basic editors that reduce image sharpness. Here are the features that don't disturb resolution:
- Use AI Enhancer: If your image loses the highest resolution, you can restore image details using UniConverter’s AI enhancer.
- Adjust Compression Setting: Always resize proportionally if possible. To avoid eliminating the image’s integrity, adjust the setting to the lowest level.
- Upscaling: If your original image is too small, use AI enhancement (like UniConverter) to minimize blurriness.
Conclusion
Resizing the image to 3000 x 3000 pixel resolution isn’t challenging anymore. Using reliable tools such as Wondershare UniConverter helps you produce professional images rapidly and effectively. Whether you choose a robust offline tool like Wondershare UniConverter or a fast online alternative like Fotor or Pixlr, knowing the correct resizing methods guarantees your pictures hold symmetry, sharpness, and perfection.
For those who need regular, high-quality conversions, the most powerful and flexible 3000x3000 image resizer is UniConverter. Wondershare UniConverter stands out as the top choice, offering a perfect blend of speed, batch processing, AI enhancement, and superior output quality.
Batch Image Editor
FAQs
1. How can I maintain quality while resizing an image to 3000x3000 pixels?
Choosing the right tool is necessary to resize the image to 3000x3000 and maintain quality simultaneously. Professional software like Wondershare Uniconverter produces high-resolution images. With Wondershare UniConverter, you can automatically improve images and keep resolution constant during resizing.
2. Can I convert small-sized images to 3000 x 3000 pixels?
Yes, you can convert small-sized images, but to avoid blurriness or pixelation, it is best to use an AI enhancement software such as UniConverter's AI Image Enhancer.
3. What is the best format for a 3000x3000 pixel resolution?
Different software offers distinct file formats. JPEG is advised for web applications while choosing PNG for transparent backgrounds. In addition, you also get high-quality prints in the TIFF file type.
4. Can free online software help you scale pictures to 3000 by 3000 pixels?
Yes, online software provides features to convert to 3000x3000 image into a desired dimension. Fotor and Pixlr allow you to resize images for free, but their functionality could be restricted due to some paid advanced features.
5. Does UniConverter allow batch resizing to 3000x3000 pixels?
Yes, it does. In a single click, you have to select the batch resizing feature, choose the custom size 3000x3000 as the desired dimension, and upload several files.

