
High-quality recordings start with clear and dry sound. Reverb is the echoey "tail" you hear when sound bounces around a room. It differs from a distinct echo, which is a delayed repeat of sound. Too much reverb makes voices sound muffled and distant, reducing the overall sound quality. This is the most common type of headache experienced during home recordings, studio sessions, Zoom calls, or podcast recordings.
Learning how to remove reverb from audio is key to clear and crisp voiceovers and interviews. In this guide, we'll define the difference between reverb and echo, explain what causes them, and provide troubleshooting tips using software tools to ensure your recordings sound clean and professional.
In this article
Part 1. What Causes Reverb in Audio Recordings?
Reverb in audio recordings happens when sound bounces around and echoes back. Even recording in a regular room at home can create these reflections. Here's what affects it:
- Room size and space: Larger, emptier rooms give the sound more space to bounce around before returning to you. Rooms with high ceilings and long distances create longer reverb tails because the sound waves continue to bounce off the walls before fading away.
- Hard vs soft surfaces: Hard surfaces like bare walls, floors, and ceilings (especially glass, wood, or concrete) bounce almost all the sound right back at you. However, softer materials, such as acoustic foam, heavy curtains, or carpet, absorb sound and reduce echo. That's why a tiled bathroom or empty office sounds so "ringy" compared to a room packed with furniture and soft materials.
- Where you put your mic: When your microphone is far from the person speaking, it picks up significantly more of the bounced-around sound compared to the direct voice. Distance allows more reverb to sneak into your recording. The closer you get to the mic, the more you capture the direct sound and the less of the room echo.
This issue is particularly relevant for live recordings, such as interviews or webinars. When someone's in a room that hasn't been treated for sound, the whole conversation can end up sounding boomy or hollow. Too much reverb makes speech muddy and harder to understand because it smears everything together.
Removing reverb from audio is important because it directly affects the clarity of your voice. Clean, dry audio helps your listeners focus on what you're saying rather than struggling to make out the words through echo.
Part 2: 3 Common Signs Your Audio Is Drowned in Reverb
Before learning how to remove reverb from audio, first listen to these common signs of too much echo:
- The "Bathroom" or "Cave" Voice Effect: If your voice sounds distant, hollow, or as if you're recording in a tiled room, that's reverb. The sound will hang in the air too long, as if there is an invisible echo behind every word.
- Lost Consonants and Muffled Mids: Reverbs can blur sharp sounds, such as "s," "t," and "k." This makes your speech hard to follow. If the words sound muddy in the middle, reverb is likely the problem.
- Room Tone That Doesn't Match the Visual Space: Imagine you're filming in a small home office, but your voice sounds like it's coming from a large hall. This mismatch is the sign of reverb.
If you notice any of these signs in your audio, do not worry. In the next section, we have a list of the best tools to remove reverb from audio.
Part 3. How to Remove Reverb from Audio with One Click
When looking for an easy way to learn how to remove reverb from audio, Wondershare UniConverter's Noise Remover is a handy go-to solution. This AI-powered tool doesn't just tackle background noise. It effectively reduces reverb, echo, and hissing sounds from your recordings. What makes it stand out is its one-click simplicity and batch processing capability, allowing you to clean multiple audio files simultaneously without the hassle of uploading them to online tools.
Key Features
- The AI noise remover automatically removes reverb, echo, static, and various background noises using advanced AI technology.
- Its vocal remover separates vocals from instrumental tracks for karaoke or remixing purposes.
- Process multiple audio and video files simultaneously for maximum efficiency.
- Comprehensive video, audio, and image editing tools offering a watermark remover, a subtitle generator, and more.

Best AI Echo/Reverb Remover
How to do AI-based reverb removal Using UniConverter
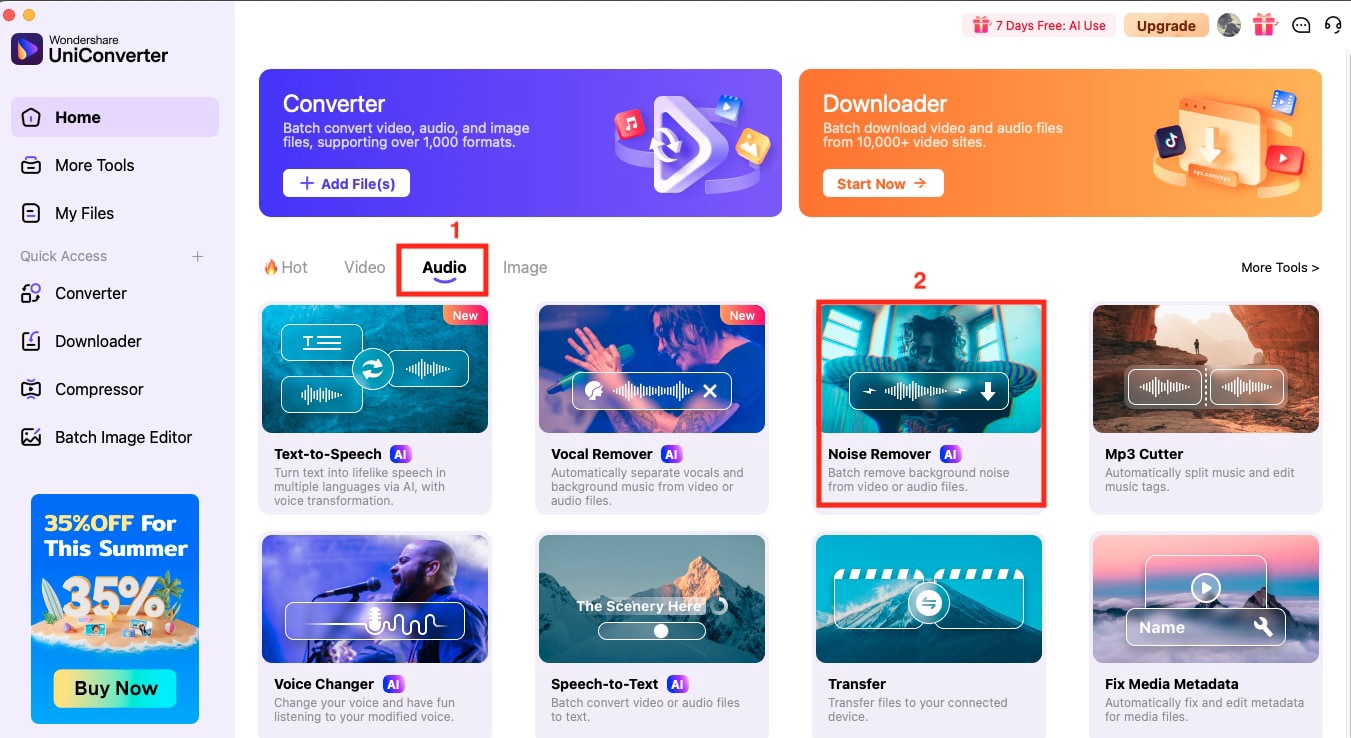
Step 1: When you open the app, head to “Audio” and click “Noise Remover.”
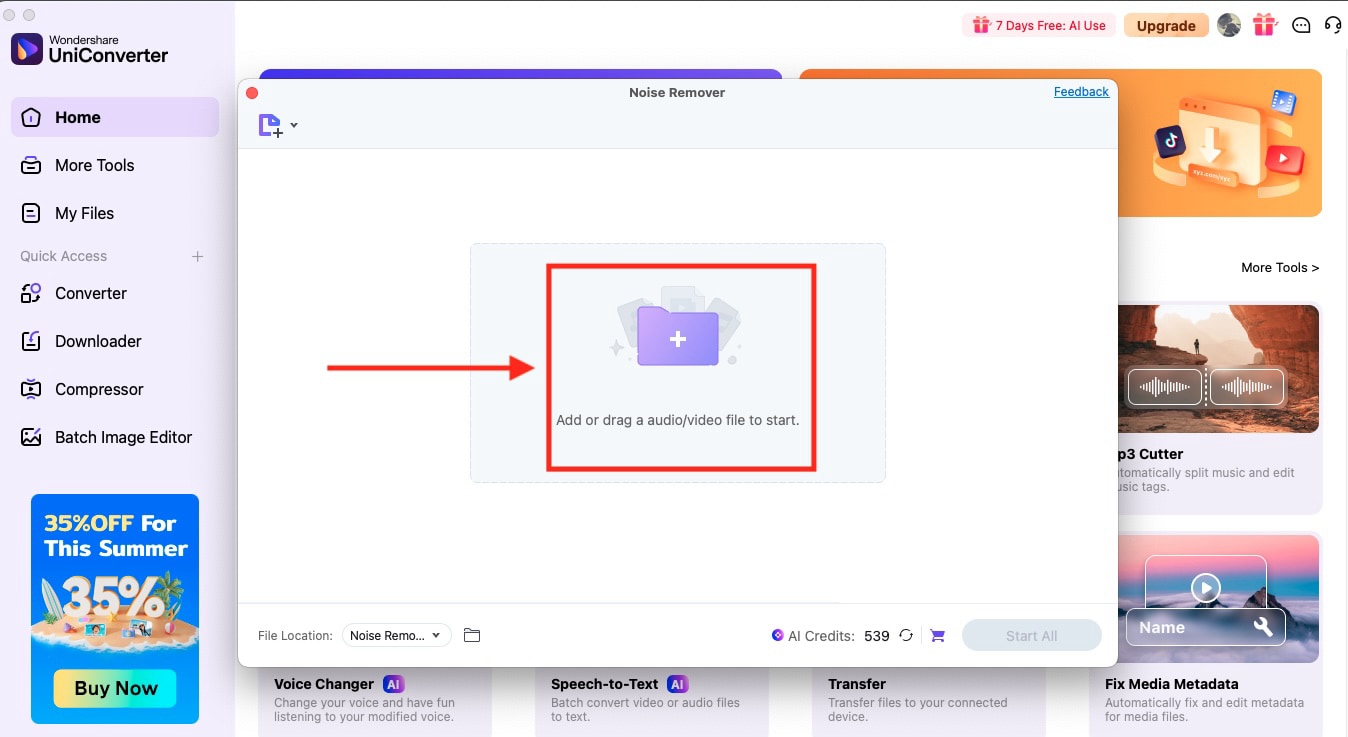
Step 2: Click the “+” sign to upload an audio file or simply drag and drop from your device.
Step 3: After uploading the audio, click the “Start All” button to remove reverb. It will then automatically save to your system.

Part 4. Other Tools to Remove Reverb from Audio
Besides Wondershare UniConverter, here are some other options to help you learn how to remove reverb from audio.
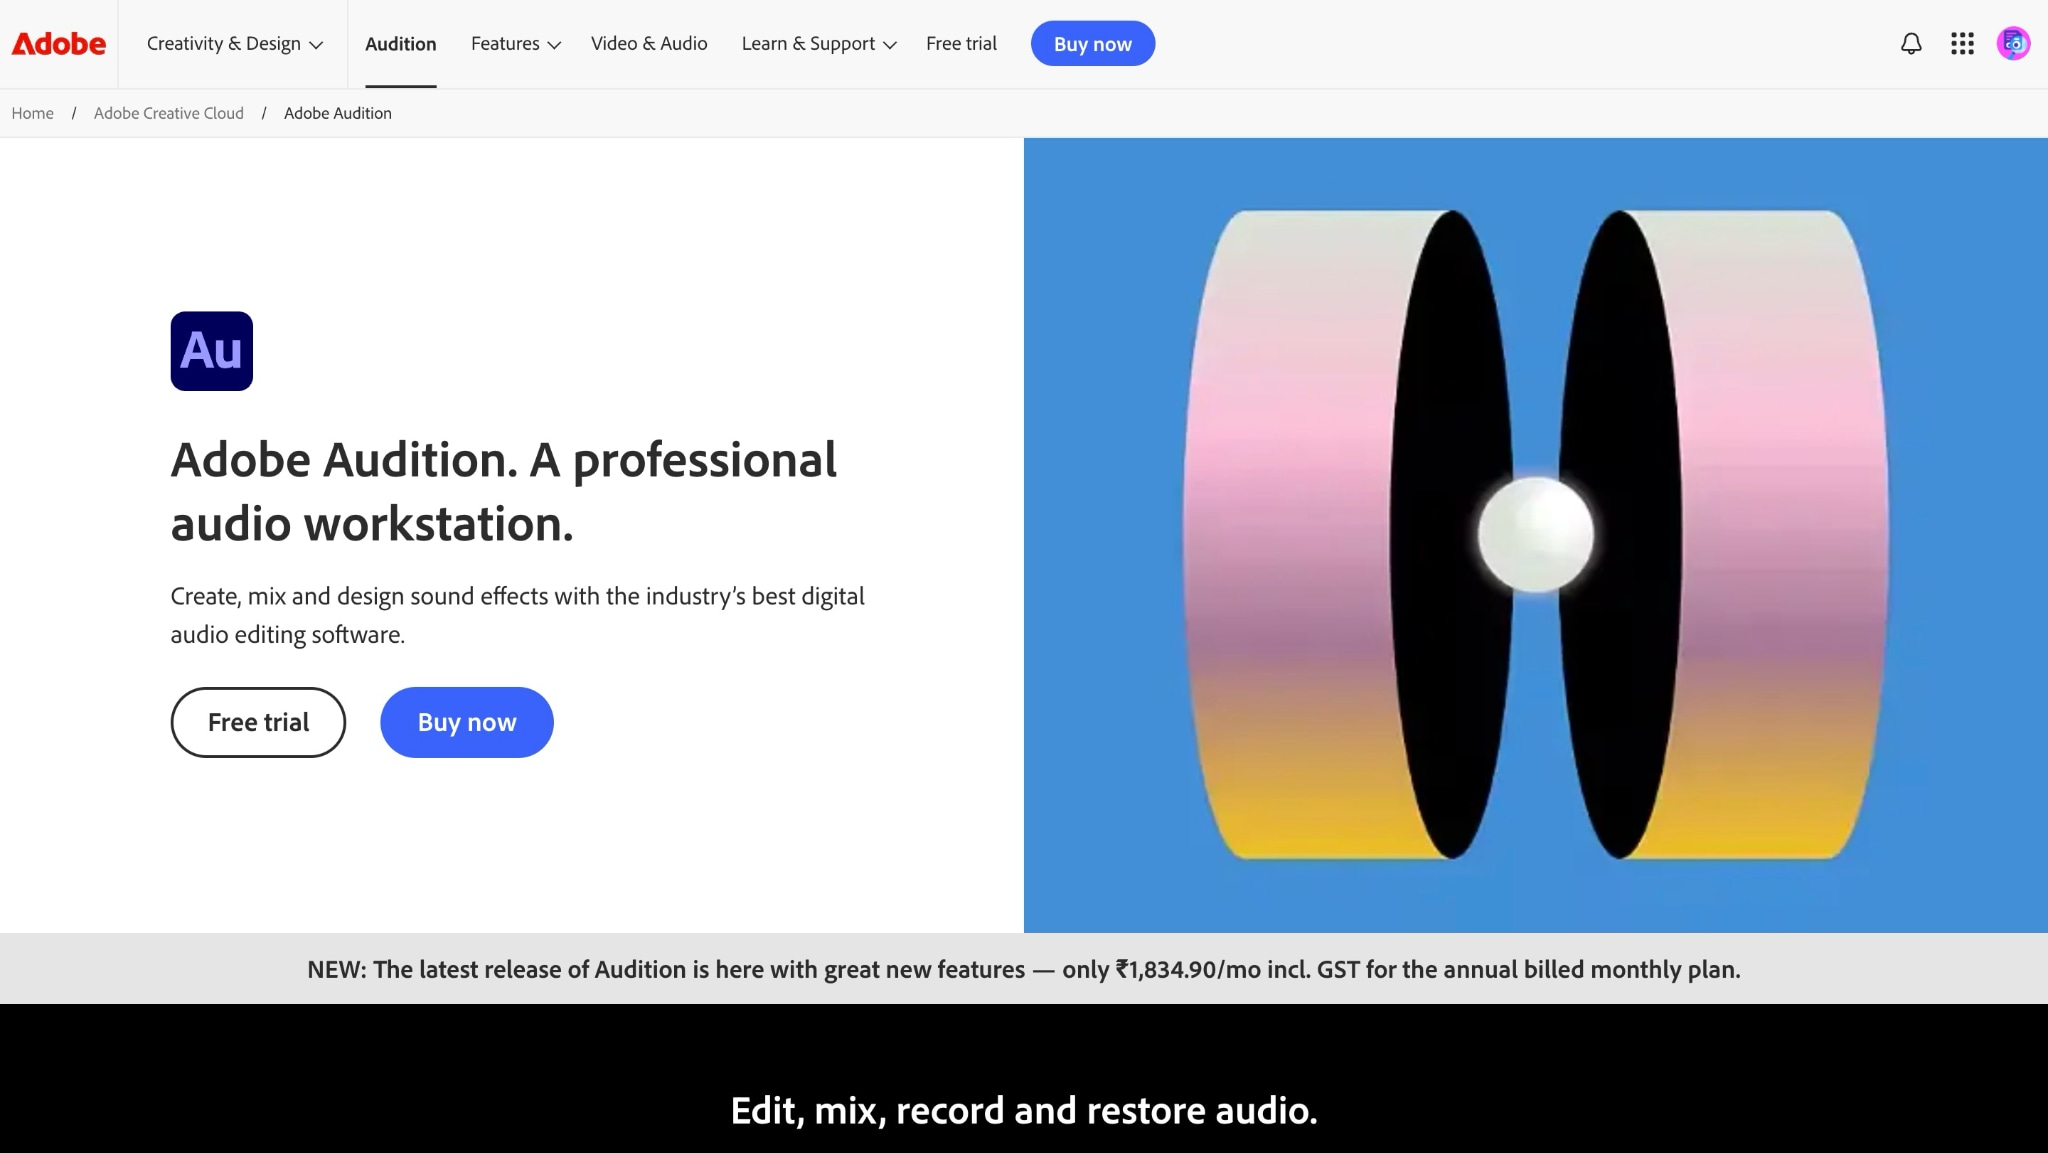
1. Adobe Audition
Adobe Audition is a professional audio workstation that can remove reverb from audio using its comprehensive restoration tools and spectral frequency display. If you need to clean up recordings, it offers multitrack editing, noise reduction, and precision audio repair features. The software is ideal for podcast creation, sound mixing, and seamless integration with Adobe Premiere Pro, making it suitable for content creators who require professional-grade audio editing capabilities.
How to Remove Reverb From Audio Using Adobe Audition
By following these simple steps, you can get professional-grade results:
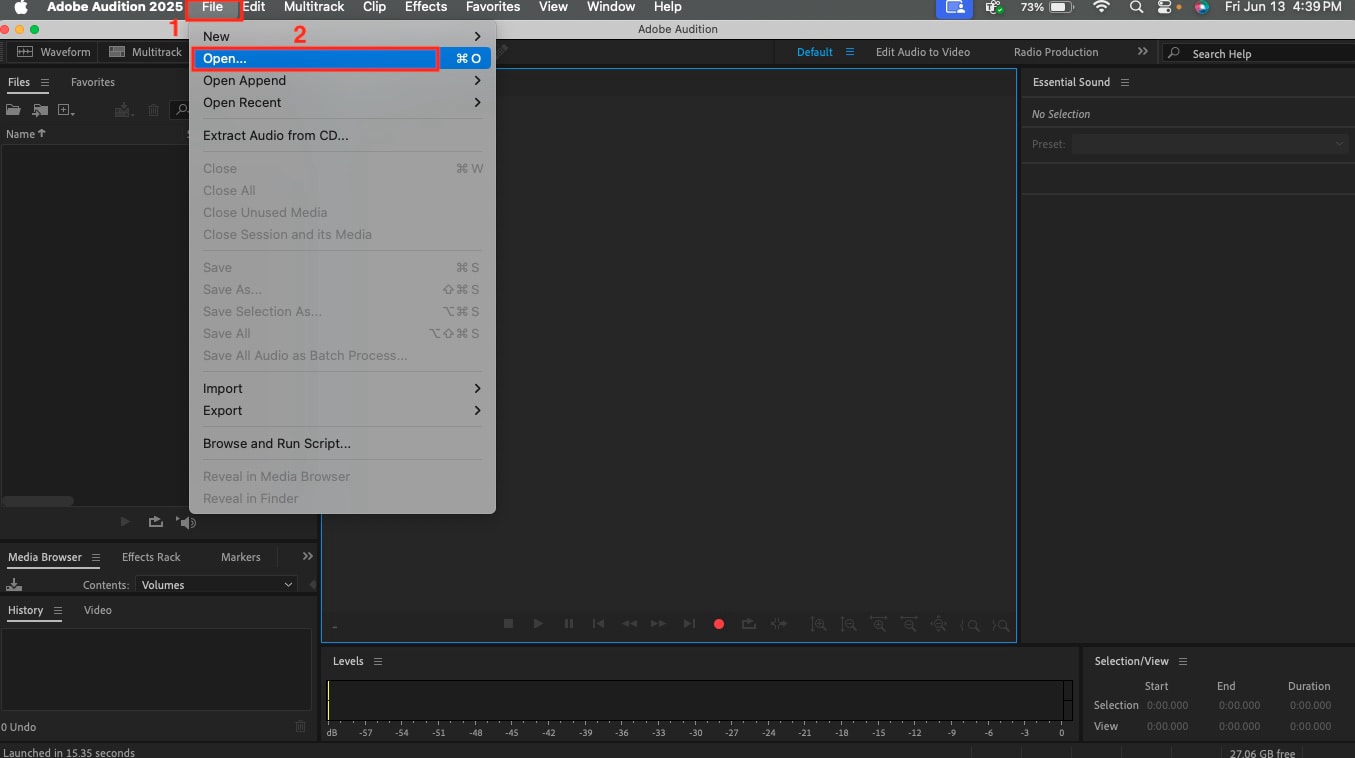
Step 1: On the homepage, go to “File > Open>” to upload the file.
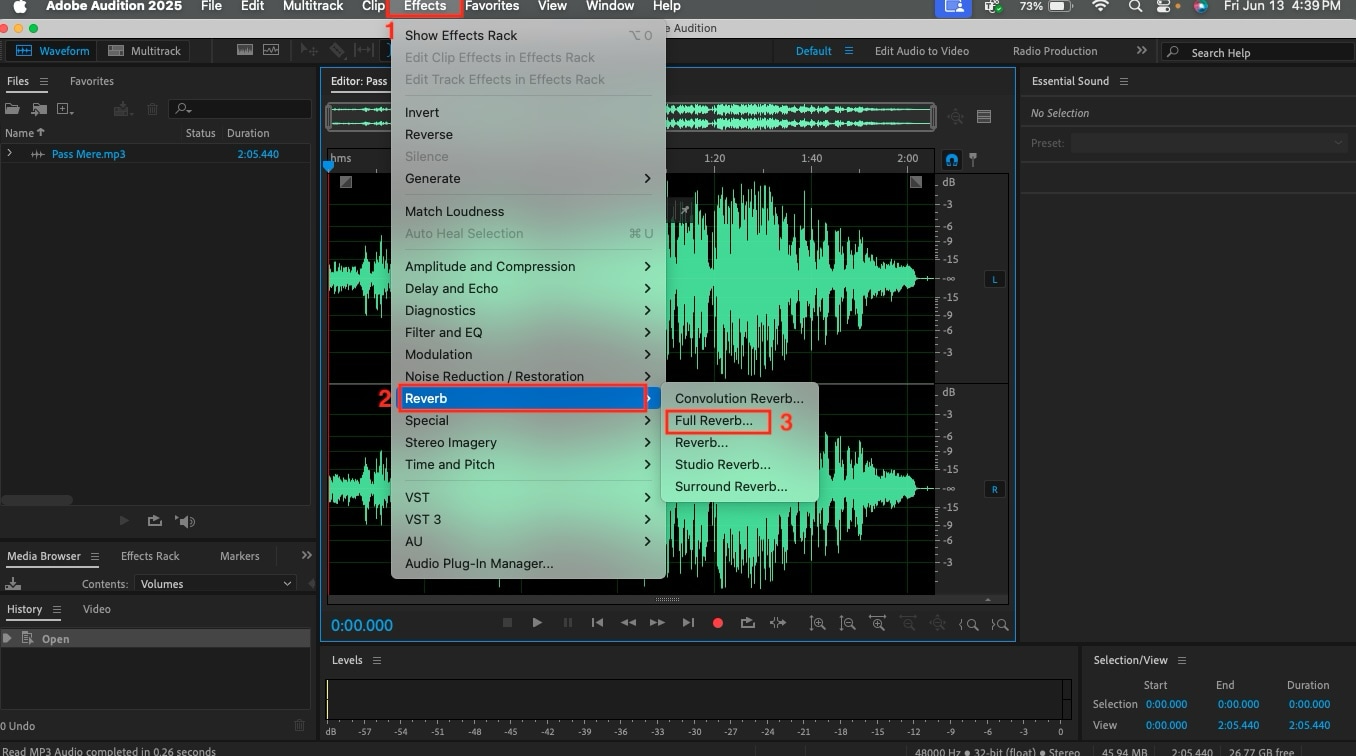
Step 2: After uploading the file, navigate to “Effects > Reverb > Full reverb.”
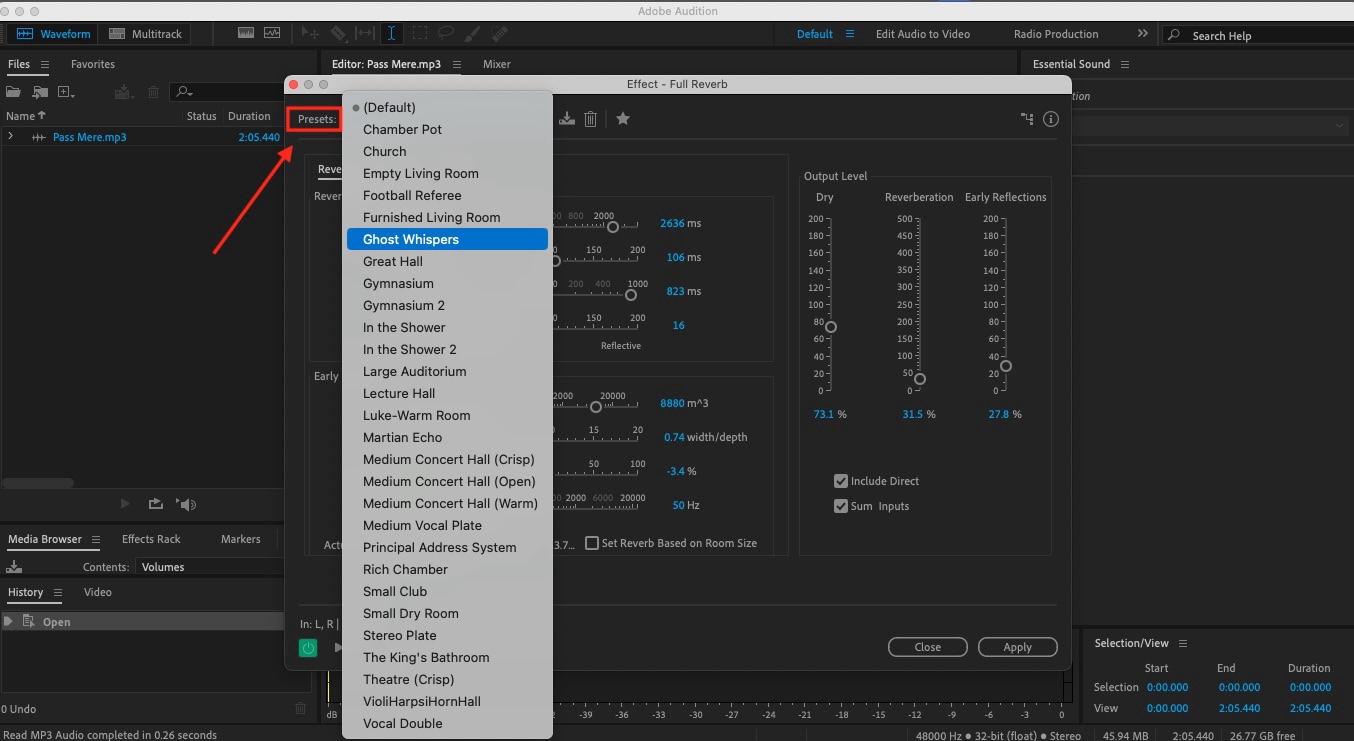
Step 3: You will see an “Effects” tab, where you click on “Presets” and choose your space type, which corresponds to where you recorded the audio. You can select from empty living rooms, great halls, a club, the king’s bathroom, and many more.
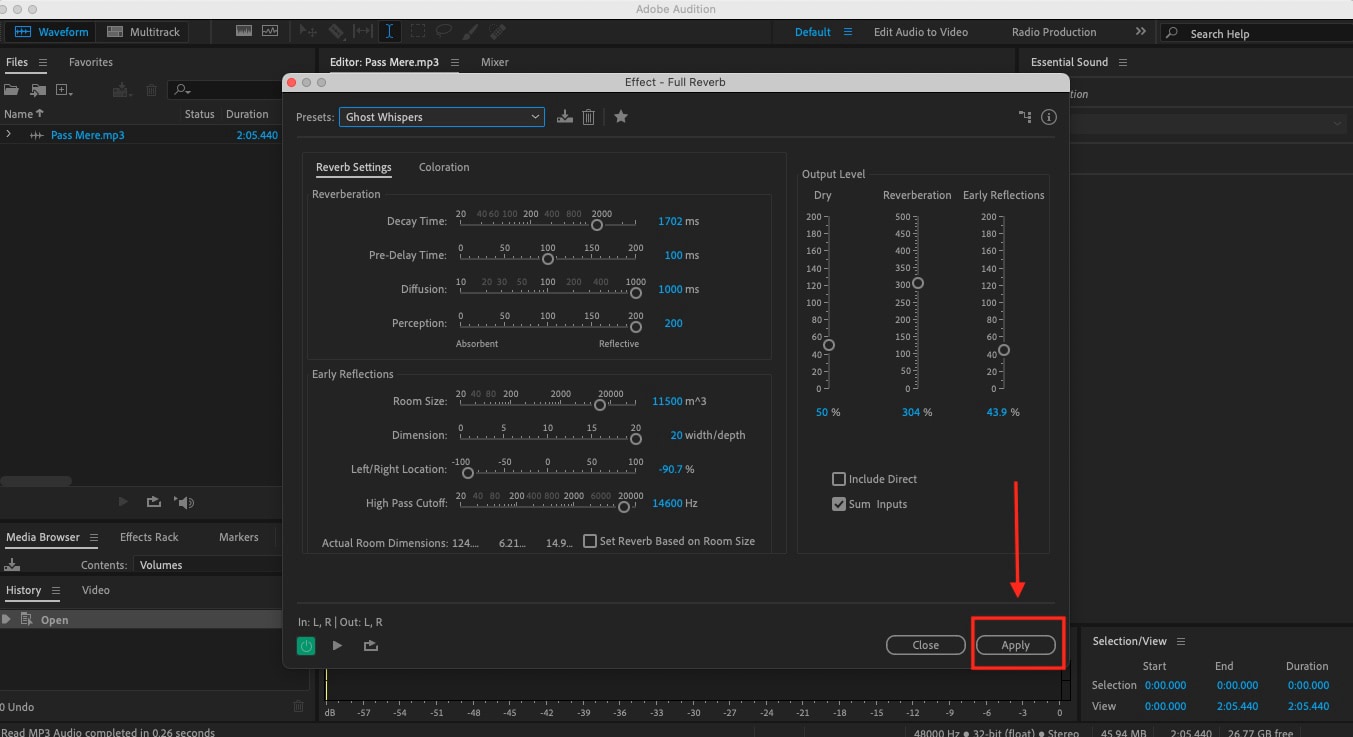
Step 4: Adjust the reverb settings and click “Apply.”
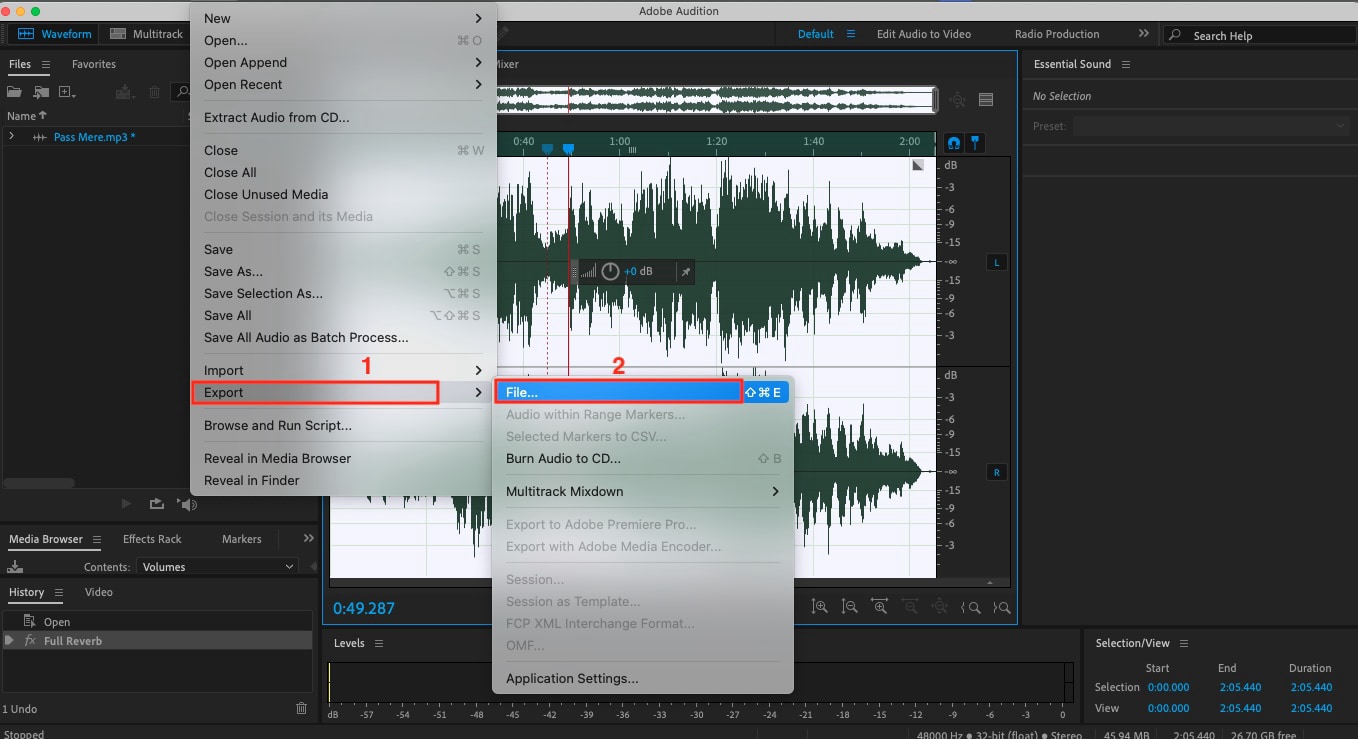
Step 5: Head to the “File” tab. Then, click on “Export > File” to export the clear audio.
2. Audacity
Audacity is a free, open-source audio editor that is perfect for anyone wanting to remove reverb from audio. You can easily remove vocals from audio, adjust pitch and tempo, apply noise reduction, or even layer multiple tracks for mixing. With features like real-time effects, batch processing, and support for numerous plugins, Audacity makes audio editing straightforward and accessible for both beginners and professionals.

How to Remove Reverb From Audio Using Audacity
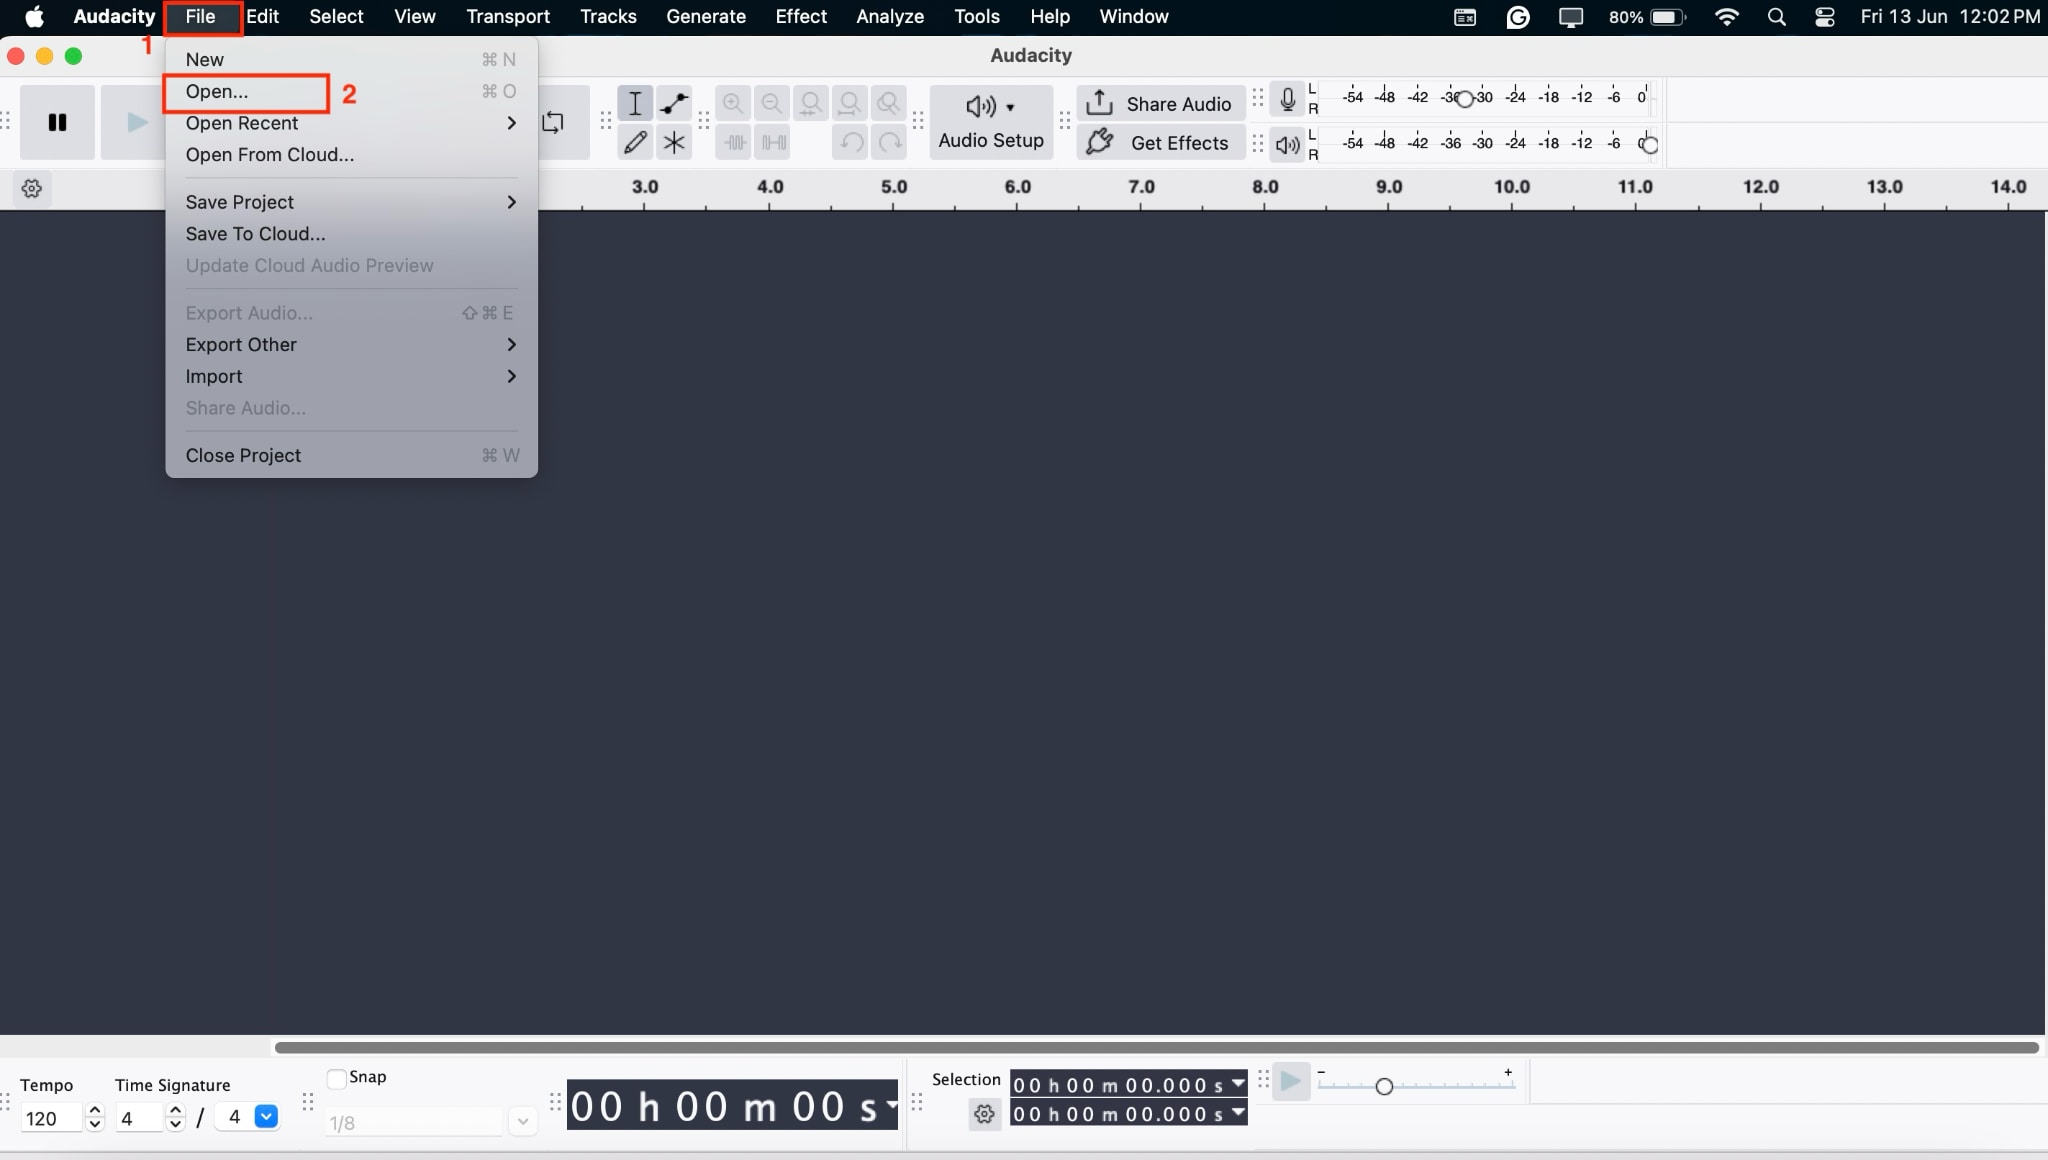
Step 1: Install the Audacity app. On the homepage, navigate to "File > Open" and upload the audio file.
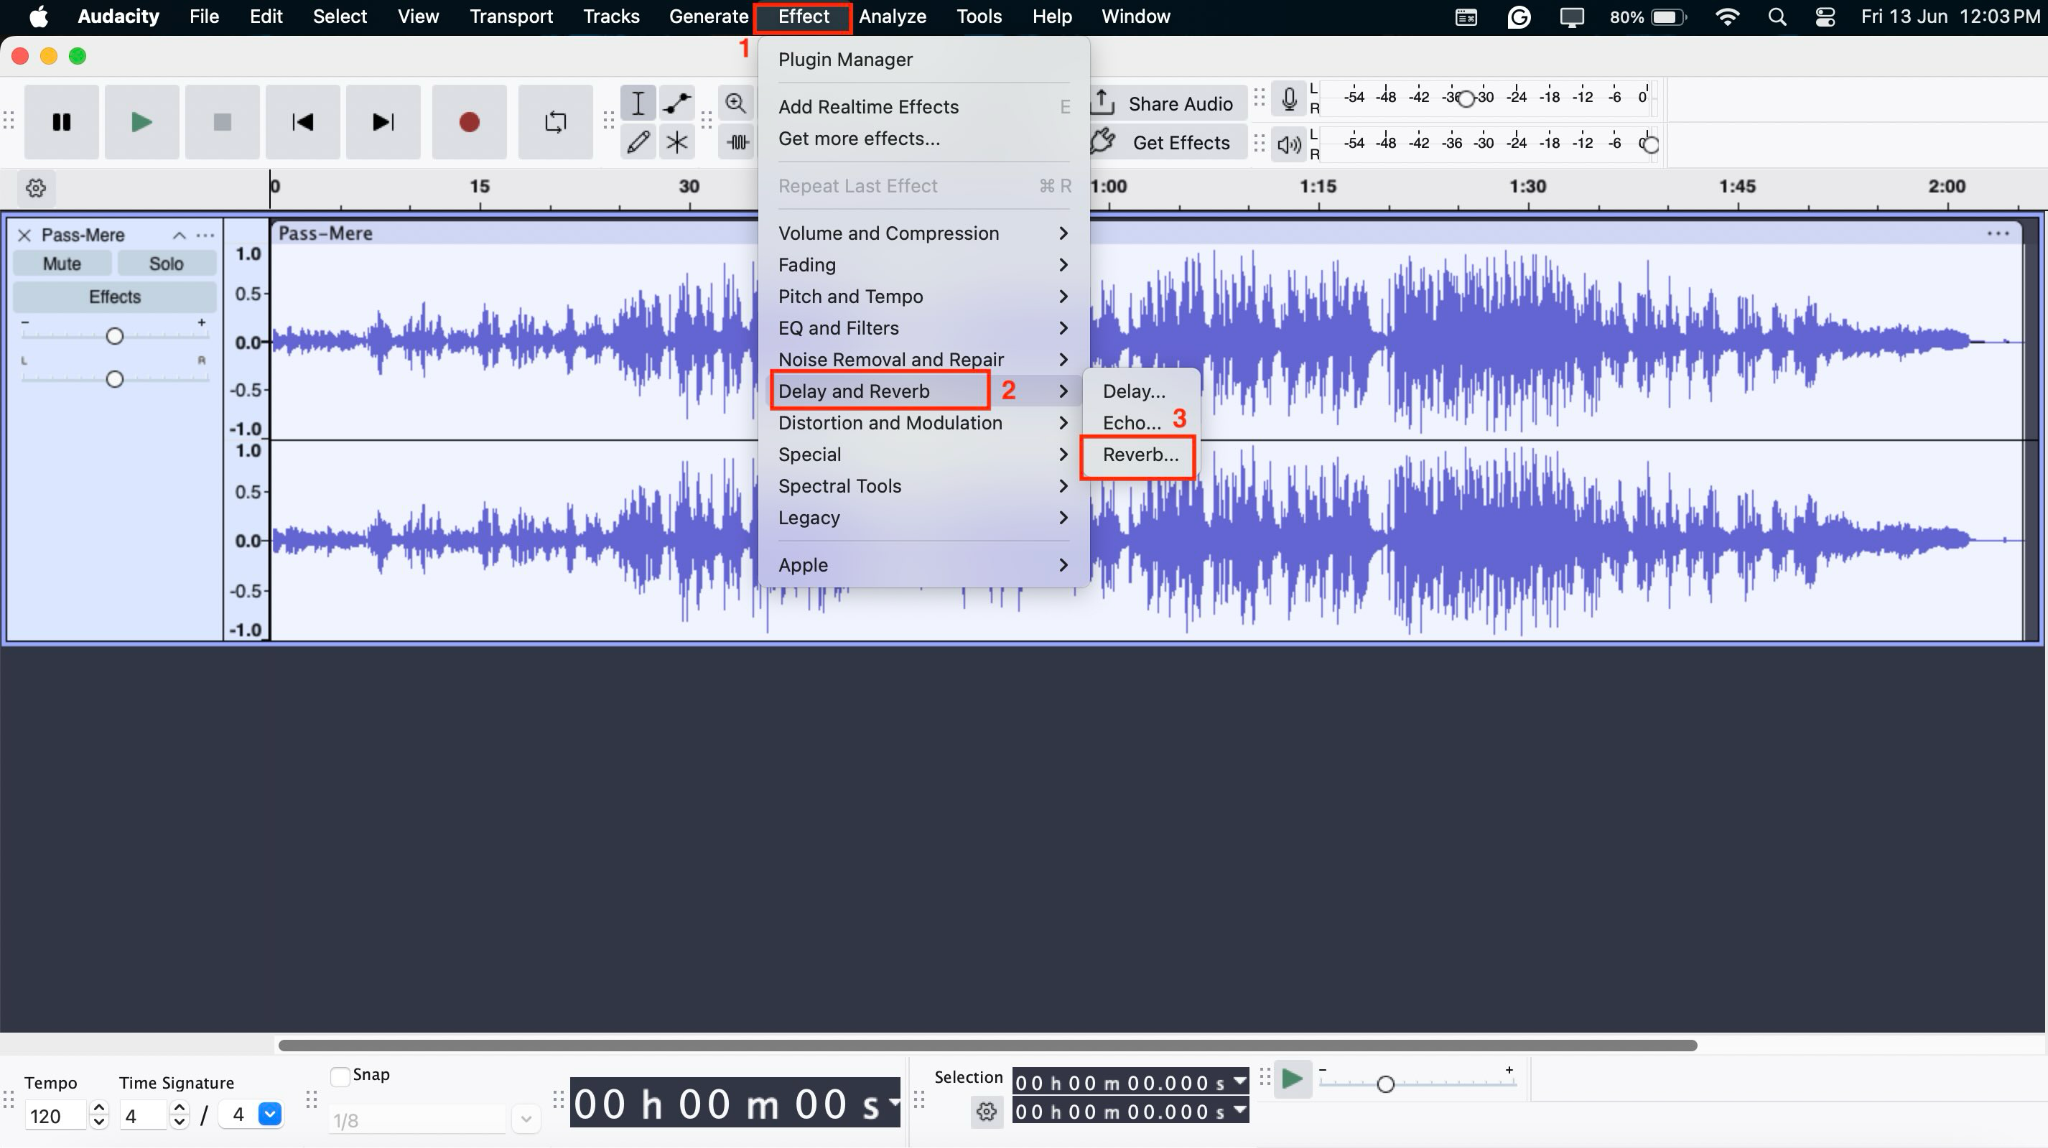
Step 2: Select a specific part of the audio or select all, then proceed to "Effects > Delay and Reverb > Reverb."
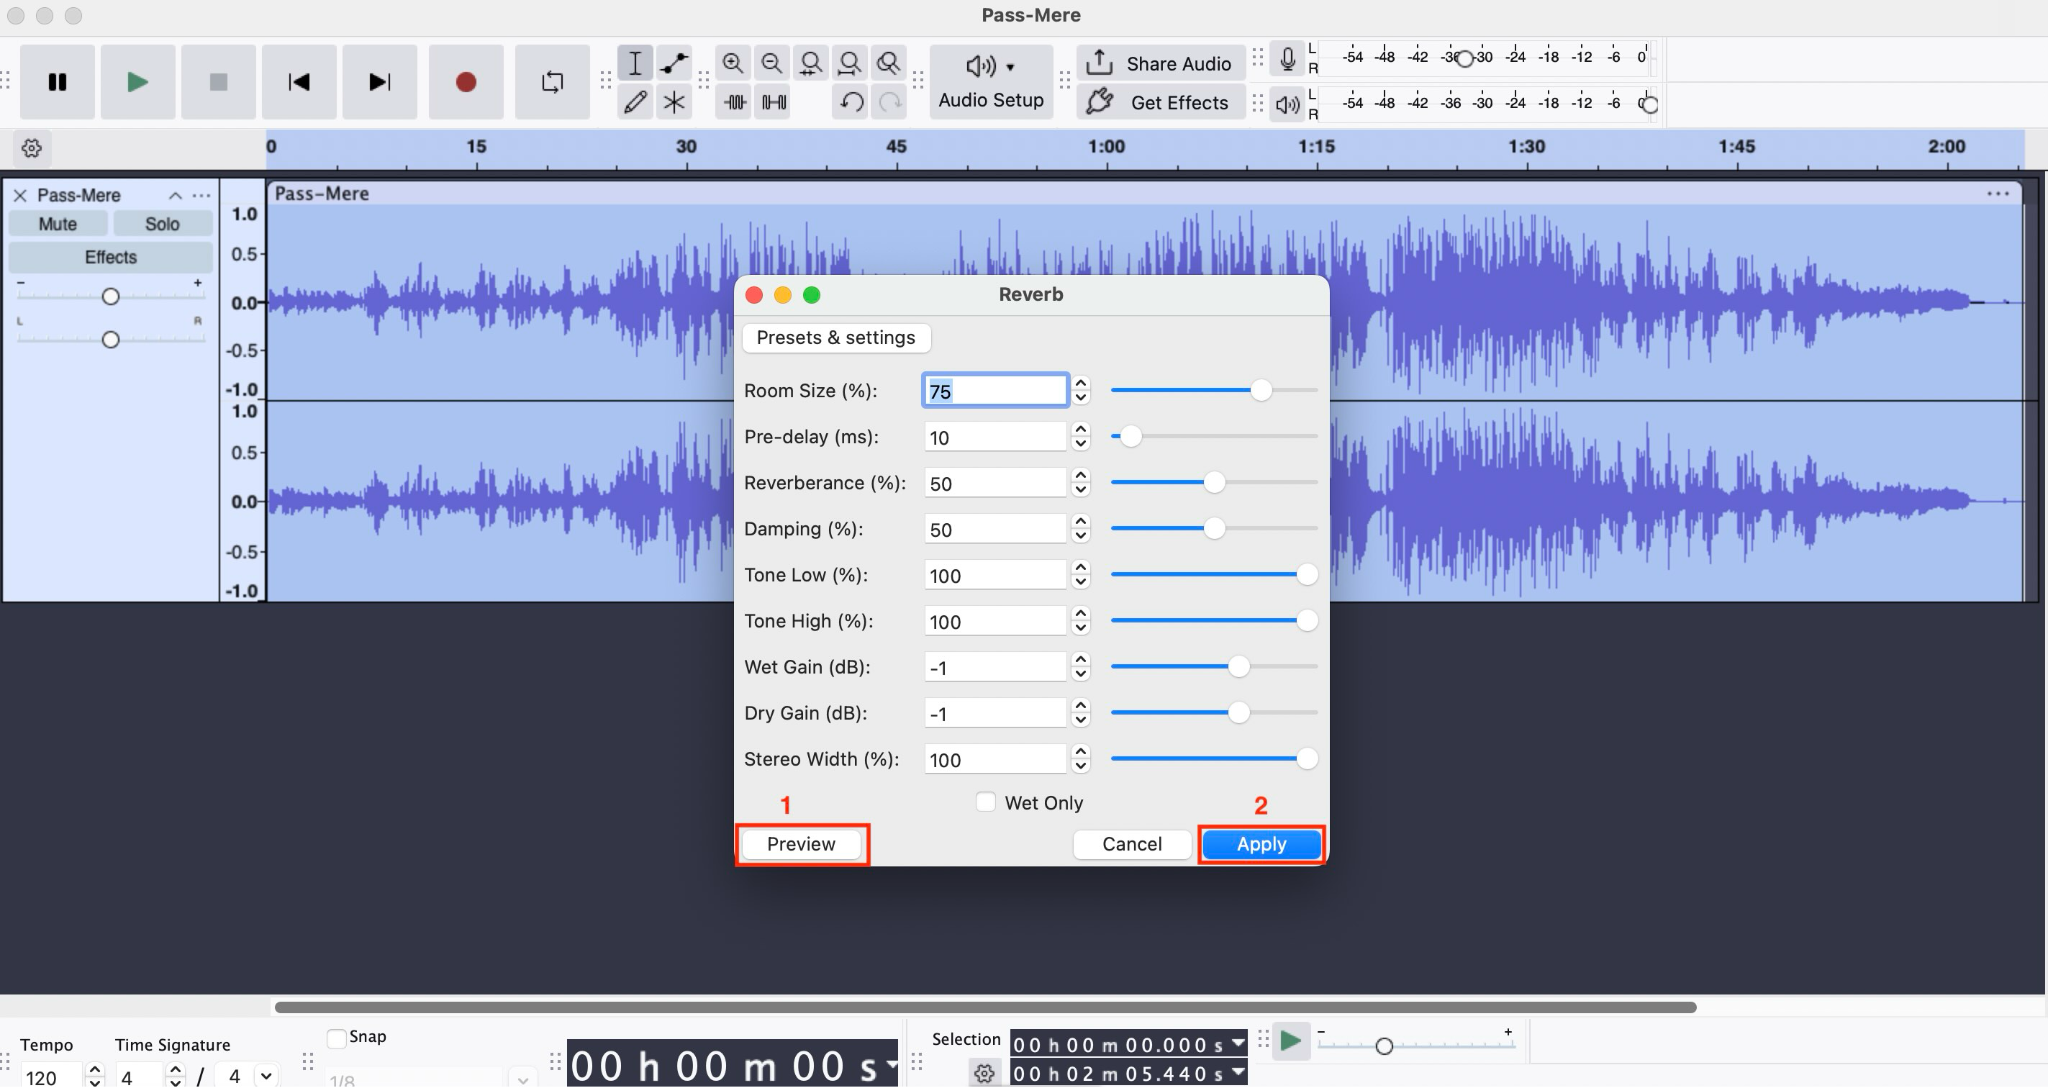
Step 3: You will see a preset and settings option to remove reverb. Adjust the settings as per your requirements. You can see real-time results by clicking "Preview." Once satisfied, click the "Apply" button to save the changes.
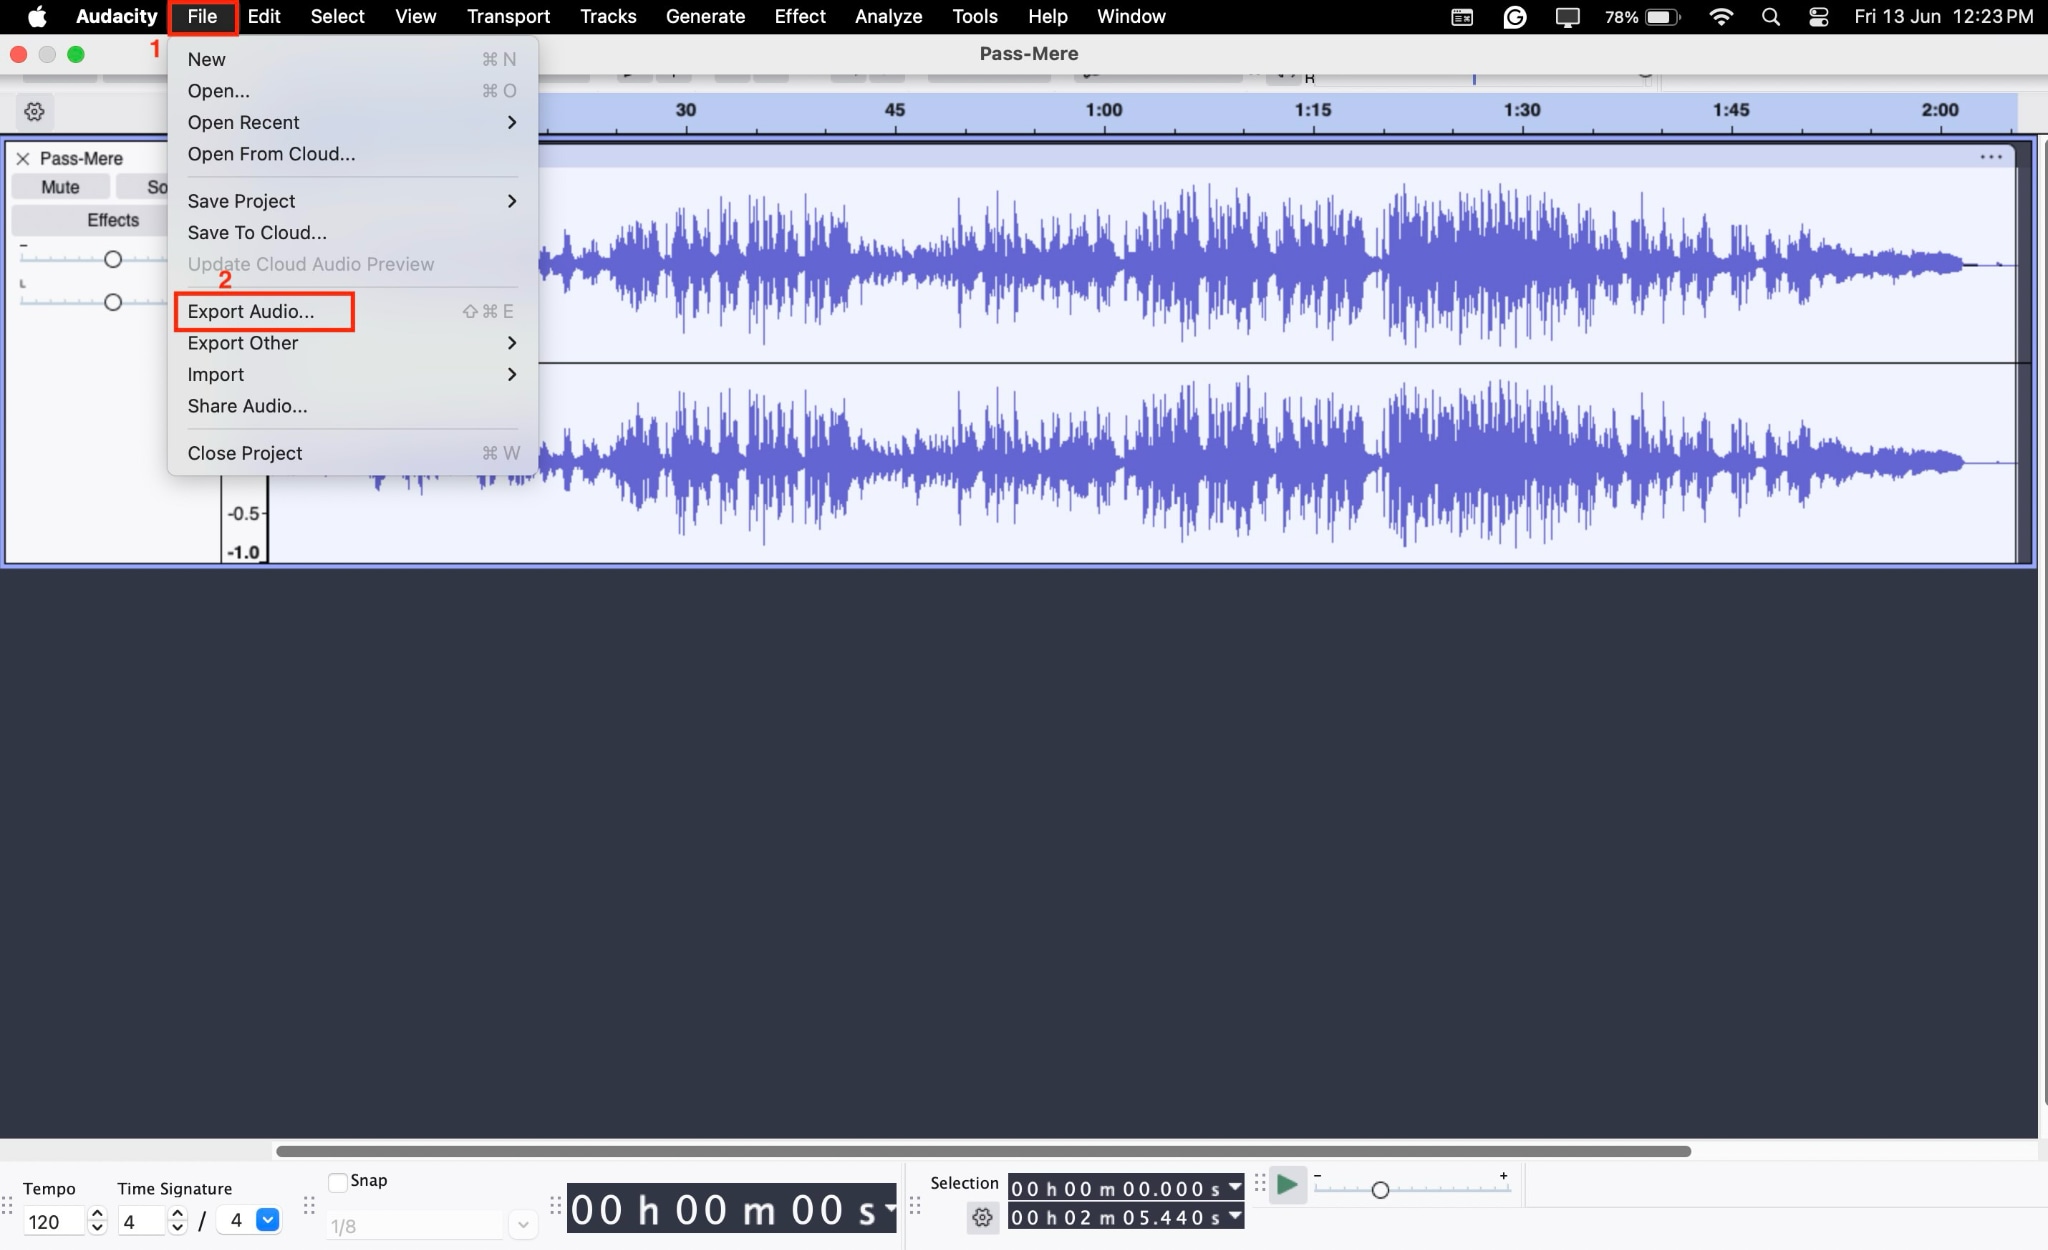
Step 4: Click "File > Export" and download the file.
3. Adobe Podcast
Adobe Podcast is a browser-based tool that helps you produce audio that sounds professionally recorded. If you're dealing with noisy recordings, it can remove reverb from audio and eliminate background noise with just one click. The AI enhancement makes voices sound like they were captured in a studio, while features like transcript-based editing, remote recording, and mic setup analysis help you create polished podcasts without any downloads.

How to Remove Reverb Using Adobe Podcast
Below is the step-by-step guide to removing reverb from audio:
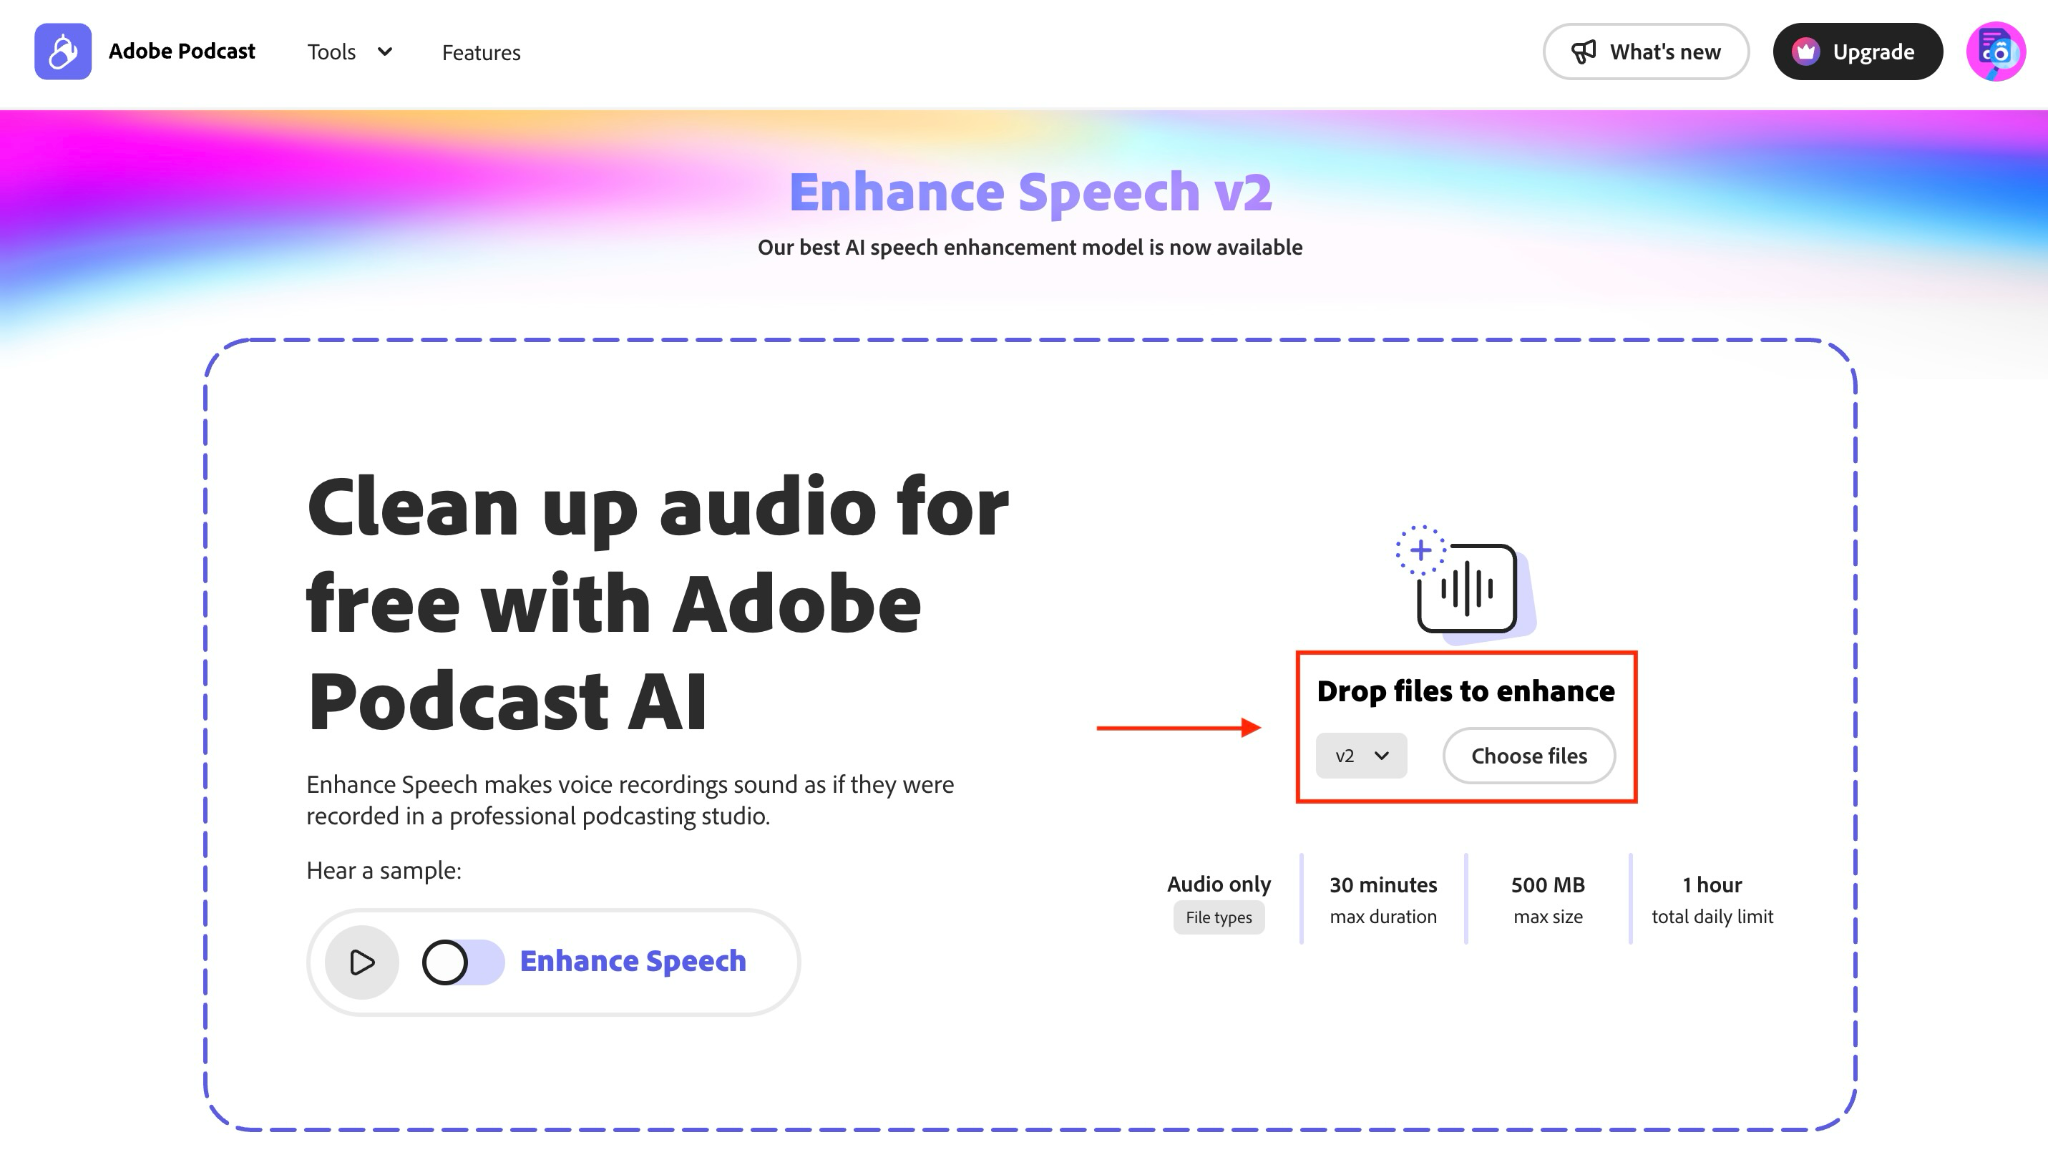
Step 1: Head to the official website, click "Start Enhancing," and then select the "Drop files to enhance" option to upload your audio file.
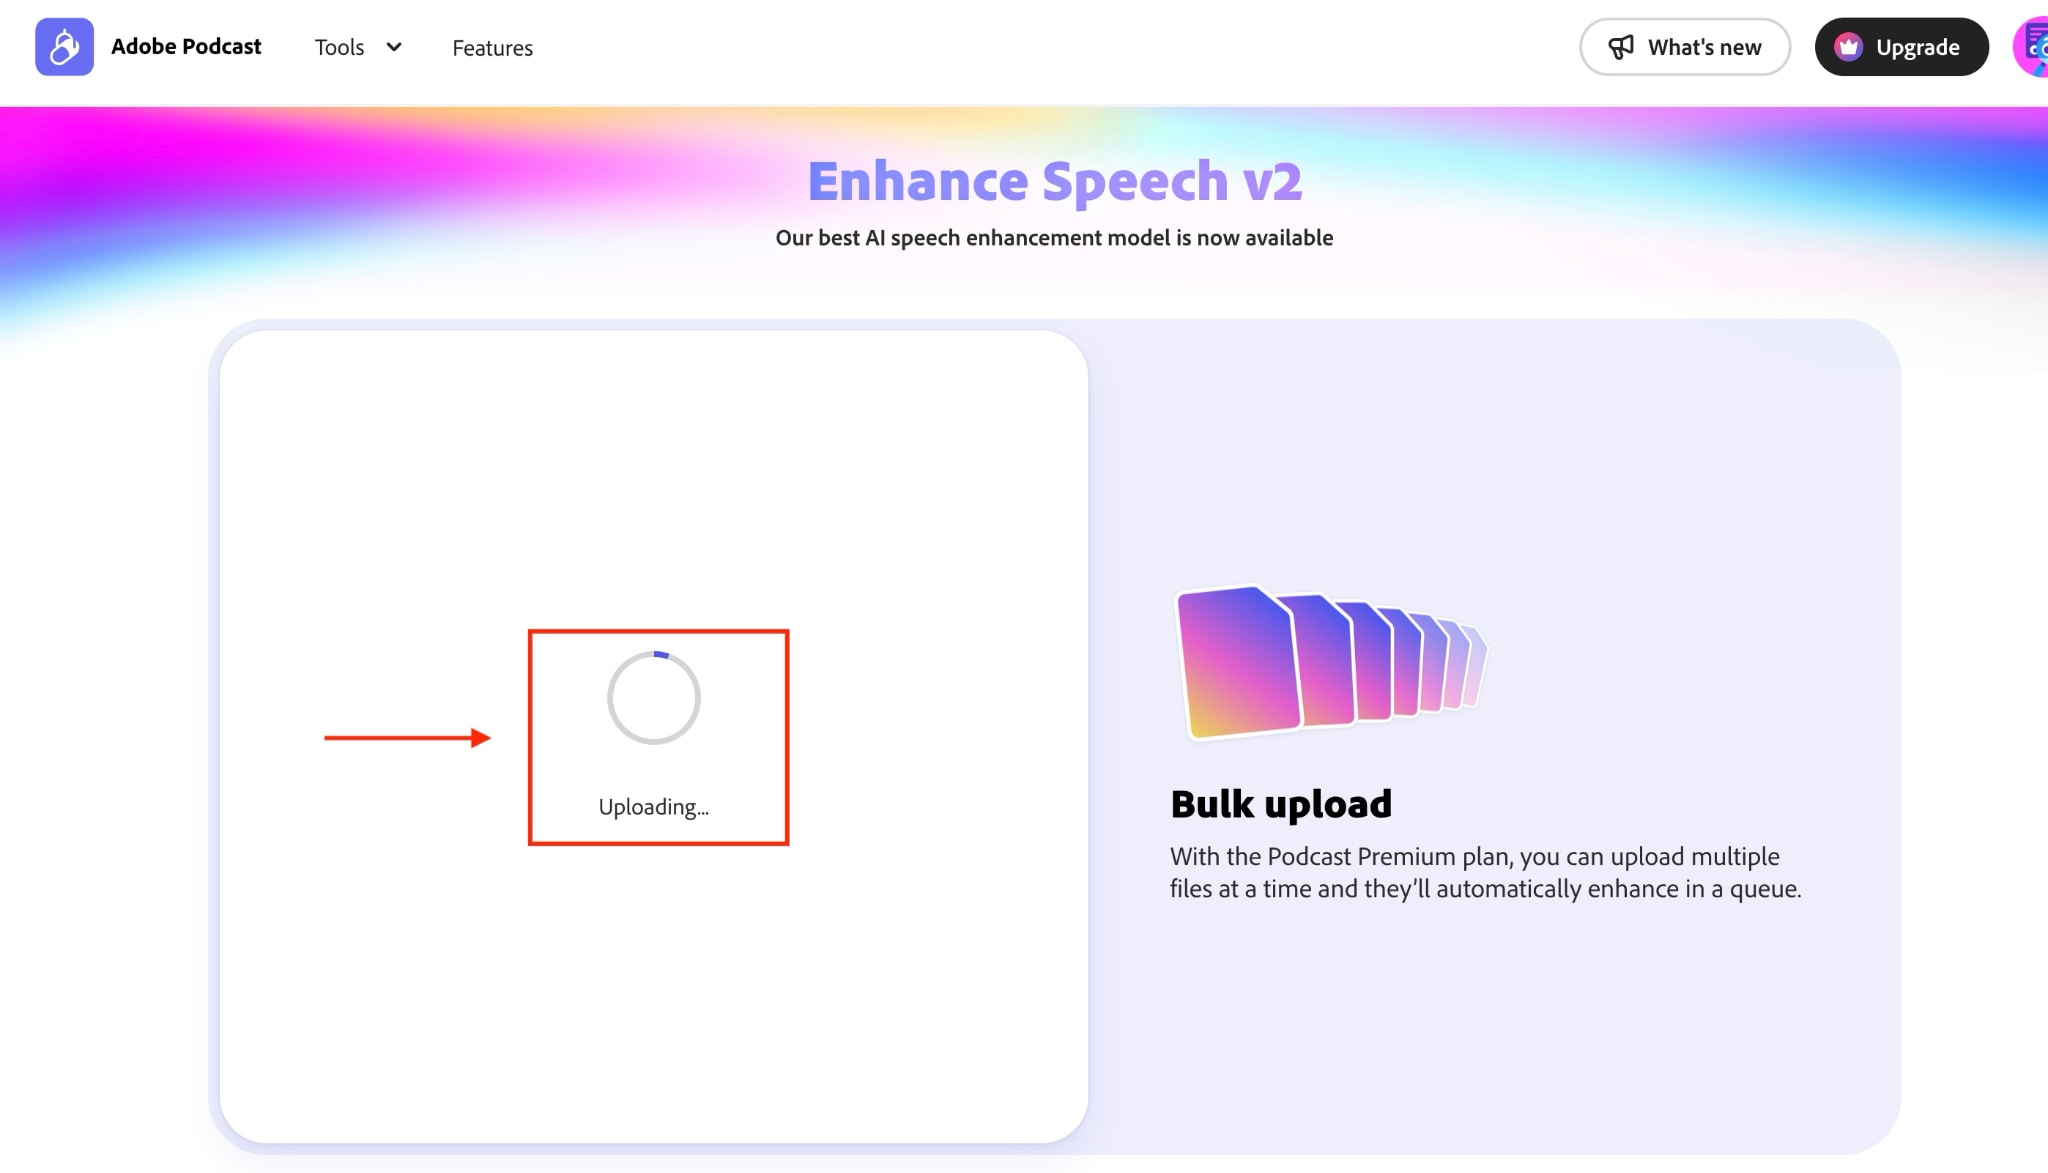
Step 2: The uploading process will begin and take a few minutes to complete.
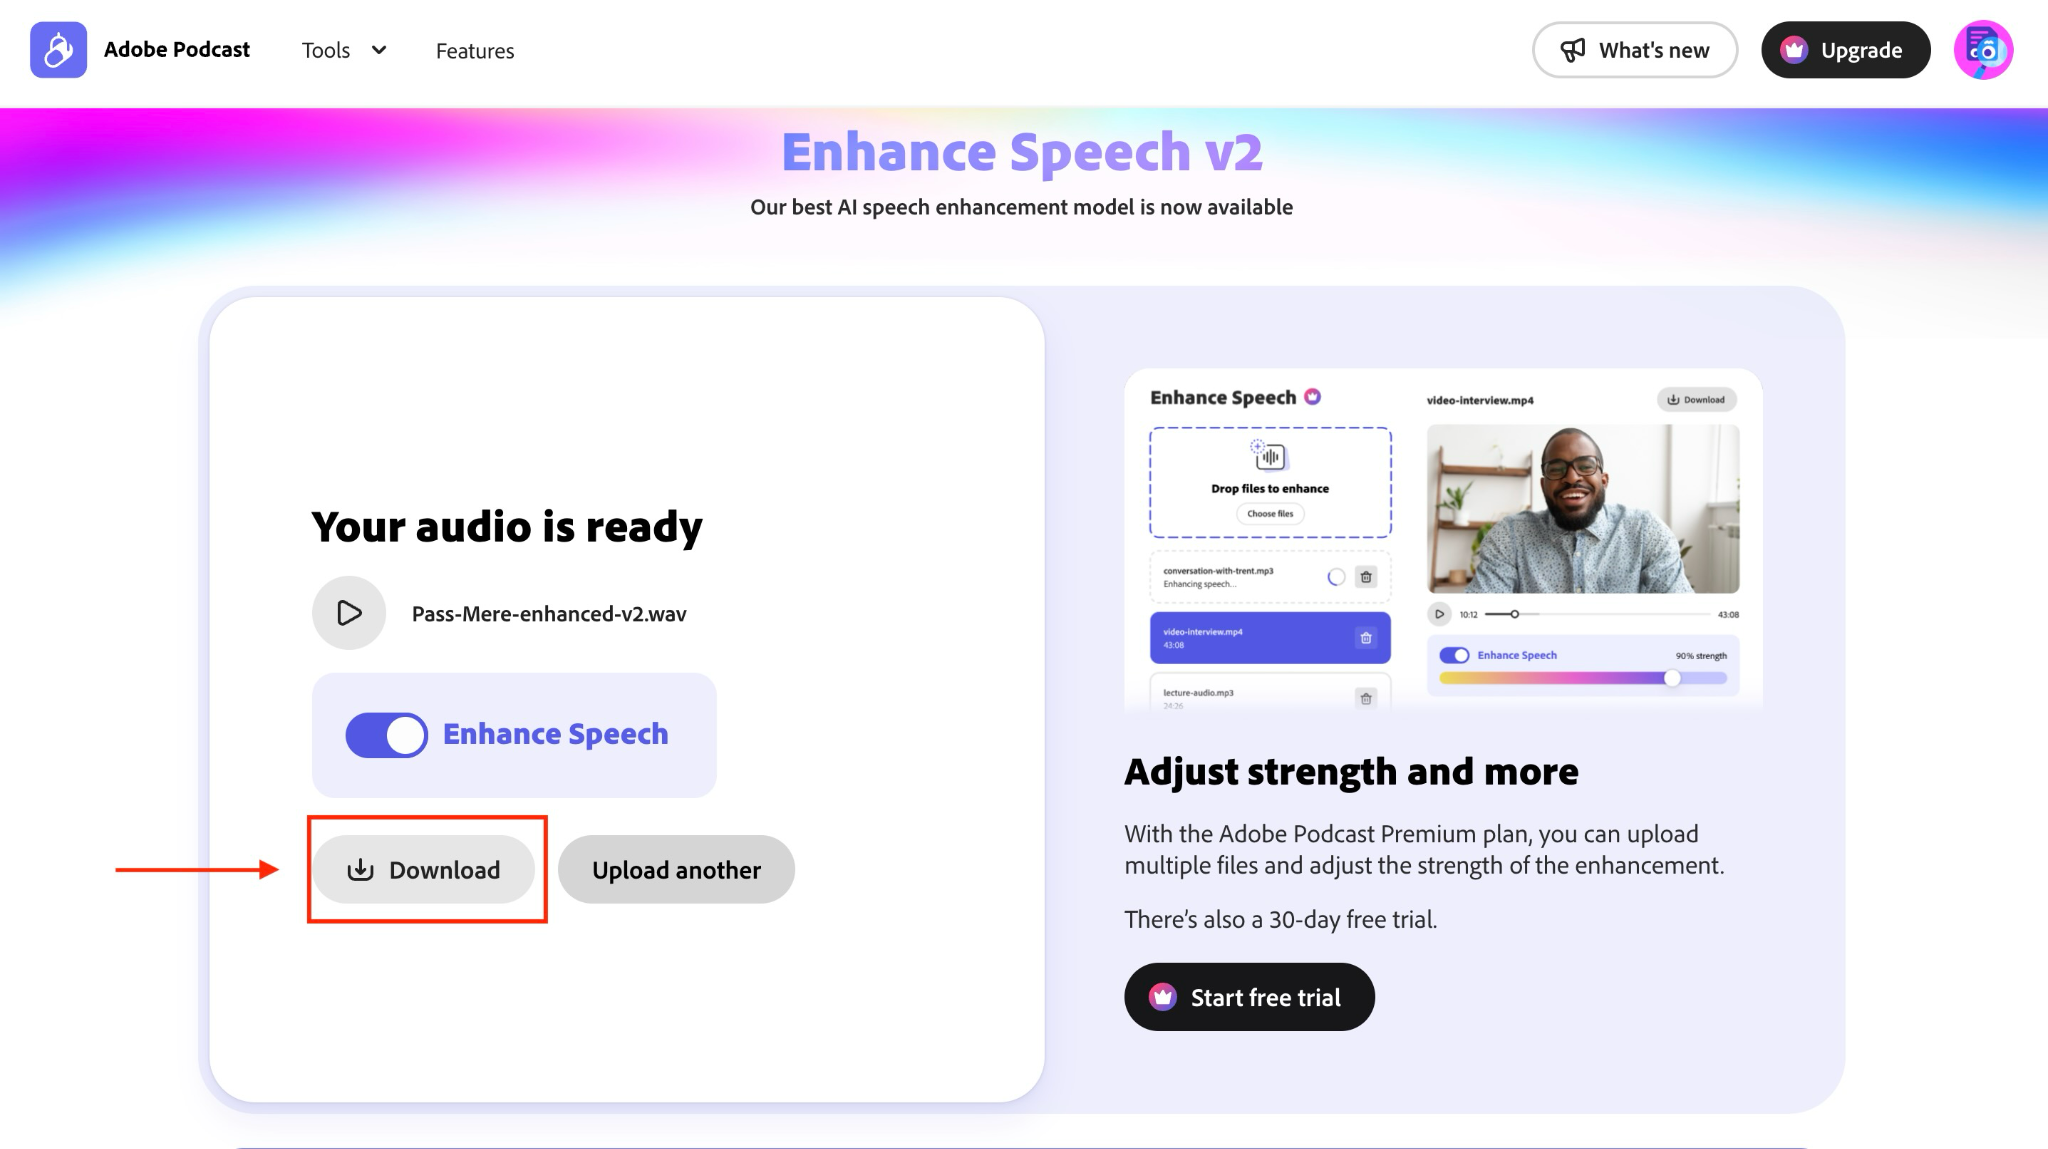
Step 3: Click on the download button and save the file in WAV format.
3. Auphonic
Auphonic is an online audio post-production tool that makes it easy to learn how to remove reverb from audio. If you're looking for various audio editing features in one place to make your interviews or podcast audio professional-grade, Auphonic can be the solution. It offers a voice cleaner with or without music, partial adverbs, removal of breathing sounds, and more. It also cuts filler words and silence from your video and audio recordings.
How to Remove Reverb from Audio Using Auphonic
Follow these steps to remove reverb from audio with Auponic:
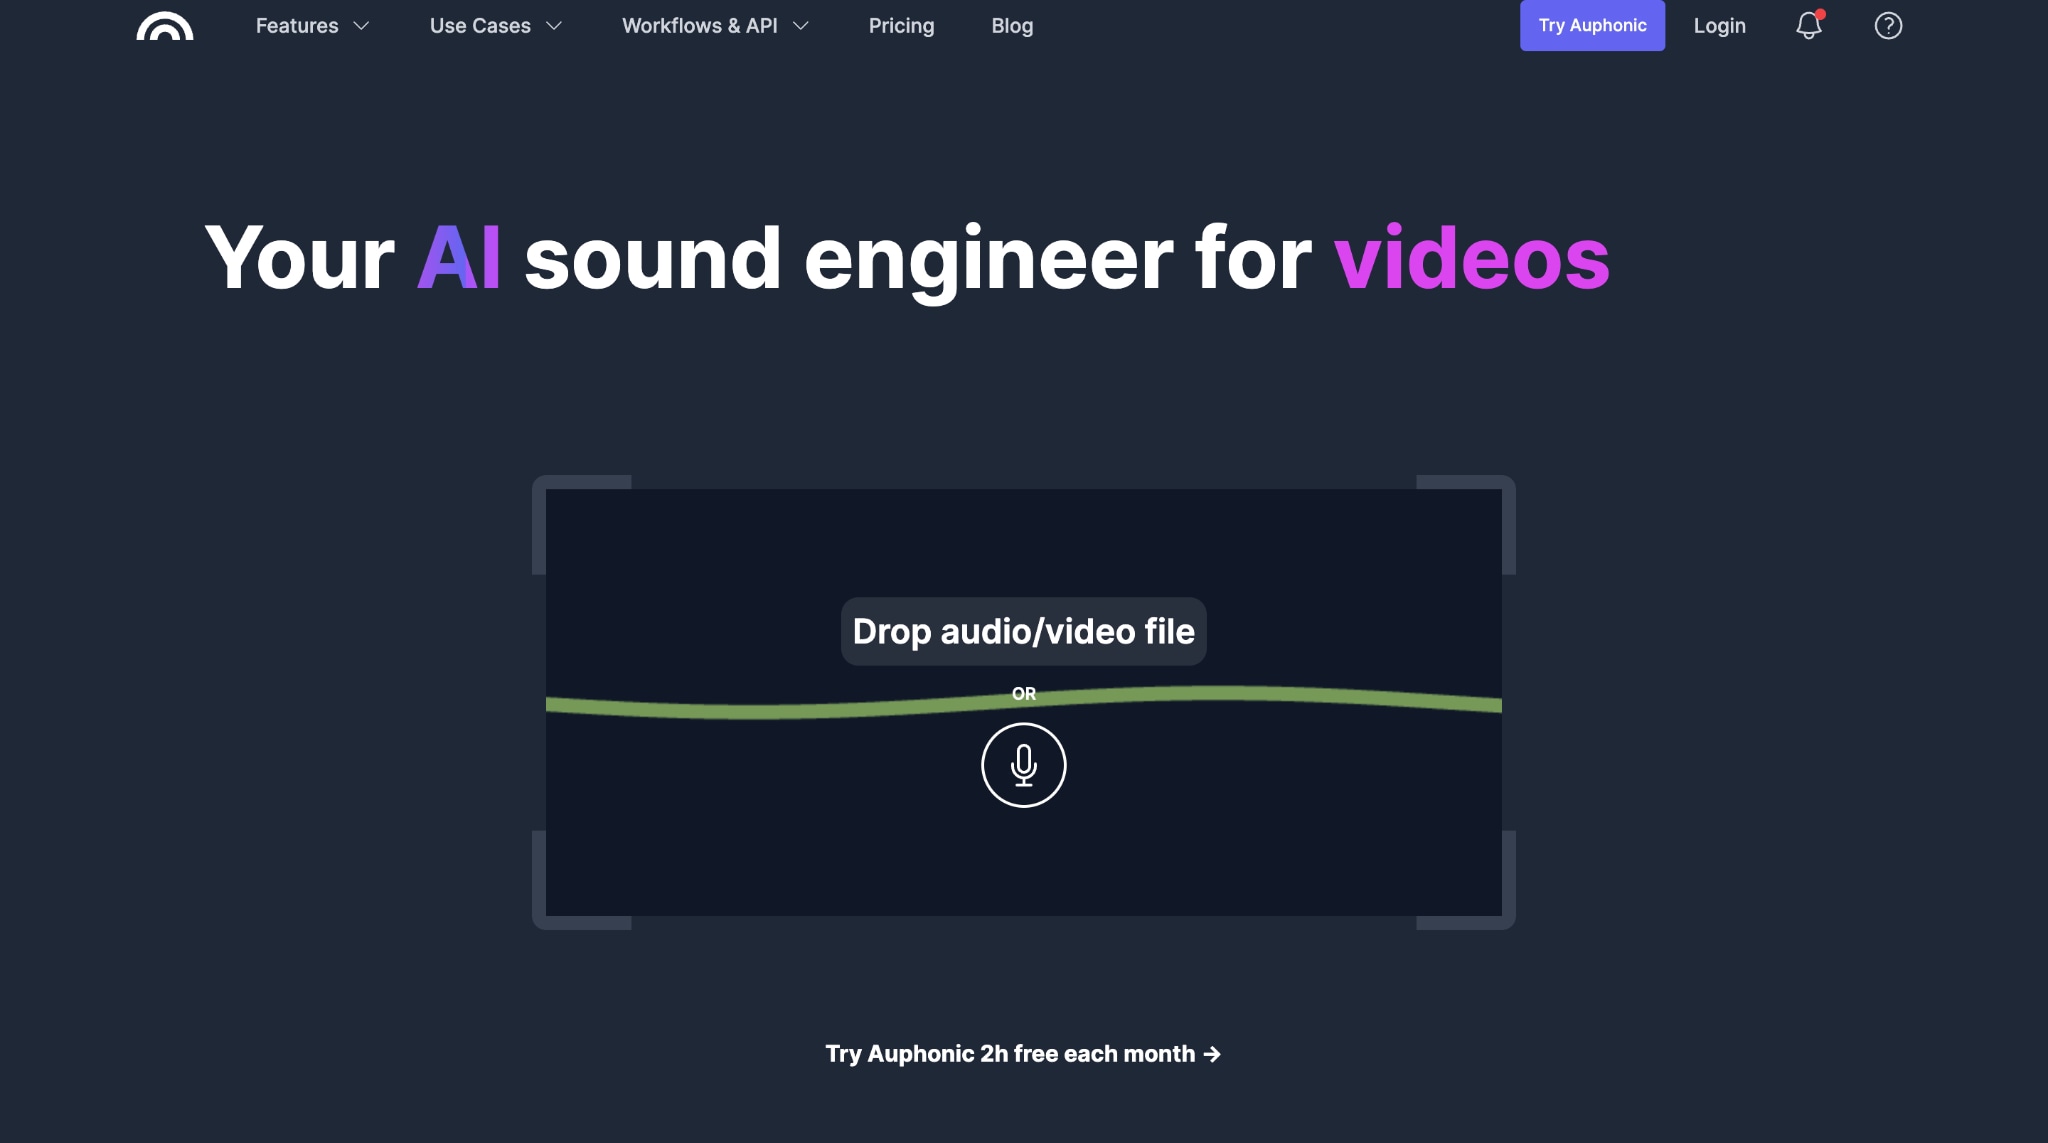
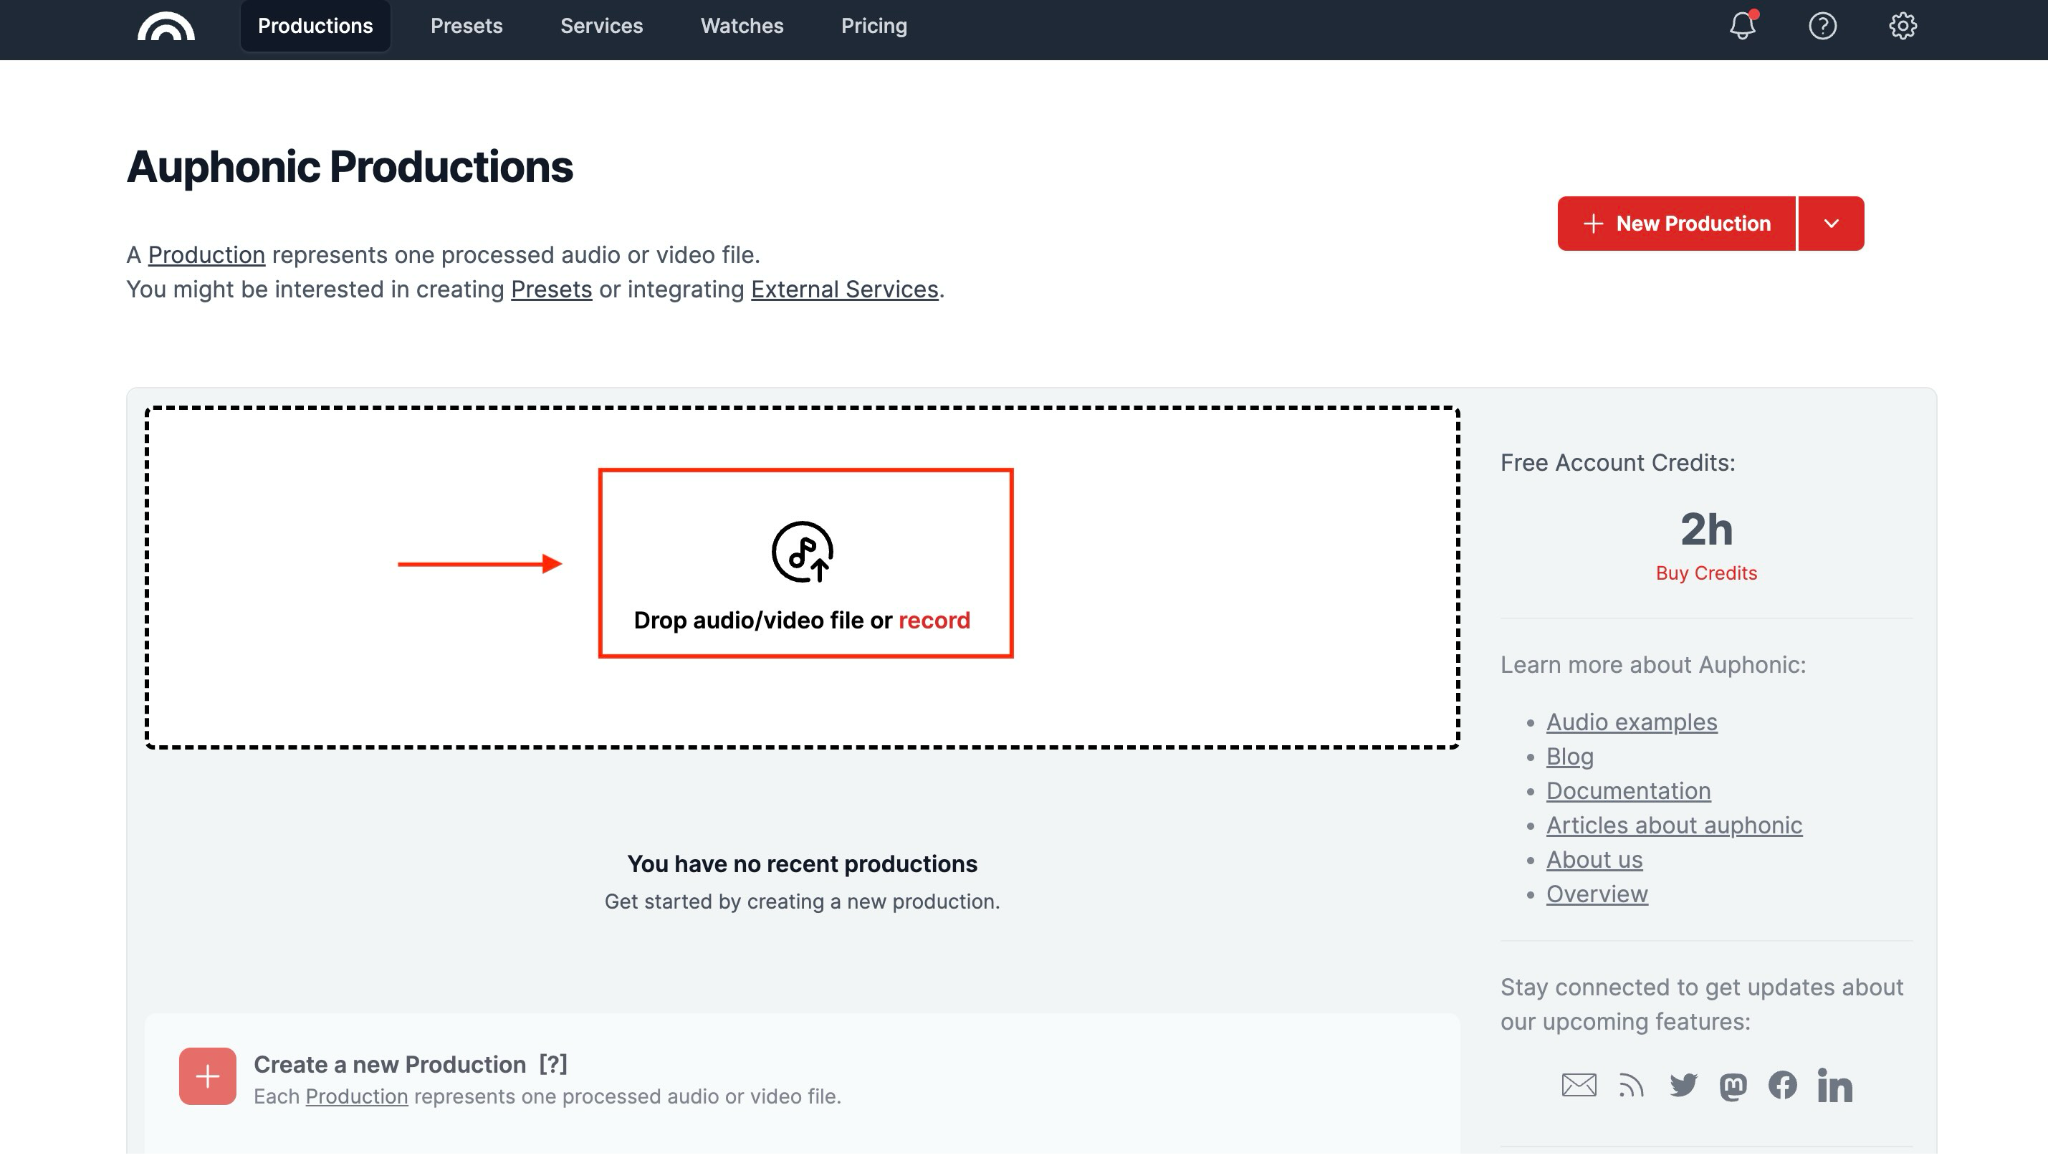
Step 1: Access the official website, create your account, and click "Drop Audio/Video File or Record."
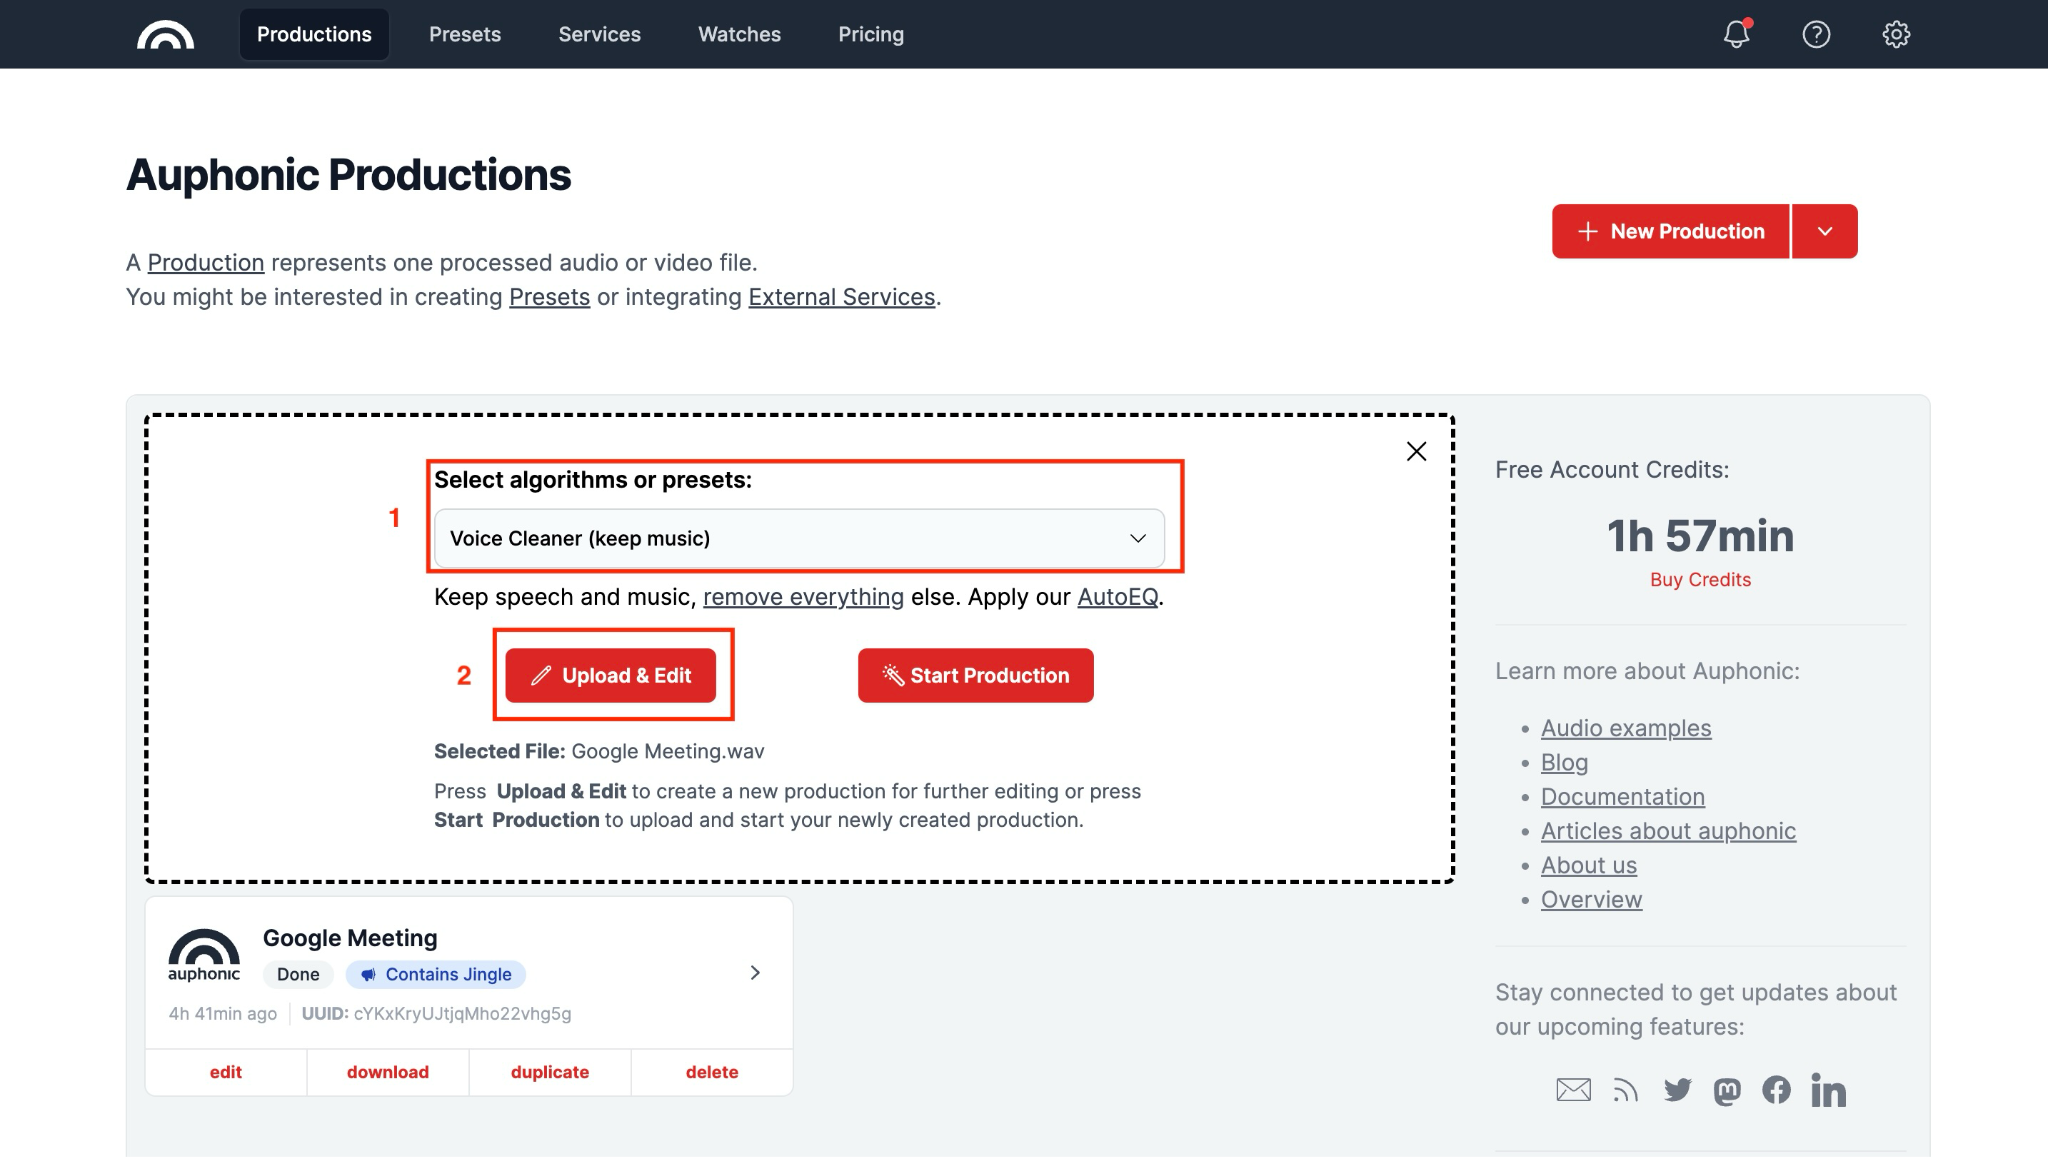
Step 2: Select the file, and now click the drop-down menu to choose from algorithms or presets. Choose the "Voice Cleaner (Partial Deverb)" option and click the "Upload & Edit" button.
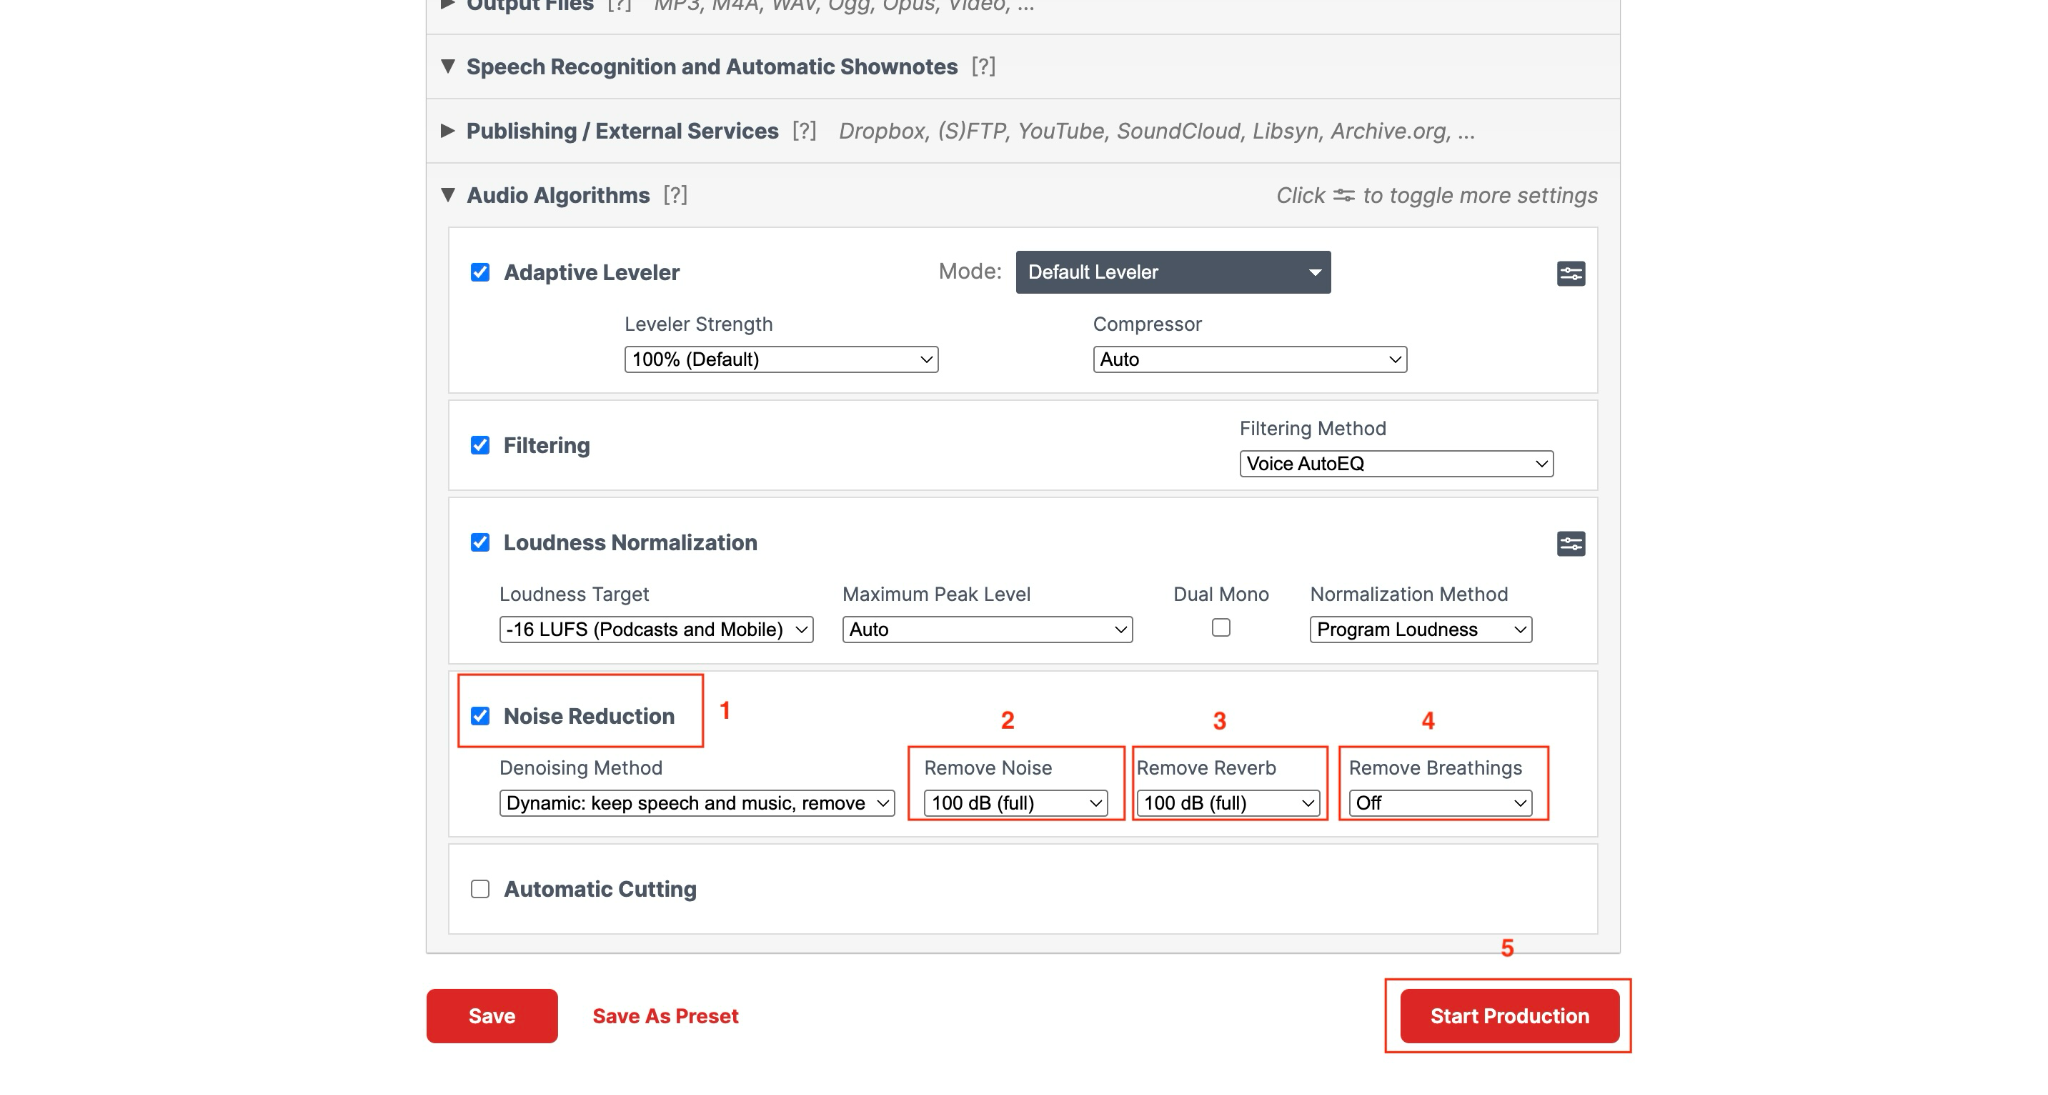
Step 3: You will see several settings to configure. Scroll down to "Noise reduction" and select your denoising method. Then, adjust the "Remove noise," "Remove reverb," and "Remove breathing" settings. Click "Start Production."
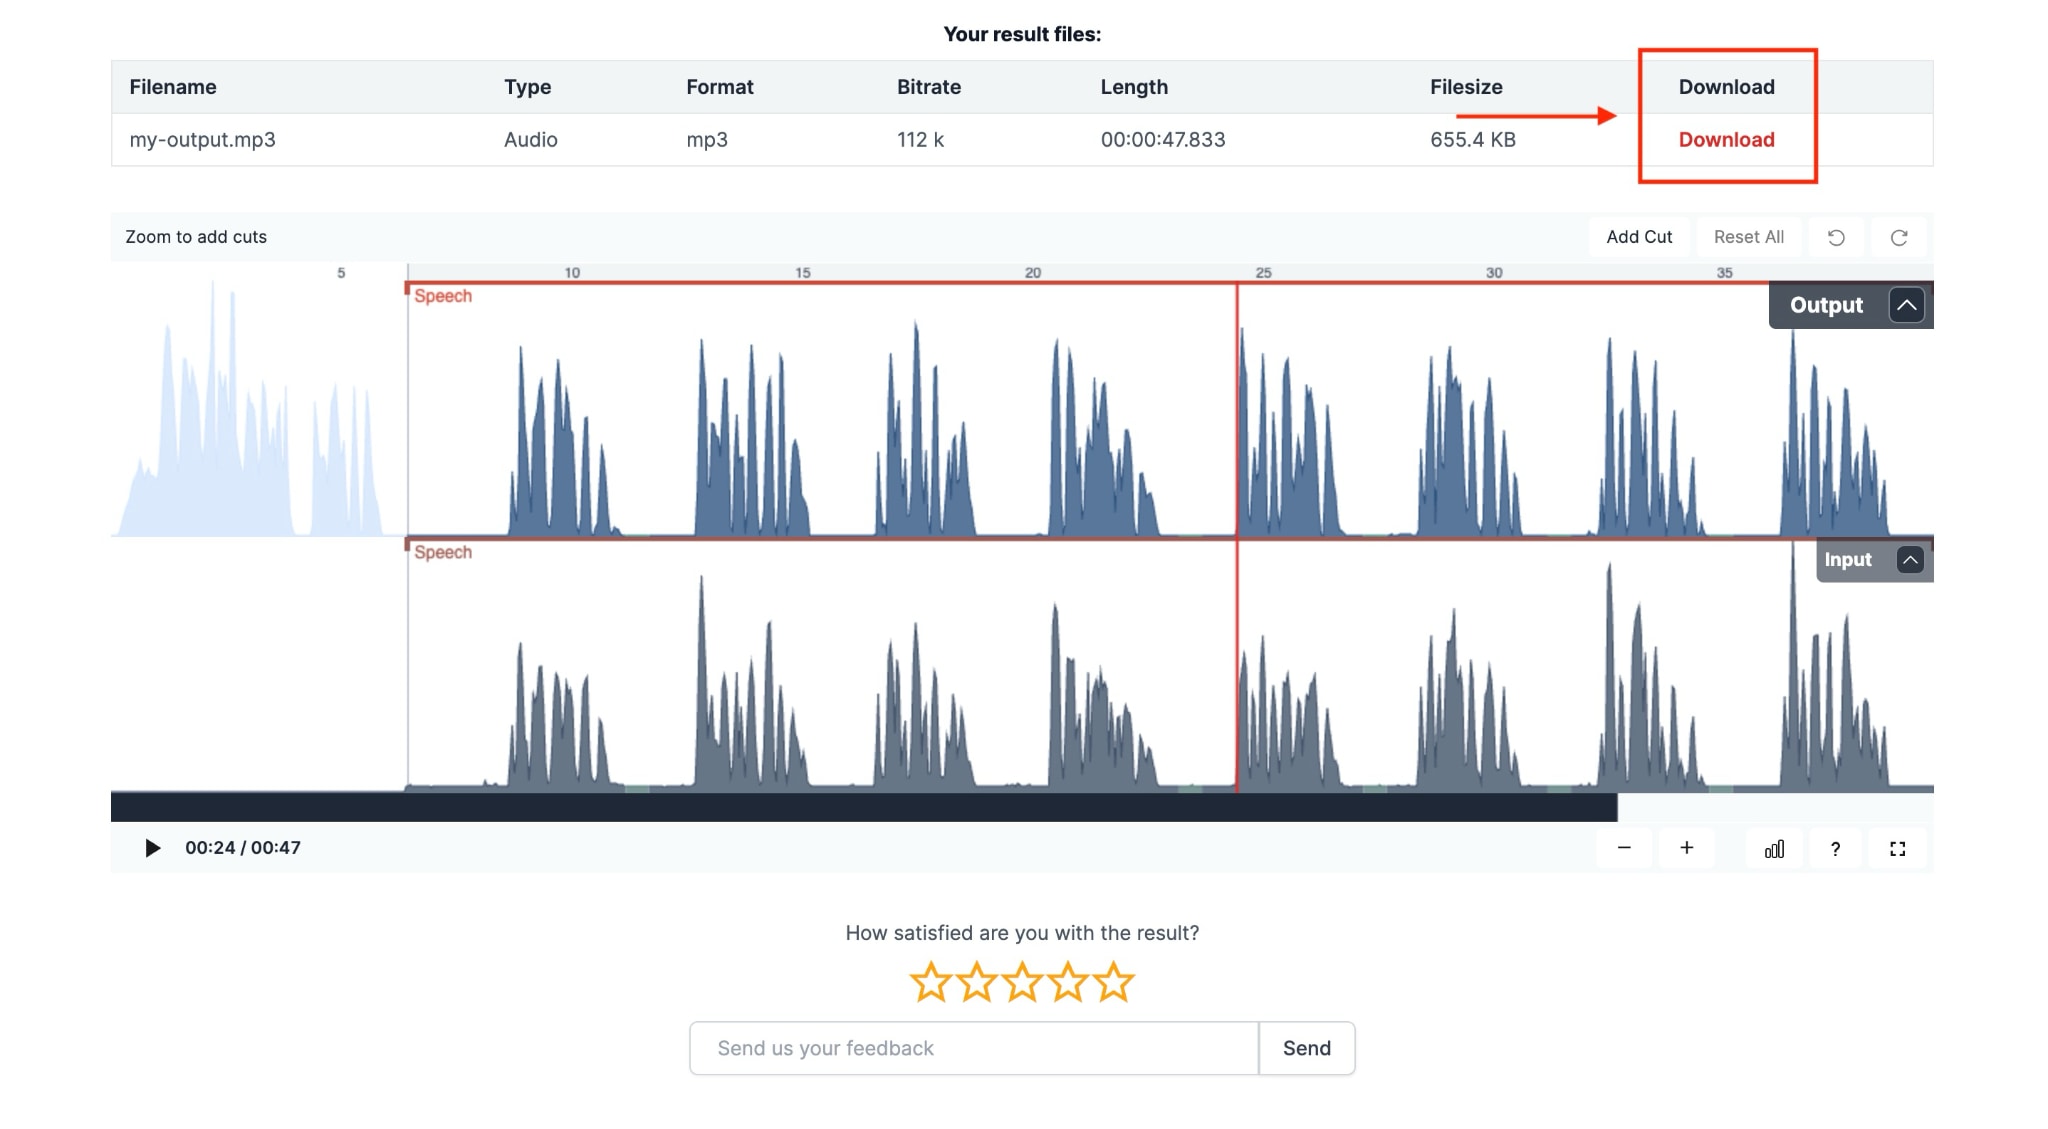
Step 4: After a few seconds, you can preview your audio in real-time. If needed, you can edit the production; otherwise, click the "Download" button to save your reverb-free audio file in MP3 format.
5. Voice.ai
Voice.ai offers comprehensive online audio tools that can remove reverb and other unwanted sounds from your recordings. If you're looking to enhance your audio quality, this platform provides effective noise reduction, audio splitting, and tonal analysis features. The tool works fast online, making it simple for streamers, content creators, and podcasters to clean up their audio without complex software installations.

How to Remove Reverb from Audio Using Voice.ai
Here is the step-by-step guide to removing reverb from audio:
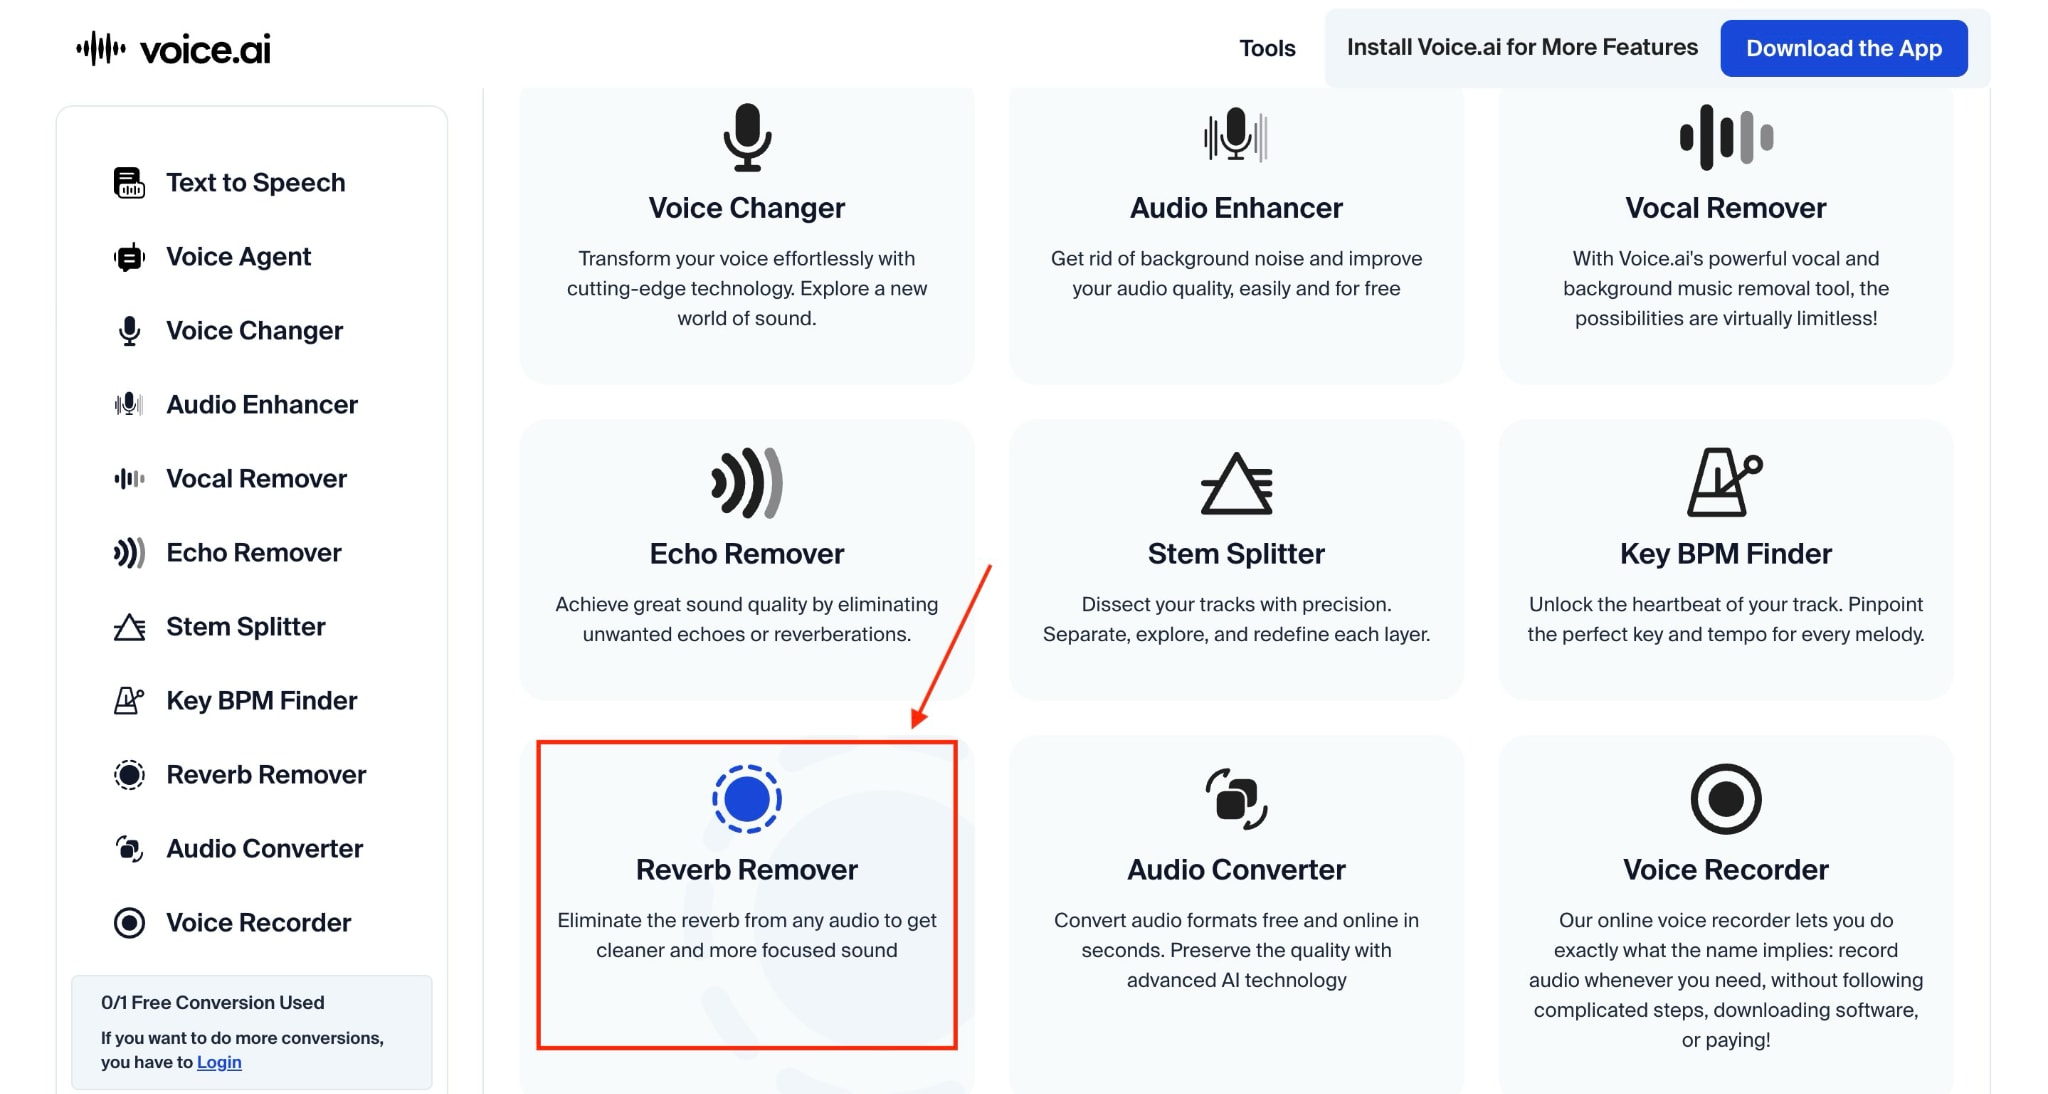
Step 1: Access the official website and click "Audio Tool" on the top menu bar, then select "Reverb Remover."
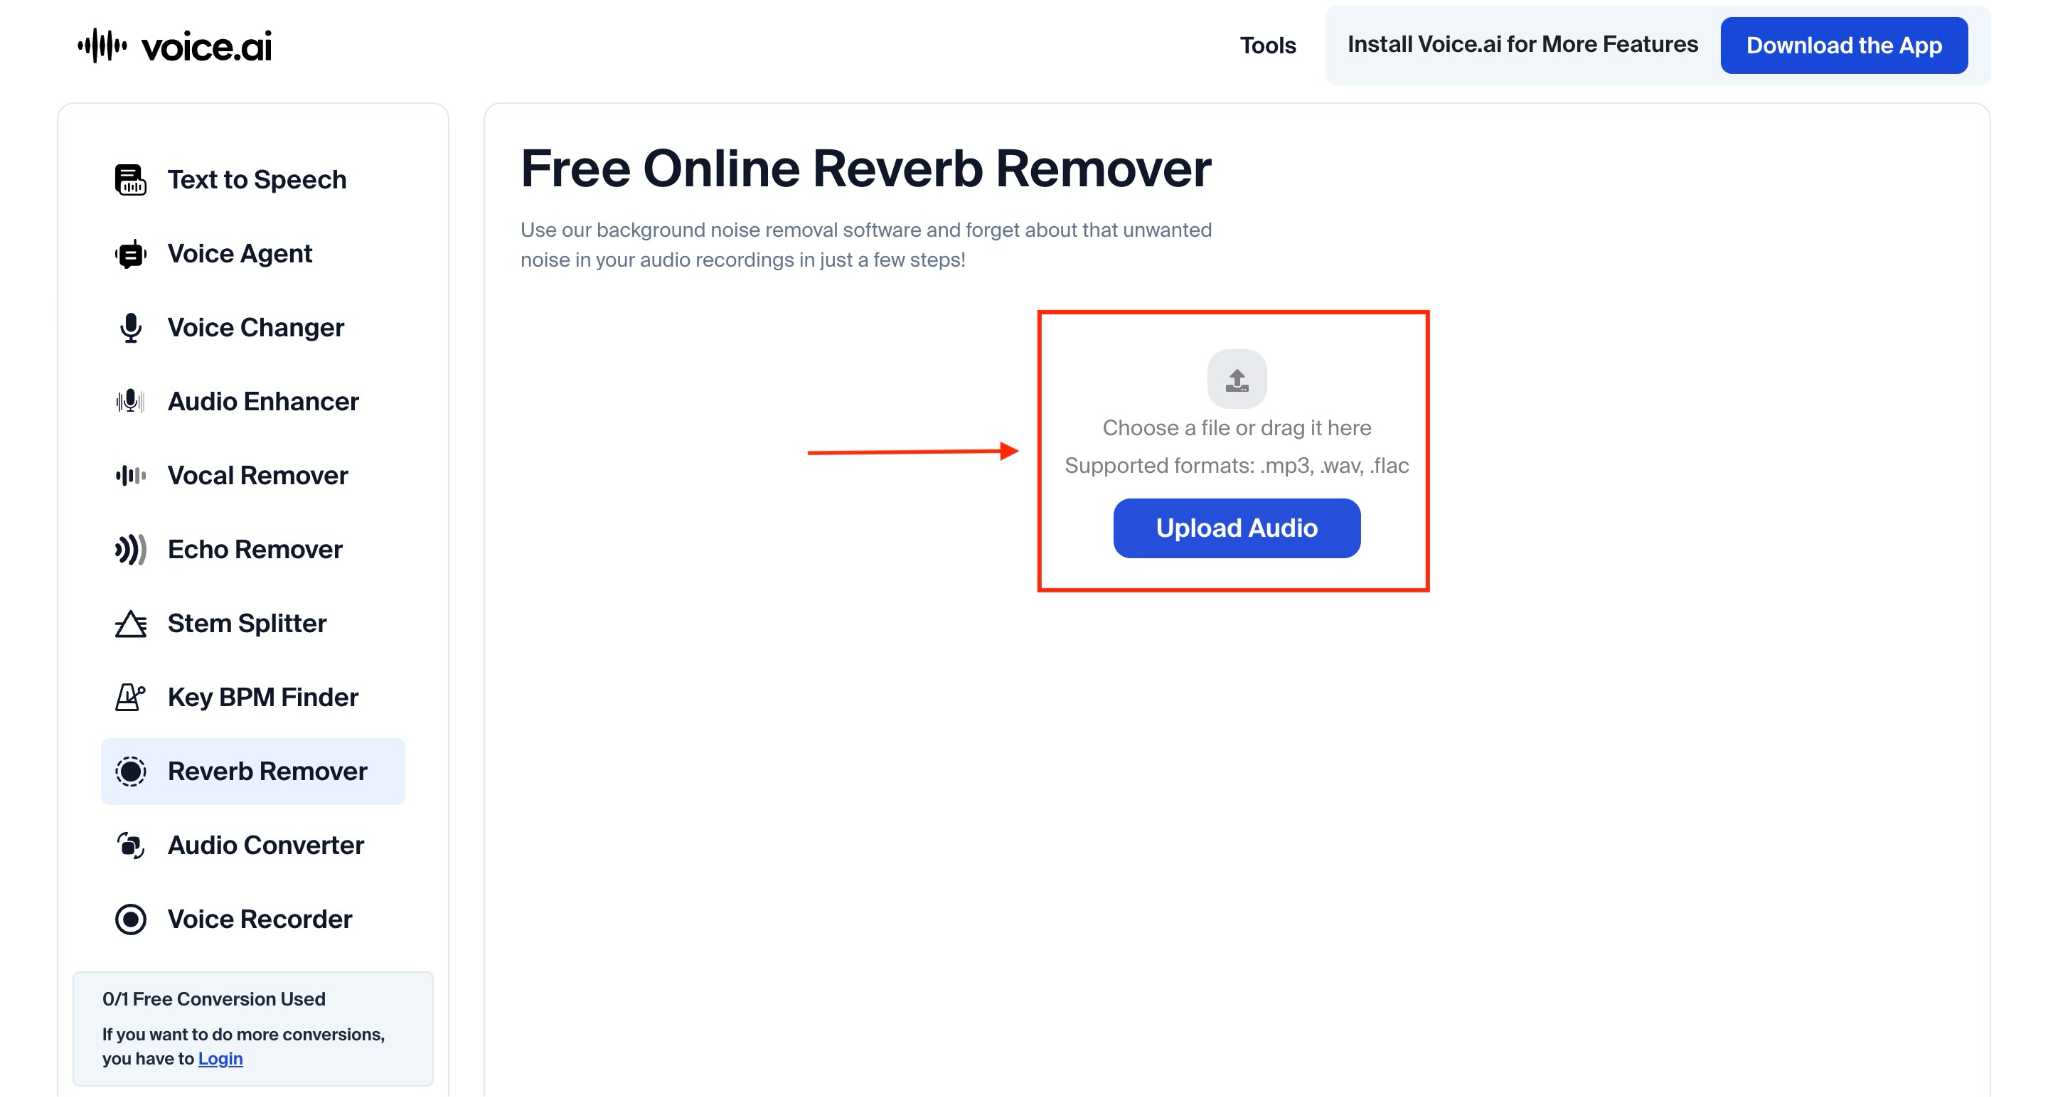
Step 2: Click on the "Upload File" button to upload your meeting or interview recording.
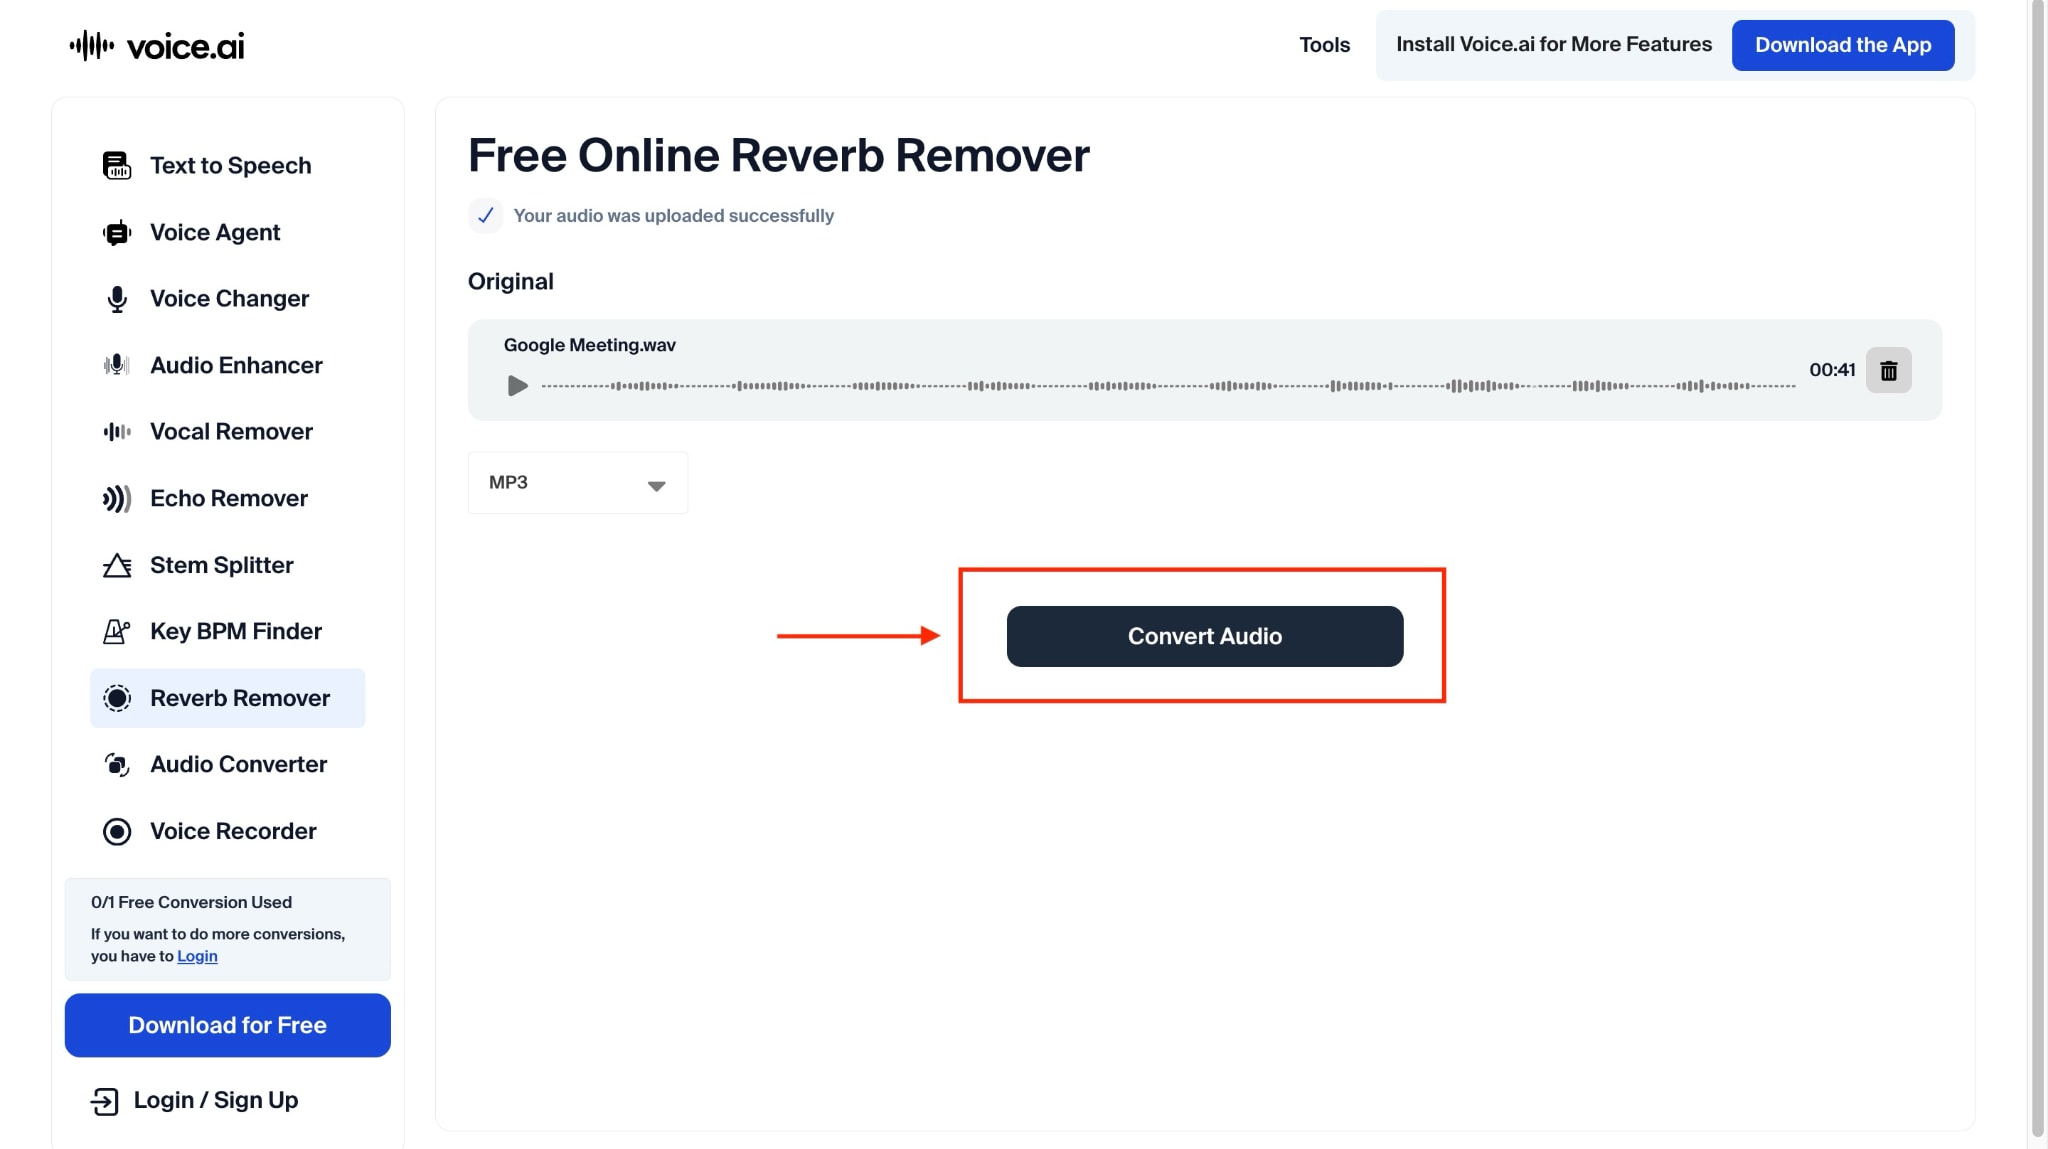
Step 3: After a few seconds, your audio will be uploaded. Click "Convert Audio" for further processing.
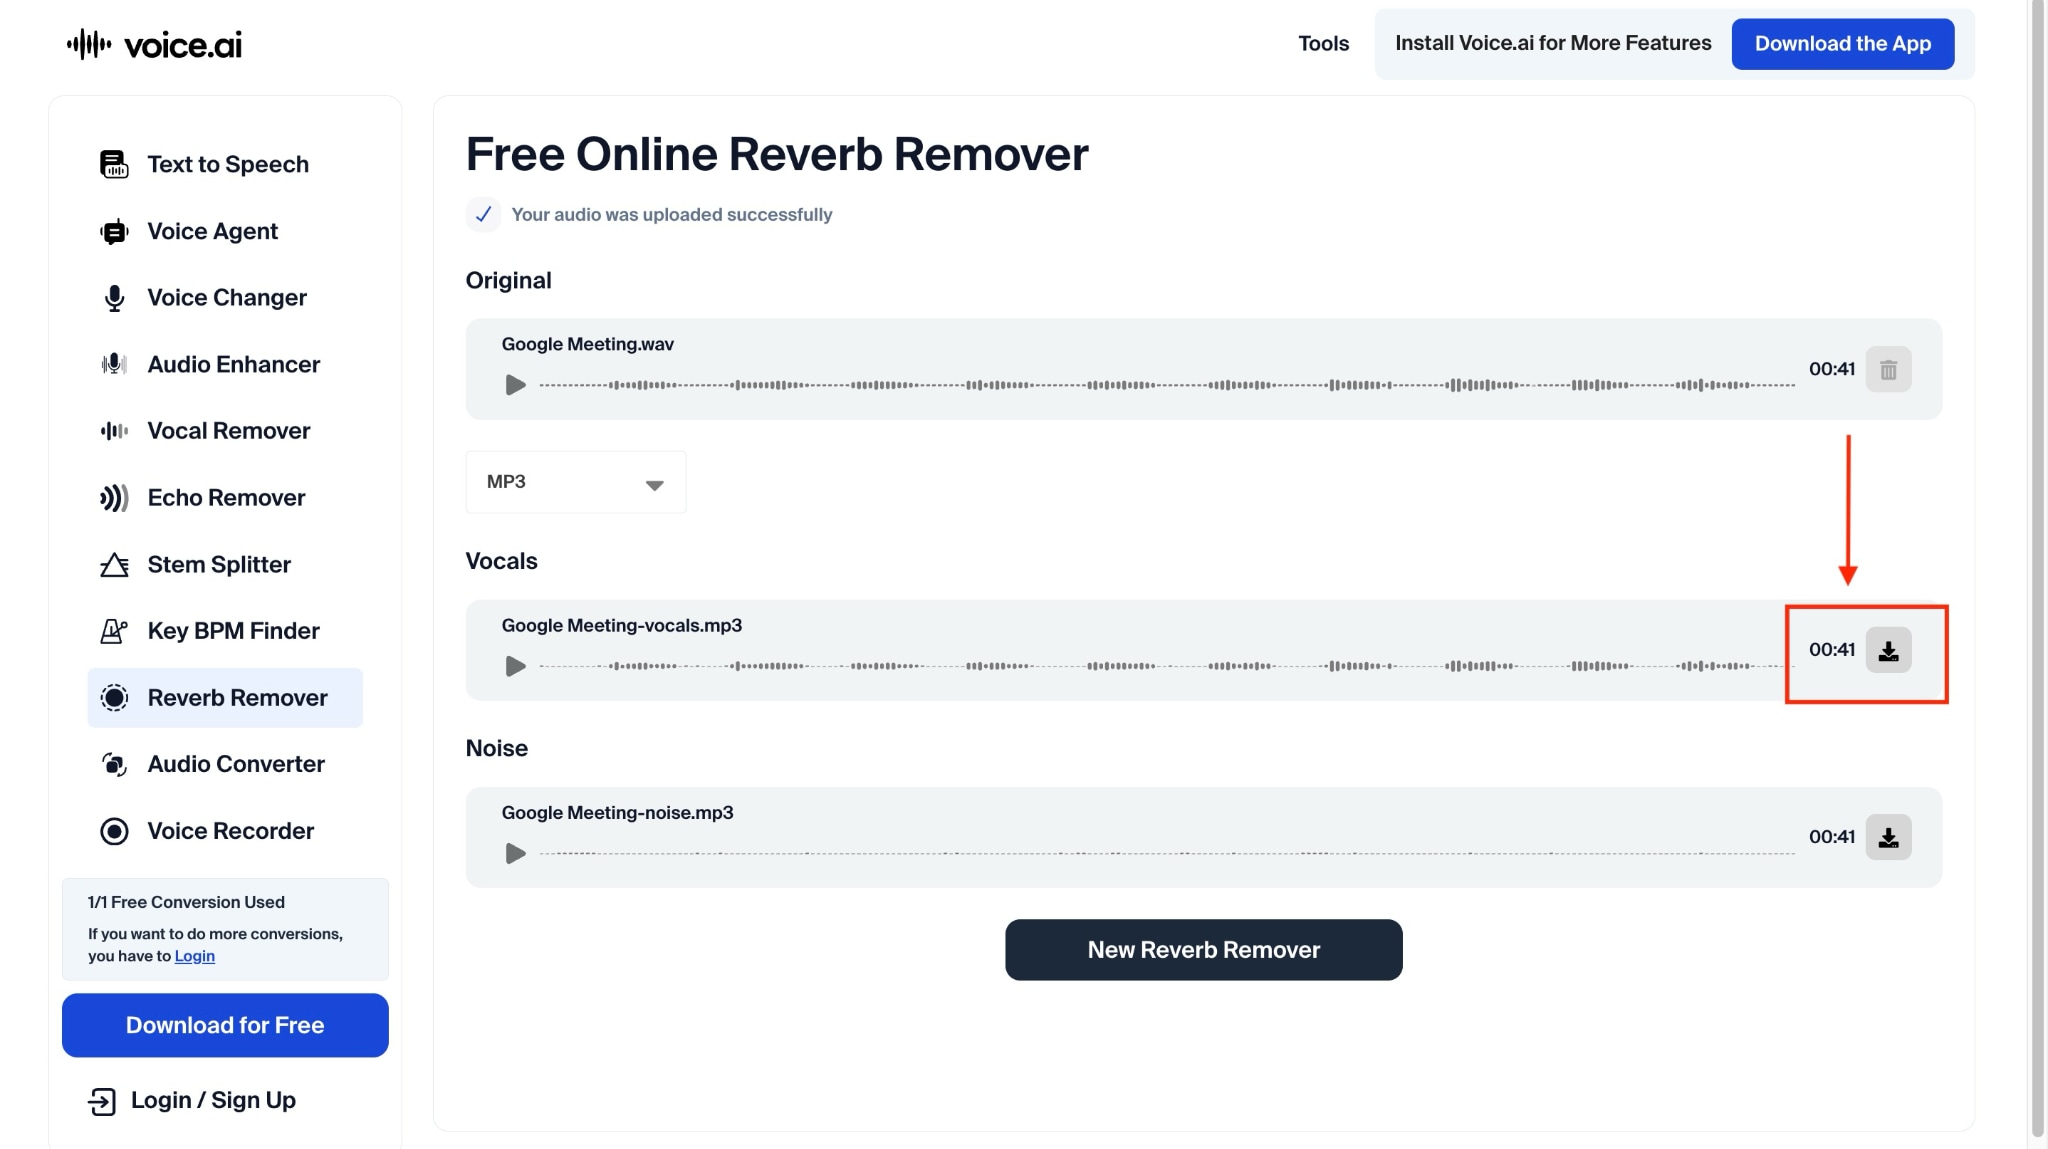
Step 4: It will separate noise and echo from vocals. Click the download sign next to “Vocals” and save in MP3 format.
To Sum Up
Learning how to remove reverb from audio is essential for creating professional-quality recordings, whether you're podcasting, conducting interviews, or recording voiceovers at home. If you're dealing with echoey or muddy audio, the tools we've covered, ranging from free options like Audacity to AI-powered solutions like Adobe Podcast, can help you achieve cleaner, more intelligible sound.
If you want the most efficient solution, Wondershare UniConverter stands out as an excellent choice for removing reverb with just one click. It combines powerful AI technology with user-friendly features, making it perfect for both beginners and professionals. Try Wondershare UniConverter today and see how batch processing saves time and offers professional-grade audio.

