


Sometimes, the perfect photo ends up sideways or upside down. Maybe you snapped it quickly, or your phone’s orientation didn’t catch up. Either way, viewing or sharing a misaligned image isn’t ideal. Luckily, both iPhone and Android offer basic rotation tools.
In this guide, you’ll learn how to rotate a photo on iPhone/Android using built-in features. You will know the accurate steps to rotate any image you want, regardless of the phone model and operating system.
In this article
Part 1: How to Rotate a Photo in iPhone
Have you ever clicked a perfect photo only to find that it's in the wrong ratio, either landscape or portrait? It's a common hiccup, but thankfully, your iPhone's Photos app can help you correct it. From adjusting a single image to editing landscape photos, the built-in features will prove beneficial, especially if you don’t know how to rotate photos on iPhone.
However, for tasks like rotating multiple photos or achieving precise angles, the native options might be a bit limiting. The lack of these features might make you look for other, more reliable alternatives.
How Do You Rotate a Picture on iPhone
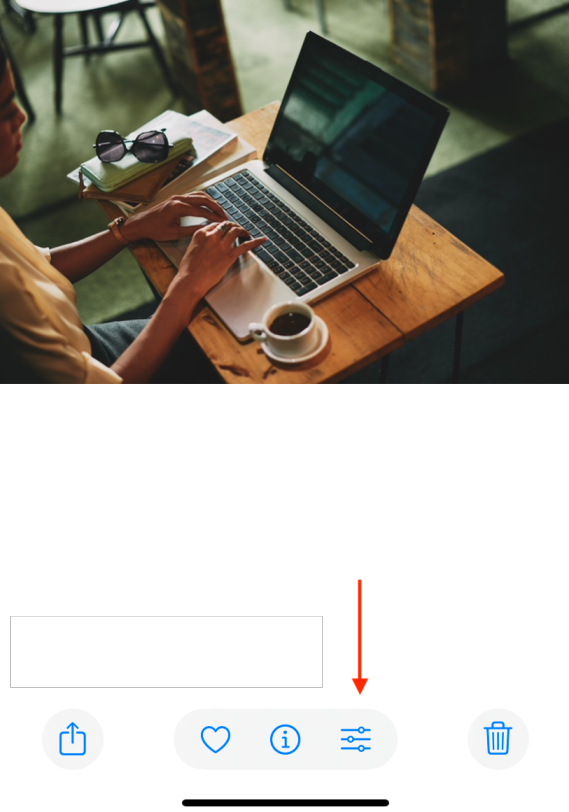
Step 1: Open the Photos App and Enter Edit Mode
Go to the Photos app and choose the image you want to rotate. From the bottom, click “Settings” to access the editing options.
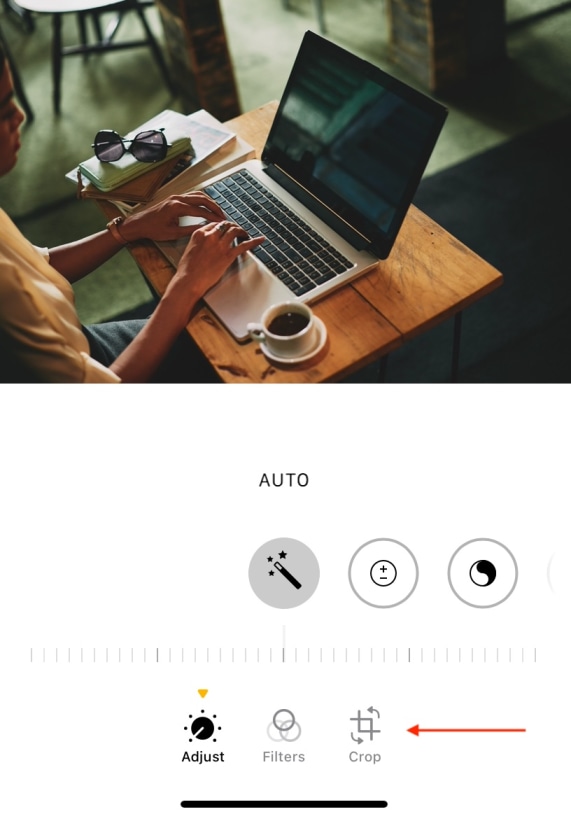
Step 2: Go to Crop Option
Within the editing interface, tap the “Crop” icon at the bottom right side of the screen. The icon looks like a square with overlapping arrows.
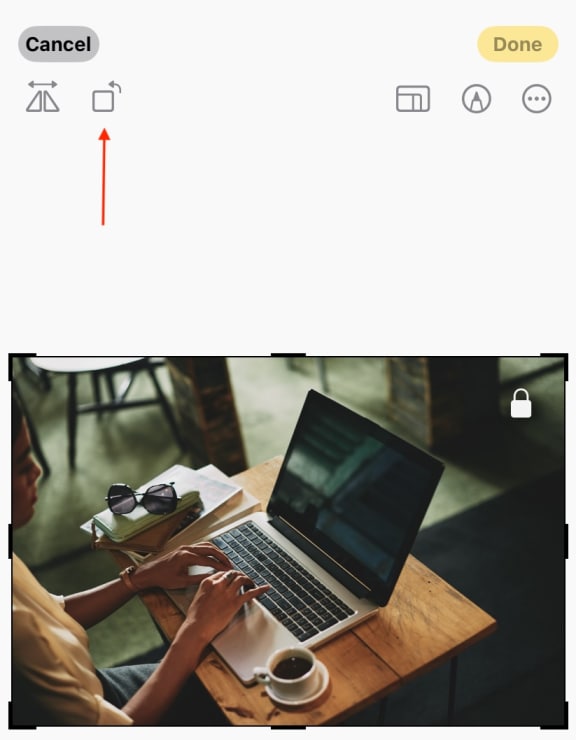
Step 3: Rotate the Image and Save Your Changes
Tap the rotate icon (a square with a curved arrow) to rotate the photo in 90-degree increments. If satisfied, click "Done" to save the edited image.
Part 2: How to Rotate Image on Android
If you have an Android phone, you can quickly and easily rotate a photo using the built-in Google Photos app or your default gallery. However, since Android is open-source, the gallery option will vary from one phone model and OS to another. Thus, the steps might be slightly different.
Android also provides various options for fixing camera orientation issues and adjusting image angles for better framing. But just like iOS, it's best for one-off edits. Most Android operating systems cannot handle bulk tasks or precise angle control.
Step-by-Step Guide to Rotating a Photo on Android
Step 1: Open Google Photos or the Gallery App
Open either Google Photos or the Gallery app on your Android. Choose the image that you want to rotate.
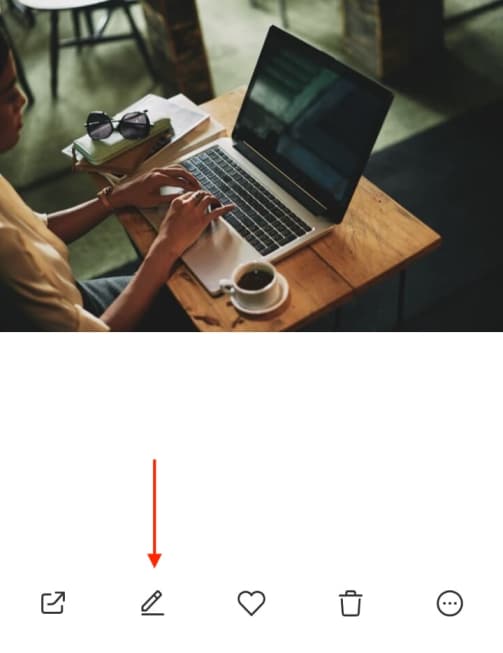
Step 2: Enter the Editing Mode and Crop Option
Go to editing mode from the options. The editing mode or icon will depend on the phone model and operating system. Then, click on the “Crop” option.
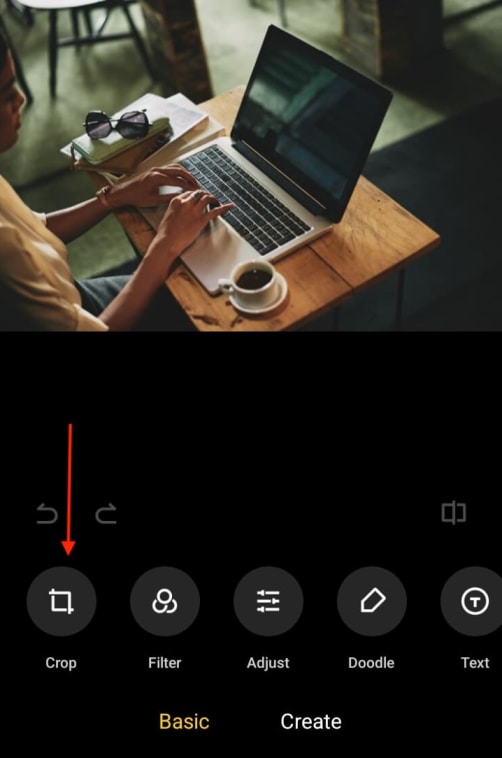
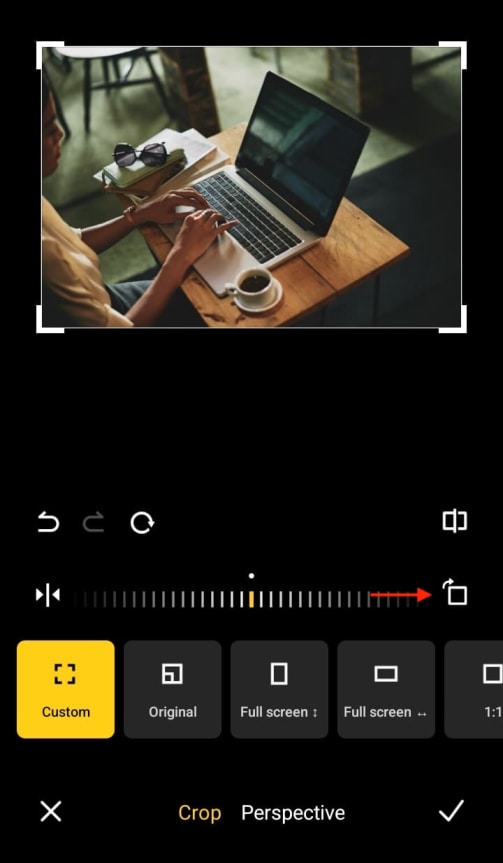
Step 3: Rotate and Save the Image
Next, click on the “Rotate” icon to rotate the image. Once done, click on the right sign to save the rotation. Clicking the “Save” button will save the rotated photo.
Part 3: When Default Rotation Isn’t Enough
While the built-in rotation tools on iPhone, iPad, and Android are convenient, they aren’t always the most efficient. If you’re looking for more than just basic features, you must know more than just how to rotate image in iPhone/Android. These tools are designed for casual use, which can become frustrating after some point.
No Bulk Rotation Support: Mobile devices don’t offer any way to rotate multiple photos at once. Want to rotate 20 pictures at once? You’ll have to do it manually, one image at a time. There's also no folder-level editing or drag-and-drop batch functionality.
Inconsistent Tools Across Devices: Android tools vary by brand and OS version. One phone may offer an angle dial, while another offers only flip and rotate. Some offer sliders, others don’t. Some save new files, while others overwrite originals without warning.
File Type and Resolution Restrictions: Most native apps work best with standard image formats, such as JPEG (JPG) or PNG. But if you work with RAW files, TIFFs, or other professional formats, your device may not support rotation. Sometimes, it may compress or alter the image quality after saving.
Lack of Angle Precision: The rotation options are mostly limited to 90° increments. Even when a slider is available, it’s not easy to get exact angles, such as 33° or 45°. This is a problem when you don’t know how to rotate a photo on iPhone or Android, such as straightening a line in an image.
Part 4: Batch Rotate Images with UniConverter
If you know how to rotate a photo on an iPhone/Android, the built-in Gallery or Photos app can be handy for basic image rotation on both Android and iPhone/iPad. However, these apps won’t be able to cater to your needs if you want to rotate multiple images. Since you can only rotate one photo at a time, the process will become too time-consuming.
Thanks to Wondershare UniConverter, you can easily rotate and edit multiple images. The platform will also provide you with advanced features for better image editing and enhancement. Unlike the built-in apps of Android and iPhone/iPad, you won’t feel like there are too many restrictions.

Batch Image Editor
Key Features
- Rotate hundreds of images at once. You can choose from various angles without quality loss.
- UniConverter supports various file formats, including JPG, PNG, BMP, and TIFF.
- Apply a horizontal or vertical flip across all selected photos for quick visual adjustments.
- As UniConverter remembers the previous settings, you can reuse custom rotation angles.
How to Rotate Images Using UniConverter
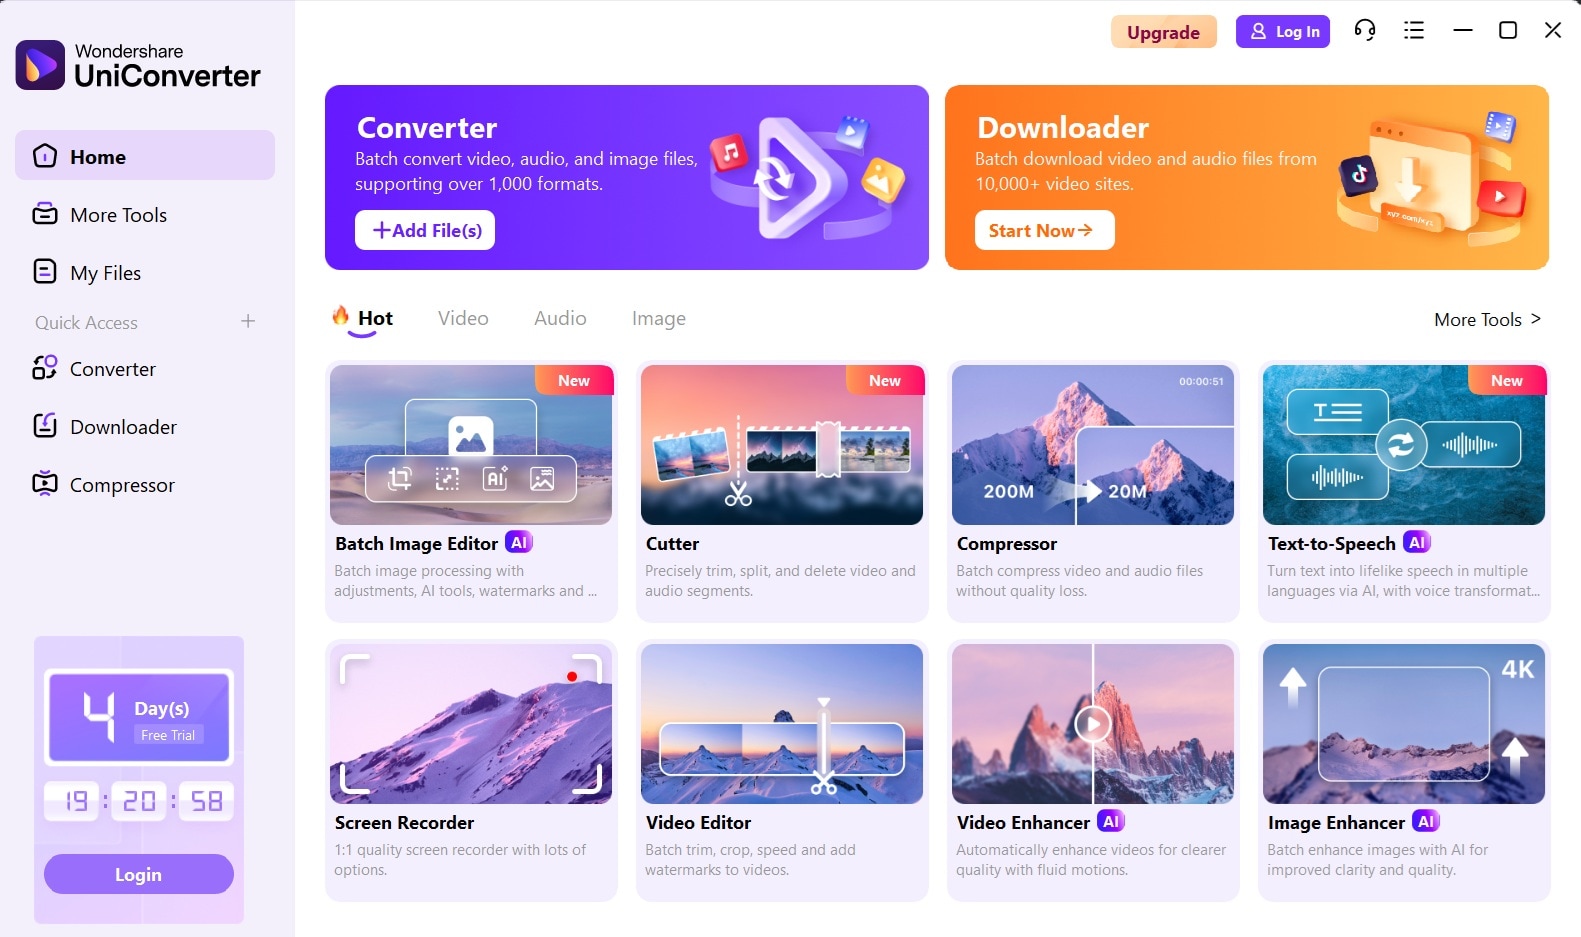
Step 1Upload the Image
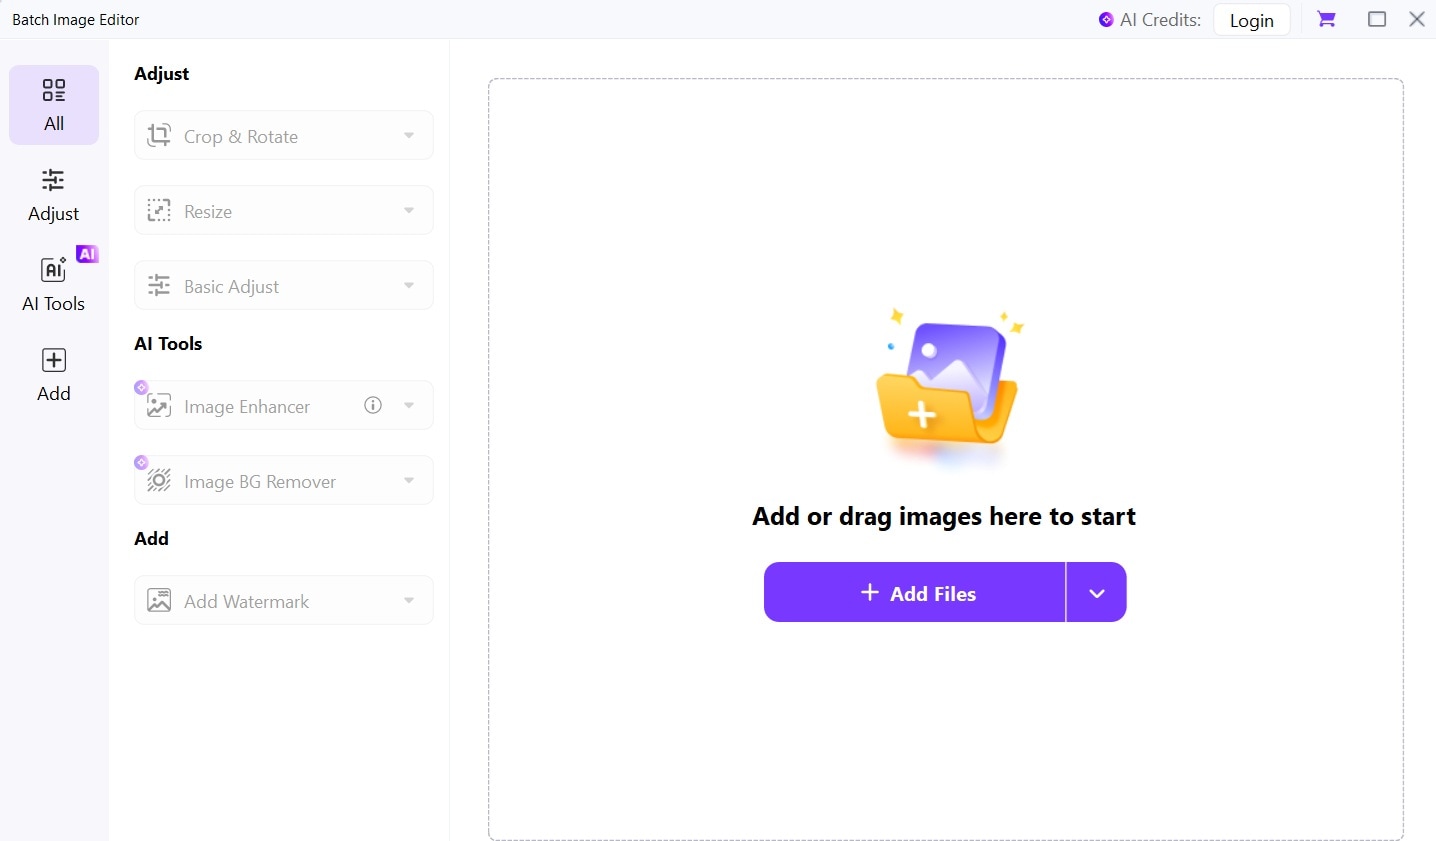
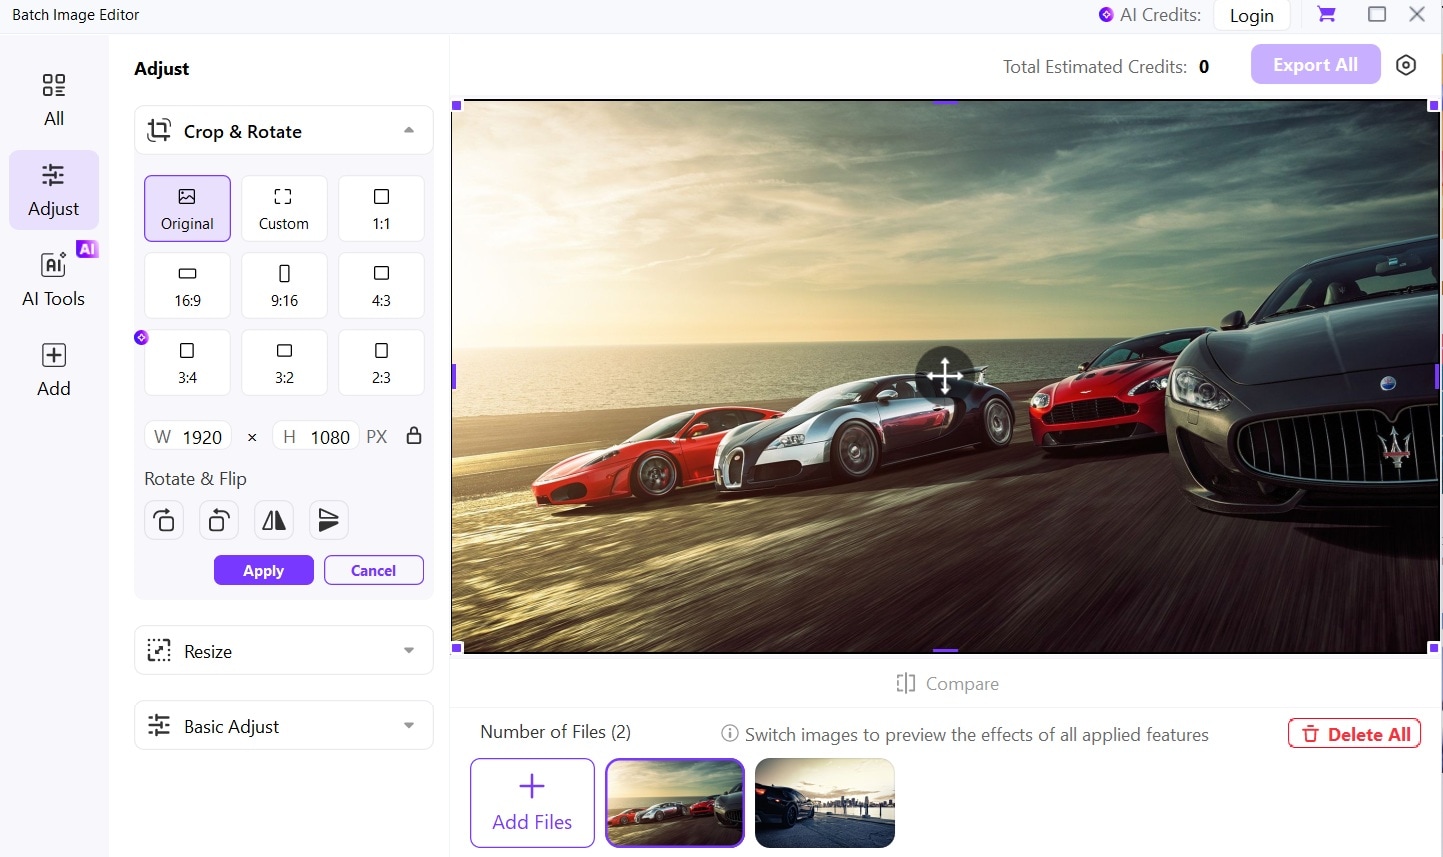
Head to Batch Image Editor and click “Add Files” to upload the image(s) you want to rotate. If you're rotating several at once, switch to the batch editor and upload them all at the same time.
Step 2Rotate the Images and Apply Changes
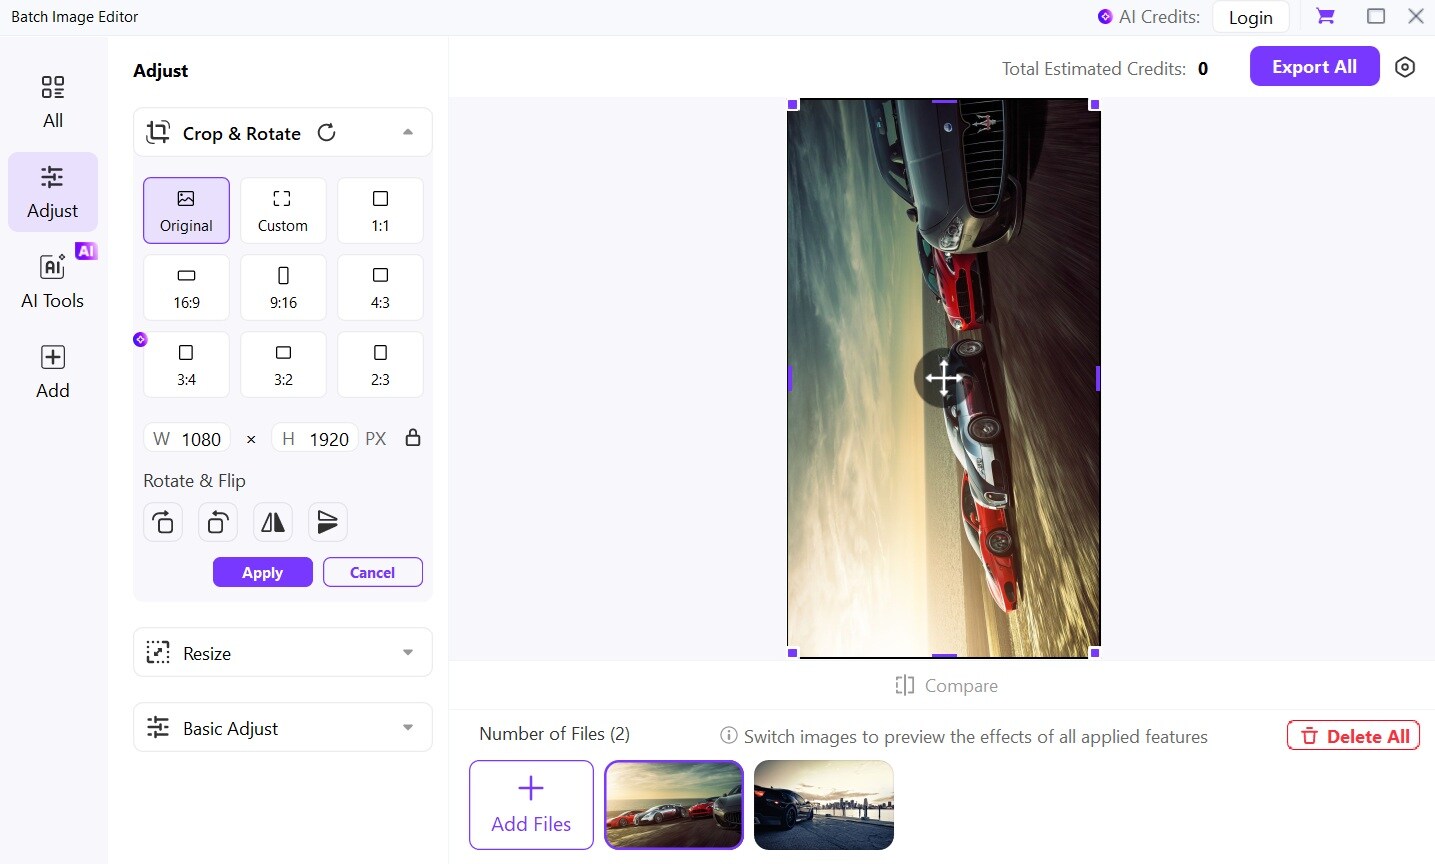
From the “Rotate & Flip” option, rotate the image as you want. You can rotate the photos horizontally or vertically. Once done, click on “Apply” to implement the changes.
Step 3Save the Images
After rotating your images, click “Export All” in the top-right corner. All edited files will download to your device immediately.
Conclusion
Photo rotation on iPhone, iPad, or an Android device is easy with just a few quick edits. But once you know how to rotate pic in iPhone/Android, you’ll no longer like the default tools. In such cases, you can use UniConverter for better control and speed, something which built-in tools cannot match.
Instead of repeating the same steps all over again, switch to a tool like UniConverter that handles it all in one go. Give it a try and improve your photo cropping process today!

