

Android users are sometimes skeptical about resizing images on their devices. They wonder if the tools and features would be sufficient or not, or maybe they will have to download third-party apps to resize images. Worry not, because we are revealing all the ways to resize on your Android device. Your use case could vary from cropping a picture for social media to bulk resizing images for websites. We assure you that this guide will help you cover all your image-resizing needs on Android devices.
But why does image resizing matter so much?Because it helps to save storage space on your Android device, alter pixels and percentages of an image and transfer files quickly. During the process of image resizing, several shortcomings may pop up out of nowhere. Without further ado, let's start by understanding the common mistakes to avoid when resizing images on Android devices.
In this article
Part 1. Common Mistakes to Avoid When Resizing Images on Android
1. Not Locking the Aspect Ratio
Android devices have drag-and-adjust features to resize an image. Users sometimes tend to overlook the presence of aspect ratios ( 1:1, 4:3, 16:9). And saving the image without freezing the aspect ratio can lead to blurry and stretched images.
Now, how to avoid this mistake? It's simple. Try to use the built-in aspect ratio selection on your Android device. It will set the frame for your image according to your needs and make it ideal for social media posting as well.
2. Saving the Image in the Wrong Format
Imagine saving a PNG as your profile picture. That’s disastrous. It happens when you resize your image but do not save it in the right format. If you edit a PNG and save it as a JPEG, your image will have a solid white (or black) background that you won’t be able to get rid of. Or you may end up converting your JPG file to a BMP, and suddenly, the image size has touched the clouds.
What happens next? That’s why you should ensure that your resized image has the preferred file format. It will refrain from losing quality and maintain an optimum file size that is necessary for uploading everywhere.
3. Over-compressing the File
You want to reduce the image size and make it ideal for uploading. But along the way, you end up over-shrinking the file size, and thus, the pixels burn out, and the quality depletes like a drying well.
Been there? No worries. The simple solution for this mistake is to determine the pixel size beforehand so that you can maintain an ideal compression for the image. For example, the ideal pixel ratio for your image could be 100 x 100 DPI, but if your input goes below that number, your image quality would end up being depleted. Thus, you must always look for the preferred pixel range and enter it if you are looking to reduce the file size.
4. Guessing Instead of Checking the Output Size
Another common mistake when resizing images on Android is guessing the output size. Your required dimensions could be precise, but because you aren’t sure, you just guess a number and input it into the field. That’s where the struggle really starts. Now that you have guessed the output size, your image could end up being stretched, squashed, or flattened (Which you obviously did not want to happen).
So, the solution is to check the output size and dimensions that you want your resized image to have, and then start resizing it on your Android device.
5. Using the Wrong App for the Task
Now, resizing has numerous use cases. You might want to resize the file size, upscale the image, or crop unwanted elements in the image. All of that may not be possible in one single native app. What do you do then? Most people end up using the wrong app for the task. Their actual need could be to reduce the file size, but they end up cropping the image or compressing it. This model also sacrifices the quality of the image and does not give much in return.
Getting rid of this menace is not hard. You just need to use a tool that is versatile and supports every type of image resizing that you might need. For instance, UniConverter! This software runs on your desktop and helps resize images like a pro! The best part? You can use it for free.
Part 2. Resize Images on Android With Built-in Tool
Every Android smartphone or tablet has a Photos app. This application is native or built-in, so you can do basic image resizing without being reliant on third-party apps. Every Photos app has somewhat similar features. Let's understand how to use the Photos app step by step for resizing images:
1. Open the Photos App
Navigate to the Photos App on your Android device and open it. Tap on the image that you want to resize. The options to optimize or share this image would be available at the bottom of the screen.
2. Tap Edit and Explore the Options
When you tap ‘Edit’, you will find another pop-up with multiple options. You will be able to crop the image, set the aspect ratio, and use basic editing features such as sharpening, tone enhancement, and adding filters.
3. Choose Crop or Resize
If you are looking for an aspect ratio that already exists, you will find it in the Crop or Resize option. If not, you can manually drag the cropper to remove the unwanted elements in the picture.
4. Make the changes and tap “Save.”
As a final step, preview the final output after cropping the picture. If you are satisfied with the results, tap ‘Save,’ and the image will be saved to your Android device.
The Photos app generally has the ability to crop and set the aspect ratios of the images that you are working on. However, it might not be able to alter the file size or upscale or downscale the image. In that case, it is important to use third-party tools that support advanced resizing options.

Versatile Bulk Images Resizer
Part 3. 5 Third-Party Tools to Resize Images on Android
To address the problem of limited features on your Android device, we have identified five tools that can be used on your Android device. Most importantly, they are competent to resize the file size of the images. Let's explore them one by one and understand their pros and cons:
1. Photo & Picture Resizer
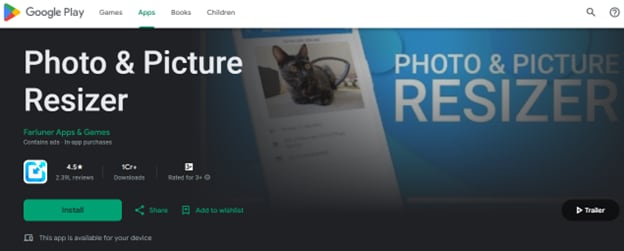
Photo & Picture Resizer has been downloaded more than 10 million times. On the Google Play Store, this application has a rating of 4.5/5. It excels in resizing images, providing advanced editing options for your images, and saving them directly to the photo gallery on your device.
Key Features
- Enlarge the picture for printing and website optimization.
- High-density image compression.
- Batch resizing options are available to save your time and storage space.
Pros & Cons
Step by Step Guide
Here is the step-by-step guide to resizing images using the Photo & Picture Resizer:
- Install this application and provide the necessary permissions, such as camera, storage, etc. Upon entering the app, tap on “Select Images”
- Select the images that you want to resize from the file menu presented to you. Then you will get advanced options to resize the images. You can do that by choosing the preferred percentage or by choosing a range for reducing the file size.
- Upon making the selection, your instant result would appear before you, containing the exact details of your image file size.
- Cross-check the details to avoid exporting the wrong file size. Then tap ‘Save’ and the pictures will be saved to your Android photo gallery.
2. InstaSize Photo Editor+Resizer
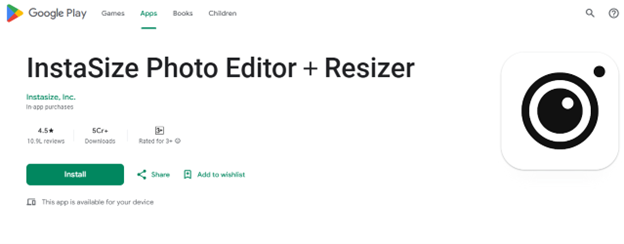
This application leads to multiple charts on the Google Play Store. It flaunts 100 million creators on its platform and has advanced image editing and resizing features. For those wishing to use the InstaSize Photo Editor + Resizer.
Key Features
- Complete photo editing and resizing solution.
- Over 130 filters are available for images and videos in the application.
- Advanced editing tools for premium members.
Pros & Cons
Step by Step Guide
Using InstaSize Photo Editor+Resizer is easy! Here’s a beginner-friendly guide to using the application:
- Upon installing the application from the Play Store, enable the required permissions for smooth import of the image from the Android device to the application.
- Select the image that you want to resize by tapping the ‘+’ icon. Your selected images will appear on the editor screen.
- Tap on the Canvas or Crop option at the bottom of the tools menu. Choose from preset sizes (like Instagram, Story, YouTube, etc.) or enter custom dimensions. Drag and adjust the image position to fit the canvas perfectly.
- Select the format that you want to download it in. Tap the ‘Download’ icon to save the image on your device.
3. Photo Resizer HD
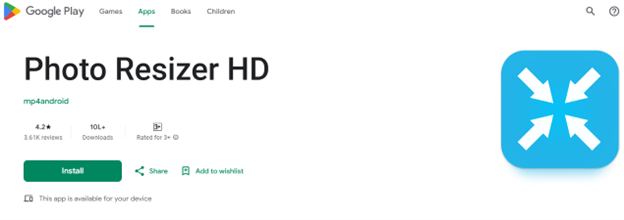
Photo Resizer HD has a minimalist interface. It is easily navigable and provides multiple image resizing options. On the Google Play Store, this application has a rating of 4.2/5, and it is used by more than one million Android users.
Key Features
- Bulk resize images in multiple formats.
- Edit the resized images for sharpness.
- Save the files into your Android device or the SD card.
Pros & Cons
Step by Step Guide
To use the Photo Resizer HD application, use the following steps:
- Install from the Play Store and allow the basic permissions requested by the app.
- After successful login, tap on the ‘Gallery’ options to import images from your device. You can select multiple images at once.
- On the bottom, you get multiple options to crop, resize, and rotate the image. Resize the image by inputting the pixel size relevant for you.
- As a final step, tap on “Shrink,” and your image will be resized. You can share to other apps or save it in your phone gallery directly.
4. Compress Image - MB to KB

This application has a clean and simple UI. Compress Image - MB to KB boasts its robust capability to reduce the image size from MB to KB in a split second. It is trusted by over a million users, and it has a rating of 4.7/5 on the Google Play Store.
Key Features
- One-tap compression from MB to KB without quality loss.
- Custom size selection to hit exact file size targets.
- Bulk compression for multiple images at once.
Pros & Cons
Step by Step Guide
Use these direct steps to effectively use the Compress Image - MB to KB app on your Android device:
- Download the Compress Image - MB to KB app from the PlayStore. Grant permissions to access media files and then tap on ‘Select Images’ to begin.
- Choose the image you want to compress. You can select one or multiple images at once. Preview the file size before compression.
- Set a preferred file size (eg. 100kb. Use the compression slider if you want more control. Tap “Compress” to begin the process.
- Your compressed image is saved directly to your Android device. You can check the folder directly from the app to share it.
5. Photo Compressor and Resizer
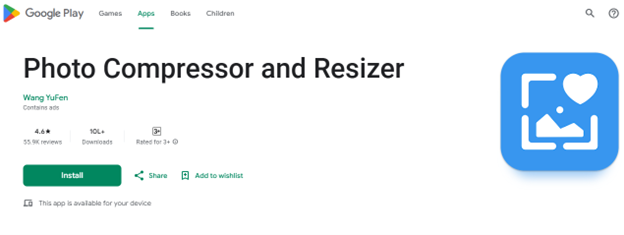
Akin to the tools mentioned above, Photo Compressor and Resizer help users resize batches of images in one go. This application has a rating of 4.6/5 on the Play Store, and it has been downloaded over a million times.
Key Features
- Batch compression for up to 100 images at once.
- Built-in preview before and after compression of the file.
- Option to retain the original file size after resizing.
Pros & Cons
Step by Step Guide
Here’s how to use this application for resizing images:
- Install the application and grant the permissions requested upon signing in. Select the images that you want to resize.
- Enter the pixel size and the percentage for the final output of the images. Then tap on ‘Next’.
- Choose a format to export your files. Multiple formats such as PNG, JPG, BMP, etc, are available. Pick one for the batch and convert the images.
- Save the files onto your device after rechecking the changes made to the file.
Versatile Bulk Images Resizer
Part 4. UniConverter: Bulk Convert Images At Lossless Quality on Desktop
The above-mentioned tools are great for converting images on Android devices. But why should you limit yourself? To convert images on a desktop, try the powerful UniConverter by Wondershare. It enables you to convert images, videos, and audio in bulk. Advanced editing and bulk resizing are all too easy with this tool. Here are the ground-breaking features of the UniConverter:
- Free Instant bulk image resizing in multiple formats.
- 20+ advanced editing functions.
- Background remover, image compressor, and watermark remover are built-in.
Pros & Cons
Step by Step Guide
UniConverter works seamlessly on a desktop. Here are four simple steps to bulk resize images on the UniConverter:
< b>Step 1
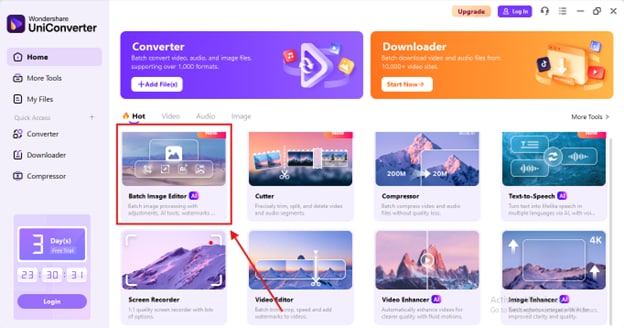
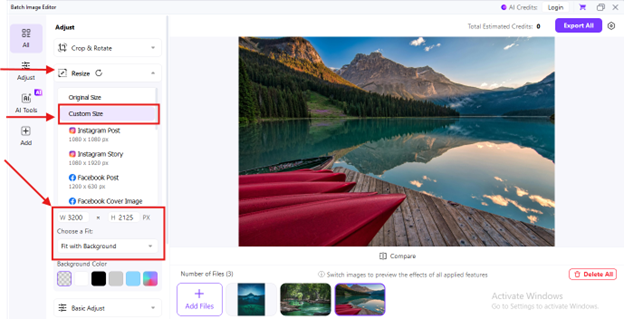
- Install the UniConverter on your Windows device and navigate to the home page. Ensure that you are using the latest version of the UniConverter (16.4.6). The tool catalogue will appear before you. Choose ‘Batch Image Editor’ from the list and head to the editor.
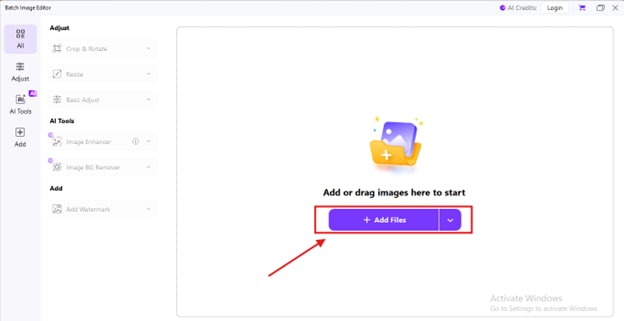
< b>Step 2
Click on ‘Add files’ in the center and choose the images that you want to resize from your file manager.
< b>Step 3
Click on the settings icon in the top right corner. A pop-up will appear for adjusting the image format.
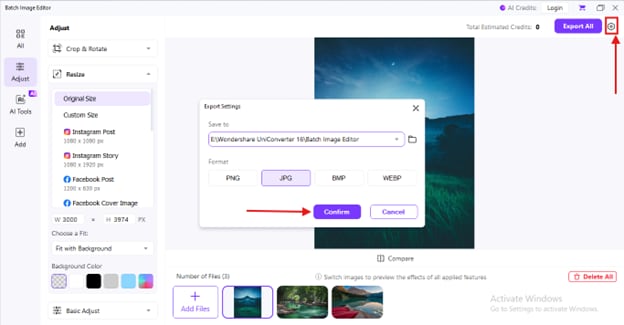
Fill in the custom size of the image by clicking on, ‘Custom Size” under the ‘Resize” dropdown in the top left corner.
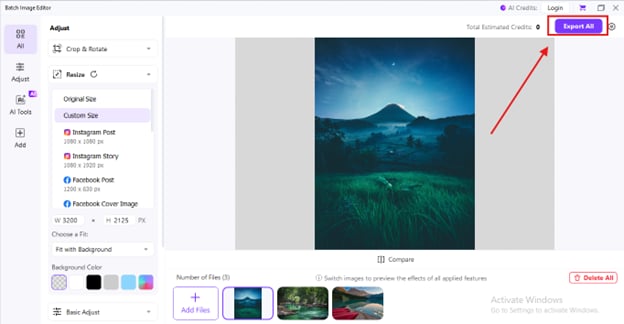
< b>Step 4
After adjusting the image format, click “Export all.” Your images will be converted instantly and saved to your device.
UniConverter is free to use for resizing images, videos, and audio. You can also edit your files with advanced in-built tools. You can download it directly from the Wondershare website and use it for free!
Part 5. Tips for Resizing Images on Android
Not every app can have the feature that you specifically need. Hence, follow these tips when you are resizing images on Android devices. They will help you to complete your resizing task efficiently and avoid pitfalls along the way:
1. Bulk Resize Images to Save Time
The apps that you are currently using might not have a bulk resizing option. Resizing one picture at a time can drain tons of hours and seem hectic. But guess what, you can avoid this and save those hours.
You must always choose an application that has a bulk resizing option for saving time and storage. Like UniConverter! It has all the advanced image resizing options to deliver quality images in an instant.
2. Use Preset Sizes for Social Media
Your image resizing app may offer preset sizes specifically for social media. You can use that to resize your image and get the accurate aspect ratio for each image. Without the presets, you might end up creating inaccurate images.
3. Rename for Better Organization
Rename the original images for better categorisation. Images that look similar might sometimes create confusion. You can also create a separate folder for all your resized images to keep your files organized.
4. Preview Before Saving
Before you export your images, you need to preview the images and cross-check the new file size and resolutions. Some apps do not have preview options, so you must ensure if its there before starting the bulk resizing procedure.
5. Beware of Watermarks
Your resized images may have a watermark. That may happen when you use the free version of an application. To avoid this, use an application that does not force the watermark on your images, even if you are on the free plan.
Conclusion
Resizing images on Android is not difficult. You have the option to choose the built-in Photos app or use a third-party application from the Play Store to resize the images. However, it is important to remember that the built-in application may not have the pixel modification feature. It will limit you to resizing the aspect ratio, but won’t help you with image compression.
In such a case, it is advisable to use a third-party tool or use UniConverter on a desktop. It is a versatile tool that is used to resize images, videos, and audio files. Through its free version, anyone can resize their images and save storage.
Versatile Bulk Images Resizer
FAQs
-
1. How do I change the resolution of a picture on Android?
You will need a third-party application to change the resolution of the picture. You can download the InstaSize Photo Editor+Resizer from the Play Store and alter the image resolution. -
2. How do I reduce the size of a picture to 20kb on my phone?
To reduce a picture to 20KB, you’ll need a compression-focused app like Compress Image - MB to KB or Photo Compressor. Open the app, upload your image, and select or enter “20KB” as the target size. The app will compress your photo while trying to keep it clear and usable. -
3. How can I change the size of an image?
Determine if you want to change the aspect ratio or compress the file. If you want to change the aspect ratio, you can open the image in your built-in Photos app, tap on ‘Edit” and choose the ideal aspect ratio. -
4. How do I compress the JPG file?
You can compress a JPG file by importing it into UniConverter. Download it from the official website and select ‘Converter’. Then add your JPG file and adjust the quality setting before converting it.

