


Do you need to mirror your photos but aren’t sure how? It’s a question many designers, photographers, and content creators ask.
Many users find themselves stuck on basic image edits. So, are you also thinking about how to flip images in Photoshop? The process is quick and requires just a few clicks.
We'll guide you through a variety of methods to flip an image in Adobe Photoshop. You’ll learn how to flip an image on Photoshop and understand when and why flipping a photo is useful for design projects. Each step is clearly explained, so even beginners can follow along.
By the end, you’ll know all about flipping images in Photoshop. Whether you need to adjust composition, create reflections, or correct orientation, you’ll be able to do it effortlessly.
In this article
- Why Flip An Image in Photoshop? How is it Useful?
- What is the Difference Between Flip and Rotate in Photoshop?
- How To Flip An Image On Photoshop: Step-by-Step Guide
- Best Alternative to Flip Images in Bulk with One Click
- Flip Photo in Photoshop: Common Mistakes to Avoid
- FAQs about Photoshop Flip Image
Part 1: Why Flip An Image in Photoshop? How is it Useful?
Flipping a photo in Photoshop helps in many design and photo projects.
Here's why it is important to learn about how to flip picture in Photoshop:
- Correct Orientation – Fix images that are accidentally flipped or rotated incorrectly.
- Create Mirror Effects – Design symmetrical compositions and reflections for artistic visuals.
- Enhance Composition – Adjust image layouts to fit specific design needs or improve balance.
- Improve Readability – Flip text-based images for better readability and proper alignment.
- Design Variations – Quickly generate different perspectives for marketing and creative projects.
- Artistic Expression – Experiment with flipped elements to create abstract or surreal effects.
- Photo Manipulation – Combine flipped images with edits for unique and engaging visuals.
Part 2: What is the Difference Between Flip and Rotate in Photoshop?

Well, new users often mix up flipping and rotating in Photoshop. They're not the same. When you ask how to flip an image Photoshop, you're talking about mirroring, not just turning.
Rotation turns your image at an angle. You can rotate 90°, 180°, or any custom angle. This helps when photos are crooked or sideways. The image stays the same; it just turned.
Flipping an image creates a mirrored effect by reversing it along an axis. In Photoshop, a horizontal flip swaps left and right, while a vertical flip switches top and bottom. This simple tool instantly transforms your photo into a mirrored version.
Also, if the image has text, it will read backward after a horizontal flip.
Part 3: How To Flip An Image On Photoshop: Step-by-Step Guide
Flipping an image in Photoshop is a valuable tool for design and editing. It allows you to create mirrored effects, modify layouts, and shift perspectives. The software provides straightforward options to flip images horizontally or vertically, whether you're adjusting an entire image or a single layer.
These features help refine visuals while maintaining quality. With just a few simple steps, you can achieve the perfect flipped effect for any project.
Method 1: Flip Picture in Photoshop By Flipping the Entire Canvas
Flipping the entire canvas is the quickest way to mirror an image in Photoshop. It's perfect for straightforward edits that don’t need layer-specific adjustments. With a single action, everything flips instantly, making it an easy and efficient solution for fast edits.
So, yes, this answers the basic question of how do I flip an image in Photoshop.
Why use this method:
- Easy way to reverse simple images effortlessly.
- Works great for basic photos with one layer
- Keeps your image quality perfect
Steps to flip the entire canvas:
- Open your image in Photoshop. Click "Image" in the top menu. Find "Image Rotation".
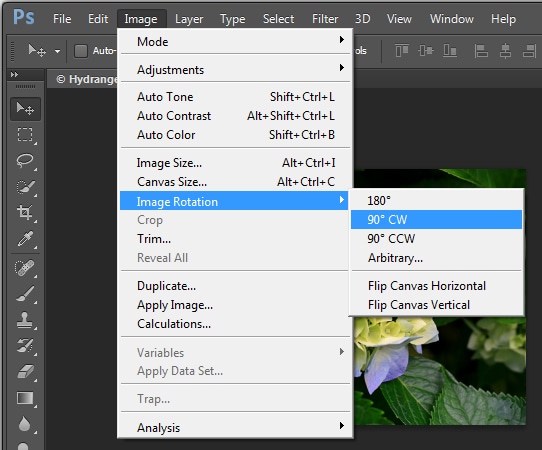
- You can either go for Flip Canvas Horizontal or Flip Canvas Vertical. Your image in Photoshop will flip right away
That's it! This method works on all Photoshop versions. It flips every part of your image at once.
Method 2: How to Flip an Image in PS By Flipping a Single Layer
For more complex projects, you might want to flip just one part of your design. This method lets you flip one layer while keeping others the same. It's perfect when learning how to flip a photo in Photoshop for advanced designs.
Why use this method:
- You can preserve certain elements of your design while making adjustments.
- It gives you more control over complex images
- It's perfect when you have text or logos that shouldn't flip
Steps to flip a single layer:
- Open your Photoshop file with multiple layers. Look at the Layers panel. Click once on the layer you want to flip. Press Ctrl+T (on Windows). Or Command+T (on Mac). Right-click inside the transform box.
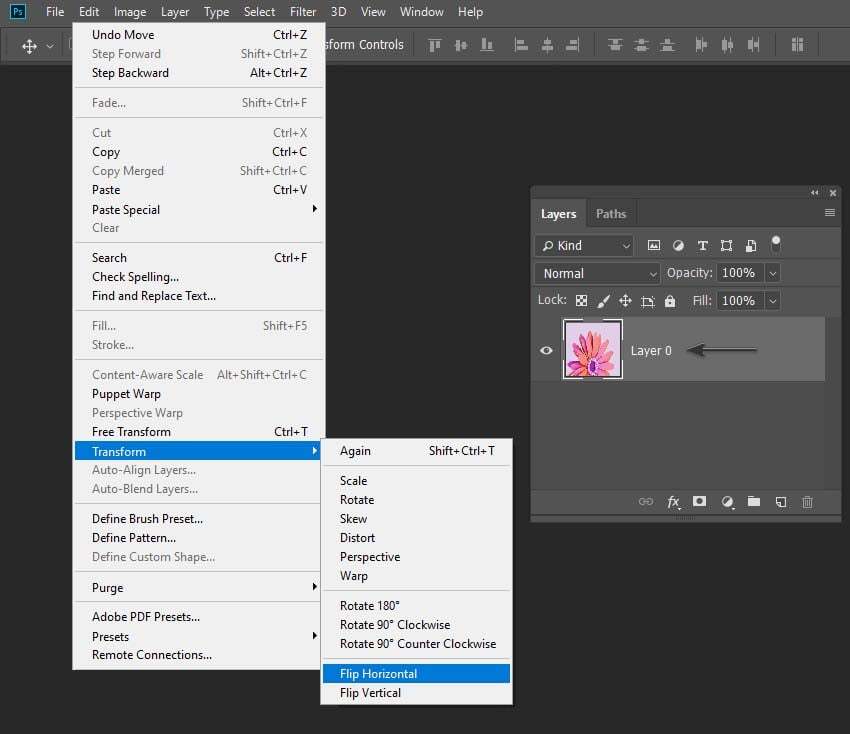
- Choose "Flip Horizontal" or "Flip Vertical". Press Enter to confirm. Only your chosen layer will flip
This method works great when you need some parts of your design to stay the same. It gives you more control.
Method 3: How to Reverse Image in Photoshop By Creating a Mirror Effect
A mirror effect looks fancy but is easy to make. This technique answers how do you reverse an image in Photoshop when you want a reflection effect.
Why use this method:
- Creates stunning reflections for product photos
- Makes symmetrical art that draws the eye
- Adds a pro touch to portfolio pieces
Steps to create a mirror effect:
- Open your image in Photoshop. Press C to get the Crop tool. Drag to make your image a bit bigger on one side. Press Enter to confirm the crop.
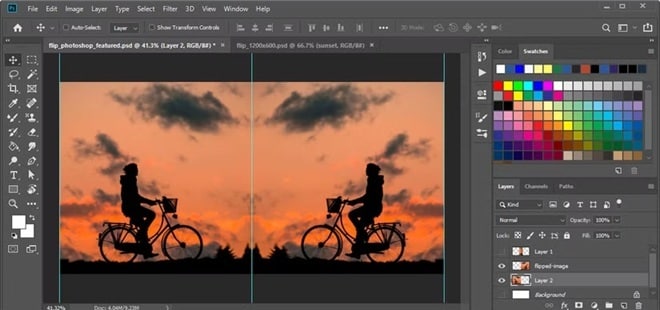
- Select half of your image using the Rectangle tool. Copy it with Ctrl+C, then paste it as a new layer using Ctrl+V. Open Transform with Ctrl+T, right-click, and choose Flip Horizontal. Move the flipped section beside the original, then use the Eraser tool to blend the edges smoothly if needed.
Quick TIP: For a water reflection effect, add a slight Gaussian blur to the flipped half. Then lower its opacity to about 80%.
Part 4: Best Alternative to Flip Images in Bulk with One Click
Photoshop is great for single images. But what if you have 50 photos to flip? That's when Photoshop falls short. If you need to batch process, knowing just how do you flip an image in Photoshop isn't enough. Right?
This is where UniConverter saves the day. It lets you flip many images at once with just a few clicks.
Introducing UniConverter
UniConverter isn’t just for flipping images—it’s got way more tricks. You can resize, crop, adjust size, and even add text to multiple images all at once. No need for separate tools—it handles everything in one place.
But it doesn’t stop at images. UniConverter also converts videos, compresses files, and even records your screen. Whether you're editing photos or tweaking media files, it’s built to make the whole process smooth and hassle-free.
UniConverter makes batch image processing a breeze. You can flip, resize, and crop, saving tons of time. No need to edit each file separately; just upload your images, apply changes, and process everything in one go.
Whether you're working with hundreds of photos or just a handful, UniConverter keeps things quick and efficient. It’s perfect for designers, photographers, or anyone handling large batches of media.

Batch Image Editor
Key Features of UniConverter:
- Flips dozens of images at once with one click
- Has a simple drag-and-drop system, easier than flipping in Photoshop
- Includes tools to crop, resize, and add watermarks
- Works with over 1000 file types
- Processes files very fast using your GPU
- Keeps image quality perfect when flipping
- Converts videos between formats
- Includes screen recording tools
- Offers video editing features
Step-by-Step Guide on How to Flip Images in Bulk Using UniConverter:
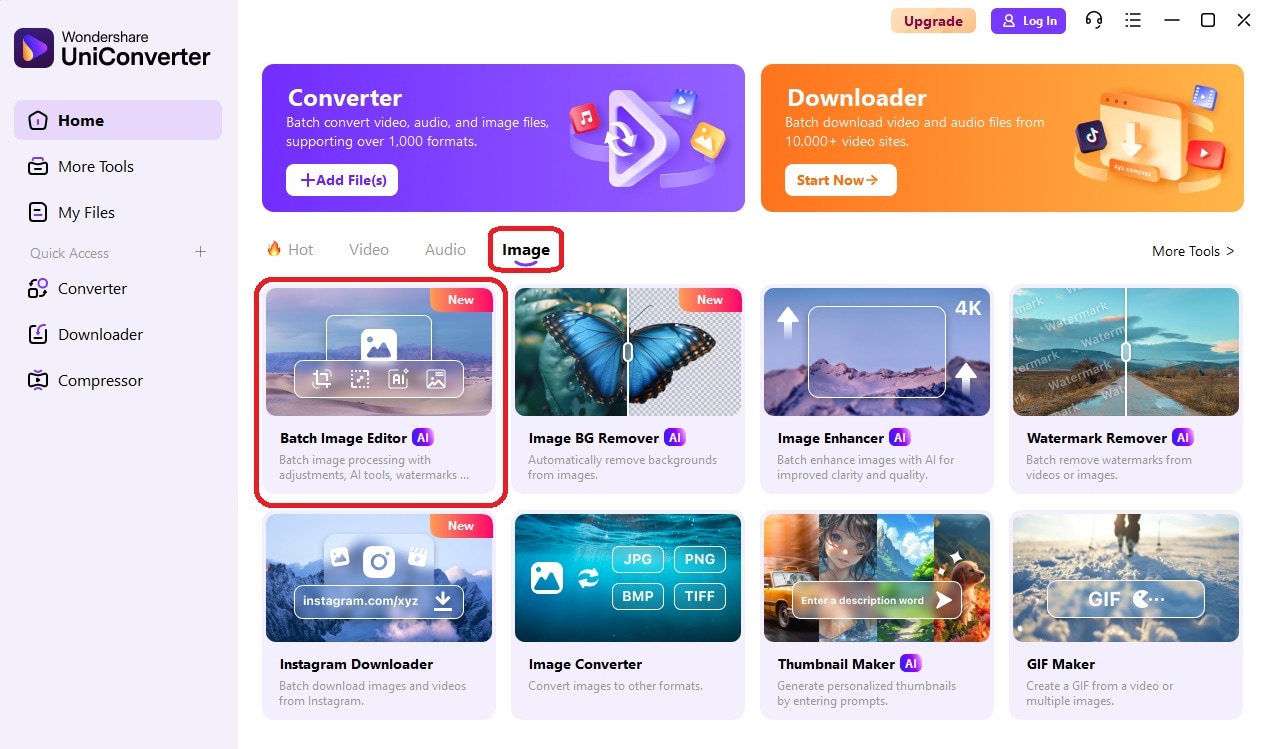
Step 1
Free Download Free Download and install UniConverter on your PC. Open the program. You will see various options on the dashboard. Select Batch Photo Editor.
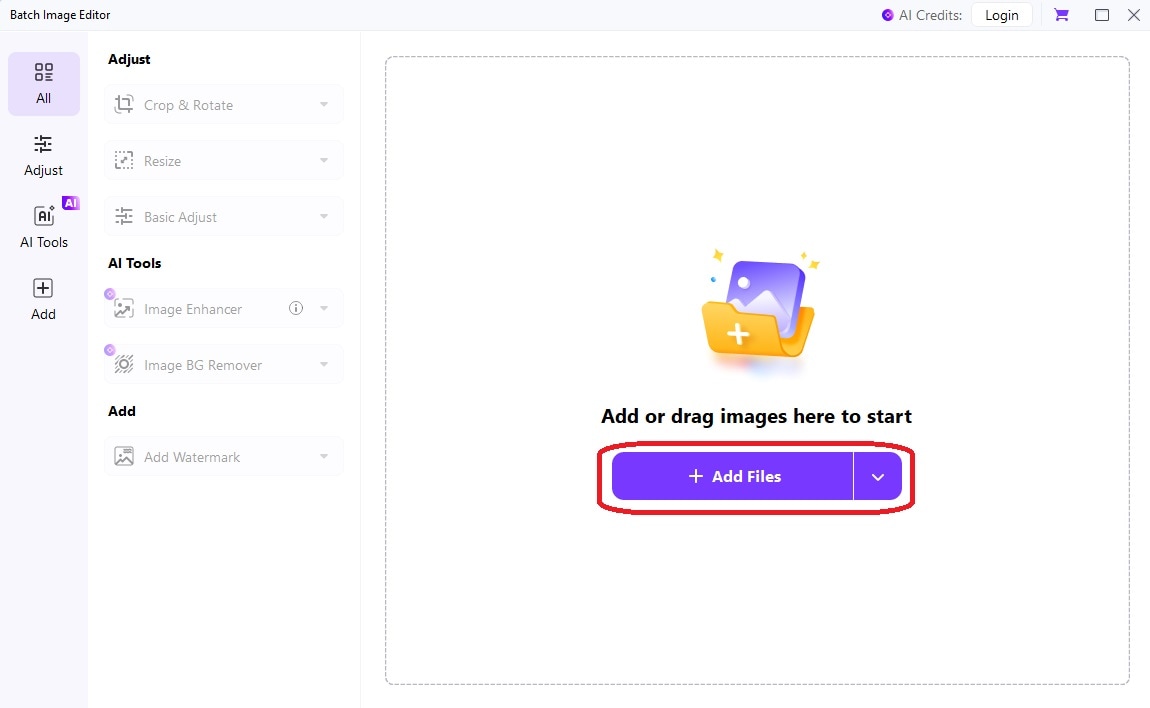
Step 2
Click Add Files and select all the images you want to flip for batch editing.
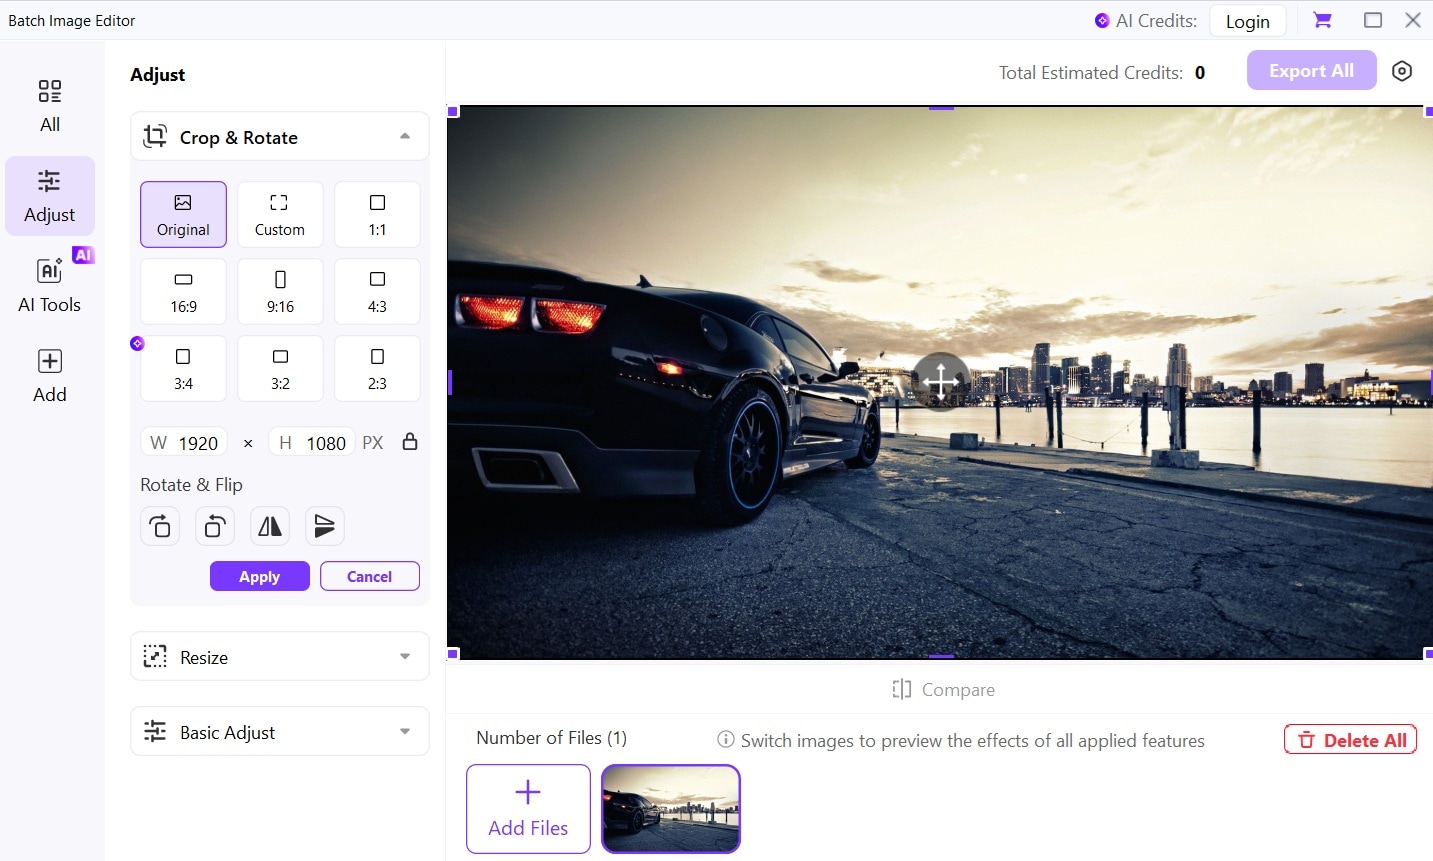
Step 3
Now, switch to the Adjust tab from the left menu pane. Click the Flip icon (two adjacent triangles) under the Rotate & Flip section.
Step 4
Check Apply to All to use these settings on every image. Pick where to save your files and which format to use. Wait a moment. Find your flipped images in your chosen folder.
And that’s it! With UniConverter, you don't need to repeat steps for each image. This saves hours when working with many photos.
Part 5: Flip Photo in Photoshop: Common Mistakes to Avoid
When learning how do you flip a photo in Photoshop, watch out for these common errors. Avoid these mistakes to work faster and get better results.
Common mistakes when flipping images:
- Flipping the whole canvas when you only need one layer flipped
- Not saving a copy first makes it hard to undo changes
- Forgetting that text will read backward after a horizontal flip
- Not noticing that shadows now fall the wrong way
- Missing that logos or known items look strange when flipped
- Using the wrong flip type (horizontal vs. vertical)
- Not using Smart Objects for non-destructive editing
- Forgetting that facial features can look odd when flipped
- Not considering that flipping can change the visual "weight" of a composition
- Failing to check if any elements should stay unflipped
Conclusion
Learning how to flip an image in PS is a basic skill that helps in many projects. Now you know several ways to flip images in Photoshop.
We covered three main methods: flipping the whole canvas, flipping single layers, and creating mirror effects. Each works best for different needs. The canvas flip works for simple images. Layer flipping helps with complex designs. Mirror effects create artistic reflections.
For bulk processing, tools like UniConverter save time. Now you know both Photoshop flip image methods and faster options for multiple images. These skills will speed up your workflow and give you more creative control.

