


Adobe InDesign is a powerful layout and publishing software, and a go-to tool for graphic designers, publishers, and marketers. It offers users precise control over images, typography, and page elements. Cropping in InDesign allows them to focus on the most critical parts of an image, enhance its visual impact, and more.
However, cropping here doesn’t follow the standard procedure of image editors. This article provides a step-by-step guide that highlights how to crop image on InDesign, so follow along. It further recommends an alternative tool that makes your cropping task relatively simple.
In this article
Part 1. How to Crop Image on InDesign: Step-by-Step Guide
When you crop a picture in InDesign, you work with two elements: the photo and the frame. The following are the different methods that answer your question of how to crop a picture in InDesign:
Method 1: Crop Image Indesign Using Frame Fitting Options
To crop photo in InDesign using frame fitting options, follow these simple steps:
Step 1: Launch InDesign
As you install InDesign from Adobe Creative Cloud Desktop, launch it to access its main dashboard. Then, select a preset worksheet or create a custom one.

Step 2: Place your Image
Tap “File > Place” or press “Ctrl/Cmd + D” to select the image file you want to crop. Then, drag and click to place the image inside the frame. The best way is to keep the image in the top-left corner and drag it to the desired size.

Step 3: Resize the Frame
Activate the “Selection Tool” from the toolbar or press “V” and click on the image. The blue box and the control handles around the image are the frame. Double-click the picture or click the gray circle in the middle to select it. Then, drag the handles inward or outward to resize the image into the desired dimensions. This will crop the image to fit into a new frame size.

Step 4: Adjust Fitting Options
With the image selected, right-click on it to navigate to “Fitting” from the pop-up menu. Choose from the fitting options, such as Fit Content Proportionally or Fill Frame Proportionally, to control how the image is displayed within the frame. These options are also accessible from the “Object menu > Fitting.”

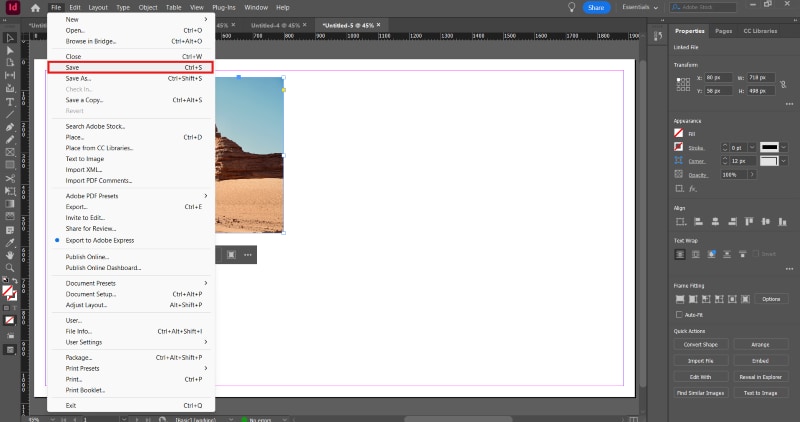
Step 5: Reposition the Image
If the image doesn’t seem to align with the frame, select “Direct Selection Tool” from the toolbar or press “A.” Then, click the image and drag it to the desired position. Then, download the file by selecting “File > Save.”
Method 2: Crop Photo in Indsign to a Shape
Another answer to your question of how to crop an image in InDesign is to use the available shapes, so follow the steps in order:
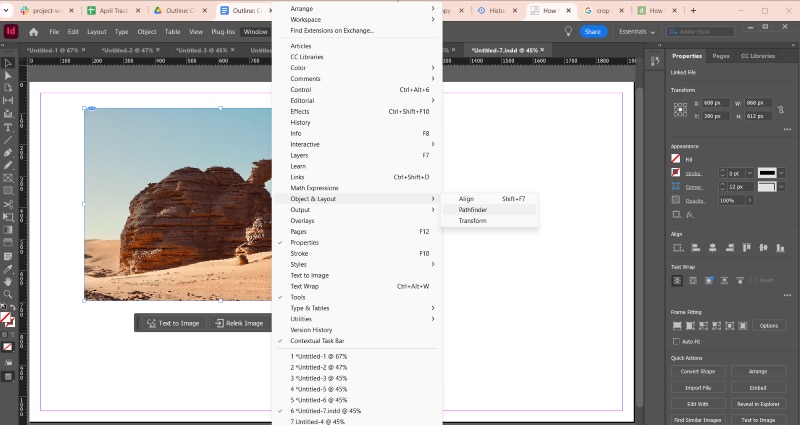
Step 1: Access the Pathfinder Tool
Upload or place your desired image on your worksheet following the steps mentioned in the previous method. Select the frame and not the image. Then, navigate to Window > Object & Layout > Pathfinder.
Step 2: Convert into Shape
In the new pop-up “Pathfinder” panel, select a shape from the various options available under “Convert Shape.”
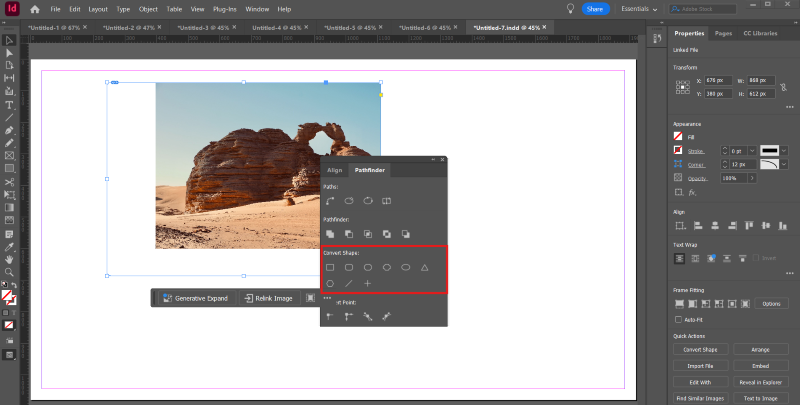
For instance, if you select “Triangle,” your image will be cropped in a triangle shape. You can create a new design around the cropped image.

Method 3: Using Clipping Path
This might not be a very reliable method to crop an image in InDesign, but it works well. Follow the steps in order:
Step 1: Create a Shape
On the image, use a pen or a shape to draw a shape that represents an area you want to crop. This shape will serve as your clipping path. Then, press the Shift key and use the “Selection Tool (V)” to select both the shape and the image frame.
Step 2: Create a Clipping Path
Click “Object > Clipping Path > Options.” From the “Type” dropdown menu of the Clipping Path dialog box, select “User-modified Path” or “Detect Edges.” Then, click “Ok” to apply the clipping path and crop the image.

Step 3: Edit the Clipping Path
If you want to set a different clipping path, use the “Direct Selection Tool (A)” to modify or adjust the anchor points or handles of the path.
Part 2. InDesign’s Cropping Limitations You Should Know
Adobe InDesign is a powerful tool with multiple features that help you create and edit images and documents. Also, there are many ways to crop an image using InDesign, but it has limitations.
Not a True Crop: Cropping an image in InDesign doesn’t physically remove its parts. Instead, it defines a portion of images that are visible within the frame.
Cannot Batch Crop: InDesign’s native functionality doesn’t support cropping multiple images simultaneously. You can achieve a similar effect by placing images into frames of identical dimensions and adjusting the crop for each frame. This can cost a chunk of your time and might not be suitable for beginners.
Complex Interface: Although InDesign offers multiple tools for creating and editing documents, it has a steep learning curve. It requires dedicated time and effort to master the interface and tools, even to carry out basic functions like cropping and resizing.
Highlighting the same, a user on G2 says, “While it's powerful, mastering InDesign can be difficult for beginners due to its extensive features and interface complexity. Even seasoned designers may take time to discover some hidden or less intuitive tools.”
Export Issues: When exporting, the full resolution of the cropped area is exported. Depending on the compression settings, the image may be compressed or downsampled.
Require Other Software: While InDesign can handle multiple layouts and design elements, it isn’t built for precise image editing. You need to use Photoshop to make detailed image manipulation and pixel-related adjustments.
A user on G2 agrees to this, and says, “I would prefer something more similar to Photoshop or Illustrator as far as how to add and manage colors in the document. InDesign's way of having a default palette, but color chips that are not easy to edit or add to the palette, is cumbersome.”
Part 3. Best Way to Crop Images Before Importing into InDesign
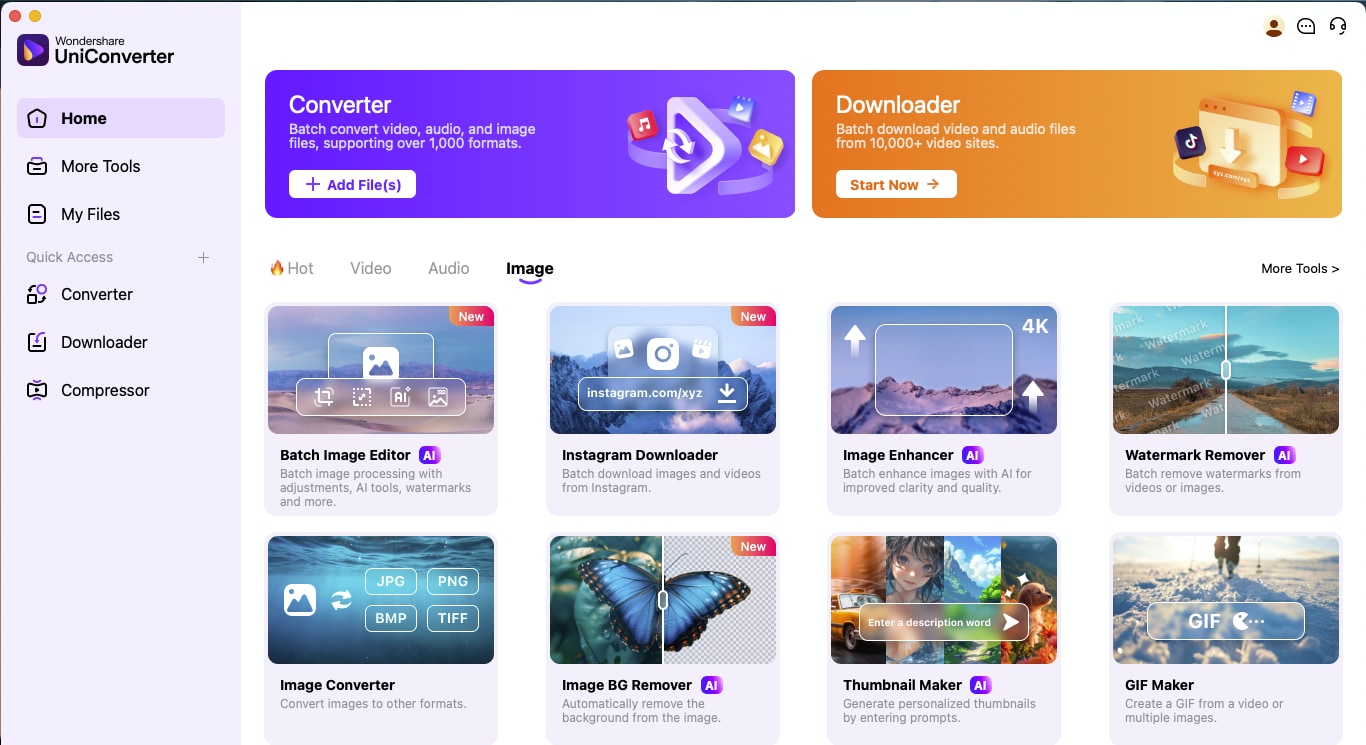
Cropping and resizing are the basics of editing, and you shouldn’t need to access hours of tutorials to perform them. If you need a relatively straightforward yet powerful tool, consider Wondershare UniConverter.
This tool makes it simple to crop images suitable for any social media platform or website upload. You can use its manual image resizer to adjust the photo dimensions without losing its quality. It also supports batch cropping and resizing so that you can edit multiple photos in less time.
Other than that, it offers a set of editing tools. From basic edits like adjusting brightness, color profiles, and tone, to advanced features like adding or removing backgrounds and watermarks, UniConverter makes editing simple.

Batch Image Editor
Key Features:
- Can perform batch cropping, resizing, and conversion.
- Supports standard image formats, including JPEG, JFIF, PNG, TIFF, and RAW.
- AI-powered editing tools like image enhancer, add and remove watermarks, and background.
- Download videos from popular websites, add subtitles, cut, convert videos, and more.
Steps to crop images on Wondershare UniConverter:
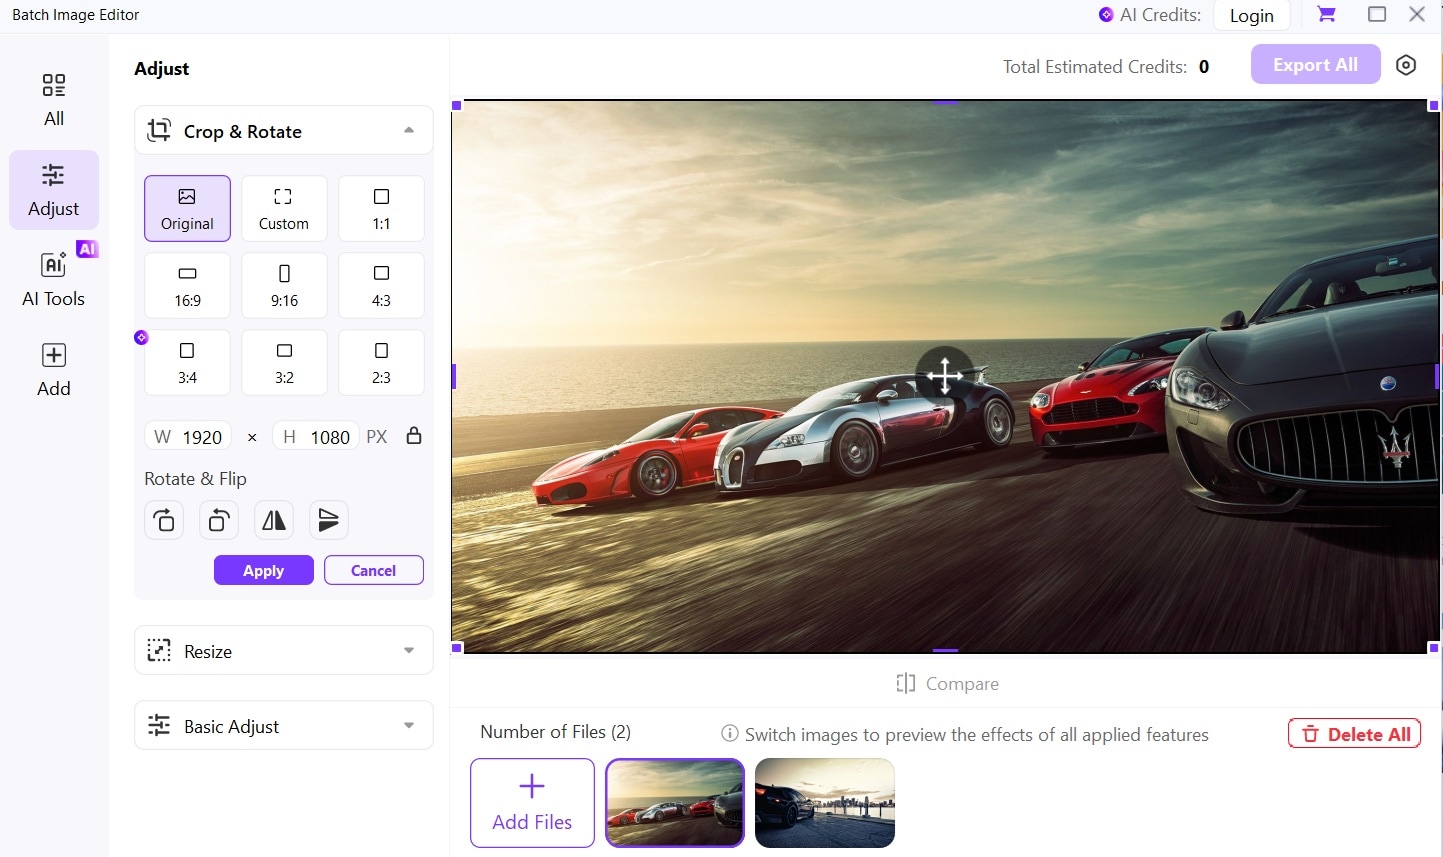
Step 1Access Photo Editor
On UniConverter’s quick access panel, tap “Batch Image Editor” to upload the image to crop. The platform supports drag-and-drop functionality and provides tools for batch cropping, resizing, converting, and editing.
Step 2Crop the Image
Under the “Adjust” panel, find and access the “Crop & Rotate” option. Select from the predefined aspect ratios, such as 16:9, 4:3, etc. You can also enter the width and height to manually crop an image. Tap “Apply” to apply the crops.
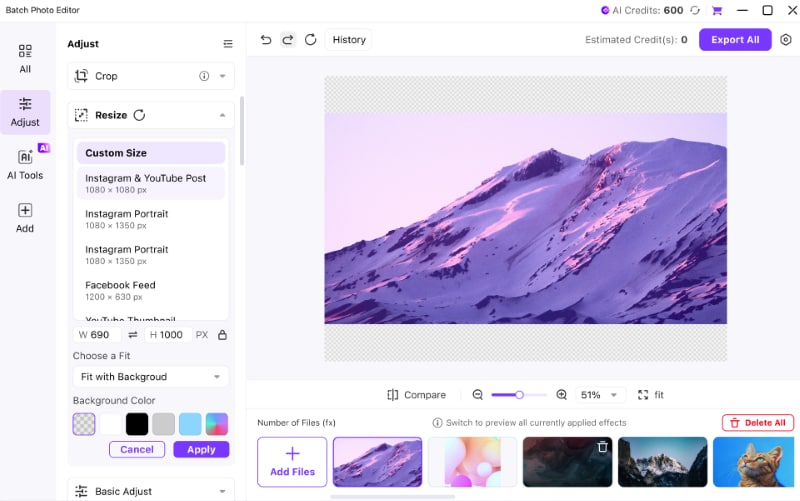
Step 3Resize the Image
Select the “Resize” option under the “Adjust” panel. You can input a custom width and height or select from presets like an Instagram Post or YouTube Thumbnail. There’s also an option to set the fit to “Stretch to Fit” or “Fit with Background.”
Step 4Export the File
UniConverter offers some AI tools like Image Enhancer and Background Remover to help increase the image clarity and appeal. Once done, tap “Export All” to download your edited image(s) and upload them on social media or share with your friends.
Part 4. When to Crop in InDesign vs Outside of It
InDesign is primarily suitable for graphic designers, production artists, and publishers who work with layouts for print and digital media. It isn’t mainly used for precise image editing, and here’s a tabular comparison on when to crop an image in InDesign and outside of it:
| Use Case | InDesign | UniConverter |
| Quick masking | ||
| Exact crop size | ||
| Batch cropping | ||
| Layout placement | ||
| AI-powered edits | ||
| Resizing | ||
| Create interactive documents | ||
| File format conversion | ||
| Work with paths, shapes, and various drawing tools |
Conclusion
InDesign is more suitable for professionals who are into professional layout design and desktop publishing, especially those who prefer precise control over typography, text, and image placement. From the detailed guide for cropping photo in InDesign, you can perform basic editing tasks, but the outputs might not maintain quality. Its cluttered interface also makes it unsuitable for beginners.
On the other hand, Wondershare UniConverter stands out with its straightforward interface and features, including a batch image editor, image enhancer, and bulk file converter. So, try it today for free!

