

If you’ve ever seen a silky-smooth waterfall, dreamy star trails, or hypnotic light trails in cityscapes, you’ve witnessed the magic of long exposure photography. This technique turns everyday scenes into surreal visuals that captivate the eye and stir the soul. Whether you're using an iPhone, Android, or a DSLR camera, long exposure photography allows you to stretch time itself within a single shot.
This beginner-friendly guide dives into how to take long exposure photography, optimize settings, and even enhance image quality in batches. Ready to freeze motion by letting it flow? Let’s get started.
In this article
Part 1. What is Long Exposure Photography?
Long exposure photography is a captivating technique that involves deliberately using slow shutter speeds to allow the camera’s sensor to absorb light over an extended period. Unlike traditional photography, which aims to freeze a moment with a quick snap, long-exposure photography embraces the passage of time within a single frame. This method enables photographers to capture motion over some time, creating surreal, dreamlike effects that transcend what the human eye can perceive in real time.
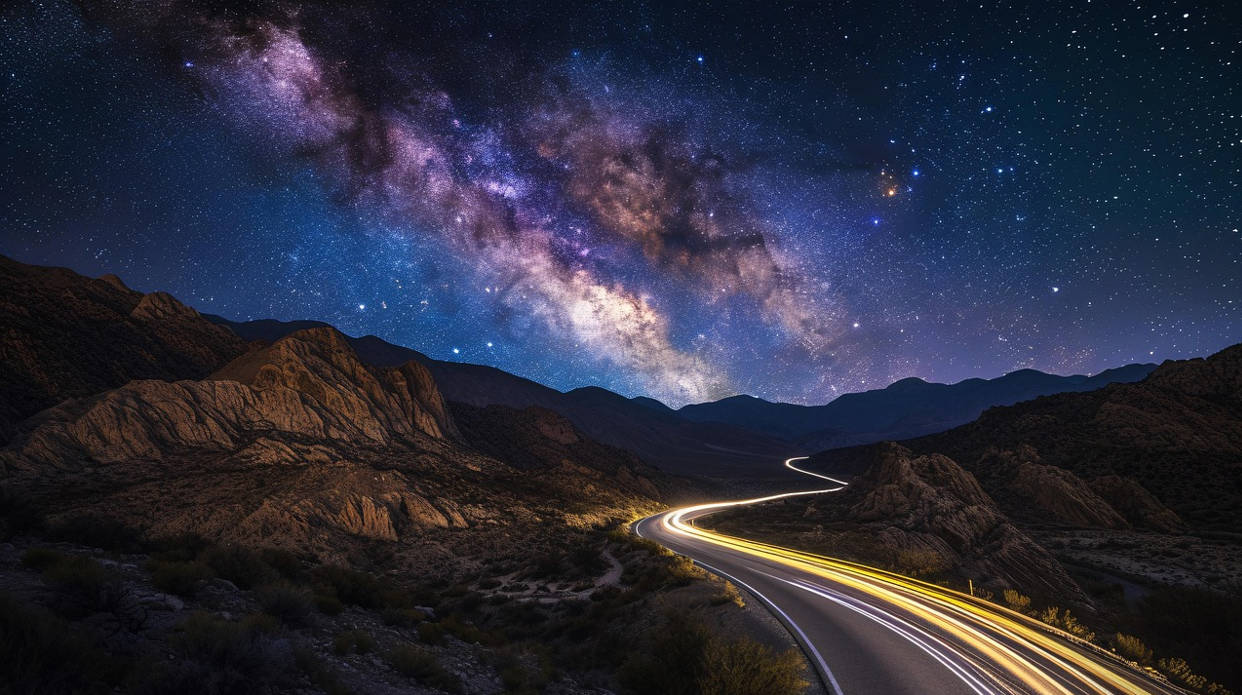
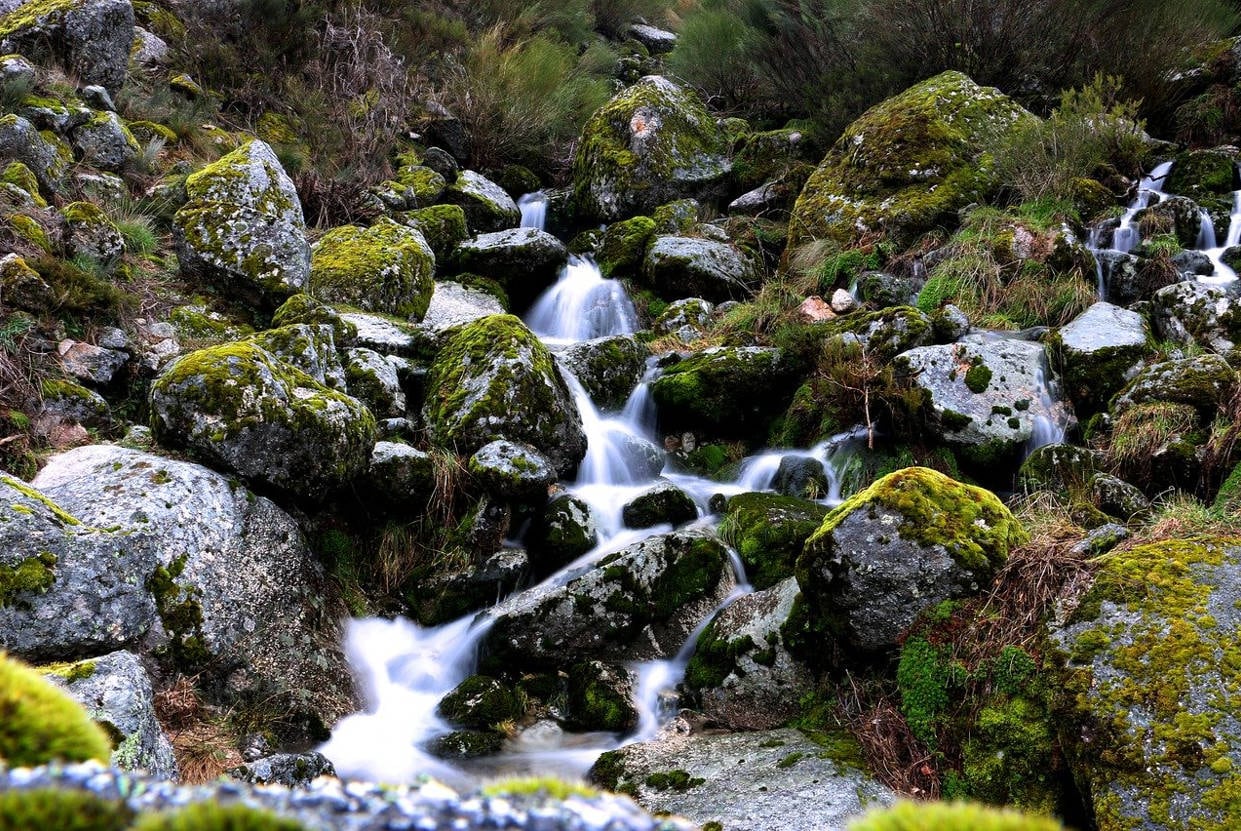
By keeping the shutter open longer, moving elements in a scene—such as flowing water, drifting clouds, or bustling city lights—are beautifully blurred. At the same time, static subjects remain sharp and defined. The result is a visual contrast that emphasizes movement and adds an ethereal, storytelling quality to the image. For example, moving water turns into mist, creating a silky, ghostly river or waterfall. Headlights become glowing trails that snake through highways like neon threads. In astrophotography, stars transform into rotating galaxies, leaving behind luminous arcs that map the Earth’s rotation.
This technique is where physics meets fantasy, blending the science of light with artistic expression. It demands a careful balance of settings—shutter speed, aperture, and ISO—and often requires tools like tripods, neutral density filters, and remote triggers to achieve stability and control. But the results are well worth the effort. Long-exposure photography isn’t just about technical prowess; it’s about visual storytelling and creative exploration.
With the proper technique, even an average long-exposure picture can become a showstopper, turning ordinary scenes into mesmerizing pieces of art that captivate viewers and evoke emotion.
Part 2. Use Cases of Long Exposure Photography
Long-exposure photography is a powerful technique that transforms ordinary scenes into captivating visual stories. Whether you're using a long-exposure camera or just learning how to take long-exposure photography on your phone, the creative possibilities are endless. From dreamy long-exposure waterfalls to glowing light painting shots, each long-exposure photo uniquely captures movement and mood. This style is widely used in nighttime photography, portraits, and even cityscapes to create surreal and dramatic effects. Whether you’re working with an advanced DSLR or experimenting with long exposure photo Android or iPhone apps, the results can be striking. Below are some inspiring and practical ways photographers use long exposure images to push their creativity further.
1. Waterfalls & Rivers
Shooting a waterfall with long exposure turns the rushing water into a silky, ethereal veil. This style of photography creates a peaceful and dreamy aesthetic that draws viewers in. It’s one of the most iconic uses of long exposure photography and works beautifully with cloudy skies and soft natural light.
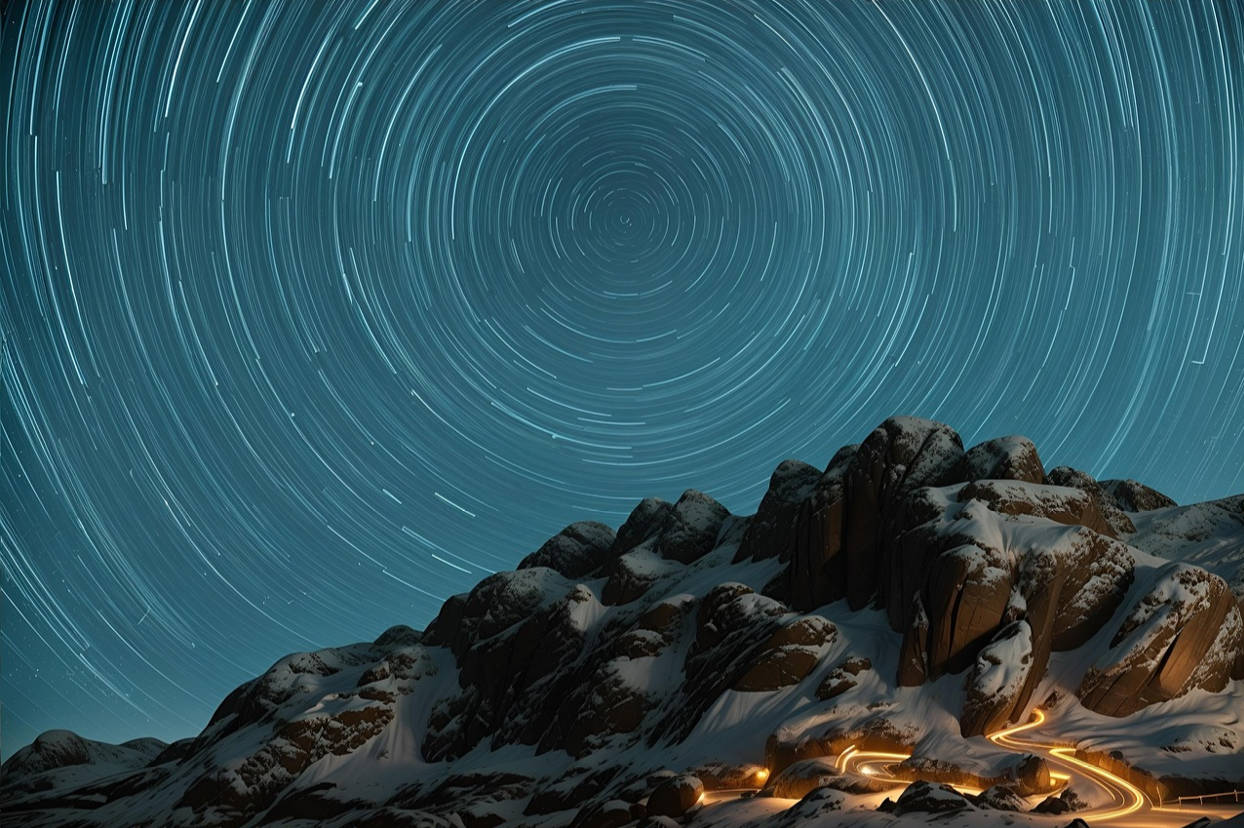
2. Star Trails
By using extreme shutter speeds (even up to hours), you can capture the movement of stars across the sky. These star trails create hypnotic circular patterns that illustrate Earth’s rotation—making for stunning long exposure night photography and a favorite among astrophotographers.
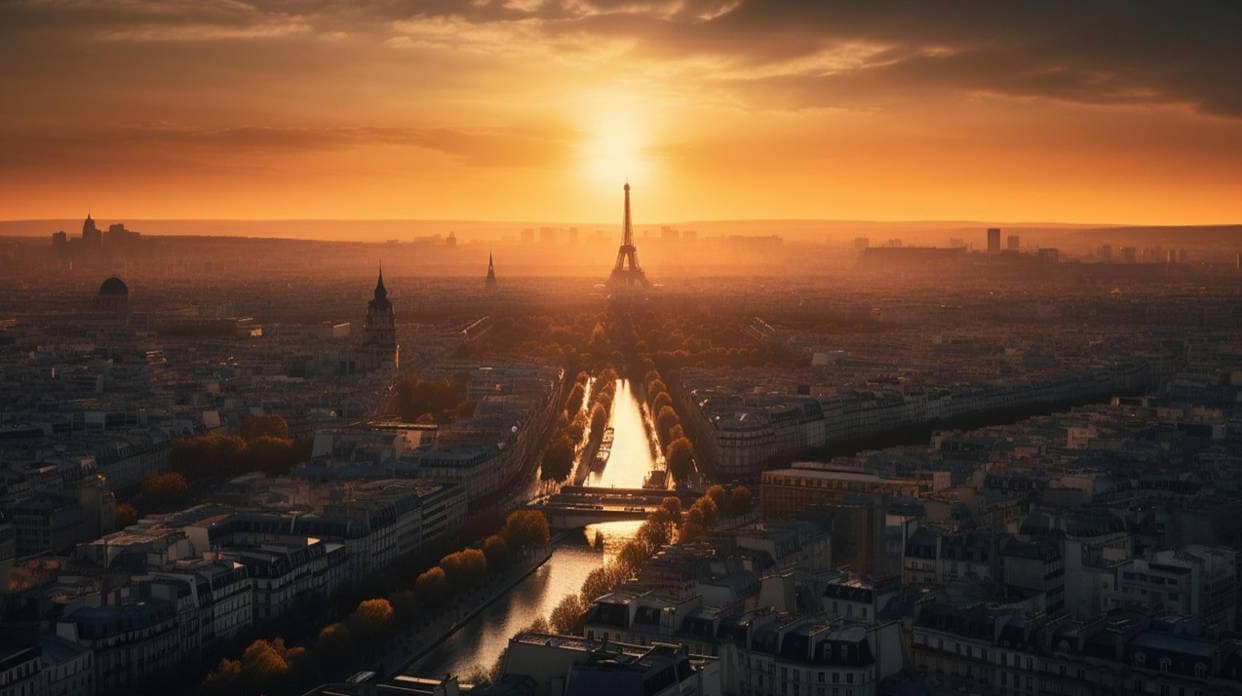
3. Golden & Blue Hour Landscapes
The soft, warm tones of golden hour and the deep blues of blue hour are perfect times for long exposure shots. These hours offer optimal light conditions for smoothing clouds and water, making every long exposure image look more cinematic and moody.
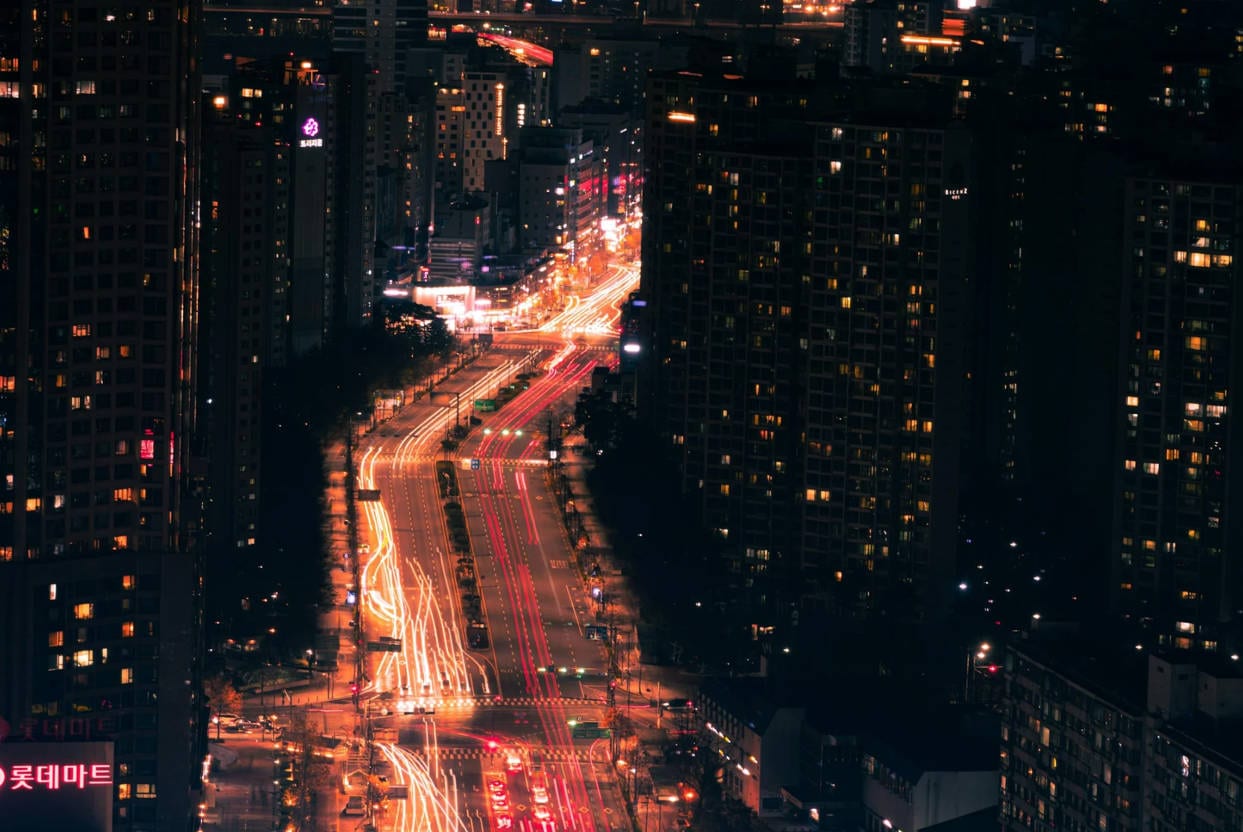
4. Cityscapes & Light Trails
Want to make car headlights look like glowing ribbons? Set your camera up on a street corner during rush hour. Long exposure photography light painting, and cityscapes are a visual feast of motion and color—mighty during nighttime photography sessions.
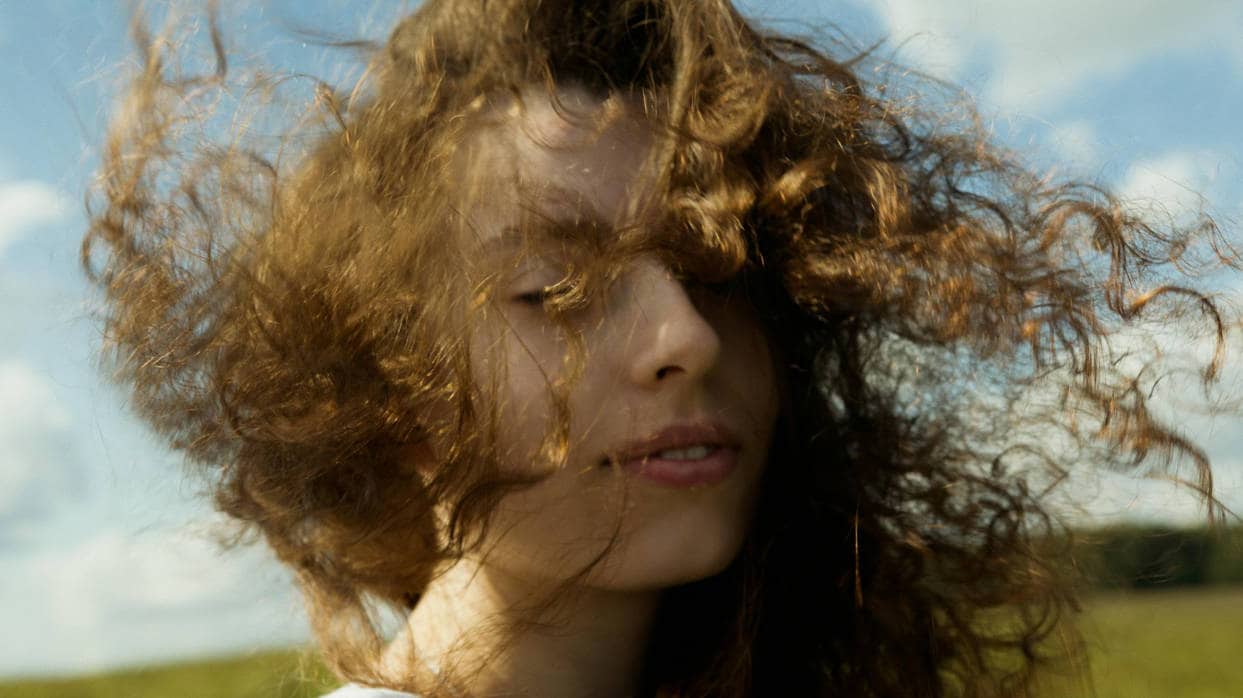
5. Portraits with Motion
Long exposure photography portraits can be incredibly artistic. By blending stillness with motion—like flowing fabric or blurred background movement—you can create haunting or dreamy effects. Just be certain your subject stays still to maintain facial clarity.

Super Easy to Use Image Enhancer for Win and Mac
Part 3. Settings for Long Exposure Photography
Nailing the correct settings is everything when it comes to capturing stunning long exposure photos. Your camera is essentially manipulating time, and precise control is necessary to create a clean, not chaotic, scene. Mastering the balance between ISO, shutter speed, aperture, and even file format is crucial for achieving sharp, dramatic results. Whether you're using a DSLR, a long exposure camera, or shooting a long exposure photo on Android or iPhone, these settings can make or break your shot. The correct configuration will help transform motion into magic in every long exposure picture you take.
- ISO – Keep It Low (100–200): High ISO introduces digital noise, especially during long exposures. By keeping your ISO low (between 100 and 200), you ensure cleaner, crisper long exposure images—vital in low-light scenes where detail matters most.
- Shutter Speed—The Real Magic: This parameter is the heart of long exposure photography. The slower your shutter, the more motion you capture. For a subtle blur, start with 1–2 seconds. For dramatic effects like star trails or misty water, go beyond 10–30 seconds. Always test a few shots and adjust based on light and motion.
- Aperture—Control the Depth & Exposure: A narrower aperture, like f/8 to f/16, helps keep your scene sharp from foreground to background. It also controls the amount of light hitting your sensor, which is critical in long exposures to avoid overexposure—especially in daylight.
- RAW Format—Non-Negotiable for Quality: RAW files store all the image data your sensor captures, giving you maximum flexibility in post-processing. You can easily correct shadows, highlights, and color without losing quality—an essential advantage when working with complex long exposure shots.
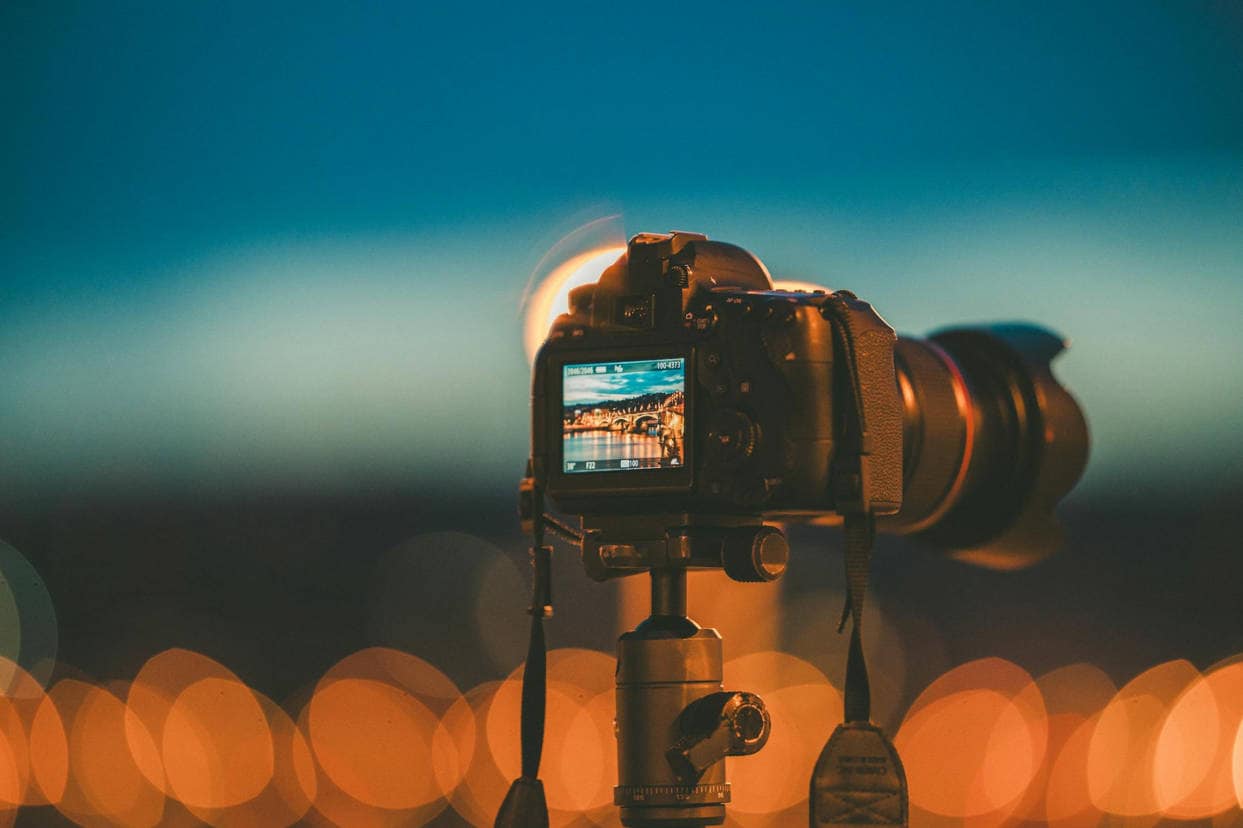
- Tripod—Your Unseen Hero: Even the slightest handshake can ruin a long-exposure photo. A stable tripod is a must for maintaining sharpness during extended exposures. For mobile shooters, a smartphone tripod or clamp can work just as well.
Part 4. How to Easily Batch Improve Sharpness of Long Exposure Photos
You took the shot—but something’s off. Your long exposure photo looks dreamy but lacks that crisp, professional edge. Softness in long exposure photography, especially under low light or in long exposure night photography, is often caused by motion blur or slight camera shake. Instead of spending hours manually sharpening each long exposure image, there's a more innovative way to fix them all. Use an AI-powered enhancer to batch-improve the sharpness of your long exposure pictures, saving time while delivering stunning results.
Use UniConverter Image Enhancer
UniConverter can instantly upgrade your long exposure photos by boosting clarity, sharpness, and detail in just a few clicks. Whether it’s a dreamy long exposure waterfall or a moody long exposure portrait, this tool delivers pro-level results quickly. It works on both DSLR shots and mobile images, including long exposure photo iPhones and Androids. Instead of editing one image at a time, you can batch-enhance multiple long exposure pictures effortlessly with AI.
Key features of UniConverter:
- AI Image Enhancer: UniConverter’s AI Image Enhancer intelligently analyzes your long exposure photos to detect blur, noise, and lack of detail. It sharpens and clarifies the image without over-processing. Ideal for fixing soft, long-exposure night photography or dreamy waterfall shots.
- Batch Processing: Instead of editing each photo manually, UniConverter allows you to process multiple long exposure pictures at once. This functionality is perfect for photographers who shoot in series or time-lapse. Save time while keeping quality consistent across your entire gallery.
- Cross-Device Compatibility: Whether you’re working with DSLR files or mobile shots, UniConverter supports it all. It’s optimized for formats from long exposure photo iPhones to Android and RAW files. No matter your setup, the tool adapts to your workflow.
- High-Quality Output: UniConverter enhances image clarity without compromising resolution or color balance. Your long exposure photography retains its original style—just sharper and more professional. It’s perfect for printing, posting, or portfolio use.
- Beginner-Friendly Interface: The tool is designed for ease, even if you’re new to editing or long exposure photography settings. With clear options and one-click enhancements, anyone can achieve studio-quality results. No learning curve—just instant improvements.
Super Easy to Use Image Enhancer for Win and Mac
Step-by-Step Guide:
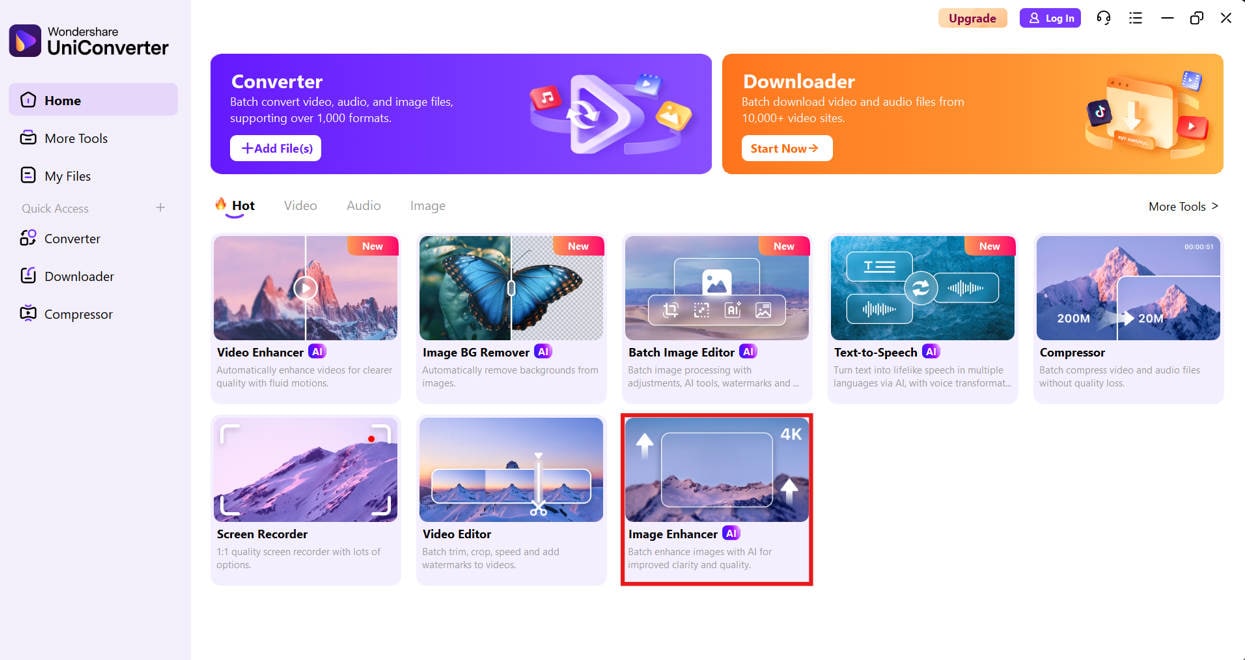
Step 1: Visit UniConverter Image Enhancer
Go to the official UniConverter Image Enhancer tool on your browser. This online tool supports both RAW and JPEG formats, making it perfect for high-quality long exposure photography edits.
Step 2: Upload Your Long Exposure Photos
Click the “Upload” button and select the images you want to enhance. You can upload multiple files at once for batch processing—ideal for speeding up your workflow.

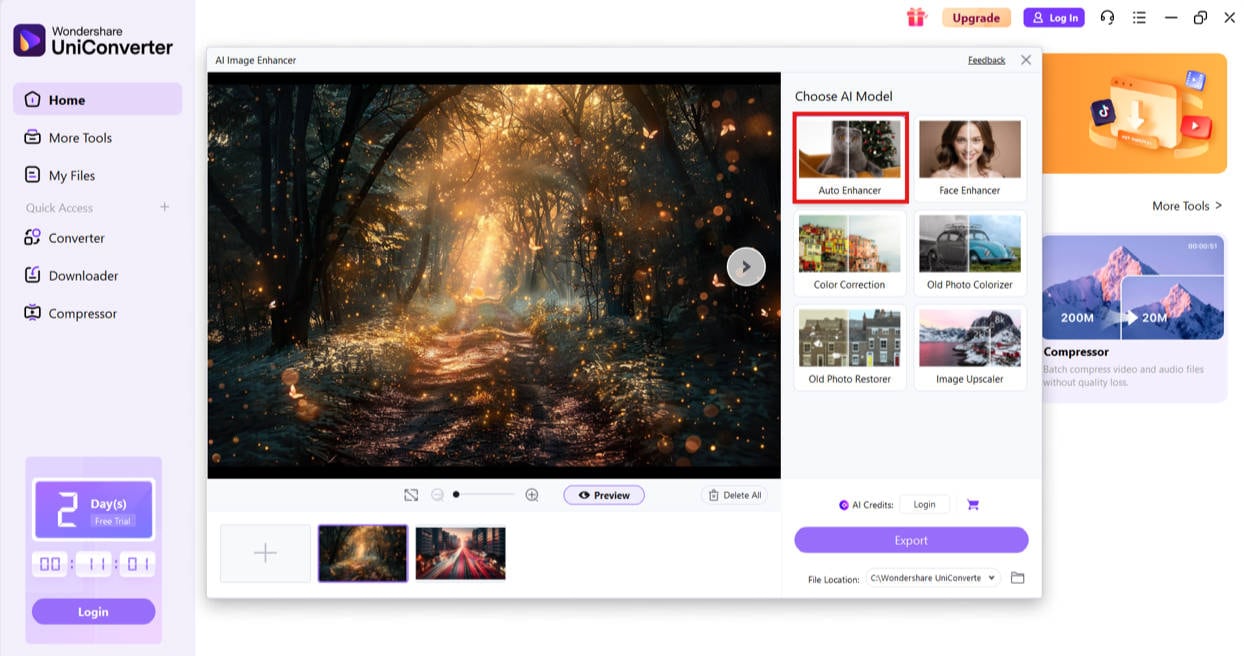
Step 3: Select ‘Auto Enhancer’ Mode
After uploading, choose the "Auto Enhancer" option from the available features. This phase is where the AI analyzes each long exposure image and intelligently sharpens motion-blurred areas while preserving the dreamy effect.
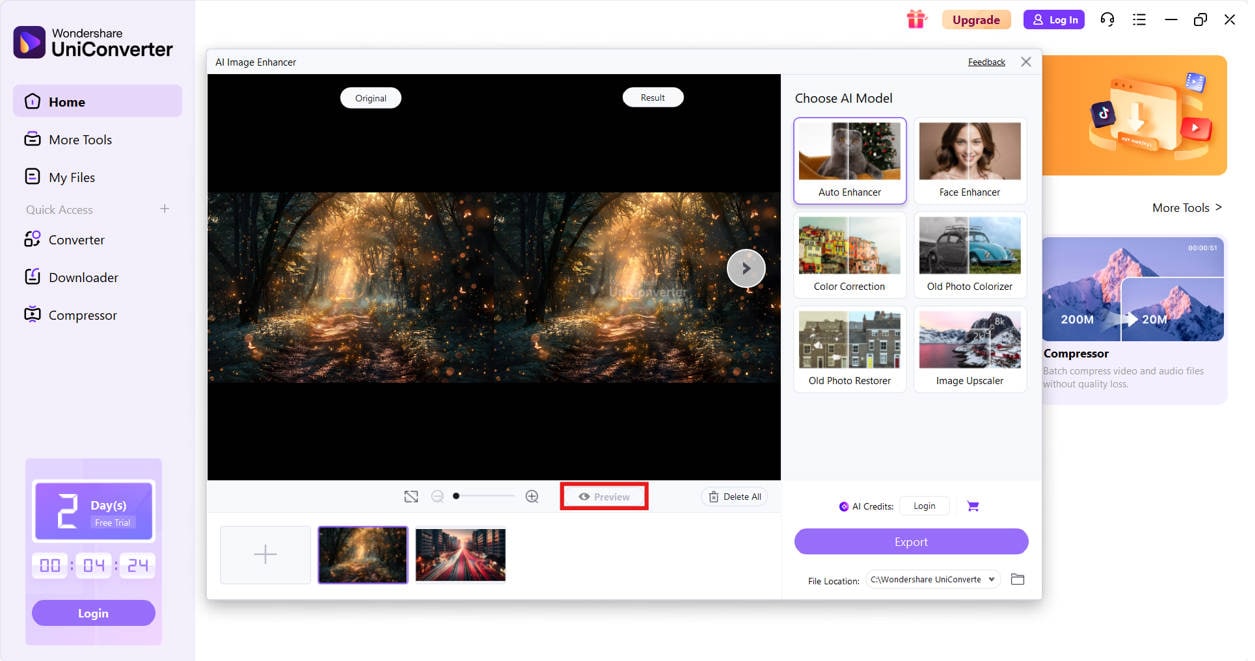
Step 4: Preview Before Applying
Check the real-time preview to compare before and after results. This feature helps you see the difference instantly and make sure it aligns with your artistic vision.
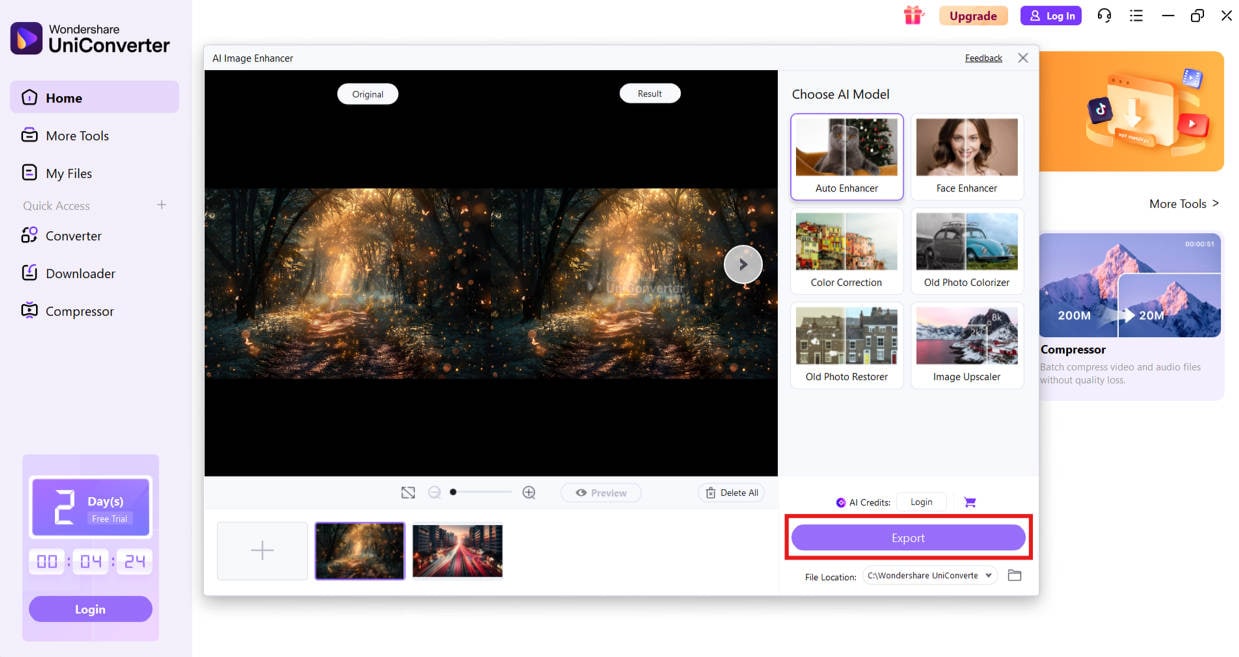
Step 5: Export
Once satisfied, apply the sharpness enhancement to all uploaded images in one click. Then download the upgraded versions in high resolution—ready to post, print, or share.
*Bonus Tip:
This tool works great for long-exposure photo Android shots as well as DSLR images. Whether you’re fixing soft night cityscapes or detailed long-exposure night photography, it’s a huge time-saver.
Conclusion
Long-exposure photography isn’t just about taking a photo—it’s about crafting a visual narrative. With patience, the correct settings, and creative instincts, your long-exposure photos can stand out—even from a smartphone. Remember, every long exposure shot you take is a dialogue between time and light. Don’t just aim to replicate what others do. Let your vision evolve. Experiment, fail, learn, and shoot again. Or you can also turn to Uniconverter AI Image Enhancer for help as a quick fix.
The beauty of long-exposure photography lies in embracing imperfection and making motion your medium. As you keep shooting, you’ll improve your technical skills and unlock your style—one surreal frame at a time.
Super Easy to Use Image Enhancer for Win and Mac
FAQs
-
1. What is the best camera for long-exposure photography?
DSLRs and mirrorless cameras like the Canon EOS R or Sony A7 series are excellent. But today’s high-end phones with manual control modes can also shoot compelling long-exposure images. -
2. Can I do long-exposure photography on my phone?
Yes! Many Androids and iPhones offer manual or "Pro" modes. You can also use apps like Lightroom Mobile, Camera FV-5, or Slow Shutter Cam for a long exposure photo Android or iOS. -
3.What’s the best time of day for long-exposure photography?
Golden hour and blue hour (just after sunset and before sunrise) offer the perfect lighting for dramatic long-exposure photography without harsh shadows. -
4. How long should my exposure be for waterfalls or rivers?
Start with 1–2 seconds. For that dreamy, foggy water, look in a long exposure waterfall and go up to 10–15 seconds, depending on the light. -
5. Is long-exposure photography good for portraits?
Yes, for artistic effects! A long exposure photography portrait can create motion blur in hair, fabric, or surroundings while keeping the subject still—make sure the subject holds position. -
6. Can I do light painting with long-exposure photography?
Absolutely. Set your camera to a 10–30 second shutter and use a flashlight or glow stick to paint in the frame. Welcome to the world of long exposure photography light painting.

