

When you look at the bright and dreamy image that appears dark and mysterious, you may also want something like that. The secret often lies in how you control the light.High-key and low-key photography techniques can instantly shift the entire mood of the image and elevate you as a photographer.
Whether you want a soft, glowing portrait or a striking, shadow-heavy shot, understanding these styles will give you control over the emotional tone of your photos. In this guide, we will explain both high-key and low-key photography in detail, including camera settings and how to improve batch overexposure and underexposure with a single click.
In this article
Part 1. What is High-Key and Low-Key Photography
Let's start with the basics–what exactly are we talking about when we mention high-key and low-key photography? These represent two contrasting approaches to lighting and exposure that create dramatically different moods in your images.
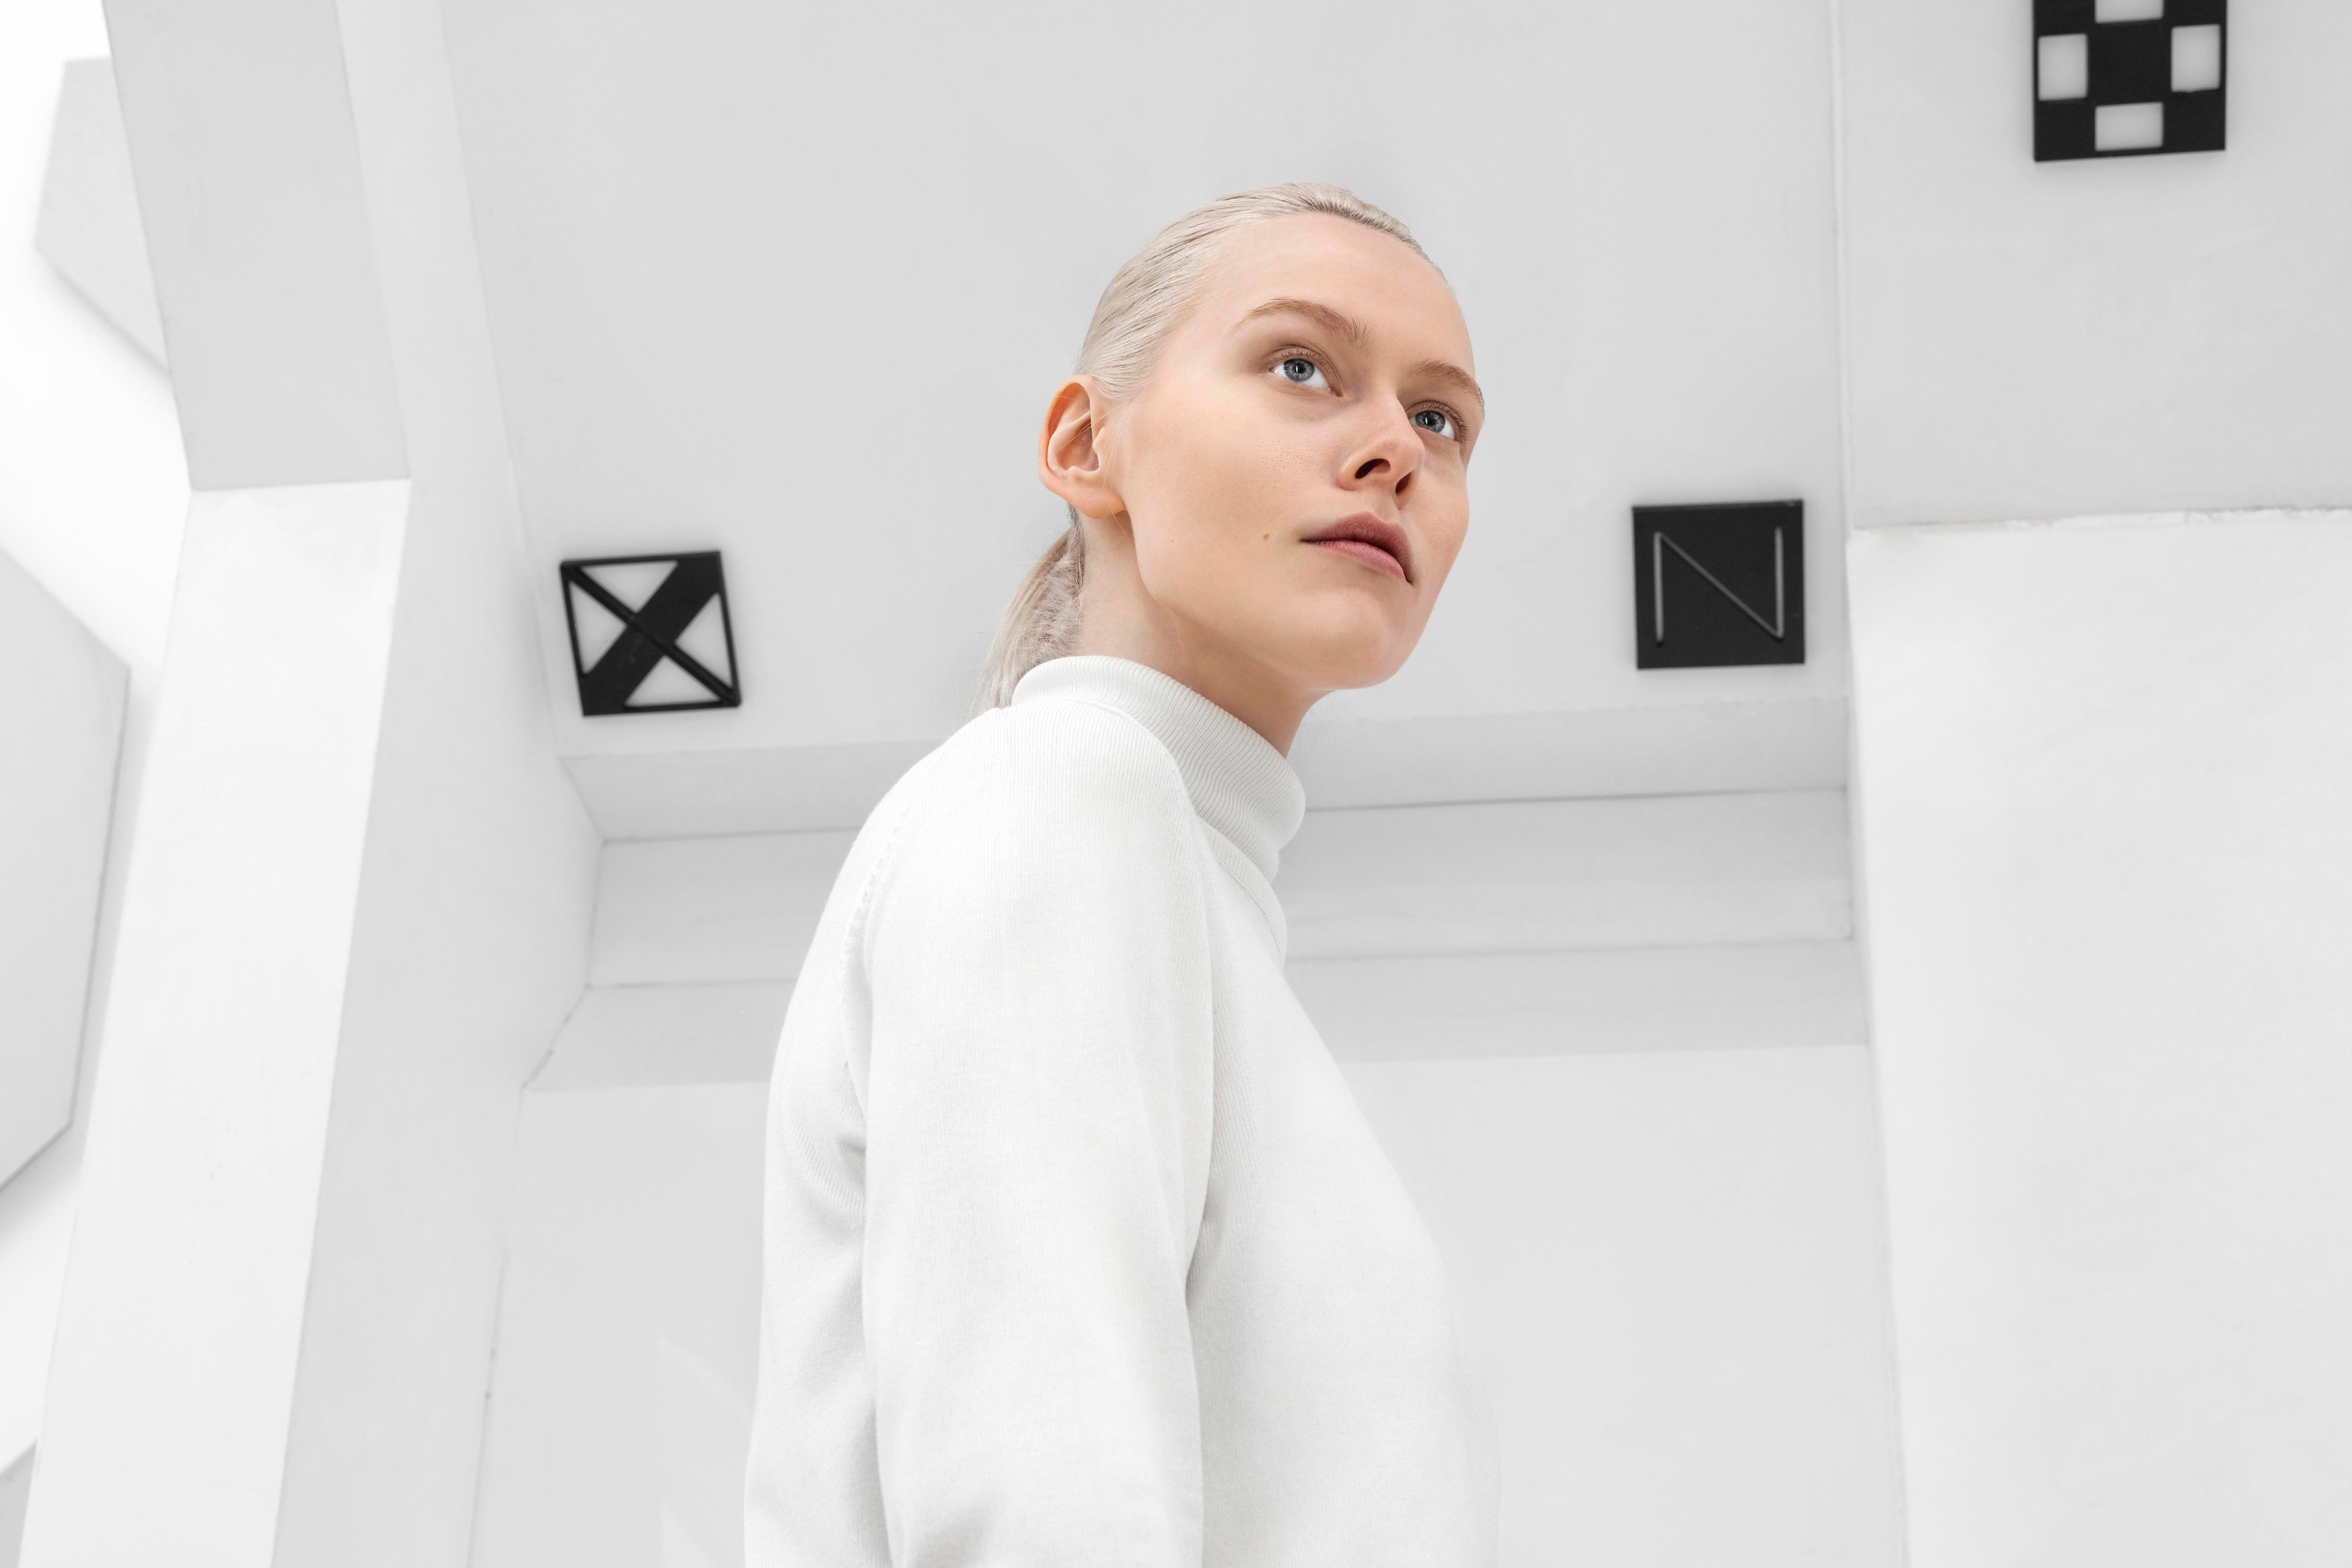
High-Key Photography
High key in photography uses bright, even lighting with minimal shadows to create soft, uplifting images. By reducing the contrast, it produces a clean, airy feel, ideal for conveying positivity, simplicity, or a lighthearted mood.
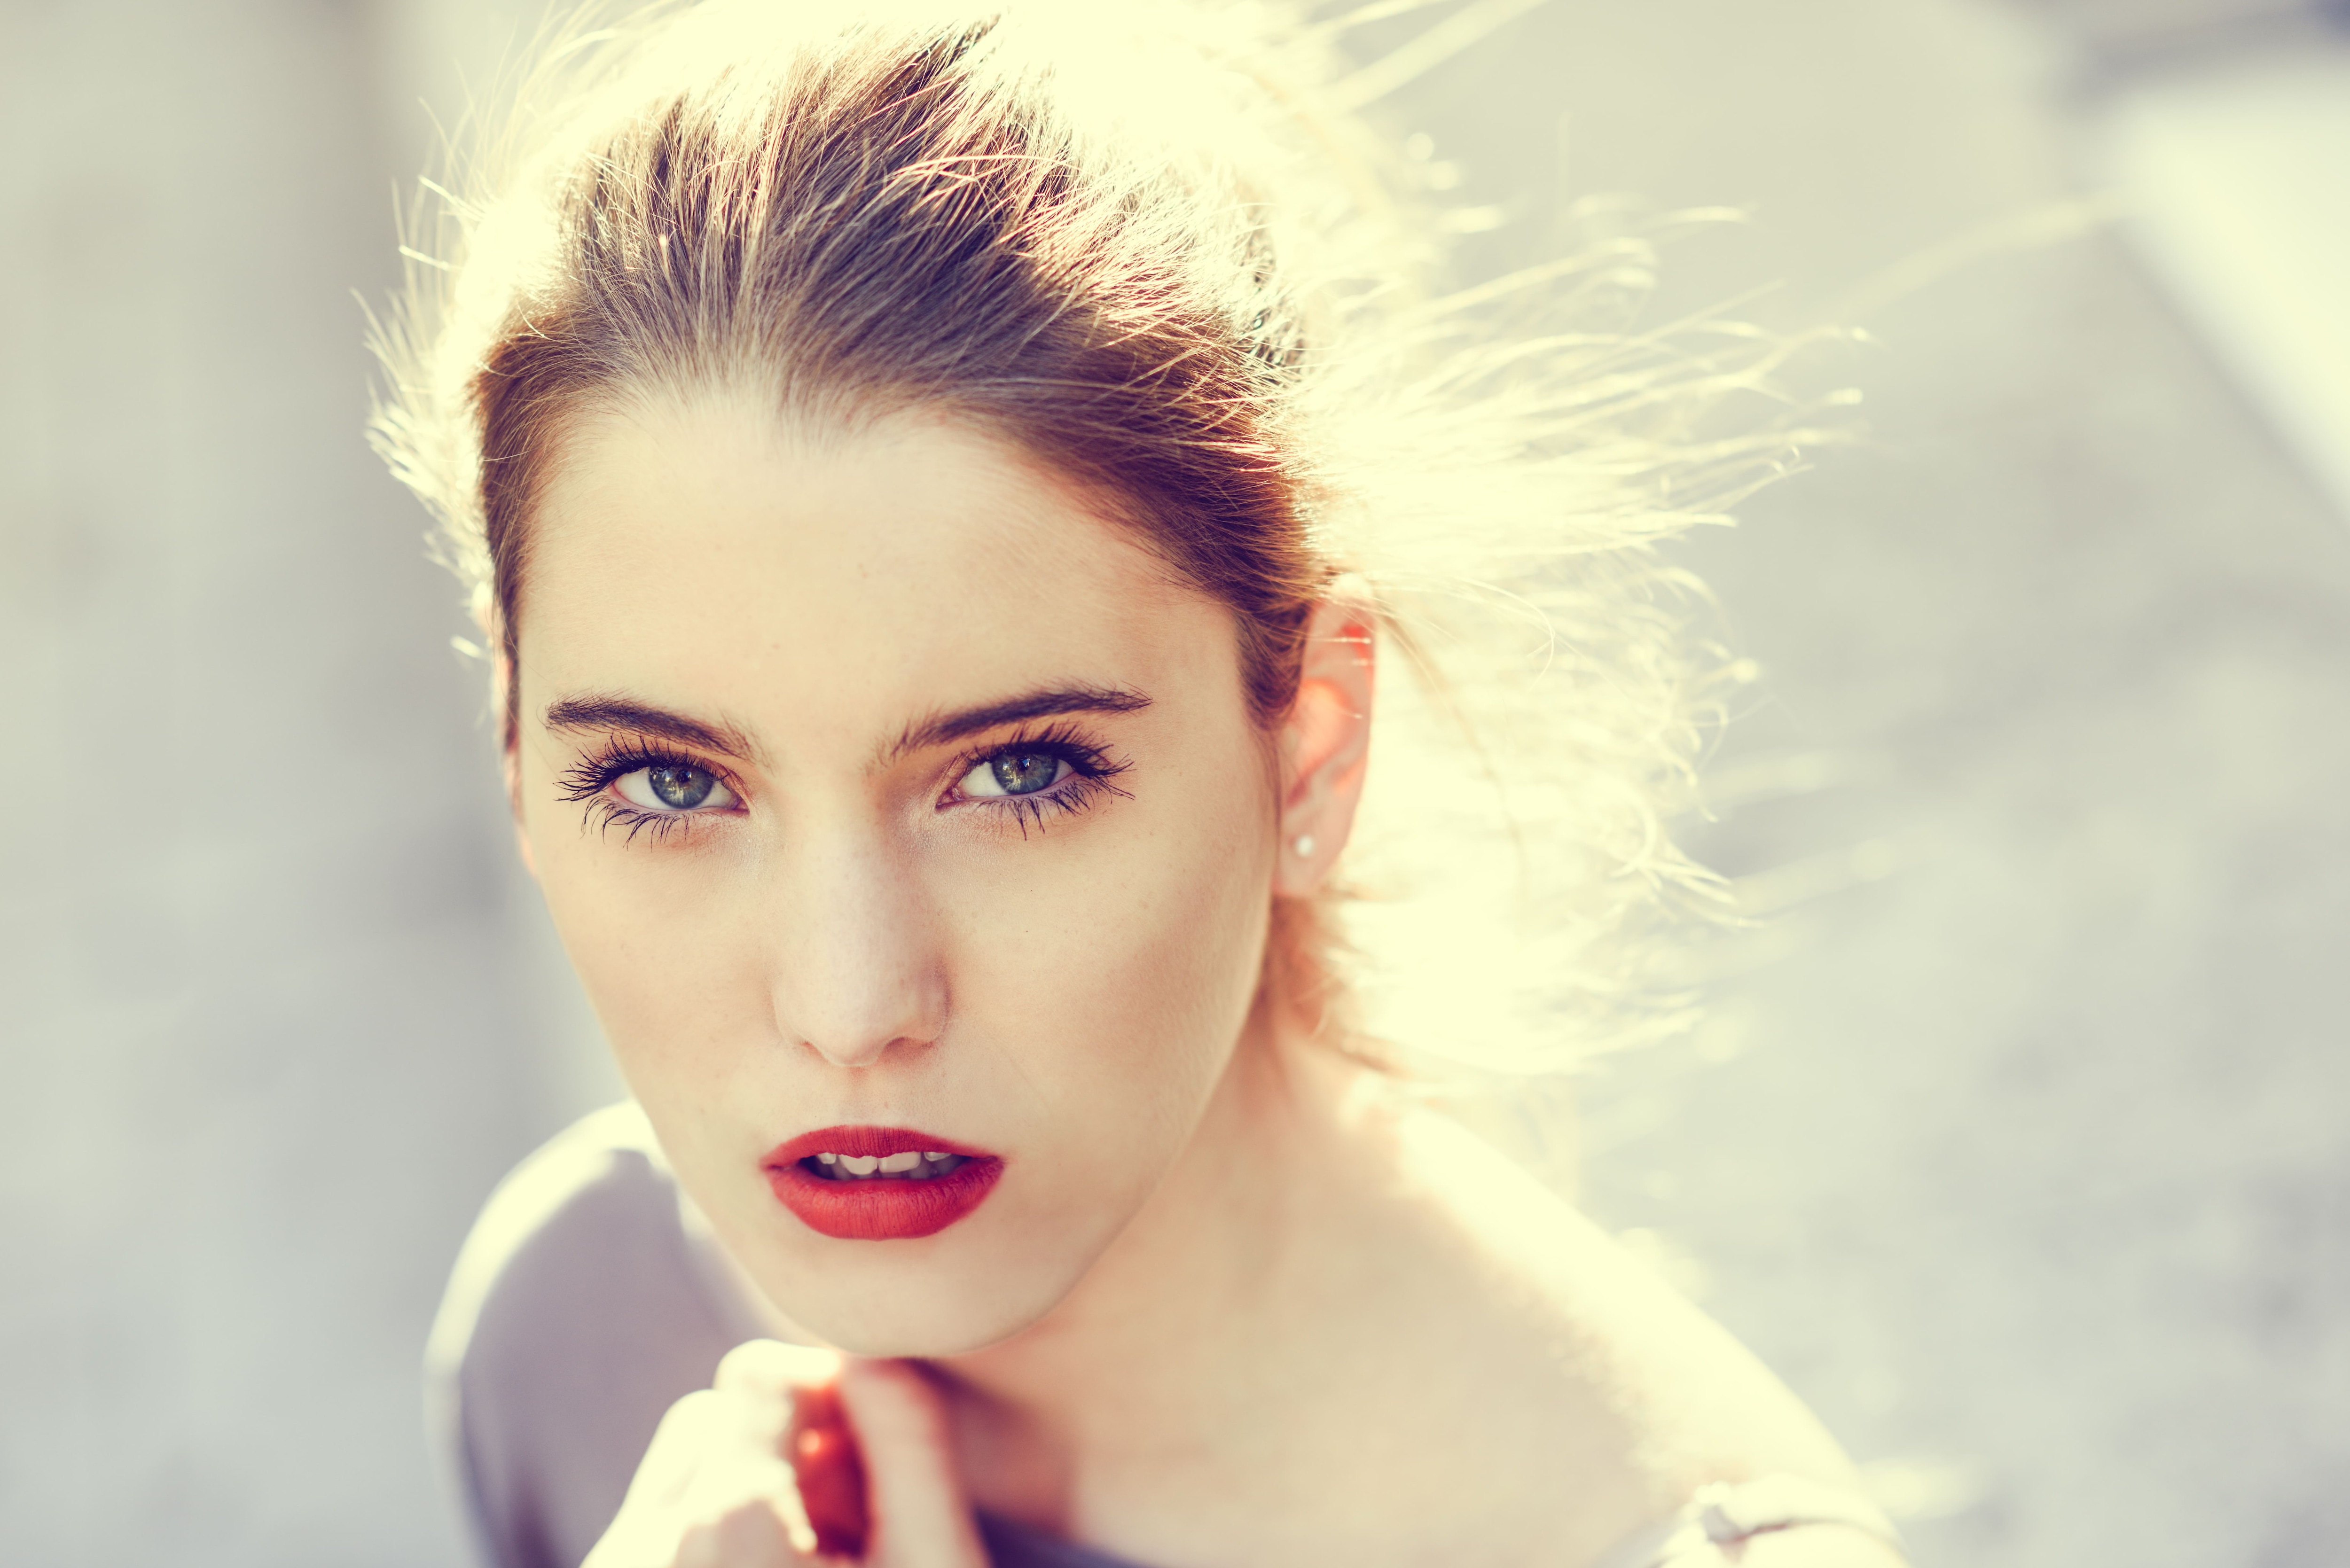
High-Key Photography Features
- Abundant bright tones with minimal shadows
- Soft, even lighting that reduces contrast
- Light or white backgrounds that create an airy feel
- Overexposed appearance that maintains detail in highlights
- A cheerful, optimistic mood is perfect for portraits and nature shots
When to Choose High-Key Photos
- Portrait photography for a youthful, fresh look
- Wedding photography for romantic, dreamy effects
- Product photography to emphasize cleanliness and simplicity
- Nature photography during misty mornings or snowy landscapes
- Fashion photography for a clean, modern aesthetic
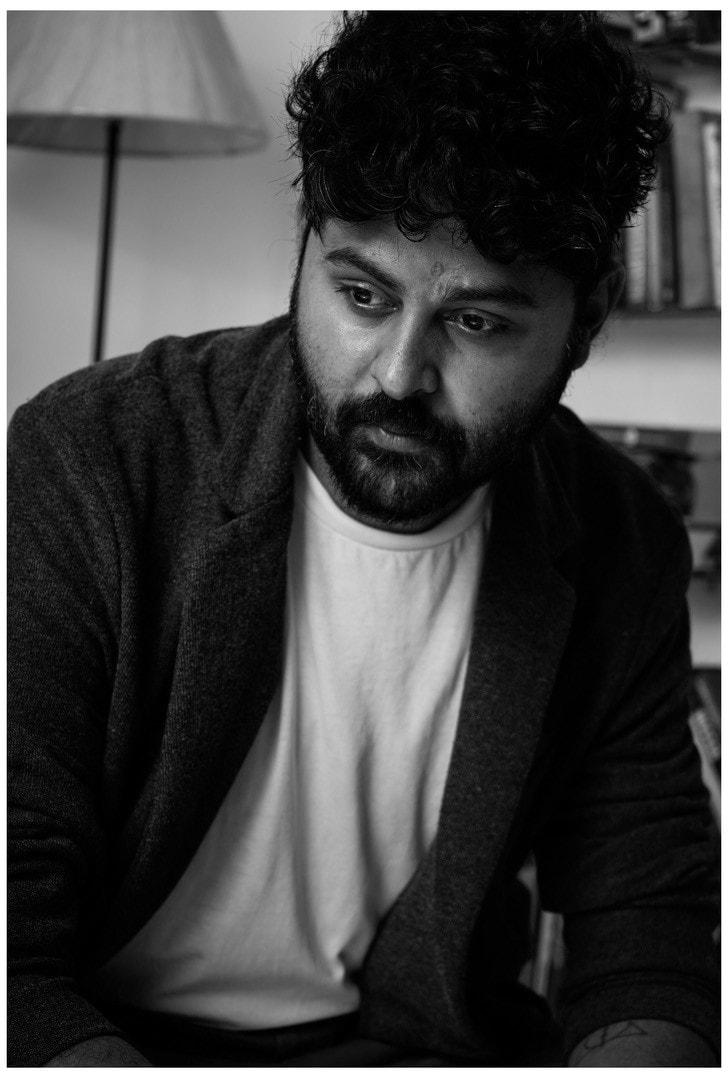
Low-Key Photography
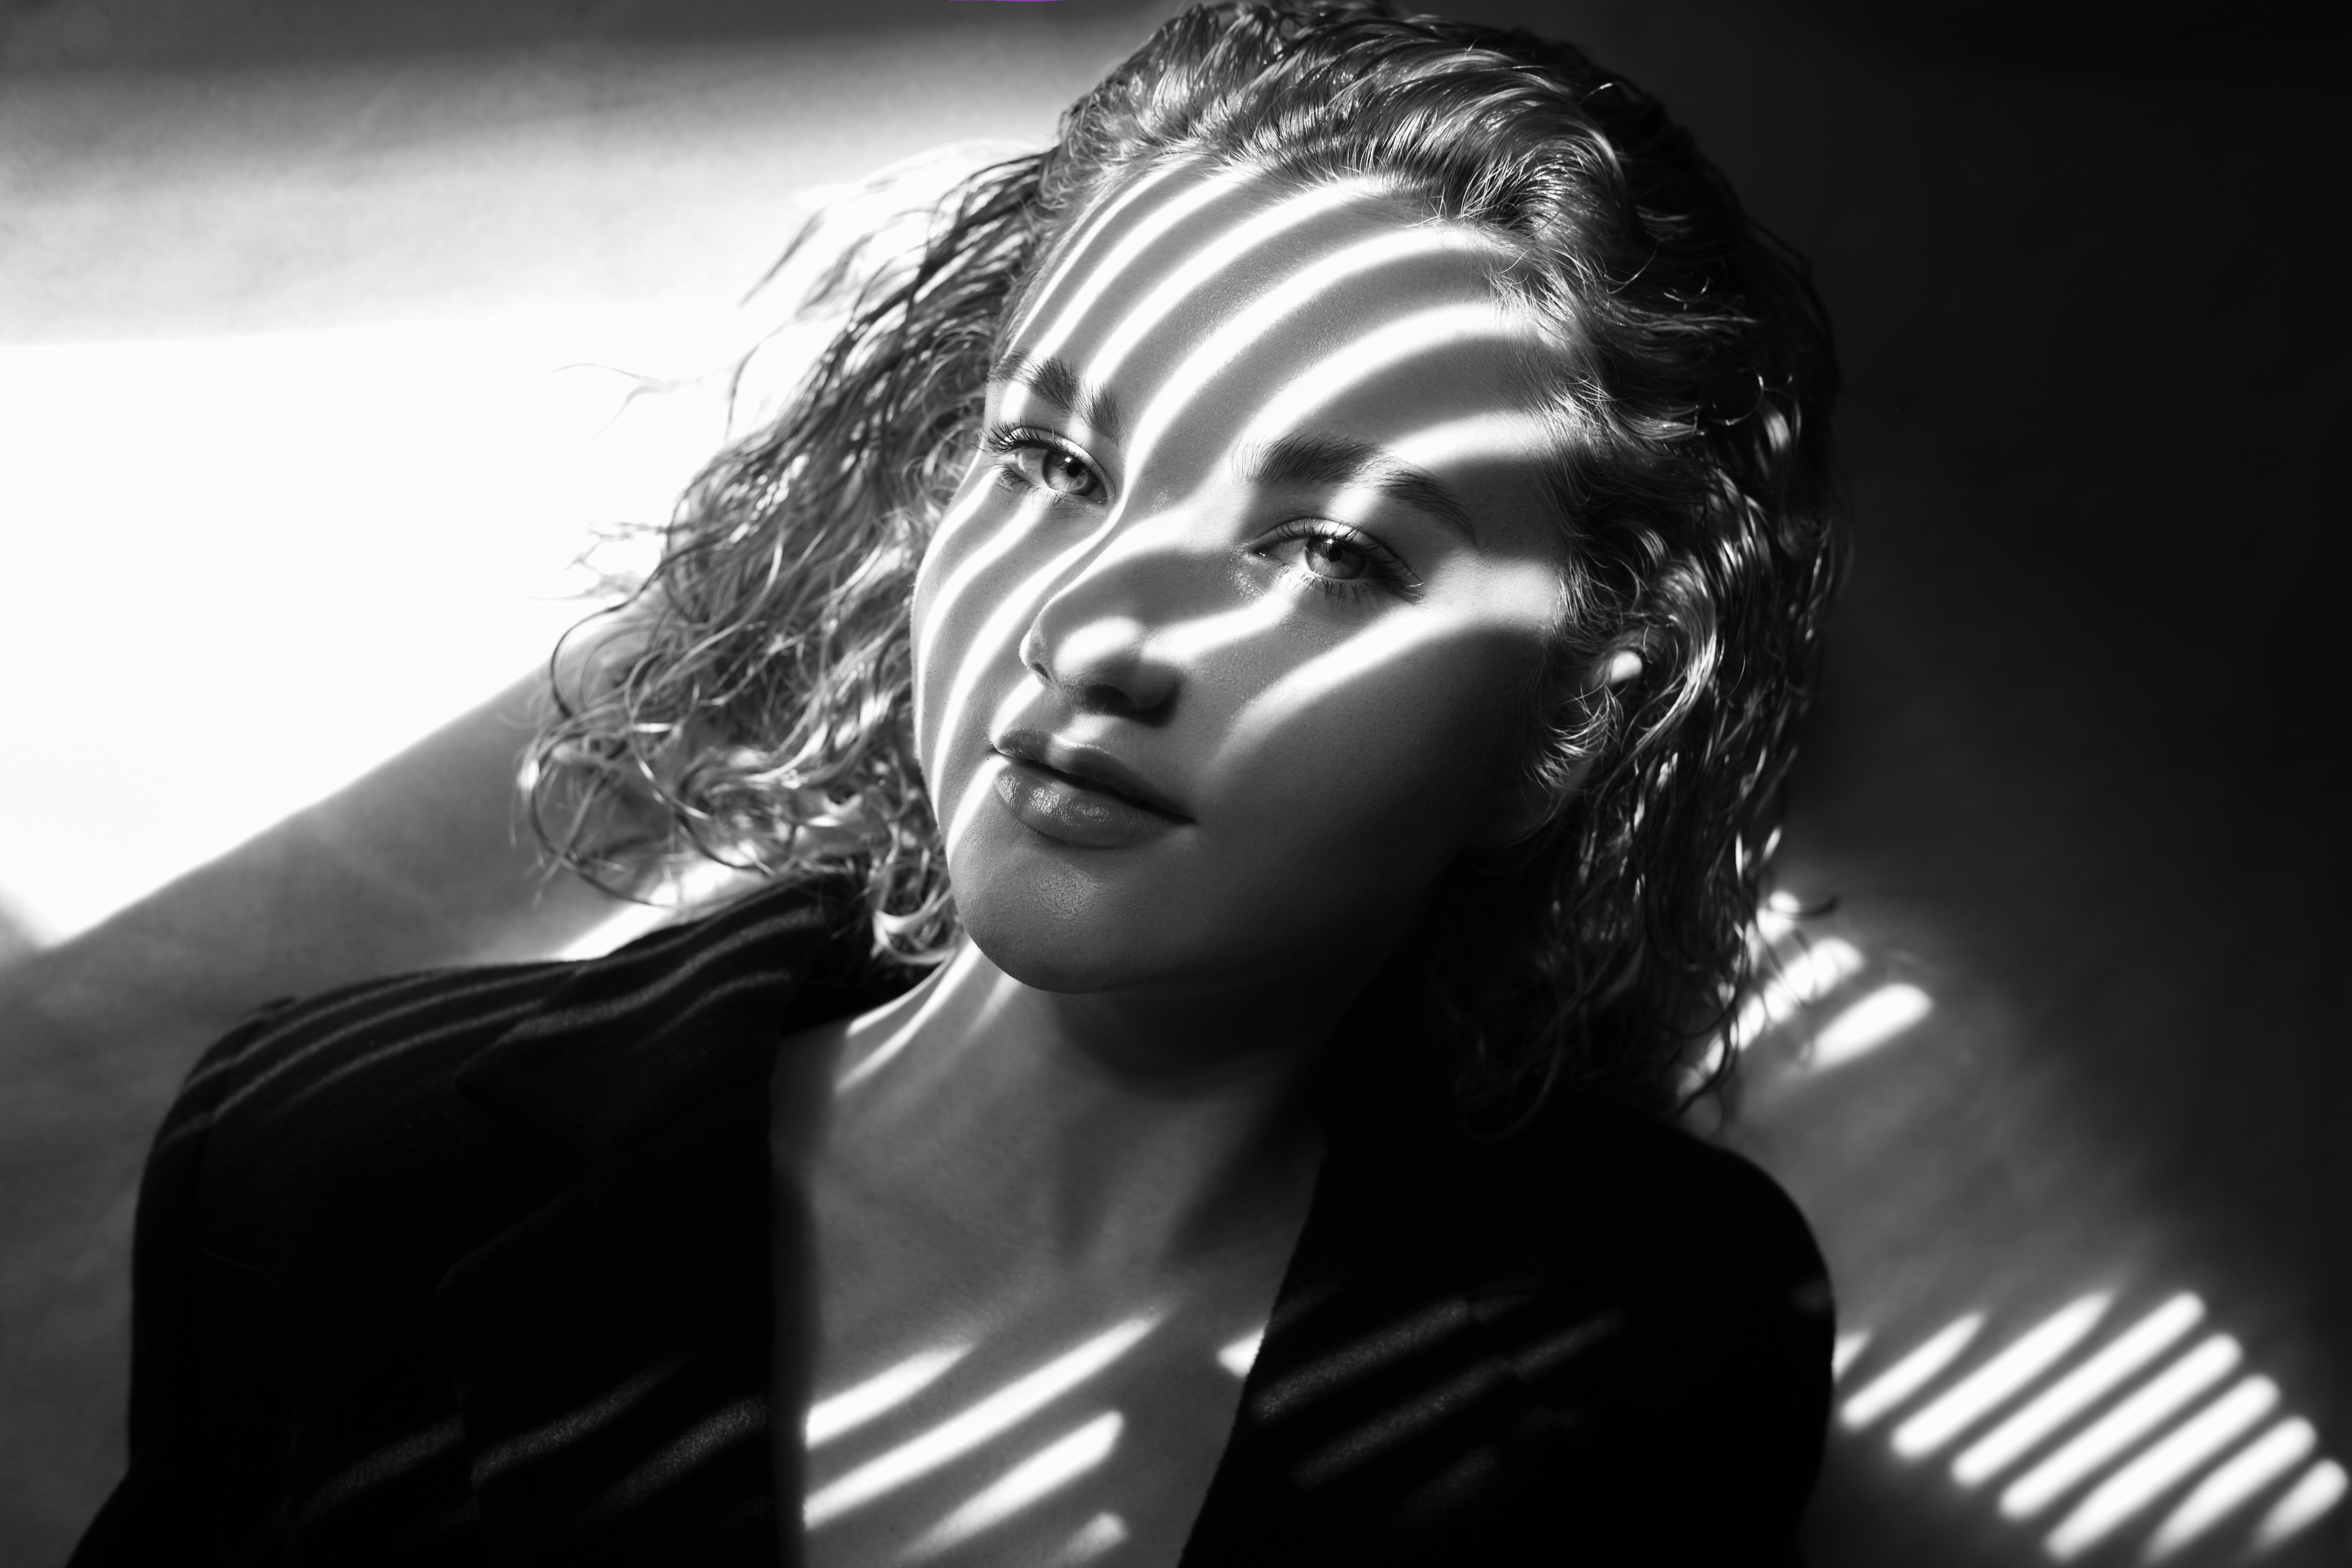
Low-key photography relies on minimal, directional light to create strong contrast and deep shadows. This dramatic lighting style emphasizes darkness and depth, making images intense, mysterious, or emotionally charged.
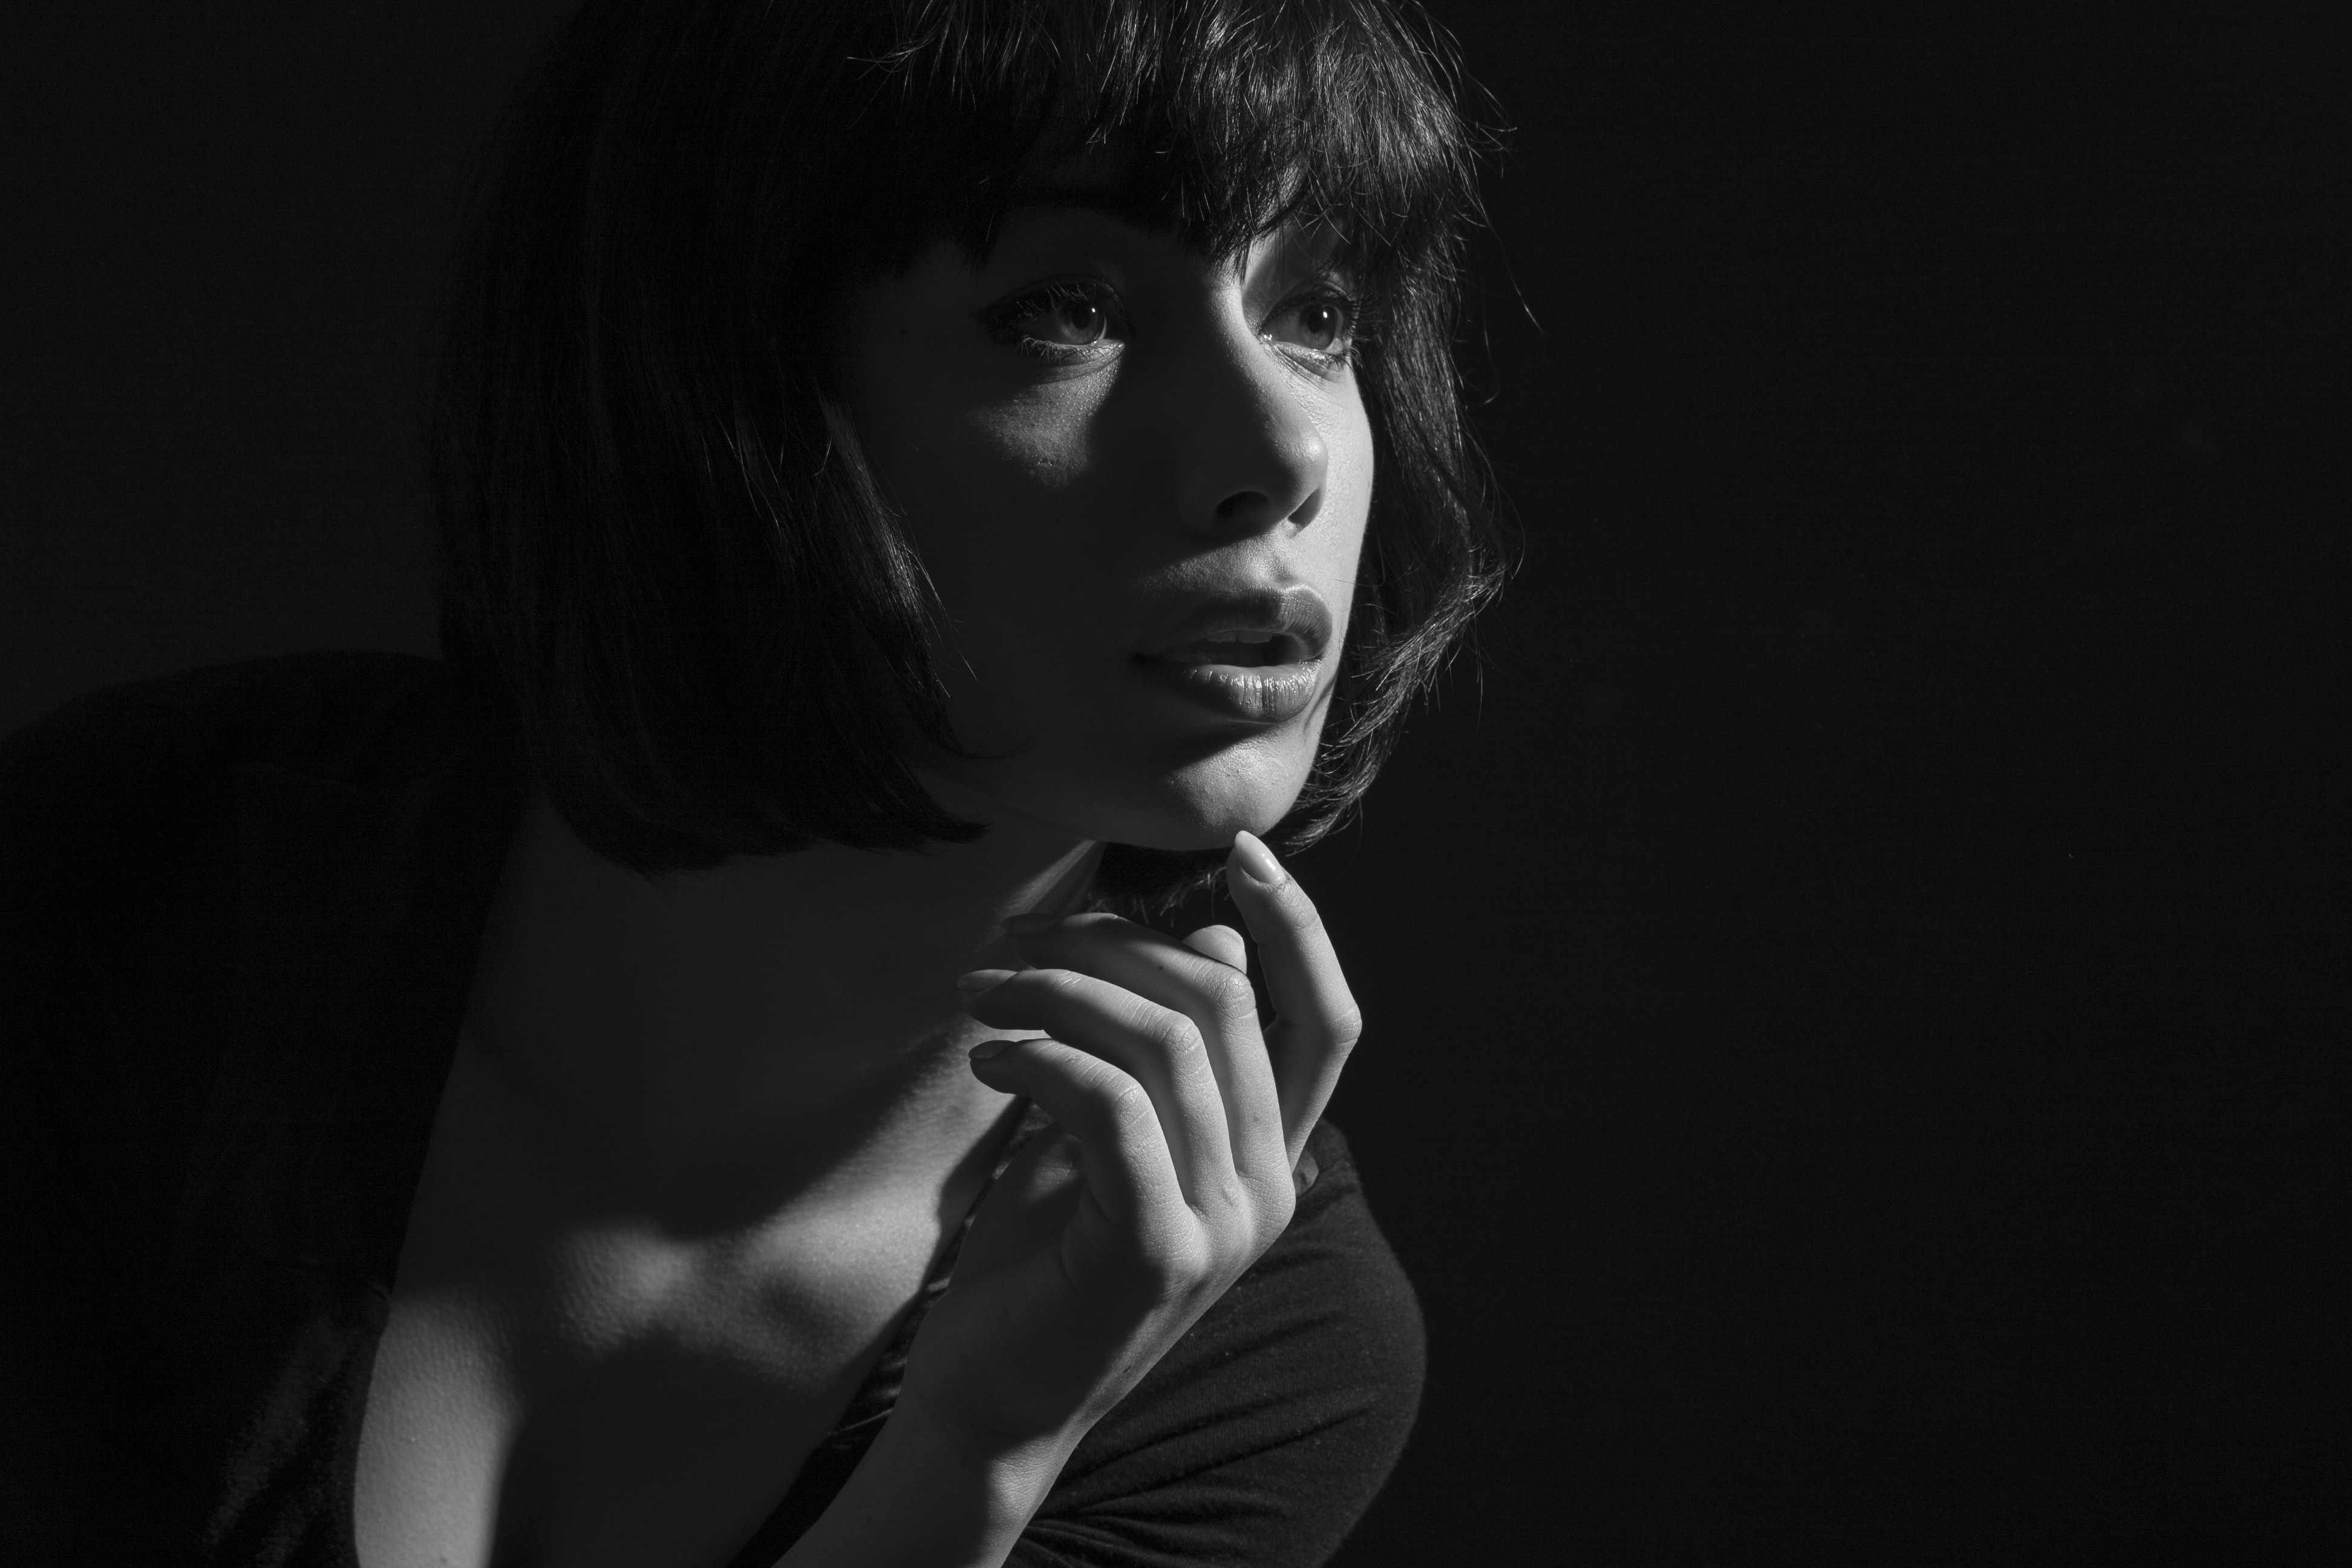
Low-Key Photography Features
- Predominantly dark tones with deep shadows
- High contrast between light and dark areas
- Dramatic lighting, often from a single source
- Rich textures and details in shadowed areas
- Moody, mysterious atmosphere that evokes deep emotion
When to Choose Low-Key in Photography
- Portrait photography for dramatic, artistic effects
- Black and white photography to emphasize contrast
- Still-life photography to create mood and depth
- Fine art photography for emotional storytelling
- Commercial photography is used when selling luxury or premium products

Super Easy to Use Image Enhancer for Win and Mac
Part 2. How to Make High-Key Photography
Creating stunning, high-key photos requires careful attention to the lighting, camera settings, and composition. Let's break down the essential elements and step-by-step process.
Here are the essential elements for high-key photography
Lighting Setup
- Key light: The light source should be bright and positioned to illuminate your subject evenly
- Fill lights: Use multiple light sources to eliminate shadows and reduce contrast
- Background lights: Use additional lighting to brighten the backdrop
- Reflectors: Use white or silver reflectors to bounce light into shadow areas
- Diffusers: Use diffusers to soften harsh light sources for even, well-lit areas
Equipment and Setup
- White or light-colored background: Use a white or light-coloured background because it’s essential for achieving the high-key look
- Multiple light sources: Use strobes, softboxes, or continuous lights
- Light meters: Use light meters for precise exposure measurements
- Tripod: Use a tripod for stability for slower shutter speeds
- Fast lenses: Use wide apertures (f/1.4-f/2.8) to maximize light intake
Camera Settings for High-Key Photography
Here are the key camera settings that are needed for high-key photography:
1. ISO Settings
Begin with a low ISO setting, around 100-200, to minimize noise and preserve image quality. Only increase ISO if shooting in challenging low-light conditions where you need to brighten the image.
2. Aperture
Use a wide aperture (f/1.4 to f/2.8) to:
- Allow maximum light into the camera
- Create a shallow depth of field
- Isolate your subject from the background
- Achieve the characteristic bright, overexposed look
3. Shutter Speed
Employ slower shutter speeds to let in more light, but be careful to:
- Avoid camera shake by using a tripod
- Prevent motion blur if your subject is moving
- Balance exposure with your aperture and ISO settings
4. Exposure Compensation
Intentionally overexpose by +1 to +2 stops using exposure compensation to:
- Create the bright, airy feeling typical of high-key images
- Wash out harsh shadows
- Maintain detail in important highlight areas
5. Shooting Format
Always shoot in RAW format for maximum flexibility in post-processing, allowing you to:
- Adjust exposure without losing image quality
- Fine-tune white balance
- Recover highlight and shadow details
Super Easy to Use Image Enhancer for Win and Mac
Part 3. How to Make Low-Key Photography
Mastering low-light photography techniques requires a different approach that focuses on controlling shadows and creating dramatic contrast.
Here are the essential elements for low-key photography:
Lighting Setup
- Single key light: Use one primary light source for a dramatic effect
- Minimal fill light: Limit secondary lighting to preserve shadows
- Dark background: Choose a black or very dark backdrop to enhance contrast
- Controlled light direction: Keep precise positioning to create desired shadow patterns
- Light modifiers: Use light modifiers like snoots, barn doors, or flags to control light spill
Equipment and Setup:
- Dark or black background: Use a dark background, because it’s essential for the low-key aesthetic
- Powerful key light: Use strong light sources like strobes or LED panels
- Light control accessories: Use light control accessories like flags, gobos, and barn doors
- Fast lenses: Use wide apertures for shooting in low-light conditions
- Sturdy tripod: Use a sturdy tripod for stability in challenging lighting conditions
Camera Settings for Low-Key Photography
ISO settings, aperture, and shutter speed are some key camera settings for low-key images:
1. ISO Settings
Keep ISO as low as possible (100-200) to:
- Minimize noise in dark areas of the image
- Maintain clean shadows without grain
- Preserve detail in underexposed regions
- Create smooth tonal transitions
2. Aperture
Start with a wide aperture (f/1.8 to f/2.8) to:
- Maximize light intake in low-light conditions
- Allow faster shutter speeds
- Control the amount of background in focus
3. Shutter Speed
Use faster shutter speeds (1/100s or quicker) to:
- Freeze subject movement
- Prevent camera shake
- Maintain a sharp focus on your subject
- Control overall exposure
4. Exposure Settings
Deliberately underexpose your image by:
- Exposing for the highlights on your subject
- Allowing the background to fall into darkness
- Using spot or center-weighted metering
- Checking your histogram to avoid clipping highlights
5. Manual Mode
Shoot in manual mode for complete control over:
- ISO sensitivity
- Aperture opening
- Shutter speed
- White balance settings
Part 4. How to Batch Improve Overexposed or Underexposed Photos
If, after adjusting all high-key and low-key photography settings, your image still exhibits a low-quality issue or you want to enhance the face or perform color correction without complications, try Wondershare UniConverter's Free Image Editor, which can yield the best results. You can add more than one image simultaneously and enhance face and color correction, restore old photos, and upscale images to 2X, 4X, and 8X without losing quality. You can also view real-time results before downloading.

Key Features
- UniConverter's AI image enhancer is like having a professional photo editor at your fingertips. It unblurs images, improves quality, and even colorizes old black images in one click.
- It allows you to crop and resize images in batches. With UniConverter’sWatermark Editor, you can add or remove a watermark to the image for a personal touch.
- ItsBackground Remover lets you remove or add a fresh background to your image without losing the quality.
- With an image converter, you can also convert your images to various formats that suit the needs of different platforms.
How to Enhance Batch Image Quality with Wondershare
Here is the step-by-step guide to enhance the image quality with ease:
Step 1
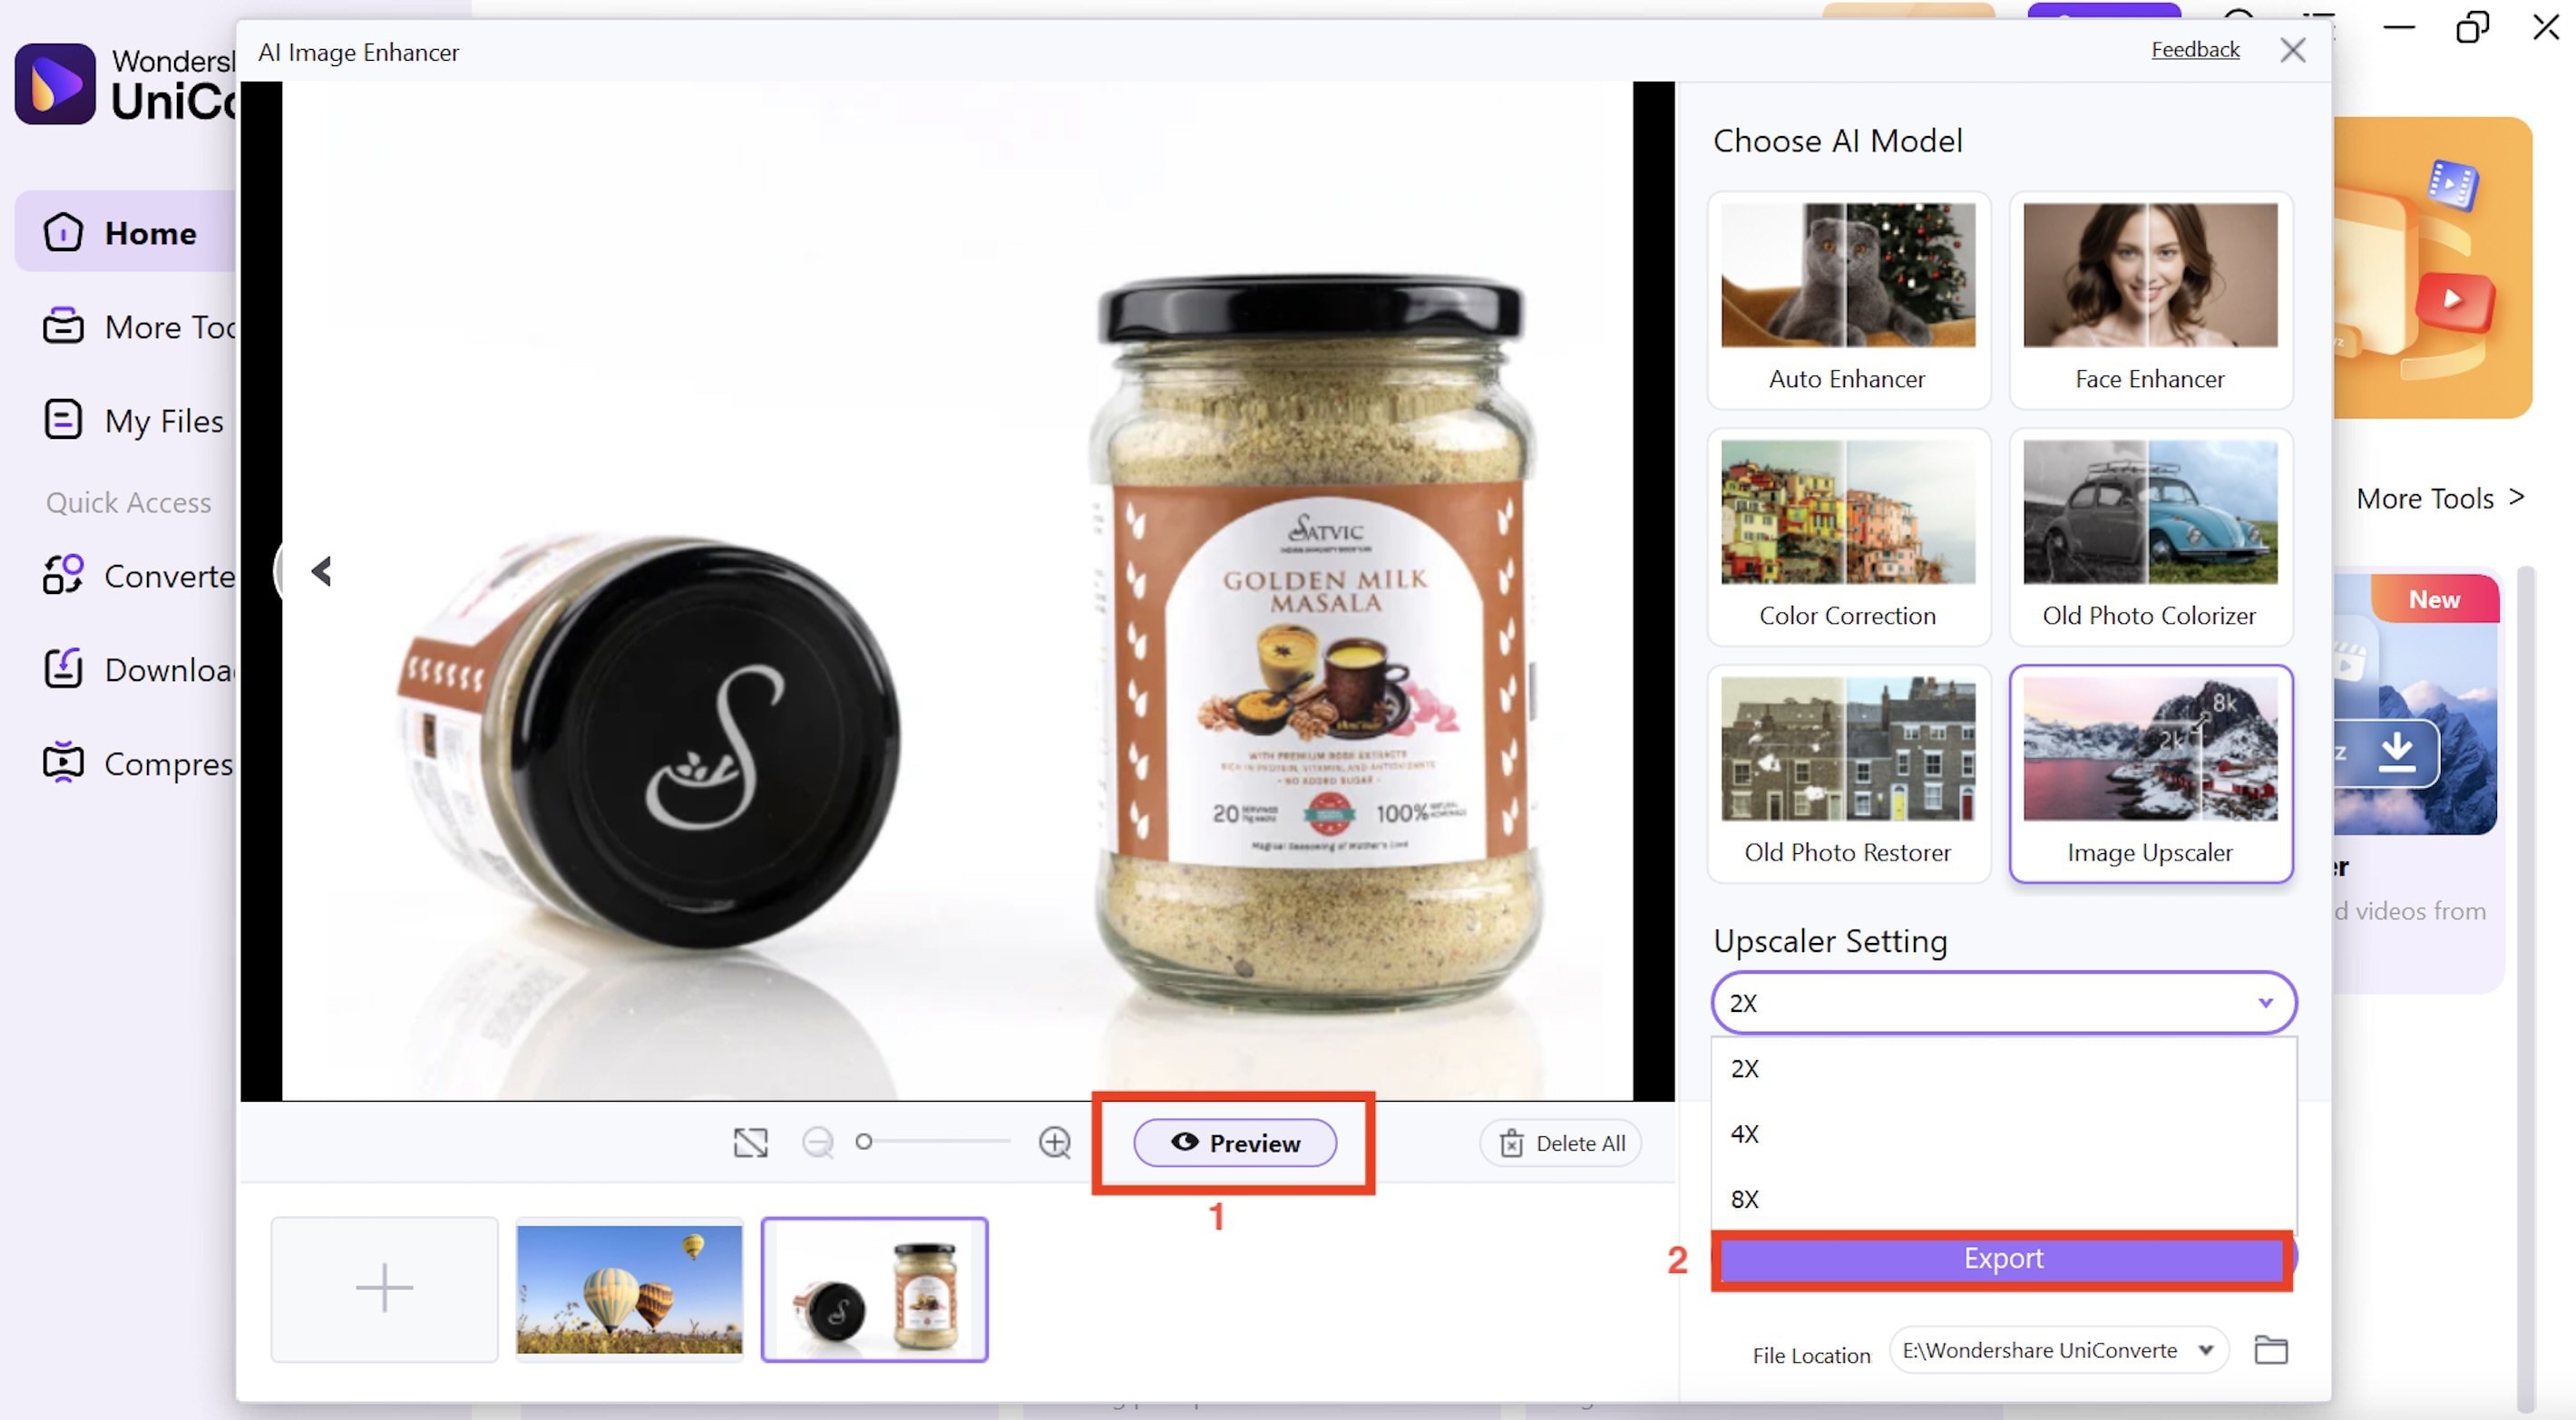
Open the app and navigate to "Image > AI Image Enhancer" on the homepage to upload the images.

Step 2
Once images are uploaded, you can try its auto enhancer, face enhancer, color correction, image upscaler, and more, located on the right side.

Step 3
Click the "Image Upscaler" and adjust the "Upscaler Settings" from 2X to 8X.

Step 4
Once complete, you can preview the results until you are satisfied, then click the "Export" button to save the final images.
Part 5. Conclusion
When you master high-key and low-key photography, it opens endless creative possibilities for your images. High key creates bright, uplifting photos perfect for portraits and nature, while low key produces dramatic, moody shots ideal for artistic work. Success comes from understanding lighting, using proper camera settings, and shooting in RAW format.
When your images need that extra polish, Wondershare UniConverter's batch image enhancer can automatically improve quality, fix exposure issues, and upscale photos without losing detail. Try UniConverter today and upscale your images now!
Super Easy to Use Image Enhancer for Win and Mac
FAQs
-
1. What's the main difference between high-key and low-key photography?
High-key photography emphasizes bright tones with minimal shadows and low contrast, resulting in a light and airy mood. Low-key photography emphasizes dark tones with deep shadows and high contrast, creating a dramatic and mysterious atmosphere. -
2. Can I create high-key photos without professional lighting equipment?
Yes! You can achieve high-key effects using natural light on overcast days by positioning subjects near large windows or using simple reflectors to bounce available light. The key is maximizing light while minimizing harsh shadows. -
3. Is post-processing essential for high-key and low-key photography?
Yes, post-processing is essential for high-key and low-key photography. While you should aim for the desired look in the camera, post-processing is crucial for refining these techniques. Shooting in RAW format provides maximum flexibility to adjust exposure, contrast, and color balance without compromising image quality. -
4. What subjects work best for each photography style?
High-key photography works well for portraits, weddings, products, flowers, and misty landscapes. Low-key photography excels with portraits, still life, textures, dramatic scenes, and artistic compositions where mood and mystery are important.

