


If you're just stepping into photography, you've probably heard terms likeISO, aperture, and shutter speed tossed around. But how do they actually work together? The answer lies in the exposure triangle explained—a fundamental photography concept made up of three critical elements. Learning how each works, especially shutter speed, is your first big step toward capturing professional-quality photos.
Keep on reading and learn how to make use of tools like shutter speed and aperture charts as a beginner , and how to utilize Unicovnerter AI Image Enhancer as a quick fix for photos taken with imporper shutter speed.
In this article
Part 1. What is Shutter Speed in Photography?
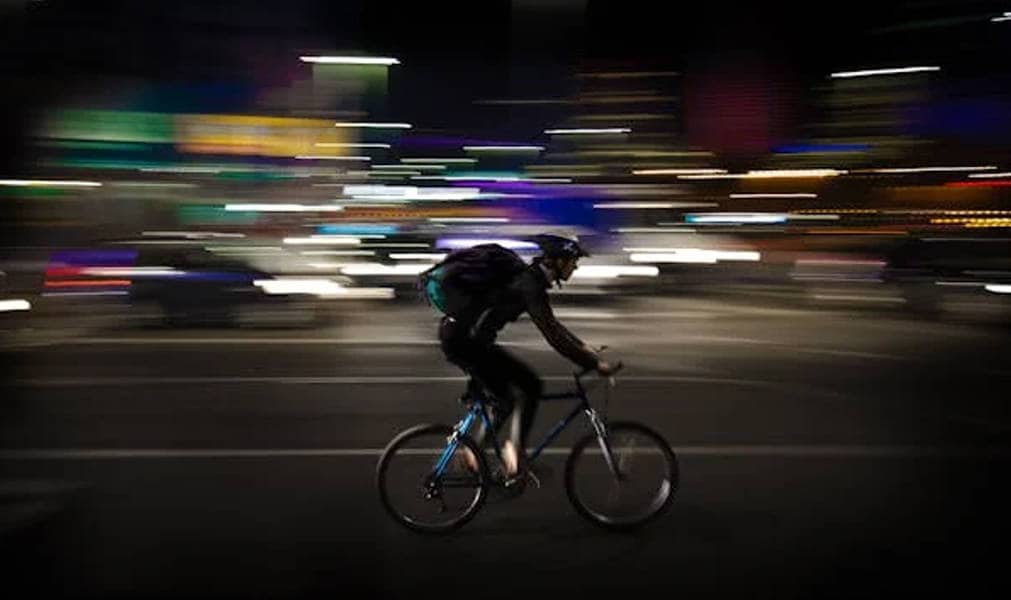
Shutter speed refers to the length of time your camera’s sensor is exposed to light when taking a photo. It is directly tied to what is the camera shutter—the physical or digital mechanism that opens and closes to control light intake. Measured in seconds or fractions (e.g., 1/500s or 2s), shutter speed determines how motion is captured. A fast shutter speed freezes action, while a slow shutter speed blurs it, giving artistic effects. Understanding what is shutter speed measured in helps you determine the right setting for each type of photo. Whether it's a running dog or a glowing cityscape, your choice impacts the sharpness and brightness. It's also a critical part of the ISO shutter speed and aperture triangle, which controls exposure. Mastering shutter speed is essential when working with the shutter speed and aperture chart for balanced results. In photography, knowing what does shutter speed control helps you decide whether to emphasize motion or clarity in a shot.
Part 2. Relationship Between Shutter Speed and ISO
The relationship between shutter speed and ISO is at the heart of exposure. A faster shutter requires a higher ISO to brighten the image, while a slower one allows more light, and needs a lower ISO. This balancing act is part of the ISO shutter speed and aperture triangle, which dictates your overall photo quality. You must understand this dynamic to get both sharp and well-lit photos. If your shutter speed is too fast in a dark room, the photo will turn out underexposed—unless you crank up the ISO, which may add noise. That’s why knowing the understanding ISO shutter speed and aperture logic is vital for clarity.
Part 3. Common Shutter Speed Settings in Different Cases
Different subjects move at different speeds, so you’ll need different shutter speed settings. Use this mini shutter aperture ISO chart as a quick reference for various photo types:
|
Scene Type |
Suggested Shutter Speed |
Use Case Insight |
|
Portraits |
1/125s–1/250s |
Sharp facial features with natural light. |
|
City Street Photography |
1/250s–1/500s |
Freeze casual human motion. |
|
Fast-moving Vehicles |
1/1000s–1/2000s |
Use a fast shutter speed to prevent blur. |
|
Waterfalls or Raindrops |
1/4s–2s |
Create flowy effects using a slow shutter speed. |
|
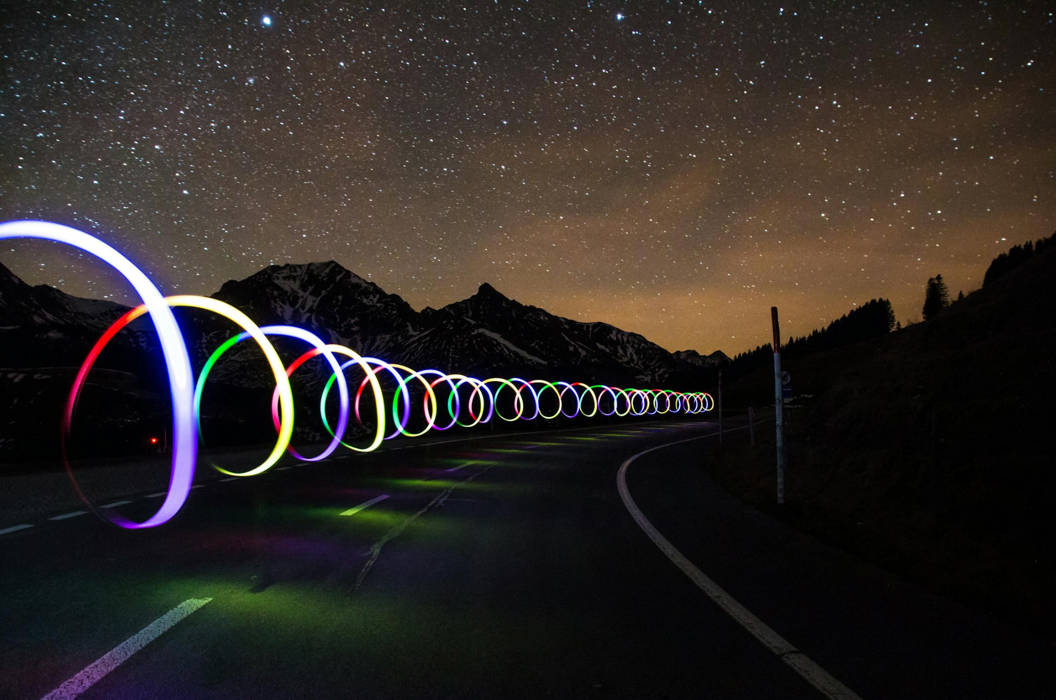
Night Photography |
5s–30s |
Allow more light in dark environments. |
|
Fireworks |
3s–10s |
Capture burst trails effectively. |
|
Sports/Action |
1/2000s |
Freeze rapid movement crisply. |
|
Landscape |
1/125s–1/500s |
Balance sharpness with ambient light. |
|
Portraits |
1/125s–1/250s |
Sharp facial features with natural light. |
These settings help build a mental photography aperture ISO shutter speed map for different motion and lighting needs.

Super Easy to Use Image Enhancer for Win and Mac
Part 4. How to Set Shutter Speed on iPhone or Android
You can’t fully master photography without learning how to control the shutter speed on your phone. Here’s a quick guide for both platforms: On iPhone, use third-party camera apps like Halide or ProCamera to manually adjust settings. For Android, many built-in camera apps (like Samsung’s Pro Mode) already support manual shutter speed control. Set a slower speed for low-light or motion blur, and a faster one for sharp, action-filled shots. Experimenting with manual controls helps you take full creative control of your mobile photography.
Method 1: iPhone steps (Using Halide App)
Halide is one of the best manual camera apps for iPhone that gives you full control over shutter speed, ISO, and focus.
Step 1: Install the Halide App
Go to the App Store, search for “Halide Mark II – Pro Camera,” and install it or download it by clicking the button.

Step 2: Launch Halide and Grant Permissions
Open Halide for the first time and grant permission to access your camera and photos.
Step 3: Switch to Manual Mode
At the bottom of the screen, tap the "AF" button located next to the shutter button to disable auto-focus and enter manual control mode.
Step 4: Adjust Shutter Speed
Swipe up or down on the shutter speed slider (S) at the bottom left to set your preferred value, like 1/1000s or 1s.
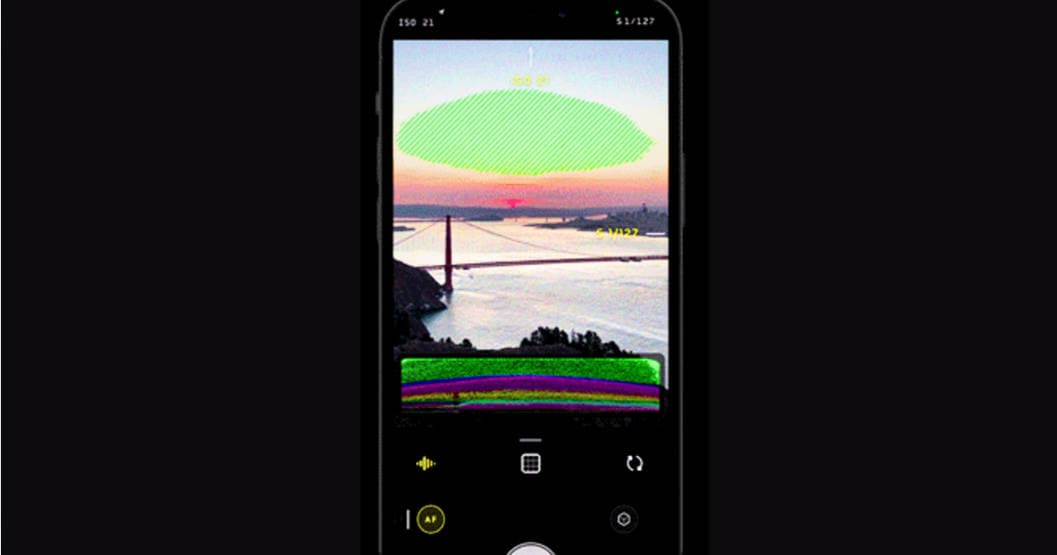
Step 5: Adjust ISO (Optional)
If needed, adjust the ISO using the adjacent ISO slider to maintain exposure balance while changing the shutter speed.
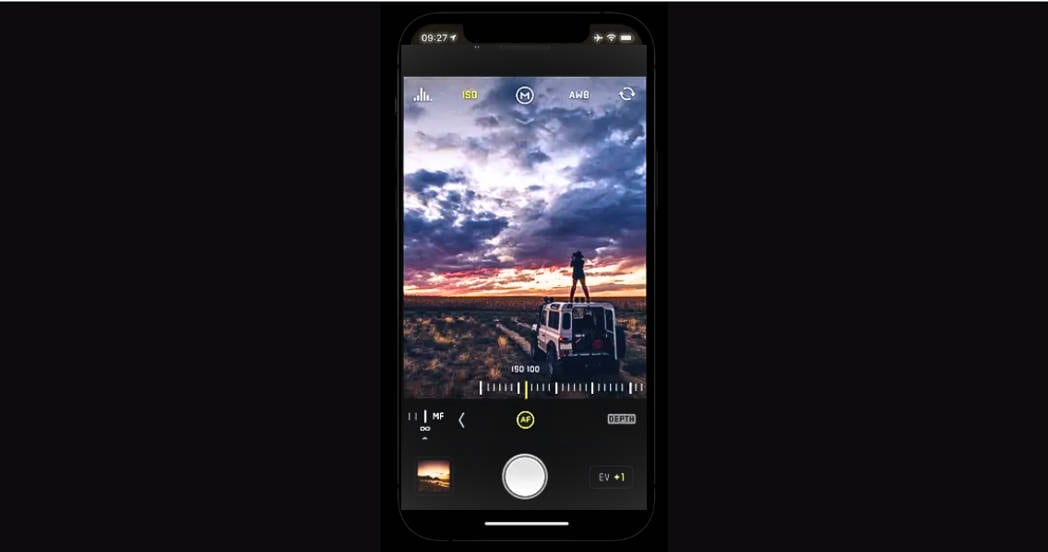
Step 6: Tap to Focus and Shoot
Tap on your subject to focus, then press the shutter button to capture your image with the set values.
Method 2: Android Steps (Using Pro Mode)
Step 1: Launch the Default Camera App
Open your phone’s camera and swipe or tap to switch to “Pro” mode from the mode selector.
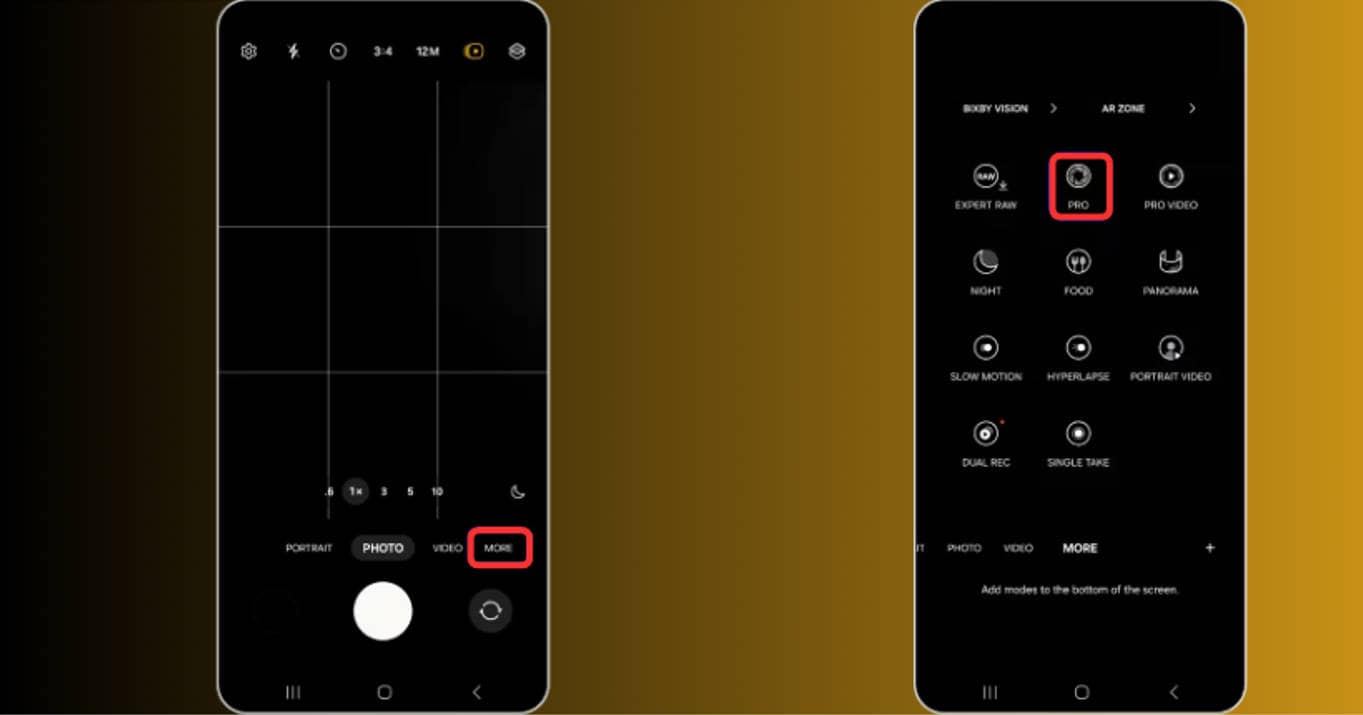
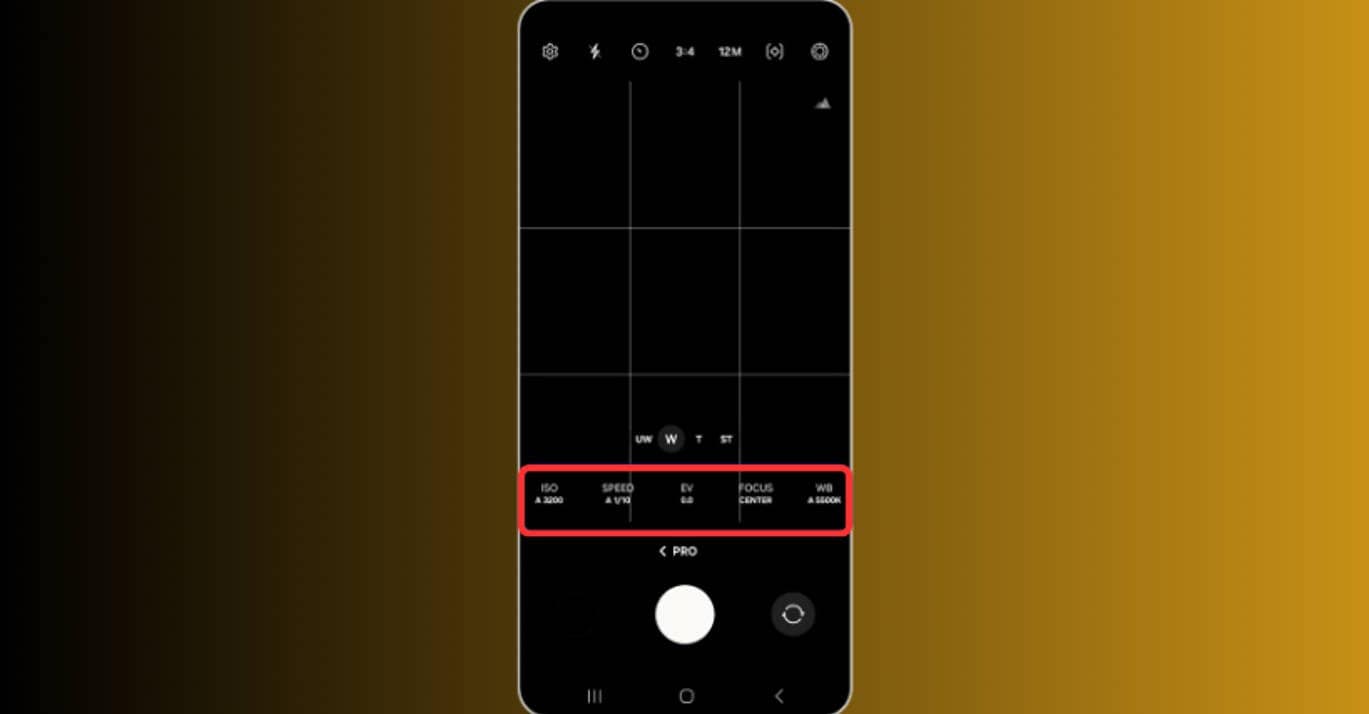
Step 2: Locate the Shutter Speed Option (“S”)
In Pro Mode, you’ll get many options from which you can easily find the setting labeled ”S” or “Speed”—usually at the bottom or side, depending on the device.
Step 3: Adjust Shutter Speed
Slide left or right on the scale to change shutter speed — e.g., set it to 1/1000s for fast shots or 2s for low light.
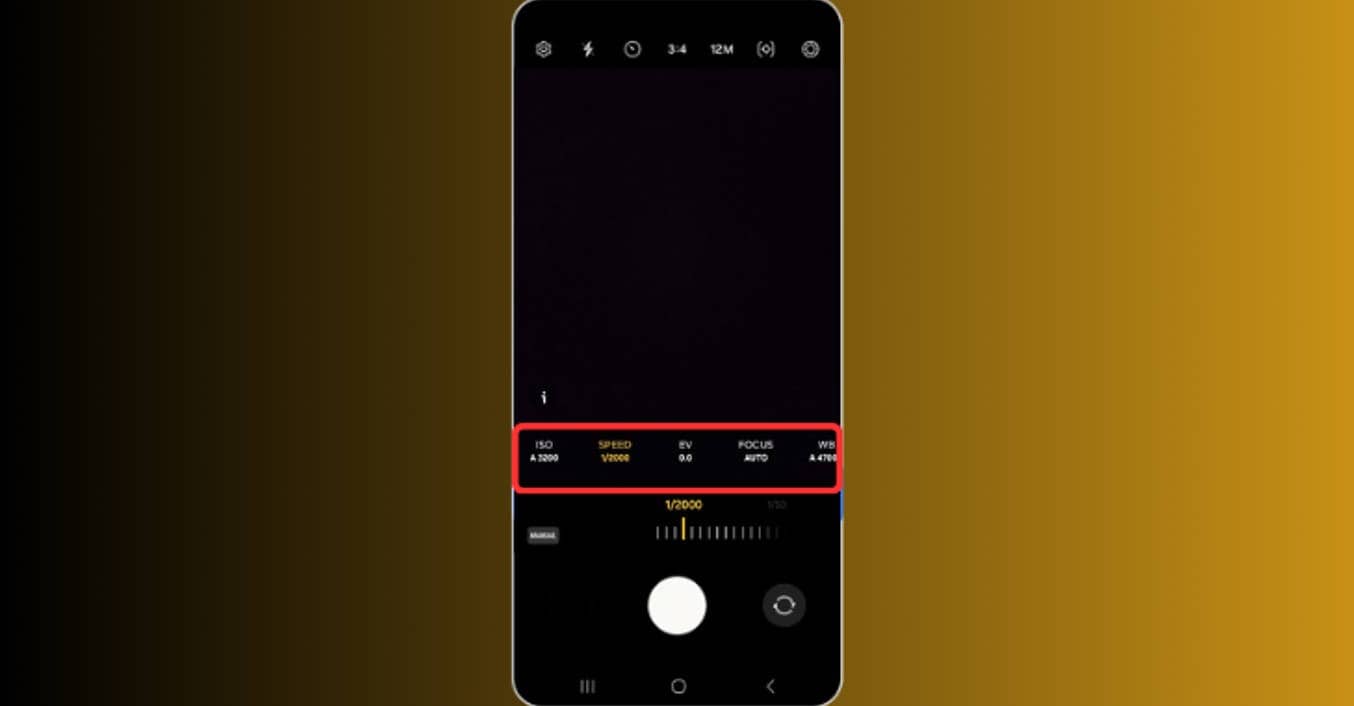
Step 4: Use a Tripod for Long Exposures
For anything slower than 1/30s, use a tripod to avoid camera shake and get sharper images.
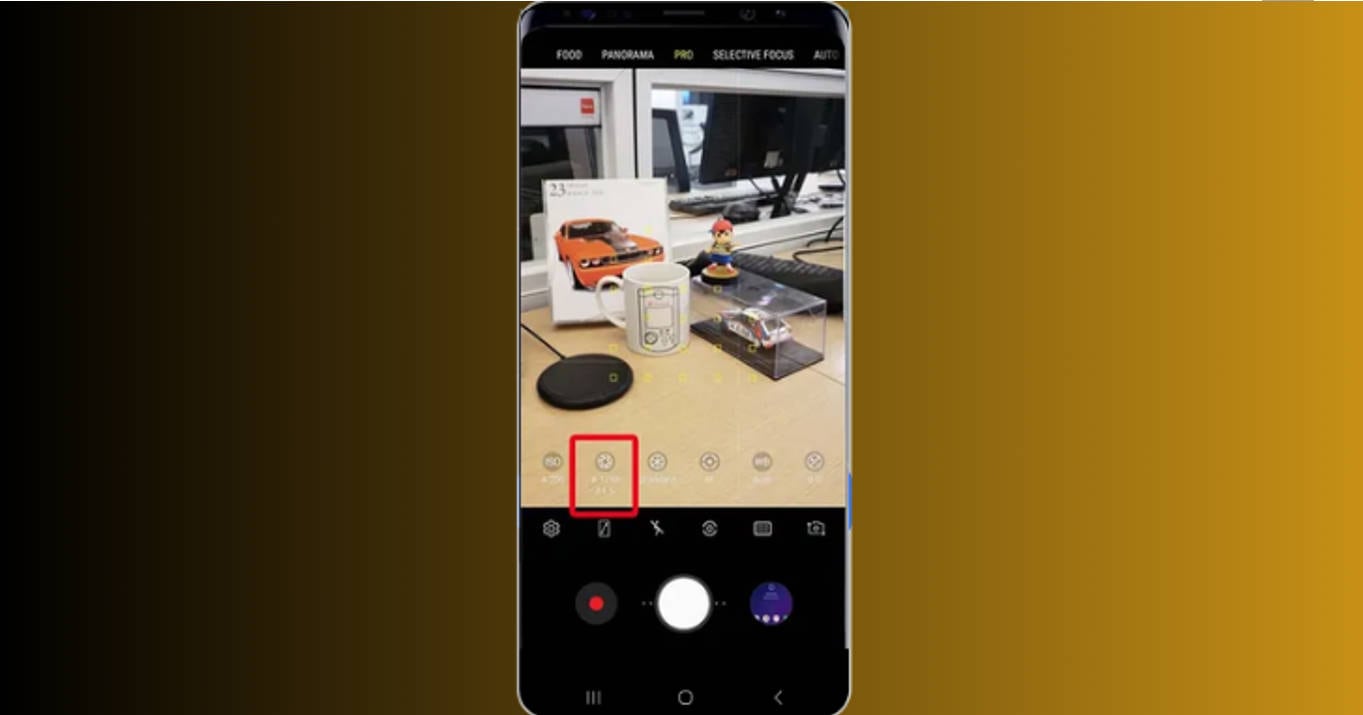
Step 5: Adjust ISO and Aperture (if Available)
Tune the ISO to compensate for exposure and noise. Some phones also allow manual aperture control (like the Samsung Galaxy series).
Step 6: Focus and Capture
Tap your subject to focus, then hit the shutter button to snap your photo with the chosen settings.
Whether you shoot casual photos or cinematic footage, knowing what shutter speed to use for video also helps make motion smoother. Most pros recommend doubling your frame rate (e.g., 1/60s for 30fps)
Part 5. How to Batch Improve Blurry Photos
Did you take photos with the wrong shutter speed? No worries—tools like Uniconverter AI Image Enhancer can fix them in batches. Blurry images often result from either too slow or too fast a shutter speed, leading to motion blur or underexposed shots. Instead of editing each photo manually, you can use AI-powered tools to save time and effort. These tools sharpen You can adjust details, reduce noise, and enhance clarity in just a few clicks. Whether it’s portraits, landscapes, or action shots, batch enhancement brings them back to life efficiently.
Steps to Use Uniconverter Image Enhancer
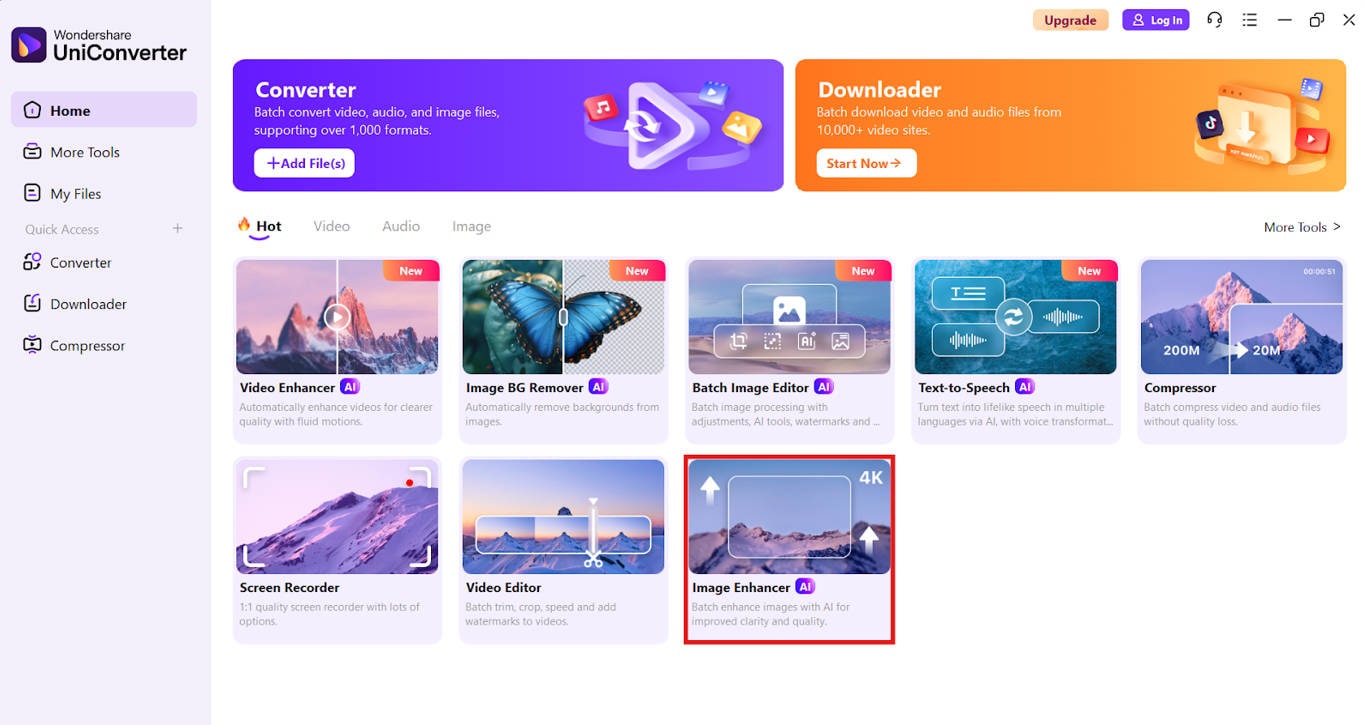
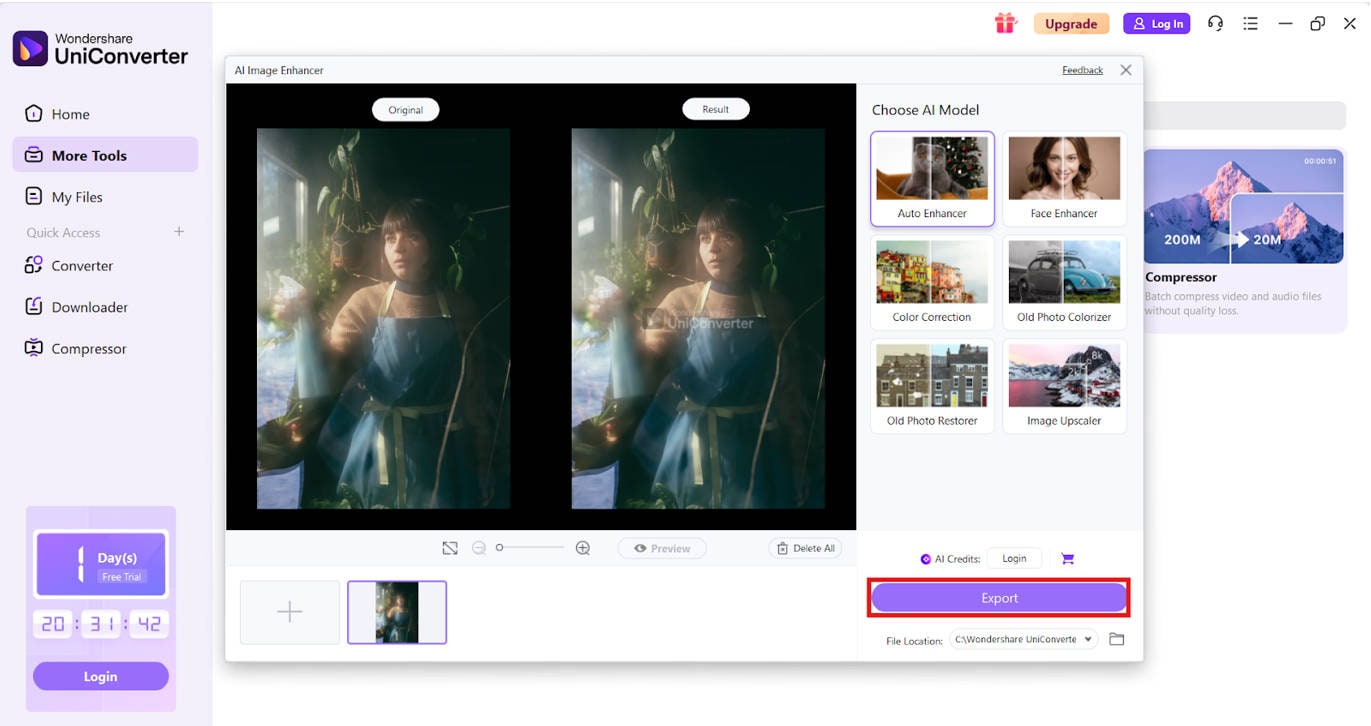
Step 1: Open UniConverter and Go to Image Enhancer
Launch Wondershare UniConverter and navigate to the “Image Enhancer.”
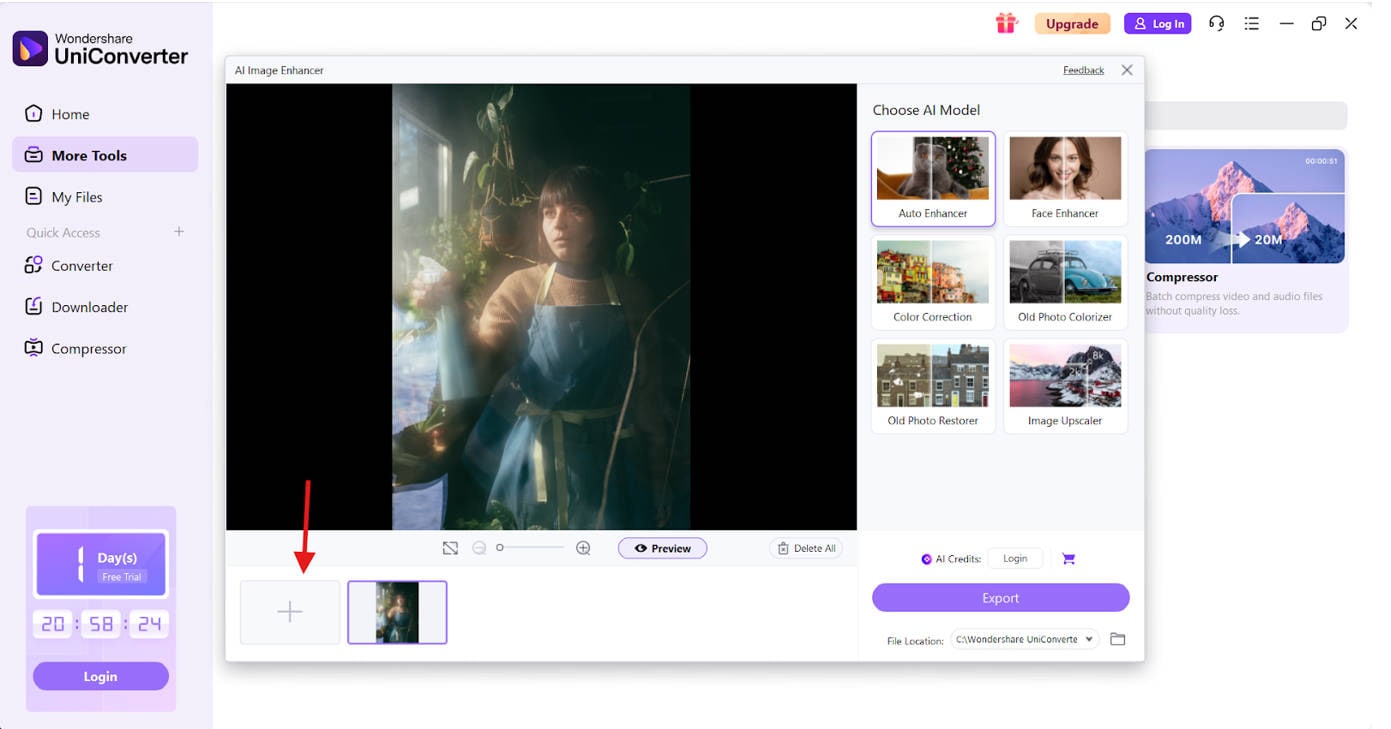
Step 2: Upload All Blurry or Underexposed Images
Click the “+ Add Files” button to import all the images that appear blurry, soft, or underexposed.
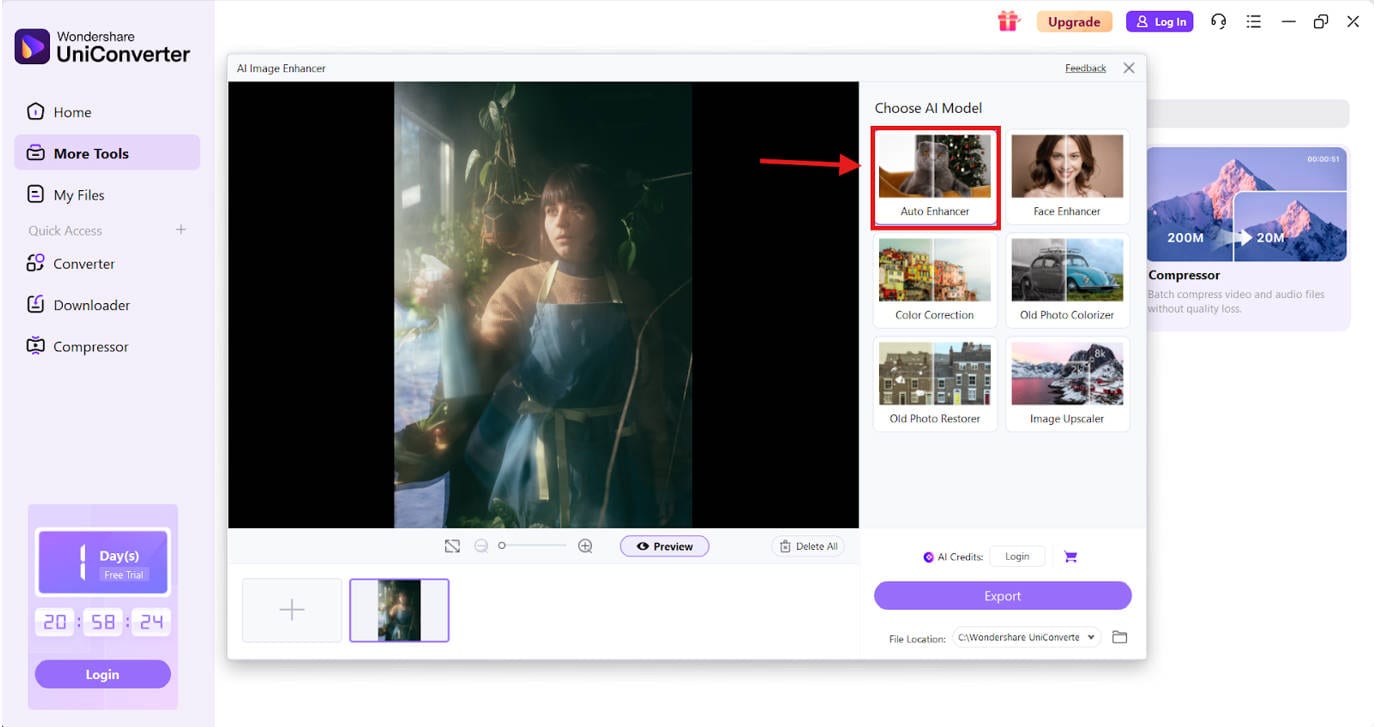
Step 3: Choose Auto Enhancer to Level Up
After uploading, choose the "Auto Enhancer" option from the available features. This phase is where the AI analyzes and intelligently sharpens motion-blurred areas while preserving the dreamy effect.
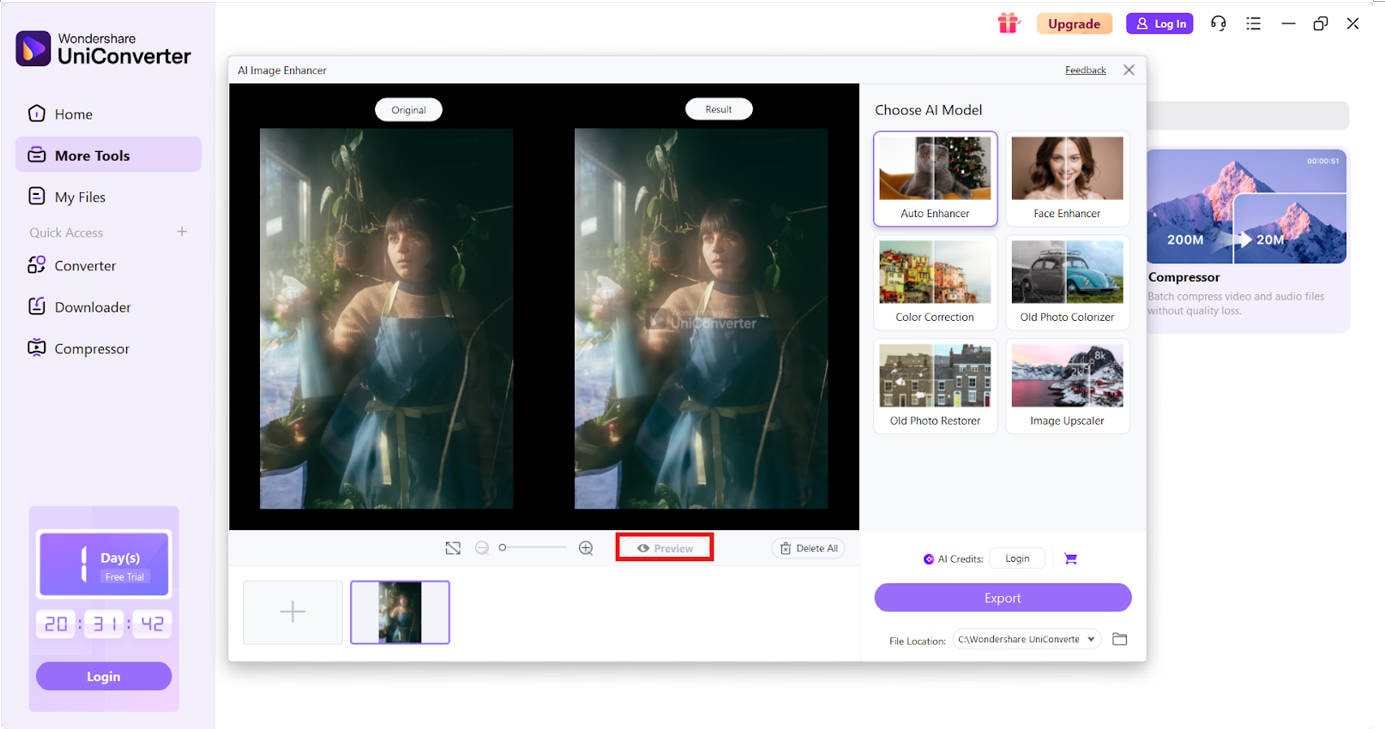
Step 4: Preview Before Applying
Check the real-time preview to compare before and after results. This feature helps you see the difference instantly and make sure it aligns with your artistic vision.
Step 5: Export
Once satisfied, apply the sharpness enhancement to all uploaded images in one click. Then download the upgraded versions in high resolution—ready to post, print, or share.
This is helpful when you’re still mastering the beginner aperture shutter speed ISO chart and accidentally pick the wrong values. It helps reverse mistakes while reinforcing the concept of what shutter speed control is.
Conclusion
Learning what aperture, shutter speed, and ISO is more than technical knowledge—it’s the core of creative control. From soft waterfalls to frozen sports shots, every photo you take reflects your mastery of the ISO aperture shutter speed triangle. By regularly using a visual aperture ISO shutter speed chart, you’ll begin to adjust settings instinctively based on scene type and lighting. This empowers you to ask confidently: what should my shutter speed be for this shot? Whether you shoot with a phone or DSLR, knowing what is ISO aperture and shutter speed helps you adapt, correct, and create freely. For imperfect photos taken with improper shutter speed, you can also always consider to choose Uniconverter as a quick fix. Try take your splendid photos now.
Super Easy to Use Image Enhancer for Win and Mac
FAQs
-
1. What is shutter speed in photography?
Shutter speed refers to how long the camera shutter remains open. It's crucial in controlling light exposure and motion clarity. -
2. What is a fast/slow shutter speed?
A fast shutter speed like 1/1000s freezes motion. It's perfect for action, sports, or wildlife photography, while a slow shutter speed like 1s or more creates motion blur. It’s ideal for creative long-exposure photography like waterfalls or stars. -
3. What does shutter speed control in a photo? What should my shutter speed be?
It controls the amount of motion blur and light. A fundamental aspect of the understanding ISO shutter speed and aperture equation. Your shutter speed depends on the subject's motion and lighting. Refer to a shutter speed and aperture chart or ISO aperture shutter speed triangle for guidance. -
4. What is shutter angle, and how does it relate?
Shutter angle is a cinematography term controlling motion blur in video. Similar to what shutter speed to use for video in photography. -
5. What are shutter speed aperture and ISO?
They are the three building blocks of photography exposure. Together, they form the camera aperture shutter speed ISO triangle.

