


Need to edit pictures on Mac, like maybe to crop out extra space, adjust colors, or resize an image for a report or website? Whether you are preparing visuals for work, sharing content online, or organizing personal photos, Mac users often find themselves needing quick and effective image edits.
But we often wonder how to do it easily and effectively. This article will guide you through the easiest ways to edit pictures on Mac using built-in tools like Preview and Photos, plus more powerful third-party options for advanced editing.
In this article
Part 1. How Can I Edit Pictures on Mac (3 Built-in Ways)
Apple’s macOS offers native tools that allow users to perform essential photo edits without the need for third-party software. Whether you want to make a quick crop, adjust colors, or even add annotations, you can always check built-in macOS apps.
Here are three quick built-in ways to edit pictures on Mac:
1. Edit a JPEG on Using Preview App
Preview is the default image viewer on Macs, but it also doubles as a lightweight image editor. What sets Preview apart from its Windows counterpart is that it is packed with essential features, like cropping, adding annotations/signatures, and even adjusting colors.
How to use Preview to edit pictures on Mac:
Step 1
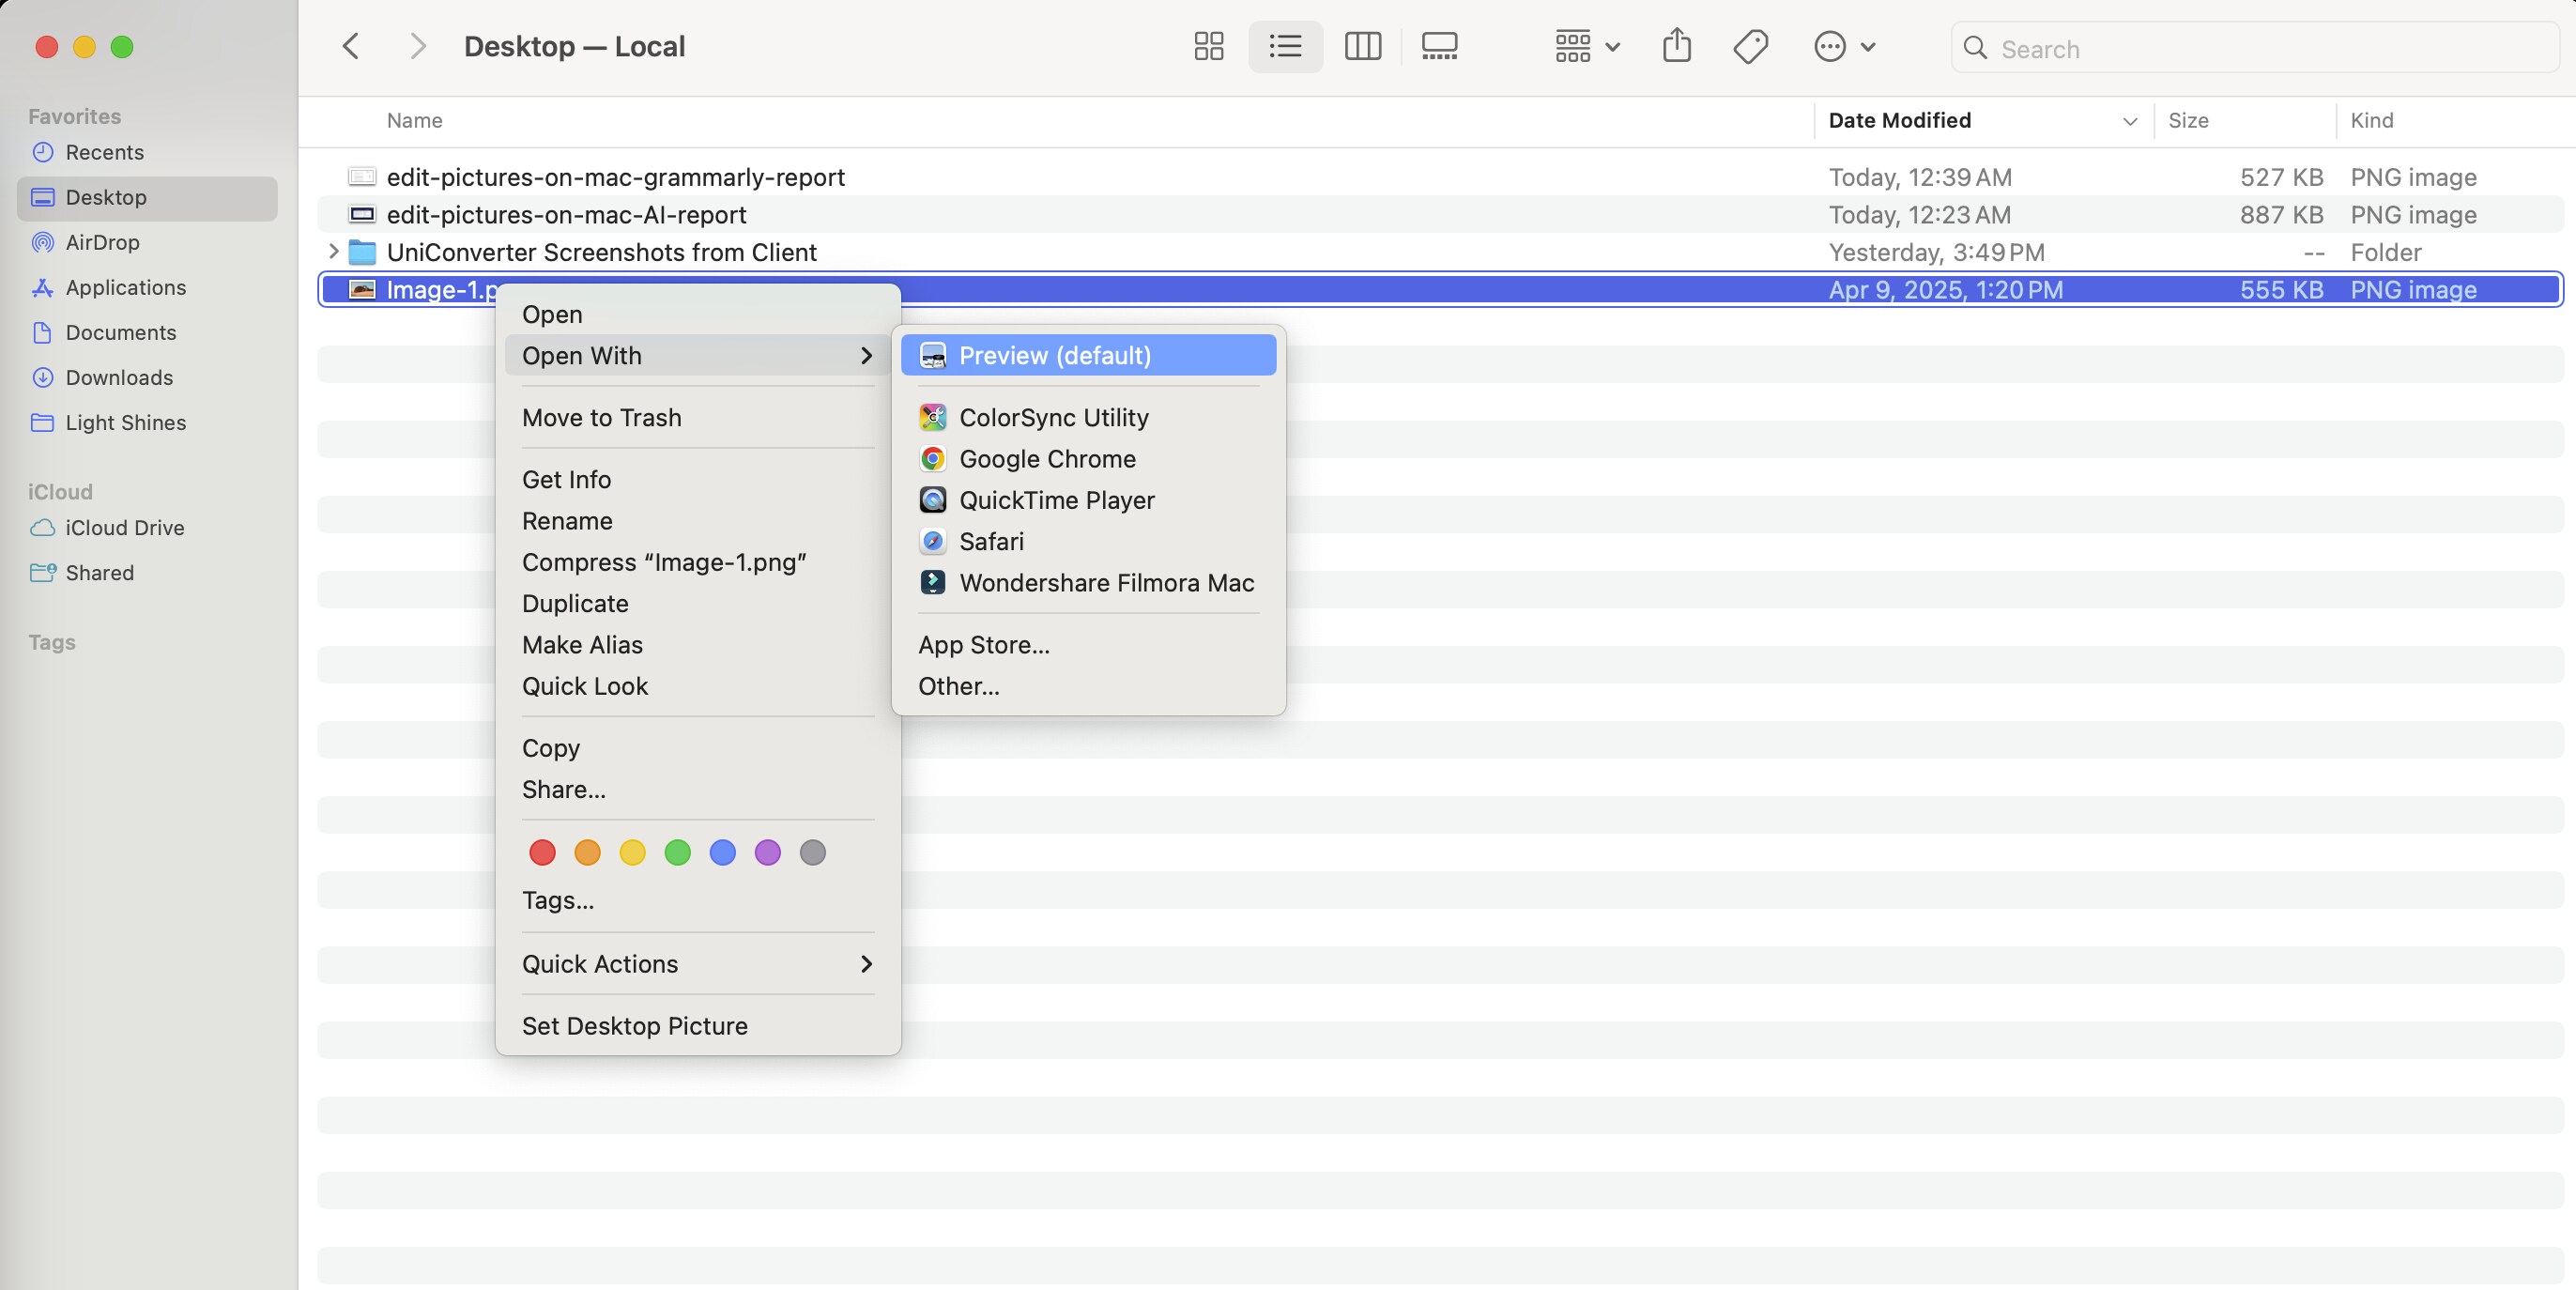
Right-click any image on your Mac and select "Open With" > Preview.
Step 2
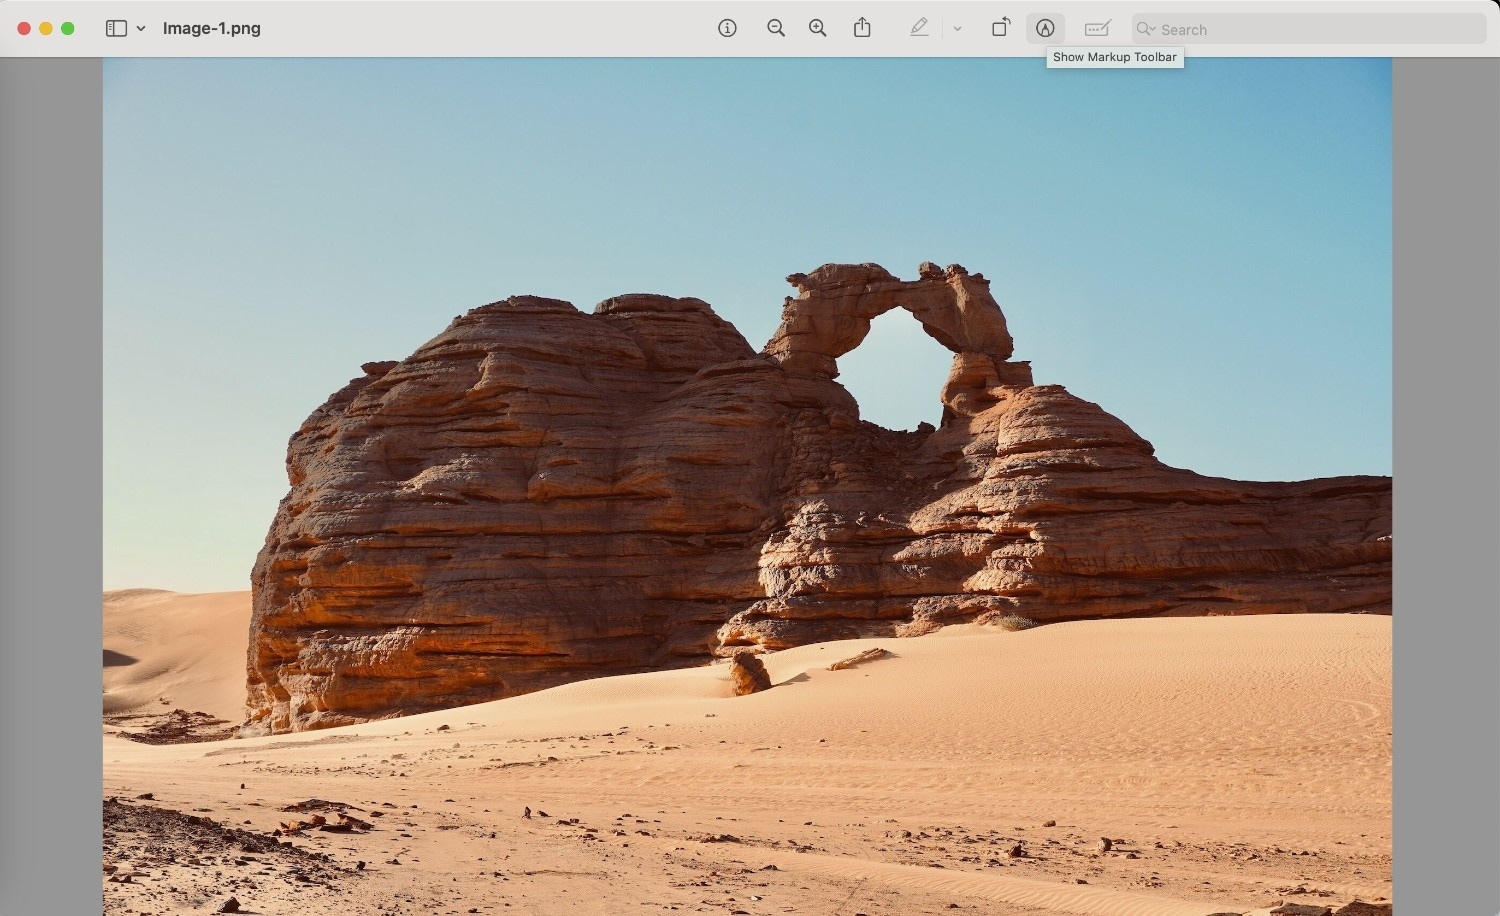
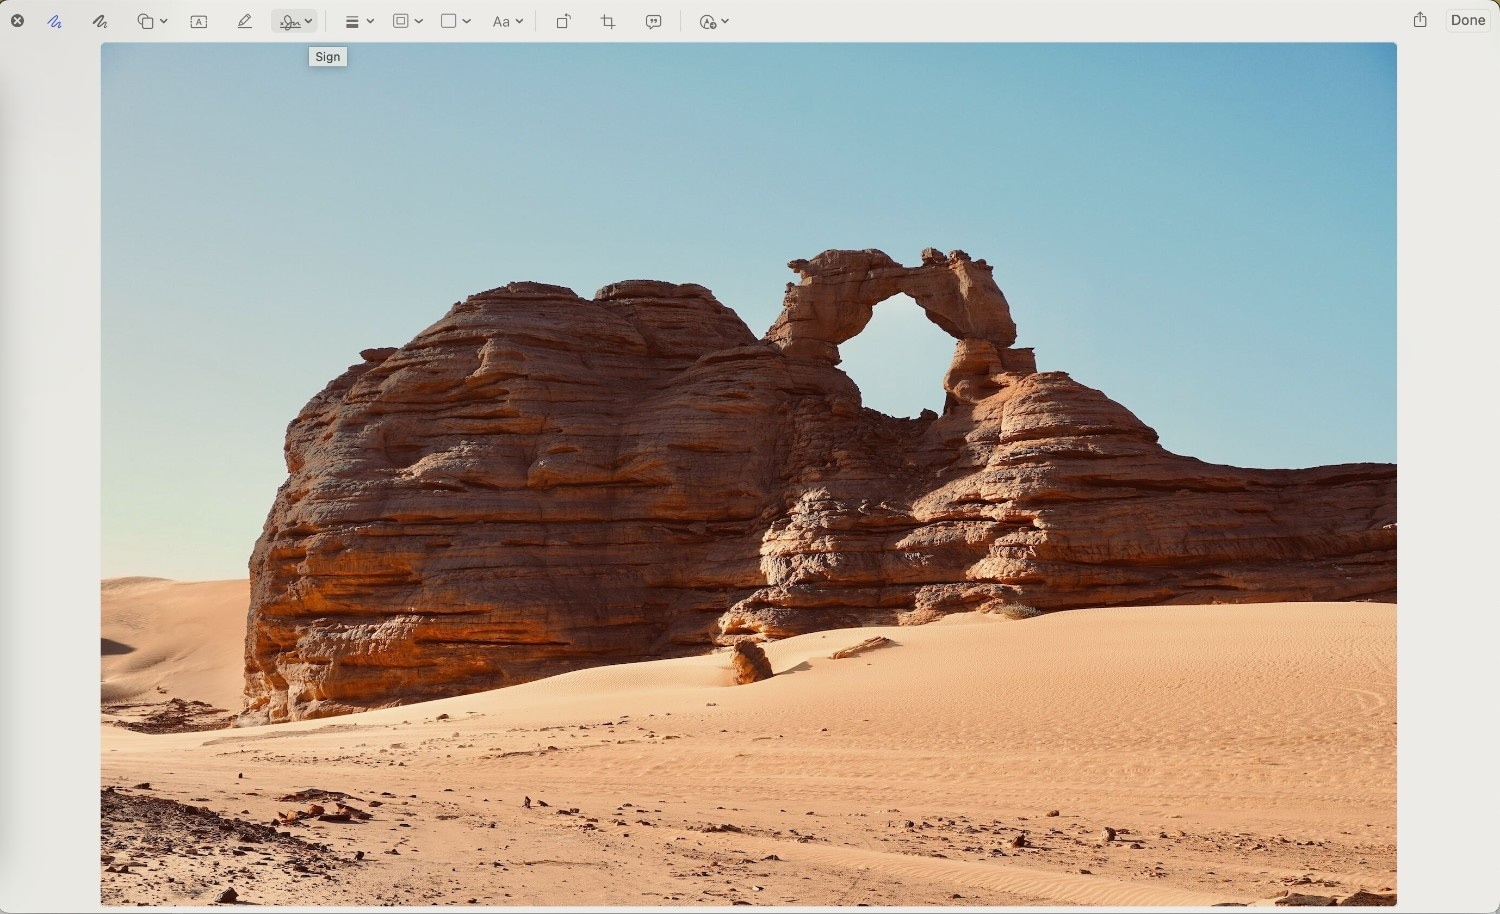
Click the pencil icon on the top toolbar to activate the Markup Toolbar option.
Step 3
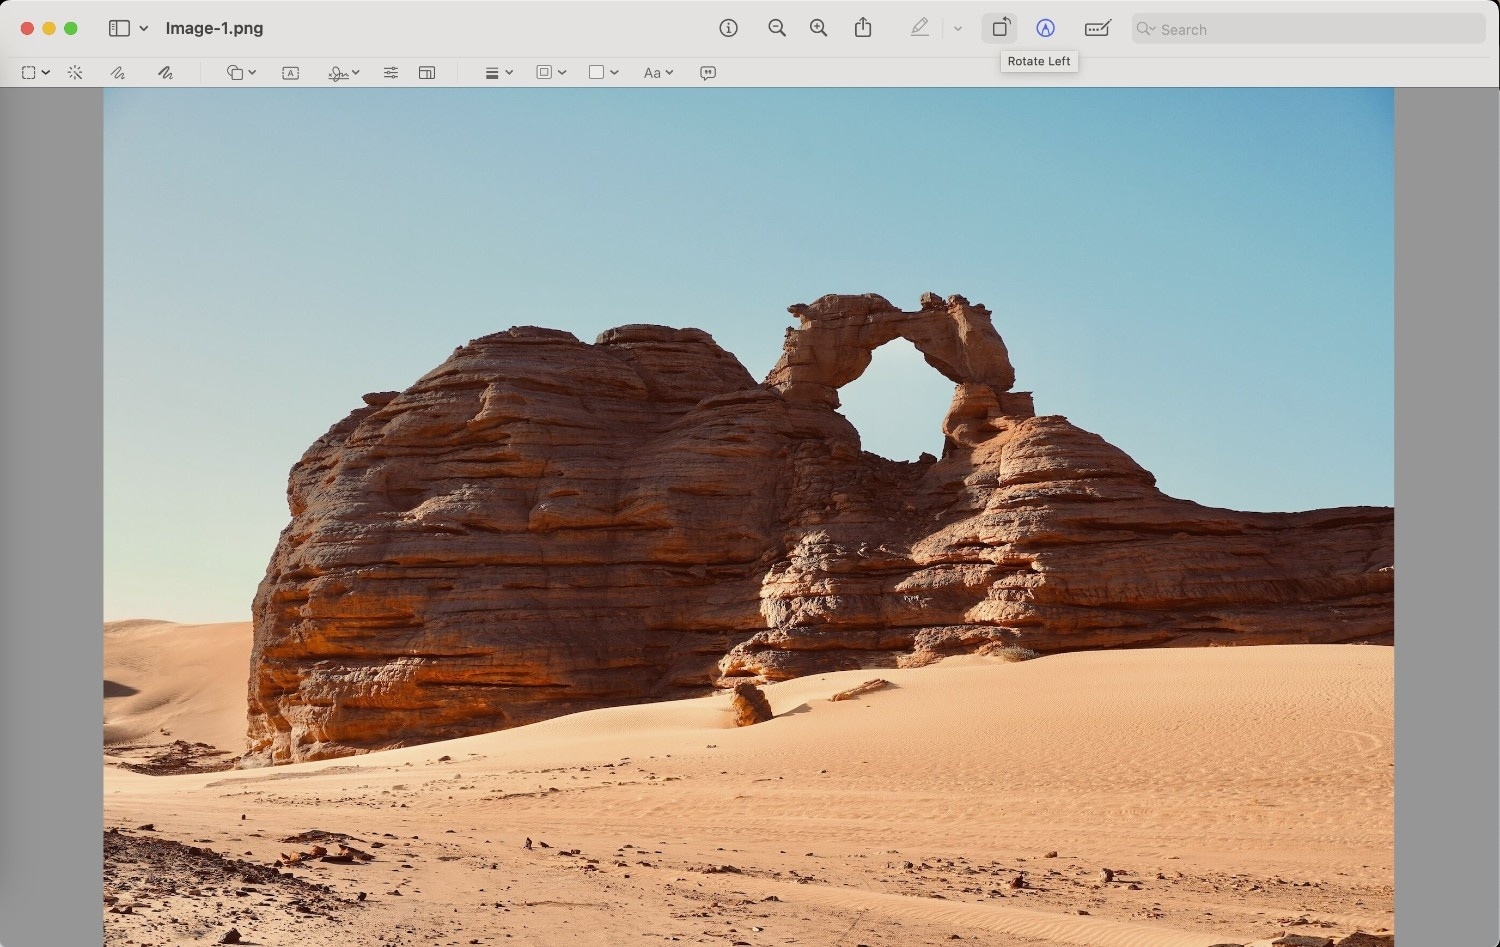
Use the toolbar to crop, rotate, flip, add text, shapes, sketch, draw, or even insert a signature.
Step 4
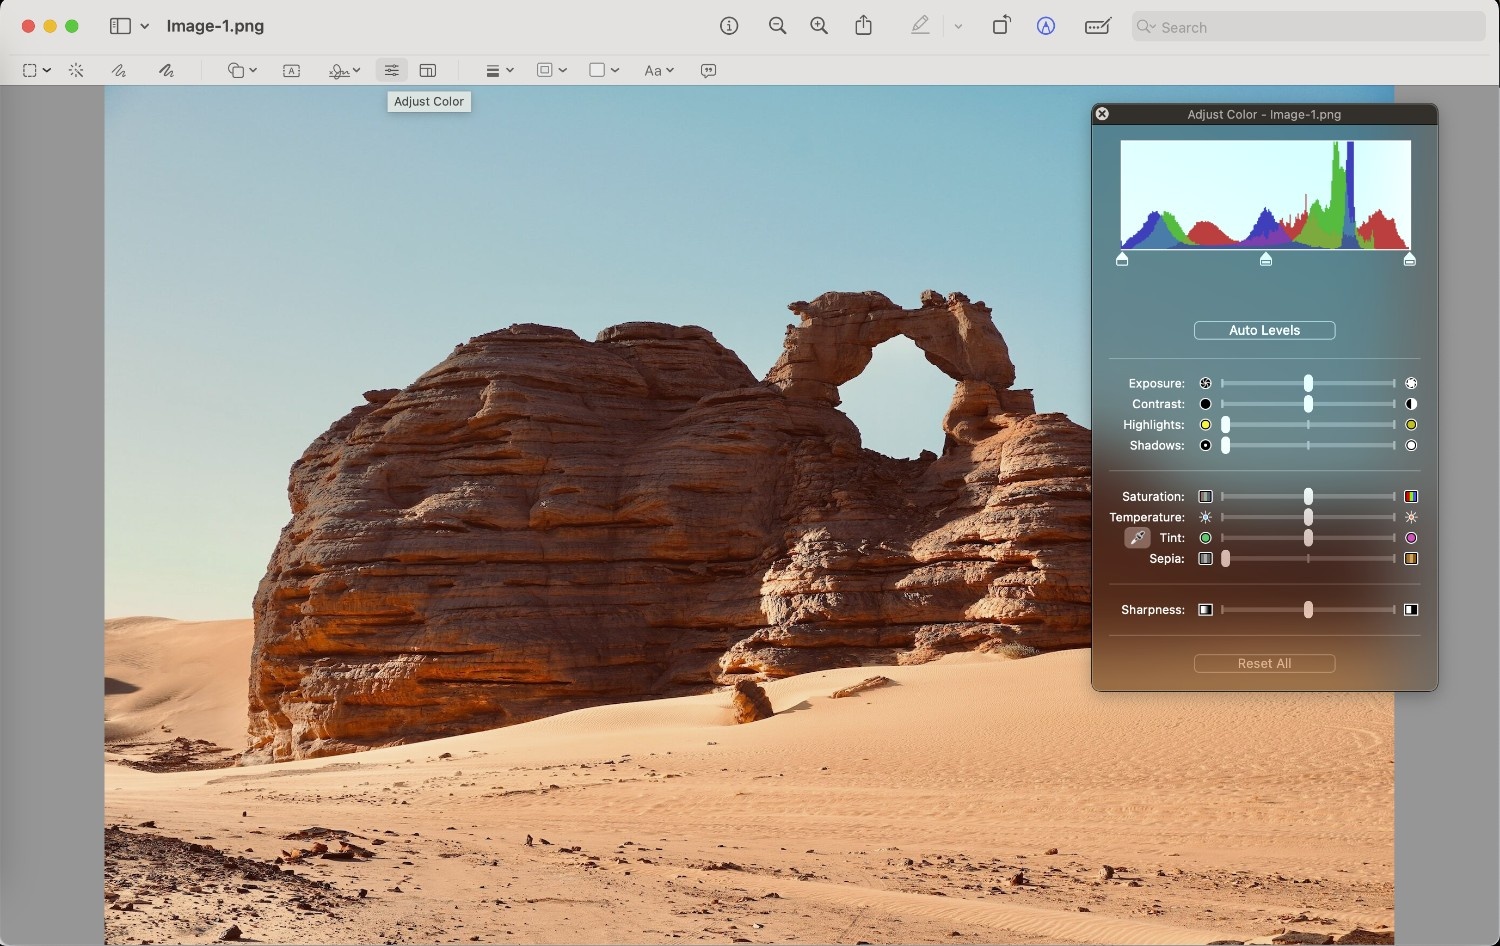
To adjust color, go to Tools > Adjust Color and fine-tune exposure, contrast, highlights, and more.
What is amazing is that these edits on your image are non-destructive until you save or export, which makes Preview a safe and effective tool for quick adjustments.
2. How to Edit Photos on Macbook Using the Photos App
The Photos app on macOS offers not only a viewing feature for the imported images but also a full suite of editing tools built right into your system. From basic filters to color adjustments, macOS’s Photo app is designed to help users enhance their photos quickly and efficiently.
How to edit pictures on Mac using the Photos application:
Step 1
Open the Photos app from your Applications folder and select the pre-imported image you want to edit.
Step 2
Click the “Edit” button at the top-right corner to launch the editing interface.

Step 3
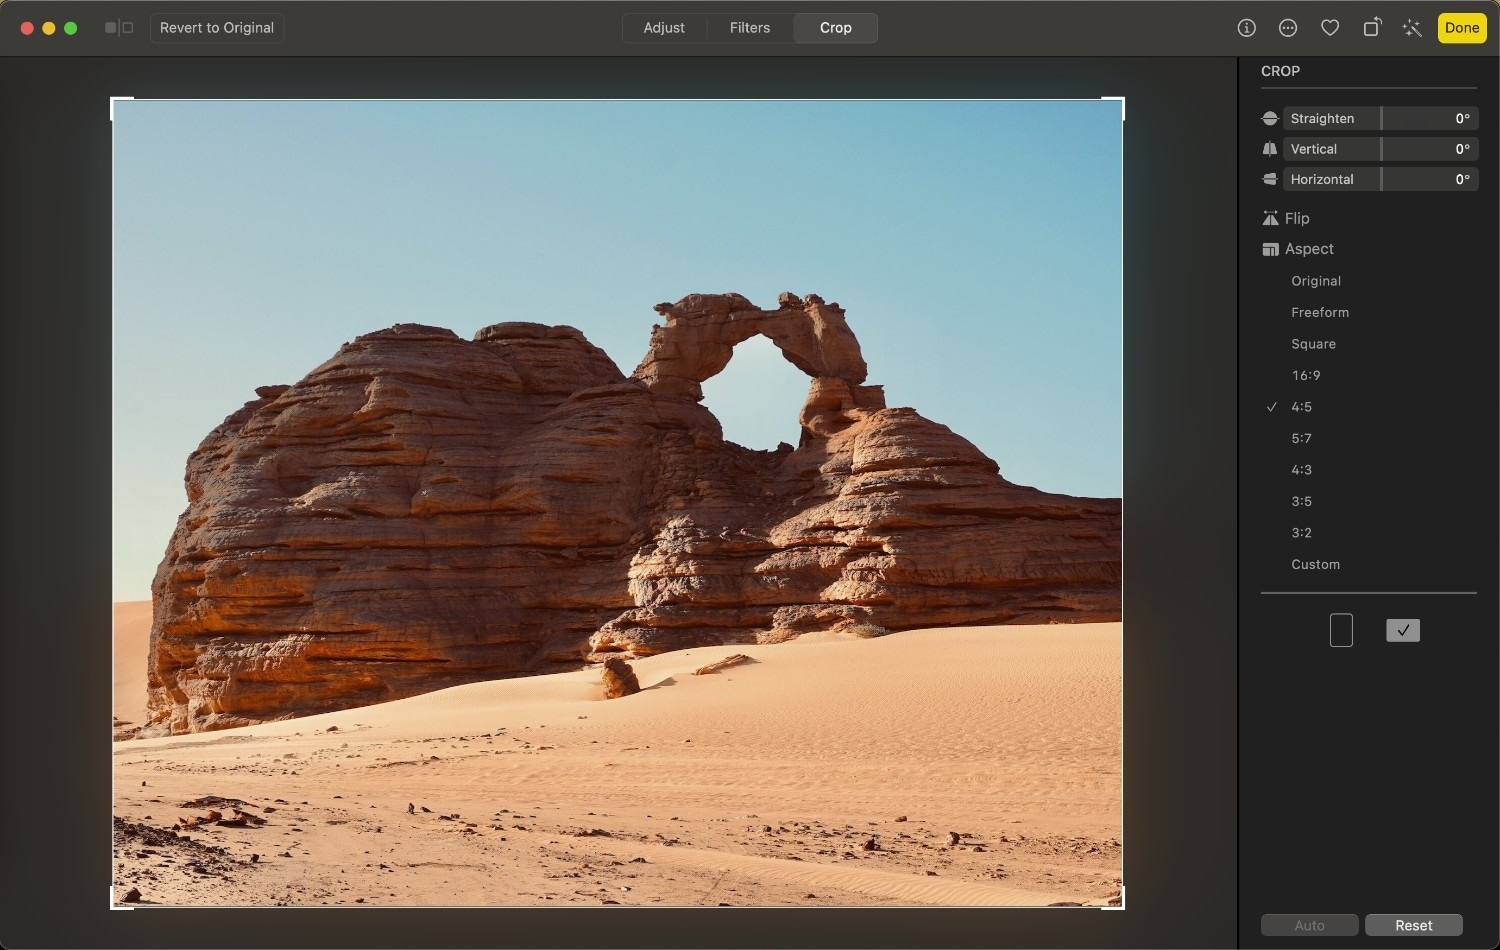
Under the Adjust tab, you can fine-tune Light, Color, Black & White, apply White Balance, fix Red-Eye, or use the Retouch brush.

Step 4
From the top menu, you can switch to the Filters tab to apply predefined looks to your image.

Step 5
You can then use the Crop tab to rotate, straighten, or crop the image based on preset or custom aspect ratios as per your preference. Once you are done, click “Done” to save changes.
3. Edit JPEG on Mac Using Markup Tool in Finder
The Markup tool in Finder provides a quick way to make simple edits without opening a dedicated app. Unfortunately, most macOS users are unaware of it, as the feature is not directly visible in the Photos app or the application.
How you can edit pictures on Mac using the built-in Markup tool:
Step 1
Right-click on any image in Finder and go to Quick Actions > Markup.

Step 2
The image will open in a pop-up editing window with a toolbar at the top. From here, use the available tools to sketch, draw, add text boxes, insert shapes, or place your signature.
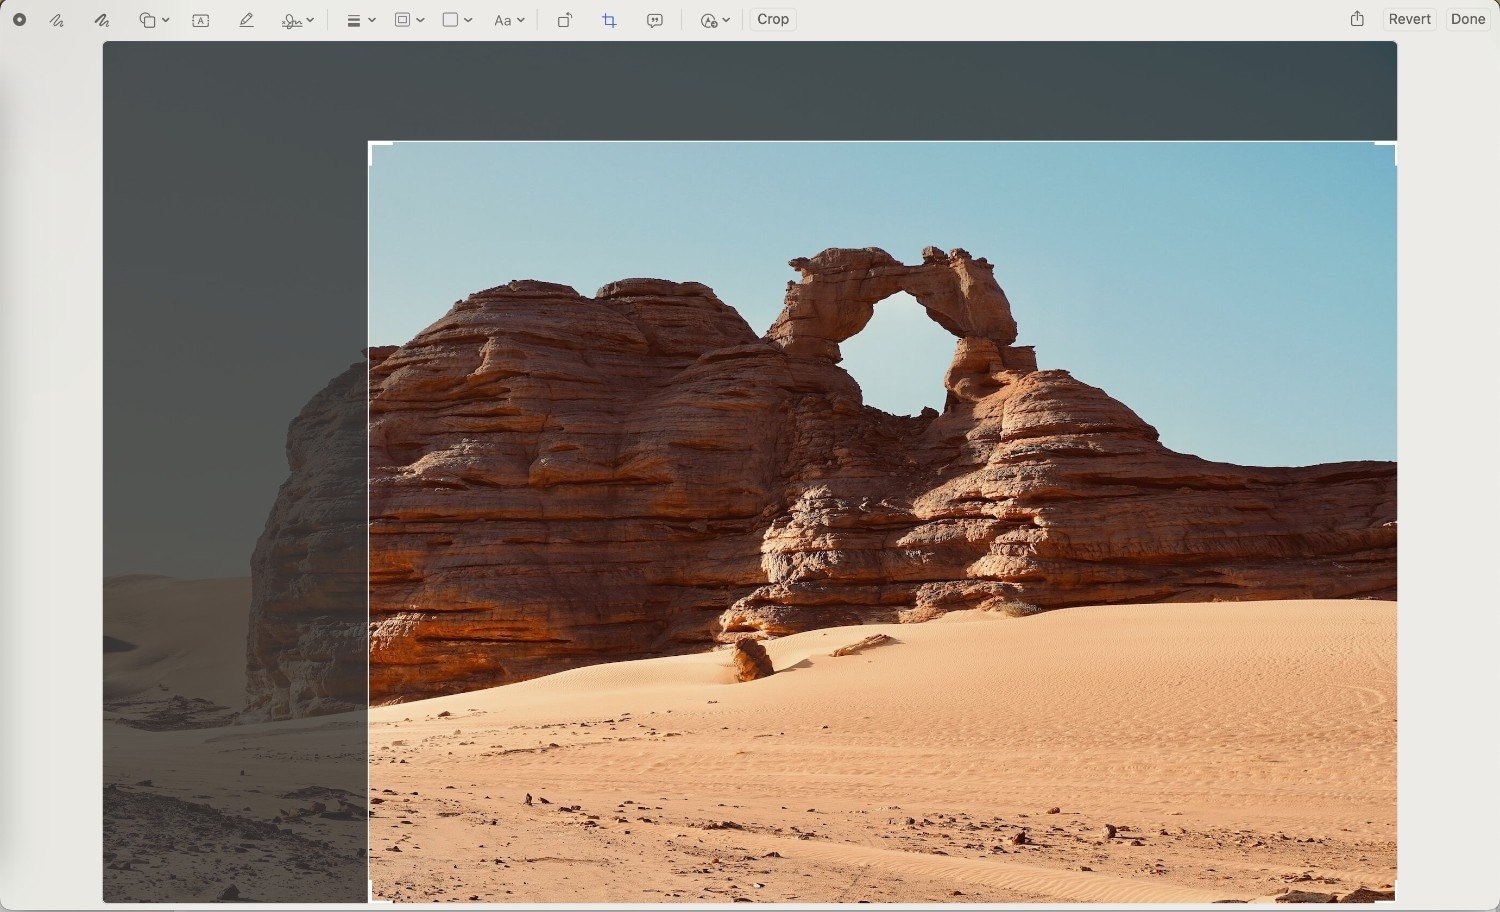
Step 3
Click the crop icon to trim the image if needed or write the image description.
Step 4
You can also click the Share icon to send the image to your iPad or iPhone for continued editing.

Part 2. Why Built-in Mac Tools May Not Be Enough
While macOS provides convenient image editing options, these built-in tools are designed primarily for basic, single-image tasks. If you are looking for basic color correction or straightforward cropping, then you will find these tools to be ideal, but they fall short when it comes to scalability, file flexibility, and even professional-level grading. Some of the most common limitations of using built-in apps to edit pictures on Mac are:
- You cannot edit or resize multiple images at once. For every image, you need to work from scratch, even if you aim to make the same adjustments to multiple files.
- A few file formats, like WebP, TIFF, or RAW, are not fully supported when editing pictures on Mac.
- You will only find basic markup features, which are not ideal when you need to add masking or work on layers.
- There are no custom resizing or automation options that would ease your picture editing process.
Part 3. How to Edit Photos on Macbook with Third-Party Tools
1. Wondershare UniConverter
If you are one of those users who needs more than the basic edits that MacOS offers but do not wish to spend a hefty amount on premium tools that require extensive training, then you can always check out Wondershare UniConverter. The tool creates a bridge for beginners and professionals by providing batch processing, AI-powered enhancements, and flexible export controls.

Batch Image Editor
Here are some of the key features of Wondershare UniConverter that set it apart from the built-in editing apps from Mac:
| Feature | Built-in Mac Tools (Preview, Photos) | Wondershare UniConverter |
| Basic Edits (Crop, Resize) | Yes | Yes |
| Batch Editing | Not supported | Full batch support |
| Format Conversion | Limited options | Supports JPG, PNG, BMP, TIFF, and more |
| Compression Without Quality Loss | Basic compression only | Advanced compression with control |
| AI Background Removal | Not available | One-click AI background remover |
| Color & Saturation Adjustments | Limited manual controls | Precise, real-time adjustments |
| Export Quality | May reduce quality during save | High-quality export options |
Steps to to edit pictures on Mac with UniConverter:
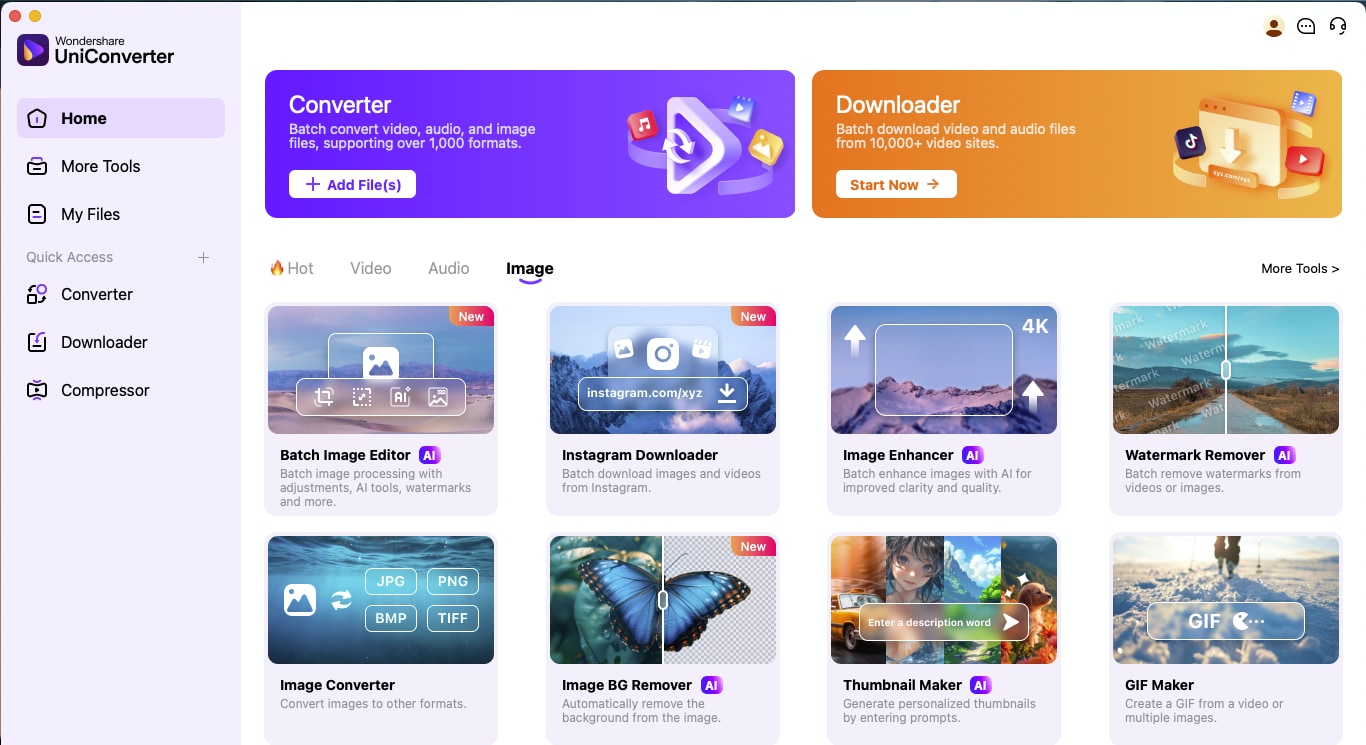
Step 1
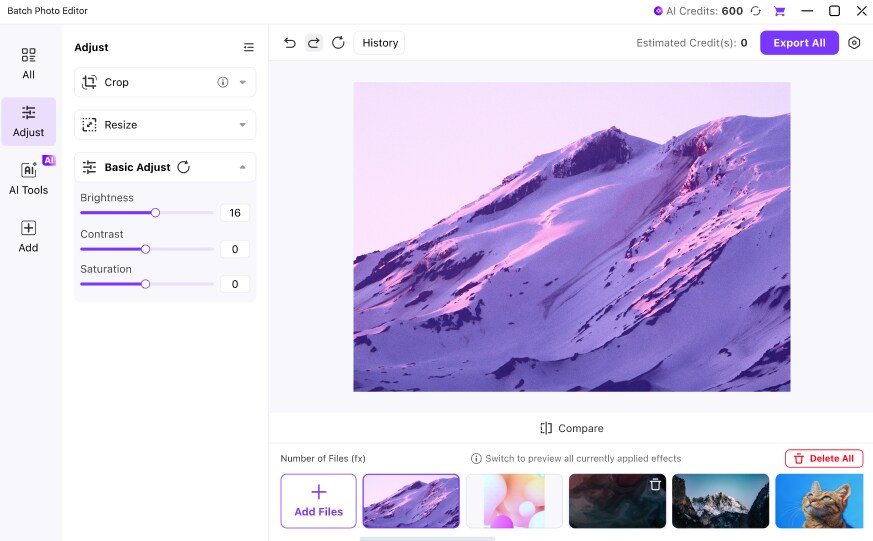
Launch UniConverter on your Mac and navigate to the Qucik Access from the left sidebar. From here, you can click “Batch Photo Editor” if you wish to edit multiple photos simultaneously.
Step 2
From the left panel, you can choose different editing options. Under the Adjust tab, you can access tools like Crop, Resize, Rotate, and Flip or apply basic adjustments such as Brightness, Contrast, and Saturation.
Step 3
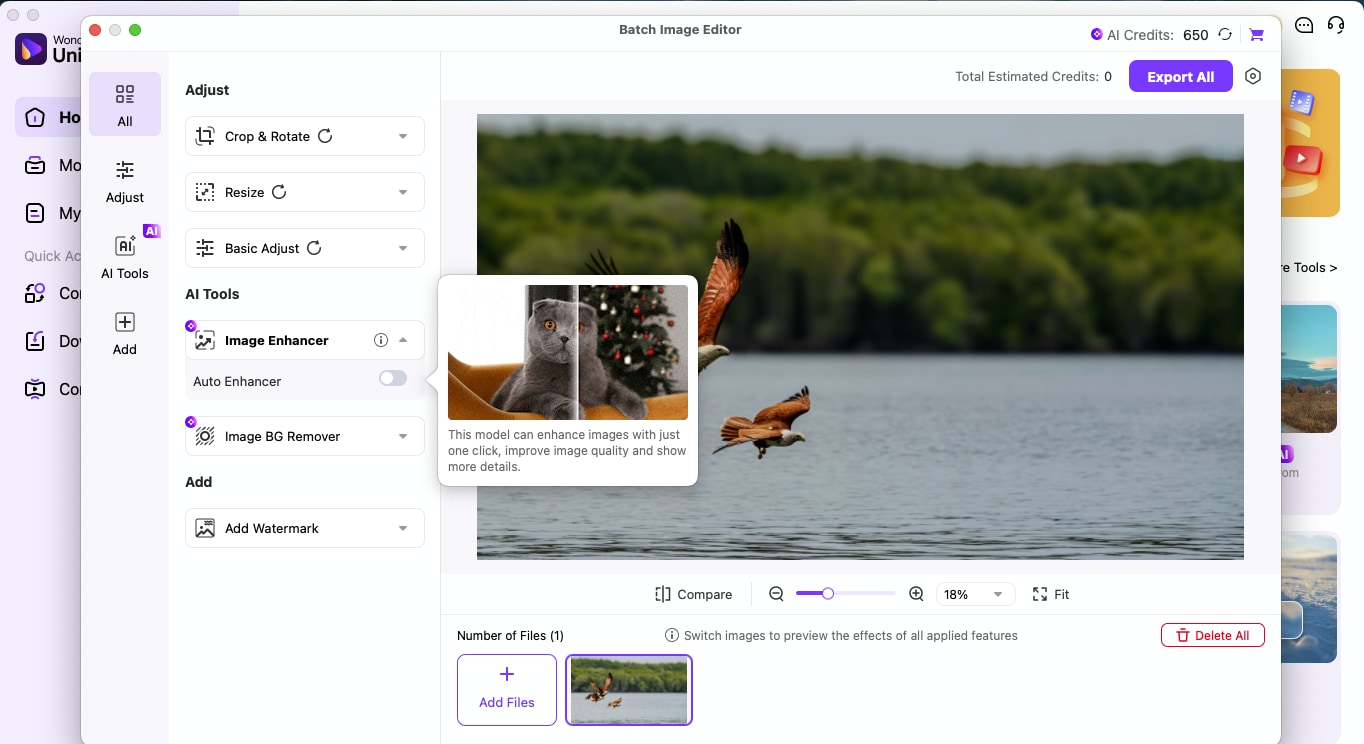
You can also head to the “AI Tools” section to use AI-powered features like Background Remover and Image Enhancer. From here, you can apply a new background from pre-built categories like Outdoor and Beach or add your own photo by clicking Custom.
Step 4
Once edits are complete, click Export All to download your images with all enhancements applied.
2. GIMP (GNU Image Manipulation Program)
GIMP is a powerful, open-source photo editing software that most users use. The only setback that most users feel is the complicated dashboard. If you overcome that limitation, then GIMP can even be seen as a free alternative to Photoshop.
3. PhotoScape X
If you are only looking for a beginner-friendly tool and wondering how to edit pictures on Mac without relying much on its built-in tools, then you can check out PhotoScape X. It offers a clean interface and useful presets for color, filters, and cropping.
As you can see, these tools offer more than macOS defaults, but they still don’t deliver the all-in-one control, batch workflow, or AI capabilities that many users need.
Part 4. What’s the Best Way to Edit JPEG on Mac?
The internet is filled with multiple tools and applications for editing pictures on Mac. It can be difficult to decide which tool is best suited for your editing needs. For starters, you should understand that the right choice ultimately depends on your workflow.
If you only occasionally need to crop a single image, macOS Preview might be enough. But if you want to handle multiple images and use AI features, you should use professional yet user-friendly tools like UniConverter.
Here’s a quick comparison to help you evaluate:
| Tool | Best For | Batch Editing | Ease of Use | AI Tools |
| Preview | Quick, one-off edits | ★★★★☆ | ||
| Photos App | Basic adjustments and filters | ★★★★☆ | ||
| GIMP | Layer-based editing, open source | ★★★☆☆ | ||
| PhotoScape X | Easy editing with built-in presets | Limited (Free) | ★★★★☆ | |
| UniConverter | Batch edits, resizing, AI-enhancement | ★★★★★ |
Conclusion
When you explore how can I edit pictures on Mac, you realize that the system offers basic tools, but as soon as you move beyond one-off crops or light adjustments, the limitations become apparent. Whether it’s the inability to batch process, the lack of AI-powered enhancements, or restricted export control, these small gaps can slow down creative workflows.
That’s where UniConverter comes in as an ideal photo editing tool for Mac. With a dedicated Batch Photo Editor, AI tools, and full format compatibility, it helps you edit pictures on a Mac like a professional. Explore UniConverter today and experience a more efficient way to edit images on Mac.

