User Guide
How to use Wondershare UniConverter (originally Wondershare Video Converter
Ultimate)?
Learn the step-by-step guide below.

UniConverter User Guide
-
Get Started for Mac
-
Video Converter (Mac)
- Convert Videos to Any Format | Wondershare UniConverter for Mac
- Convert DVD to Video | Wondershare UniConverter for Mac
- Mute Video | Wondershare UniConverter for Mac
- Add Audio to Video | Wondershare UniConverter for Mac
- Convert 4K and 8K Videos | Wondershare UniConverter for Mac
- Batch Convert Video Formats | Wondershare UniConverter for Mac
- Convert Videos to MP3 | Wondershare UniConverter for Mac
- Convert Videos to GIF | Wondershare UniConverter for Mac
- Convert SDR Video to HDR | Wondershare UniConverter For Mac
- Convert Video to Image Sequence | Wondershare UniConverter for Mac
-
Audio Converter (Mac)
-
Video Compressor (Mac)
-
Downloader (Mac)
-
Screen Recorder (Mac)
-
Merger (Mac)
-
DVD Burner (Mac)
-
Media Player (Mac)
-
Video Editor (Mac)
- Trim Video | Wondershare UniConverter for Mac
- Add Watermark | Wondershare UniConverter for Mac
- Crop Video | Wondershare UniConverter for Mac
- Apply Effect | Wondershare UniConverter for Mac
- Add Subtitle | Wondershare UniConverter for Mac
- Audio Track Volume | Wondershare UniConverter for Mac
- How to Edit Video - Wondershare UniConverter for Mac
- Auto Video Cutter | Wondershare UniConverter for Mac
-
Tools (Mac)
- Transfer | Wondershare UniConverter for Mac
- Image Converter | Wondershare UniConverter for Mac
- GIF Maker | Wondershare UniConverter for Mac
- Fix Media Metadata | Wondershare UniConverter for Mac
- CD Converter | Wondershare UniConverter for Mac
- CD Burner | Wondershare UniConverter for Mac
- VR Converter | Wondershare UniConverter for Mac
- Subtitle Editor | Wondershare UniConverter for Mac
- Watermark Editor | Wondershare UniConverter for Mac
- Smart Trimmer | Wondershare UniConverter for Mac
- Background Remover | Wondershare UniConverter for Mac
- Auto Crop Video | Wondershare UniConverter for Mac
- AI Portrait | Wondershare UniConverter for Mac
- Intro & Outro | Wondershare UniConverter for Mac
- Vocal Remover | Wondershare UniConverter for Mac
- Noise Remover | Wondershare UniConverter for Mac
- MP3 Cutter | Wondershare UniConverter for Mac
- Video Stabilization | Wondershare UniConverter for Mac
- AI Image Enhancer | Wondershare UniConverter for Mac
- AI Script Generator | Wondershare UniConverter for Mac
- AI Thumbnail Maker | Wondershare UniConverter for Mac
- AI Video Enhancer | Wondershare UniConverter for Mac
- Auto Highlight | Wondershare UniConverter for Mac
- Remove Watermark | Wondershare UniConverter for Mac
- AI Subtitle Translator | Wondershare UniConverter for Mac
- Text To Speech | Wondershare UniConverter for Mac
- AI Voice Changer | Wondershare UniConverter for Mac
- How to Upscale Image | Wondershare UniConverter for Mac
- How to Crop Image | Wondershare UniConverter for Mac
- How to Rotate Image | Wondershare UniConverter for Mac
- How to Resize Image | Wondershare UniConverter for Mac
- Anime Enhancement | Wondershare UniConverter for Mac
- Face Enhancement | Wondershare UniConverter for Mac
- Adjust Speed of TTS Audio | Wondershare UniConverter for Mac
- Voice Clone | Wondershare UniConverter for Mac
- Smart Summarizer on Mac| Wondershare UniConverter for Windows
FAQs
Video/Audio Solutions
How to crop Image With UniConverter For Mac
Part 1: Introduction
The importance of ensuring image dimensions are compatible with the specifications of the respective platform cannot be overstated. Furthermore, it should be noted that divergent image sizes have the capacity to influence storage space and loading speed, amongst other factors. UniConverter's free image cropper offers a number of preset image sizes for immediate cropping, as well as the option to customise the cropping range of the image by inputting specific width and height values. It is asserted that no deterioration in the quality of the crop occurs during the process of harvesting.
Part 2: Step-by-Step Guide on Image Cropper of UniConverter for Mac
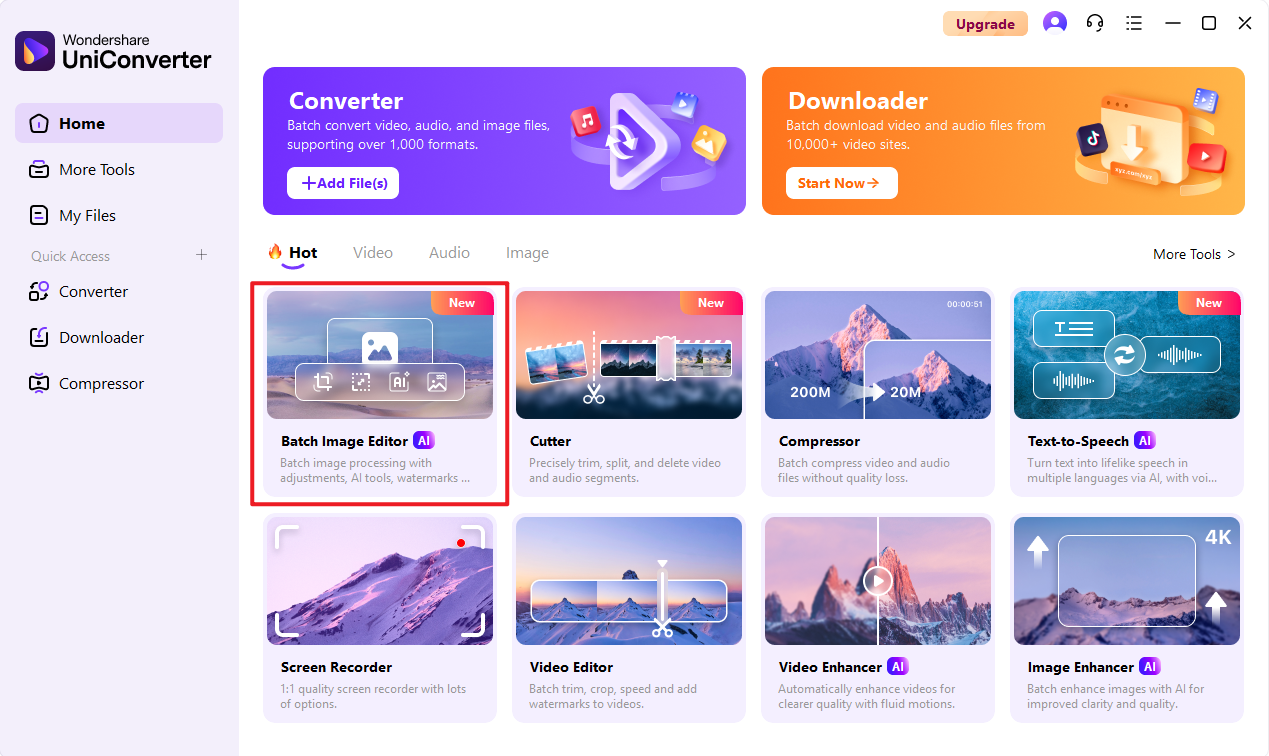
Step 1 Navigate to the Image Cropper Tool
Install UniConverter on your macOS, After you log in with your account credentials, Click “Batch Image Editor” under the “Hot” section of the software’s interface.
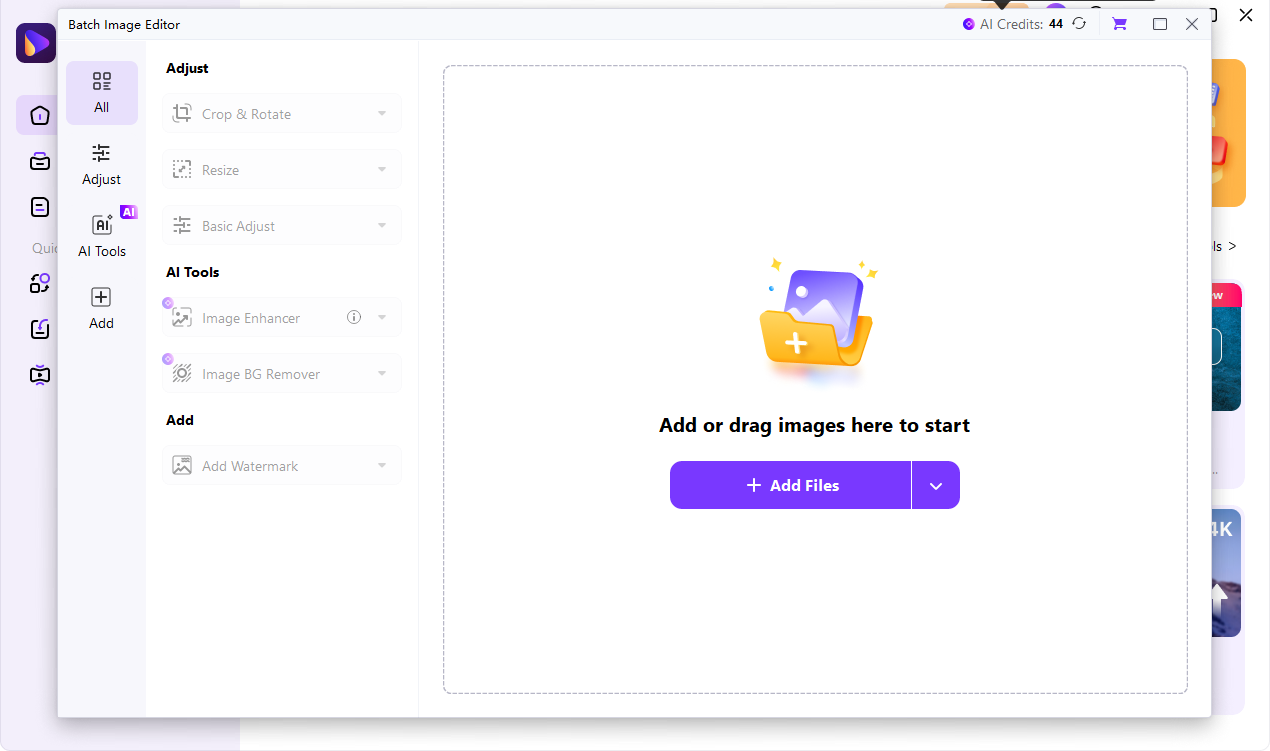
Step 2 Add Image to Batch Image Editor
Click the button or drag and drop images directly into the product for uploading, UniConverter supports almost all major image formats for editing.
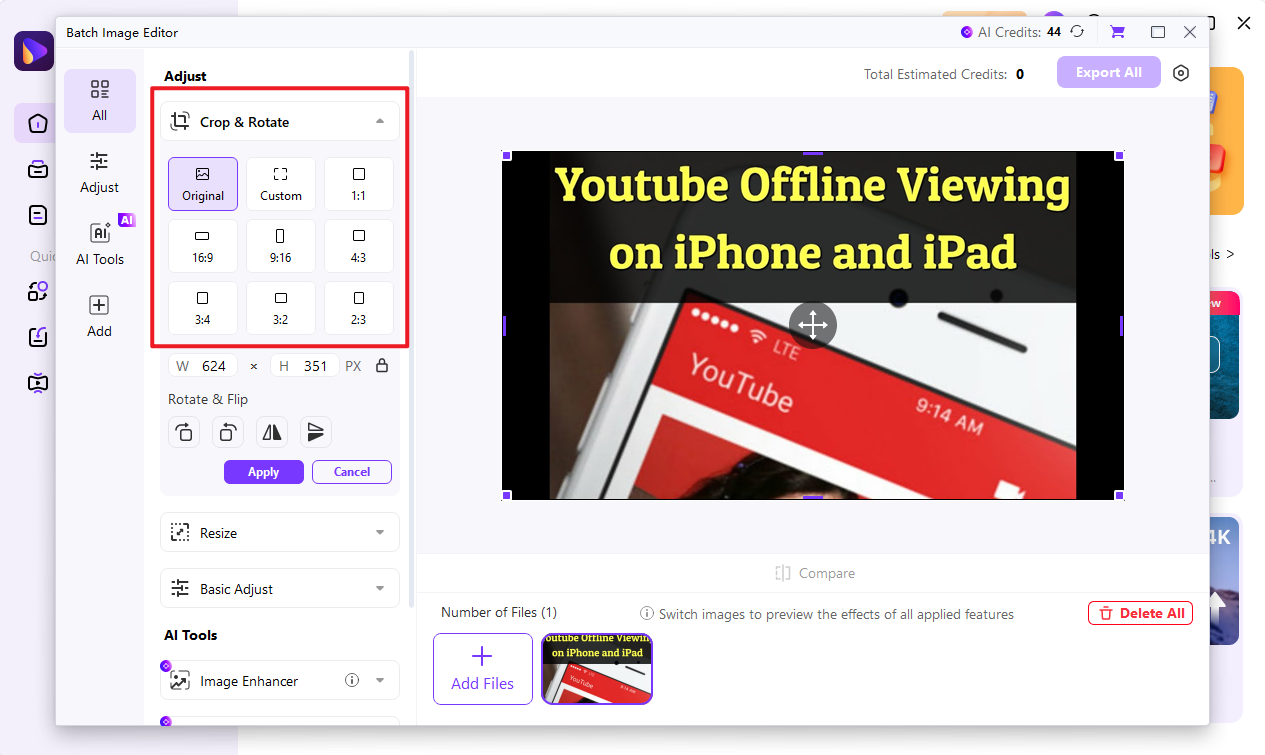
Step 3 Finish Setting the Size
The Crop Image option is located on the left side of the action pop-up window. By clicking on the drop-down box, a number of preset sizes will be displayed, enabling the image to be cropped with a single click.
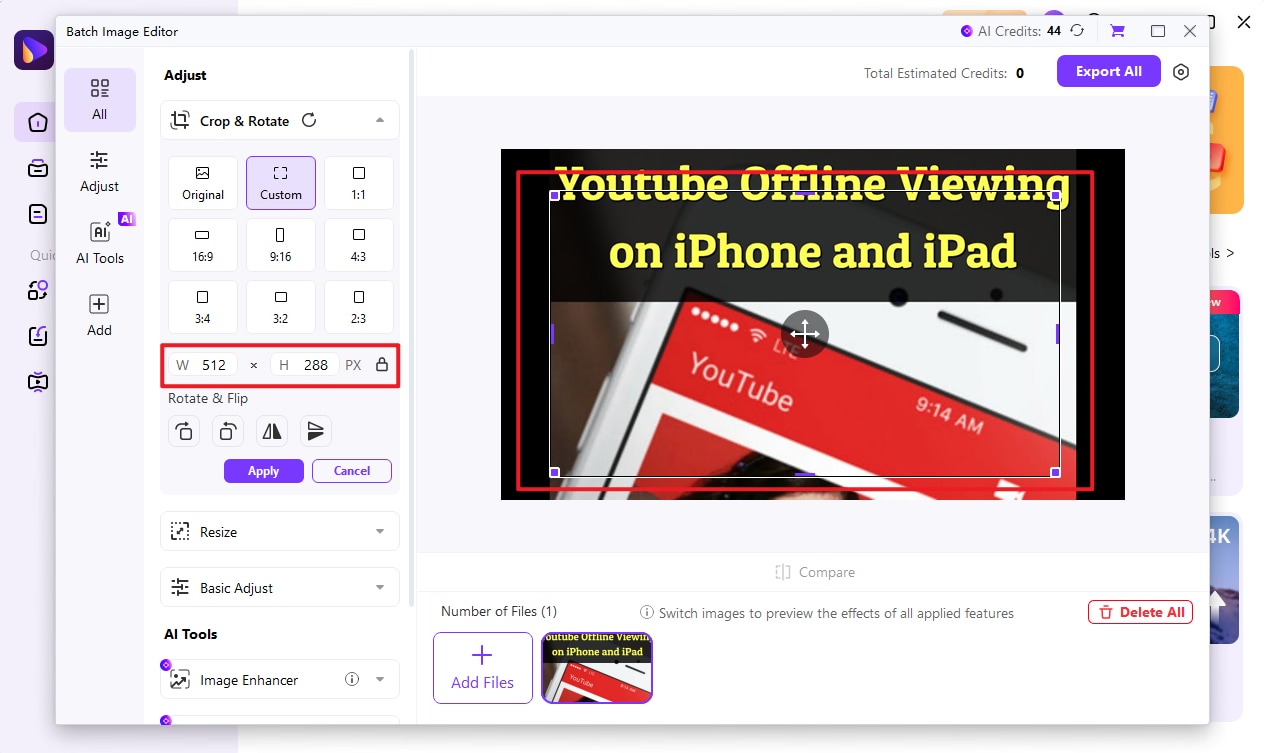
Should users have specific requirements pertaining to image cropping, it is possible to customise the relevant range by entering the aspect ratio in the field located beneath the dropdown menu. It is also possible to drag and drop the crop box directly above the image.
Step 4 Export all image
Once the image size has been adjusted to the required dimensions, the "Export All" button, located in the upper right corner, should be selected in order to transfer the image to the designated saved folder.
 print
print
