User Guide
How to use Wondershare UniConverter (originally Wondershare Video Converter
Ultimate)?
Learn the step-by-step guide below.

UniConverter User Guide
-
Get Started for Mac
-
Video Converter (Mac)
- How to Convert Videos to Any Format on Mac | UniConverter 18
- Convert DVD to Video | Wondershare UniConverter for Mac
- Mute Video | Wondershare UniConverter for Mac
- Add Audio to Video | Wondershare UniConverter for Mac
- Convert 4K and 8K Videos | Wondershare UniConverter for Mac
- Batch Convert Video Formats | Wondershare UniConverter for Mac
- Convert Videos to MP3 | Wondershare UniConverter for Mac
- Convert Videos to GIF | Wondershare UniConverter for Mac
- Convert SDR Video to HDR | Wondershare UniConverter For Mac
- Convert Video to Image Sequence | Wondershare UniConverter for Mac
-
Audio Converter (Mac)
-
Video Compressor (Mac)
-
Downloader (Mac)
-
Screen Recorder (Mac)
-
Merger (Mac)
-
DVD Burner (Mac)
-
Media Player (Mac)
-
Video Editor (Mac)
- Trim Video | Wondershare UniConverter for Mac
- Add Watermark | Wondershare UniConverter for Mac
- Crop Video | Wondershare UniConverter for Mac
- Apply Effect | Wondershare UniConverter for Mac
- Add Subtitle | Wondershare UniConverter for Mac
- Audio Track Volume | Wondershare UniConverter for Mac
- How to Edit Video - Wondershare UniConverter for Mac
- Auto Video Cutter | Wondershare UniConverter for Mac
-
Tools (Mac)
- Transfer | Wondershare UniConverter for Mac
- Image Converter | Wondershare UniConverter for Mac
- GIF Maker | Wondershare UniConverter for Mac
- Fix Media Metadata | Wondershare UniConverter for Mac
- CD Converter | Wondershare UniConverter for Mac
- CD Burner | Wondershare UniConverter for Mac
- VR Converter | Wondershare UniConverter for Mac
- Subtitle Editor | Wondershare UniConverter for Mac
- How to Remove Watermarks, Subtitles & Objects from Videos on Mac
- Smart Trimmer | Wondershare UniConverter for Mac
- Background Remover | Wondershare UniConverter for Mac
- Auto Crop Video | Wondershare UniConverter for Mac
- AI Portrait | Wondershare UniConverter for Mac
- Intro & Outro | Wondershare UniConverter for Mac
- Vocal Remover | Wondershare UniConverter for Mac
- Noise Remover | Wondershare UniConverter for Mac
- MP3 Cutter | Wondershare UniConverter for Mac
- Video Stabilization | Wondershare UniConverter for Mac
- AI Image Enhancer | Wondershare UniConverter for Mac
- AI Script Generator | Wondershare UniConverter for Mac
- AI Thumbnail Maker | Wondershare UniConverter for Mac
- How to Enhance Video Quality with AI on Mac | UniConverter
- Auto Highlight | Wondershare UniConverter for Mac
- Remove Watermark | Wondershare UniConverter for Mac
- AI Subtitle Translator | Wondershare UniConverter for Mac
- Text To Speech | Wondershare UniConverter for Mac
- AI Voice Changer | Wondershare UniConverter for Mac
- How to Upscale Image | Wondershare UniConverter for Mac
- How to Crop Image | Wondershare UniConverter for Mac
- How to Rotate Image | Wondershare UniConverter for Mac
- How to Resize Image | Wondershare UniConverter for Mac
- Anime Enhancement | Wondershare UniConverter for Mac
- How to Enhance Faces in Videos with AI | UniConverter for Mac
- Adjust Speed of TTS Audio | Wondershare UniConverter for Mac
- Voice Clone | Wondershare UniConverter for Mac
- Smart Summarizer on Mac| Wondershare UniConverter for Windows
- AI Video Blur for Mac: Blur Faces & Moving Objects in Videos
- AI Media Agent | Wondershare UniConverter for Mac
FAQs
Video/Audio Solutions
AI Image Enhancer
Part 1: Introduction
AI Image Enhancer uses artificial intelligence technology to improve and restore image quality.
Wondershare UniConverter’s AI Image Enhancer provides professional image enhancement capabilities, including detail enhancement, super resolution, colorization, and restoration. You can also use scenario-based AI recipes for more specific image enhancement needs or use AI Auto Fix to automatically analyze an image and generate a personalized enhancement solution.
Part 2: Guides
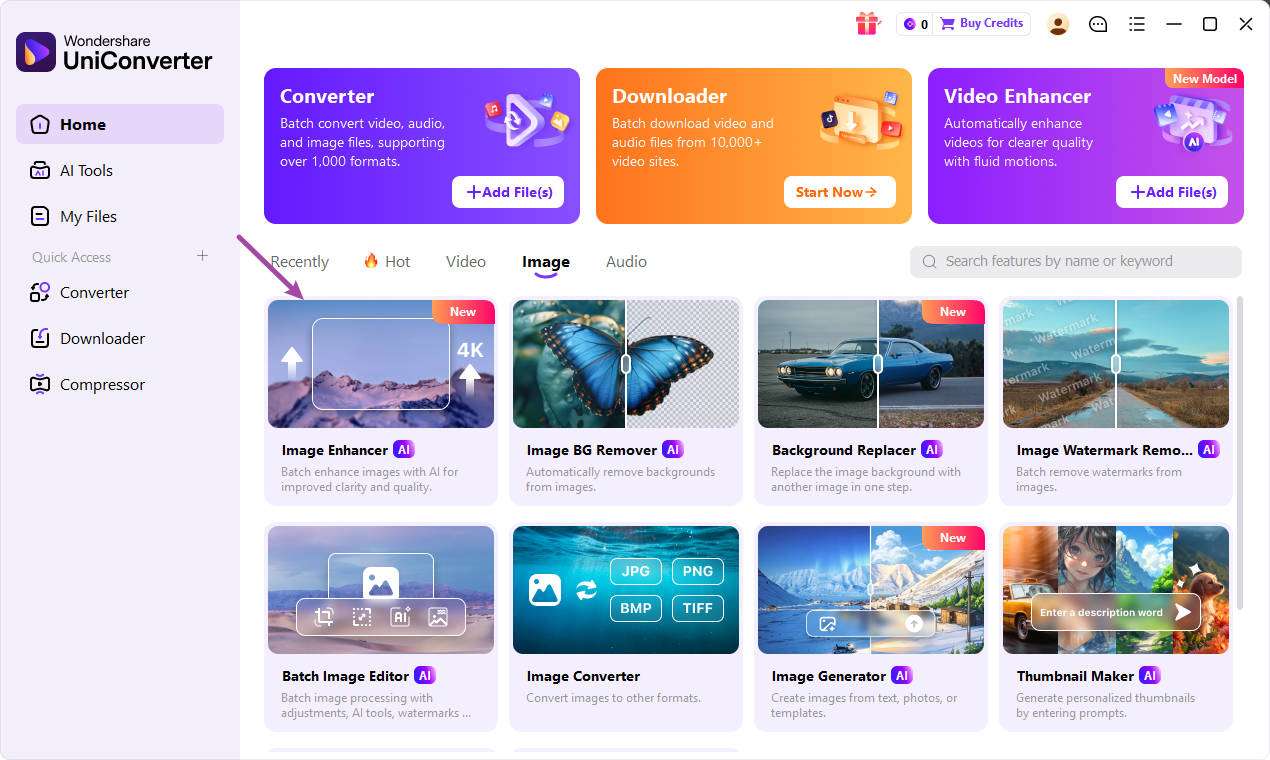
Step 1: Open AI Image Enhancer and Add an Image
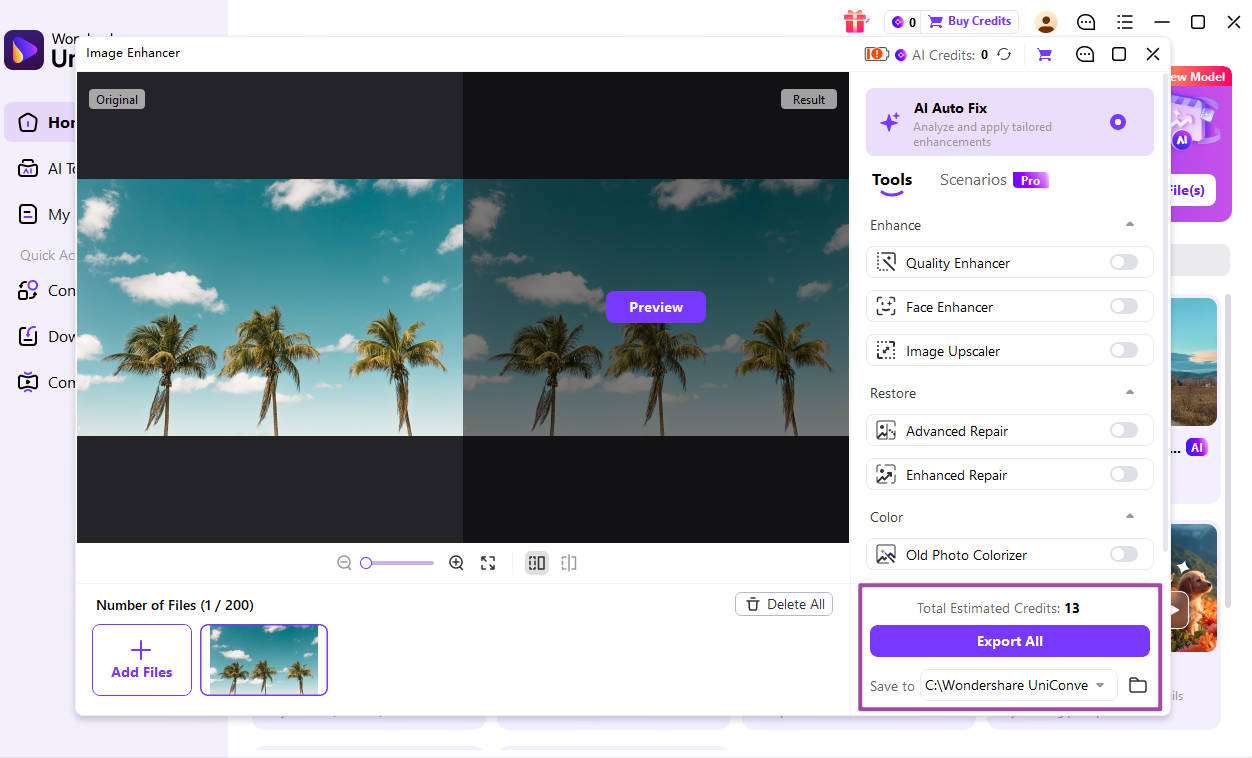
Launch Wondershare UniConverter and select AI Image Enhancer from the main interface. Then drag and drop the image you want to enhance into the workspace, or click the “+” icon to select an image from your computer.
Step 2: Select an AI Enhancement Mode
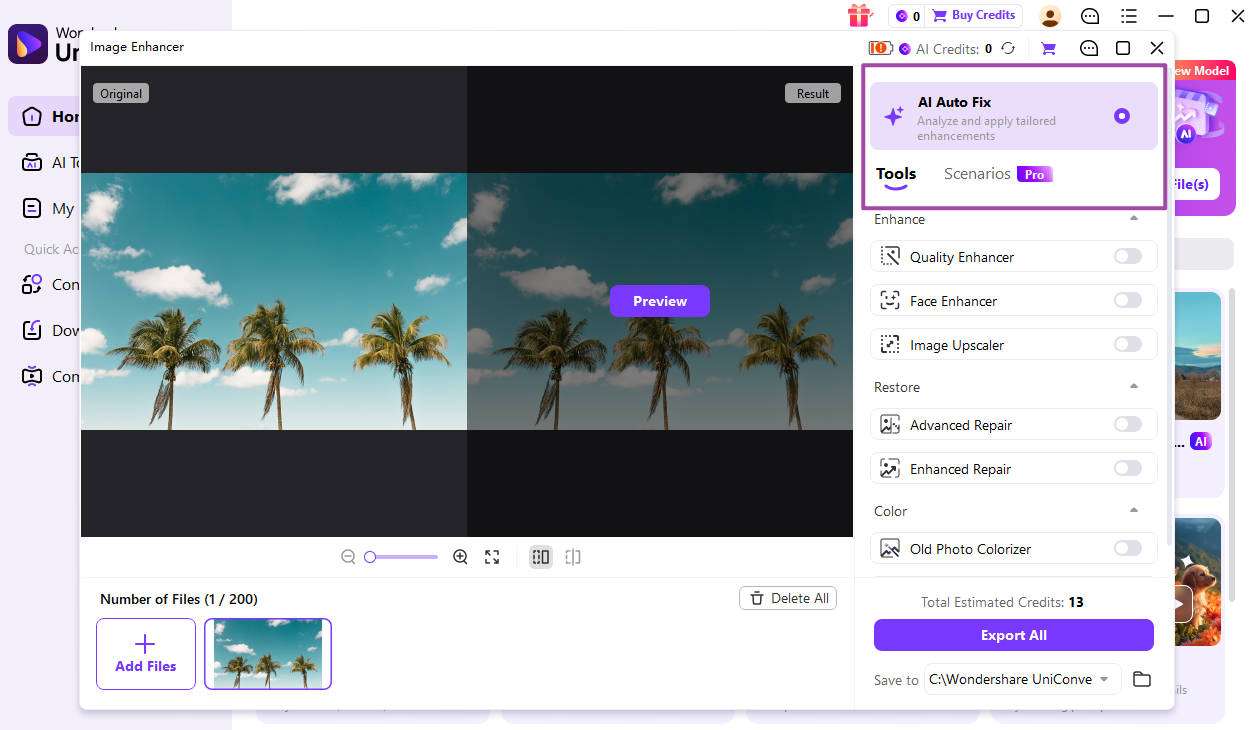
After adding an image, select Tools, Scenarios, or AI Auto Fix based on your image and enhancement needs.
Tools provides professional AI image enhancement capabilities for specific image quality issues. You can select dedicated tools for tasks such as detail enhancement, super resolution, colorization, and restoration. If you already know what issue you want to fix, select the corresponding professional tool for a more precise, stable, and controllable enhancement result.
Scenarios provides scenario-based image enhancement through AI recipes. Recipes and prompts are designed to cover more specific image enhancement scenarios. For example, the new Old Photo Scan Correction recipe is designed to correct and enhance scanned old photos.
AI Auto Fix automatically analyzes your image, identifies the image type, main subject, and image quality issues, and generates a personalized repair solution based on the analysis. It then enhances the image according to the generated solution. If you are not sure which AI tool to choose or want a simpler and faster way to enhance your image, select AI Auto Fix.
Note: Tools, Scenarios, and AI Auto Fix are mutually exclusive. Only one mode can be selected at a time. When you select one mode, the other two modes will be automatically disabled.
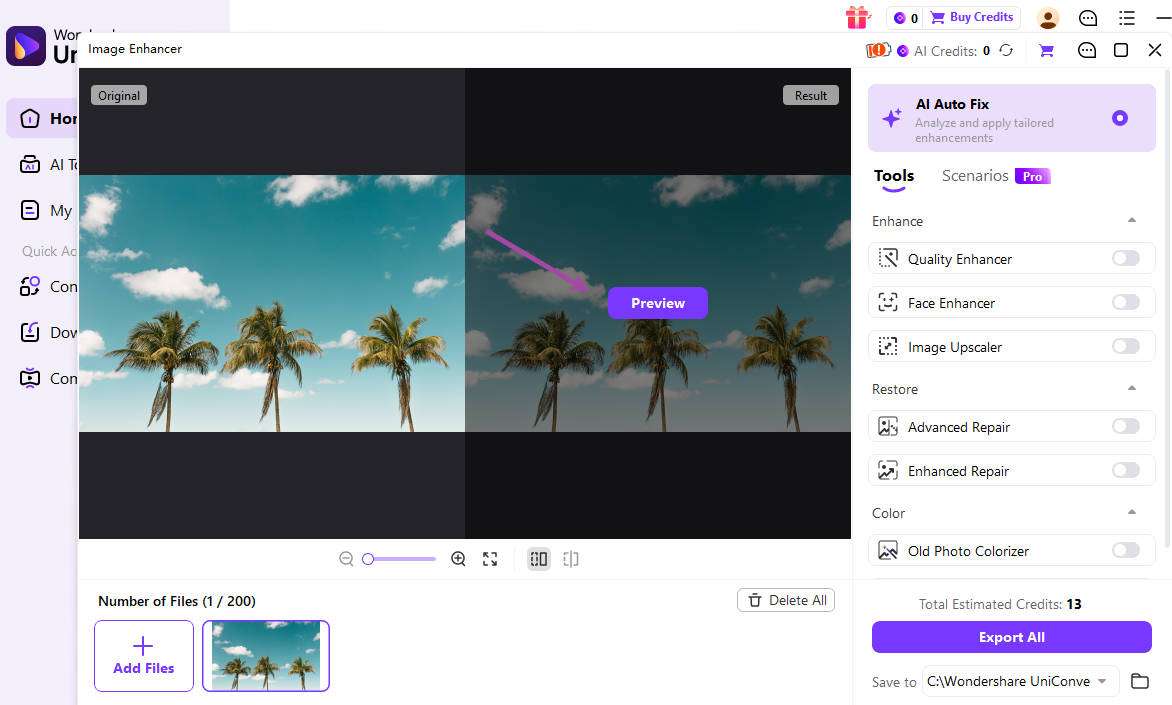
Step 3: Preview the Enhanced Result
After selecting an AI enhancement mode and completing the required settings, click Preview to view the enhanced image. You can compare the original image with the enhanced result and check whether the enhancement meets your expectations.
Step 4: Export the Enhanced Image
After confirming the enhancement result, click Export to save the enhanced image. Once the process is complete, the enhanced image will be saved to the default download directory.
 print
print