


Cropping images plays a key role in improving the visual structure of documents and presentations. Whether you are removing unwanted backgrounds, focusing on a specific subject, or fitting an image neatly within your layout, cropping helps maintain clarity and professionalism across different content.
In this guide, we will walk you through step-by-step instructions to crop pictures in Microsoft PowerPoint, Word, and Google Docs, helping you enhance your visuals directly within these platforms.
In this article
Part 1: How to Crop an Image in PowerPoint (Including Circle Crop!)
Microsoft PowerPoint is a predominantly presentation software that helps users create visually engaging slides for meetings, lectures, and reports. In MS PowerPoint, you can work from text formatting to animations, multimedia integration, and even make basic diagrams.
Sometimes, while working on a presentation, you might need to crop an image to better fit your slide layout. If you're not sure how to do it, follow the steps below.
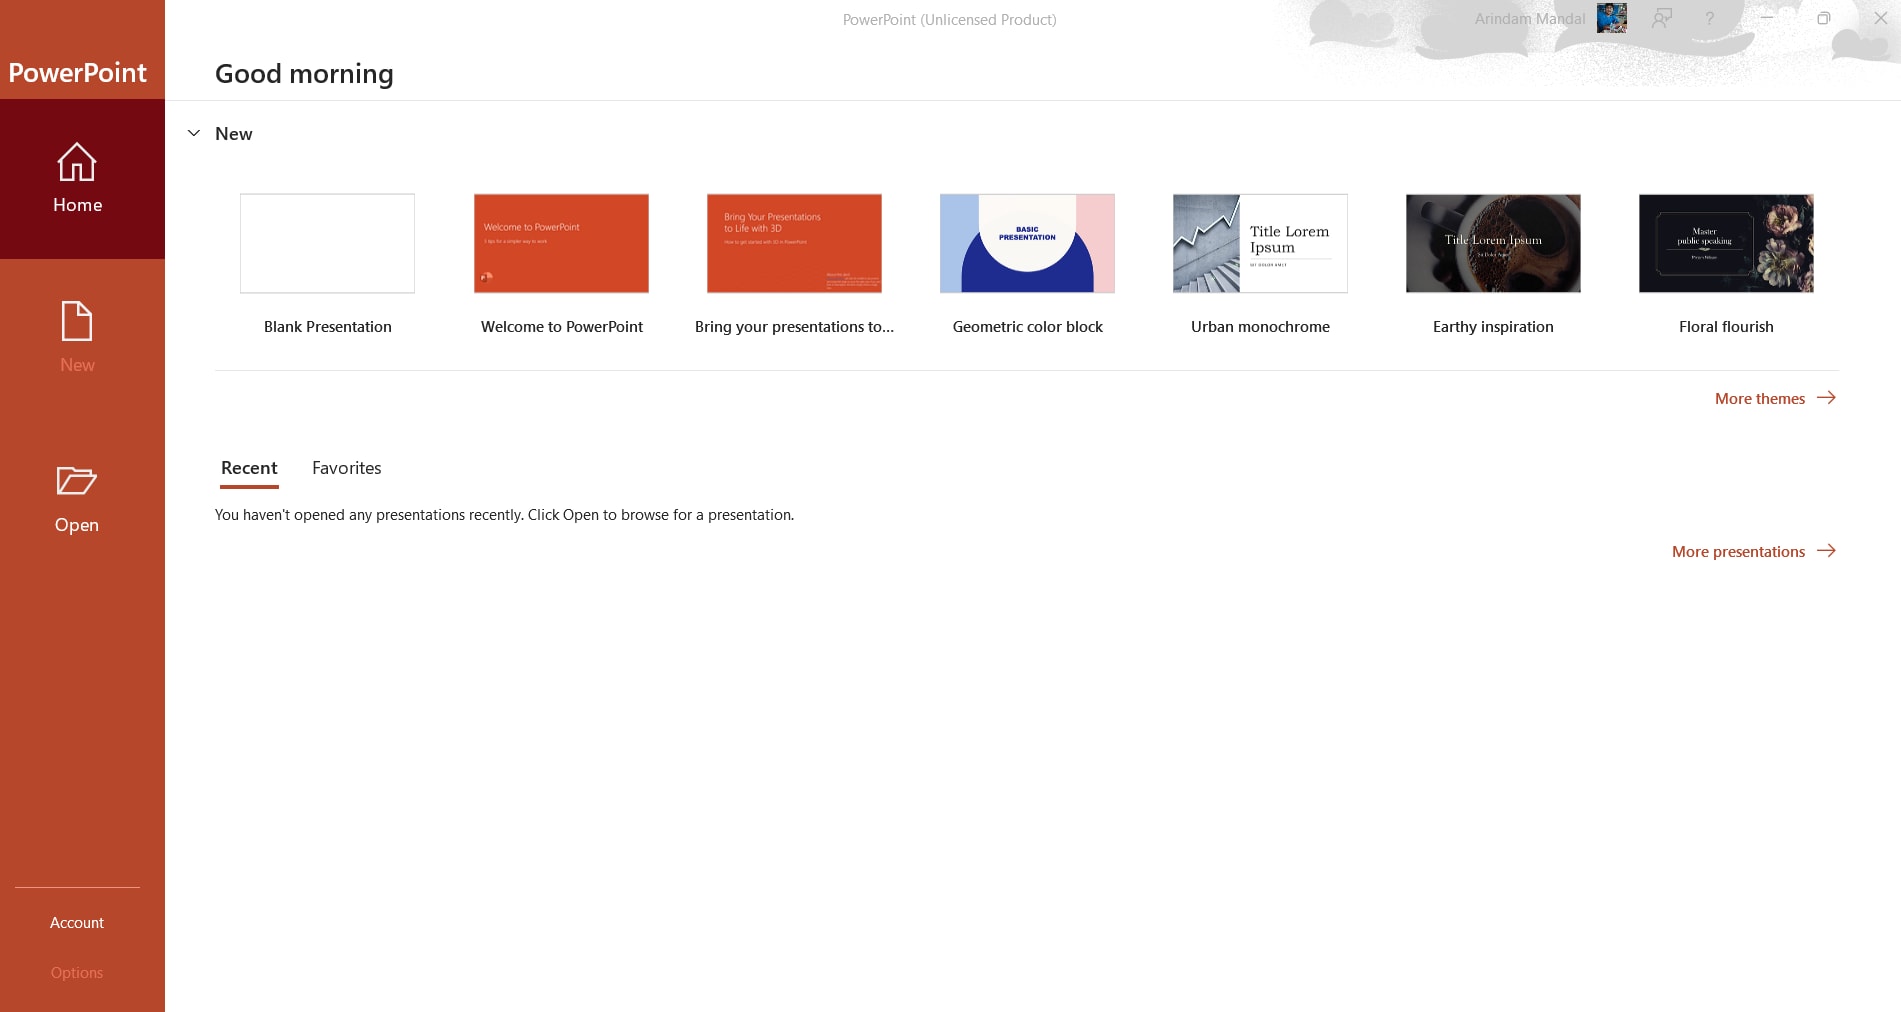
Step 1
Open PowerPoint and start with a “Blank Presentation.” Click on the Insert tab, then choose Pictures to upload an image from your device.
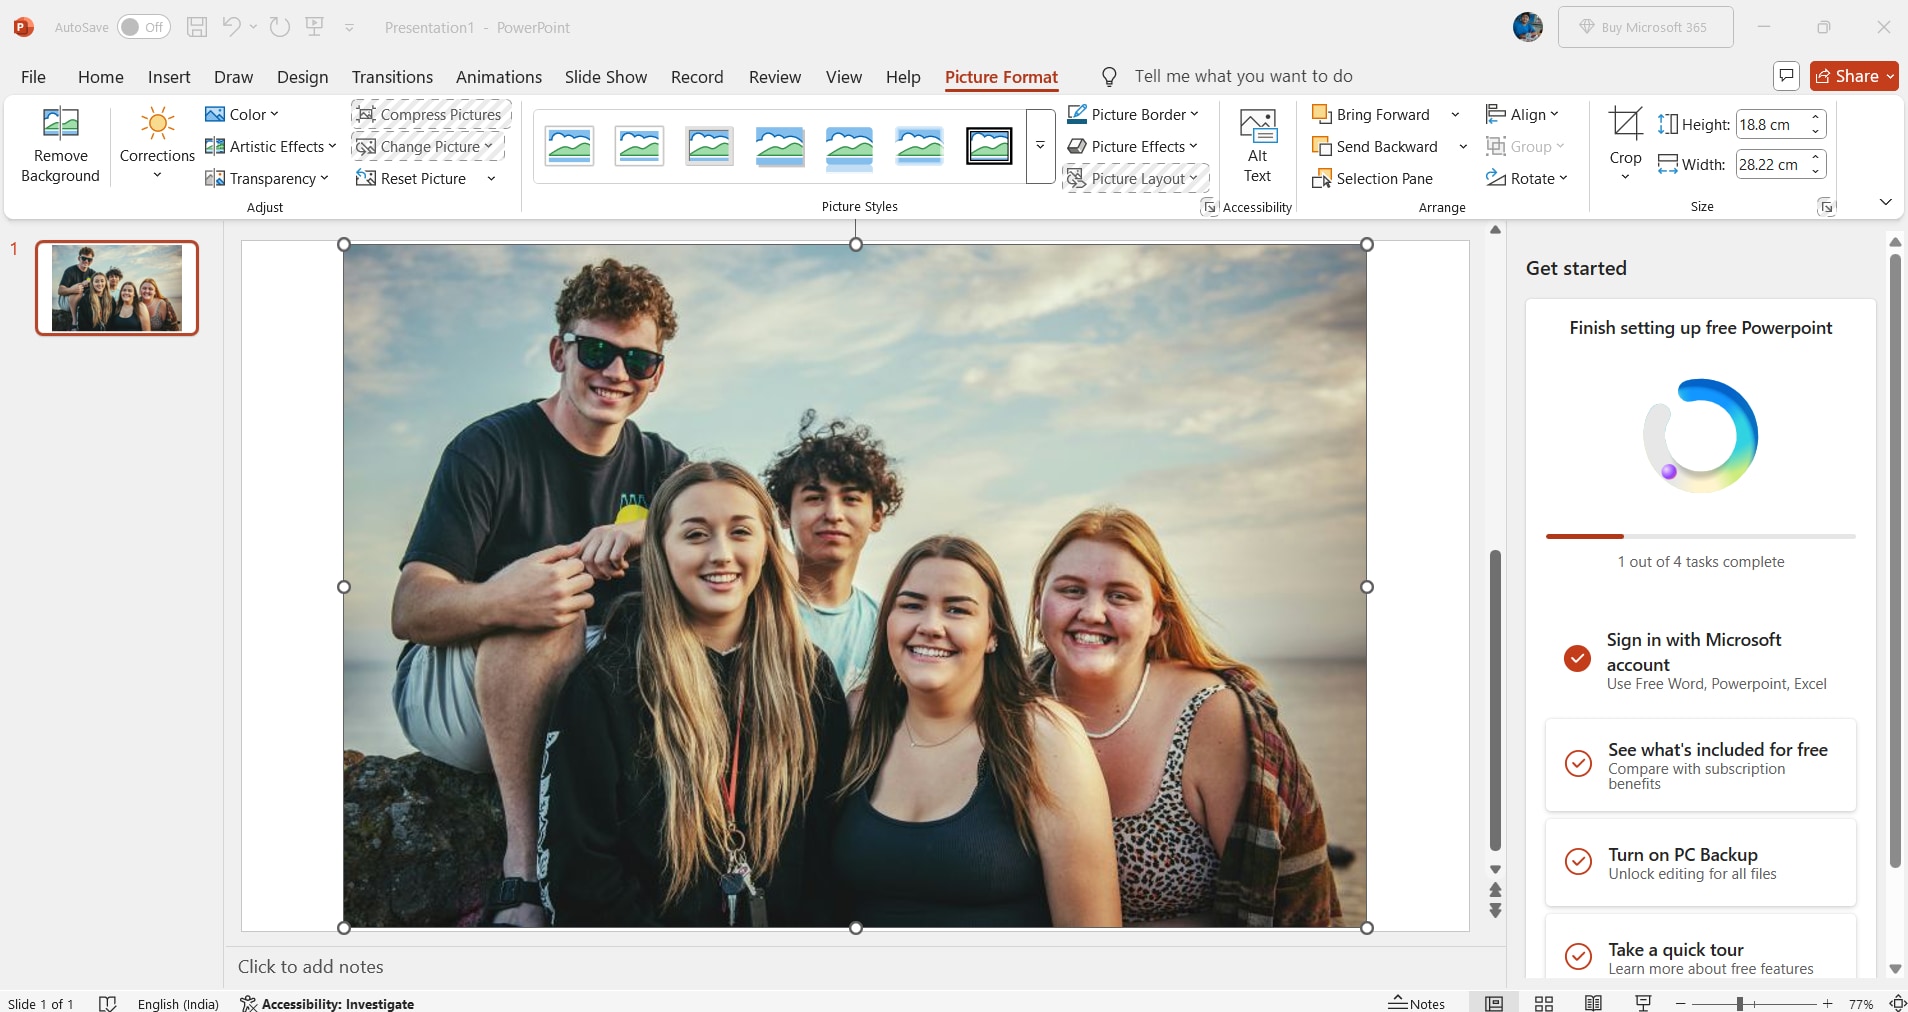
Step 2
Once the image is inserted, click on it to activate the Picture Format tab in the top menu.
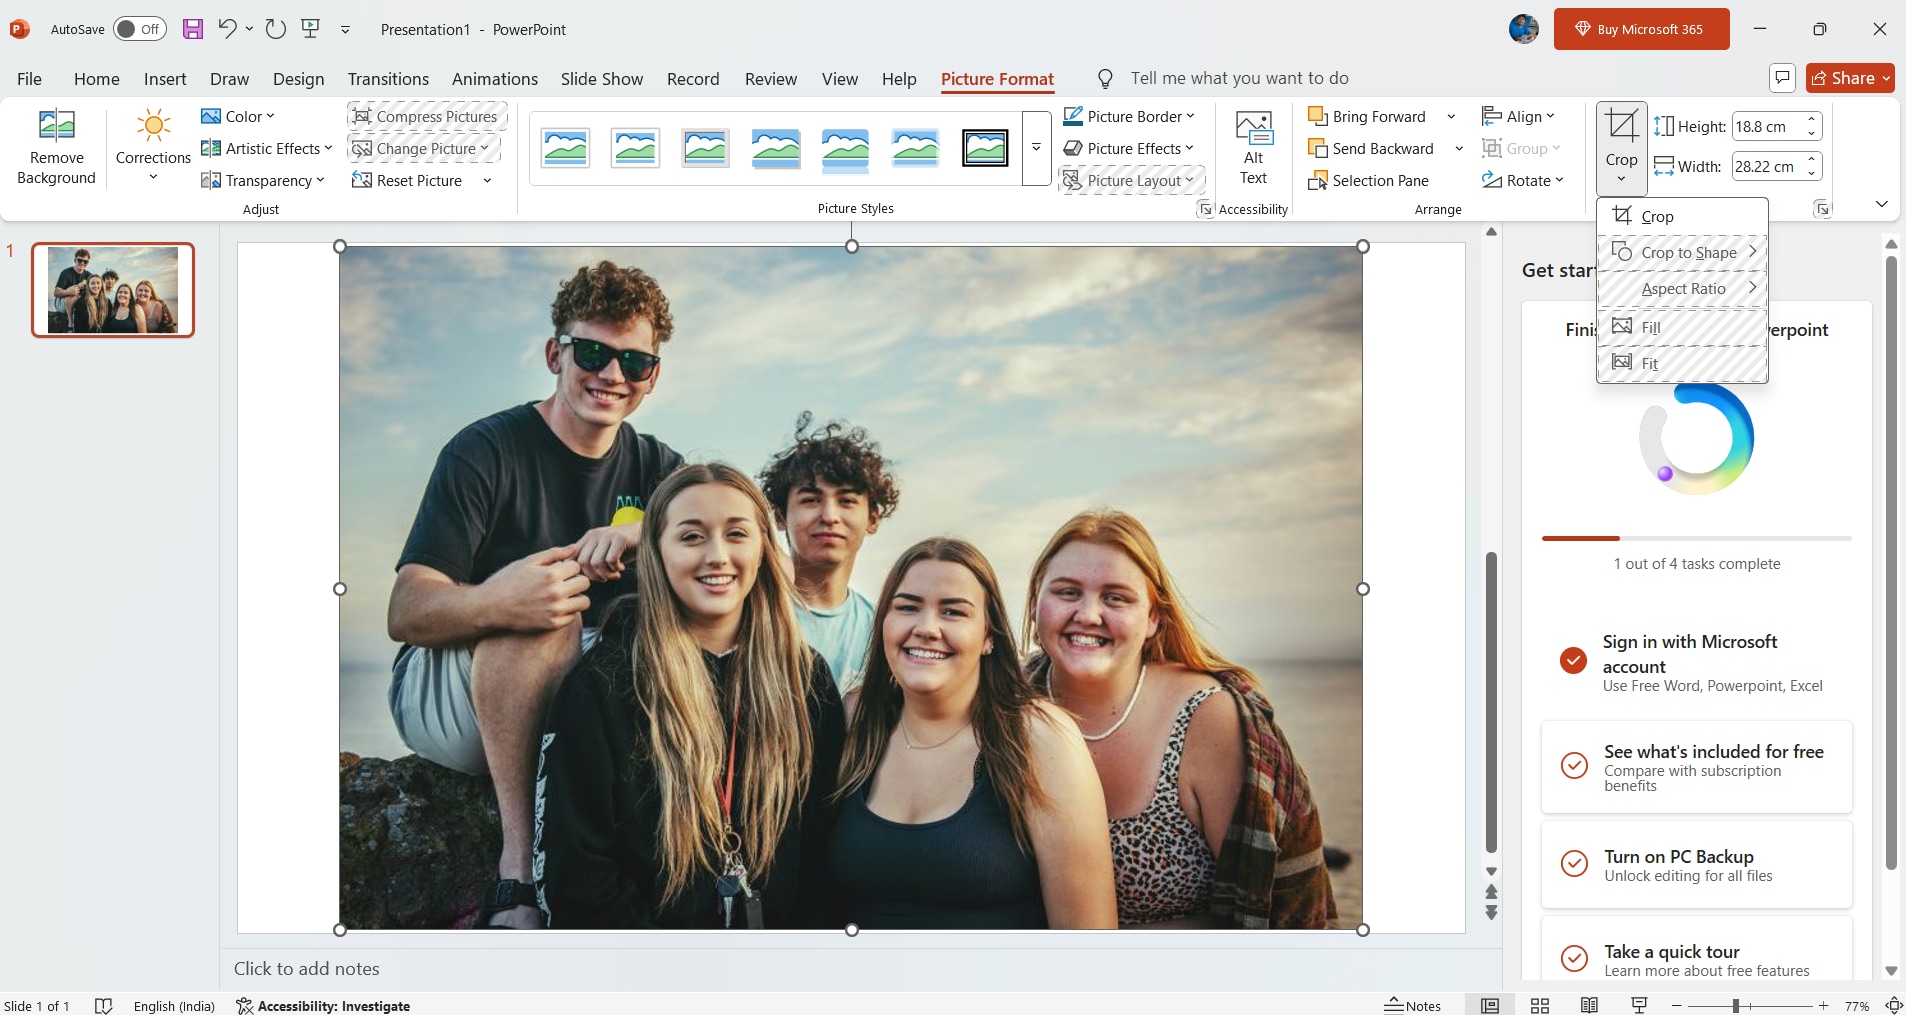
Step 3
Click on the Crop dropdown from the toolbar. Use the black handles to manually crop, or choose “Crop to Shape” to crop the image into shapes like a circle or rectangle.
Step 4
After cropping, you can adjust the image’s height and width directly from the right-side toolbar. You can save your slide or export it to keep the cropped image.
Part 2: How to Crop a Picture in Microsoft Word
While Microsoft Word is primarily a word processor, it offers a range of image editing tools that are often overlooked. In MS Word, you can not only insert images or design elements but also perform essential edits, such as cropping, resizing, and even adding borders if needed. These built-in features make it convenient for users to edit the images while staying within the Word document.
Microsoft Word also lets you crop images, including cropping them into specific shapes. If you are unsure how to use this feature, follow the steps below.
Step 1
Open MS Word and click on Blank Document. Go to the Insert tab and add a picture from your device.

Step 2
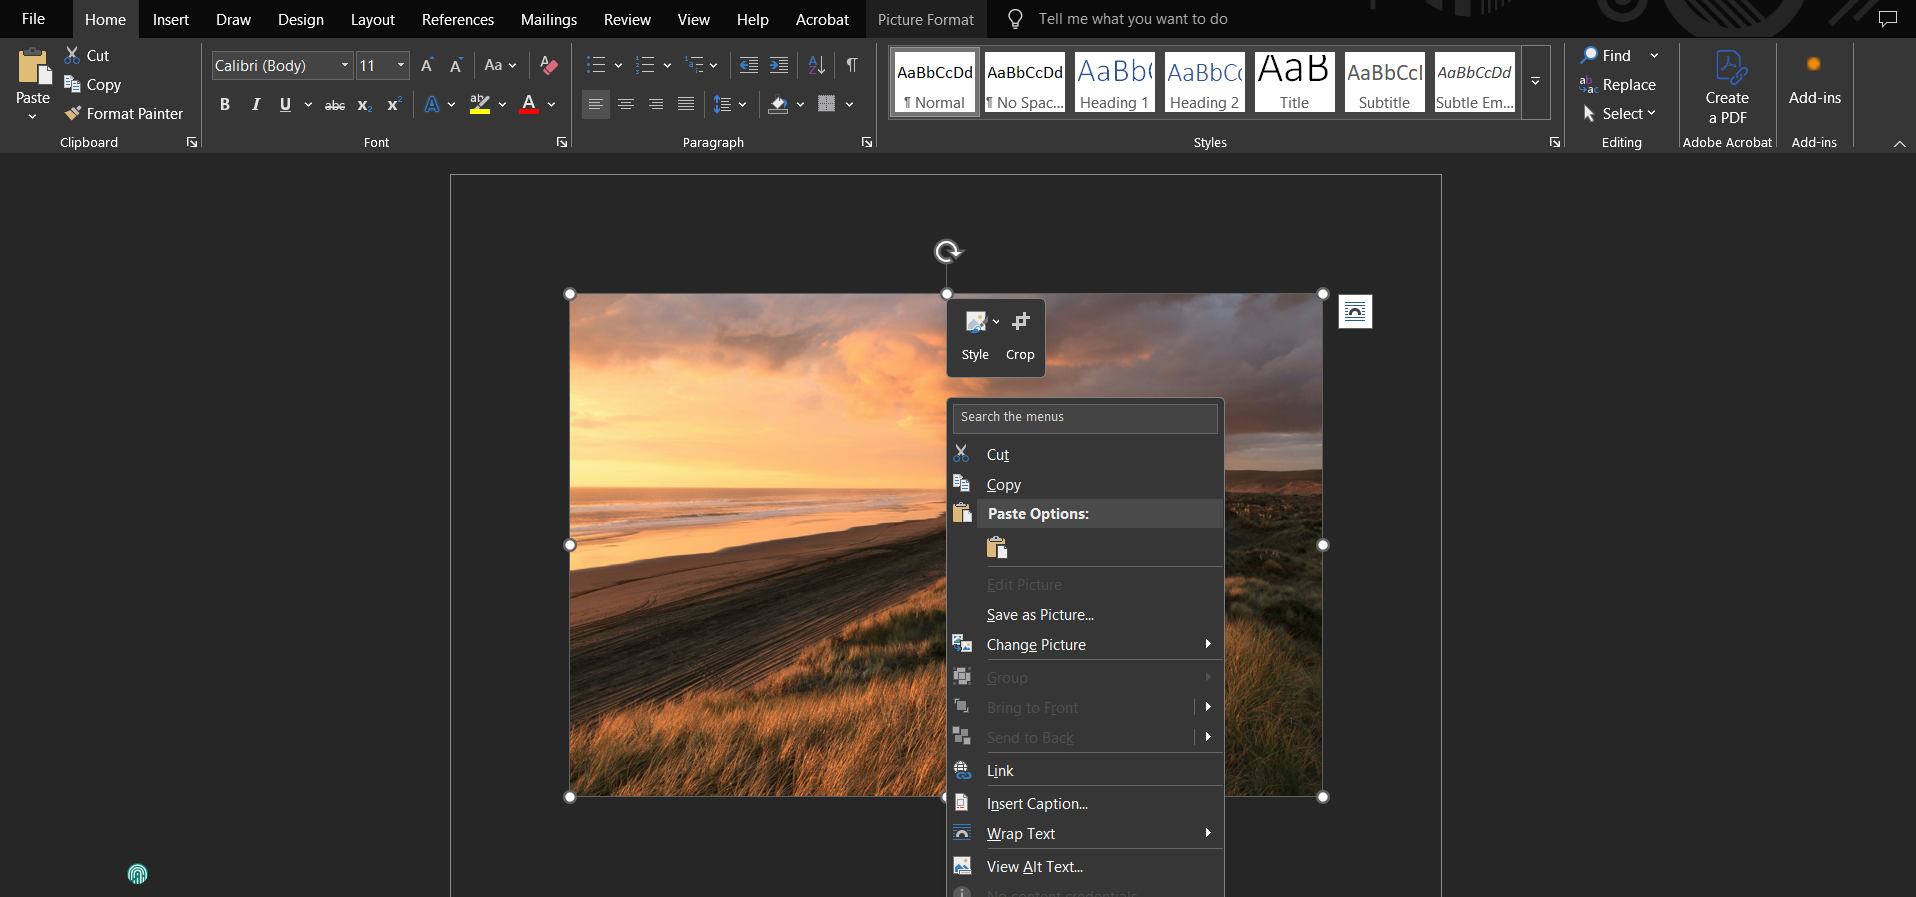
Click on the inserted image. Then right-click on it and select Crop from the context menu that appears.
Step 3
Drag the black cropping handles inward to trim the image as needed. Click anywhere outside the image to apply the crop.

Part 3: How to Crop a Picture in Google Docs
If you are using Google Docs to create reports, study notes, or collaborative documents, you might want to add images or illustrations to support your content. In such cases, cropping an image helps focus on the relevant part or adjust the layout. While Google Docs isn’t a full-featured image editor, it does allow you to crop and resize images easily. Here's how you can do it.
Here are the generic for those who wonder how to crop an image in Google Docs:
Step 1
Open Google Docs and start a Blank Document. Click on Insert > Image to upload a picture from your device.
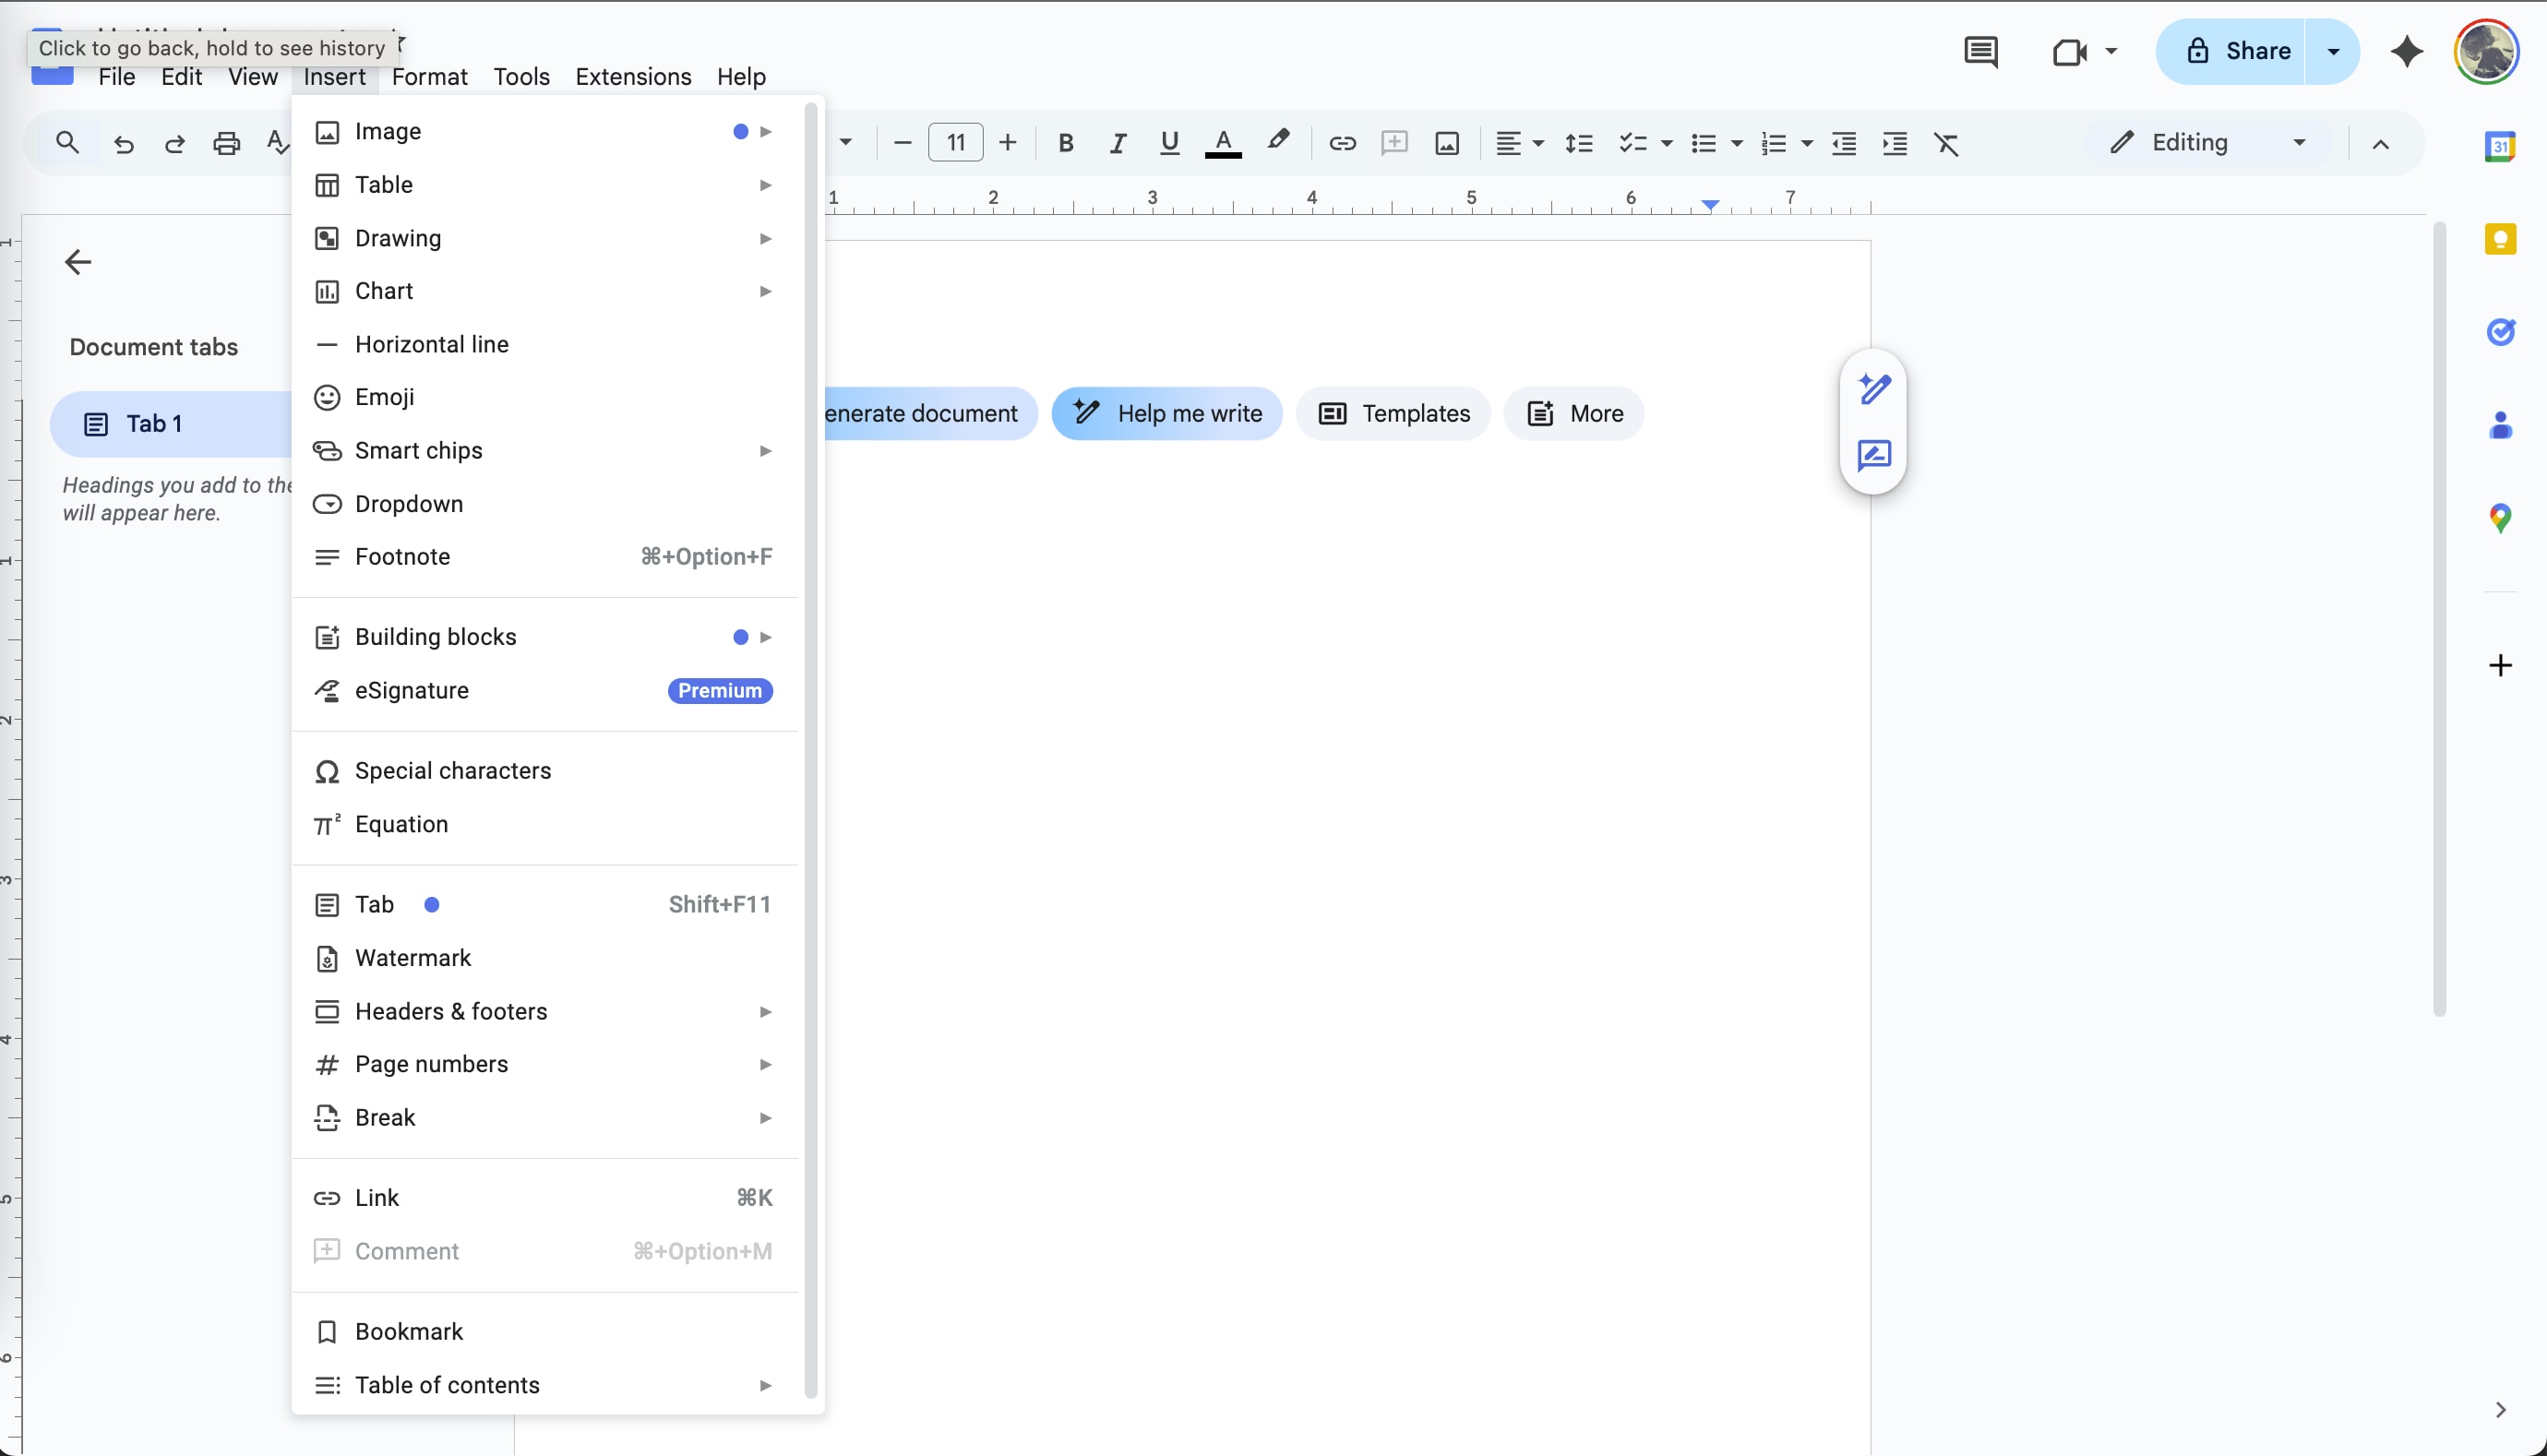
Step 2
Select the image and click the Crop icon from the top toolbar. Black borders will appear around the image.
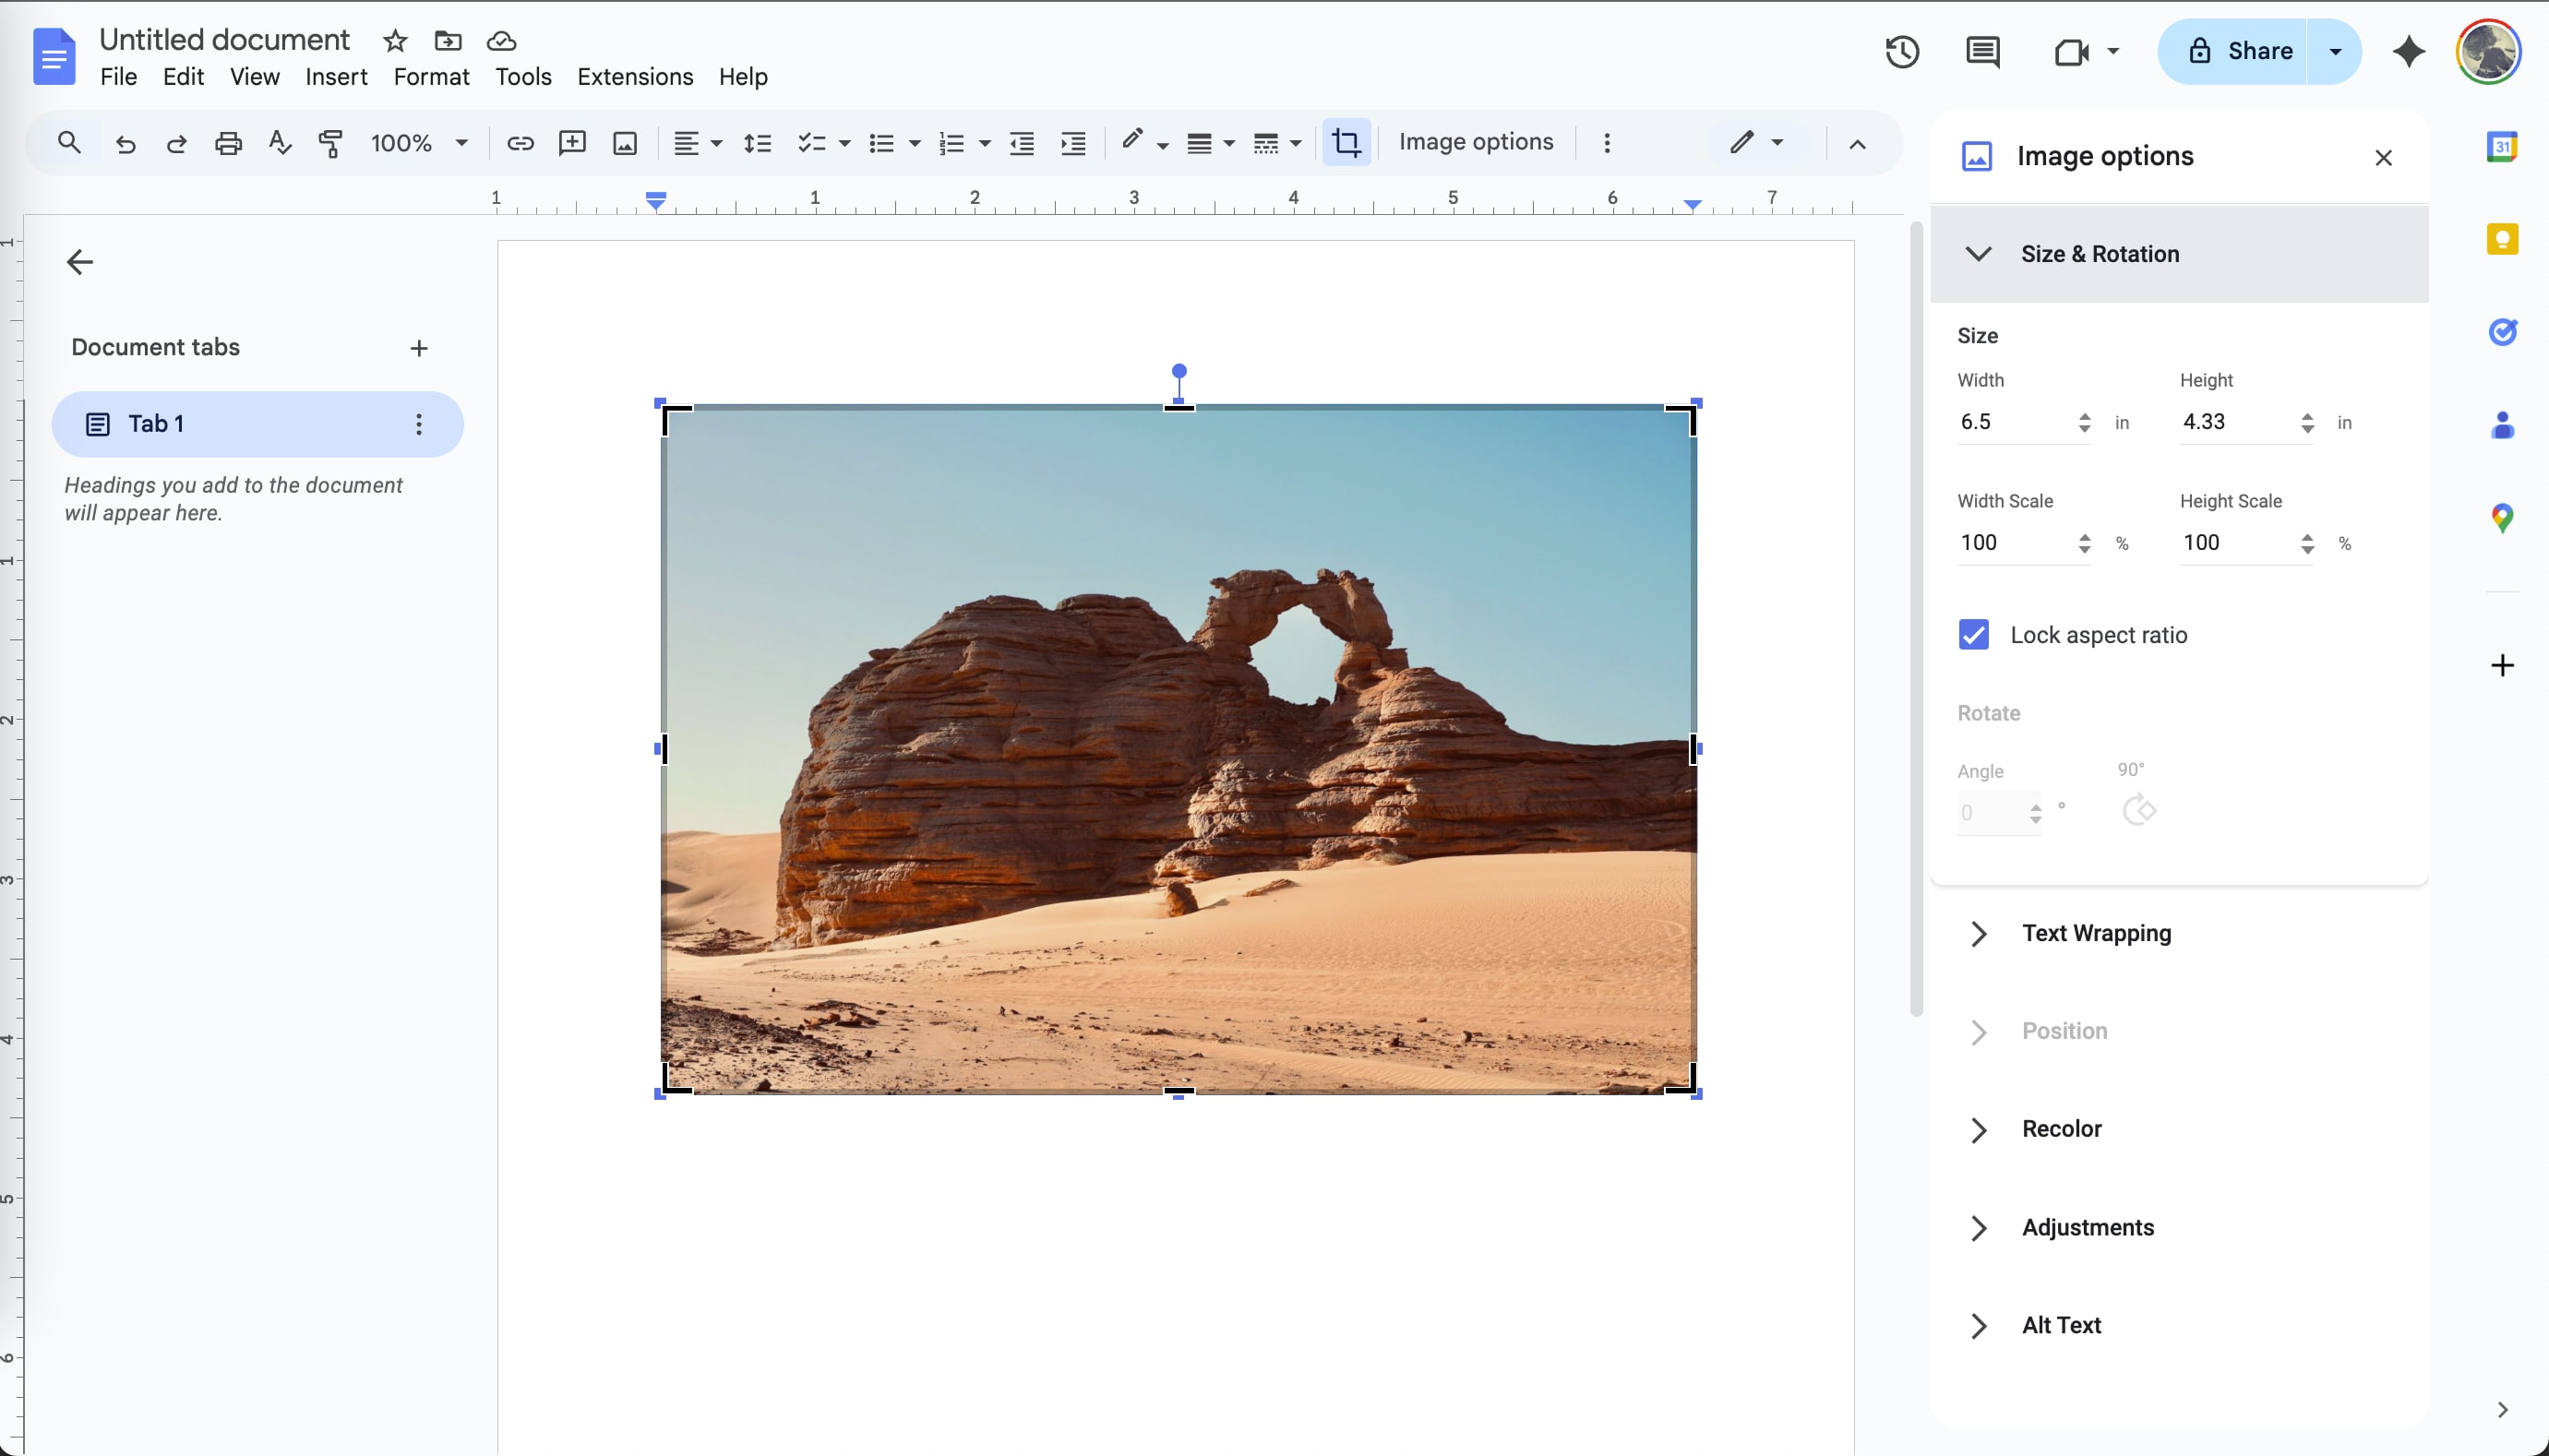
Step 3
Drag the black handles to crop the image as desired. Press Enter or click outside the image to apply the changes.
Step 4
Click Image Options to adjust size, rotation, or reset the image if needed.
Part 4: Why Crop Image in PowerPoint/Google Docs/Word Is Not Recommended
Although PowerPoint, Word, and Google Docs offer basic cropping tools, they are not designed to be used to crop images if you want high-quality or better control. If you ever wondered how to crop a picture in PowerPoint or how to crop a picture on Google Docs, then you would have come to the realization that these tools fall short, which makes them less ideal for content creators, designers, and even students.
Here are a few notable limitations of cropping an image in PowerPoint, Google Docs, and MS Word:
- You cannot crop or adjust multiple images simultaneously, ultimately slowing workflow.
- PowerPoint, MS Word, and Google Docs do not allow accurate pixel-based cropping, which leads to inconsistent results.
- Only PowerPoint supports shape-based cropping, which is also confined to predefined templates.
- These tools lack in adjusting sharpness, saturation, or AI-based optimizations.
Here are a few comparisons between these tools, which highlight their key limitations:
| Platform | Cropping Accuracy | Custom Shape Cropping | Batch Editing | Image Enhancement Tools | Output Quality |
| PowerPoint | Moderate | Limited to presets | ❌ | Basic (shadows, borders) | Medium |
| Microsoft Word | Basic | Very limited | ❌ | Basic (brightness/contrast) | Low |
| Google Docs | Basic | Not available | ❌ | Very limited | Low |
Part 5. UniConverter: Easy Way to Crop Images
Now, if you are looking for a powerful AI tool that goes beyond basic editing and is not complicated, unlike other premium tools, then you can check out Wondershare UniConverter. Unlike PowerPoint, Word, or Google Docs, which are not meant for professional-level image editing, UniConverter offers a dedicated image editing suite that is now powered by AI.
What sets UniConverter different from its counterparts is that it is designed for users who want speed, better control, and results. It supports advanced editing features such as resizing, rotating, flipping, and adjusting image elements like brightness, contrast, and saturation.

Batch Image Editor
Key Features:
- Perform batch cropping to edit multiple images at once and maintain consistency
- Crop images into custom sizes or aspect ratios with pixel-level control
- Convert images into various formats such as JPG, PNG, BMP, and TIFF
- Resize, rotate, or flip images with real-time previews
- Adjust brightness, contrast, saturation, and sharpness for professional-quality output
- Use the AI background remover to isolate subjects instantly
- Export edited images without quality loss, even in high-resolution formats
How to easily crop images in UniConverter
Here’s a step-by-step guide that would help you crop an image in UniConveter:
Step 1
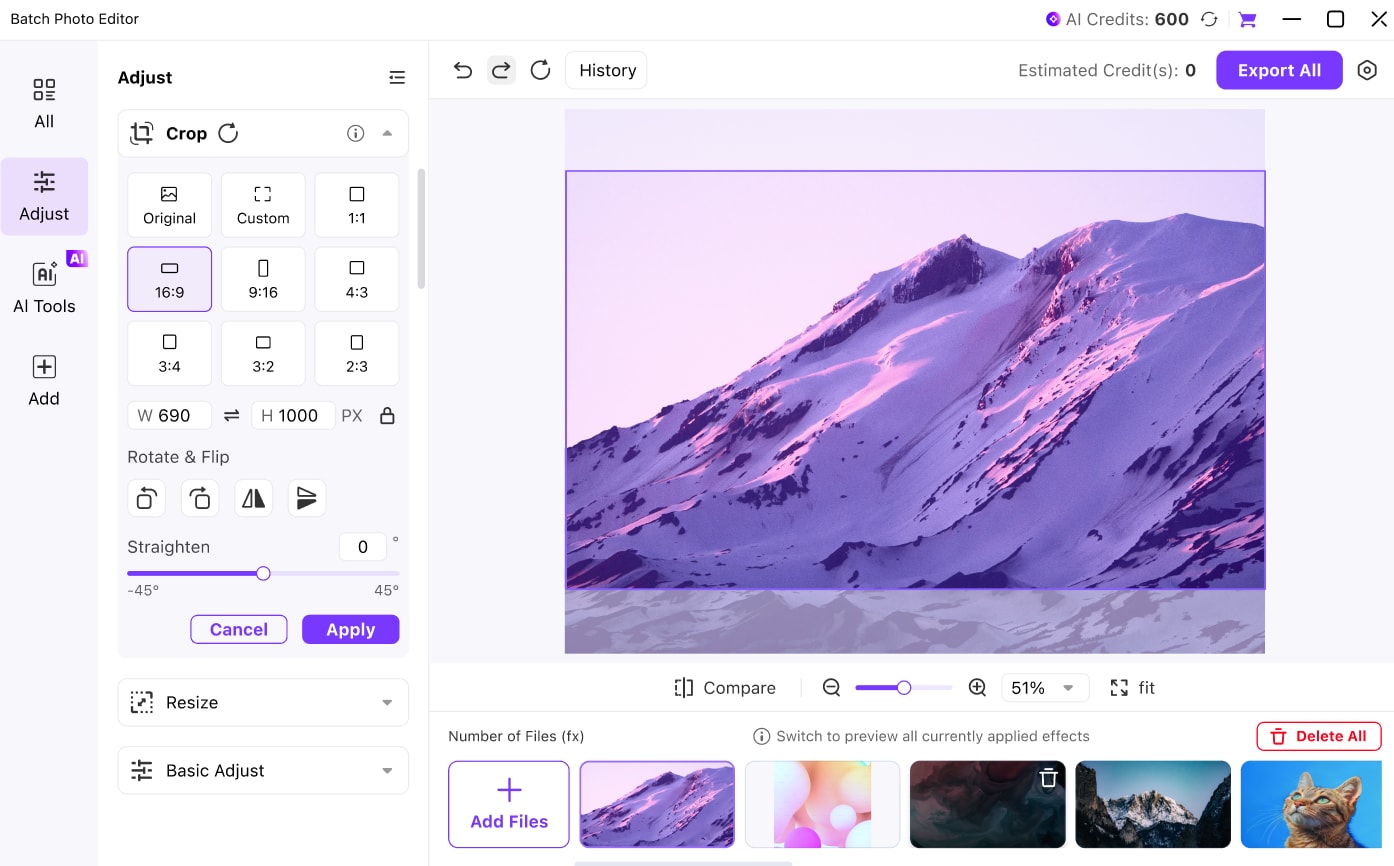
Open UniConverter and go to the “Photo Editor” and then go to the “Batch Photo Editor.” Click on ‘Add Files’ to import the image(s) you want to crop.

Step 2
Once uploaded, click the ‘Crop’ icon that you find in “Adjust” section. Select from predefined aspect rations or enter the width and height manually.
Step 3
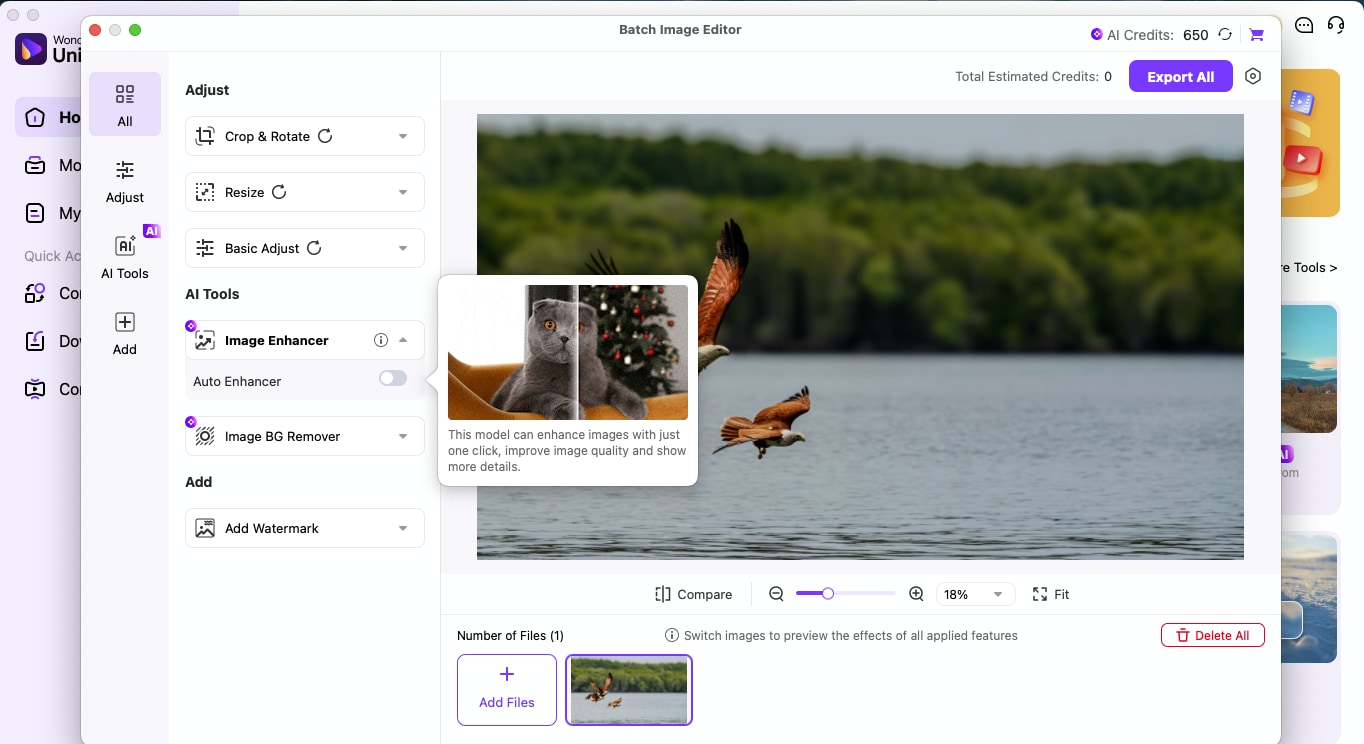
Go to “AI Tools” from the left panel to use UniConverter’s AI-powered engine to remove background or replace the background. This is an optional step.
Step 4
Once done, tap “Export All” to download your cropped pictures that you can later upload in your PowerPoint, Word, or Google Docs file
Part 6: Final Thoughts
Cropping an image in PowerPoint, Word, or Google Docs is fine for simple edits, but these tools aren't built for advanced image processing. Whether you are trying to crop a picture in PowerPoint, adjust one in Word, or resize it in Google Docs, the lack of precision and flexibility can be limiting.
For better control and faster results, Wondershare UniConverter is a smarter choice. With features like batch cropping, AI enhancements, format conversion, and real-time adjustments, it offers a complete solution for anyone who works with images regularly.
FAQs
FAQ
-
How do I crop a picture into a circle in PowerPoint?
Go to PowerPoint and Select the image. Then, go to the “Picture Format” tab, click “Crop,” choose “Crop to Shape,” and select the oval or circle. Hold Shift while resizing to maintain a perfect circular aspect ratio. -
Can I crop an image to a custom shape in Microsoft Word?
Yes, you can crop an image in Word, but the tool allows you to crop to basic shapes like rectangles or circles using the “Crop to Shape” option under the Picture Format tab. However, the customization is limited and unsuitable for precise or irregular cropping needs. -
How do I resize and crop an image?
First, crop the image using the crop tool to remove unwanted areas, then resize it by dragging the corners while holding Shift to maintain proportions. For more control, use tools like Wondershare UniConverter for precise dimensions and quality retention. -
Can I convert image formats while cropping for better compatibility?
Yes, with tools like UniConverter, you can crop and convert images simultaneously into formats like JPG, PNG, BMP, or TIFF, which makes it ideal for compatibility across platforms and maintaining visual quality during uploads or document integration. -
Why should I crop images before importing them into Google Docs or Word?
Pre-cropping ensures that only the relevant parts of the image are used, improving layout and reducing file size. It also avoids formatting issues since Docs and Word offer limited cropping and alignment options post-import.

