

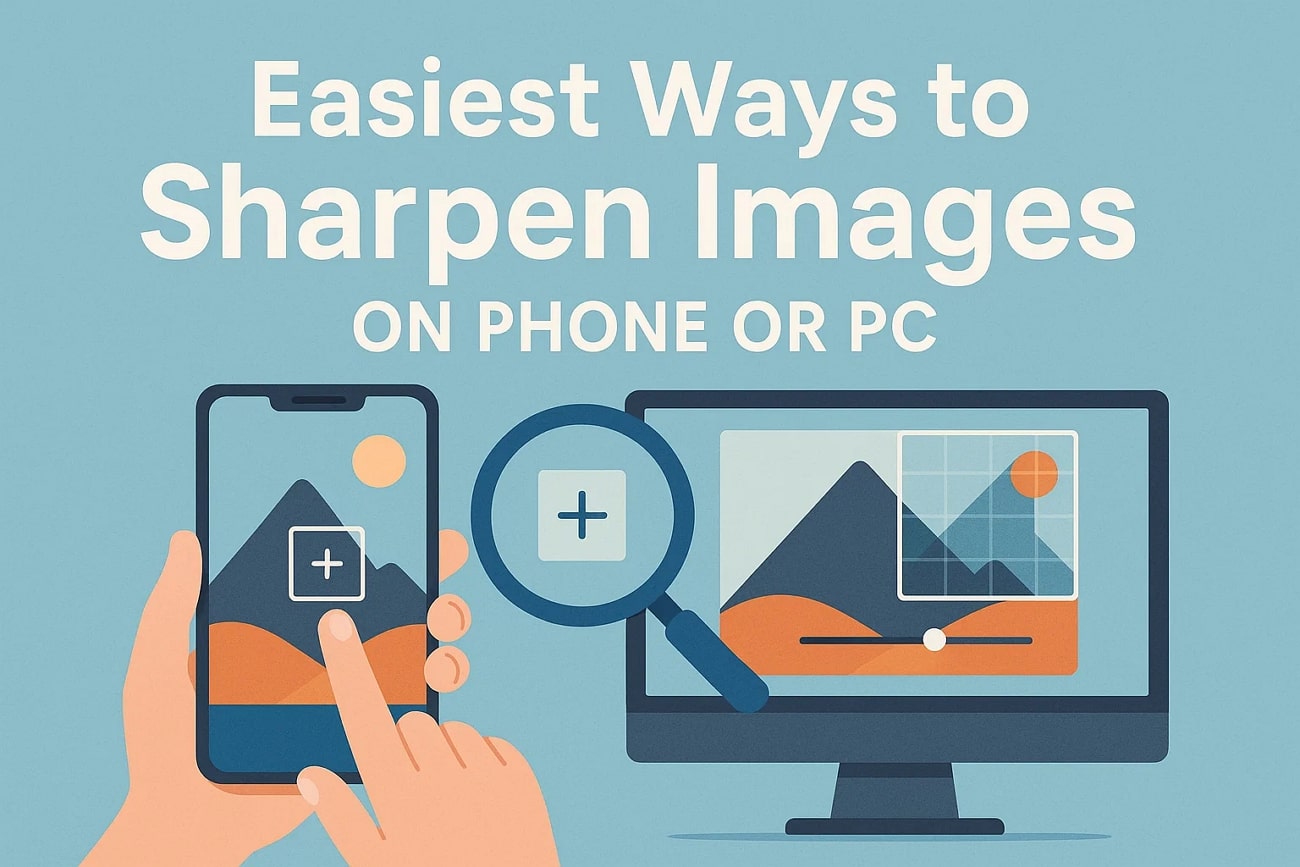
It is not easy to take a perfect picture that you can share on social media or use in professional branding. When a handheld camera is used in low light, pictures may easily turn out to be blurry or soft. These pictures require manual editing to rectify the motion blurs and sharpen them, which can be done using a picture sharpener tool.
In this guide, we will explore 4 ways to sharpen your images on your PC, iPhone, or Android device directly using various tools and online software. Furthermore, you will be introduced to a desktop program that could turn out to be the best image sharpener tool out there.
In this article
Part 1. How to Batch Sharpen Any Images with UniConverter
Designed for creators and marketers, Wondershare UniConverter photo enhancer tool provides professional enhancement of photos. The AI models, like face enhancer, allow you to transform your portraits for your portfolio pictures by softening out the skin and sharpening details. You can restore and colorize your old photos with its dedicated models and upscale them to 4X and 8X without losing details.
Users can compare the original photo with the enhanced version before saving, which ensures satisfaction with the changes. This tool supports both Windows and macOS, allowing wider access to sharpen image AI. It allows you to zoom in on your pictures while you compare results to ensure no detail is missing.

Key Features
- Batch Processing: If you want to batch enhance your images, the tool allows you to process up to 20 images at a time for faster enhancement.
- Format Support: The tool supports multiple formats, including JPEG, PNG, and BMP files, making it easier to insert your images.
- Auto Enhancement: It has a special feature that automatically enhances your pictures without needing to alter each aspect.
- Old Photo Restoration: There are two dedicated tools within this program that allow you to colorize and remove stains and scratches from old photos.
- Custom Export Location: You can sharpen images and change the destination folder where your enhanced images are saved to handle organizing larger bulks of media easily.
A Comprehensive Guide on Sharpening Images Using UniConverter
When you have decided to sharpen a blurry image with this tool, follow the given guide to perform the procedure:
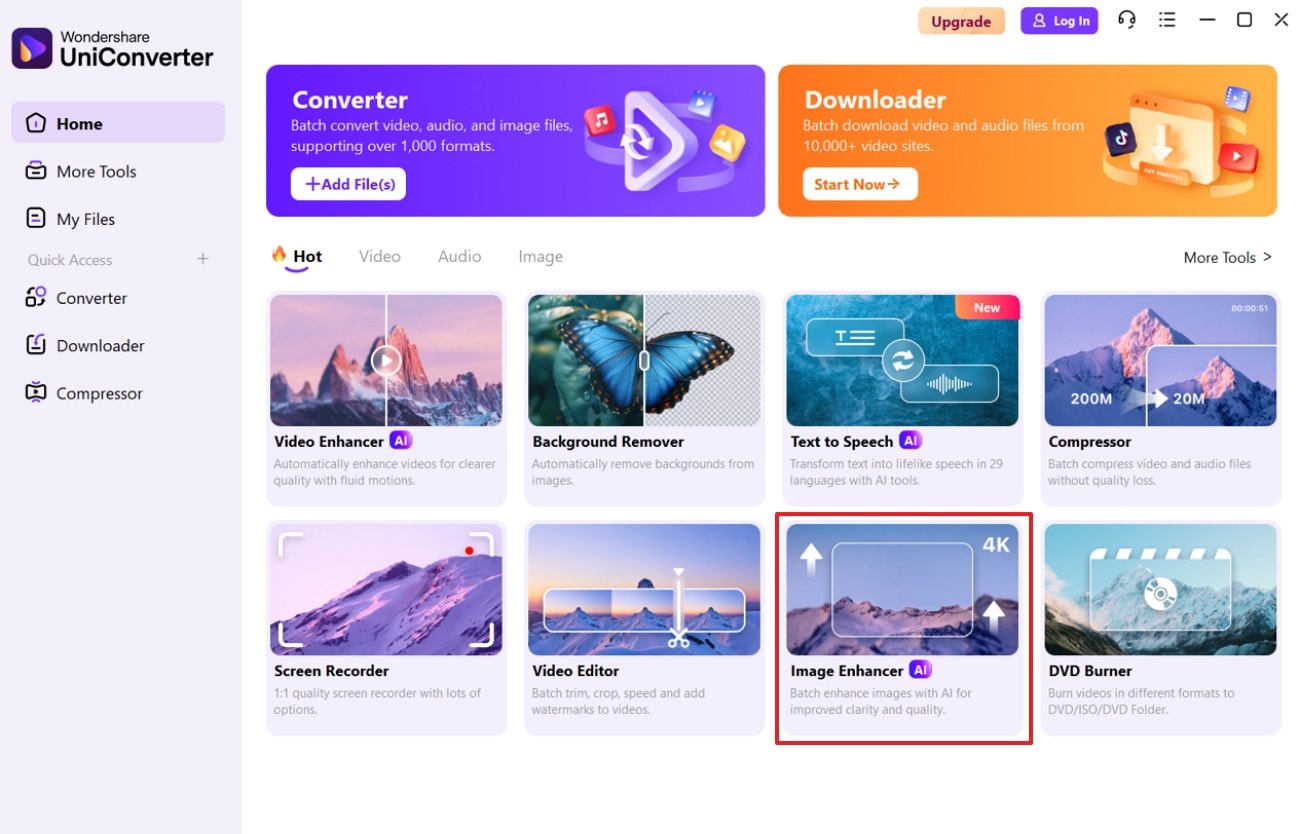
Step 1. Go to Main Interface And Choose Image Enhancer Tool
Open the program and in the “Home” tab, select the “Image Enhancer” tool to start the process. Once inside the tool, click on the “+” button to import your image that needs sharpening inside the tool library.
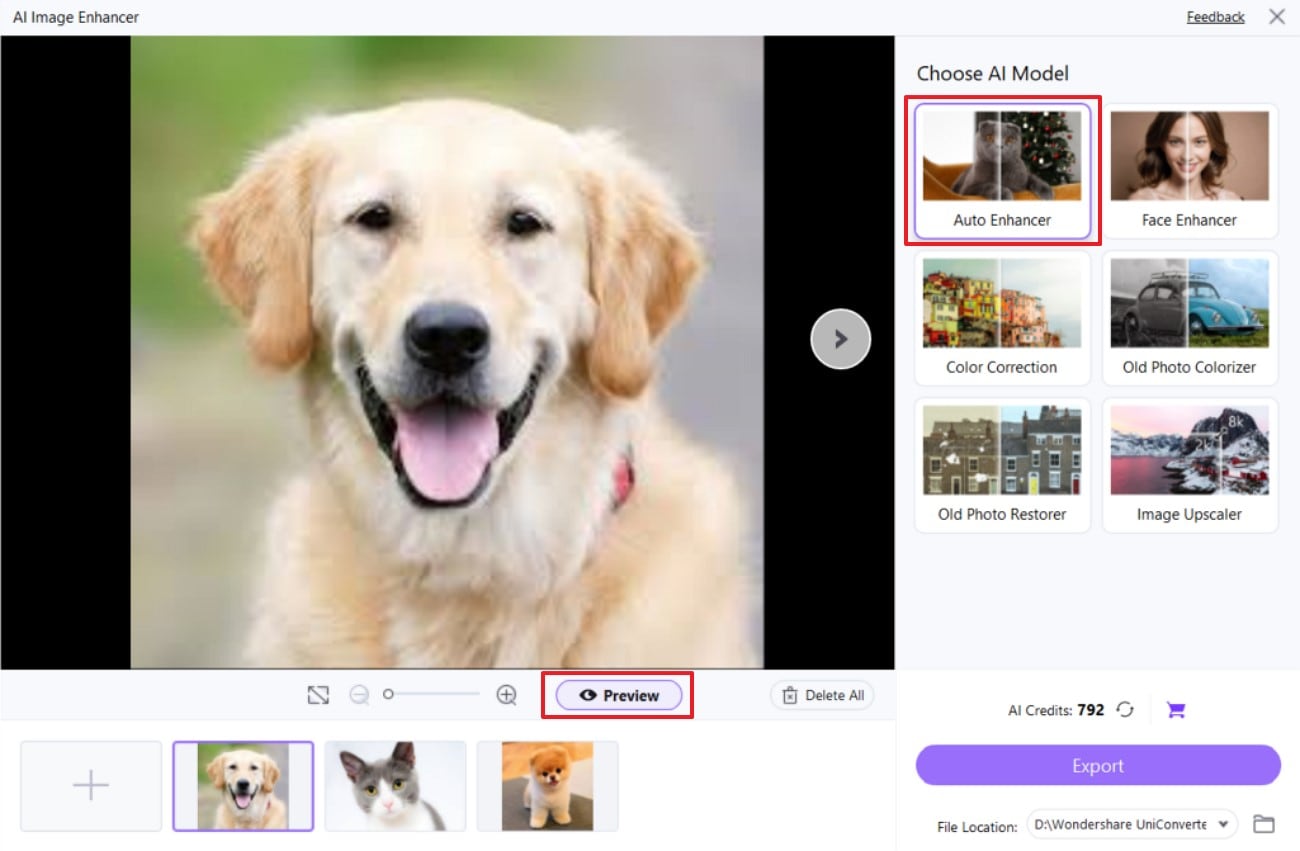
Step 2. Use The Desired Enhancement Model and Start the Process
After importing the image, choose the “Auto Enhancer” AI model and click on the “Preview” button beneath the photo to start the process.
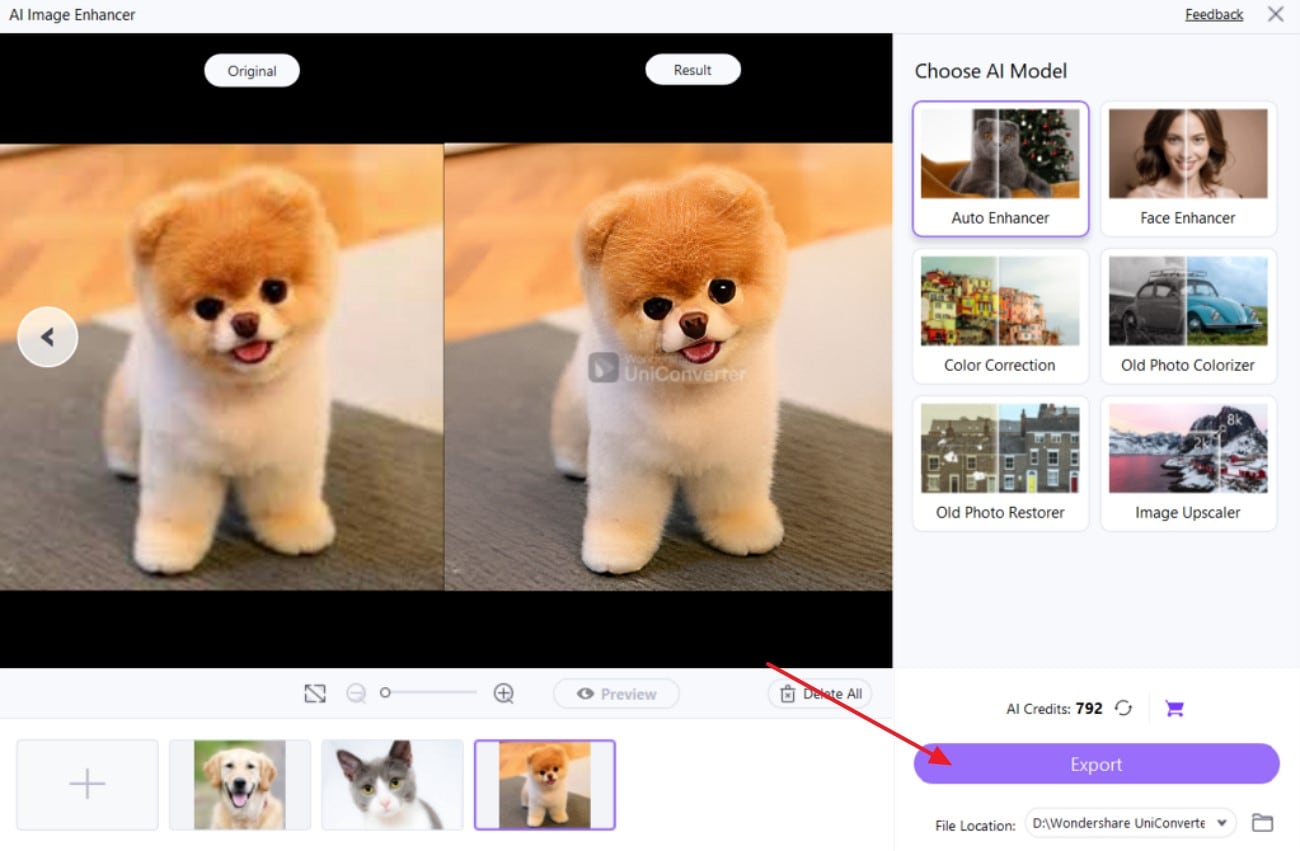
Step 3. Export The Sharpened Image After Enhancement
When you see the enhanced image on the screen and are satisfied with the results, save it to your desired destination folder by hitting the “Export” button.

Easy to Use Batch Image Sharpener
Part 2. How to Sharpen Images Online
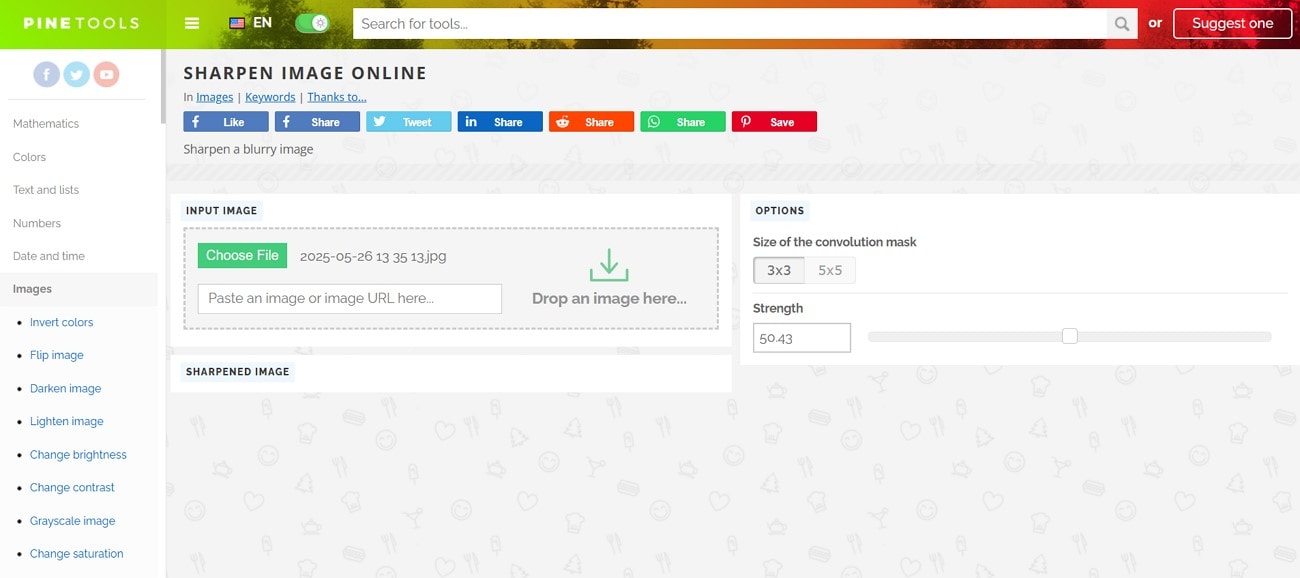
Made with a straightforward interface and allowing quick enhancement, Pine Tools eliminate the need for advanced editing software to sharpen images. It requires a simple upload after which you can adjust the sharpening strength for the photo with manual control, and the image is processed within seconds. You can improve blurry visuals and emphasize edges of your landscape and portrait photos.
Key Features
- A slider is available through which the intensity of the sharpening effect can be directly adjusted.
- While uploading an image to AI Sharpen, the platform supports multiple formats, including PNG, JPEG, and WEBP.
- The tool offers a preview option to see how the sharpening adjustments alter the image and ensure desired results.
- You can select between a 3x3 and 5x5 size for a convolution mask to refine the sharpening algorithm.
A Step-By-Step Guide On Sharpening Images Online with Pine Tools
After learning about this tool, let's find out how to sharpen an image with the following simple steps:
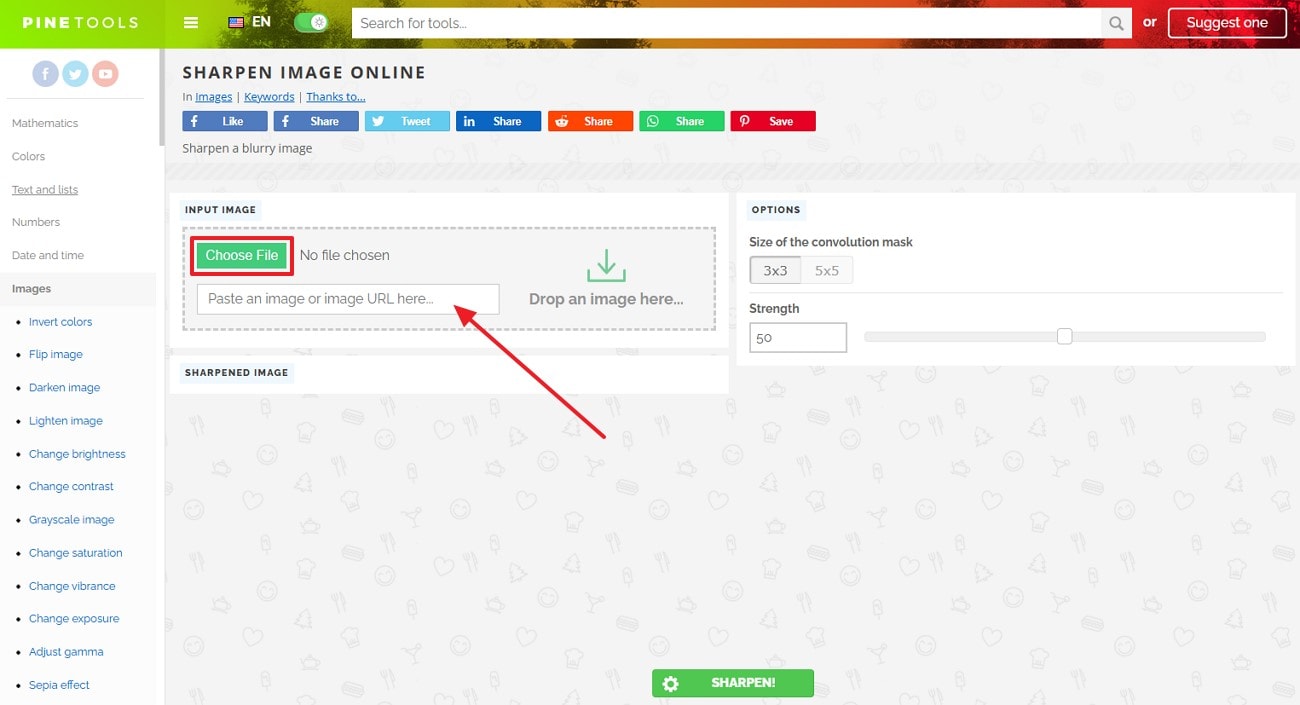
Step 1. Go to the tool page and click the “Choose File” button to import your image or paste the URL of the image in the bar below.
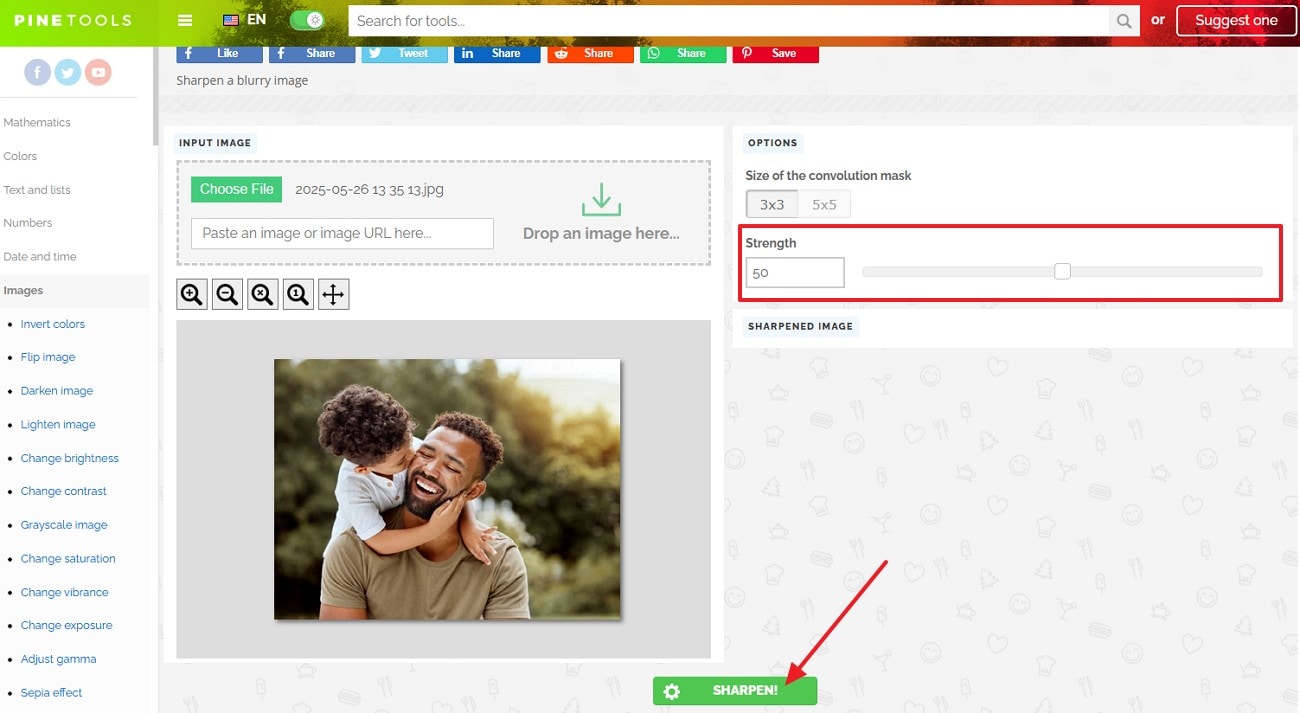
Step 2. Next, adjust the sharpening strength and press on the green “Sharpen” button at the bottom of the screen to initiate the process.
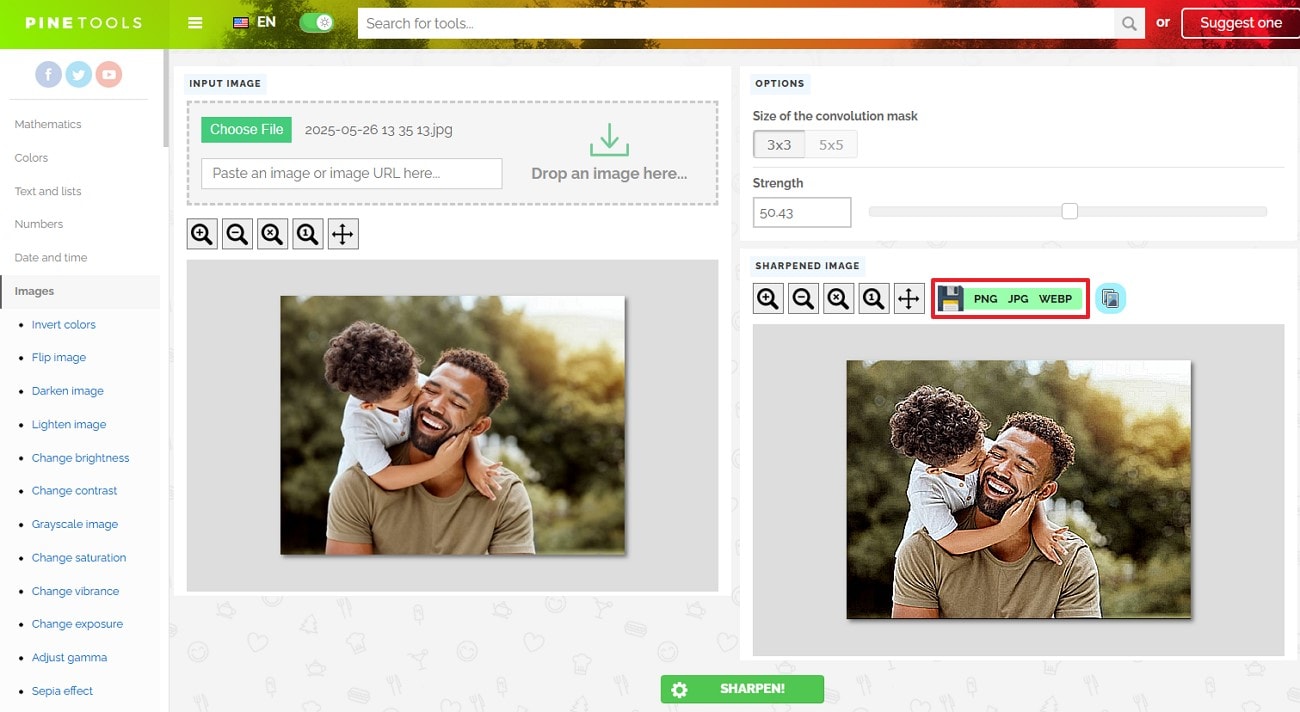
Step 3. Once the image is sharpened, download it in the desired format by clicking on the format name.
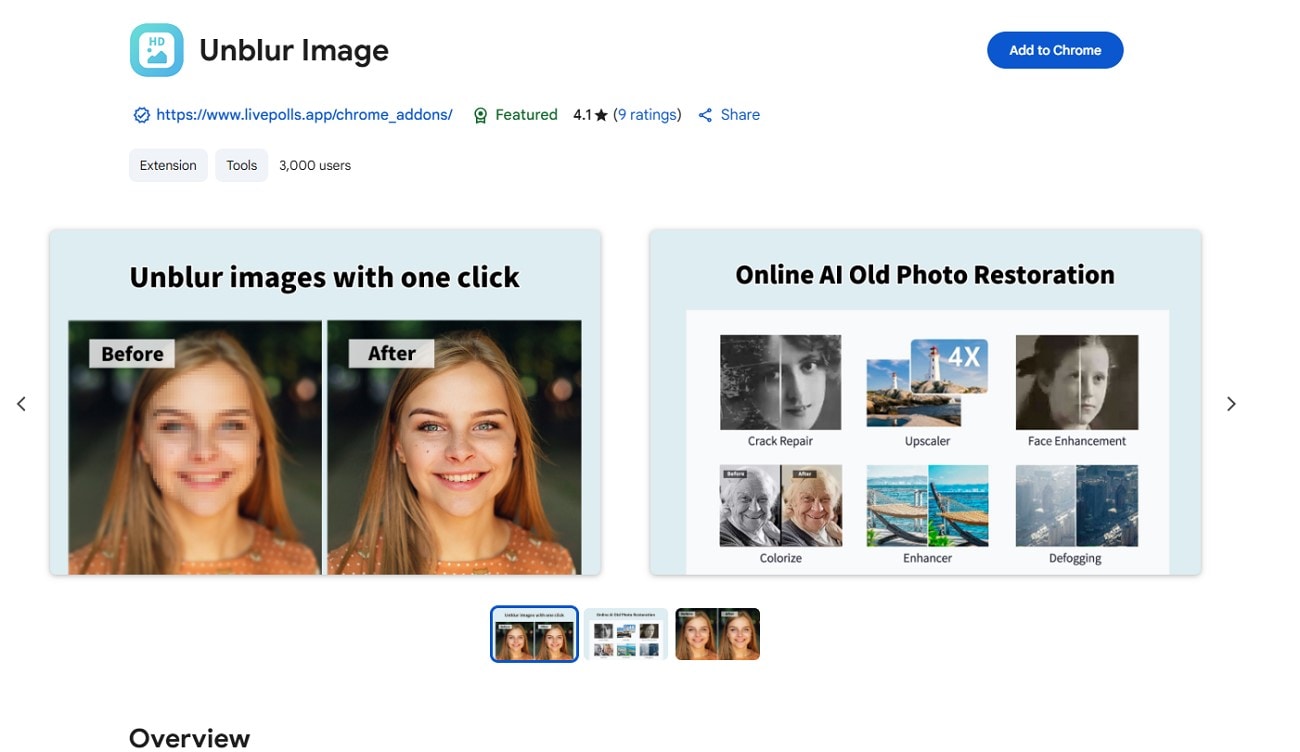
Part 3. How to Sharpen Blurry Pics with Chrome Extension
You can use Chrome extensions like Unblur Image for an even faster experience of sharpening blurry photos. Built by imgkits, it lets users deblur photos with its advanced algorithms by detecting only blurred areas while leaving others untouched. It has a privacy-focused design that ensures your data remains secure and is deleted automatically, which is all based on strict privacy laws.
Key Features
- This photo sharpener AI automatically takes you to the site where your picture is uploaded and processing takes place.
- This extension is available in over 50 languages, making it accessible to a broader user base.
- It has defogging, colorization, and crack repair models, apart from the unblur option, for further enhancement.
- You can upgrade to the premium option to avail even more advanced photo-enhancing features like video processing and watermark-free image download.
An Easy Step-By-Step Guide to Sharpening Images Using Unblur Image Chrome Extension
Once you have decided to upload an image to sharpen on this extension, follow the given instructions to carry out the process seamlessly:
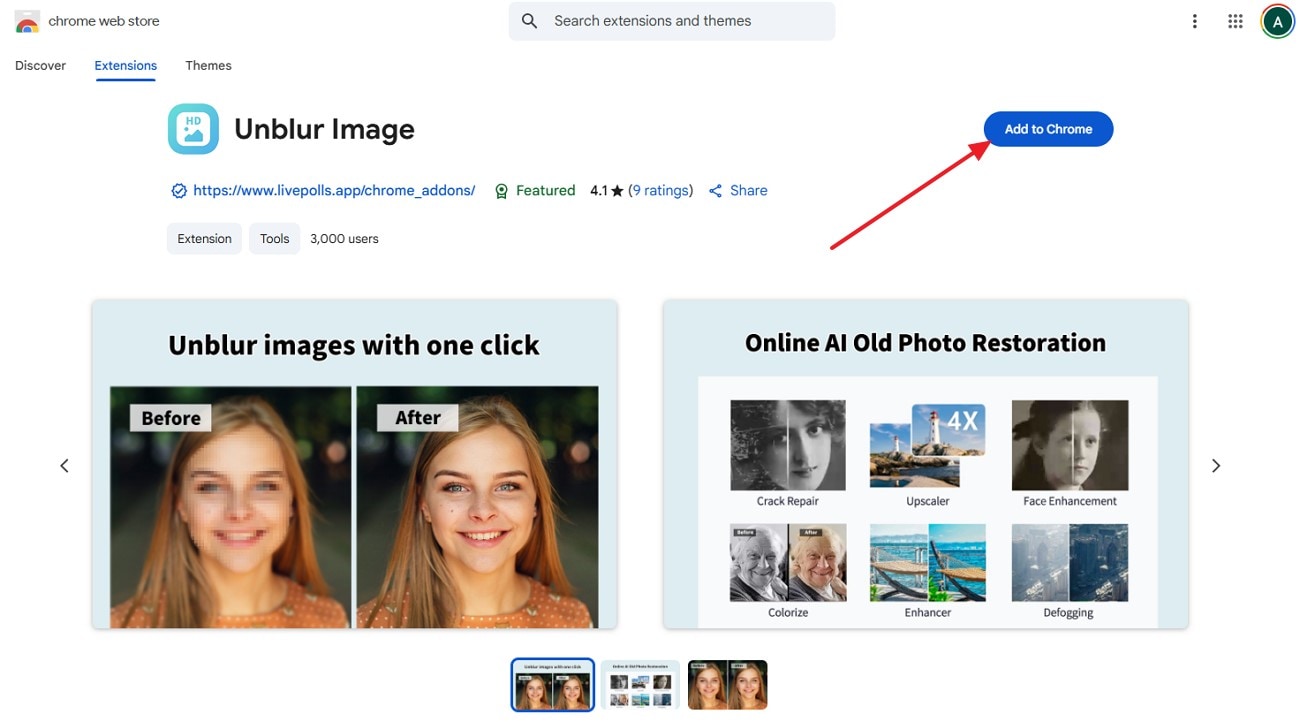
Step 1. Go to the web extension page, click on the “Add to Chrome” button, and hit the “Add extension” button on the next pop-up.
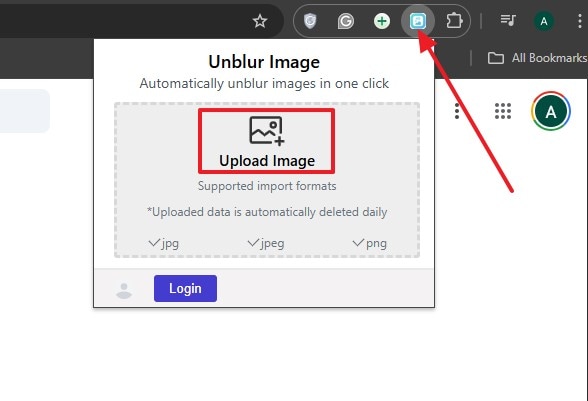
Step 2. Once your extension is added, in the extension window, click on the “Upload Image” box to select your blurry image. This will directly take you to the imgkit site with your picture uploaded.
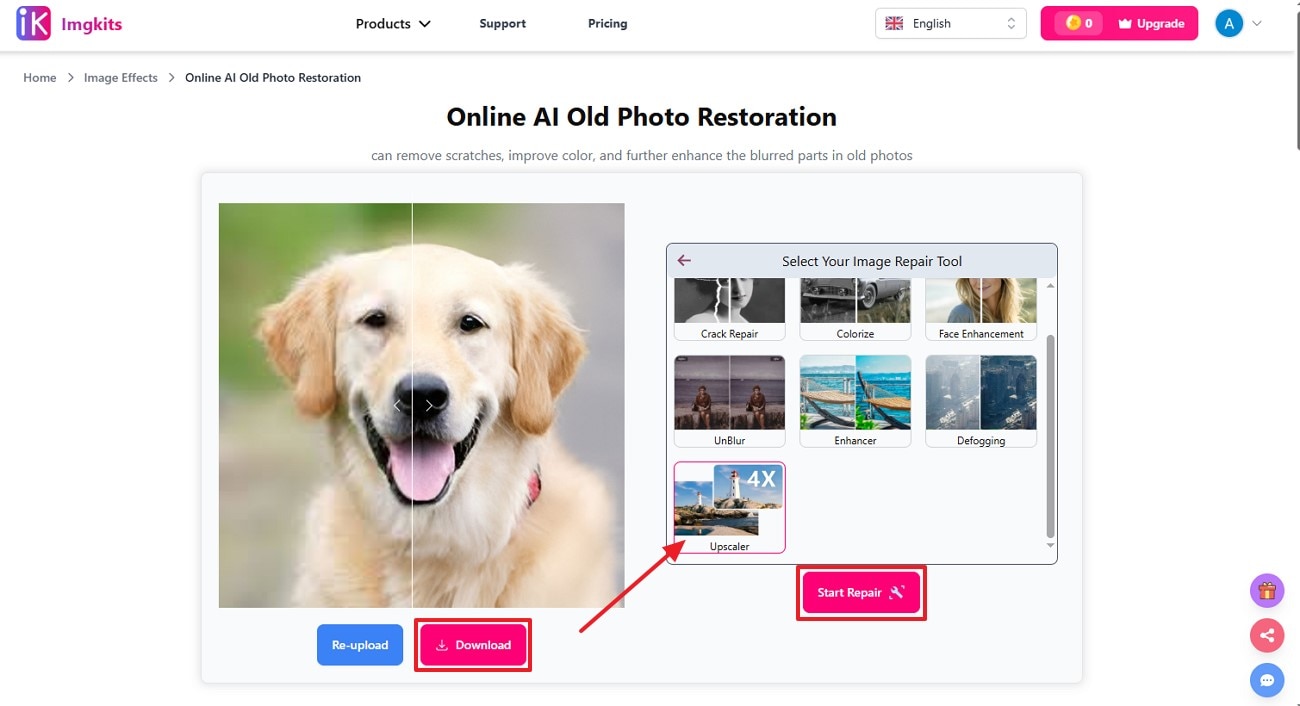
Step 3. From the options, select the “Upscaler” feature and click on the “Start Repair” button to sharpen your blurry photo. Once the image is processed to a clear and sharp version, click the “Download” button to save it to your device.
Easy to Use Batch Image Sharpener
Part 4. How to Sharpen Images on iPhone or Android?
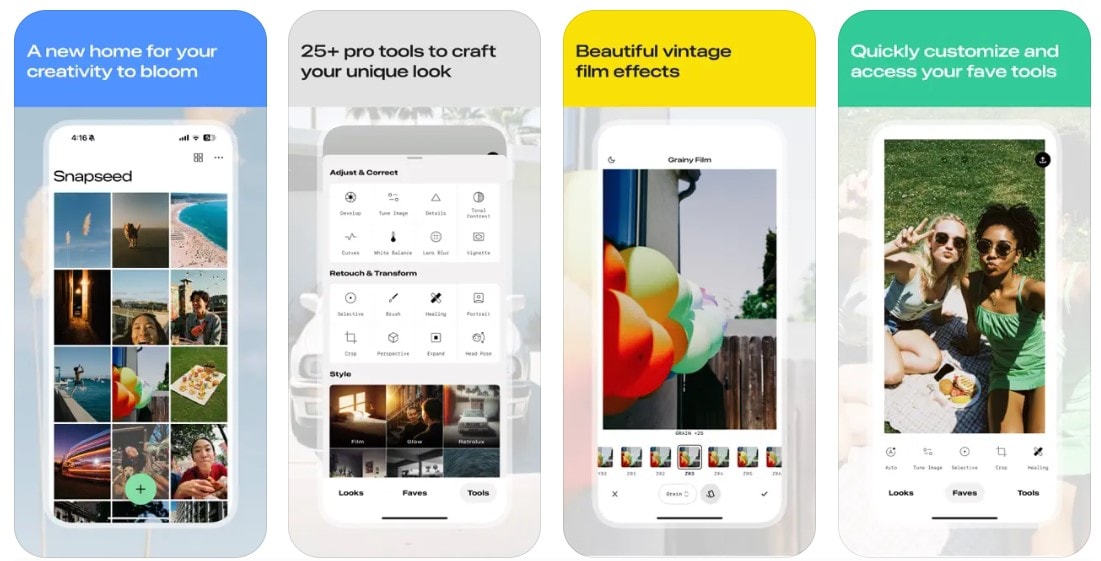
One can use a mobile app like Snapseed (iOS|Android) to sharpen image directly on their mobile. Snapseed has a powerful tool that can ensure your images are crisp and free from blur. It works in a non-destructive way with RAW files to allow you to control the output while maintaining photo quality. You can adjust the sharpness and preview the file in the “View Edits” option to compare results.
Key Features
- It allows you to sharpen the images while also allowing you to tweak the tonal structure.
- You can revert the image to its previous state if you are unsatisfied with the results.
- This tool allows you to make multiple edits in the image separately, which can be observed.
- An export option is available which lets you change the format and sizing of the image later on.
A Complete Guide on Using the Snapseed App for Sharpening Photos On Your Phone
Provided below is a quick guide to AI sharpen image with Snapseed on your mobile:
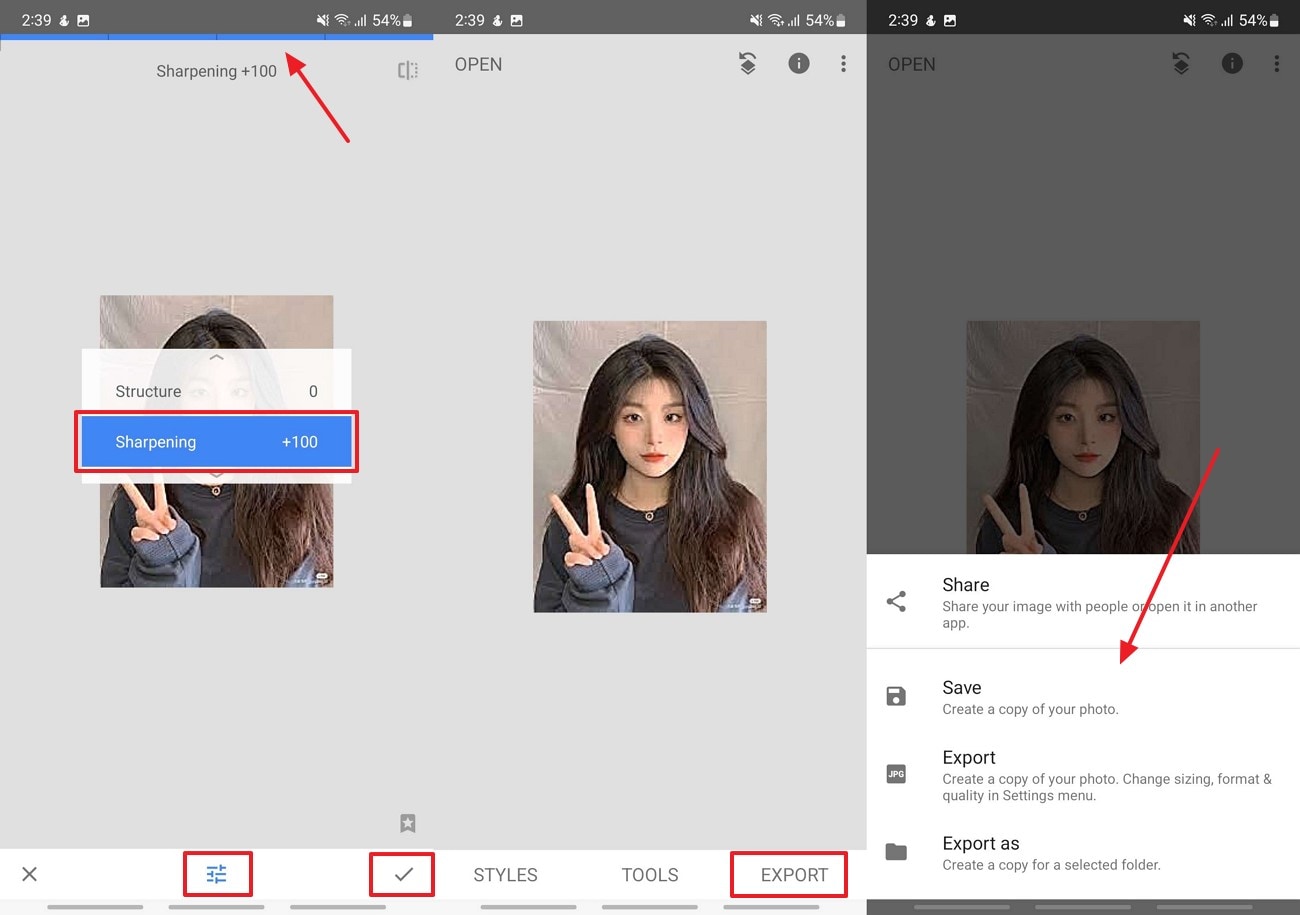
Step 1. Once the app is downloaded on your phone, add a photo by tapping on the screen with the “+” mark. Hit the “Tools” tab in the middle of the screen to select the “Details” feature and proceed.

Step 2. Press the “Equalizer” sign and select the “Sharpening” option to adjust the effect as required through the slider on top of the screen. Once you are done with the AI sharpen process, click the “Tick” sign to confirm the edits and save the image by pressing the “Export” button.
Conclusion
Summing up, sharpening images can become a challenging task when you don’t know about credible platforms to do so. In this article, we have explored various methods for sharpening images, including online tools and mobile apps. Among all of these, it is recommended to use UniConverter as the most superior picture sharpener for AI-powered photo enhancement.
Easy to Use Batch Image Sharpener
FAQs
-
1. Where can image sharpening be helpful in everyday life?
If you take photos from your smartphone, making scanned copies and receipts will require you to sharpen images. You might also want to enhance social media pictures to restore old or faded family photos or even use them for product display. -
2. What features should I look for when trying to find a good image sharpening tool?
While figuring out how to sharpen blurry photos, look for features like real-time preview to ensure tailored results for your output photos. You should see the file format support, along with easier export options for flexibility and convenience. -
3. How can I avoid over-sharpening and unwanted artifacts?
Minor changes can be applied in increments, and the file should be previewed by zooming in to identify any unnecessary artifacts. One should opt for tools that give more control over sharpening effects with sliders to bring natural clarity. -
4. Why is my picture still unclear after using an image sharpening app?
Your picture can seem unclear even after applying a sharpening effect over it if it was severely out of focus beforehand. It is possible that excessive blur and compression artifacts are limiting the clarity.

