All Topic
- YouTube Tips
-
- AI Tools Tips
-
- AI Photo Enhancer Tips
- Voice Changer Tips
- AI Thumbnail Maker Tips
- AI Script Generator Tips
- Smart Summarizer
- AI Subtitle Generator Tips
- Watermark Remover
- Vocal Remover Tips
- Speech to Text Tips
- AI Video Tips
- AI Image Tips
- AI Subtitle Translator Tips
- Video Extractor Tips
- Text to Speech Tips
- AI Video Enhancer Tips
- DVD Users
- Social Media Users
- Camera Users
- Photography
- Creative Design
- Movie Users
- Travelling Fans
- Educational Users
- More Solutions
- Holidays and Commemoration
- Game Lovers
- Other Tips
Top 3 Ways to Draw on the Screen While Recording on Windows/Mac
by Christine Smith • 2026-01-21 19:01:08 • Proven solutions
” I need a software or an application which I can use to write and draw while recording a video of my screen. What app/software would you recommend?” -------Question from Quora
With a screen recording app, you can capture computer screen activities such as video games, browser tabs, multimedia players, and more. However, only a handful can draw on the screen while recording. This feature can be vital if you want to highlight a subject as you record the screen. So, this article has rounded up some excellent free screen capture tools to help you annotate the screen while recording.
- Part 1. Easy Steps to Draw on the Screen While Recording
- Part 2. Another 2 Ways to Draw on the Screen While Recording
Part 1. Easy Steps to Draw on the Screen While Recording
The best free screen capture tool for adding annotations, voiceovers, and picture-in-picture effects is Wondershare UniConverter. With this premium program, you can record all activities happening on your computer screen in full-screen or custom modes. As you capture the webcam footage, you can embed a picture-in-picture (PIP) effect and voice narrations using a mic. And as said, Wondershare UniConverter allows you to apply annotations like drawings, shapes, lines, arrows, etc.
Wondershare UniConverter - # Screen Recorder for Desktops
Wondershare UniConverter - Best Video Converter for Mac/Windows
-
Records all computer screen activities in either full-screen or custom mode.
-
Allows users to add PIP effects using a webcam and voiceovers using a mic.
-
Users can preset the video output quality, format, and frame rate.
-
Converts between 1000+ file formats, including MP4, MP3, MP2, MOV, M4A, VOB, FLV, etc.
-
Edits videos by trimming, cropping, adding watermarks, applying subtitles, and more.
-
Features an all-in-one toolbox with a GIF maker, image converter, CD burner, CD ripper, and more.
-
The best method to draw on the screen while recording on Mac OS X 10.9+ and Win 10/8/7.
Now follow these steps to annotate screen while recording on Mac/Win using Wondershare UniConverter:
Step 1Launch the Screen Recorder function.
Visit Wondershare UniConverter’s official website, then download and install the software. After that, Click Screen Recorder before clicking the big Camcorder icon. The Screen Recorder feature will launch automatically.
![]()
Step 2Choose a specific capture area.
Do you want to record your computer screen in full-screen or customized mode? In that case, launch the app to record, then drag the recording frame inwards or outwards to choose a capture area. Another way is to open the recording mode menu, then select Custom or Full Screen. If you choose the former, enter the video frame dimensions (H x W), then click Lock Aspect Ratio.
![]()
Step 3Customize your preferences.
Now choose a device on the System Audio menu for recording the sounds of your computer. After that, click Microphone, then choose a mic for adding your voice narrations. Finish off by selecting a Facecam on the Webcam menu. You’ll use it to record a PIP effect.
![]()
It doesn’t end there! Click the Advanced Settings icon, then choose MP4, AVI, or FLV as the target format. You can also set the output quality, frame rate, folder path and customize the keyboard shortcuts.
![]()
Step 4Start recording and drawing.
Crosscheck if everything looks okay, then click the REC button. Wait for the three-second countdown to finish to start recording. As said, this tool allows you to annotate as you record. To do that, open the recording taskbar, then click the Annotation icon to start adding lines, texts, drawings, and shapes. Press Stop to finish the recording process.
![]()
Part 2. Another 2 Ways to Draw on the Screen While Recording
Of course, Wondershare UniConverter is not the only screen recording app you can find out there. So without much dilly-dallying, let me introduce you to two other excellent computer screen recorders.
1. Wondershare DemoCreator
Wondershare DemoCreator is another Wondershare product for recording computer screen activities. It’s straightforward and lets you capture presentations, tutorials, games, and more. As expected, it offers powerful annotation tools for adding banners, arrows, captions, and more. And yes, you’ll enjoy fast editing after recording the video.
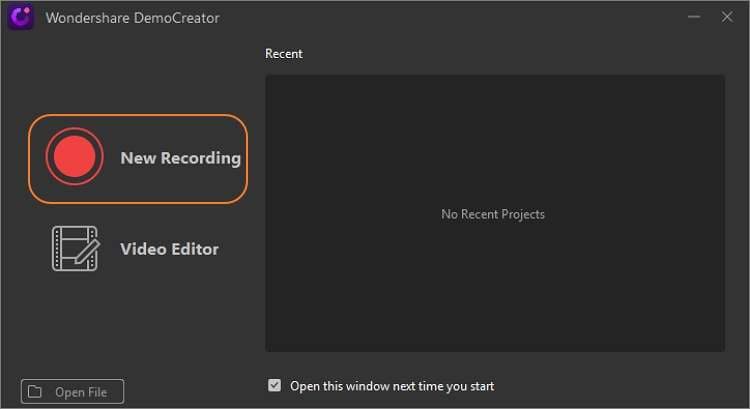
Step 1. Install and run DemoCreator on your PC, then click the New Recording button.

Step 2. Click Start to launch the screen capture tool. You’ll also see the PIP overlay launch automatically.
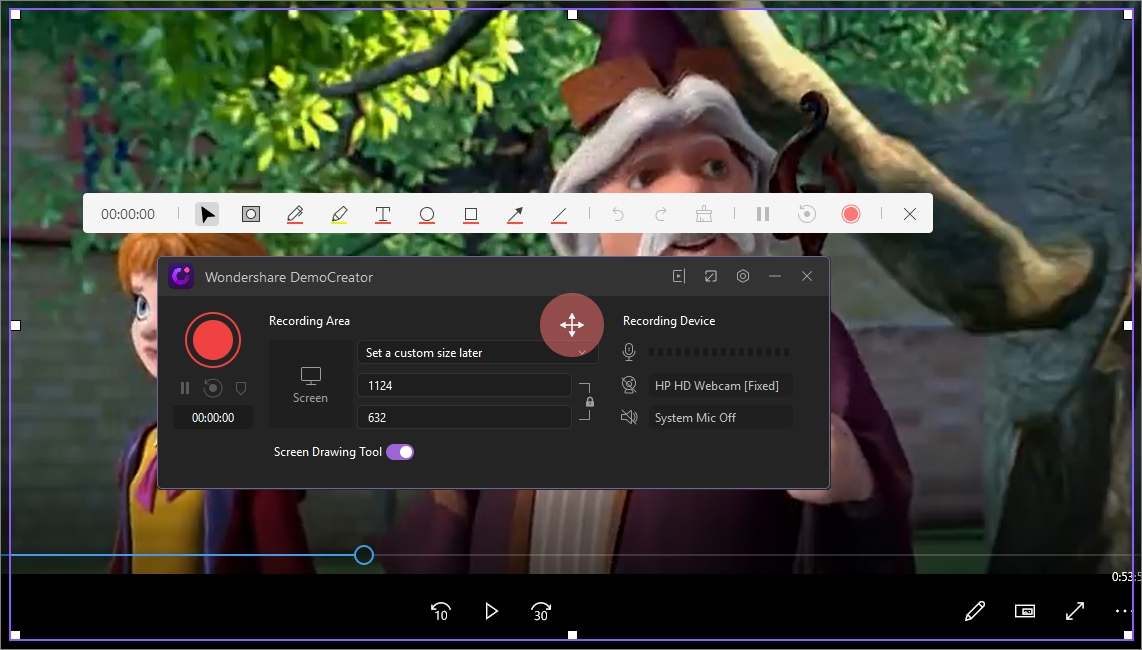
Step 3. Now open the app or browser tab you want to record, then customize the recording area by dragging the recording frame. You can also enter the video frame dimensions on the Recording Area section.

Step 4. Next, navigate to the Recording Device section and choose whether you want to record the mic, webcam, and system audio.
Step 5. Last but not least, click the Record button to begin capturing your computer screen.
Step 6. As you record the computer screen, click the Screen Drawing Tool toggle to launch all annotation features. Here, you can draw and add shapes and lines. Click Stop to finish recording the video. You’ll be redirected to the video recorder section, where you can retouch your video professionally.
2. Bandicam
Bandicam is another well-respected name in the computer screen recording realm. It’s a lightweight app that won’t take you long to install and use. With Bandicam, you can record computer screen activities and save them as AVI or MP4. It also allows users to add a webcam overlay, perform real-time drawing, apply voice narrations, and more. Best of all, Bandicam features multiple keyboard shortcuts.
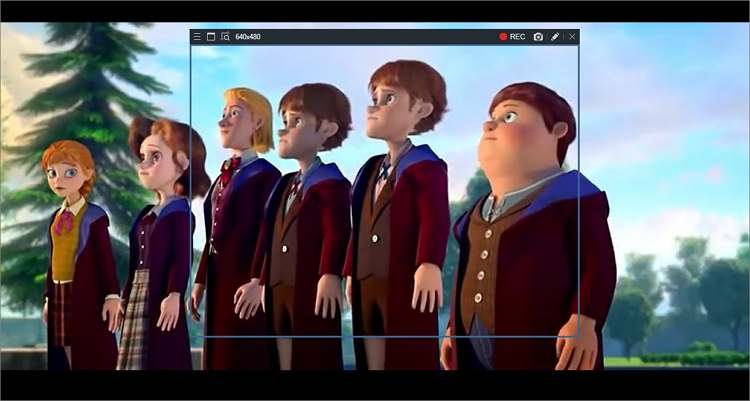
Step 1. Install and run Bandicam, then choose Rectangle on-screen mode.
Step 2. Launch the app to record, then drag the recording frame to fit a particular section to record. You can even manually input the video frame dimensions.
Step 3. Click REC to begin capturing the computer screen.

Step 4. If you want to add drawings as you record, click the Pen icon on the top-right corner of the recording screen. Now you can draw, add shapes, apply texts, and so on.
Step 5. Finally, click Stop to finish recording. Close the recorder, then click the Videos tab on the main app. You’ll see all your recorded videos.
Conclusion
These are the best methods to draw on the screen while recording on Mac or Win. As you can see, all the apps discussed above are super easy to use and offer annotation features. However, Wondershare UniConverter offers slightly more features like the DVD burner, audio converter, GIF maker, etc.
Your complete video toolbox
 Record the computer screen in full-screen mode or select a specific capture area.


Christine Smith
chief Editor