

Resizing images in bulk can be a time-consuming task, especially when you need to adjust multiple photos for social media, websites, or print. However, with the right tools, you can streamline this process and ensure consistent and high-quality resized images.
Whether you’re on Windows, Mac, or prefer using an online tool, this guide highlights the best bulk image resizers available. We'll help you find the perfect solution for resizing multiple images efficiently while keeping their resolution intact.
In this article
Part 1. Approaches to Resize Images
When it comes to resizing images, there are several methods and tools available. Understanding the different approaches can help you choose the best one for your needs. Below are some common methods:
Resize by Pixels
Adjust the dimensions of an image by specifying pixel width and height. This method ensures precision when resizing images for specific use cases, such as profile pictures, banners, or thumbnails.
Resize by Percentage
This method resizes images by a specific percentage of their original size. It’s useful when you need to maintain proportionality while reducing or enlarging images.
Batch Resize
Batch resizing allows you to resize multiple images at once, saving time and ensuring consistency across all images. This is especially helpful for large projects where you need to maintain uniform dimensions across all images.
Resize with Aspect Ratio
Keeping the aspect ratio intact ensures that the image’s proportions (width vs. height) are maintained. This is essential for avoiding distortion in images when resizing.
Compression While Resizing
Compression reduces the file size of an image while maintaining its visual quality. Many tools allow you to resize images and compress them simultaneously, which is particularly useful for web and social media use.
Part 2. 3 Best Bulk Image Resizers For Win & Mac
Resizing multiple images on your computer is easier with the right desktop software that supports batch processing. These tools allow you to resize images quickly and efficiently without losing quality.
1. UniConverter (For Win & Mac)
UniConverter is a powerful tool that offers a batch processing feature for resizing multiple images on both Windows and Mac. It allows you to quickly adjust the dimensions of images, ensuring high quality even when resizing in bulk. This software supports various formats and ensures no quality loss during the resizing process, making it ideal for users who need to process large sets of images efficiently.
Key Features
- Batch resize multiple images at once.
- High-quality output without pixelation.
- Supports various image formats, including JPG, PNG, and GIF.
- Customizable pixel resizing options.
- User-friendly interface for quick resizing.
Pros & Cons
Bulk Image Resizers For Win & Mac: A Step-by-Step Guide
If you need to resize multiple images at once, using a bulk image resizer like UniConverter can save you a lot of time and effort. Here's how to resize your images in bulk using UniConverter on both Windows and Mac:
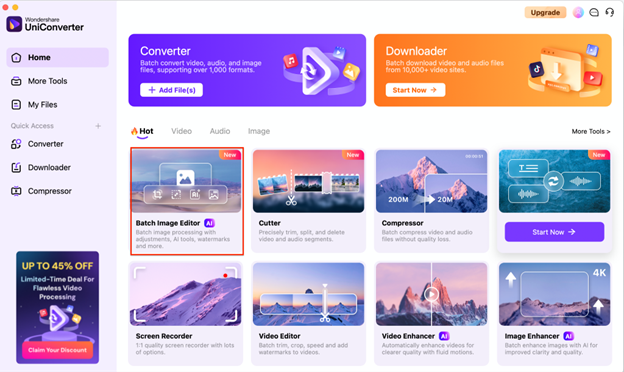
Step 1: Launch UniConverter and Access the Bulk Image Resizer Tool
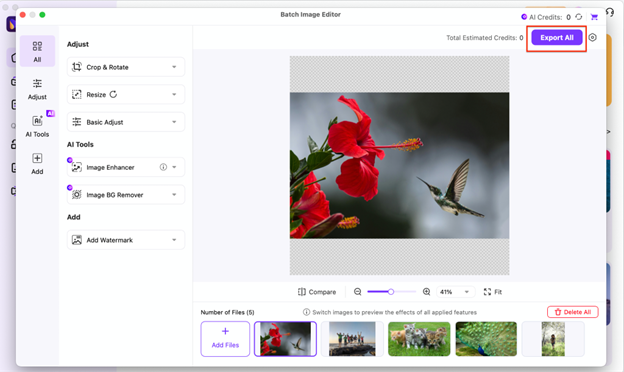
Open UniConverter on your computer and navigate to the "Toolbox" section. Select the "Batch Image Editor" option to start the bulk resizing process.
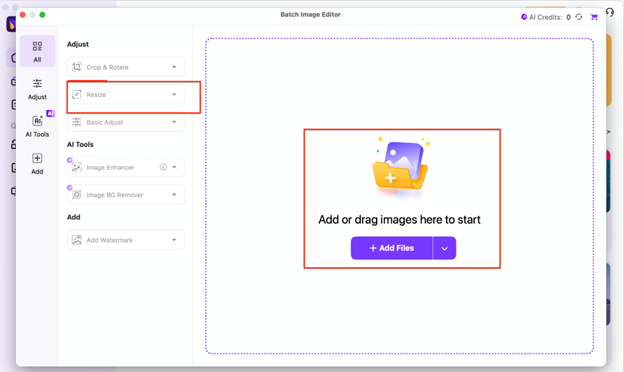
Step 2: Upload Your Images
Click the "Add Files" button to upload all the images you want to resize. Once uploaded, all the images will appear in the editing window, ready for bulk adjustments.
Step 3: Set the Desired Dimensions for All Images
Choose the resize options to set the desired dimensions for your images. You can either manually input the width and height or select from preset aspect ratios, depending on the required output size for your project.
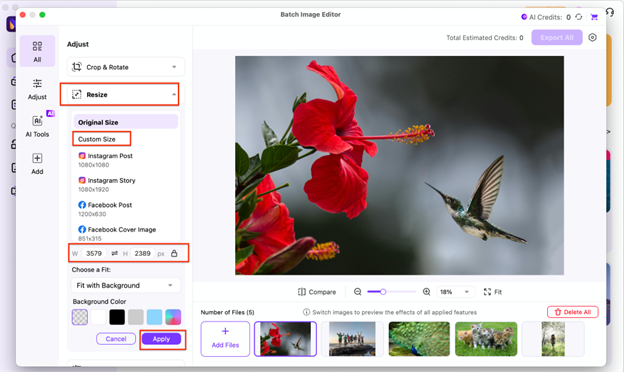
Step 4: Export and Save the Resized Images
Once you’ve previewed the resized images and are satisfied with the adjustments, click the "Export All" button. This will allow you to save the resized images to your preferred location on your computer in the desired format.

Versatile Bulk Images Resizer
2. XnConvert
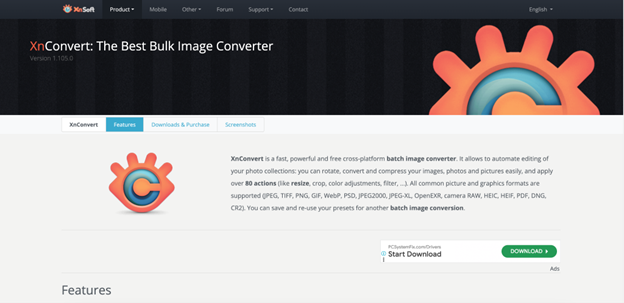
XnConvert is a free and open-source batch image resizer available for both Windows and Mac. It supports multiple image formats and offers a range of resizing options. Ideal for bulk resizing, XnConvert is a versatile tool for both casual users and professionals looking to process images efficiently without sacrificing quality.
Key Features
- Batch resizing of multiple images.
- Supports over 500 image formats.
- Customizable resizing options for width and height.
- Advanced editing tools like filters and color adjustments.
- Free and open-source software.
Pros & Cons
Step by Step Guide
Step 1: Download and Install XnConvert
Download XnConvert from the official website and install it on your system.
Step 2: Add Images for Resizing
Open the software, then click “Add Files” to upload the images you want to resize.
Step 3: Set Resizing Dimensions
Adjust the pixel dimensions for all images and click “Convert” to resize your images in bulk.
3. ImageOptim
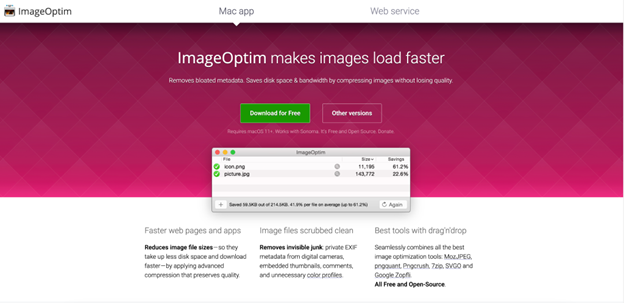
ImageOptim is a macOS-exclusive tool that allows you to resize multiple images at once without compromising quality. It's perfect for optimizing images for web use, as it helps reduce file size while maintaining the clarity and resolution of your images. ImageOptim is known for its simplicity and efficiency, making it a top choice for users needing to resize images in bulk for Mac.
Key Features
- Batch resize images with minimal effort.
- Supports multiple image formats (JPG, PNG, GIF).
- Lossless compression to reduce file size without quality loss.
- Drag-and-drop interface for quick image uploading.
- Optimizes images for web use by reducing file sizes.
Pros & Cons
Step by Step Guide
Step 1: Download and Install ImageOptim
Visit the ImageOptim website and download the macOS application.
Step 2: Add Images for Resizing
Drag and drop the images you want to resize into the ImageOptim interface.
Step 3: Resize and Save
Adjust your desired dimensions and click “Optimize” to resize your images and save them in your chosen format.
Versatile Bulk Images Resizer
Part 3. 3 Best Online Bulk Image Resizers
1. BatchPhoto Espresso
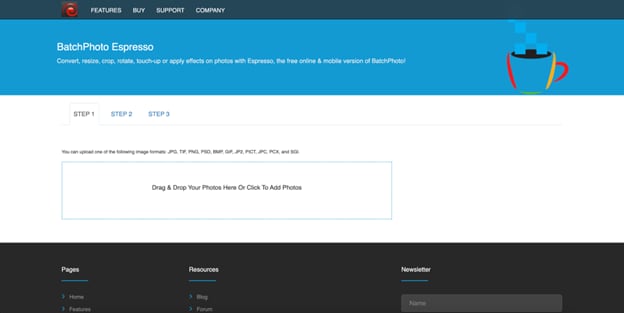
BatchPhoto Espresso is an online tool designed for fast and efficient bulk image resizing. With its simple interface, users can quickly resize multiple images at once without any hassle. Whether for social media, websites, or personal use, BatchPhoto Espresso allows you to adjust image dimensions in bulk while maintaining high quality. It’s ideal for users who need to process large sets of images efficiently and quickly.
Key Features
- Batch resizing for multiple images at once.
- Customizable image dimensions with aspect ratio adjustments.
- Supports common image formats (JPG, PNG, GIF, etc.).
- Fast processing for large sets of images.
- No sign-up or registration required for basic usage.
Pros & Cons
Step by Step Guide
Step 1: Upload Images
Visit the BatchPhoto Espresso website. Click on "Upload" or drag-and-drop your images to the interface. You can select multiple images for resizing at once.
Step 2: Set Resizing Dimensions
Choose your desired dimensions for the images. You can set custom pixel values or select from preset dimensions for social media, websites, or print.
Step 3: Resize & Download
After selecting the appropriate size, click "Resize" to process the images. Once done, click "Download" to save the resized images to your device.
2. Befunky
Befunky is a versatile online image editor that also includes a powerful bulk image resizing feature. It allows users to resize multiple photos at once without sacrificing quality, offering a variety of options like custom dimensions and aspect ratios. With its intuitive interface and additional editing tools like filters and text, Befunky is perfect for resizing and enhancing images for all types of use, including social media and personal projects.
Key Features
- Resize multiple images at once with custom pixel dimensions.
- Batch resizing for various image formats (JPG, PNG, etc.).
- Customizable aspect ratio for resizing.
- Built-in image enhancement tools like filters and text addition.
- Cloud-based with easy access from any device.
Pros & Cons
Step by Step Guide
Step 1: Upload Your Images
Visit the Befunky website and click on "Get Started." Upload your images by selecting the "Upload" button and choosing the photos you want to resize.
Step 2: Select Resize Options
In the editing interface, choose the "Resize" option. Set the desired dimensions or choose from preset aspect ratios suitable for your project (social media, websites, etc.).
Step 3: Apply Resizing & Download
Once you're satisfied with the resizing, click the "Apply" button. Afterward, click "Download" to save your resized images to your device.
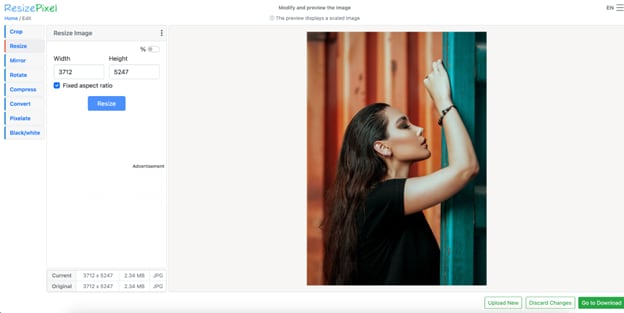
3. ResizePixel
ResizePixel is an online tool specifically designed for resizing images in bulk, making it easy to adjust the size of multiple images at once. With a focus on simplicity and efficiency, ResizePixel offers users the ability to customize dimensions and resize photos quickly. It supports a wide range of image formats and ensures high-quality output, making it an excellent choice for users who need to resize multiple pictures online for various purposes.
Key Features
- Simple drag-and-drop interface for easy image resizing.
- Resizes multiple images at once without registration.
- Supports various formats, including JPG, PNG, and GIF.
- Allows for both resizing by dimensions and aspect ratios.
- Fast processing time for batch image resizing.
Pros & Cons
Step by Step Guide
Step 1: Upload Your Images
Go to the ResizePixel website and click the "Upload" button. Select multiple images from your device that you wish to resize.
Step 2: Set Desired Dimensions
Enter the custom pixel dimensions or choose from the preset options for resizing. You can adjust width and height as per your needs.
Step 3: Resize and Download
After setting the dimensions, click "Resize" to process the images. Once resized, click "Download" to save your resized images to your device.
Part 4. Bonus: How to Ensure High Resolution of Resized Images
When resizing images, especially in bulk, it’s crucial to maintain high resolution to ensure your images retain their clarity and quality across different platforms. Here are some strategies to ensure that your resized images remain high resolution:
1. Use a High-Quality Resizer
The quality of the resizer tool you use plays a significant role in maintaining the resolution of your images. Tools like UniConverter and BatchPhoto Espresso preserve image clarity while resizing, reducing the risk of pixelation. Make sure to select a high-quality image resizer that offers lossless resizing. If you already had a batch of vague images after resizing and want to unblur already resized images, you can also trun to Uniconverter Image Enhancer for help.
2. Set the Correct Resolution Settings
When resizing images, always set a high resolution (at least 72 PPI for web use and 300 PPI for print) in the resizing tool. This ensures that the image retains its sharpness and clarity, even when the image size is reduced or enlarged.
3. Avoid Enlarging Small Images
Enlarging small images to a larger size can cause pixelation, as the software needs to stretch the pixels to fit the new size. Always start with a high-resolution image and resize downward to maintain quality.
4. Preserve the Aspect Ratio
To avoid distortion during resizing, always maintain the aspect ratio of the image. This will ensure that the image doesn’t become stretched or squished. Many tools, like UniConverter, automatically lock the aspect ratio, so the image will resize proportionally.
5. Use Image Compression Carefully
Image compression reduces the file size of images without significant quality loss, but excessive compression can cause a drop in resolution. Always opt for mild compression and use high-quality formats like PNG or TIFF for images that need to maintain detail.
Conclusion
Resizing images, whether in bulk or individually, can save time and improve the visual appeal of your content. Whether you’re resizing for social media, websites, or print, using the right tools ensures high-quality output without pixelation. With the tools mentioned in this guide, you can efficiently resize multiple images while maintaining their clarity and detail. UniConverter, BatchPhoto Espresso, and other recommended tools provide a seamless resizing experience for both beginners and professionals. Choose the right tool and follow the best practices for resizing to ensure your images look their best across all platforms.
Versatile Bulk Images Resizer
FAQs
-
1. What is the difference between cropping and resizing an image
Pixelation happens when resizing small images larger. Always start with high-resolution images and reduce them instead of enlarging. -
2. What’s the difference between resizing and cropping images?
Resizing changes the overall dimensions of the image, while cropping cuts off parts of the image to focus on a specific area. -
3. How can I ensure my resized images are high resolution?
Choose tools that offer high-quality output and set the correct resolution settings to preserve image clarity, such as those found in UniConverter and BatchPhoto Espresso. -
4. Can I resize an image for both web and print?
Yes, tools like UniConverter allow you to customize the resolution for both web (72 PPI) and print (300 PPI).

