

Today's creative world has taken a step forward with its new and advanced generative AI technology. It allows users to add and remove elements and helps users who struggle with tight deadlines. Graphic designers and creators rely on generative fill Photoshop to create eye-catching pieces.
Therefore, go through this article to learn more about generative AI, the reasons why you should use it, and various pros and cons. Other than that, you get to learn how to use this technology to change backgrounds with a step-by-step guide.
In this article
Part 1. What is Photoshop AI Generative Fill?
Introducing the next generation of Generative Fill, powered by Adobe Photoshop, used to create lifelike images. You can go beyond creative ideas to create complex edits and refinements on this tool and achieve your vision. Moreover, using its Generative Expand option, drag the borders and fill the space with unique blends. It lets you create variations of an image with the Generative Similar option.
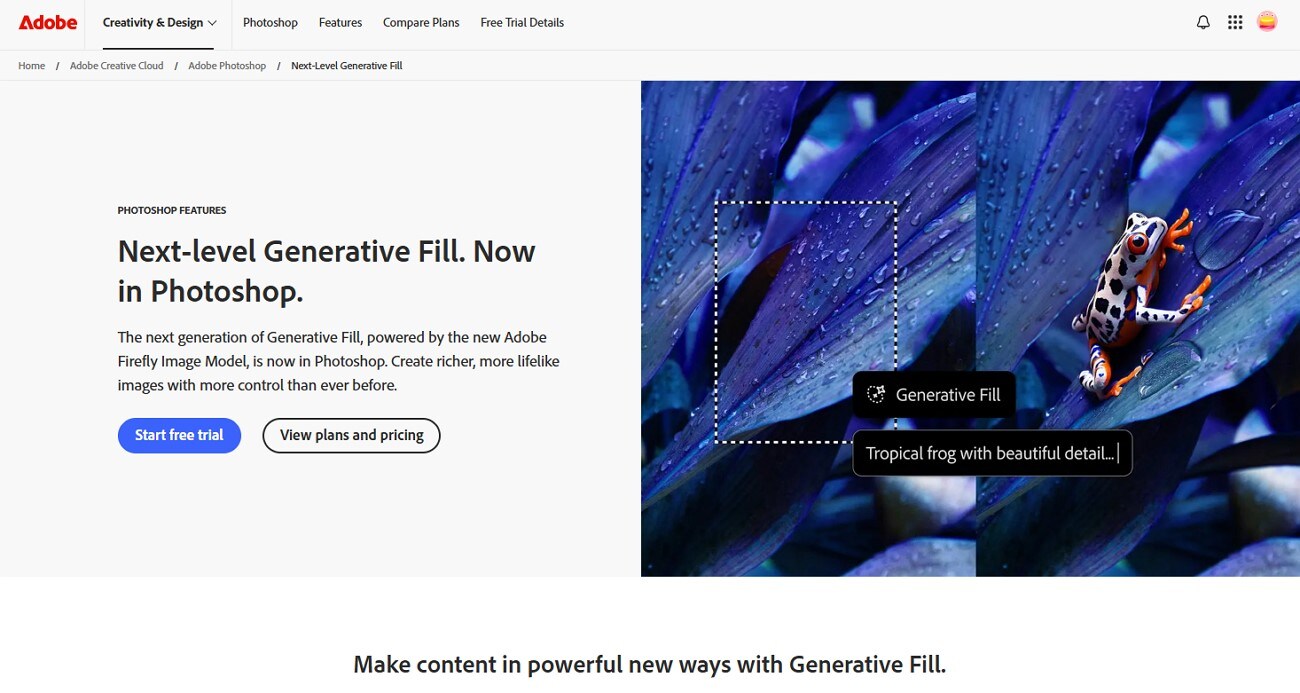
Not only can users expand and fill images, but they can also change the background, update an outfit, and generate an object with a prompt. This Photoshop AI generative fill allows adjustments by letting you add a yellow line and fixing it with a text prompt. Photoshop analyzes each pixel of an image and matches its lighting, perspective, and color to create realistic pieces of art.
Part 2. Why Use Photoshop AI Generative Fill
Unlike other tools that limit themselves to filling out spaces, generative fill Photoshop takes it to another level. The following are some of the use cases you can use this AI for, so go through them:
Change or Extend Backgrounds
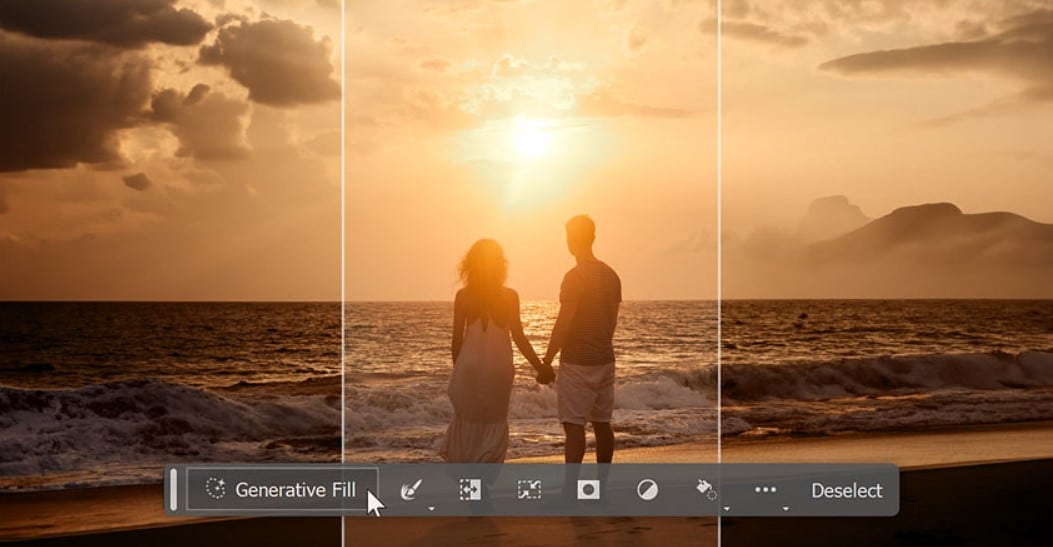
Creators can replace dull backgrounds with beautiful scenes. You can expand a photo's canvas and make various adjustments to the frame without losing any quality.
Remove Unwanted Elements
You can use the Photoshop generative fill to remove or erase distractions with ease. This produces realistic results that can be later filled with different details that blend perfectly with the rest of the image.

Generate New Content
Try adding various objects, textures, or scenery to your image or art piece that didn't exist in the original to give it a spark. Moreover, this generative fill can build stunning composite photos and visuals within seconds.
Speed Up Creative Workflows
There is no need to perform any complex edits manually as this tool does it in mere seconds with simple text prompts. This seamless process of Photoshop AI generative fill saves hours of manual retouching and fixing.
Enhance Creative Designs
Users can experiment freely with various ideas, edits, and visuals on this tool. Furthermore, there is no creative boundary, so you can create anything without limitations.

Part 3. Pros and Cons of Photoshop AI Generative Fill
Before learning how to use generative fill Photoshop, read the following pros and cons of this feature. By understanding its advantages and limitations, utilize it to your full extent without facing any complications:
Part 4. How to Use Generative Fill in Photoshop to Change Backgrounds
After getting to know about the different pros and cons of Generative Fill, let's look at the following steps on how to use Generative Fill Photoshop:
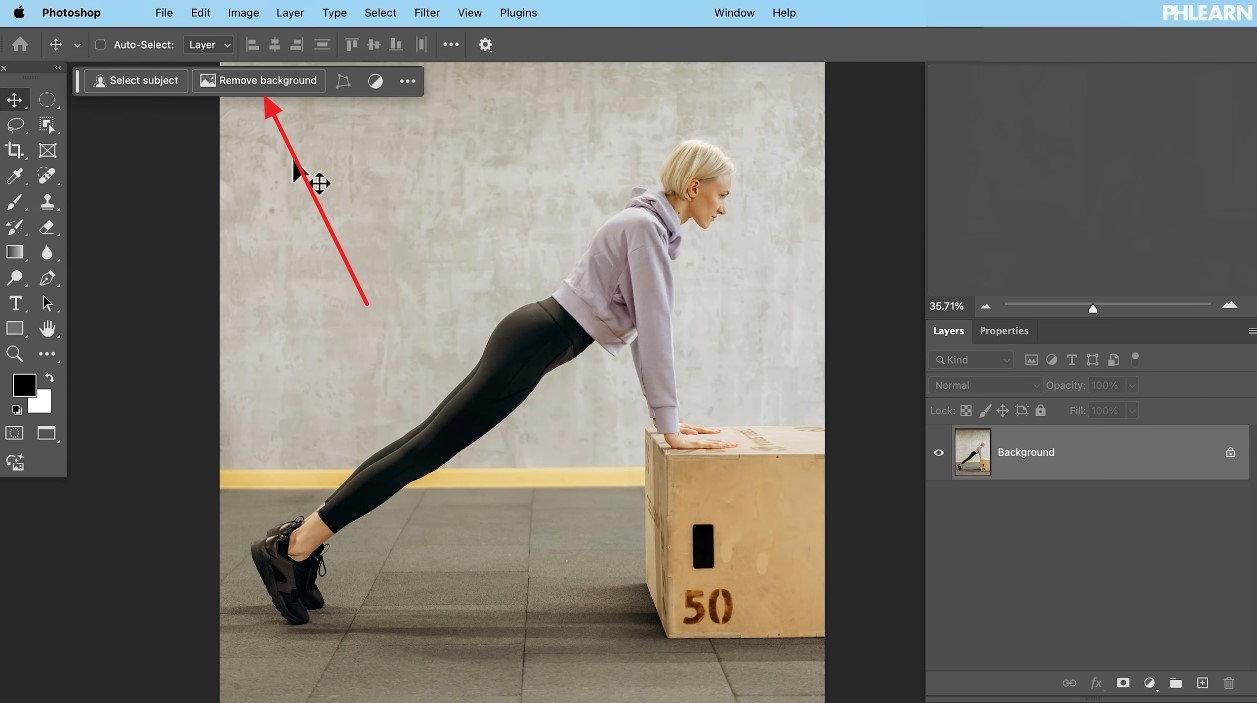
Step 1
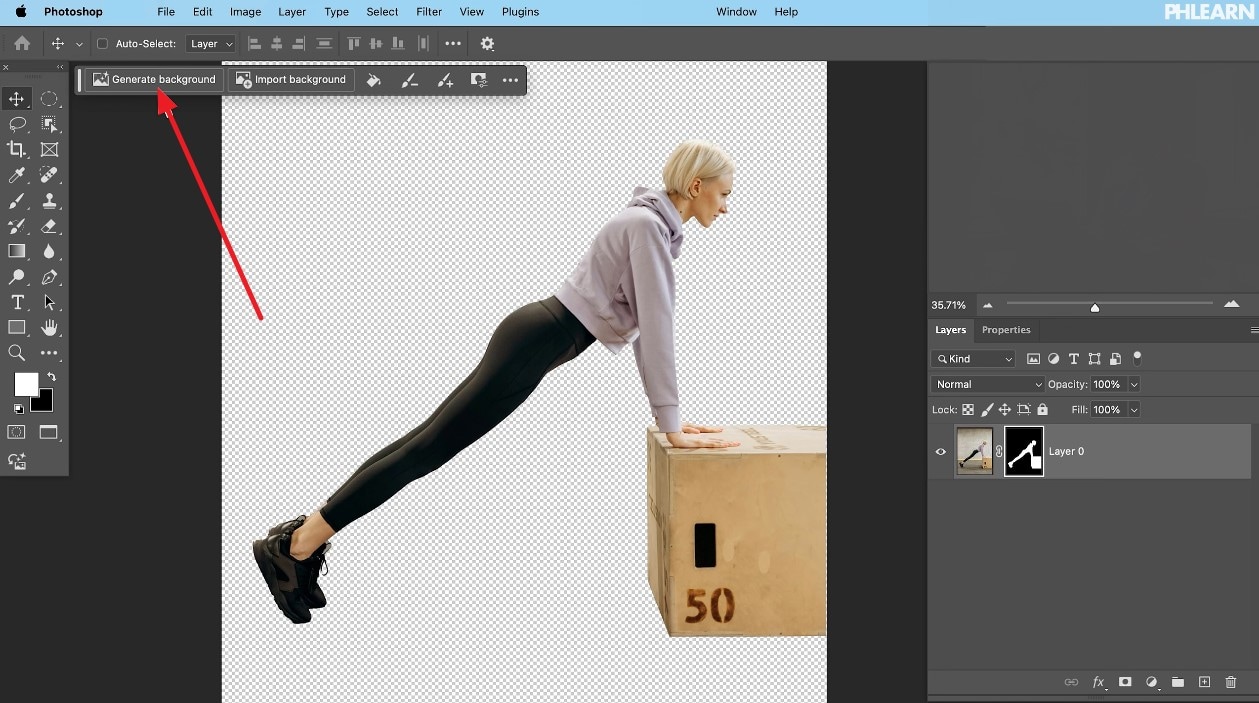
Open Photoshop on your device, import an image and click the "Remove Background" option at the top.
Step 2
When the background is removed, press the “Generate Background” option from the same toolbar.
Step 3
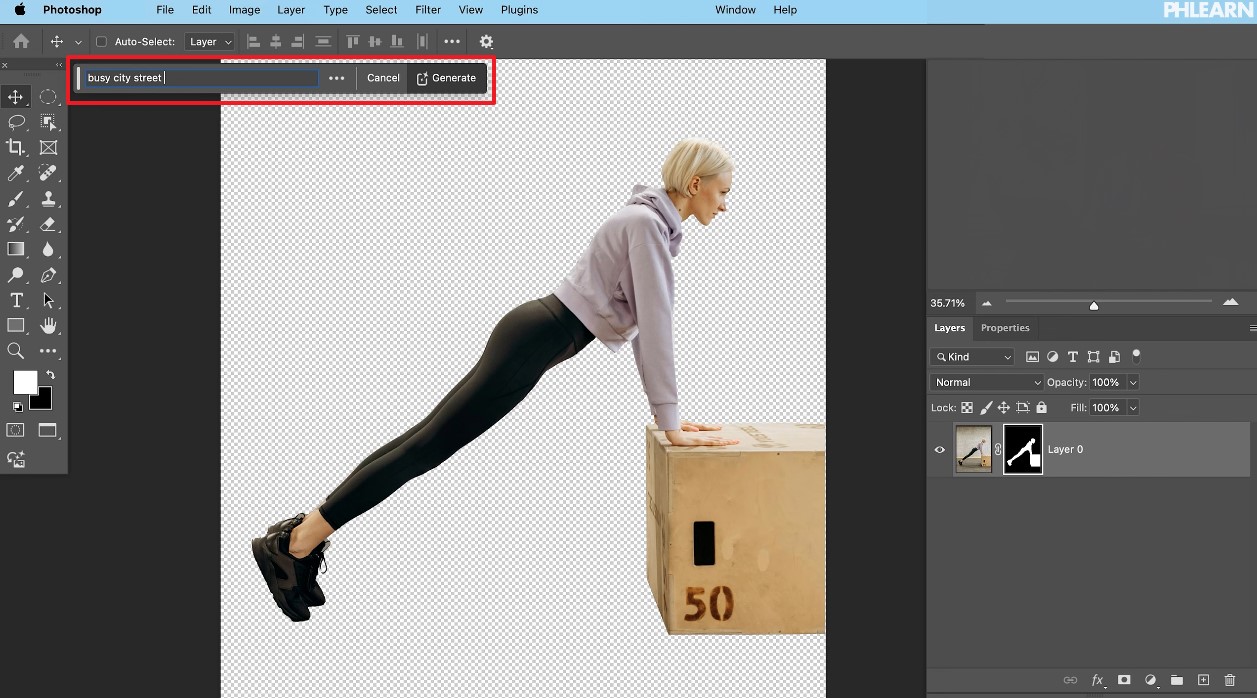
Write the desired prompt in the “What Would You Like to Generate” box and hit the “Generate” button.
Step 4
The generative fill will provide various backgrounds in the right panel under “Variations,” which you can choose from.

Part 5. Alternative Photoshop Generate Fill Background Changing
If you are looking for a more affordable and seamless background removal solution than Photoshop, then utilize Wondershare UniConverter, a generative fill alternative. Its AI neural connection technology automatically removes the background from any image without needing manual selection. Moreover, you can choose from a variety of solid scenery and other backgrounds to add to your image. It allows you to add your own custom background with extreme precision.
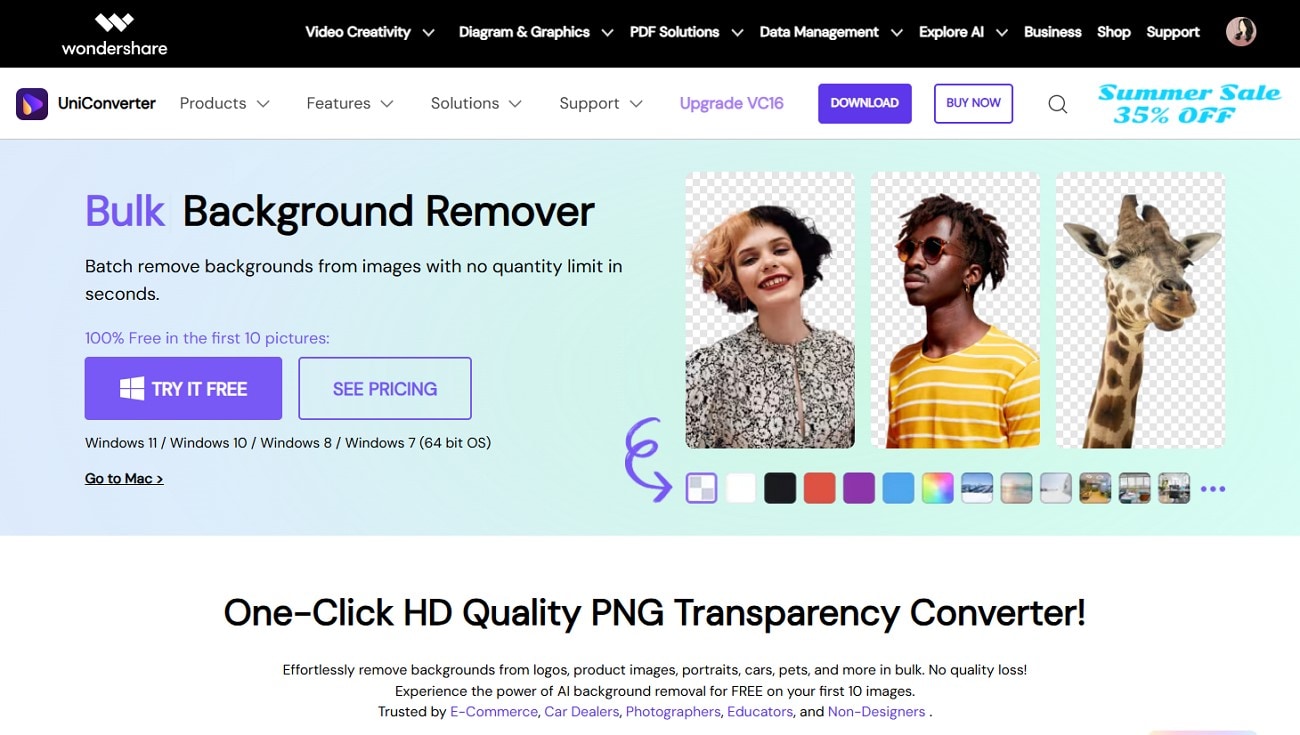
Not only that, but this tool also supports various image formats, like PNG, JPG, GIF, and more, and removes backgrounds from portraits, pets, cars, and product images. You can make auto-enhancements and manual adjustments to the final image and compare the before and after.
Key Features
- AI Removal: With a click of a button, the AI automatically detects the image's background and removes it within seconds.
- Exporting Options: This tool lets you download the final image in different formats, like BMP, WebP, and more.
- Batch Background Remover: You can remove multiple images in various formats without losing their quality and resolution.
- Adjustments of Background: Use the various basic adjustments and resizing tools to make further modifications to the image.
Comprehensive Stepwise Guide on How to Fill Background with UniConverter
To better understand how this photo editor can change the background better than the Photoshop AI generative fill, read the following steps:
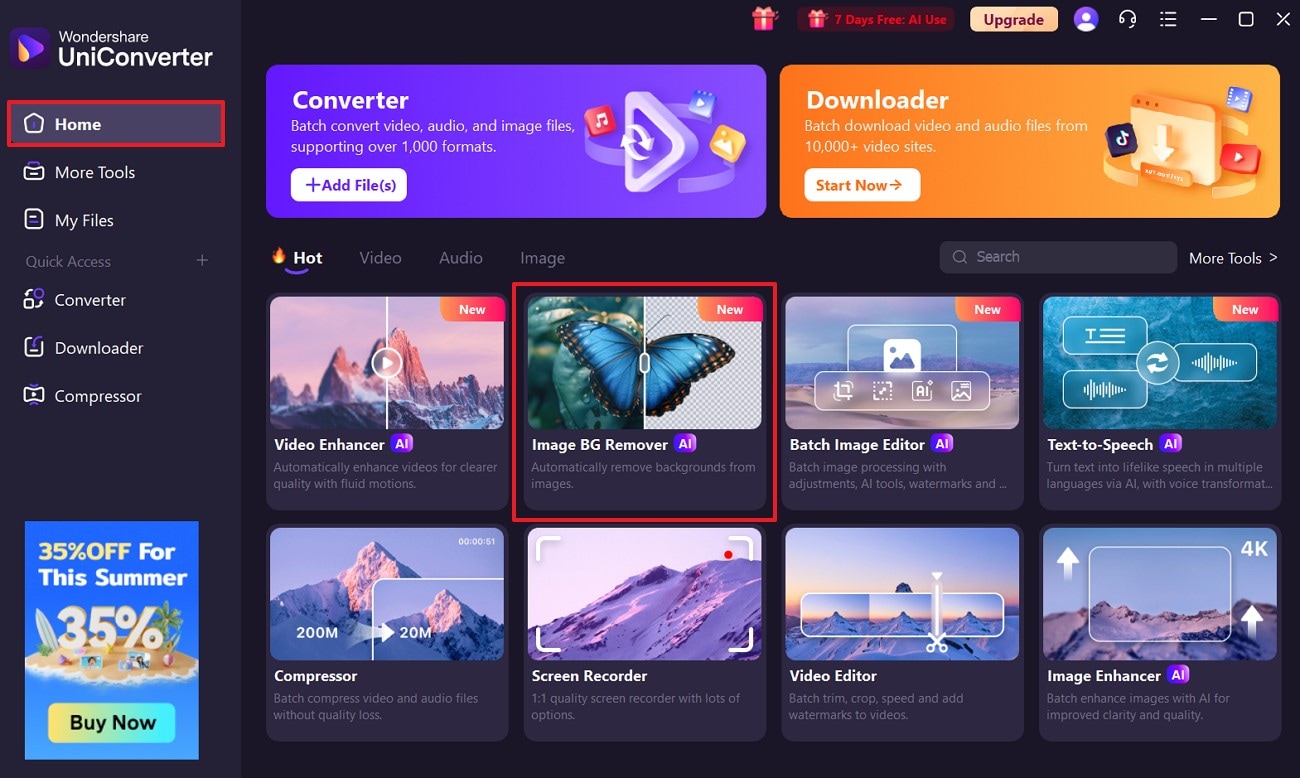
Step 1. Open the Image Remover Feature and Import Image
Launch the UniConverter software on your device, and click the "+ Add File(s)" in the "Image BG Remover" feature in the "Home" tab.
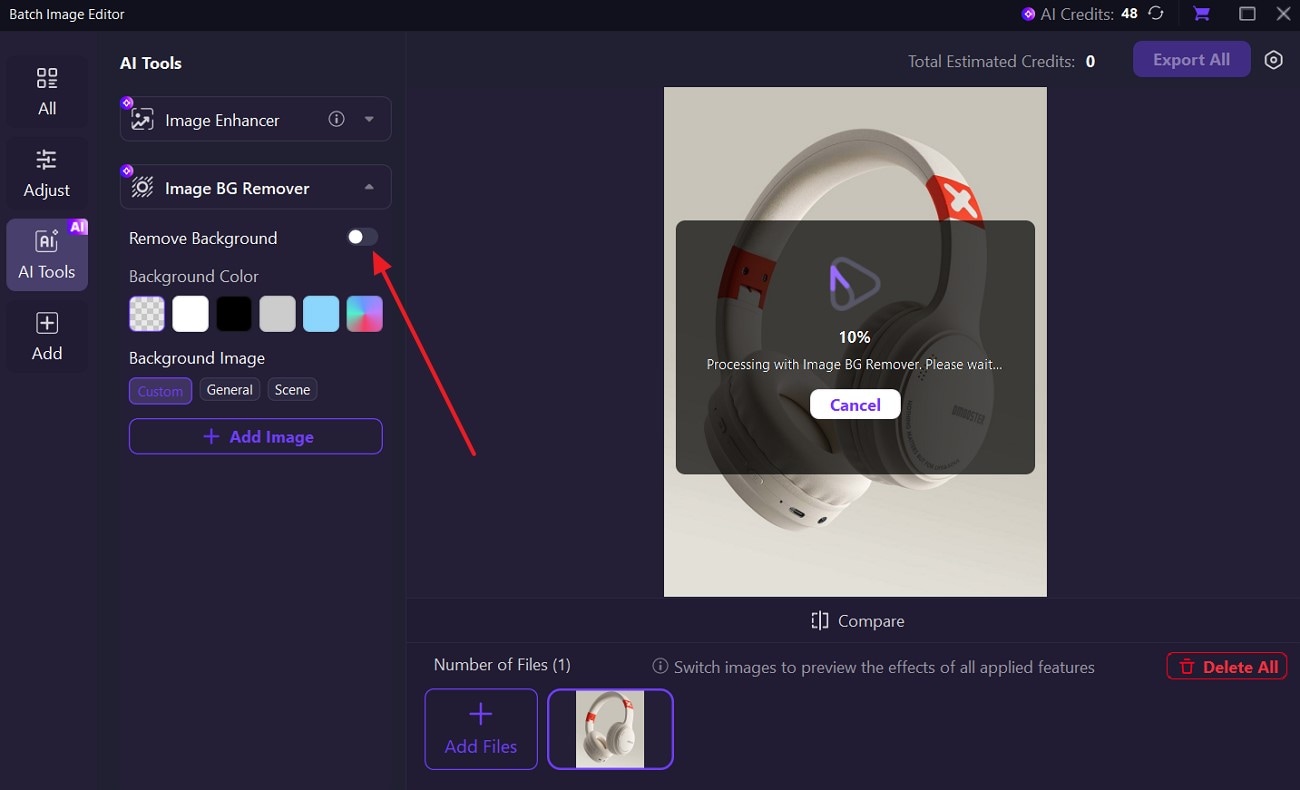
Step 2. Enable the Background Removal Process
On the next screen, toggle the “Remove Background” option and let the tool process the image and remove the image’s background.
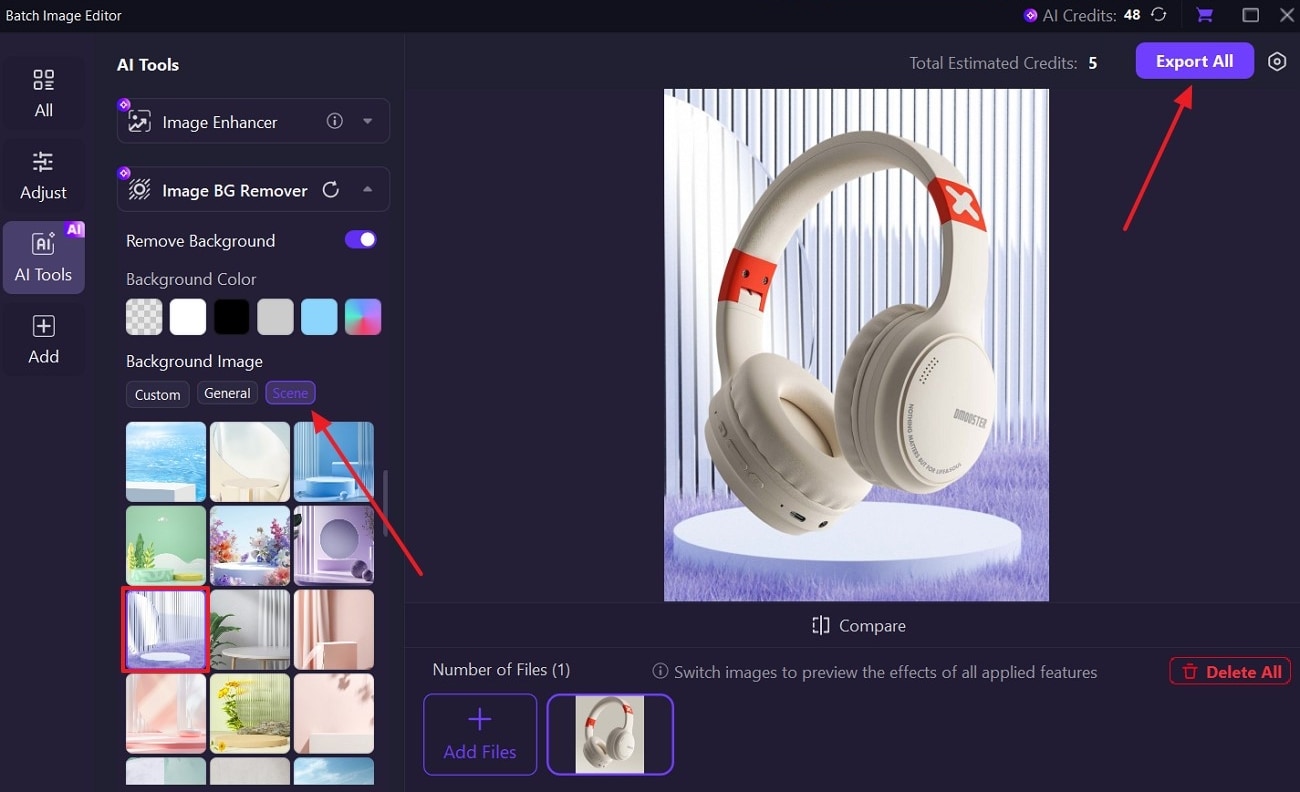
Step 3. Add a Suitable Background and Export
Once that's done, choose a tab under the "Background Image" section and pick a background for the image before pressing the "Export All" button.
Conclusion
This article sheds light on the popularity of generative fill technology and how it helps creators generate stunning art. When it comes to this AI, generative fill Photoshop has proven to provide an abundance of useful features and options. However, due to its various limitations, users turn to a more suitable and better background removal alternative, Wondershare UniConverter.
FAQs
-
1. Do I have to write a prompt every time?
No, you do not have to insert prompts each time you wish to generate a background, as it automatically fills the chosen area. It also scans and fills the area with content that is similar to the adjacent sections of the image. -
2. Is Generative Fill non-destructive?
The Photoshop AI generative fill creates a new generative layer every time you fill in a new background with a mask. Moreover, it keeps the original image intact and lets you adjust, hide, or delete the fill at any time. -
3. Does Generative Fill work offline?
You cannot work offline with the Photoshop generative fill as its AI processing is connected to its Adobe Firefly cloud account. Therefore, Wondershare UniConverter is a better option, as it lets you seamlessly remove the background and work offline. -
4. Any tips for better results?
If you want the best background results, try keeping your selections clear and your prompts specific. Users should add short and descriptive phrases like “sunset sky” or “stone path” for AI to specifically generate those backgrounds.

