


Creating a transparent background in GIMP allows you to remove unwanted backgrounds, leaving only your subject visible. This technique is essential when you need images that can be placed on any background without showing a distracting box around them.
Transparent backgrounds are perfect for logos that need to blend seamlessly with different-colored websites, product images that pop on various marketing materials, and custom stickers for digital or print projects. Making background transparent in GIMP isn't complicated once you understand the process, which we'll break down into simple steps in this guide.
In this article
- Prepare the Image: Add an Alpha Channel
- Select the Background to Create Transparent Background in GIMP
- Delete the Selected Background
- Export the Image with a Transparent Background
- Verify Transparency Worked
- Advanced Tips for Cleaner Transparent Backgrounds
- An Easier Way to Make a PNG Background Transparent
- FAQs about GIMP Invisible Background
Part 1. Prepare the Image: Add an Alpha Channel
If you want to make background transparent in GIMP, the alpha channel is your starting point. It tells GIMP which parts of your image should be see-through. Without it, even if you erase parts of your images, they won't actually become transparent.
Why the Alpha Channel is Essential
The alpha channel is the backbone of transparency manipulation in GIMP. It is indispensable when creating a transparent background in GIMP, as it defines which parts of your image are visible and see-through.
Without an alpha channel:
- Erased areas appear white instead of transparent
- Background elements cannot show through
- Masking operations fail to create true transparency
The alpha channel functions as a grayscale map where black (0) represents complete transparency and white (255) indicates full opacity. When you need to create a transparent background in GIMP, your first step must be adding an alpha channel to your layer.
Remember that your final image must be exported in a format that supports transparency, such as PNG, to preserve your transparent areas.
How to Add it in GIMP
Here is how you you can add Alpha in Gimp:
Step 1
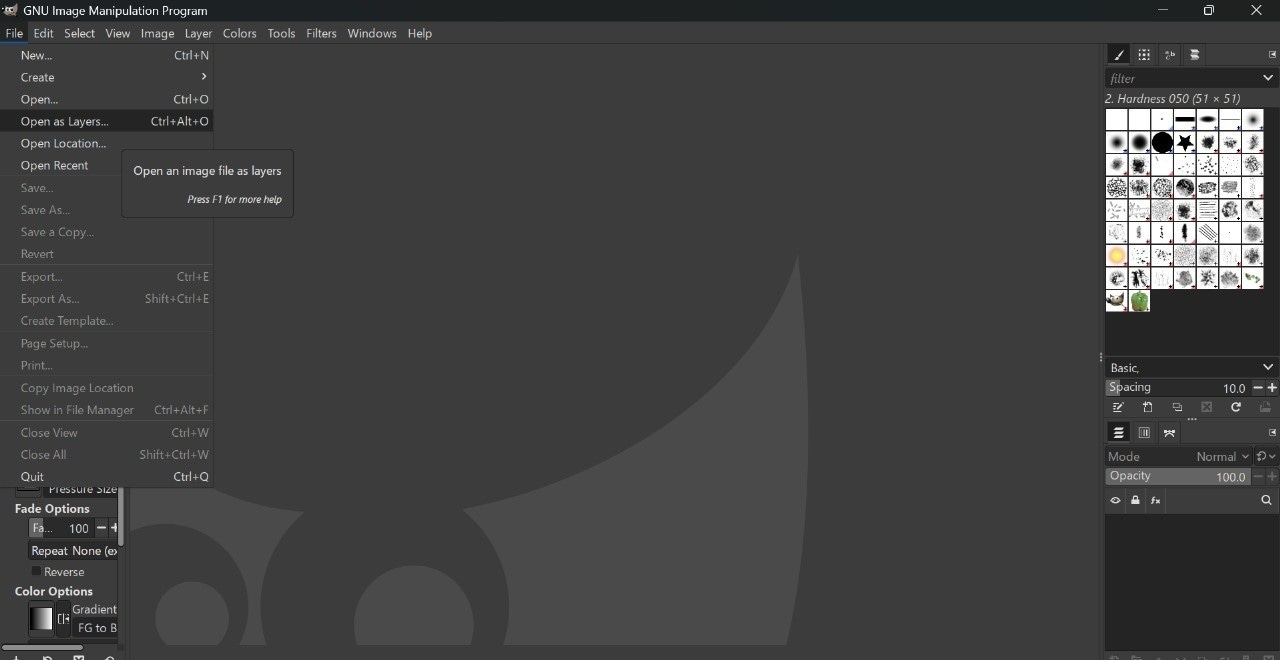
Install GIMP on your system and click the "file > open image as layer" option in the upper right corner.
Step 2
Choose a file from the desktop and double-click the image to upload.
Step 3
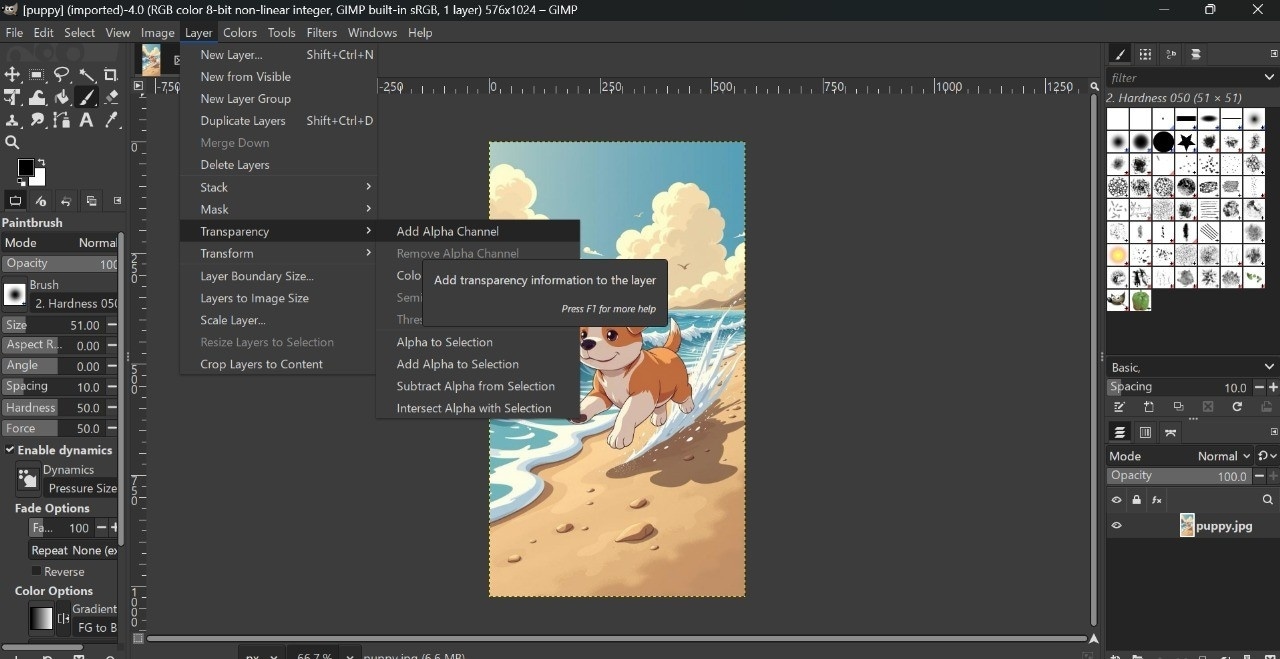
Navigate to "layer > transparency > add alpha channel."
Verify The Transparency Layer is Enabled
To verify that the transparency layer is enabled:
- Check the Channels panel: you should see "Alpha" listed.
- When you delete parts of the image, you should see a checkerboard pattern, indicating transparency.
Part 2. Select the Background to Create Transparent Background in GIMP
To make background transparent in GIMP, the first step is to select the background accurately. The right tool depends on your image. Whether it's a solid color or a complex scene, GIMP offers multiple selection tools to help you isolate your subject cleanly.
1. Use the Fuzzy Select Tool for Solid Backgrounds
The Fuzzy Select Tool (Magic Wand) selects areas of similar color, ideal for solid backgrounds. Here is how you to use Fuzzy Tool to create GIMP invisible background:
Step 1
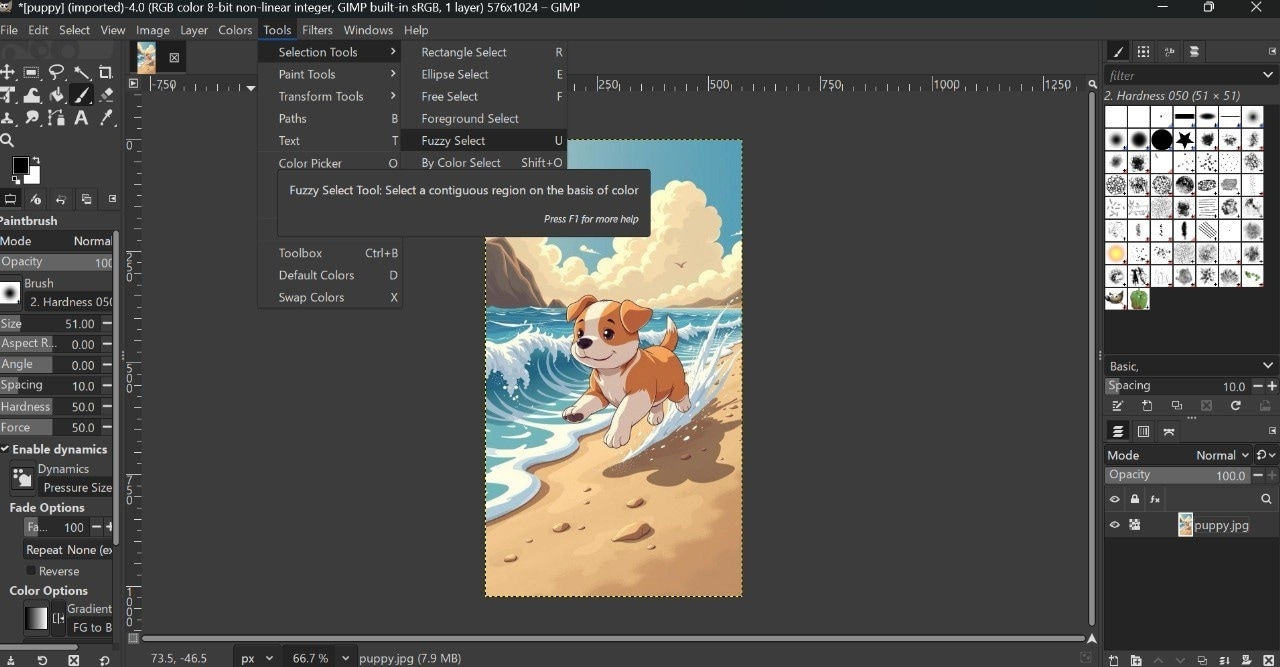
Select the Fuzzy Select Tool from the toolbox ( or simply press U).
Step 2
To control selection sensitivity, click on the background and adjust the "Tool Options" threshold.
Step 3
Use Shift to add to the selection, and Zoom in for precise selection.
2. Use the Paths Tool or Foreground Select for Complex Subjects
Use the Paths Tool or Foreground Select Tool for subjects with intricate edges or mixed backgrounds. Below, we will discuss steps for both Paths and Foreground Select Tool:
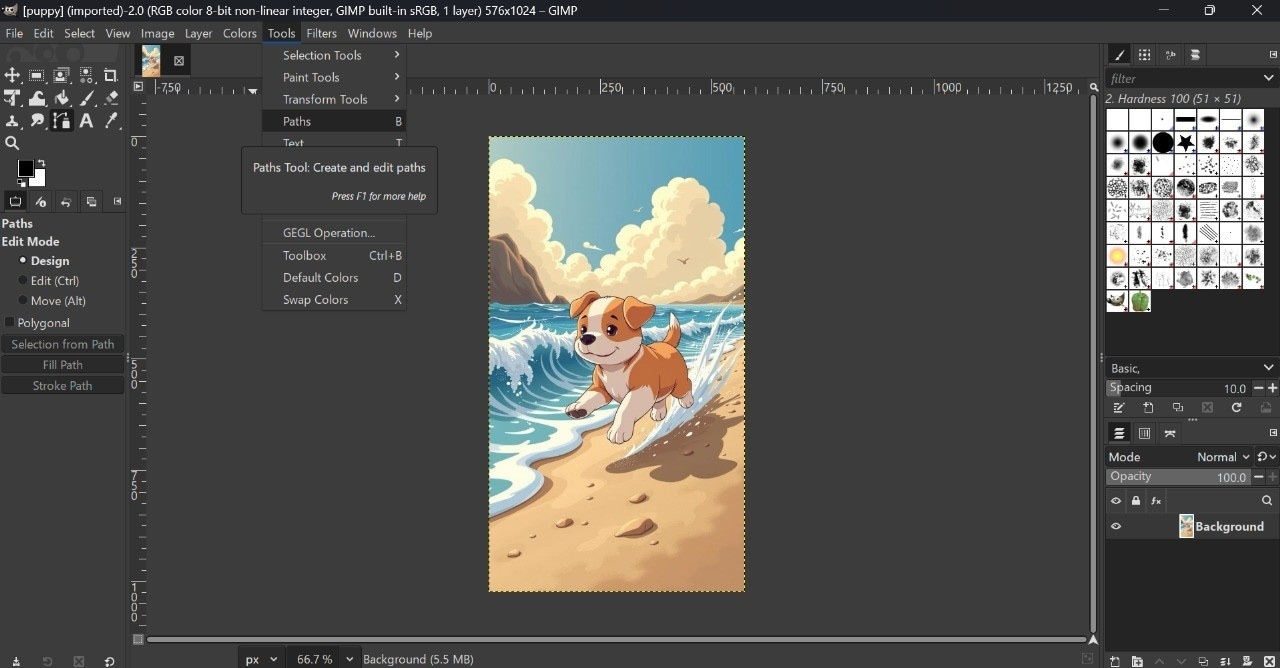
Path Tool Steps
Step 1
Select the Paths Tool or press "B" in the "Tool" option.
Step 2
Click points around your subject to create a path and connect the last point to the first to close the path.
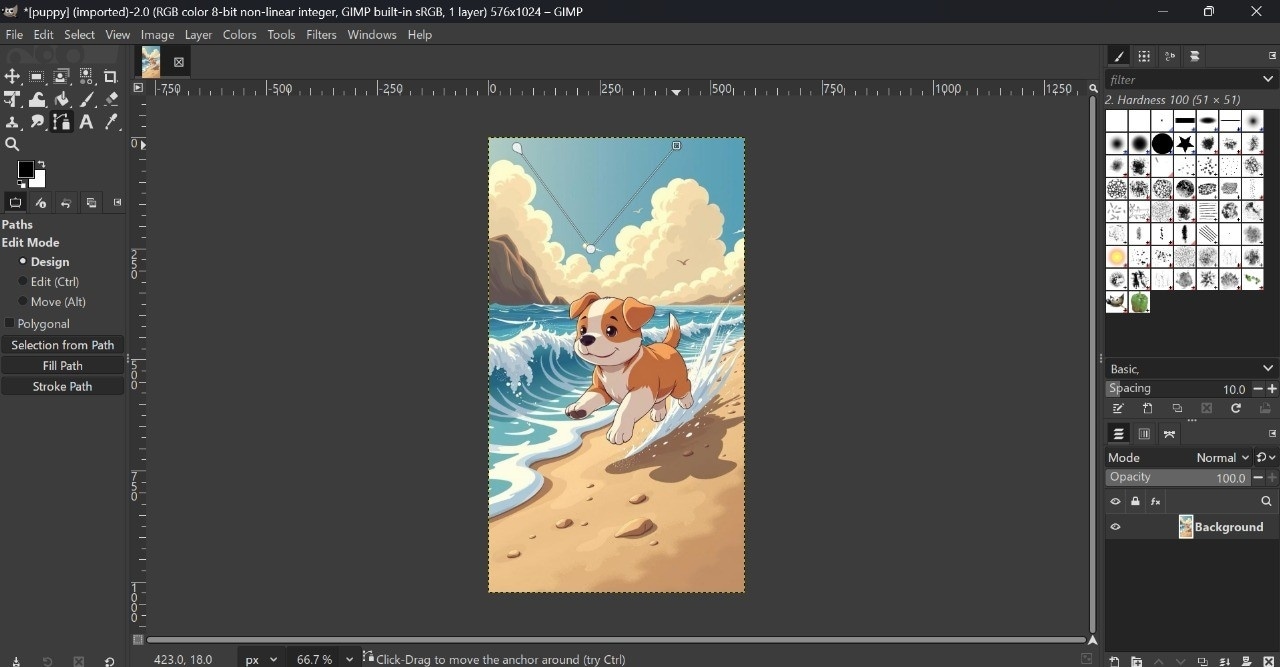
Step 3
Click "Selection from Path" in the Tool options to convert the path into a selection.

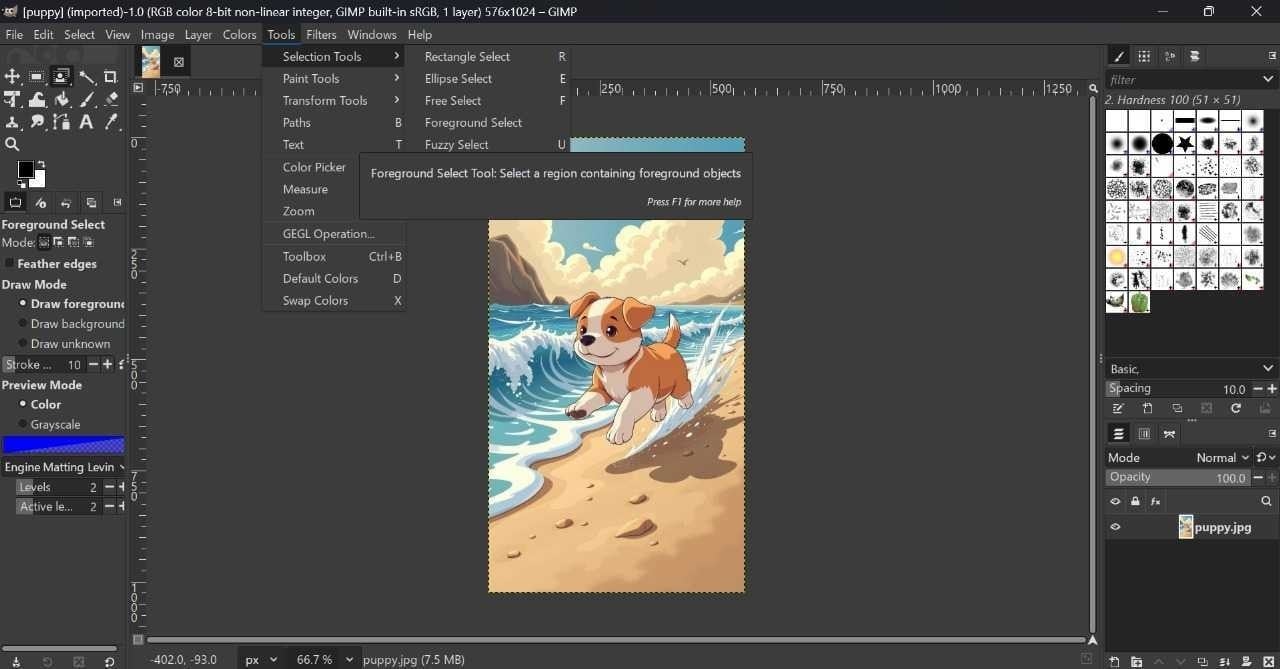
Foreground Select Tool Steps
Step 1
Navigate to "Tools > Selection Tools > Foreground Select."
Step 2
Draw a rough outline of your subject and press "Enter." Then, paint over the outline to refine the selection.
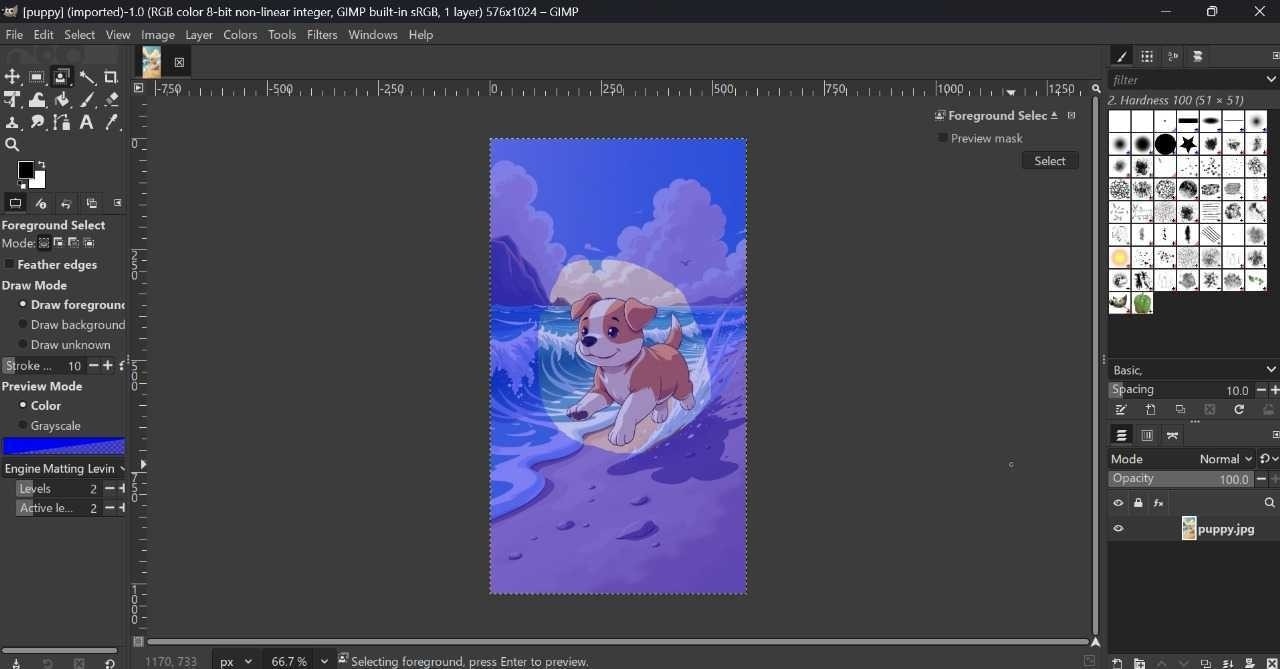
Step 3
Press "Enter" again to finalize the selection.
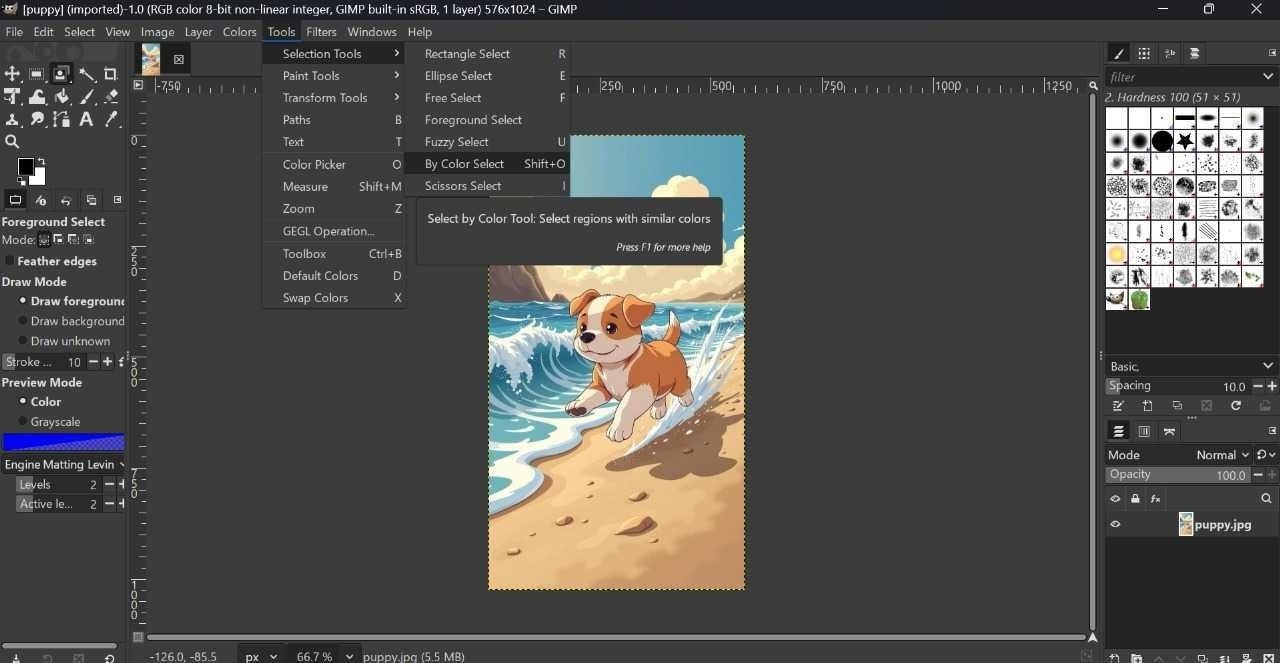
3. Combine with "Select by Color" for Uniform Backgrounds
The "Select by Color" tool selects all areas of the same color, which is useful for backgrounds with a consistent color. Here is how you can enable the tool for a uniform background:
Step 1
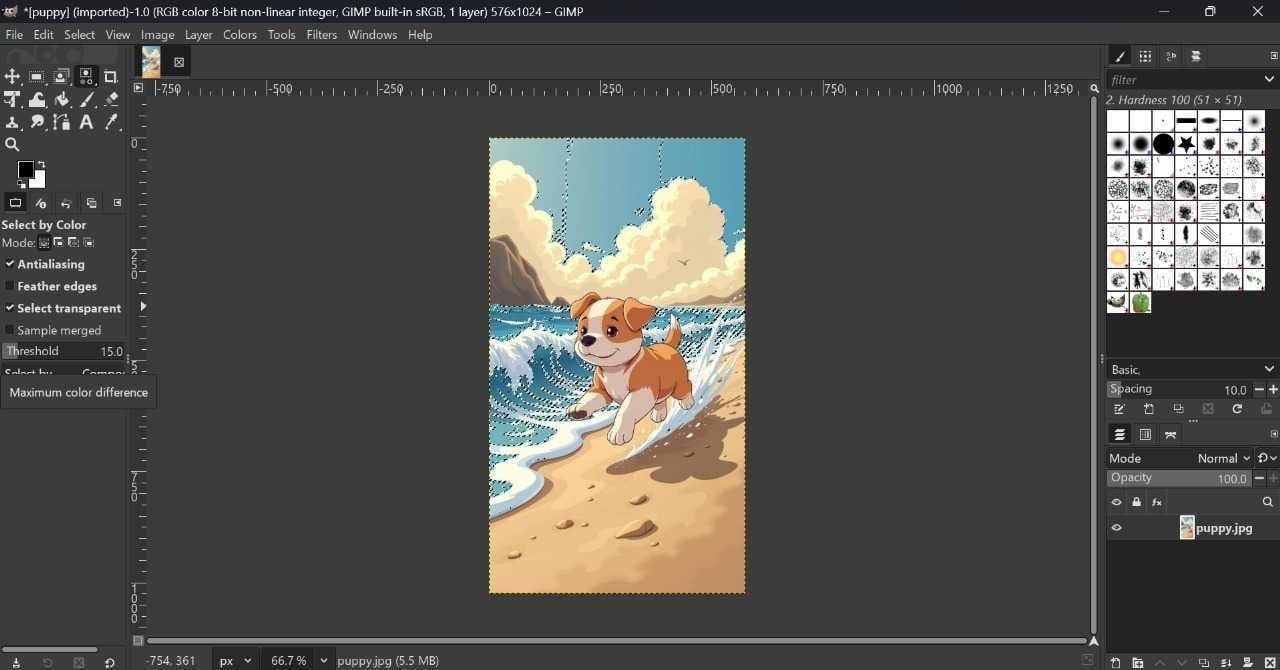
Select the tool from "Tools > Selection Tools > By Color" or press Shift+O.
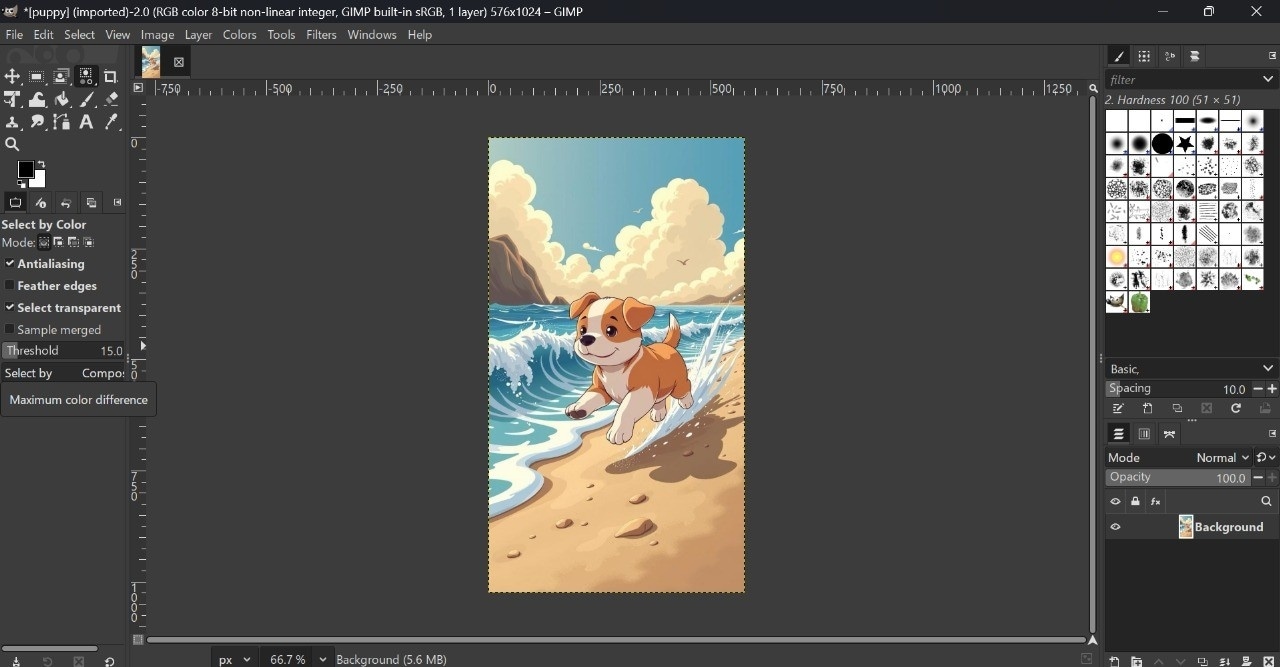
Step 2
Click on the background color and adjust the "Threshold" in the left menu as needed.
Part 3. Delete the Selected Background
Once you have selected it, it is time to remove the background and make the PNG background transparent. A simple press of the Delete key reveals the transparency, and you can fine-tune edges with tools like Feather, Eraser, or even a layer mask for non-destructive editing.
- Press the "Delete" key to remove the selected background. The area will show a checkerboard pattern, indicating transparency.
- If enabled, the Feature option can be used for clever edges. "Select by Color" is visible in the left-hand bar; if not, go to "Select" and enable Feather.
- You can also use "Eraser" from "Tool > Paint Tools" for manual touch-ups or press Shift+E.
- For non-destructive editing, right-click the layer and choose "Add Layer Mask > Selection" to mask the background instead of deleting it.
Part 4. Export the Image with a Transparent Background
To preserve your image with transparent background, exporting the image correctly is key. GIMP supports transparent backgrounds, but you'll need to choose the right format and settings, PNG is your best to maintain that clean, see-through look.
- To export the final file, go to "File > Export as."
- Choose PNG format, as it supports transparency.
- For best results, ensure "Save color values from transparent pixels" is unchecked, then click the "Export" button.
Part 5. Verify Transparency Worked
After using GIMP to remove the background and make it transparent, it's important to double-check that it worked. Open your exported PNG in a browser or viewer. Here is how you can know whether transparency worked or not.
- Open the exported PNG in a web browser or image viewer. You should see the checkerboard pattern or the background of the view, not a white box.
- If the image still has a white background, ensure the alpha channel was added and the correct areas were deleted before exporting.
Part 6. Advanced Tips for Cleaner Transparent Backgrounds
If you want to create a polished and professional transparent background in GIMP, a few advanced techniques can make all the difference. From anti-aliasing and layer masks to powerful plugins like Remove.bg, these tips will help you clean edges and fine-tune transparency with precision.
1. Anti-Aliasing Tips
- Enable antialiasing in the "Filters > Enhance > Antialiasing” menu to smooth jagged edges when selecting.
- Access dedicated antialiasing through "Filters > Enhance > Antialias" to smooth jagged edges in existing content
- When using the Text Tool, ensure antialiasing is enabled for more readable, professional-looking text.
- Choose appropriate interpolation methods (Linear, Cubic, or Sinc) when scaling images to maintain smooth edges.
- Adjust brush hardness settings—softer brushes create naturally antialiased edges while hard brushes create pixel-perfect edges.
- Use the Quick Mask mode with gradient transitions to create partially selected areas with smooth edges.
- When exporting for the web, maintain antialiased edges, such as PNG, using formats that support them.
- Remember that the pencil tool deliberately avoids antialiasing for pixel art, while the Paintbrush tool applies it automatically.
2. Clean Edge Refining With a Layer Mask
- Create a layer mask by selecting your layer and choosing Layer > Mask > Add Layer Mask.
- Use the Brush tool (shortcut key P) on the mask, painting with white to reveal areas and black to hide areas.
- Adjust brush hardness for edge quality—softer brushes create gradual transitions, while harder brushes create defined edges.
- Fine-tune precise edges by zooming in and reducing brush size for detailed work
- Use the gradient tool on the mask to create smooth transitions between transparent and opaque areas.
- To soften harsh edges, apply a Gaussian Blur filter (Filters > Blur > Gaussian Blur) to the mask.
- Try the Quick Mask mode (Shift+Q) for complex subjects to visualize your selections as you refine them.
- Remember that grey values in the mask create partial transparency—use this for subtle edge blending.
- Adjust the mask using Colors > Curves to modify edge contrast for final refinements.
3. Use Plugin (e.g., Remove.bg Plugin for GIMP if Applicable)
Adding plugins like Remove.bg to GIMP can automate and significantly improve your workflow for removing backgrounds. Here is a simple, step-by-step guide to help you install and use Remove.bg plugin for GIMP:
1. Download the Plugin
- To download the plugin file, visit a trusted source, such as the Remove.bg website or the plugin's GitHub page.
2. Locate the GIMP Plugin Folder
- Open GIMP, go to "Edit > Preferences."
- Expand the "Folder" section in the left sidebar and select "Plugins."
3. Install the Plugin
- Copy or move the downloaded .py file into one of the plugin folders.
- Place the .py file inside a folder named the same as the plugin.
- On Linux, make the file executable with "chmod+x remove_bg_gimp3.py”, and ensure Python support for GIMP is installed.
4. Restart GIMP
- Close and reopen GIMP so it can detect the new plugin.
5. Use the Remove.bg Plugin
- Open the image in GIMP. Go to "Filter > Remove Background> Remove Background."
- When prompted, enter your Remove. Click " BG API key " and "Save Settings" to store your key for future use.
- The plugin will upload your image to Remove.bg and return a version with the background removed.
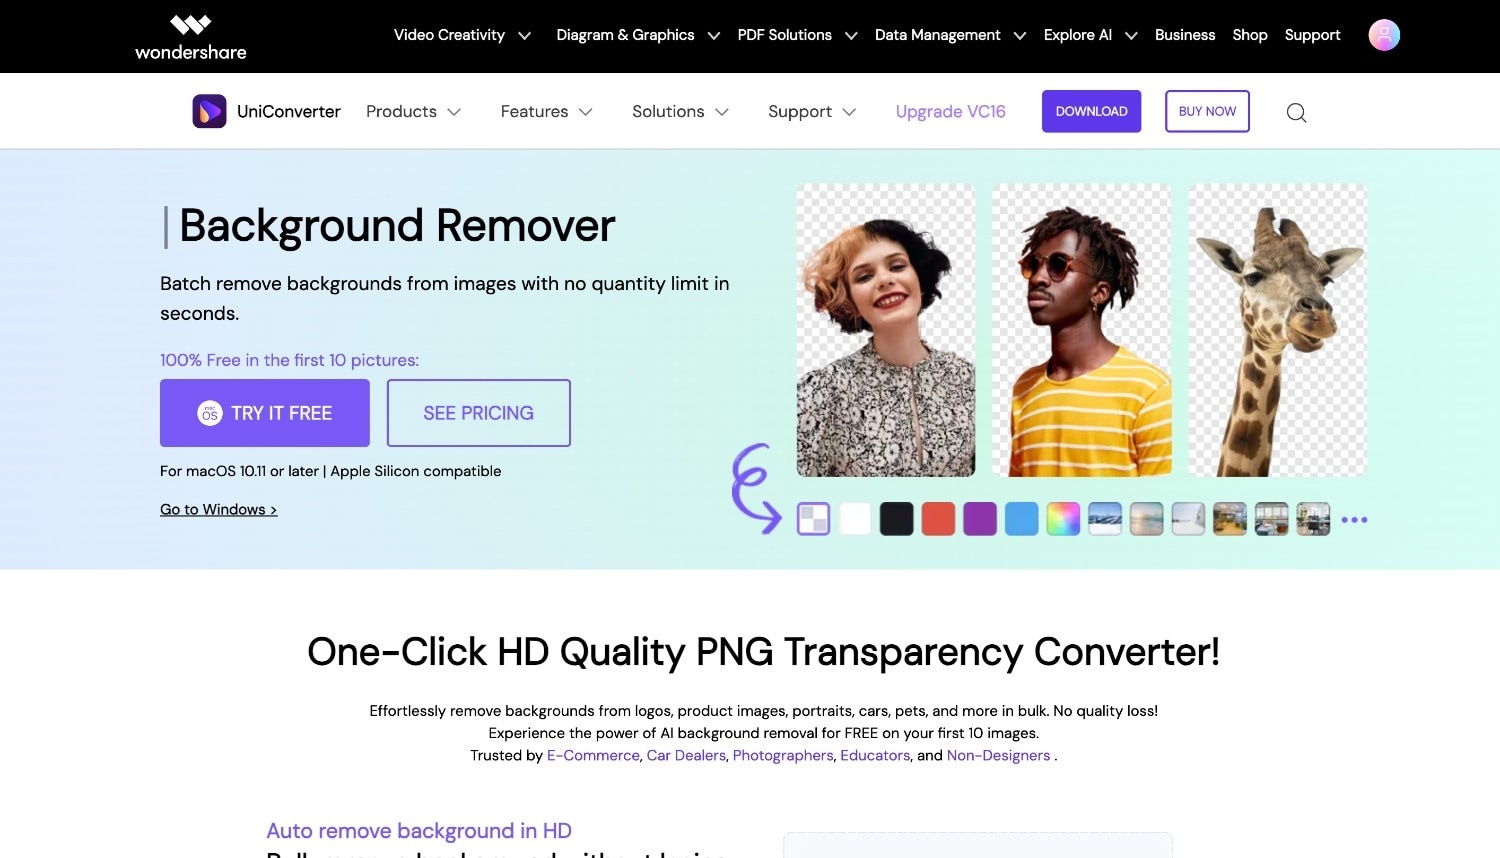
Part 7. An Easier Way to Make a PNG Background Transparent
While you can make a transparent background in GIMP using the methods we have covered, it requires technical knowledge and precision. For a beginner looking to make a transparent background for a small project, it becomes too hard to understand and use GIMP. You can try alternatives like Wondershare UniConverter's Image BG Remover for an easy and quick process. Its AI-powered technology automatically detects and removes backgrounds in seconds.
Additionally, its image enhancer adds quality to your image, and you can also add a new background from a wide range of available backgrounds.
Key Features
- One-click background removal with AI technology works on portraits, products, and complex images.
- Batch processing capabilities for removing backgrounds from multiple images simultaneously.
- Background replacement options to instantly add new colors or images behind your subject.
- Additional image tools, such as a watermark remover, image converter, thumbnail maker, and GIF maker, make it a comprehensive and easy-to-use tool.
How to Use Wondershare UniConverter to Remove Background in One Click
Follow these simple steps to remove and add a new background in one place with one click:
Step 1
On the homepage, navigate to "Image" and click "Image BG Remover."
Step 2
Click the "Add File" option to upload the image from your desktop or add multiple images simultaneously.

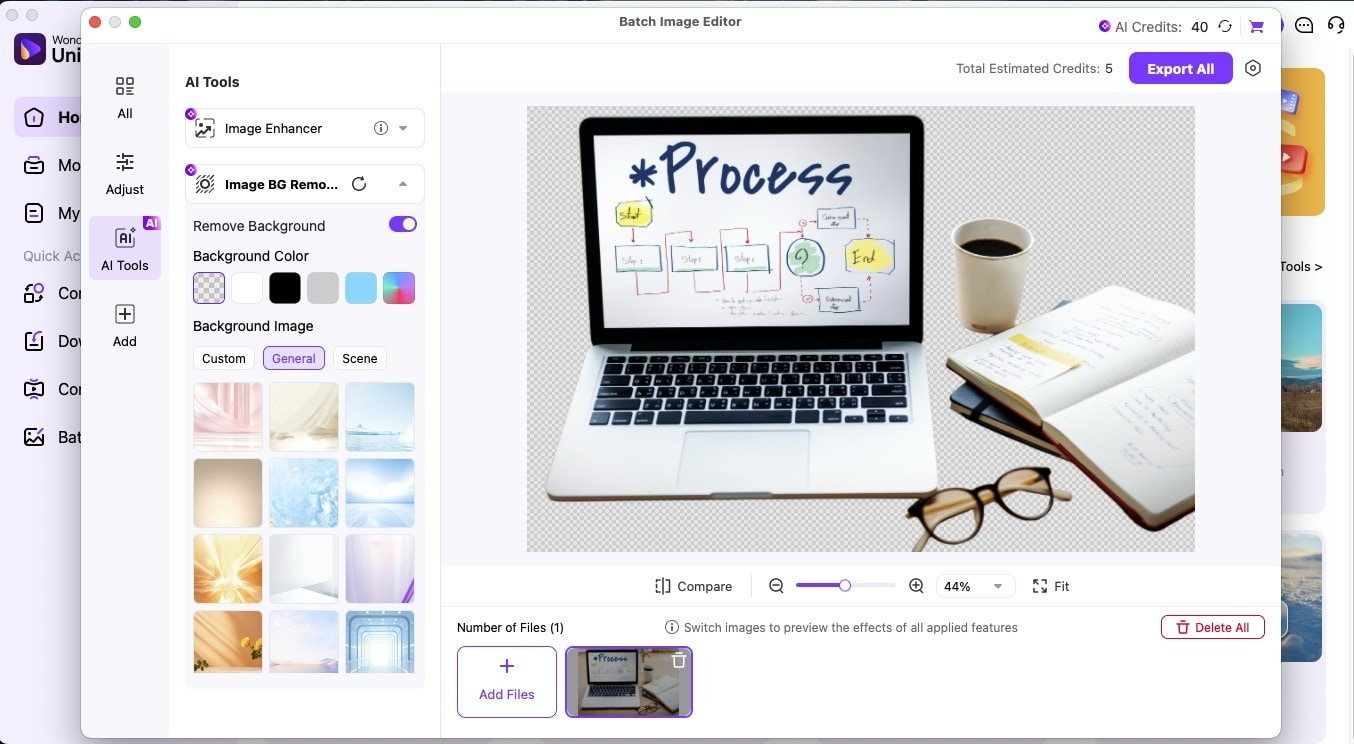
Step 3
After uploading, you get two options: "Image Enhancer" and "Image BG Remover." Click "Image BG Remover" and enable it. You can add another background to the image from custom or general to scene background options. Once done, click "Export All."
Conclusion
Creating a transparent background in GIMP gives you professional-looking images that work anywhere, though it does require following several precise steps. Remember to always add an alpha channel first, select your background carefully, and export as PNG to preserve transparency.
For those who find GIMP's learning curve challenging or need to process multiple images quickly, Wondershare UniConverter offers a streamlined alternative with its one-click AI background removal. Whether you choose the power of GIMP or the simplicity of UniConverter, you now have all the tools needed to create stunning transparent background images for your next project.

