Wondershare UniConverter
-
 Record the computer screen in full-screen mode or select a specific capture area.
 - Record screens alongside picture-in-picture effects, microphone narrations, etc.
- Convert videos in 1000+ formats with super fast speed and no quality loss.


Record Tips
- 1. Record Video +
- 2. Record PowerPoint +
- 3. Record Online Classes +
- 4. Record Audio Only +

All Topic
- AI Tools Tips
-
- AI Photo Enhancer Tips
- Voice Changer Tips
- AI Thumbnail Maker Tips
- AI Script Generator Tips
- Smart Summarizer
- AI Subtitle Generator Tips
- Watermark Remover
- Vocal Remover Tips
- Speech to Text Tips
- AI Video Tips
- AI Image Tips
- AI Subtitle Translator Tips
- Video Extractor Tips
- Text to Speech Tips
- AI Video Enhancer Tips
- DVD Users
- Social Media Users
- Camera Users
- Photography
- Creative Design
- Movie Users
- Travelling Fans
- Educational Users
- More Solutions
- Holidays and Commemoration
- Game Lovers
- Other Tips
How to Record Video in Zoom Meeting [Editing zoom video files Included]
by Christine Smith • 2026-05-20 17:37:27 • Proven solutions
Zoom is a video conferencing app that is widely used for business meetings, educational sessions, online training, social conversations, and other online communications. Several times you may need to record the Zoom session for reference, sharing, and other purposes. The host of the meeting can record the Zoom session using its built-in recording feature. For the participants to record the meeting, they need to get permission from the host for the same. Learn more about how to record video on Zoom recording as below.
- Part 1. Can you record a video on Zoom
- Part 2. How to record Zoom video in high quality
- Part 3. 3 Other useful Zoom video recorder apps for PC
- Part 4. FAQs of recording video on Zoom
Part 1. Can you record a video on Zoom?
Yes, the video on Zoom can be recorded by the host. If any participants of the meeting wish to record the video, they first need to get permission from the host. The recording feature of Zoom is available both for free as well as for paid subscribers.
The recorded video and audio can be saved to the local system, and it can also be uploaded to cloud storage like Google Drive and Dropbox. The recorded video can also be shared over the streaming services like Vimeo, YouTube, and others.
Steps on how to record video in zoom meeting:
Step 1: Open the Zoom app on your system and as a host, start the meeting
Step 2: Once the meeting is started, click on the Record button present the bottom of the window. Alternatively, if the menu is present, you can choose Record on this Computer.
Step 3: While the recording is active, an indicator showing Recording will appear at the top-left corner of the window. Even the participants will see the Recording indicator.
Step 4: At the bottom of the window, you will also see the icons for Pause and Stop. The meeting can also be stopped using the End Meeting option at the bottom-right corner.
Step 5: As the meeting end, Zoom will start processing and converting the recordings, which will be available from the folder having the recording files.
Part 2. How to record Zoom video in high quality
The default Zoom recording is done in low quality and without any options for customization. Moreover, if you are a participant, you would need to get recording permission from the host to record the meeting. To overcome these issues and record Zoom meetings in high quality, use Wondershare UniConverter. This Windows and Mac-based professional software comes with a screen recording feature that allows recording your screen activities, including zoom calls in high quality. Additionally, you can choose the customized recording settings like frame rate, quality, output format, picture-in-picture, and more.
The recorded video can be further edited as needed and also transferred and compressed.
Wondershare UniConverter - Best Video Converter for Mac/Windows
-
High-quality screen recorder with an option to record the full screen or selected portion
-
Choose customized output format for the video format, quality, and frame rate.
-
Option for recording picture-in-picture
-
Editing zoom videos is possible using the built-in editor supporting features like trim, crop, cut, adding effects, adding watermark, and more.
-
Recorded video conversion to over 1000 formats and devices
Steps to record video in high quality using Wondershare UniConverter
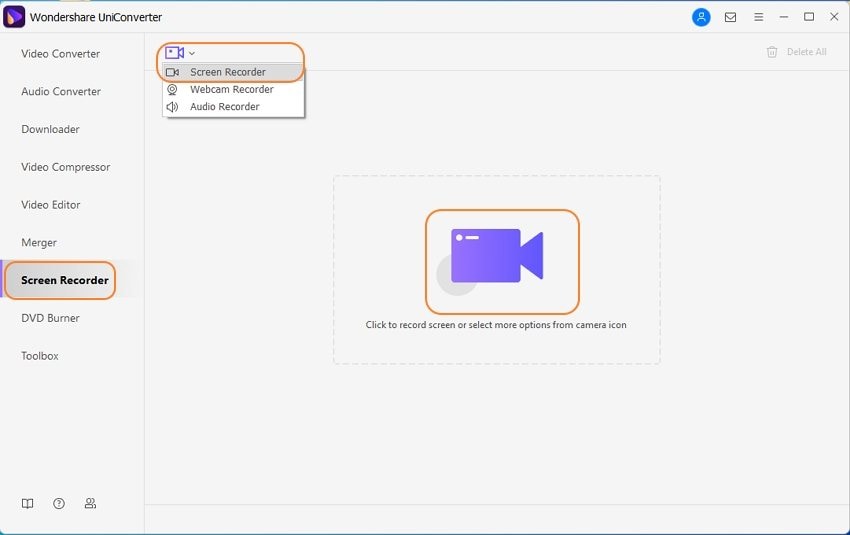
Step 1 Choose Wondershare Screen Recorder
Launch the installed software on your system, and from the main interface, choose the Screen Recorder tab. Click on the camera icon at the center or click on the drop-down arrow next to the camera icon at the top-left corner and select the Screen Recorder function.
Step 2 Choose recording settings
The recording window will now open. First, you need to choose the area to be selected. The cropper can be dragged to select the area to be captured. The center + sign will let you move the entire frame. Alternatively, you can also enter the exact width and height of the area to be captured. To capture the entire screen, choose Full Screen at the Custom tab.
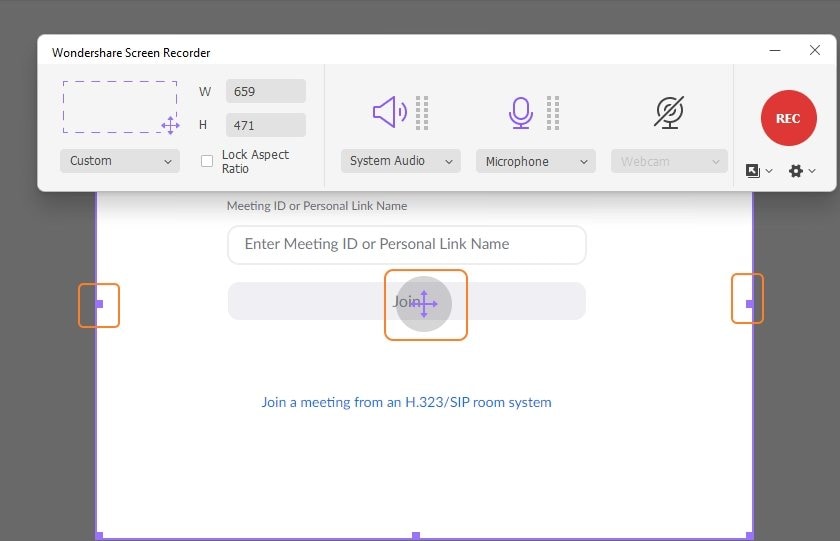
Choose the audio sources from the respective drop-down menu. To add voice narration during the recording, choose the internal mic or use the external microphone from the Microphone list.
To see yourself along with the recording, you can enable picture-in-picture mode, and for this, click on the Webcam icon and from the drop-down menu choose a camera. Output resolution can also be selected.
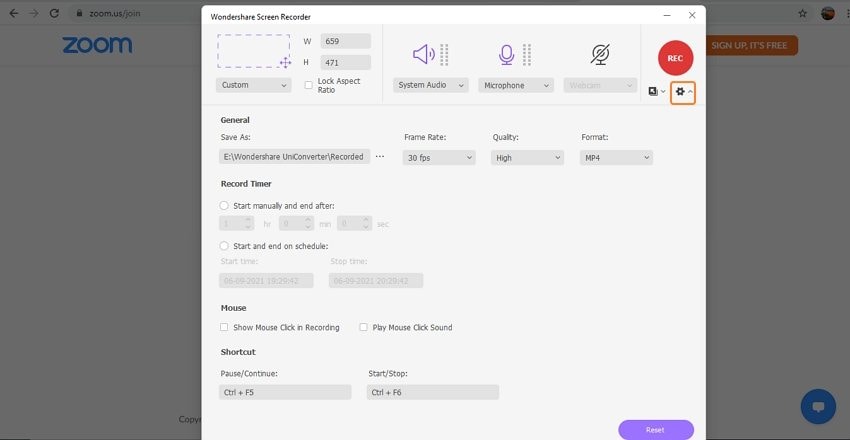
Next, click on the gear icon at the right corner to expand the options, and from here, you can choose the zoom video recording quality, desktop location to save the file, frame rate, output format, shortcuts, timer, and mouse options.
Step 3 Start Recording
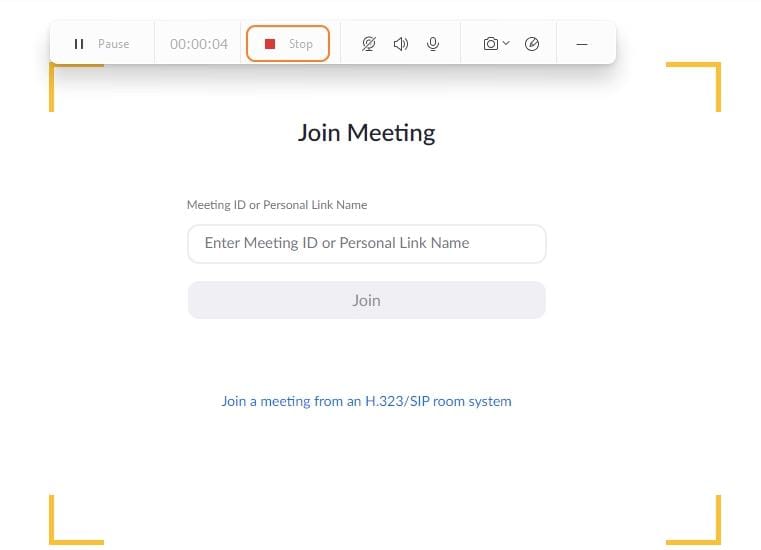
After customization options are selected, click on the REC button, and with a countdown of 3 seconds, the recording will begin. While the recording is active, you can use the top bar for further customization like capturing screenshots, mute voice, adding custom shapes and lines.

Step 4 Stop recording and process video
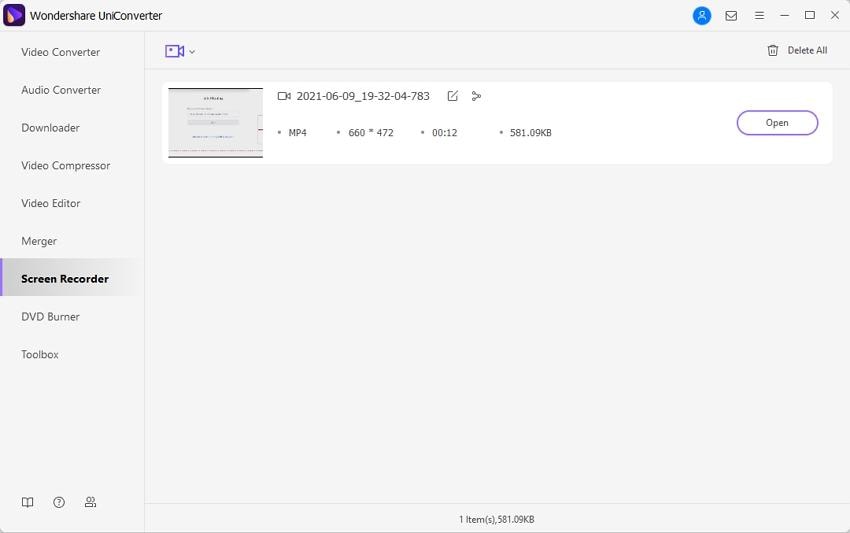
When the zoom call is over or when you wish to stop the recording, click on the red Stop button. The software will process the recording, and it will appear on the interface.
On the system, the recording video can be located from the selected folder. The recorded video can be further edited, converted, transferred, and compressed using the respective tabs on the interface. You can even edit the zoom pre-recorded video using the software.
Part 3. 3 Other useful Zoom video recorder apps for PC
Other screen recorder apps for PC are available, and for your reference, we have shortlisted the popular ones as below.
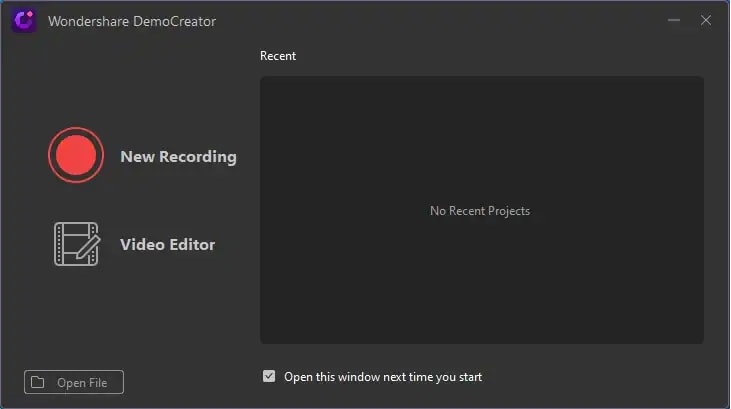
1. Wondershare DemoCreator
This is another professional tool from Wondershare that is dedicatedly created for screen recording and video editing. Compatible with Windows and Mac, the software can record video demos, presentations, games, zoom calls, and all other screen activities like a pro.
Key features of Wondershare DemoCreator:
- High-quality screen recording and video editing software
- Capture all onscreen activities, audio, and webcam
- Drawing tools can be used while capturing the screen, and dynamic stickers can be added
- Enhance videos using effects like transitions, zoom, pan, green-screen effects, and more
- Video and audio editing can be done separately
- The recording area can be customized
- Option for a spotlight feature
- Windows and Mac compatible
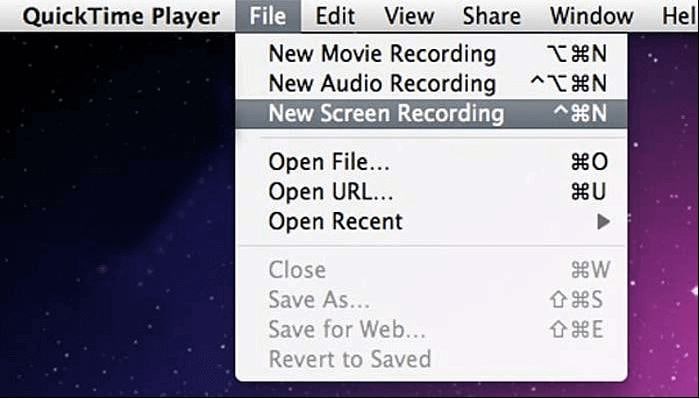
2. QuickTime Player
Though QuickTime player is the native media player app for the Mac systems, the program supports additional features well including screen recording. The zoom meeting on your Mac can be easily recorded using the player app, along with a few customization options.
Key features of QuickTime Player:
- It comes installed with Mac systems, and thus no need for any additional software download
- Simple and user-friendly interface
- Works with iTunes files
- Support recording the active screen, including the zoom call
- Choose customized video quality
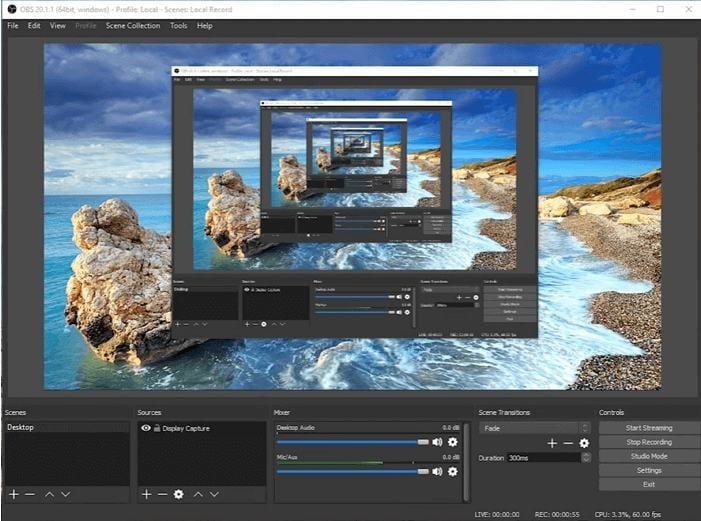
3. OBS Studio
This is free and open-source software that facilitates video recording and live streaming. Compatible with Windows, Mac, and Linux systems, the interface of the program is user-friendly, and it supports recording desktop activities, including zoom calls. You can choose to record the full screen or select a particular window.
Key features of OBS Studio:
- Free and open-source software available across platforms
- Allows recording zoom calls good quality
- Choose a particular window or record an entire screen
- Option to set up hotkeys for performing several tasks
- External camera and mic can be used
- A wide range of annotation tools supported
- Recorded files can be converted into an array of formats
Part 4. FAQs of recording video on Zoom
1. Is it possible to set zoom video recording quality?
The built-in recording feature of Zoom does not support setting the recording quality. By default, the videos are recorded in low quality with a resolution of 640 X 360 pixels. If you wish to set the Zoom video recording quality, third-party recording programs have to be used.
2. Where are zoom videos saved?
By default, the Zoom recording is saved to the following directory on your local systems.
Windows: C:\Users\ [Username]\Documents\Zoom
Mac: /Users/[Username]/Documents/Zoom
Linux: home/[Username]/Documents/Zoom
The default locations can be changed using the client settings.
For the paid Zoom subscribers, there is also an option to save the recording to the cloud storage.
3. How to upload zoom videos to YouTube?
Zoom allows sharing the recorded meetings to streaming services like Vimeo and YouTube. For uploading the videos, you need to have a Zoom desktop client version 3.5 or higher. The steps to upload zoom videos to YouTube are as follows:
Step 1: First of all, you need to locate the recording files by clicking on the Meetings and then checking the files from the Recorded tab.
Step 2: Choose the meeting to be uploaded and click on Open that will open the folder where the recorded video file is stored in MP4 format.
Step 3: Next, sign in to your YouTube account, click on the upload button at the upper right corner and choose to upload the locally saved zoom file. Alternatively, you can also simply drag and drop the file to YouTube.
4. How to solve the issue of zoom recording not converting?
As the Zoom meeting is ended, the recordings of the meetings will convert. At times there may be issues related to the recording conversion. Some of the probable reasons and solutions for the same are listed below.
Low disk space: The disk space on your system may be low, and the error code 614 will appear. To resolve the issue, you need to check the available Disk space and free some.
Invalid path: You may encounter issues related to the invalid working path or folder, and along with this, invalid network connection warming may also appear. To resolve this issue, you need to change the location of your recordings using the client settings on your Zoom and ensure that the path and folder are valid.
Some of the other common reasons for failed conversions may include turning off or closing the system during the recording conversion process, internal errors like bad data stream, logic issues, changing the name of the recording during the conversion process, and others.
6. Tips for editing zoom video recordings?
The default zoom recordings do not support any editing or customization options. So, if you want to edit the zoom video recordings, Wondershare UniConverter works as an excellent choice. This software can let you record the zoom recording with customized options, and you can even edit the recorded video as needed.
Your complete video toolbox

Other popular Articles From Wondershare


Christine Smith
chief Editor