With the growing impact of digital tech on the learning world, many noteworthy transformations have taken place in education. Online learning was starting to gain momentum even before the unfortunate pandemic hit us without warning, and now the future is digital learning.
With the competition in online learning increasing rapidly, it is important to keep your content interesting. The following guide encompasses how to make online lecture videos more engaging for your students. Head over below to learn how to make online video lectures your best work.
Part 1. Helpful tips for making a good online lecture.
Wondering how to make online video lectures your best work? We have a few tricks that might help.
1. Turn on the camera.
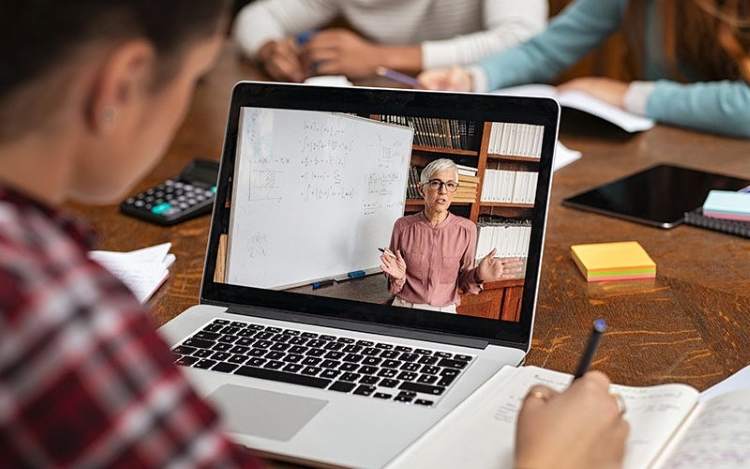
While delivering online lectures, it is best to turn on your camera while talking to your class. This way, the students can learn to take the class seriously and help promote real-time interaction.
2. Enhance your lectures using visuals.
Usually, a lecture filled with serious talks can tend to get a bit boring. Instead, you can use visuals and multimedia tools to liven up your lecture. Make use of images, animations, and videos to bring fun to your online class.

3. Assign creative tasks.
To keep the interest of the learners alive, you might have to engage them in active tasks. You can use quizzes, assessments, or other tasks to keep track of the students' progress.
4. Encourage participation.
It is necessary to keep student participation alive if you want to deliver an engaging lecture. Ask your students to participate in the discussions, address any possible queries, questions, comments, and feedback from their side. At the end of a session, you can ask them about the most difficult aspect of that lecture or what they would like to learn more about.

5. Manage time efficiently.
Time management is a crucial aspect of making engaging online lectures. Plan your classes beforehand. Break up long and arduous lectures into segments. Create weekly or monthly schedules that can help you keep track of the course.

Part 2. How to make online lecture videos for students
Wondershare UniConverter is an all-in-one toolbox for videos. The software provides an intuitive platform to convert, compress, download, merge, and edit videos easily. The tool comes loaded with useful features which can be used to refine your online learning journey.
Here is a step-by-step guide on how to make online video lectures:
Step 1 Prepare your lecture.
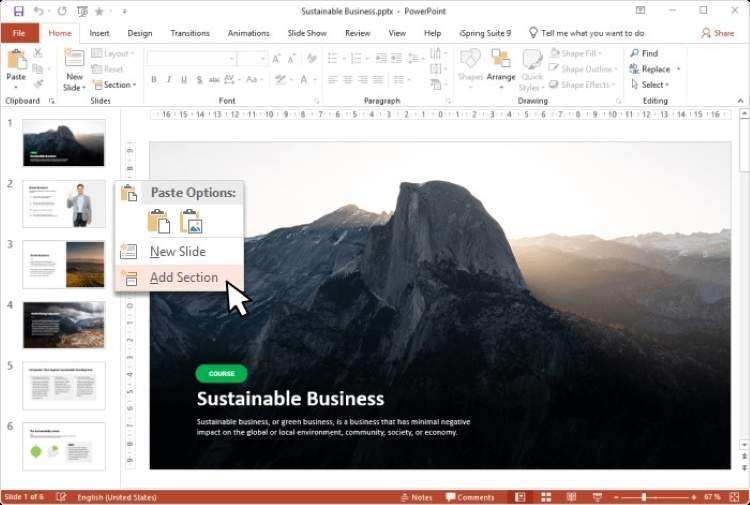
Begin by doing your homework, and prepare everything for your online lectures, such as images, slides, and drafts.
Step 2 Launch Wondershare UniConverter.
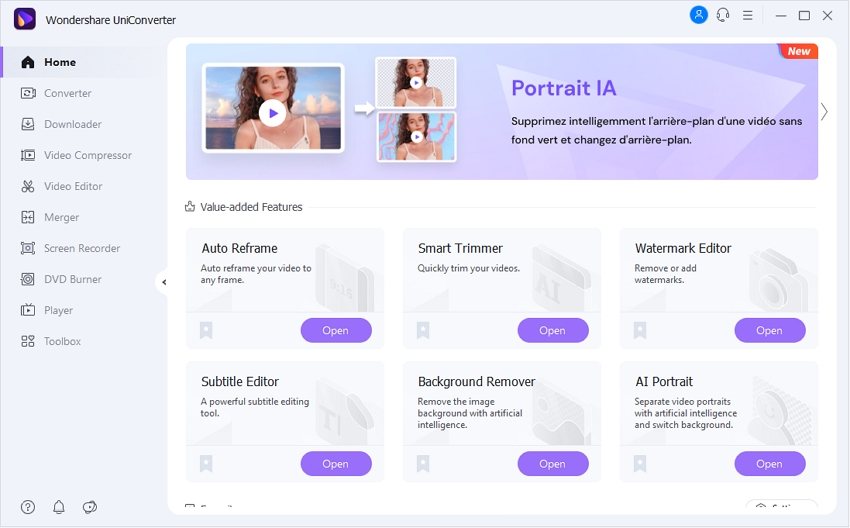
Download UniConverter from the website. Install the installation package of UniConverter and launch the program on your device.
Step 3 Record the lecture.
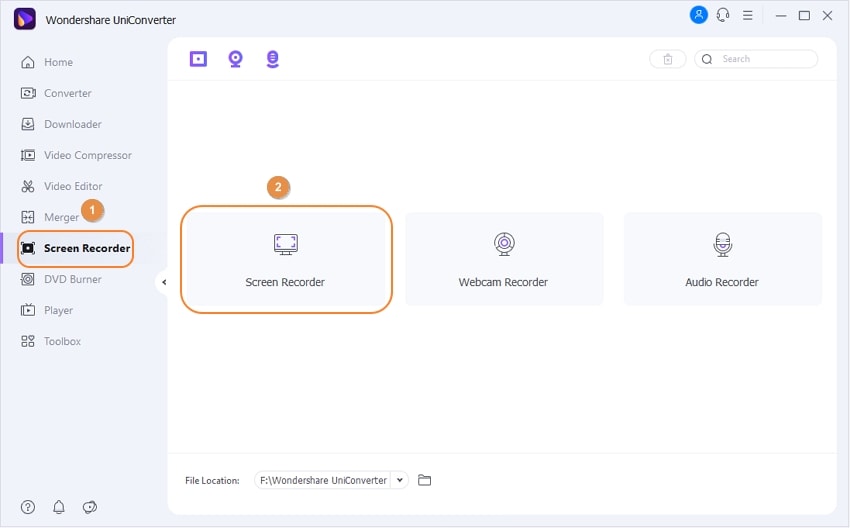
In the main interface of the program, select Screen Recorder from the left panel. Now select the option of Screen Recorder from the screen. You can now customize settings such as the aspect ratio of your screen, speakers, and microphones, etc. You can also select picture-in-picture mode, set recording timers, the output frame rate, format, and much more.
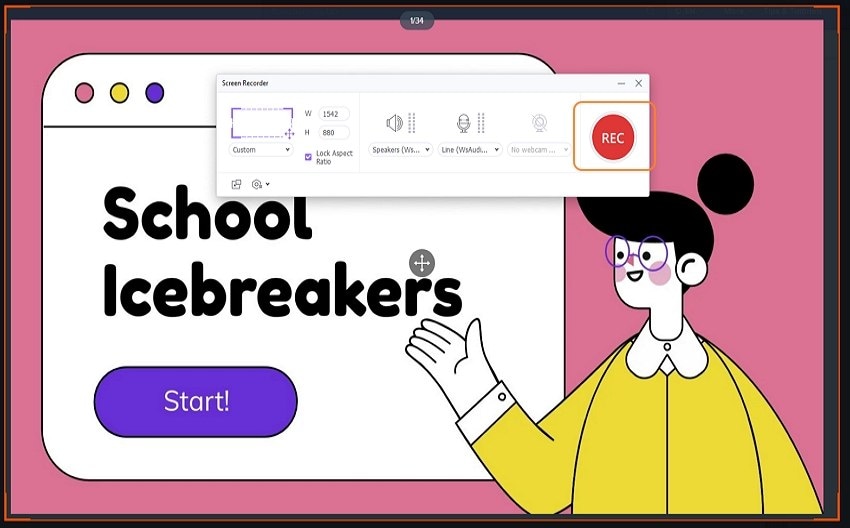
Click on the REC button to start recording. Once you are finished, click on the Stop icon to stop recording. You can now preview your recording using the Open button.
Step 4 Edit the lecture video.
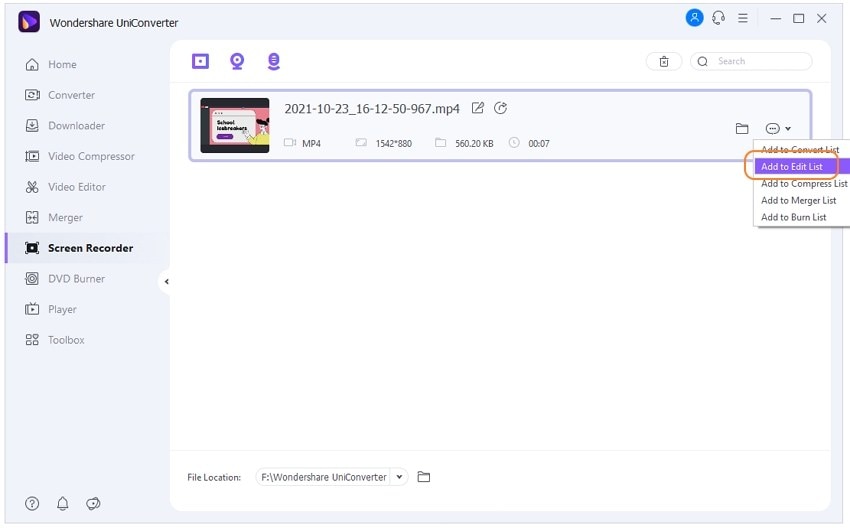
To edit the lecture video, click on the ellipsis icon on the far-right corner of the screen and select Add to edit list from the dropdown menu. Now go to Video Editor from the left pane, where you can find your recorded lecture in the list.
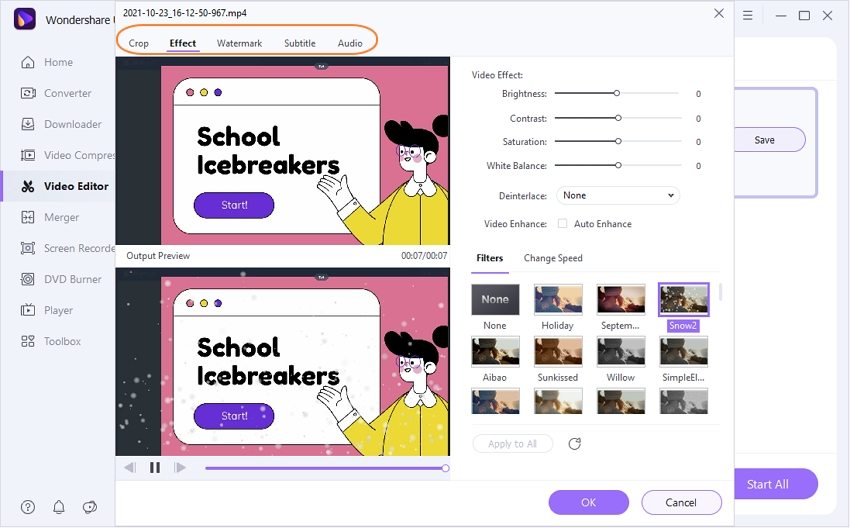
You can add subtitles or watermarks to the video, set the resolution and frame rate, or add effects of your choice. You can also trim or crop the recorded lecture.
Step 5 Output the video for sharing.
You can now save the recorded lecture video on your device for sharing with the students or upload it to Vimeo for direct sharing on the platform.

Try the all-in-one video editor Wondershare UniConverter for free now!
Over 3,591,664 people have downloaded it to try the advanced features.
What else can UniConverter do for making an engaging lecture video?
You now know how to make online lecture videos using UniConverter. But that's not all to the amazing tool. UniConverter provides various features which can make your video lecture top-tier. Here are a few examples:
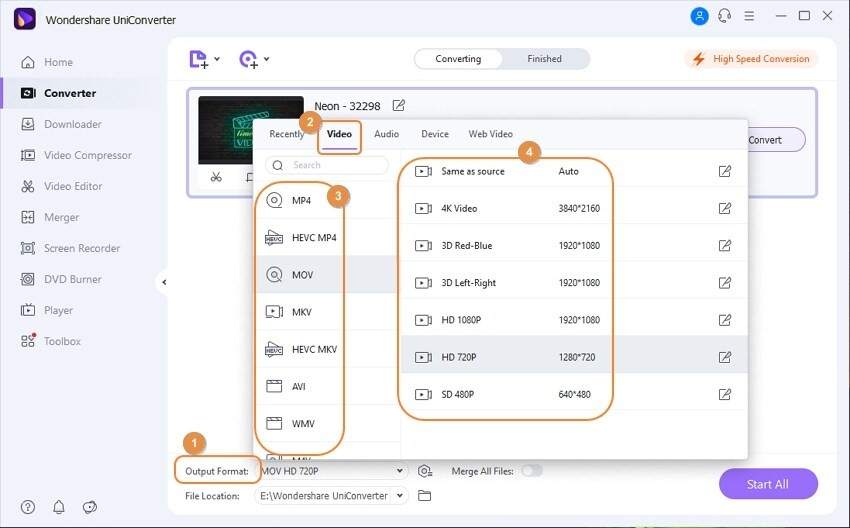
1. Convert media files.
UniConverter offers to convert your routine videos to over a thousand different file formats. Besides support for all major formats, UniConverter converted videos are also compatible with different devices, including Apple and Android. It offers up to 90x faster conversion than other platforms. You can also convert multiple videos in batches without losing the quality.
2. Compress lecture videos.
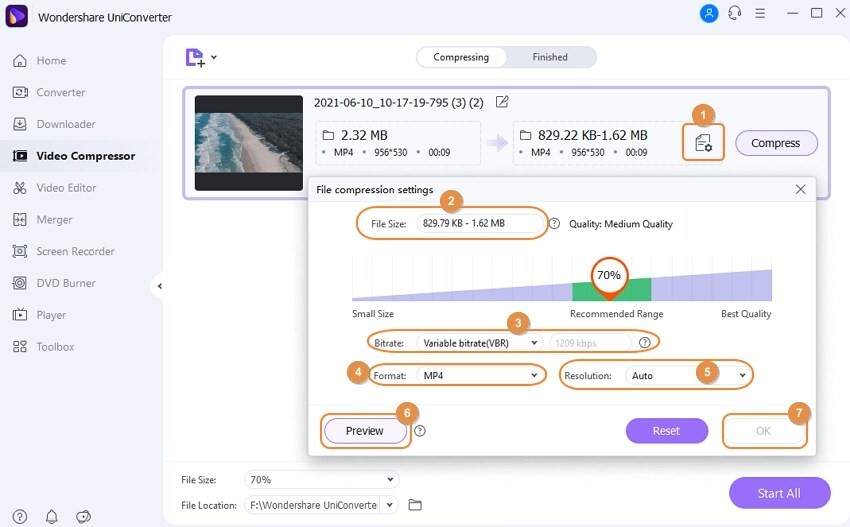
Compress large-sized lecture videos in different formats using UniConverter. You can customize the compression settings and even preview the compressed version. UniConverter also offers batch compression in high quality.
3. Download videos with external URLs.
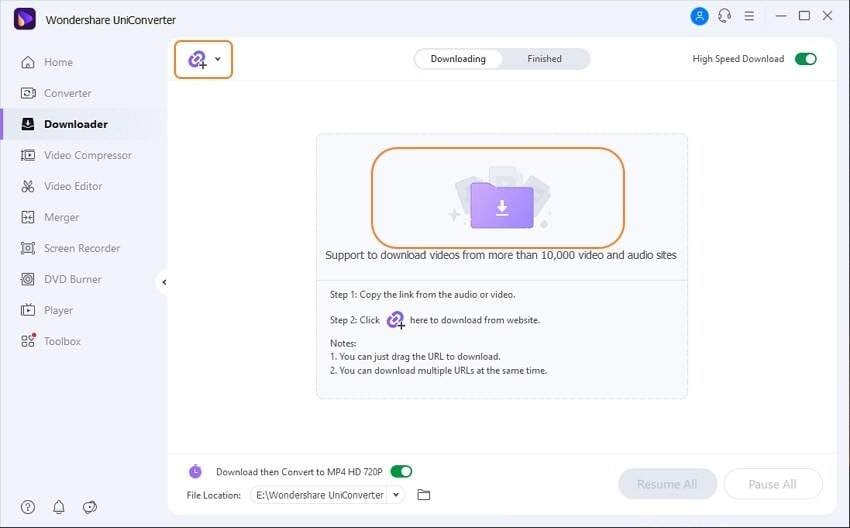
Educational videos from external sites can be saved using their URL in a format of your choice using UniConverter. You can also choose to download thumbnails and subtitles along with the video file.
4. Make GIFs for lectures.
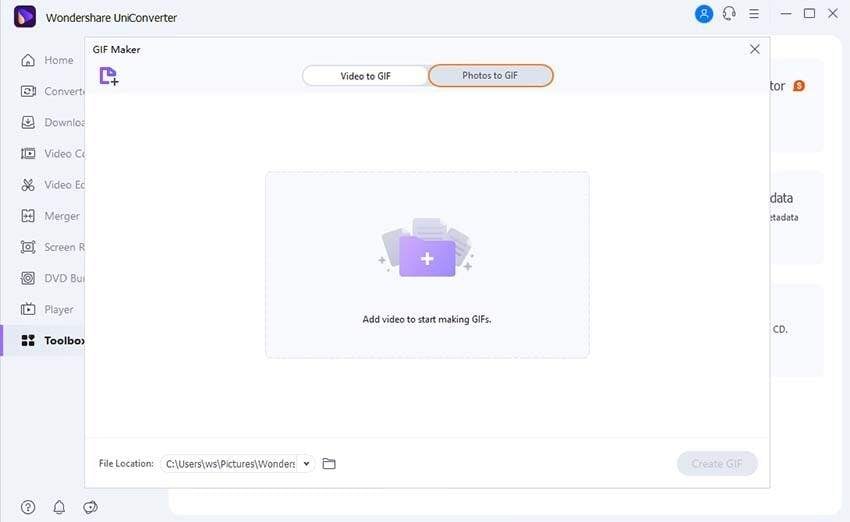
UniConverter offers a GIF maker, which you can use in your lectures to attract students. You can turn both images and videos into GIFs. With UniConverter, you can also customize the frame rate, output size, starting and ending time, and much more.
Wondershare UniConverter — Best Educational Software for Windows and Mac
Record online courses in high quality.
Converter your online course video to any format at 90X faster speed without losing quality.
Compress your video or audio files without quality loss.
Excellent smart trimmer for cutting and splitting videos automatically.
Nice AI-enabled subtitle editor for adding subtitles to your tutorial videos automatically.
Downlaod any online video for teaching from more than 10,000 platforms and sites.
Part 3. Frequently asked questions about how to make online video lectures
1. How do I make a video lecture at home?
You can easily record a video lecture at home using some recording device. You might additionally need the help of a video toolbox such as Wondershare UniConverter to edit, convert, or combine your videos.
2. Which software is used for online teaching?
Learning Management Software (LMS) is commonly used for online teaching. A few of these software includes:
- TalentLMS: TalentLMS allows teachers to create or buy their own tailored made courses for their students. It has easy to use interface, and you can monitor every student's progress separately.
- Edmodo: Edmudo, being the world's largest learning network for students and teachers in a K-12 learning facility. It provides educational material with a community network that keeps the peers connected.
- Canvas LMS: Canvas LMS provides the teaching and student-faculty with a vast and straightforward teaching platform. Its simple navigation, availability of plugins, and personalized design are exceptional to use.
- Google Classroom: Google Classroom is developed for teachers and students to help them communicate promptly with each other. It allows the teachers to share lectures, slides and even manage quizzes for the students.
- Edsby: Edsby offers a social learning environment for K-12 learning students. The iron-clad permissions and accesses and drive systems for keeping records are the main highlights of the platform.
Learn more online teaching software.
3. How do you make online classes interesting?
You can make online classes interesting using a variety of ways, such as:
- Give your learners a chance to choose topics and content.
- Encourage live feedback.
- Let students contribute to the learning process using tasks or study groups etc.
- Host fun activities and games to liven up the classroom.
- Make use of digital media tools to your advantage.
4. How do you shoot an educational video?
You can shoot a good-quality educational video using the following steps:
- Understand your students' needs and the requirements of the subject.
- Plan out everything on paper, much like a script.
- Record your voiceover so that you can easily remove the unnecessary parts out later.
- Screen record your lecture.
- Make some final editing to the video lecture.
- Share your video lecture with the learners.
Wrapping up
Online learning is undoubtedly the future of education. But making online video lectures interesting for the students might be a challenge for educators. Luckily with Wondershare UniConverter, you now know how to make online video lectures more engaging and fun for the viewers. Also, try and incorporate the tips mentioned above in your practice to get the best out of your online lectures.


