


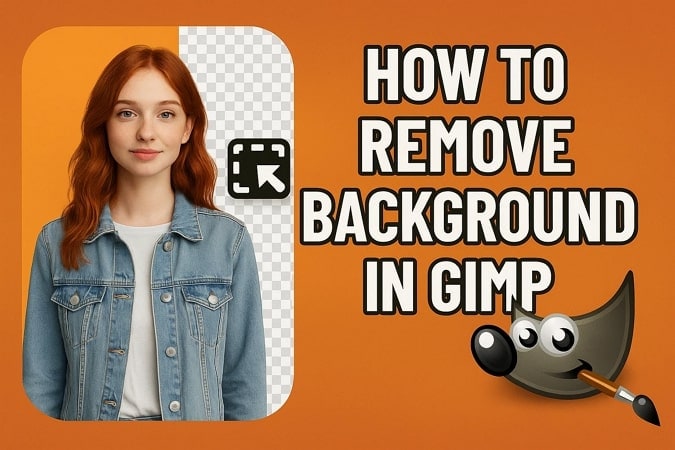
Many people face issues while removing a messy or distracting background from their images. Although tools like Photoshop can get the job done, they actually come with a hefty price tag. This is why, GIMP (GNU Image Manipulation Program) is a powerful, free alternative that gives users professional level editing without any cost.
Users often need to remove backgrounds to create clean, professional-looking thumbnails and product images highlighting the main subject without distractions. Hence in this guide, we’ll focus on how to delete background in GIMP with top 5 methods in detail. Before you review them in detail, here is a preview of these 5 methods covered in a table:
In this article
- Prepare Your Image for Background Removal in GIMP
- How to Erase Background in GIMP with 5 Methods
- Replace or Fill the Background with a Solid Color or a New Image (Optional)
- Export Your Final Image
- Common Issues & Fixes
- An Alternative Way to GIMP Erase Background (One Click)
- FAQs about Removing Background in GIMP
| Methods | Best For |
| Delete Background in GIMP Using the Fuzzy Select Tool | Simple background with strong contrast. |
| GIMP Erase Background Using Paths Tool (Manual Cutout) | Precise selections around complex or detailed subjects. |
| How to Get Rid of a Background in GIMP with Foreground Select Tool | Subjects with moderate complexity and defined edges. |
| GIMP Remove White Background with Color Tool | Removing uniform color backgrounds like white or green screens. |
| GIMP Cut Out Image with Layer Masks (Non-Destructive Editing) | Non-destructive editing requiring flexibility and refinement. |
Part 1. Prepare Your Image for Background Removal in GIMP
Before cutting out the background, preparing your image for clean and accurate results is essential. Therefore, you need to create an Alpha Channel and duplicate the layer to edit non-destructively and always have a substitute. Let’s get to know how to delete a background in GIMP and prepare your image for that:
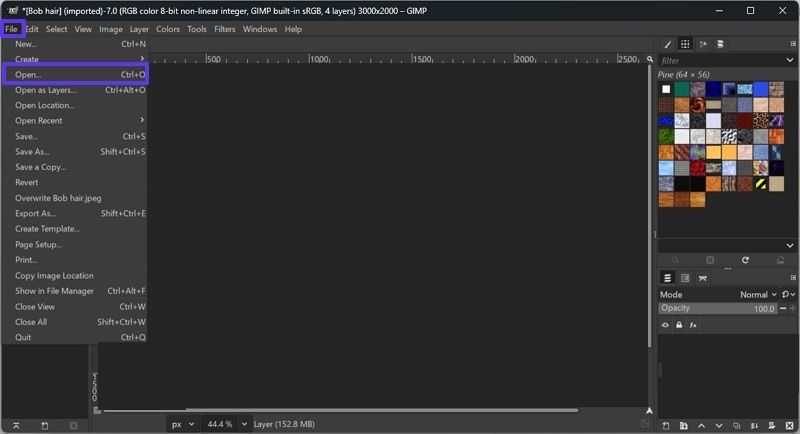
Step 1
Launch the editing program on your device and press the “File” tab at the top of the interface. Then, choose the “Open” option from the expanded menu to select the target image for removing the background.
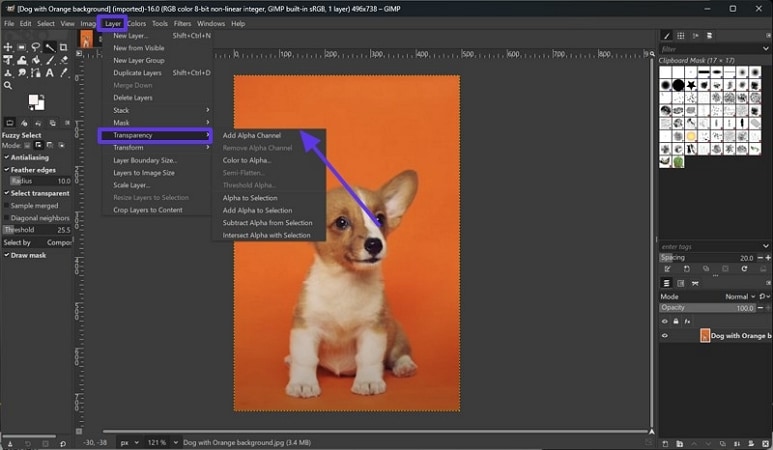
Step 2
For creating the Alpha Channel, click the “Layer” tab and choose the “Transparency” option from the drop-down menu. This will open another expanded list, and you can select “Add Alpha Channel” from there.
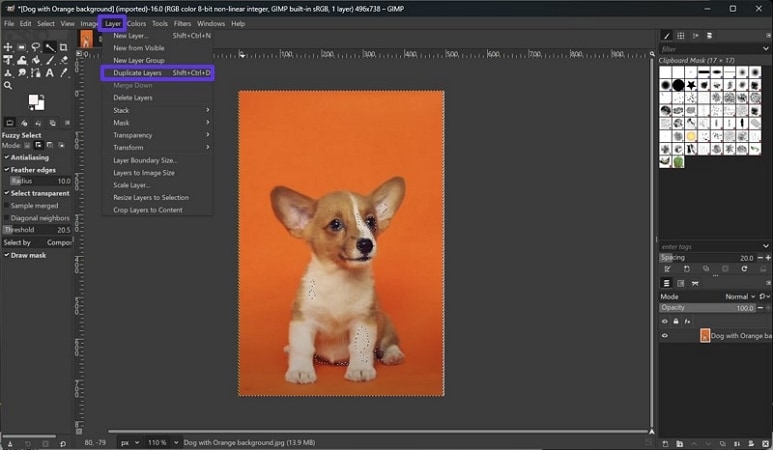
Step 3
To avoid the image from getting blurred, create a duplicate layer of your photo by choosing the “Layer” tab at the top of the screen. Afterward, press the “Duplicate Layer” option to make a copy of the image.
Step 4
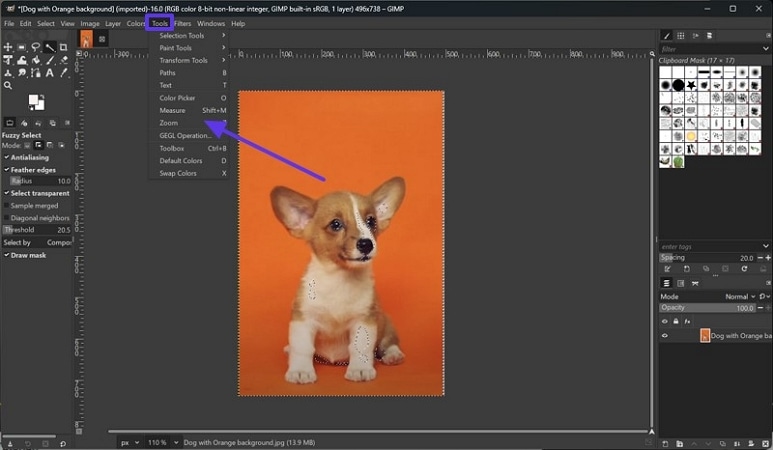
Hover over the “Tool” tab and pick the “Zoom” option to make the picture big or reduce the image size. For an enhanced editing experience, generate several layers of the image, move them around, and rename them for improved organization.
Part 2. How to Erase Background in GIMP with 5 Methods
Method 1. Delete Background in GIMP Using the Fuzzy Select Tool
Best For: Quickly removing simple, solid color backgrounds with clear contrast from the subject.
If you want to remove background in GIMP utilize “Magic Wand,” which is one of the simplest ways. It works by selecting areas of similar color, making it ideal for images with a solid background. GIMPl lets you isolate and delete the environment of the photo by using the Fuzzy tool if your photo has a high contrast background. The following section will explain the detailed steps to do this method:
Step 1
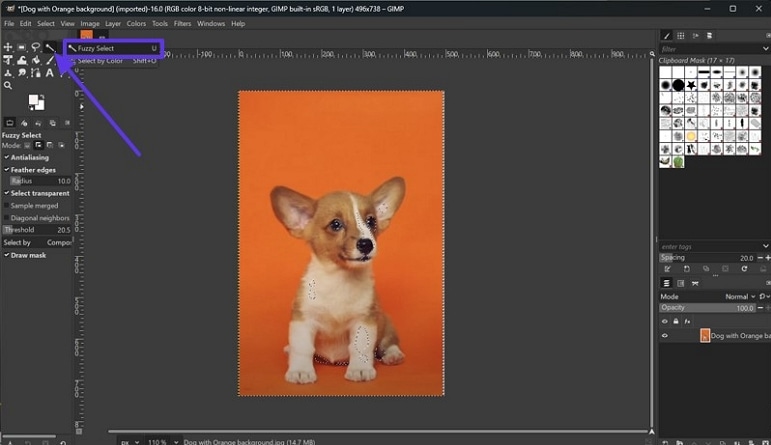
After you prepare the image, such as adding an Alpha Channel, right-click the “Magic Stick” icon to choose the “Fuzzy Tool” from the drop-down menu.
Step 2
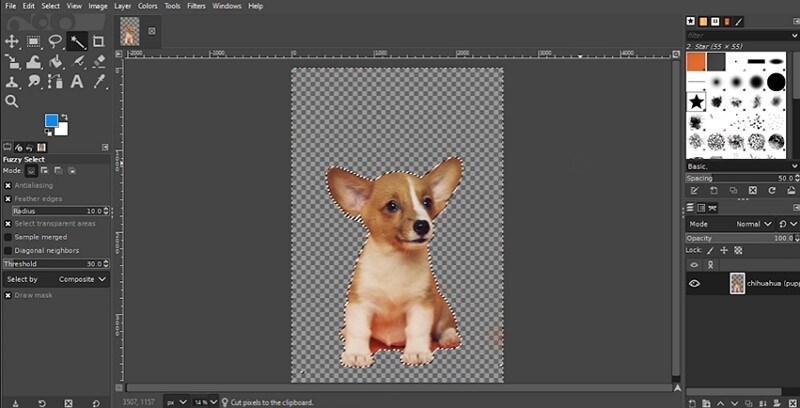
Next, enable the “Antialiasing”, “Feather Edges”, and “Draw Mask” features under the tools section to select your subject in the photo.

Step 3
After that, shove the “Ctrl + X” on your keyboard to effectively remove the background from the photo.
Method 2. GIMP Erase Background Using Paths Tool (Manual Cutout)
Best For: Cutting out objects with sharp, defined edges from busy or multicolored backgrounds.
This method gives you complete control to trace around your subjects with precision. Unlike automatic tools, this one doesn't rely on color or contrast as it uses anchor points and curves to define exactly what to keep or remove. Though it takes more time, you can get professional image with GIMP erase background by following the given steps:
Step 1
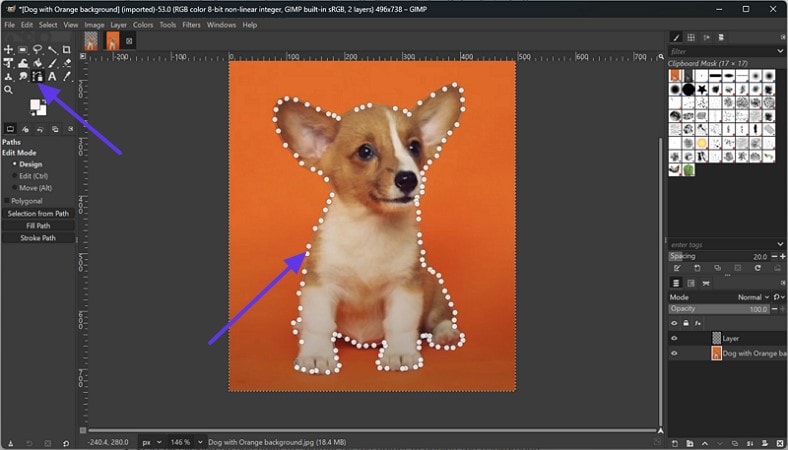
Import and prepare the image using the duplicate layer and Alpha Channel feature. Next, choose the “Path Tool” from the side panel and trace the boundaries around your subjects to create the anchor points. Once you are done with this, click the “Starting Point” to close the path.
Step 2
Afterward, press the “Select” tab from the top and choose the “Invert” option from the expanded list.
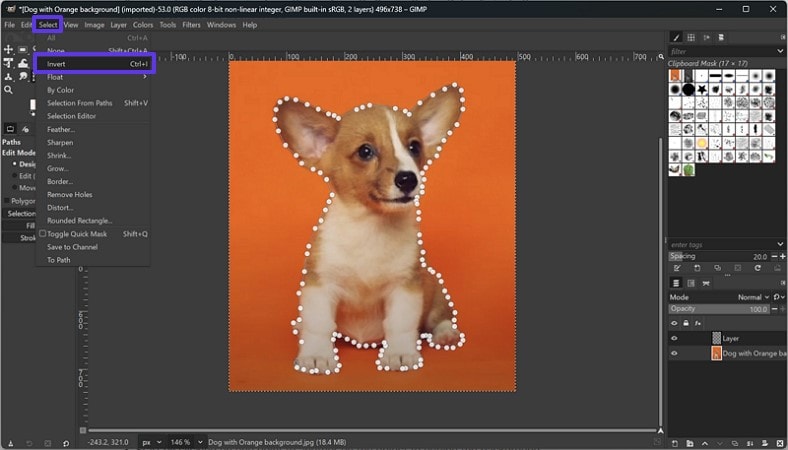
Step 3
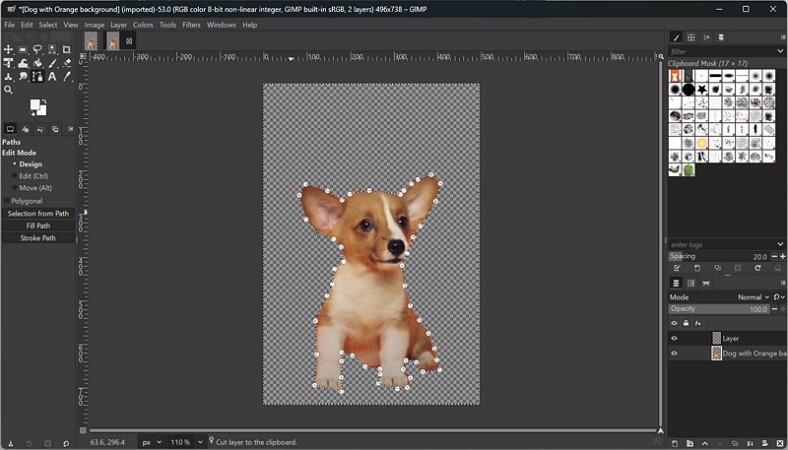
Once you are done choosing, click the “Ctrl + X” keys on your keyboard to cut the background from the photo.
Method 3. How to Get Rid of a Background in GIMP with Foreground Select Tool
Best For: Selecting subjects with soft edges (like hair or fur) from moderately complex and textured backgrounds using smart edge detection.
Another method on how to remove background from image in GIMP is the Foreground Select Tool. This semi-automatic feature helps isolate the subject from its background. Simply mark the subject, and it will intelligently detect the edges. It is a mixture of ease and precision, and you can do it by following the given steps:
Step 1
Once you prepare the picture, go to the “Tools” tab and hover your mouse over the “Selection Tool” option from the expanded list. Next, choose the “Foreground Select” option from the following drop-down menu to start the removal process.

Step 2
Afterward, enable the “Draw Background” option from the side panel and create a rough boundary around your subject. Once done, hit the “Enter” key, and the background will turn blue.
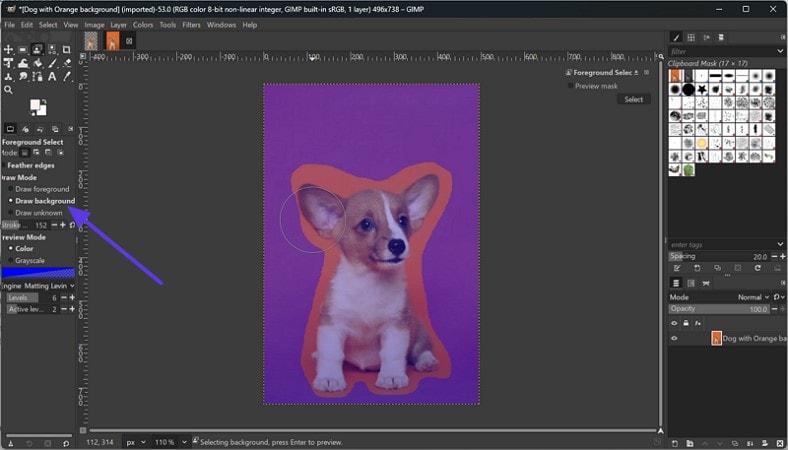
Step 3
Choose the “Draw Foreground” option and paint the inside of the subject, as the tool will use this as a sample for what to keep. Finalize the selection and click the “Select” button from the top right menu box.

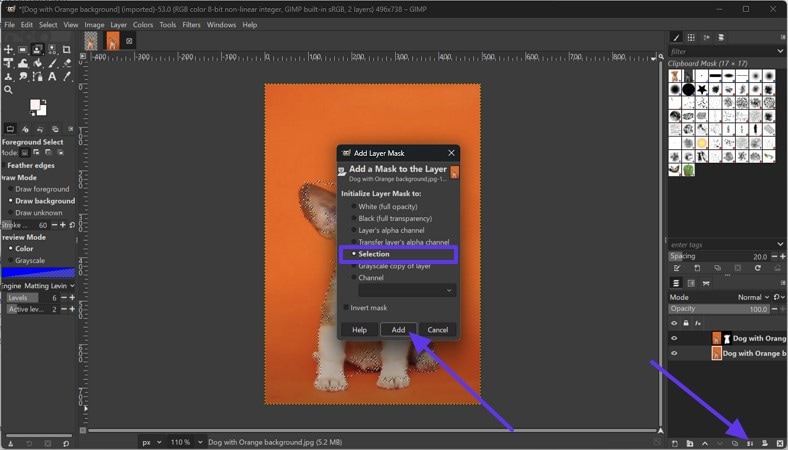
Step 4
Following up, pick the “Add Layer Mask” button on the bottom right corner and hit the “OK” button after you turn on the “Selection” option.
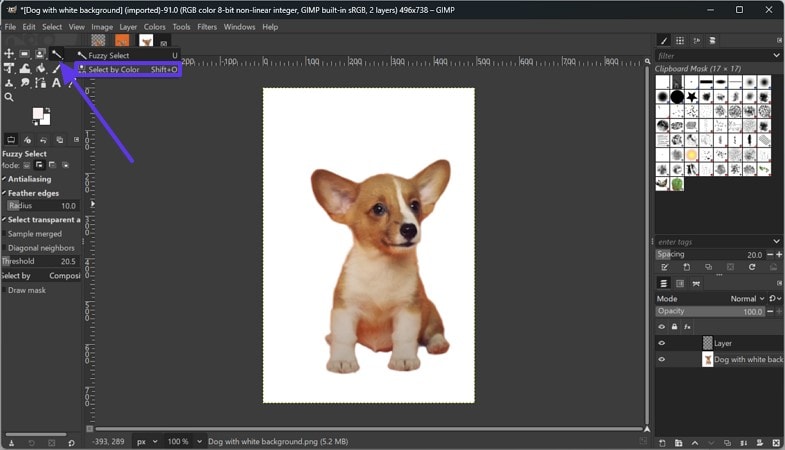
Method 4. GIMP Remove White Background with Color Tool
Best For: Instantly removing plain backgrounds like white or a single color without blending them into the subject.
The GIMP removes white background by choosing the Select by Color Tool. You can tweak the threshold for better accuracy and use options like Feather to soften the edges. This is common in product photos, scam documents, or logo files, and works by detecting and selecting the pixels that match the target color. If you want to learn, follow the detailed steps guide to learn how to use this method:
Step 1
Choose the “Magic Stick” icon and right click on it to select the “Select by Color” tool from the drop-down menu, after you prepare the image.
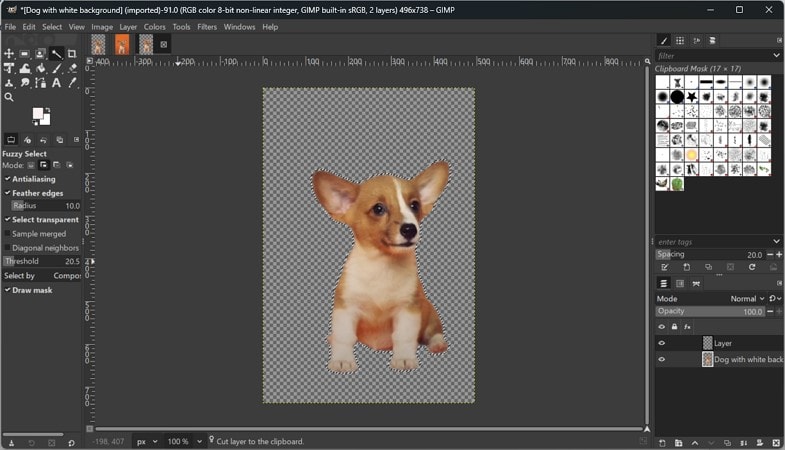
Step 2
Following up, turn on the “Draw Mask” button and press for a while on the screen to choose the target subject from the photo.

Step 3:
Now, click the “Ctrl +X” key on your keyboard to eliminate the white background from your image.
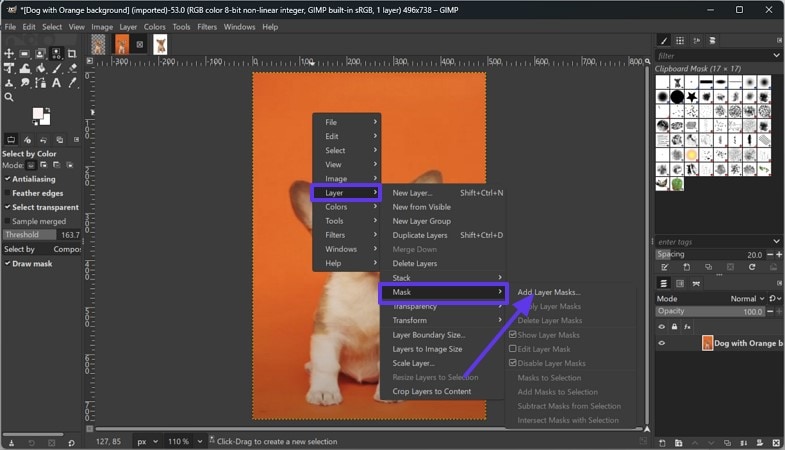
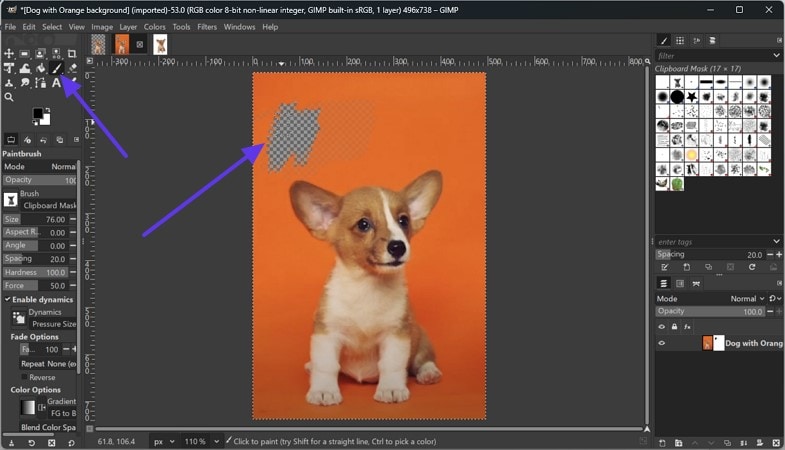
Method 5. GIMP Cut Out Image with Layer Masks (Non-Destructive Editing)
Best For: Hiding the complex backgrounds while preserving the original image data for flexible editing without damaging it.
To learn how to get rid of a background in GIMP, this method is non-destructive which means you can hide the part without permanently deleting pixels. Painting on the mask gives you full control over what's visible and hidden, and you can use white to restore and black to hide. It's perfect for detail edits or to preserve the original image for future. Let’s understand the detailed stepwise guide to use this method:
Step 1
When you view the photo, right-click on the screen and select the “Layer” option from the provided list to click on the “Mask” option. Next, choose the “Add Layer Mask” option from the extended drop-down menu to continue.
Step 2
From the pop-up menu, enable the “White (Full Capacity)” option and press the “Add” button to start the removal process.
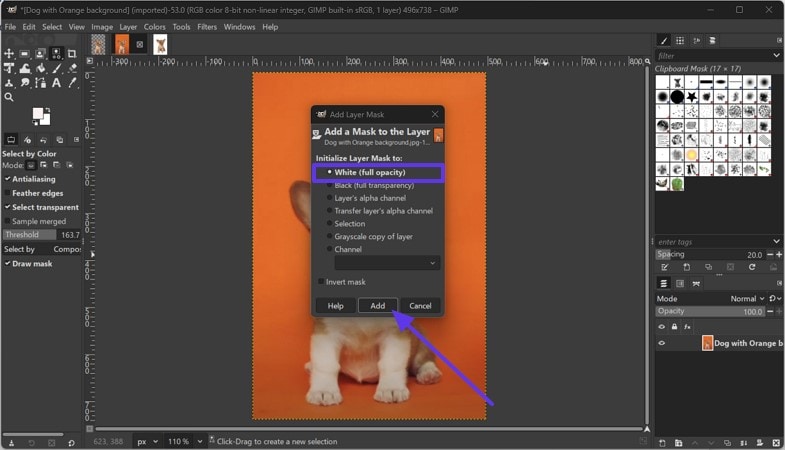
Step 3
Pick the “Paint Brush” tool from the left panel and drag the mouse on the background to remove the unwanted area from your picture.
Part 3. Replace or Fill the Background with a Solid Color or a New Image (Optional)
After you remove the background in GIMP, you can either keep it transparent or substitute it with something different. Using a single color to fill the area is excellent for a tidy appearance. Alternatively, adding a new image as a background helps create realistic scenes or creative compositions. Whether you're aiming for professional or artistic, the following instruction lets you add the color and fully customize the final look of your image:
Instructions. Click the “Bucket Fill” tool from the left panel and choose the desired color by pressing the “Activate Background Color” option. Next, press the “FG Color Fill” option and fill the background with the picked color.

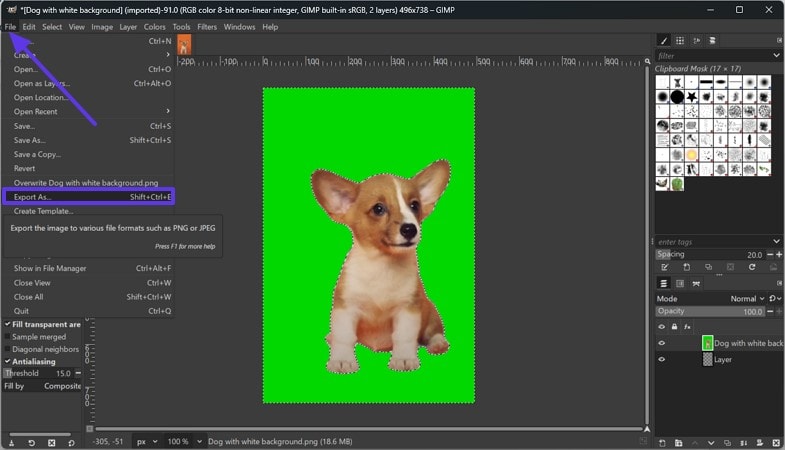
Part 4. Export Your Final Image
After you delete background in GIMP, exporting it properly ensures your surrounding removal and transparency are preserved. You’ll need to export the file in a format that supports transparency, like PNG, to keep the transparent background. As image formats like JPEG automatically fill up the surroundings of the image with white background. Exporting is the final step that prepares your edited image for use in websites or social media by following the given steps:
Step 1
Once you complete the edit process, press the “File” tab and choose the “Export As” option from the extended list.
Step 2
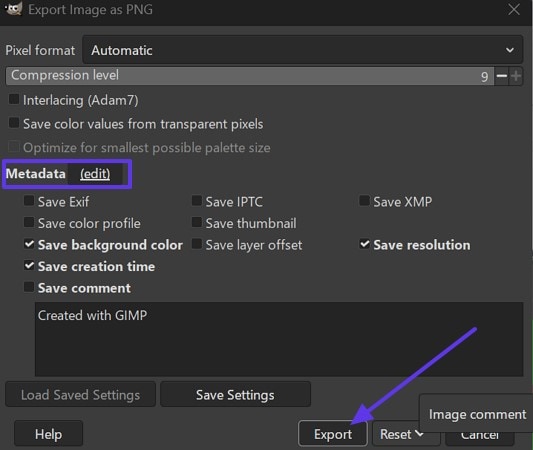
Under the “Metadata”, enable the desired options, press the “Export” button to save the image on your device.
Part 5. Common Issues & Fixes
Now that you know how to erase background in GIMP, there are a few problems that users face while doing the edit. For that, the following section gives a comprehensive table of issue causes and their solution:
| Issue | Cause | Fix |
| Background turns solid. For example, white/beige after deletion | Layer lacks an Alpha Channel (no transparency support) | Right-click the layer, select Layer, and choose Transparency. Next, add the Alpha Channel before deleting the background |
| Jagged or rough edges around the subject | Hard selections without smoothing | Click the Select tab and choose Feather before deleting, or use the Smudge Tool to soften the edges manually |
| Subject partially erased or missing details | Over-selection or aggressive erasing | Use Layer Masks for non-destructive editing, and adjust the selection threshold carefully to avoid removing parts of the subject |
| Background color bleeds into the subject | Low contrast between the subject and background | Increase the selection threshold, or use the Paths Tool for manual precision around the subject's edges |
| The exported image loses transparency | Saving in a format that doesn't support transparency (such as JPEG) | Download the photo in PNG format to preserve transparency |
Part 6. An Alternative Way to GIMP Erase Background (One Click)
While GIMP offers powerful tools to cut out image, its steep learning curve, overwhelming number of methods can make the process confusing and time consuming. Beginners or those handling multiple images, especially, need a one-click solution. Therefore, UniConverter is a better alternative for a simple and fast experience, which offers a background removal method for any kind of image format.
The tool uses advanced AI technology to automatically detect the background of the photo and give 100% transparent results. Not only that, but it also lets you manually erase the surroundings of the subject in the image to get a more accurate result. Users can check the before and after results of the picture using the compare button and decide if it needs further editing.

Batch Image Background Remover
Key Features
- Batch Processor: It allows you to cut the background of more than one picture at a time, which saves time and effort.
- Add Background: With this feature, instantly replace the background with a solid gradient or custom image to match your needs.
- Image Enhancer: You can improve the quality of the picture by toggling the Auto Enhancer tool for more high and crips visuals.
A Detailed Stepwise Guide to Remove Background from the Photo Using UniConverter
Step 1 Access the Tool and choose the Image BG Remover
Install and launch UniConverter and locate the "Home" tab from the left side of the screen. Then, choose the “Image” tab and pick the “Image BG Remover” tool to start the procedure.

Step 2 Drag the Target Photo into the Tool
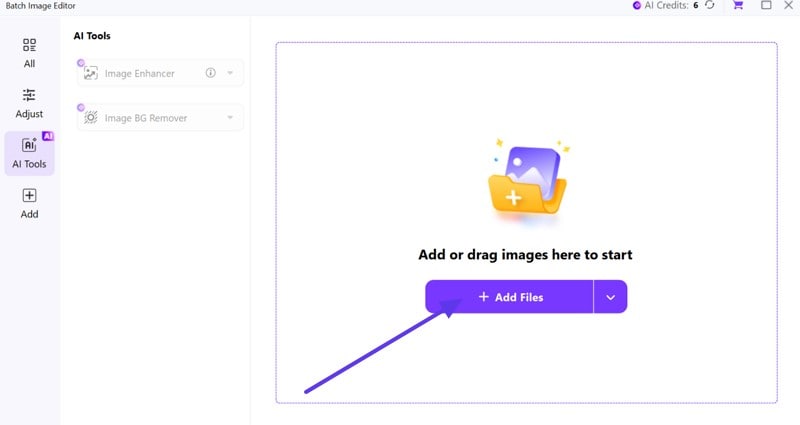
Following that, click the “+ Add Files” button from the next window to import the image from which you want to remove the background.
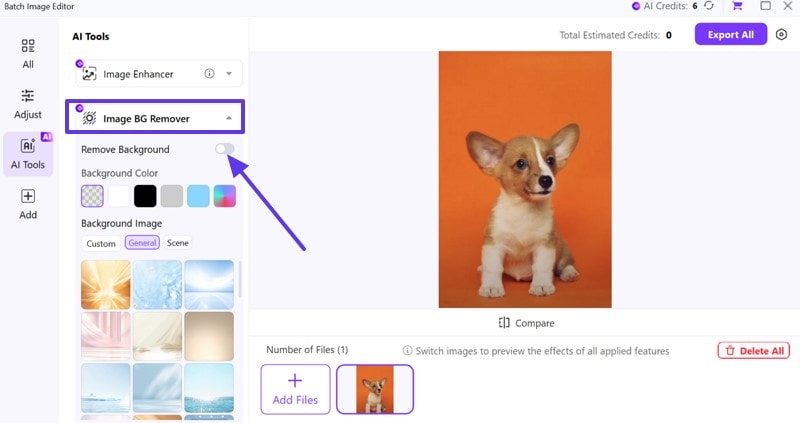
Step 3 Choose the Image BG Remover
Now, pick the “Image BG Remover” tool and enable the “Remove Background” toggle to begin the removal process.
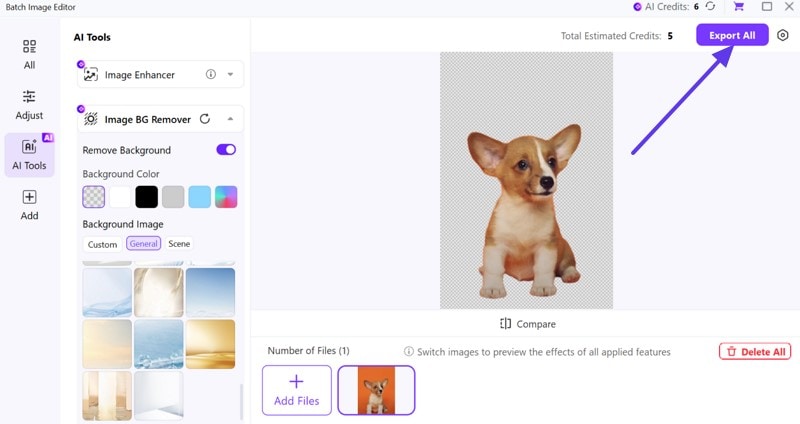
Step 4 Download the Edited Photo
Once the background is removed, press the “Export All” button at the top corner of the screen to save it on your device.
Conclusion
In conclusion, there are 5 solid methods to remove background in GIMP, where each method had its unique functionality. Beginners can start with easier tools like Fuzzy or Color, then explore Paths or Masks for more control.
For more help, check out our guide on making backgrounds transparent in GIMP. However, you might realize all of the GIMP erase background methods are pretty confusing. Therefore, if you want faster, cleaner results without the hassle, UniConverter is a smarter, one-click alternative worth trying.

