

You’ve just recorded a stunning 4K video on your phone, but the file is too large to share or upload quickly. Compressing it seems risky, as you don’t want to sacrifice the clarity or vibrant colors that make it special. Fortunately, there are reliable ways to compress video without quality loss, ensuring the file size shrinks while the content remains sharp and detailed.
Whether you’re sending clips to friends, uploading to social media, or storing memories on a cloud drive, mastering these techniques can save space and time.
In this article
- Compress MP4 Files Without Losing Quality: Recommended Settings
- Best Free Video Compressors Without Quality Loss (Desktop Solutions)
- Step-by-Step Guide to Compress Video Files Without Quality Drop (Online)
- Finding the Best Video Compressor: A Tabular Comparison
- Online vs. Desktop Video Compressors: Which One to Choose?
- Video Compressor Without Quality Loss: Advanced Tips and Tricks
- Conclusion
- Frequently Asked Questions

Part 1. Compress MP4 Files Without Losing Quality: Recommended Settings
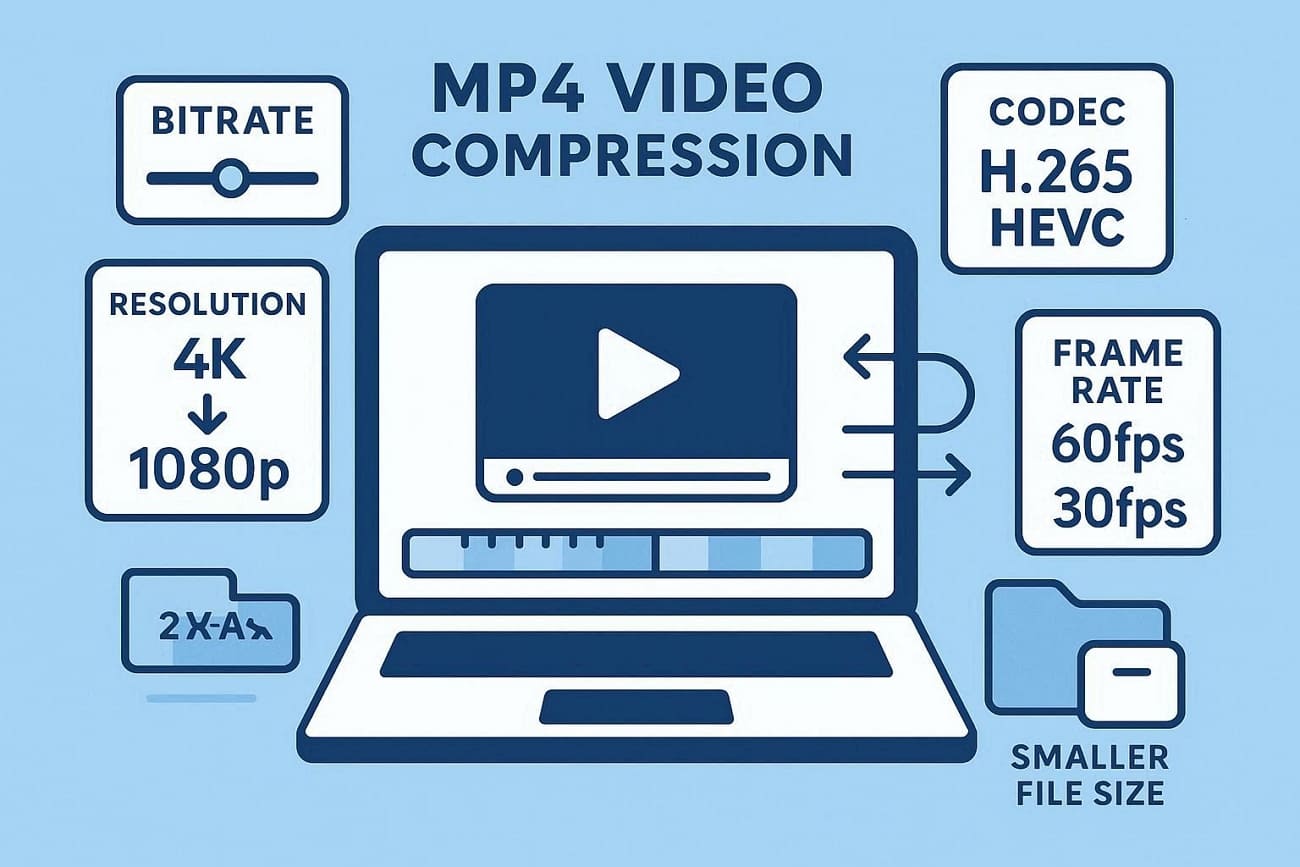
Video compression without loss of quality is essential when you want to reduce file size but maintain clarity. By carefully adjusting settings and using advanced techniques, you can achieve efficient compression while preserving the original quality. Here are the recommended techniques to compress MP4 files without losing quality:
Bitrate Optimization: Lowering the bitrate slightly can reduce file size while keeping visual fidelity high.
Resolution Adjustment: Downscaling from 4K to 1080p or 720p can save space without noticeably affecting quality on smaller screens.
Codec Selection: Modern codecs like H.265/HEVC offer better compression than H.264, maintaining sharp visuals with smaller file sizes.
Two-Pass Encoding: Encoding the video twice analyzes the file for optimal compression, resulting in high-quality output with minimal artifacts.
Frame Rate Control: Reducing unnecessary high frame rates (e.g., 60fps to 30fps) can save space while keeping motion smooth.
Part 2. Best Free Video Compressors Without Quality Loss (Desktop Solutions)
When manual settings feel too technical, reliable software can handle compression more efficiently. Choosing a lossless video compressor on a desktop allows you to reduce file size while preserving sharp visuals. Mentioned below are some of the top options that you can try:
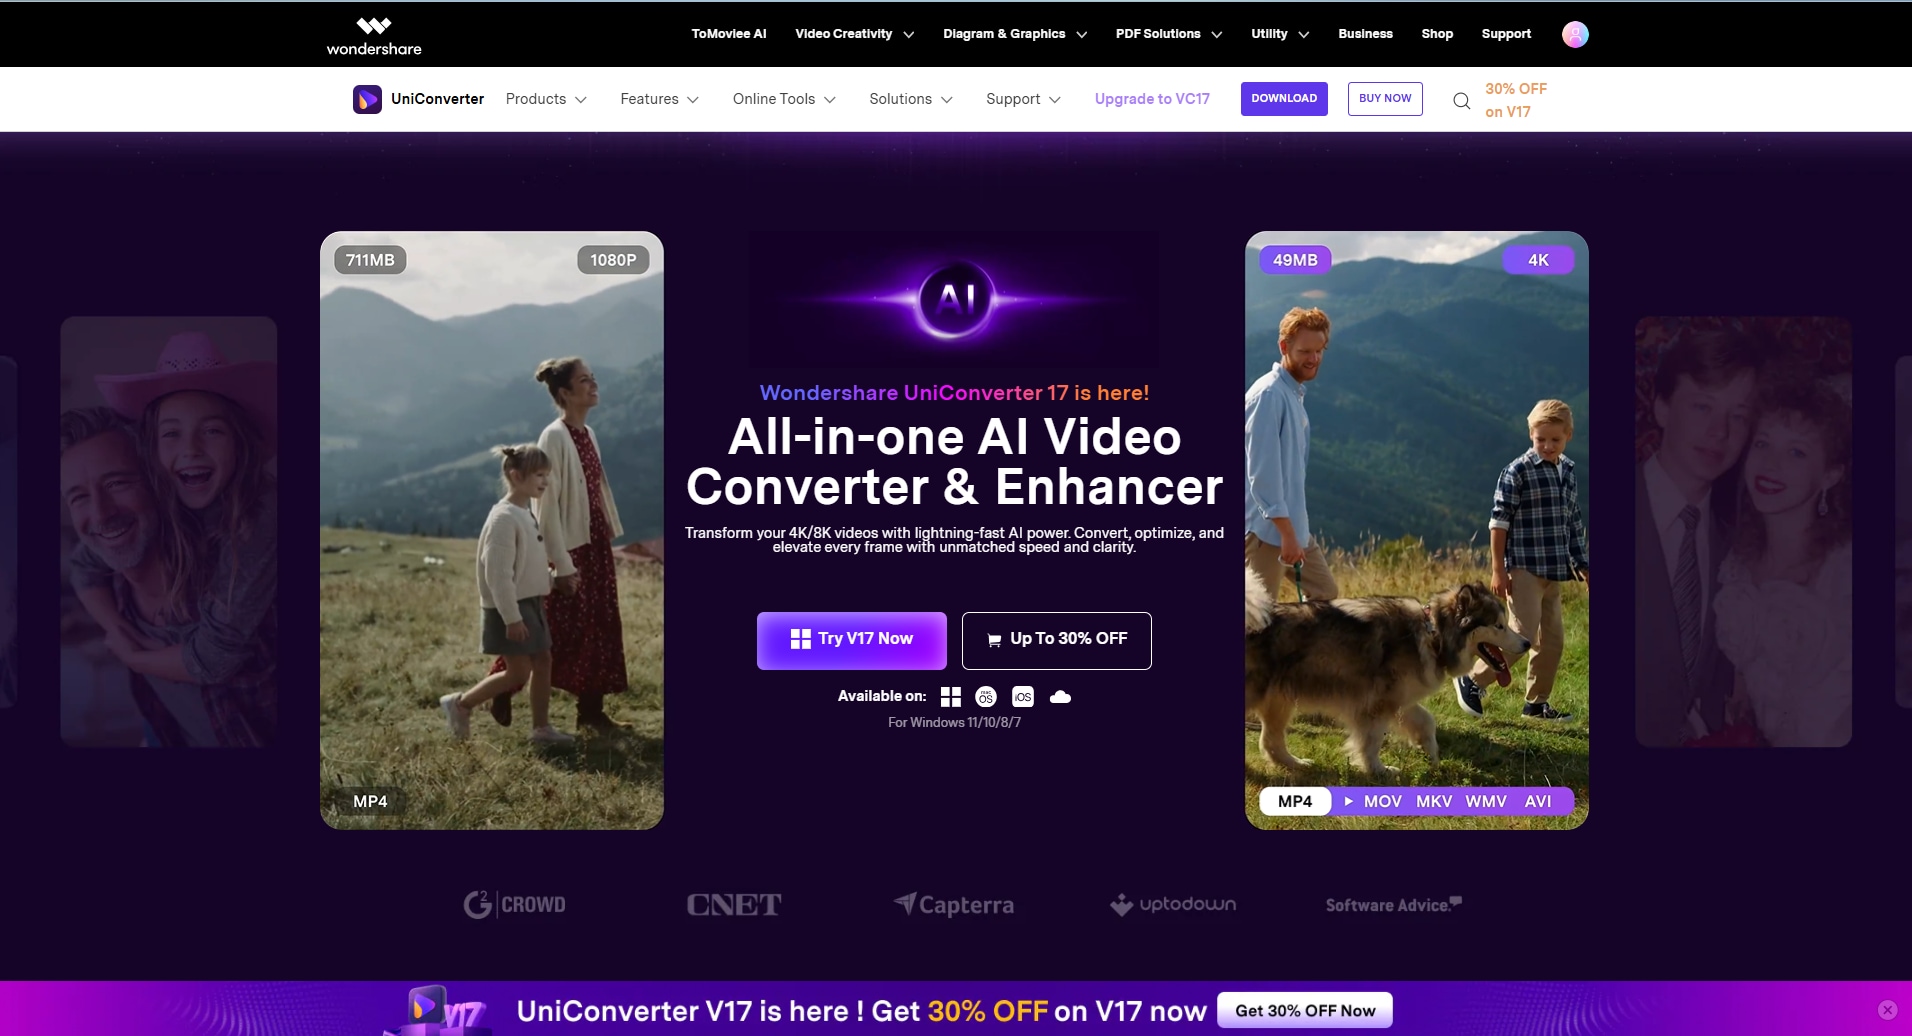
1. UniConverter
UniConverter is an all-in-one media toolkit for Windows and macOS that combines powerful video conversion, editing, and compression features into one platform. Its lossless video compressor lets you compress large 4K video files without quality loss by adjusting resolution, bitrate, and format while previewing results before export. With batch support and customizable settings, UniConverter simplifies shrinking videos for storage, sharing, or social uploads, enabling easy compression of 1GB to 10MB video files.
Beyond compression, UniConverter supports over 1,000 formats and speeds up conversion using AI-assisted profiles. The interface is user-friendly for beginners yet deep enough for advanced tasks, making it a versatile choice for content creators handling large files regularly.
Step-by-Step Guide to Compress Videos Using UniConverter
As discussed, UniConverter offers a simple interface to instantly reduce the file size while maintaining the quality. Follow the steps provided next to learn how to use this tool for compression:
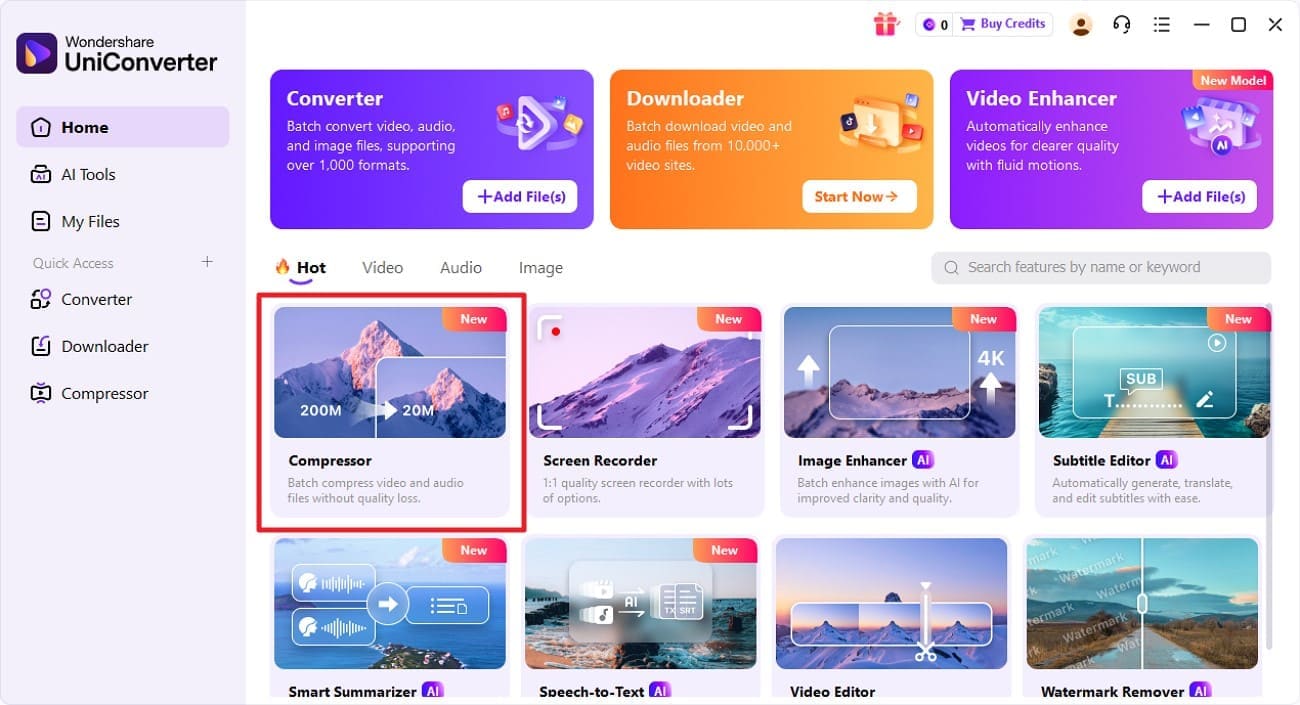
Step 1. Begin By Accessing The Compressor
To begin, launch UniConverter on your device and locate the “Compressor” feature on the homepage. Next, click on it and import the video that you want to compress within the tool’s interface.
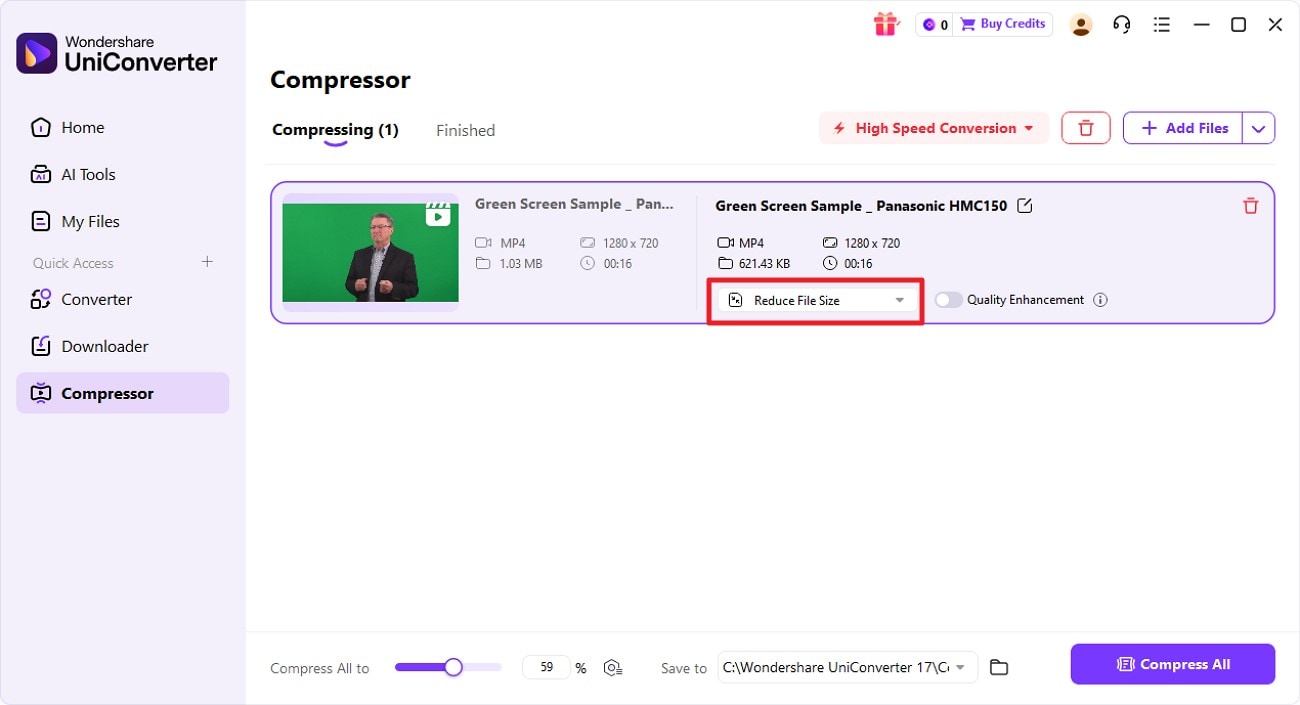
Step 2. Define Compression Settings in UniConverter
Once the video is imported within the tool’s interface, configure settings such as file location. Next, click on the “Reduce File Size” option located within the interface.
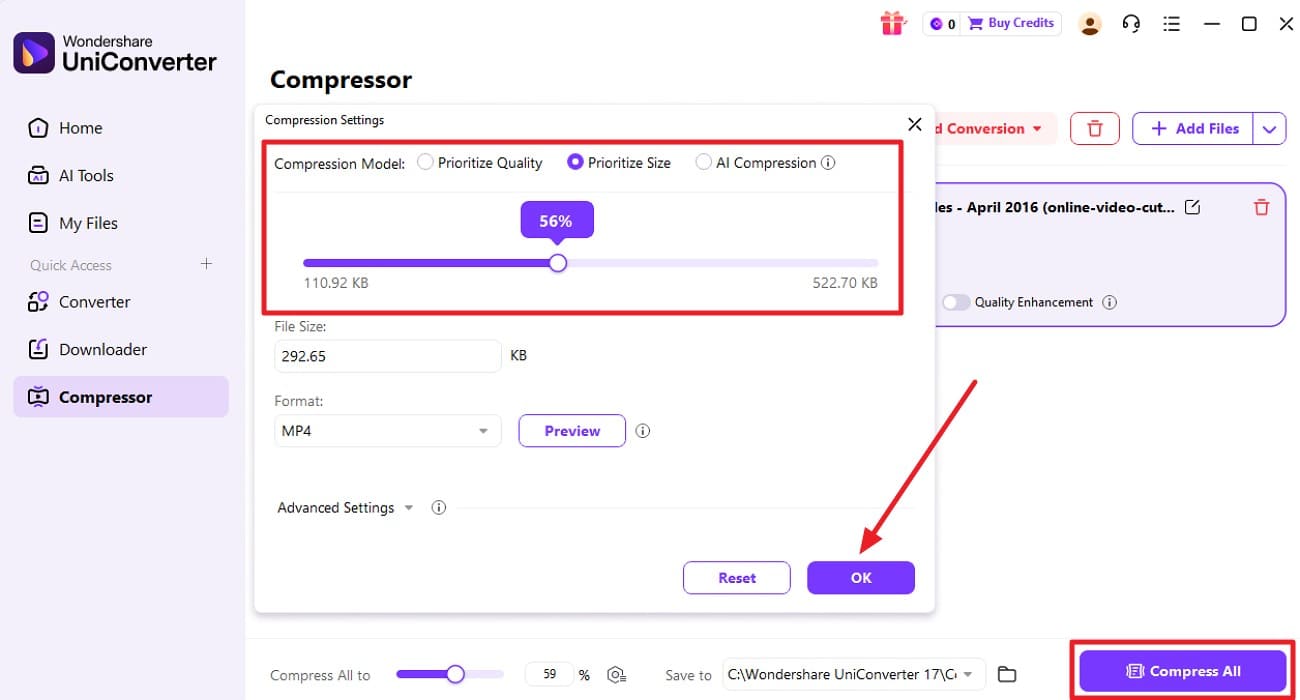
Step 3. Choose Compression Mode
In the following window, choose the “Compression Mode” and drag the slider to adjust the compression according to file size. You can also compress by quality and even choose “AI Compression.” Once done, press the “OK” button to begin the compression.
Step 4. Preview Compressed Video
After the compression is completed successfully, locate the file under the “Finished” section of the tool.

Key Features Offered By UniConverter
Quality Enhancement: Enhances video sharpness and visual details after compression to deliver clearer output.
Multiple Compression Modes: Offers flexible compression options to suit different file sizes and quality requirements.
Adjust Compression Level: Lets you control how much the video is compressed for balanced size and quality.
Improve Clarity: Optimizes colors and reduces visual noise to make compressed videos look cleaner.

Batch Video Compressor Without Quality Loss
2. HandBrake
HandBrake is a powerful, open-source video compressor and transcoder that runs on Windows, macOS, and Linux. It lets you shrink and convert video files like MP4 and MKV using modern codecs while maintaining high visual quality. With presets, adjustable bitrate, resolution, and support for H.264/H.265 encoding, HandBrake gives you precise control to compress video without quality loss.
Step-by-Step Guide to Compress Videos Using HandBrake
To learn how to use it for file compression, read the steps provided next:
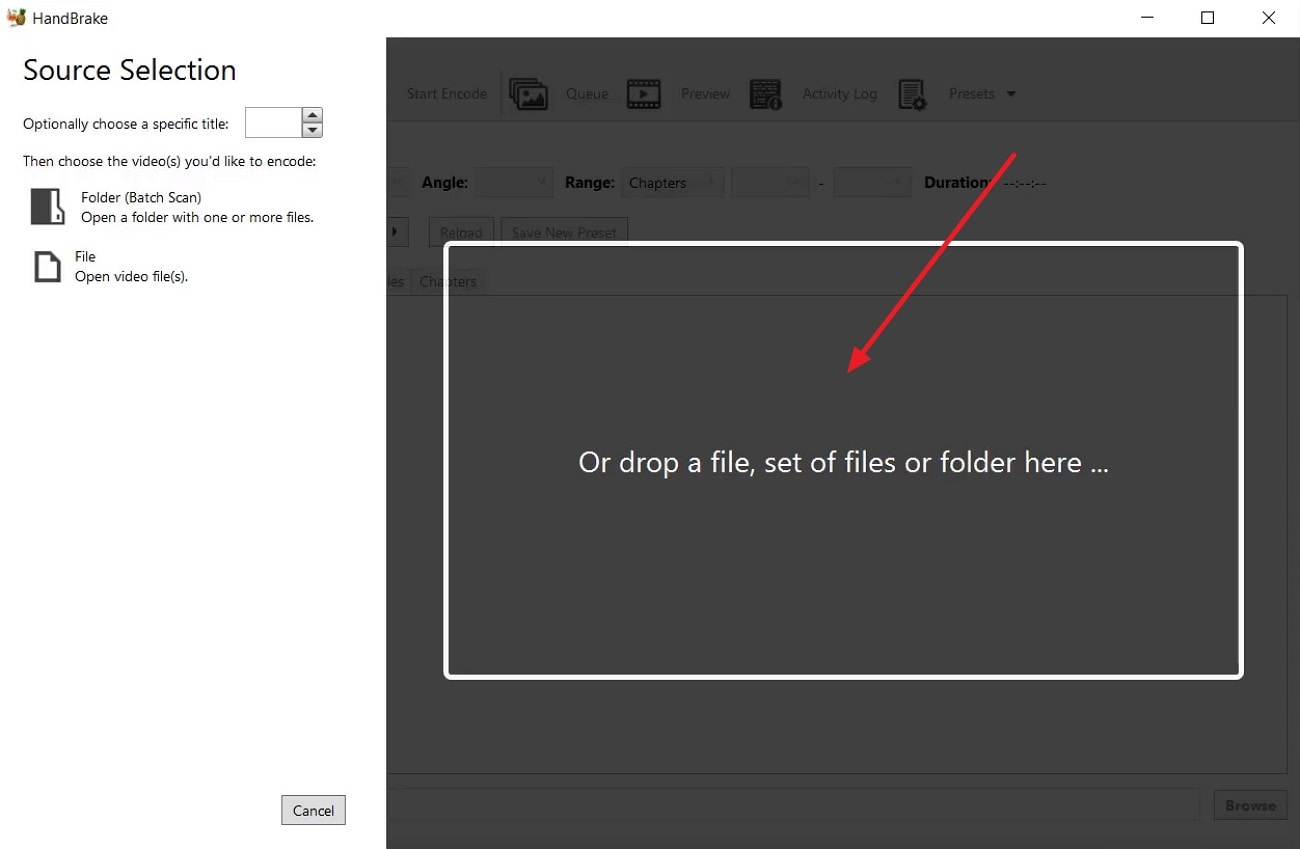
Step 1.Open HandBrake
To begin, launch the tool on your device and drag the video to its interface for compression.
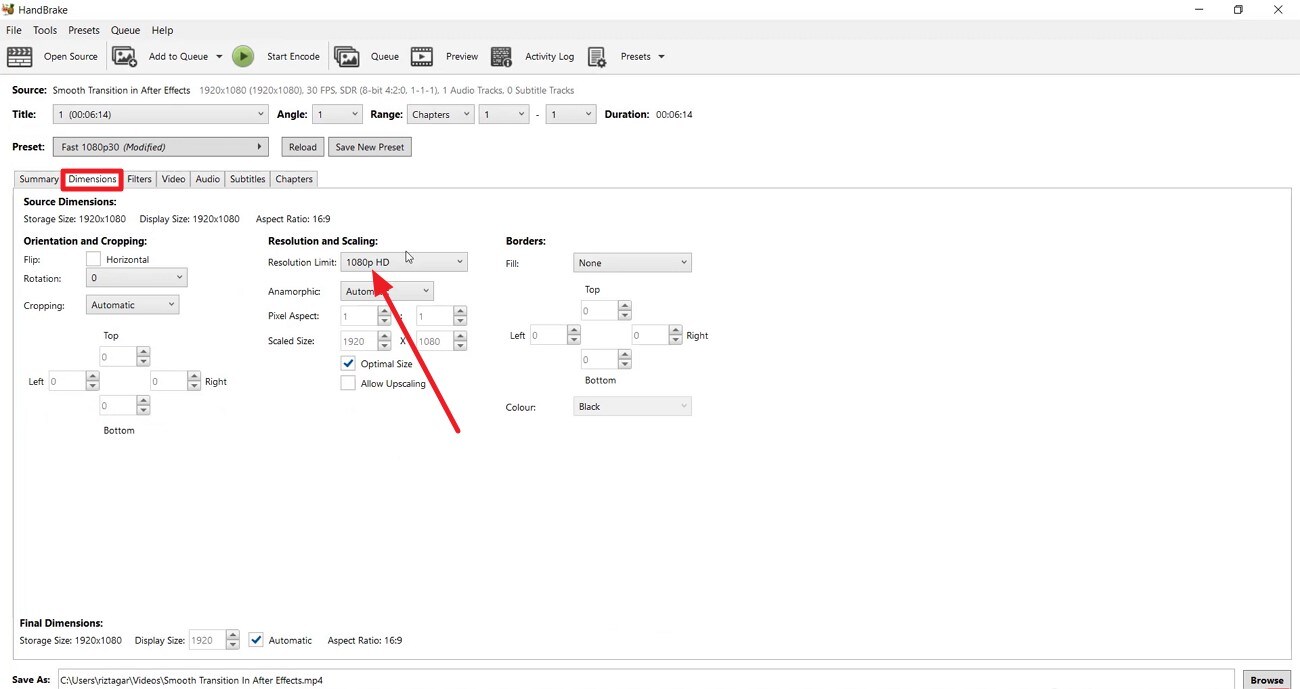
Step 2.Chose Dimensions
Now, access the “Dimensions” tab and select a lower “Resolution” by expanding the drop-down menu.
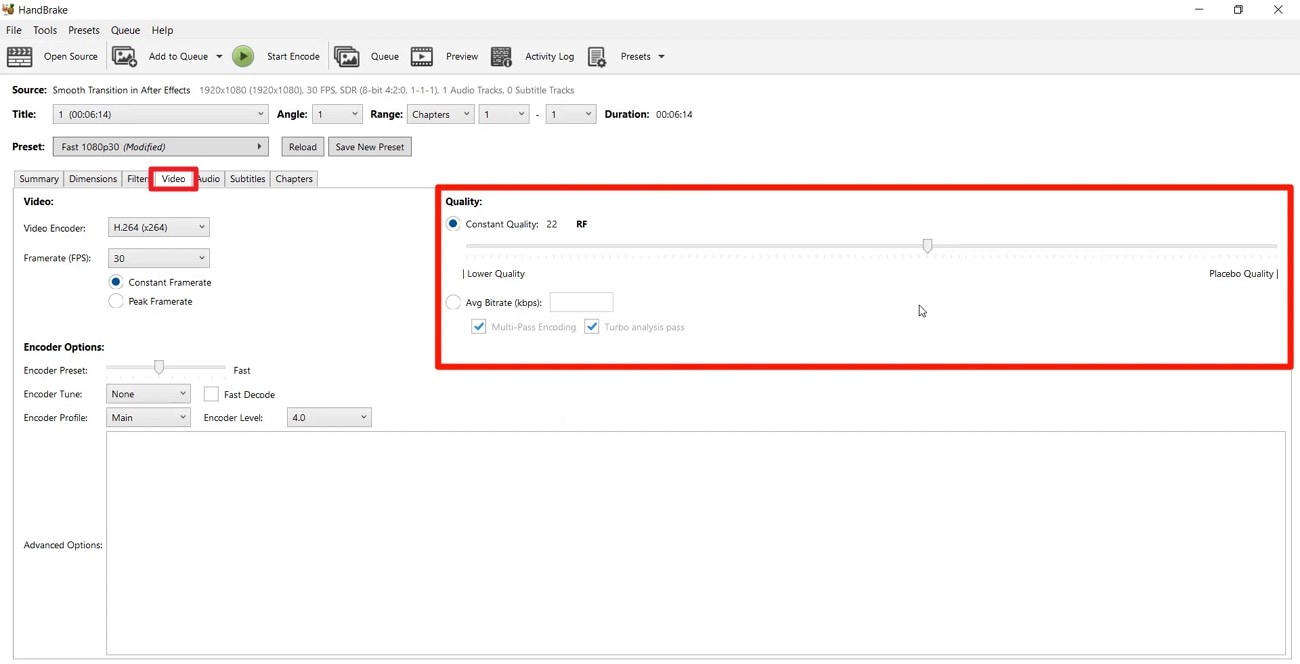
Step 3. Choose Quality Settings
Next, enable the “Video” tab and drag the “Quality” slider to a lower value.
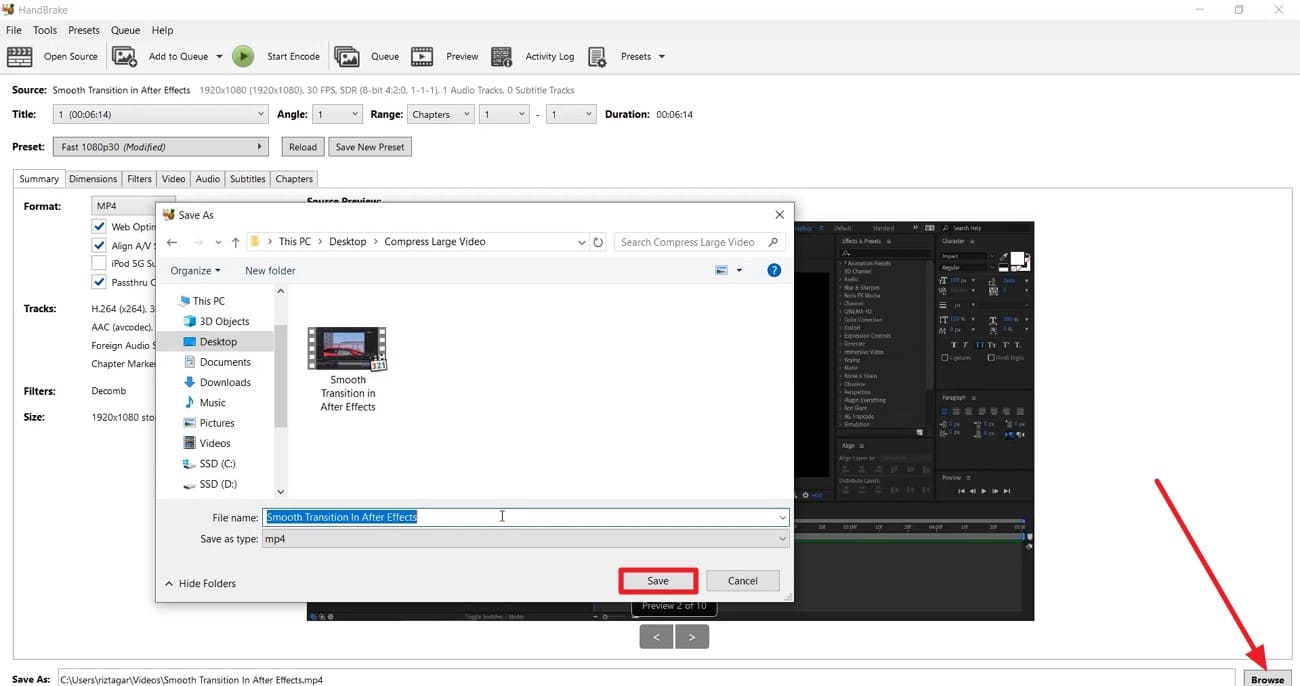
Step 4. Choose the Video to be Compressed
Once done, press the “Browse” button to save the location of the compressed video.
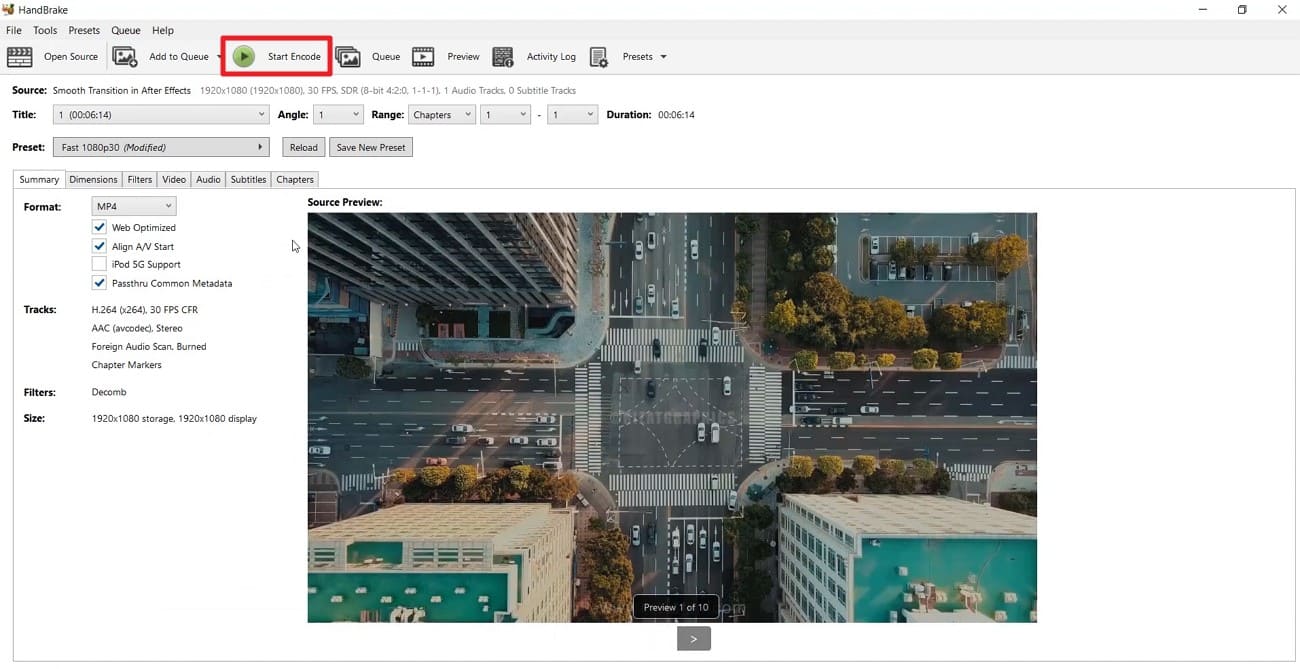
Step 5. Start Encoding
Finally, hit the “Start Encode” button to begin the execution. Once the video is successfully compressed, it will appear in the selected folder location.
3. VLC
It is an open-source application widely known for playback but also usable as a video compressor without quality loss. Using its Convert/Save feature, users can re-encode videos with efficient codecs, adjust bitrate, and change resolution to reduce file size. It supports numerous formats and platforms, making it a practical option for basic, manual video compression tasks.
Step-by-Step Guide to Compress Videos Using VLC
Read the steps provided below to learn how to use VLC for video compression:
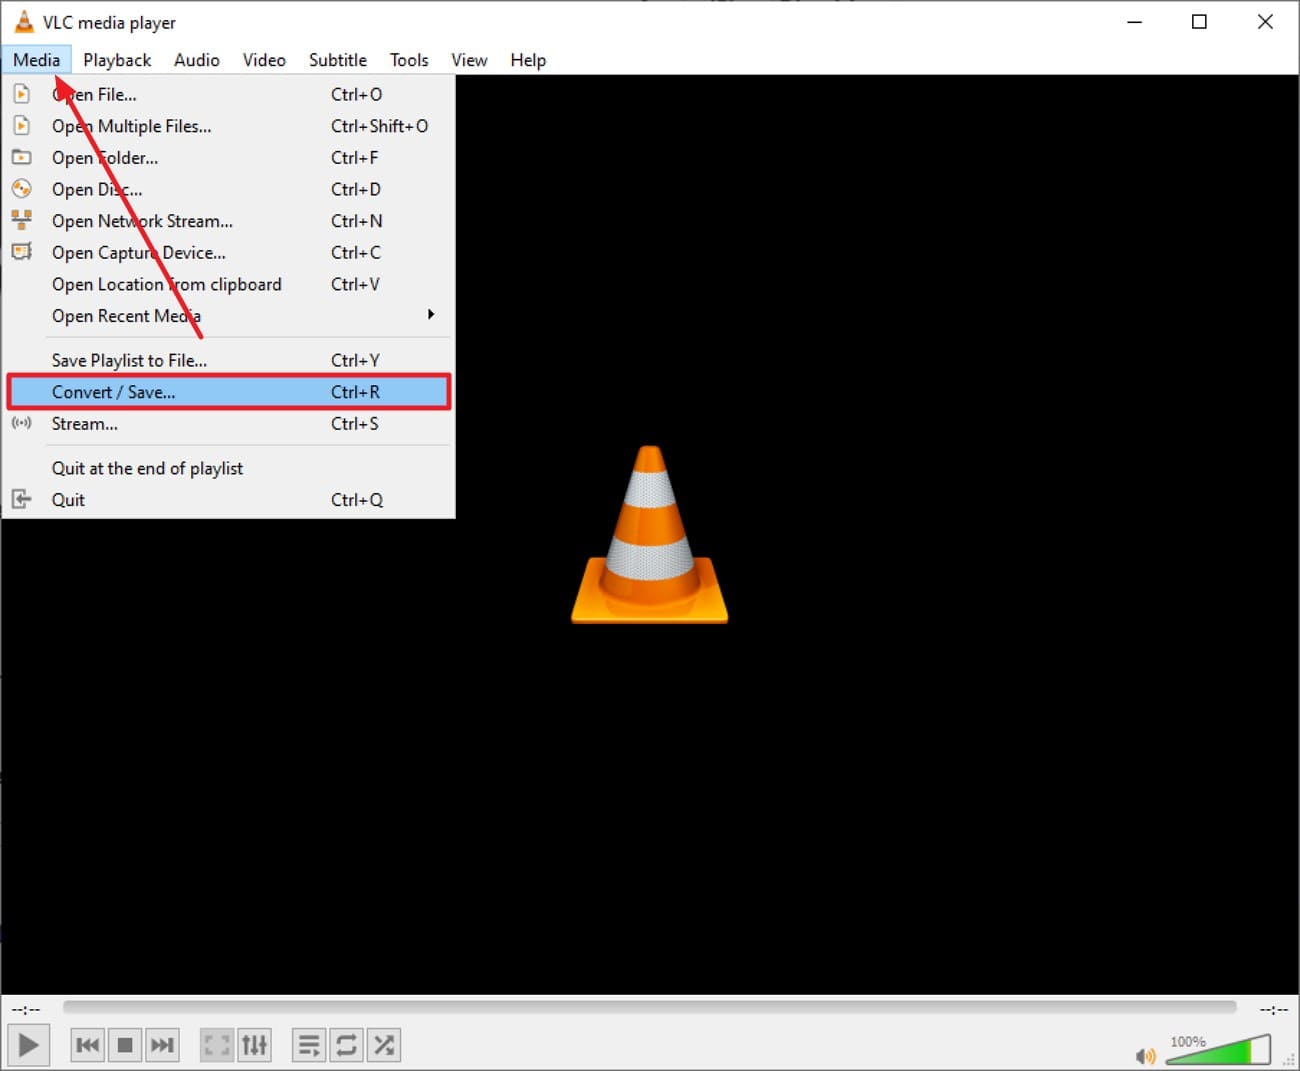
Step 1. Open VLC
After launching the tool, press the "Media" option located at the top-left corner to press the "Convert/Save" option.
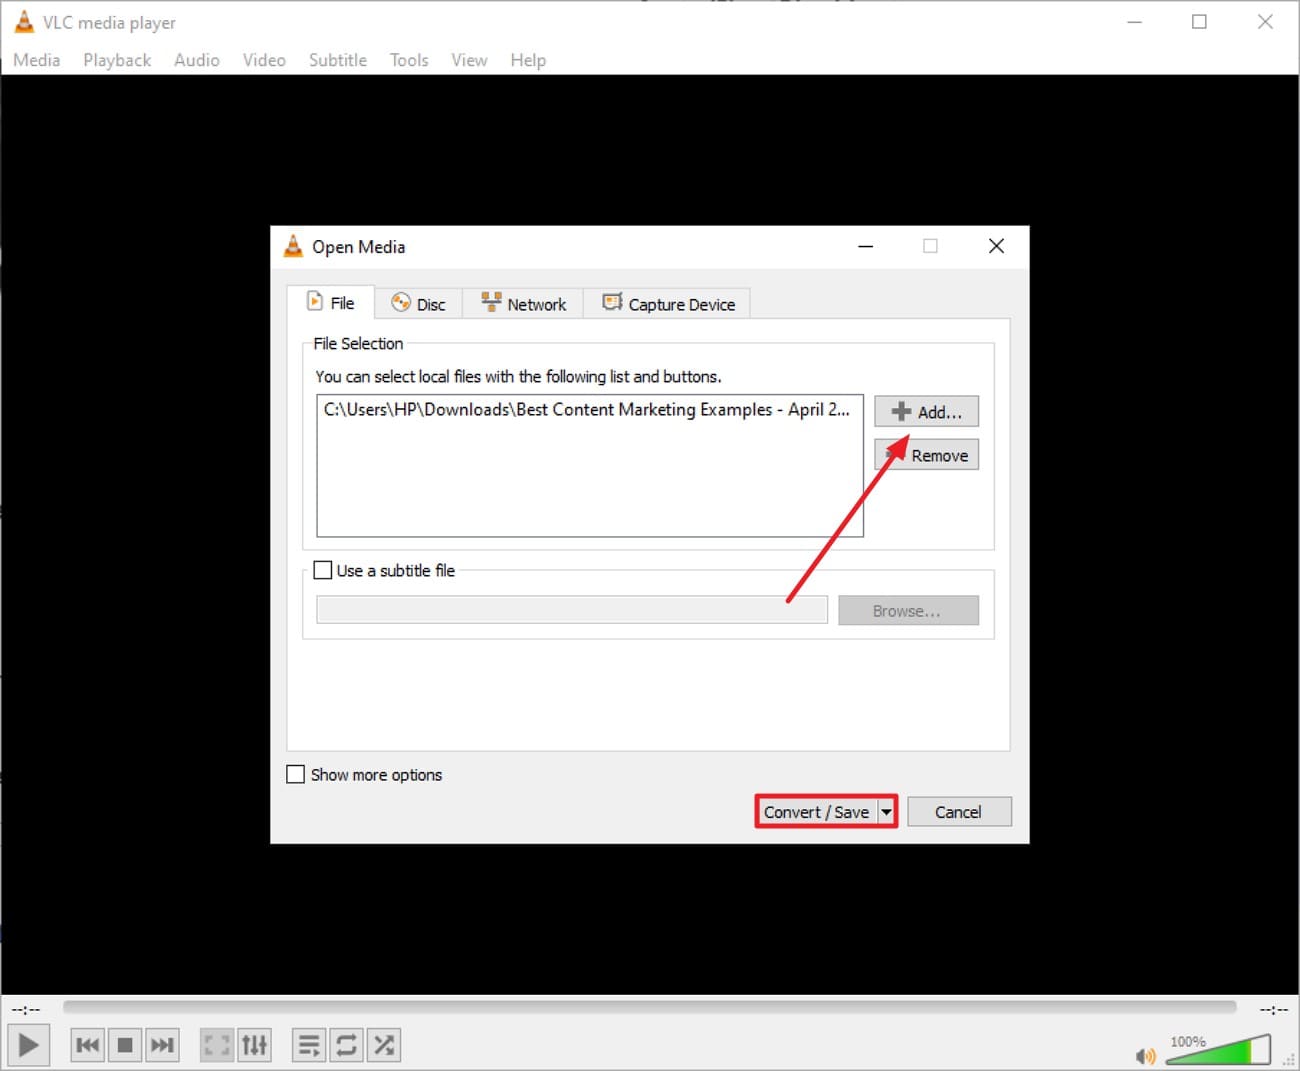
Step 2. Add Video to be Compressed
Next, press the “Add” button to import the video that you want to compress, and press “Convert/Save.”
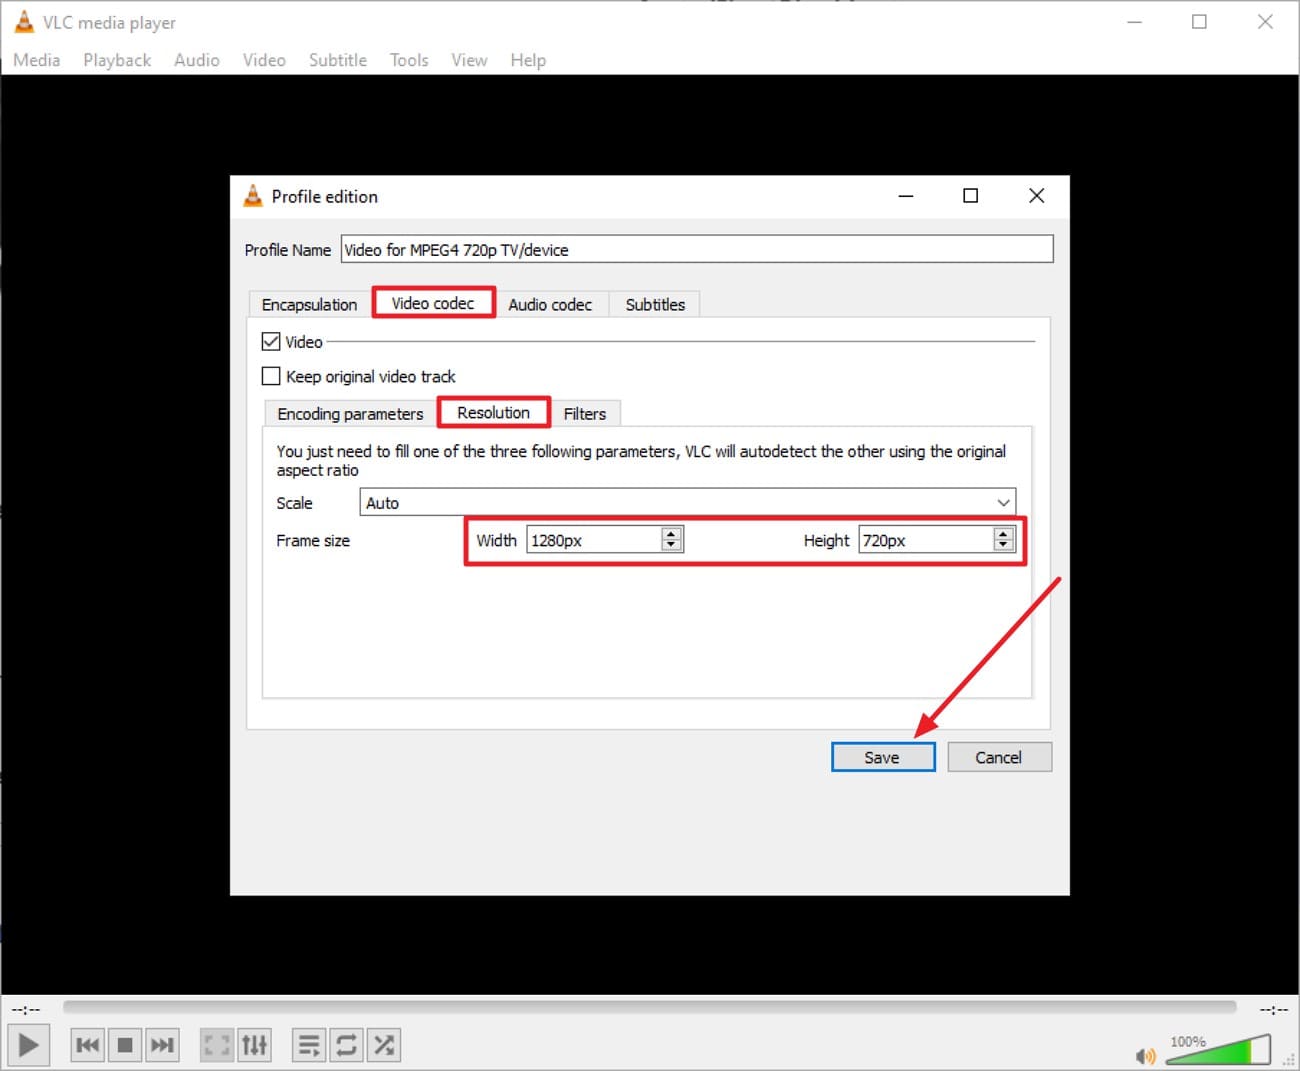
Step 3. Access the Video Codec
Access the “Video Codec” tab and choose the “Resolution” value to a lower one and press “Save.”
Step 4. Begin the Compression
Press the “Browse” button and select the location for the final file. Click the “Start” button to begin the compression, and once the file is compressed, it will be saved to the chosen location.

Part 3. Step-by-Step Guide to Compress Video Files Without Quality Drop (Online)
For users who prefer convenience without installing software, online tools provide an accessible solution. A reliable video compressor lossless allows you to reduce file size directly from your browser. Read the section below to learn about the top online options for video compression:
1. UniConverter Online Compressor
UniConverter’s online tool makes it easy to use a free online video compressor without losing quality right from your browser. You can upload MP4, MOV, and other formats, choose compression levels, and get smaller files quickly. Apart from videos, it also supports compression for common audio formats, like MP3 ,FLAC, WAV, and images formats like JPG, PNG, etc.The straightforward interface guides you through settings and supports batch uploads. It’s ideal for social sharing or saving space while keeping visuals sharp and clear.
Step-by-Step Guide to Compress Videos Using UniConverter Online
Here is how to use this tool for compression:
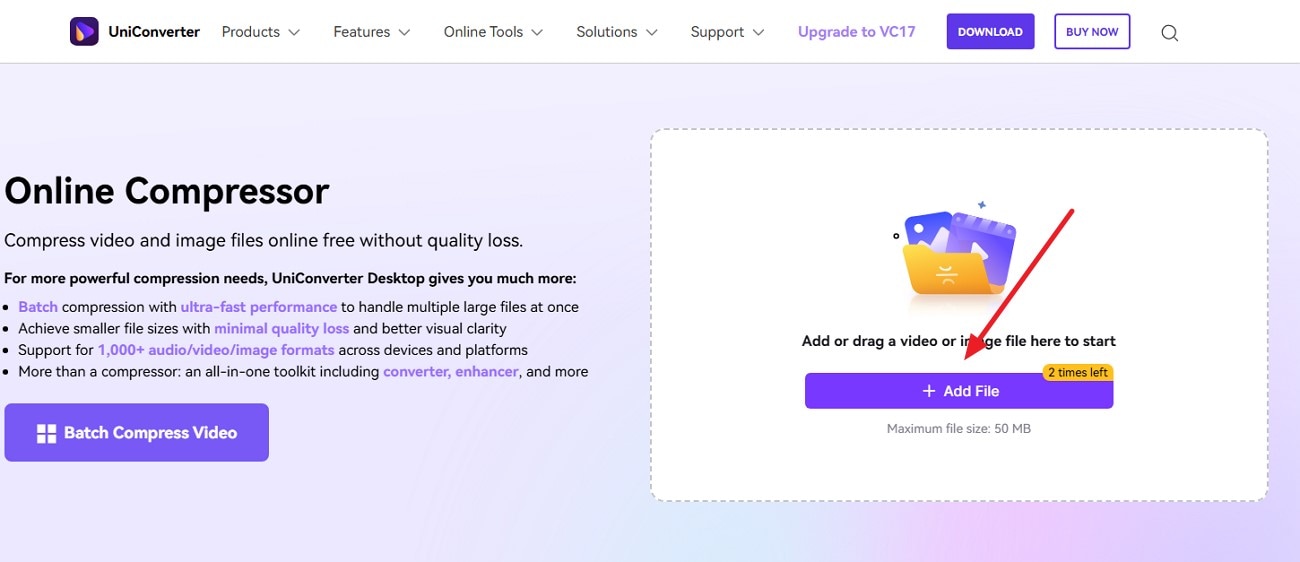
Step 1. Start By Adding File
Once you have accessed the online UniConverter on your browser, press the “Add Files‘ button to upload your video.
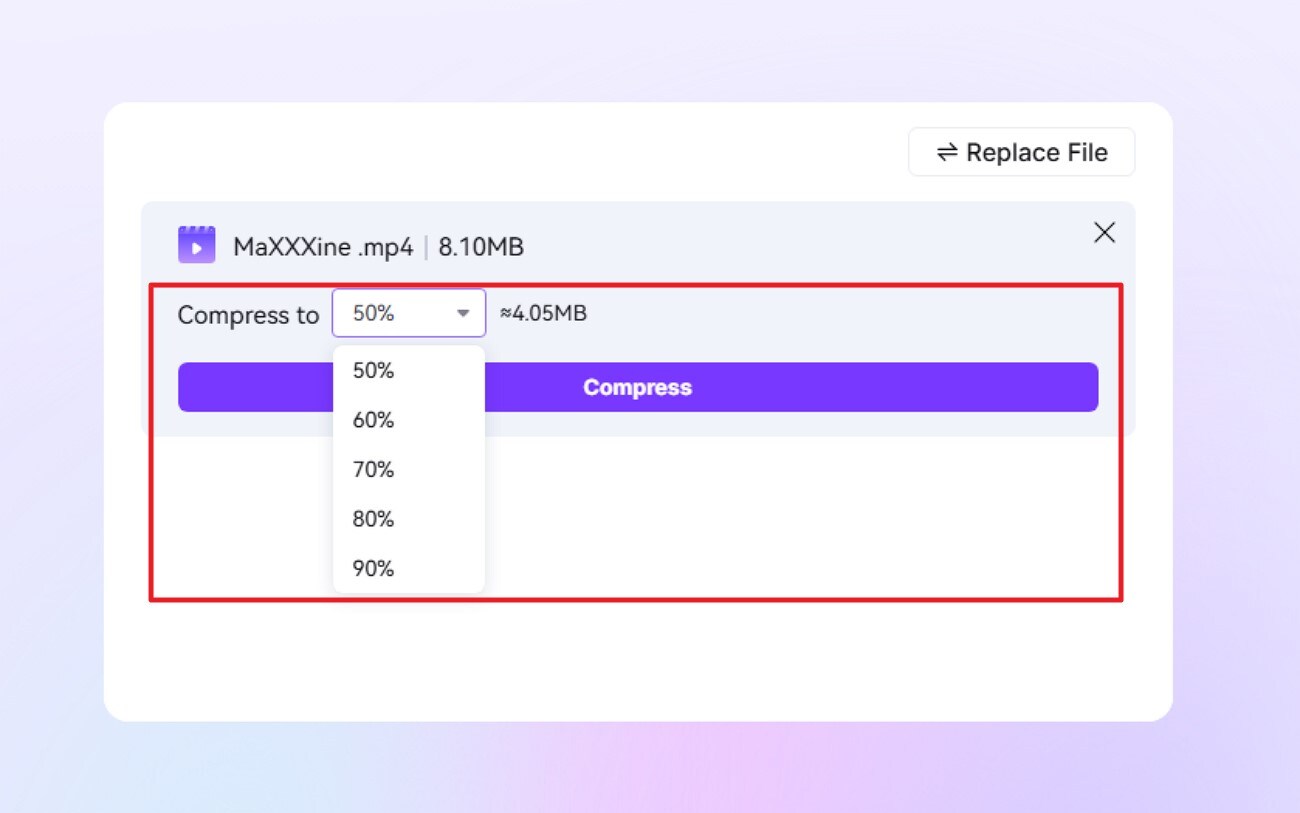
Step 2. Select the Compression Level and Compress
Once the file is uploaded, select the compression level by expanding the drop-down menu. When selected, hit the “Compress” button to execute the process.
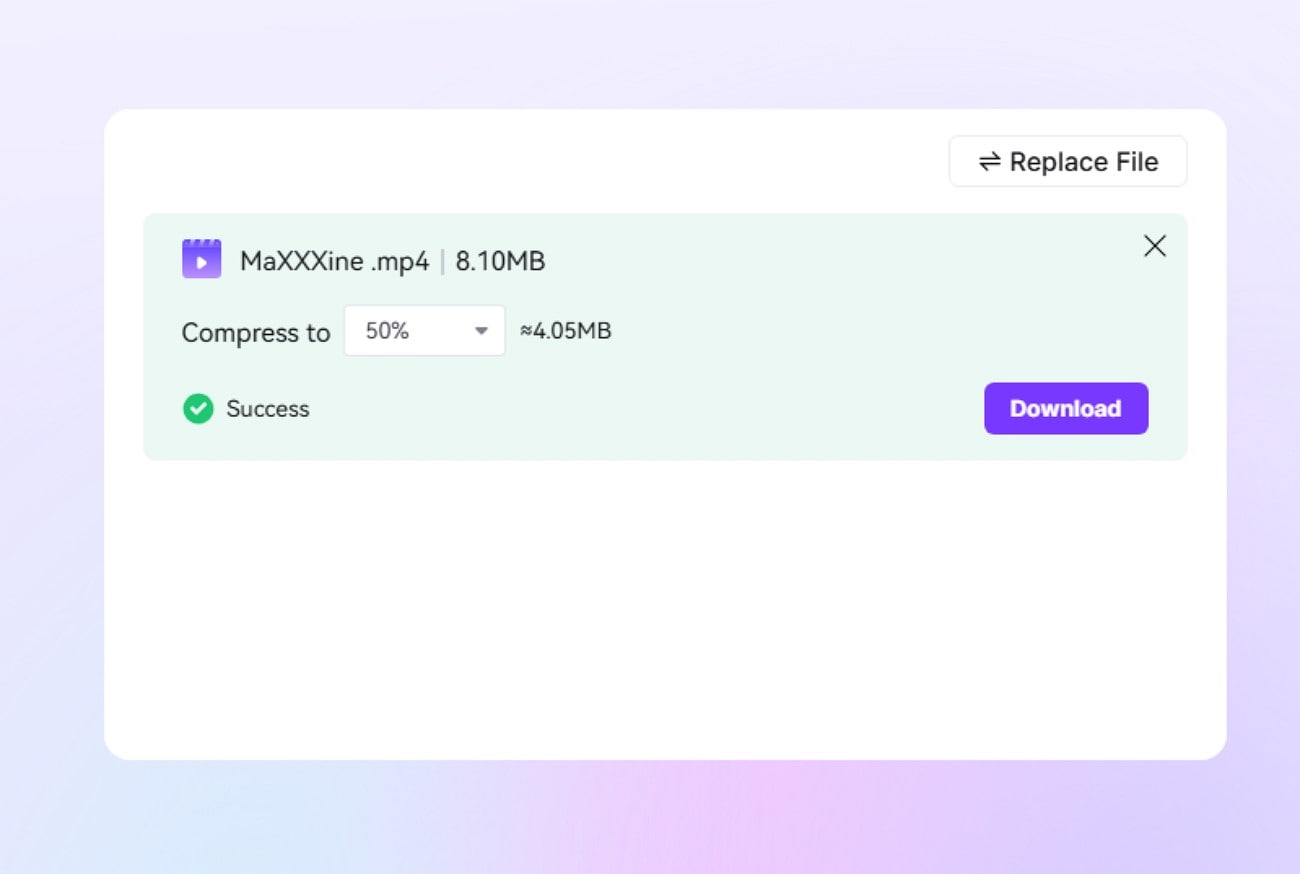
Step 3. Download Compressed Video
Once the video is successfully compressed, press the “Download” button to save it to your device.
2. Clideo
It offers a video compressor lossless solution for anyone needing smaller video files without sacrificing quality. Clideo works with popular formats and maintains high visual fidelity while optimizing file size. Its cloud-based system ensures quick processing and compatibility across devices. This makes it a convenient choice for creators or casual users who want efficient compression.
Step-by-Step Guide to Compress Videos Using Clideo
To learn how to use this tool for video compression, read the steps provided next:
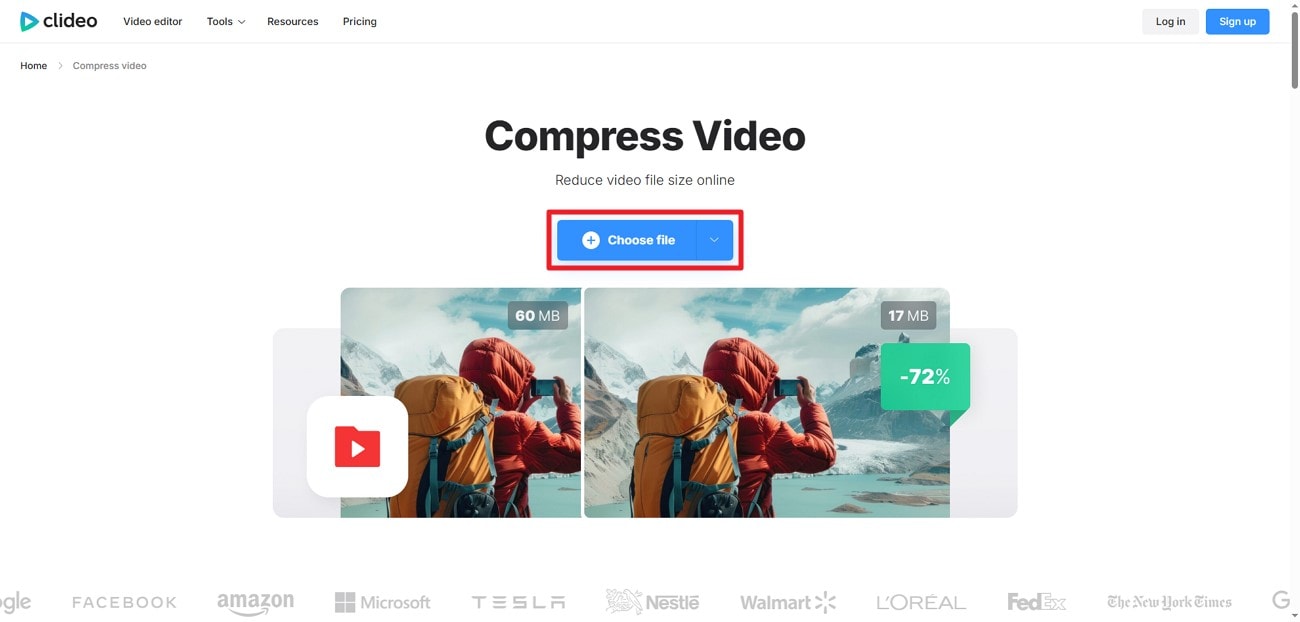
Step 1. Open Clideo
After you have acquired the tool on your browser, press the “Choose Files” button to upload the video to the interface.
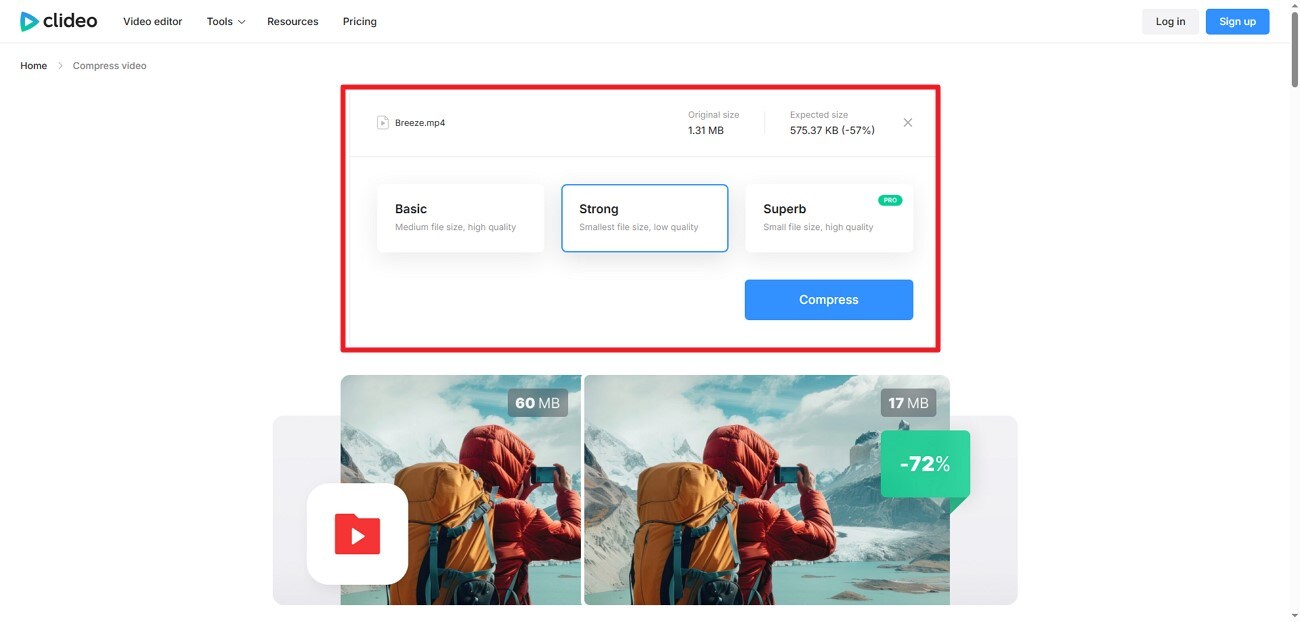
Step 2. Select Compression Settings
Next, select the compression strength from the options provided and hit the “Compress” button to execute the process.
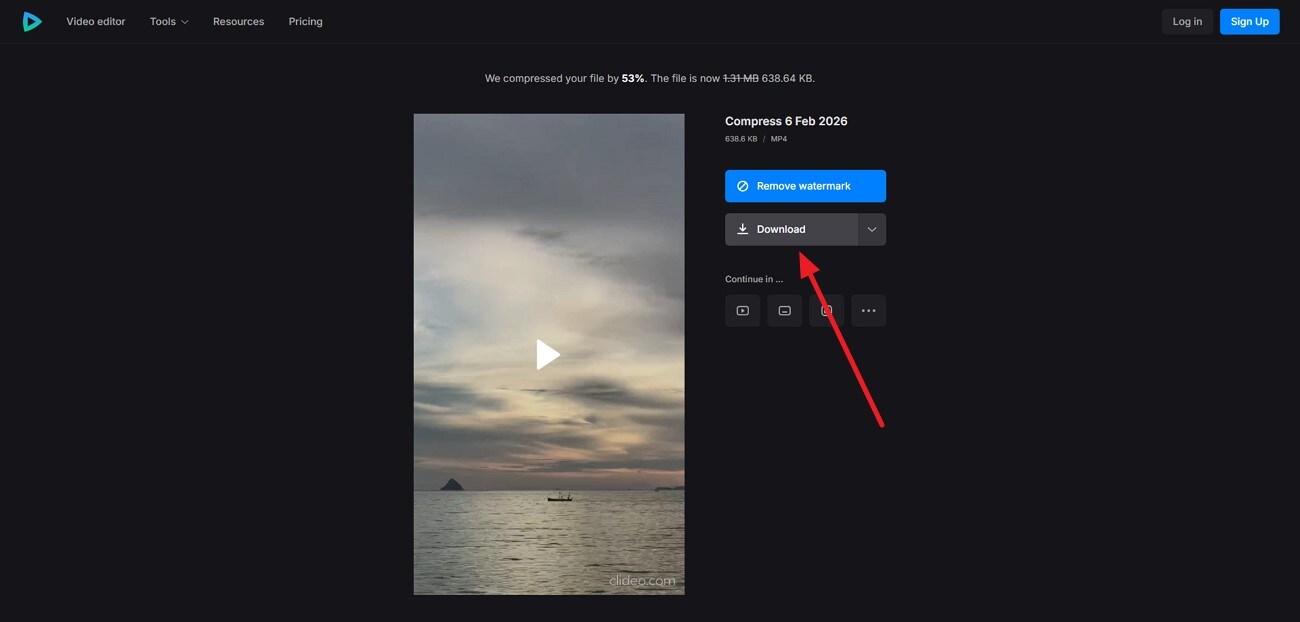
Step 3. Download Final File
Once the video is successfully compressed, press the “Download” button to download the final file.
3. FreeConvert
A reliable tool to compress MP4 files without losing quality, using advanced algorithms to preserve sharpness and color accuracy, is FreeConvert. It supports multiple formats and large files, providing flexibility for storage, sharing, or uploading. The platform balances file reduction and video clarity, ensuring the final output looks professional while taking up significantly less space.
Step-by-Step Guide to Compress Videos Using FreeConvert
Read the steps provided below to learn how to compress video using this online tool:
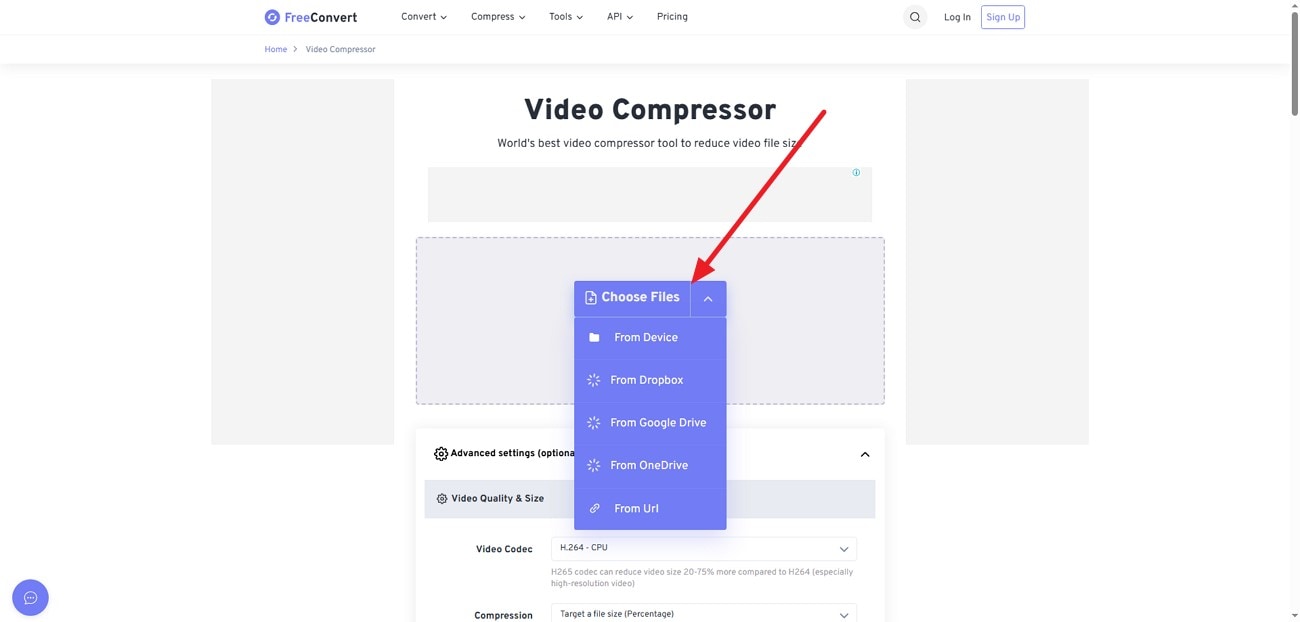
Step 1. Upload File to Video Compressor
Upload the video to the tool’s interface using the “Choose Files” option after you have accessed the tool on your browser.
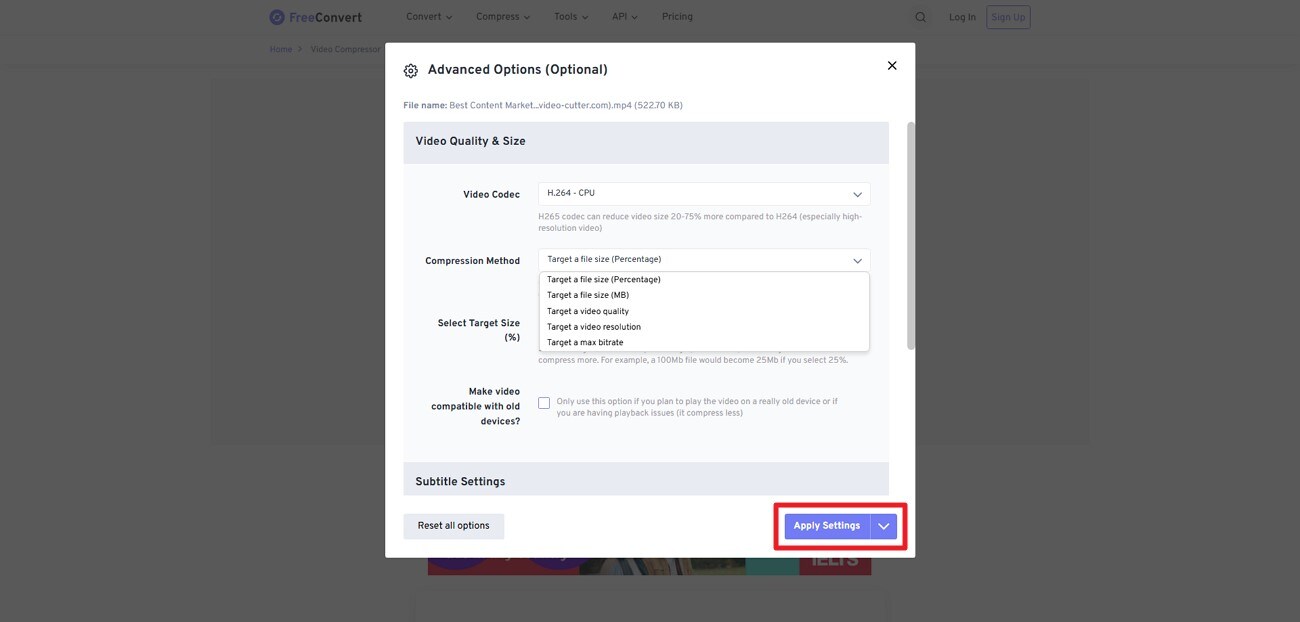
Step 2. Select the Compression Method
Next, select the “Compression Method” by expanding the drop-down menu and hitting the “Apply Settings” button.
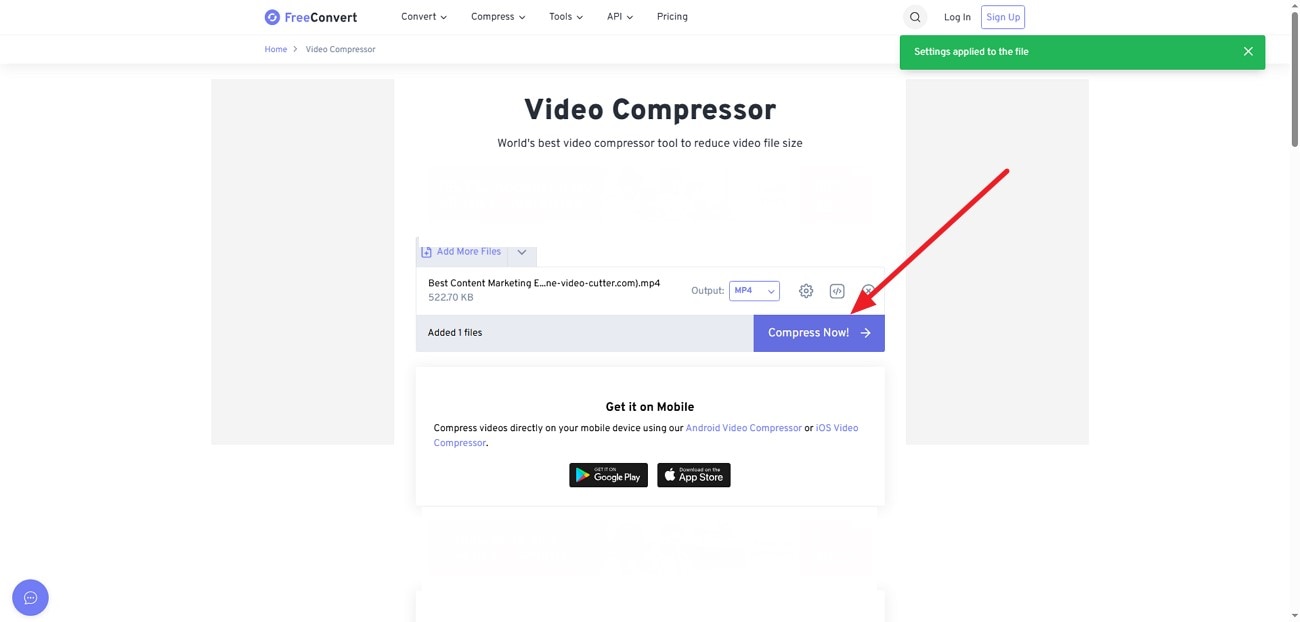
Step 3. Compress Now
Moving forward, press the “Compress Now” button in the following interface to execute the process.
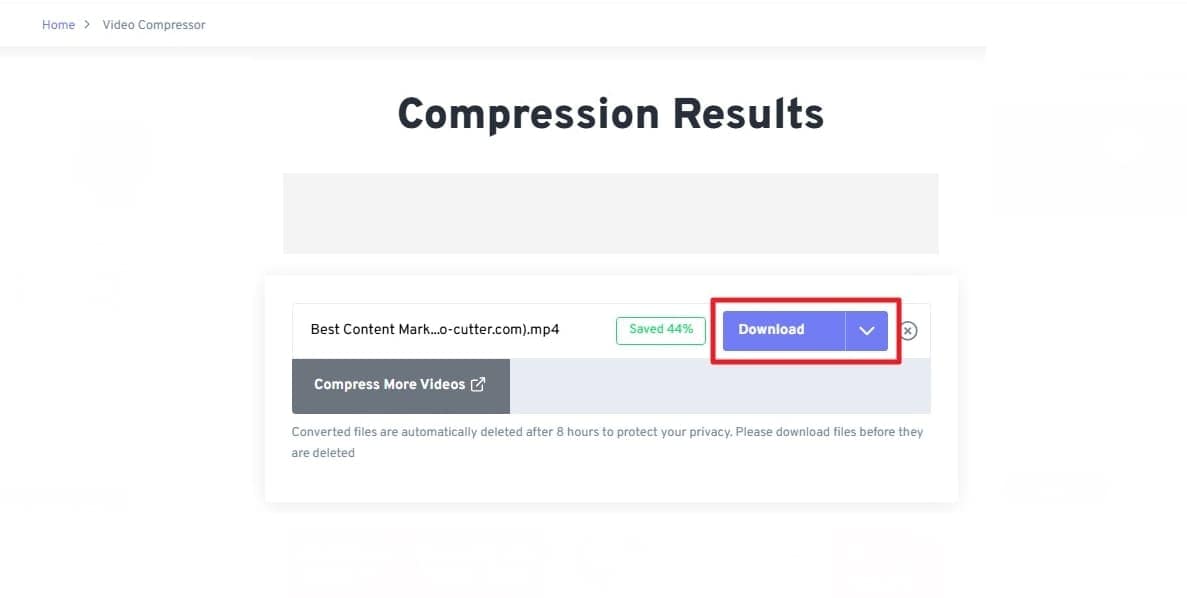
Step 4. Download Compressed File
Save the video to your device using the “Download” button once it is successfully compressed.
4. CapCut
CapCut’s online tool acts as a compression video with no quality loss solution, shrinking videos while keeping visuals and audio intact. It supports modern video formats and is optimized for quick, efficient compression. Ideal for social media creators and casual users alike, it reduces file size without noticeable degradation.
Step-by-Step Guide to Compress Videos Using CapCut
To learn how to compress video with CapCut, read the steps provided next:
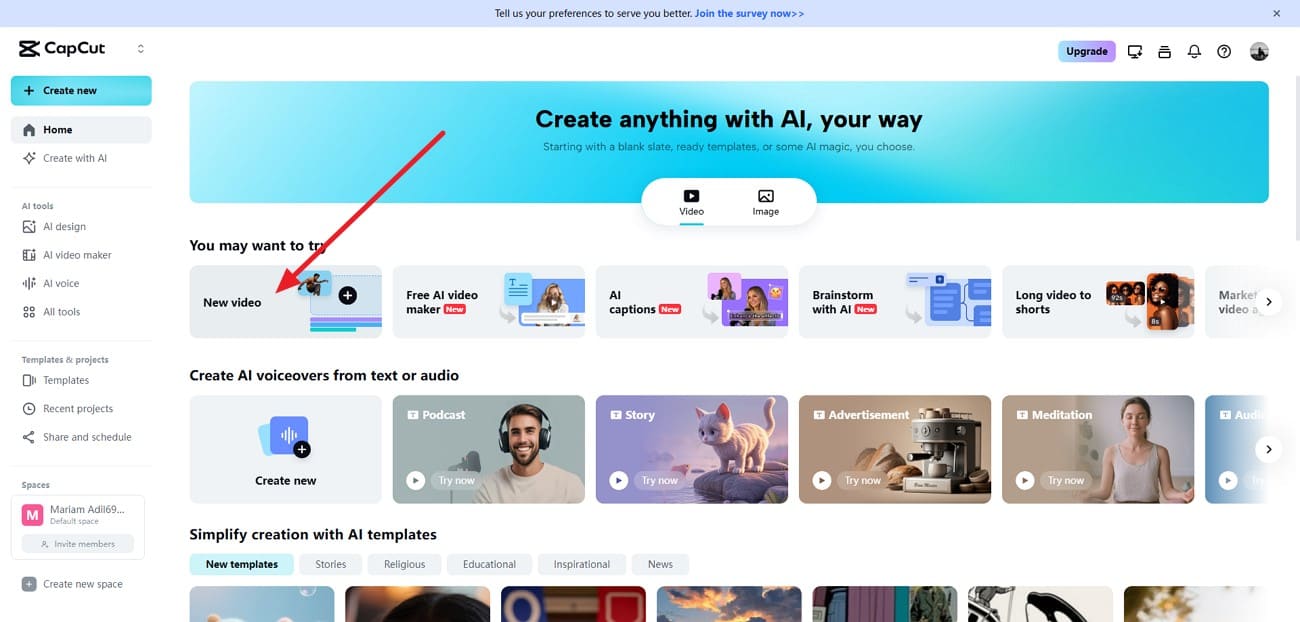
Step 1. Upload Video to CapCut
After accessing the tool on your browser, press the “New Video” button to upload the video.
Step 2.Choose Export Settings
Once the video is uploaded, head to the top-right corner and press “Export.” Under the Export option, lower the “Resolution,” “Quality,” and “Frame Rate” from the options provided and press the “Export” button to save the compressed version.

5. Veed.io
This tool provides a compression without losing the quality video feature that preserves clarity and colors even after reducing file size. It supports multiple formats and high-resolution videos, offering a versatile solution for creators who need efficient storage or online sharing. The platform ensures that videos remain smooth and visually appealing, making it suitable for professional or personal use.
Step-by-Step Guide to Compress Videos Using VEED
Follow the steps provided next to learn how to compress video using VEED:
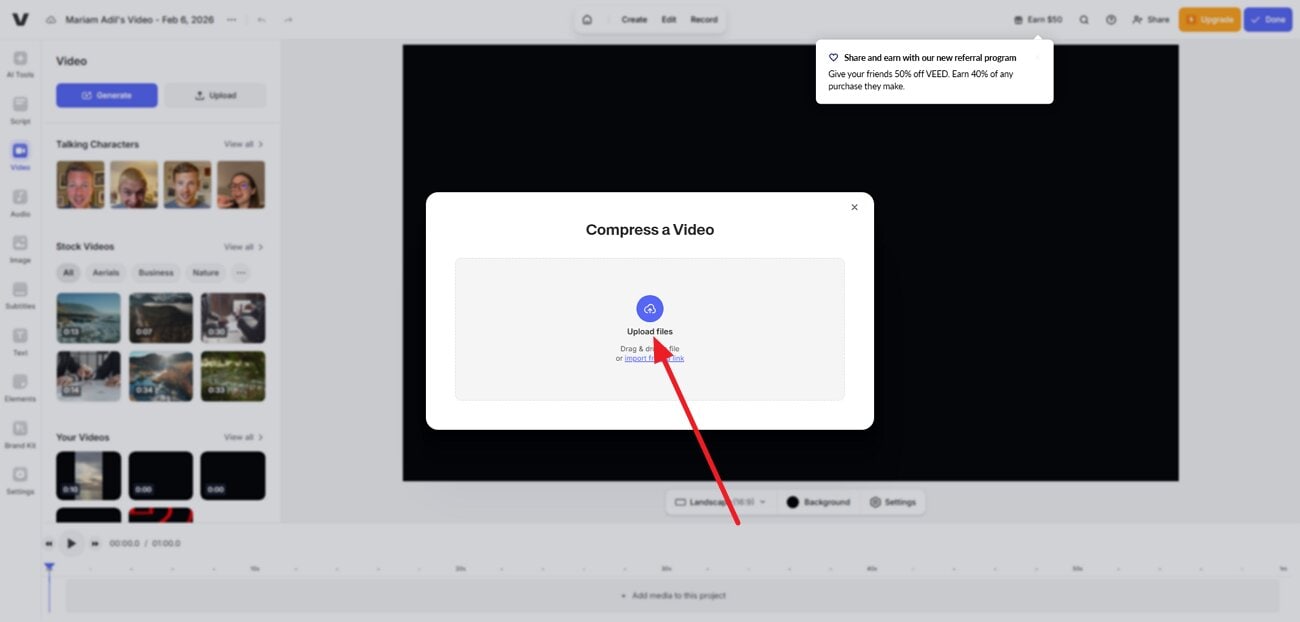
Step 1. Upload video to Veed
Upload your video to the tool’s interface using the “Upload Files” option.
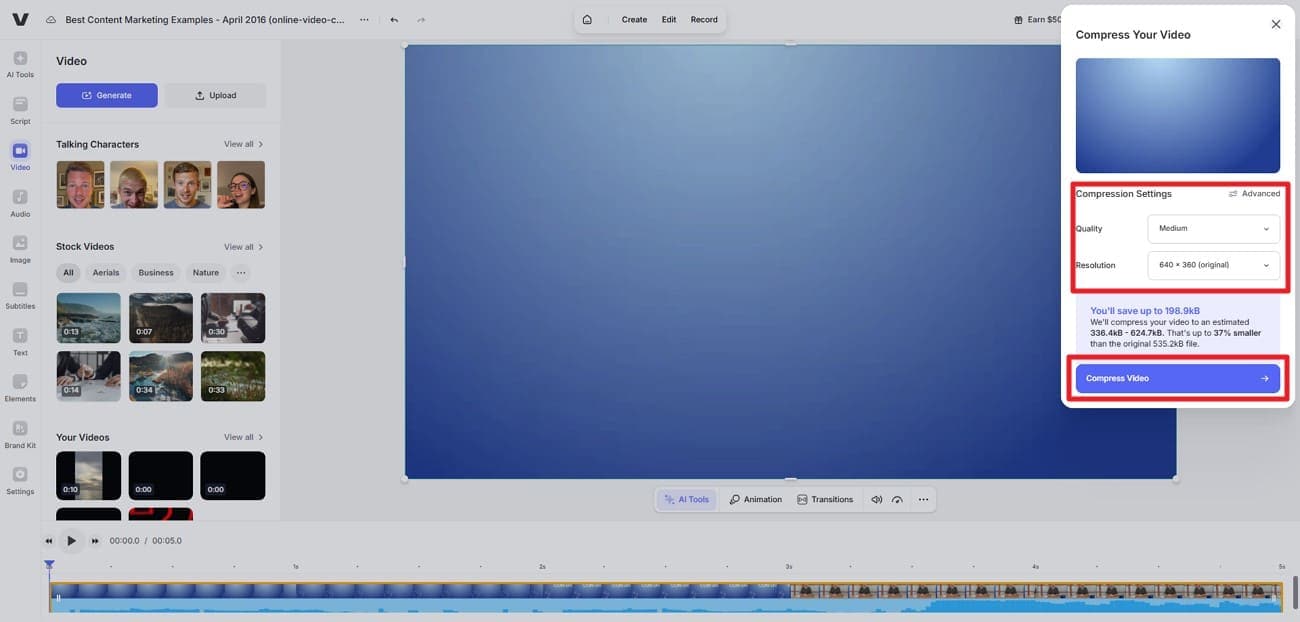
Step 2. Press Compress Video
Once uploaded, choose the compression settings from the options provided on the right and press “Compress Video.”
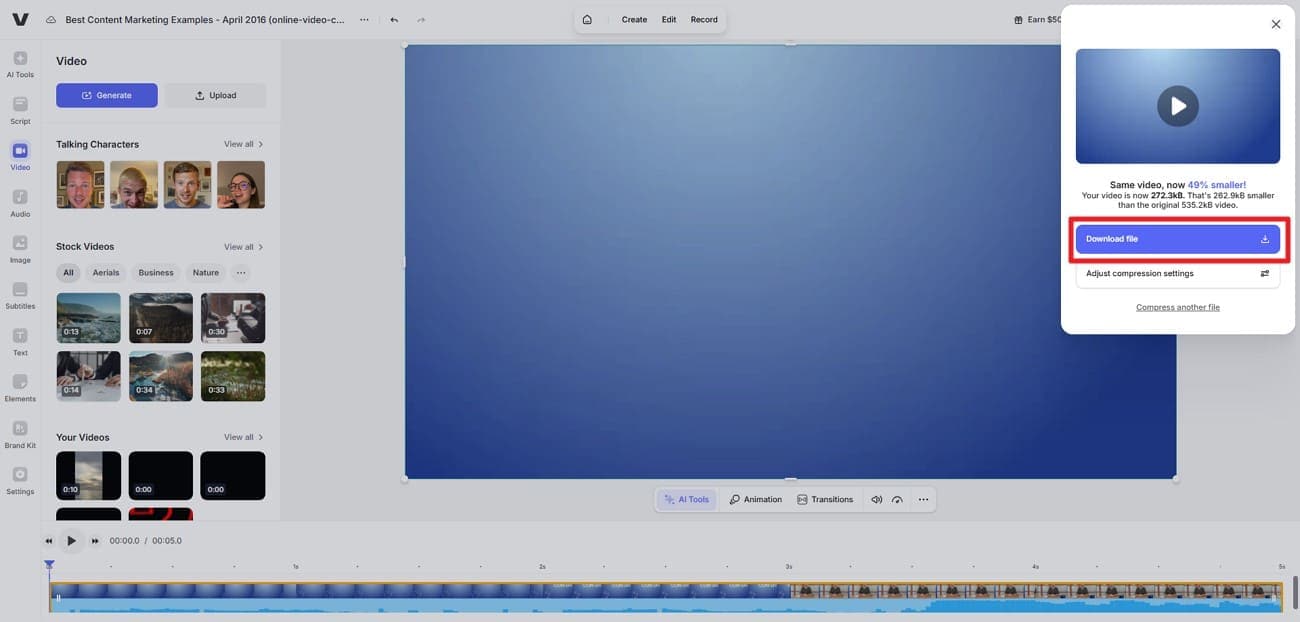
Step 3. Press the Download File
When the video is successfully compressed, press the “Download File” button to save the video to your device.
Part 4. Finding the Best Video Compressor: A Tabular Comparison
As different tools offer varying levels of control, speed, and convenience, choosing the right video compressor with no quality loss solution depends on your workflow. The comparison below highlights key differences to help you decide which option best fits your video compression needs:
| Tool | Type | Quality Retention | Compression Control | File Size Handling | Best For |
| HandBrake | Desktop | Very Good | Advanced | Medium Files | Technical users needing precise control |
| UniConverter | Desktop | Excellent | Advanced + AI modes | Very large (4K/8K) | Professionals and frequent users |
| VLC | Desktop | Good | Manual, basic | Medium to large | Basic compression with playback needs |
| UniConverter Online | Online | Very Good | Adjustable levels | up to 50 MB | Quick browser-based compression |
| Clideo | Online | Good | Presets only | up to 500 MB | Casual users and quick tasks |
| FreeConvert | Online | Very Good | Adjustable levels | up to 1 GB | Flexible online compression |
| CapCut | Online | Good | Basic | Medium files | Social media creators |
| VEED | Online | Good | Basic to moderate | Medium files | Content creators need a preview |
Part 5. Online vs. Desktop Video Compressors: Which One to Choose?
When selecting a lossless video compressor, the decision often comes down to how and why you’re compressing videos. Both online and desktop tools serve different purposes, and the right choice depends on file size, frequency of use, and quality expectations. Below is a clear comparison to help you decide:
File Size & Resolution
Choose Online When: You’re compressing small to medium videos and want quick results without installing software.
Choose Desktop When: You’re working with large, 4K, or 8K videos that require stable, high-quality compression. Tools like UniConverter offer large file and resolution support.
Compression Control
Choose Online When: Preset-based compression is sufficient, and you don’t need advanced customization.
Choose Desktop When: You want full control over bitrate, resolution, codec, and compression intensity.
Speed & Performance
Choose Online When: Internet speed is strong, and the task is a one-time or occasional compression job.
Choose Desktop When: You need faster processing, batch compression, and consistent performance without internet dependency.
Security & Privacy
Choose Online When: Files are non-sensitive and cloud-based processing is acceptable.
Choose Desktop When: Videos contain private or professional content and must stay offline. UniConverter lets you compress entirely offline with full data control.
Part 6. Video Compressor Without Quality Loss: Advanced Tips and Tricks
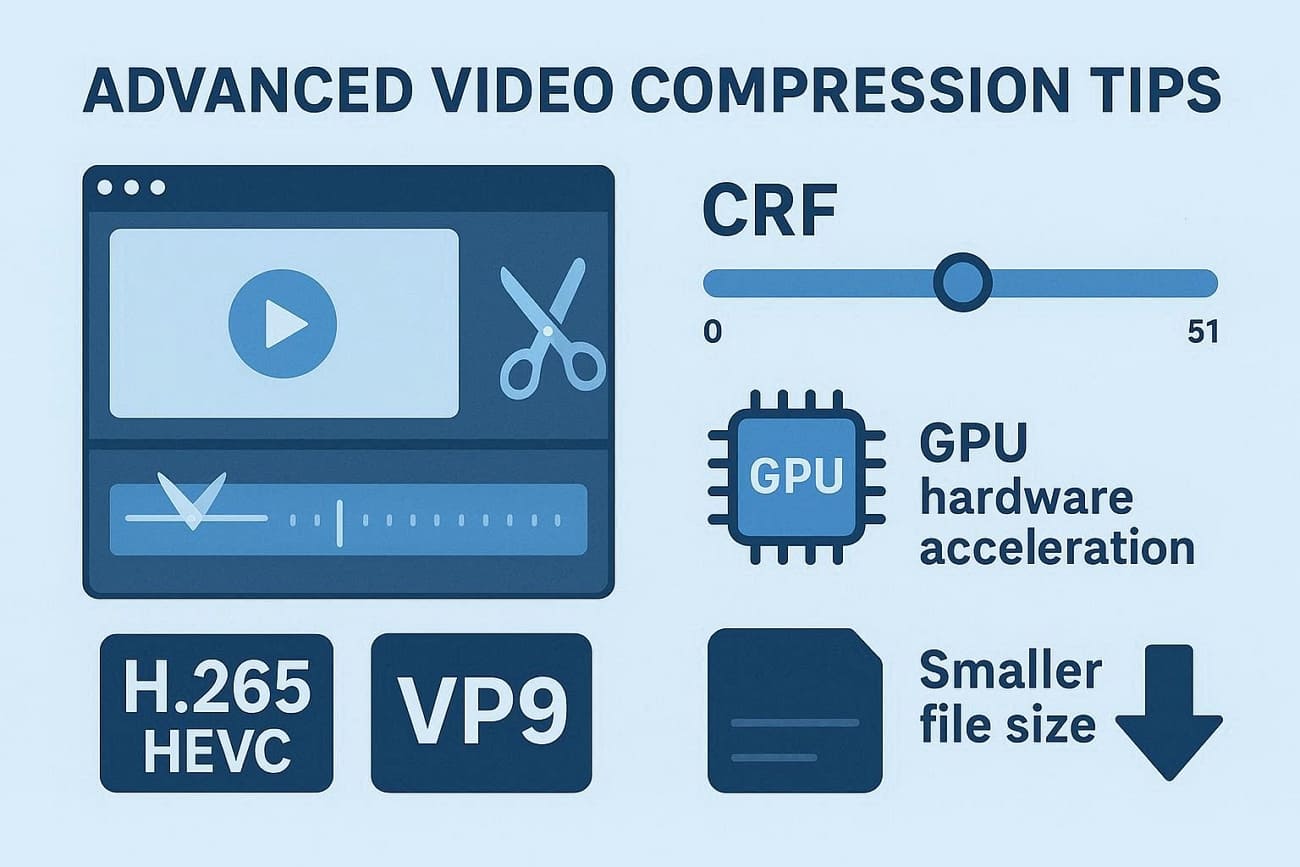
When aiming to maintain crisp visuals and clear audio, knowing how to compress files without losing quality can make a significant difference. Applying these techniques ensures smaller file sizes without compromising playback, color accuracy, or smoothness:
Use Constant Rate Factor (CRF): Adjust CRF settings in tools like HandBrake to balance compression and visual fidelity. Lower CRF values retain more detail, while higher values reduce file size.
Leverage Hardware Acceleration: Tools such as UniConverter can use GPU encoding to speed up compression without degrading quality.
Optimize Keyframe Intervals: Properly spaced keyframes improve video compression efficiency and maintain smooth playback.
Trim Unnecessary Footage: Removing unused sections before compression reduces file size while keeping core content intact.
Choose Efficient Codecs: H.265/HEVC or VP9 offer superior compression compared to older codecs, preserving quality at smaller sizes.
Conclusion
To wrap it up, this article provided a detailed guide on how to compress videos without quality loss. The article explained guides using different online and offline tools. However, for the best balance of speed, flexibility, and quality, Wondershare UniConverter is highly recommended. Its multiple compression modes, batch processing, and advanced settings ensure you can shrink large videos efficiently while preserving clarity.
FAQs
-
1. Can I compress videos without losing quality?
Yes. By using modern codecs, adjusting bitrate and resolution appropriately, and choosing reliable tools like Wondershare UniConverter, you can reduce file size with little to no noticeable quality loss. -
2. What is the best tool to compress large MP4 files?
For large MP4 files, UniConverter is a strong choice because it supports batch compression, advanced compression modes, and maintains high visual quality. -
3. Are online video compressors safe to use?
Many reputable online compressors are safe, but it’s important to use trusted services. For sensitive or very large files, desktop software like UniConverter provides better security and offline processing. -
4. Can I compress videos on my phone?
Yes. Some online video compressors work directly in mobile browsers, and certain desktop tools also offer companion mobile apps for convenient compression on the go. -
5. How much can a video be compressed without losing quality?
Depending on the resolution, codec, and video content, file sizes can often be reduced by 30% to 70% without visible quality loss when using advanced compression tools.

