User Guide
How to use Wondershare UniConverter (originally Wondershare Video Converter
Ultimate)?
Learn the step-by-step guide below.

UniConverter User Guide
-
Get Started
-
Video Converter
- Convert DVD to Any Format | Wondershare UniConverter for Windows
- Add Media Files | Wondershare UniConverter for Windows
- Convert Video from Camcorder | Wondershare UniConverter for Windows
- Convert Videos for iPhone/iPad/Android Devices | Wondershare UniConverter for Windows
- Convert Videos for Social Network | Wondershare UniConverter for Windows
- Convert Videos from iOS & Android Devices | Wondershare UniConverter for Windows
- Convert Videos to Any Format | Wondershare UniConverter for Windows
- Convert Video to Audio | Wondershare UniConverter for Windows
- Mute Video | Wondershare UniConverter for Windows
- Add Audio to Video | Wondershare UniConverter for Windows
- Convert Multiple Video In Batches | Wondershare UniConverter for Windows
- Easily Convert 4K and 8K Videos | Wondershare UniConverter for Windows
- Convert Video to MP3 | Wondershare UniConverter for Windows
- Convert Video to GIF | Wondershare UniConverter for Windows
- Convert SDR Video to HDR | Wondershare UniConverter for Windows
- Convert Video to Image Sequence | Wondershare UniConverter for Windows
-
Audio Converter
-
Video Compressor
-
Downloader
-
Screen Recorder
- Record Screen | Wondershare UniConverter for Windows
- Record Webcam | Wondershare UniConverter for Windows
- Record Audio | Wondershare UniConverter for Windows
- Record Application | Wondershare UniConverter for Windows
- Geme Recorder | Wondershare UniConverter for Windows
-
Merger
-
DVD Burner
-
Media Player
-
Video Editor
- Trim Video | Wondershare UniConverter for Windows
- Add Watermark | Wondershare UniConverter for Windows
- Crop Video | Wondershare UniConverter for Windows
- Apply Effect | Wondershare UniConverter for Windows
- Add Subtitle | Wondershare UniConverter for Windows
- Audio Track Volume | Wondershare UniConverter for Windows
- Auto Video Cutter | Wondershare UniConverter for Windows
-
Tools
- Image Converter | Wondershare UniConverter for Windows
- GIF Maker | Wondershare UniConverter for Windows
- Fix Video Metadata | Wondershare UniConverter for Windows
- CD Burner | Wondershare UniConverter for Windows
- Convert CD to MP3 | Wondershare UniConverter for Windows
- Convert Video to VR | Wondershare UniConverter for Windows
- Transfer Video/Audio Files to iOS Device | Wondershare UniConverter for Windows
- Transfer Video/Audio to Android Device | Wondershare UniConverter for Windows
- Subtitle Editor | Wondershare UniConverter for Windows
- Watermark Editor | Wondershare UniConverter for Windows
- Smart Trimmer | Wondershare UniConverter for Windows
- Background Remover | Wondershare UniConverter for Windows
- Auto Crop Video | Wondershare UniConverter
- AI Portrait | Wondershare UniConverter
- Intro & Outro | Wondershare UniConverter
- Vocal Remover | Wondershare UniConverter for Windows
- Noise Remover | Wondershare UniConverter for Windows
- Video Stabilization | Wondershare UniConverter for Windows
- AI Video Enhancer | Wondershare UniConverter for Windows
- AI Image Enhancer | Wondershare UniConverter for Windows
- AI Script Generator | Wondershare UniConverter for Windows
- Text To Speech | Wondershare UniConverter for Windows
- AI Subtitle Translator | Wondershare UniConverter for Windows
- AI Thumbnail Maker | Wondershare UniConverter for Windows
- Auto Highlight | Wondershare UniConverter for Windows
- Scene Detection | Wondershare UniConverter for Windows
- Remove Watermark | Wondershare UniConverter for Windows
- Voice Changer | Wondershare UniConverter for Windows
- AI Video Enhancer | Use AI Batch Image Enhancement
- Crop Image | Wondershare UniConverter for Windows
- Rotate Image | Wondershare UniConverter for Windows
- Resize Image | Wondershare UniConverter for Windows
- Image Edit | Wondershare UniConverter for Windows
- Anime Enhancement | Wondershare UniConverter for Windows
- Face Enhancement | Wondershare UniConverter for Windows
- Adjust Speed of TTS Audio | Wondershare UniConverter for Windows
- Voice Clone | Wondershare UniConverter for Windows
- Enable NVIDIA Acceleration | NVIDIA Graphics Driver Installation Tutorial on Win
- Smart Summarizer | Wondershare UniConverter for Windows
FAQs
Video/Audio Solutions
How to record Webcam on Windows
Sometimes you may need to explain something to a client or student, but you just can’t meet them in person. Fortunately, you have the solution in an excellent webcam recorder like Wondershare UniConverter. This tool allows you to record yourself quickly and easily using your desktop’s internal or external webcam. Not only that, but users can also set recording preferences like the output resolution, frame rate, and format. Don’t forget it also lets you edit the recording by adding subtitles, cutting, converting, compressing, and more.
Note: A Windows 10 computer is used here for illustration.
How to Record Webcam - Wondershare UniConverter (Win) User Guide
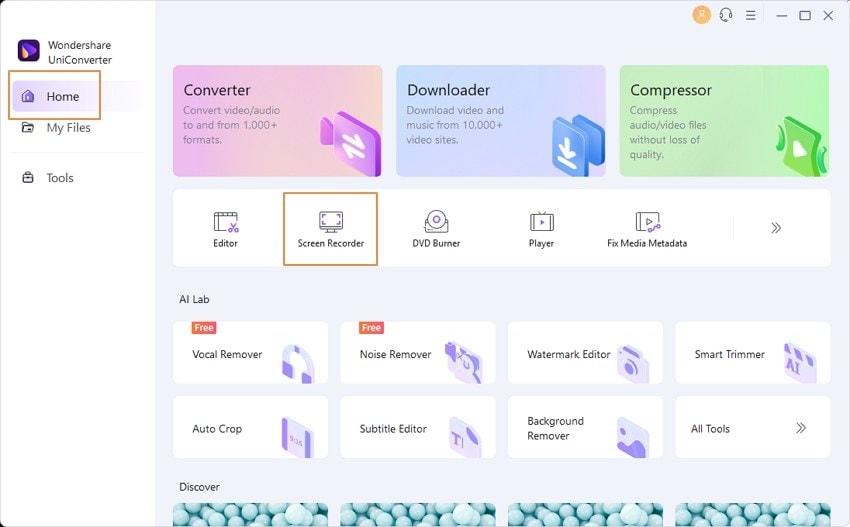
Step 1 Launch the webcam recorder.
Run Wondershare UniConverter and from the Home section on the left pane, choose the Screen Recorder function.
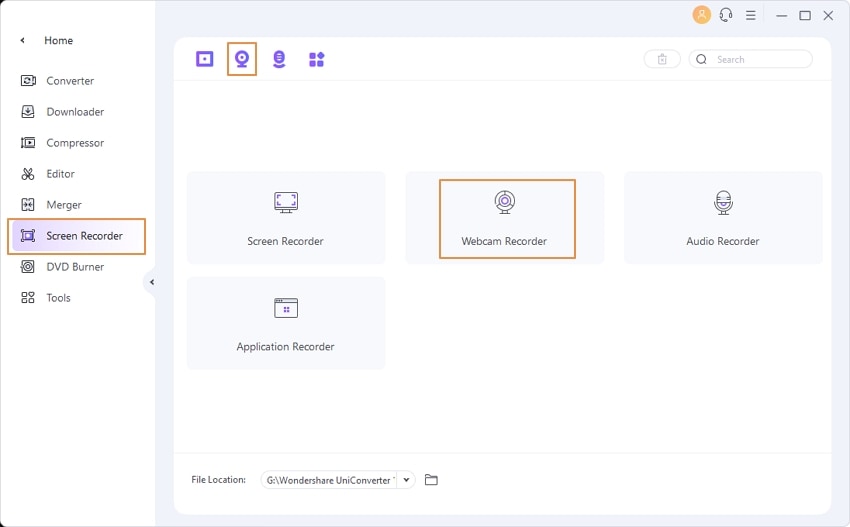
Click the Webcam Recorder or the ![]() , the Webcam Recorder should launch automatically if your computer supports this function.
, the Webcam Recorder should launch automatically if your computer supports this function.
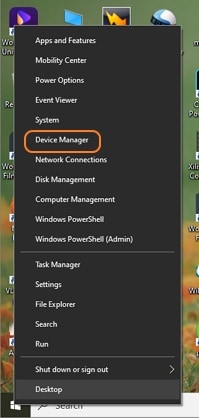
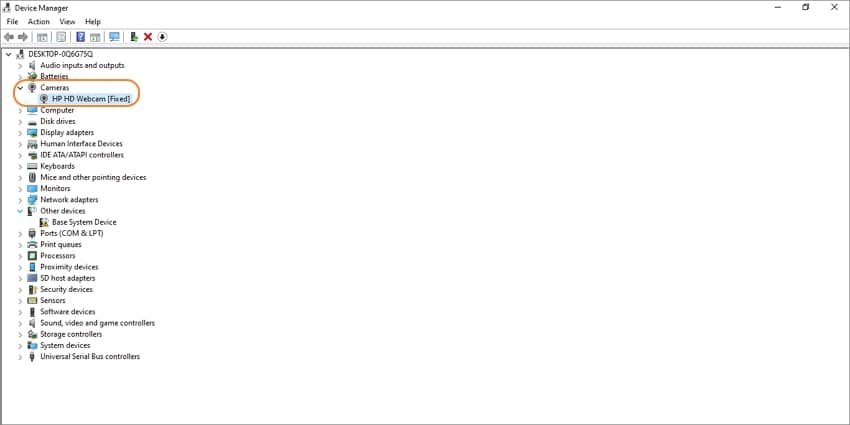
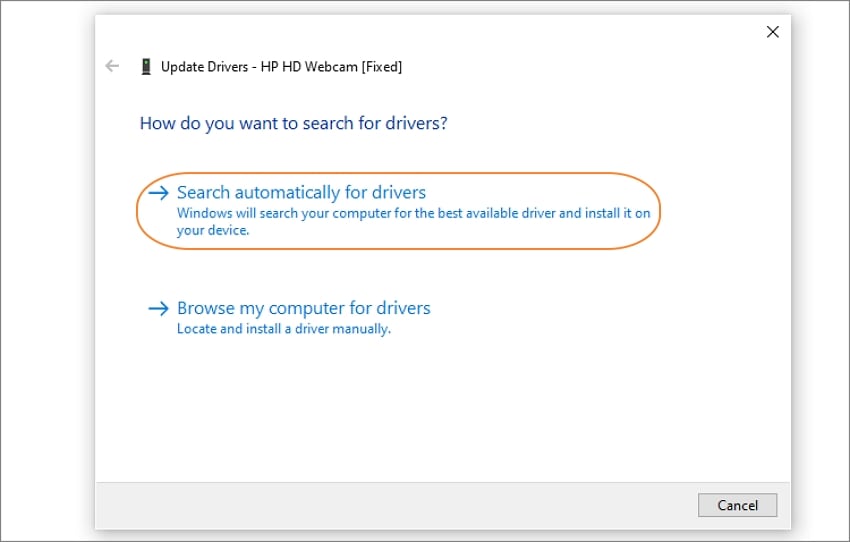
If you can't open the Webcam Recorder function, you probably need to update your webcam driver. To do that, go to the Start menu or Windows logo at the bottom-left corner and right-click it. Choose the Device Manager, open the Cameras, and right-click your integrated webcam. Now click the Update Driver and then choose the Search automatically for drivers. Finally, click Search for updated drivers on Windows update and update your webcam driver accordingly.
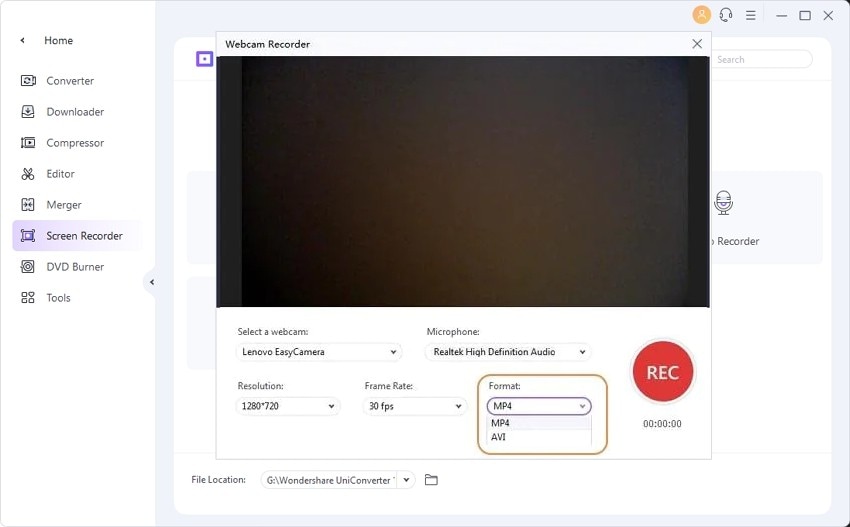
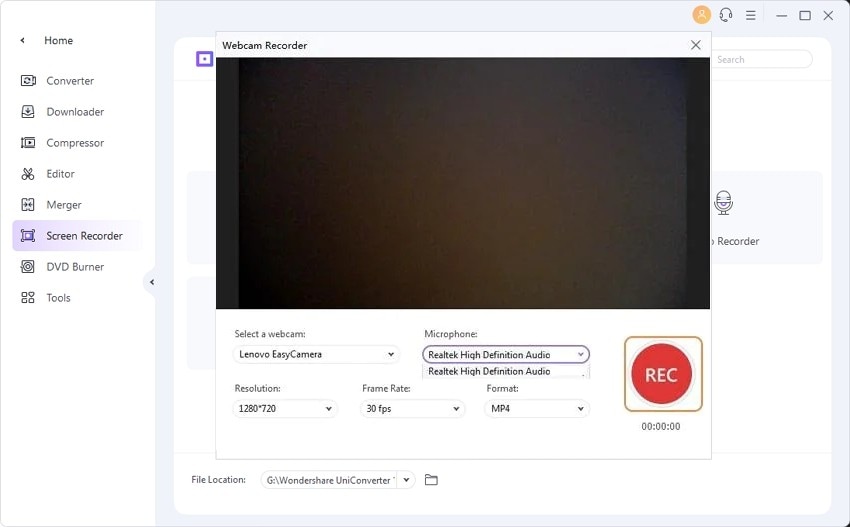
Step 2 Set up the recording preferences.
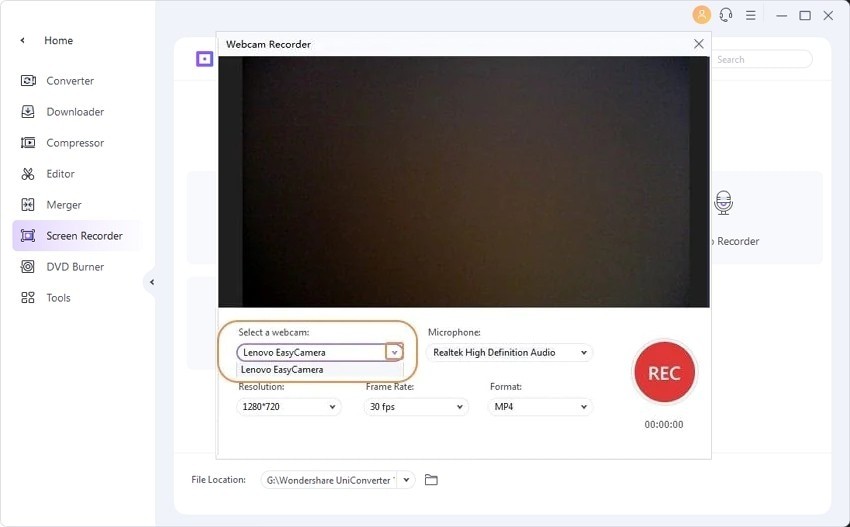
After launching the Webcam Recorder successfully, it’s time to customize things a little bit. Complete the following actions:
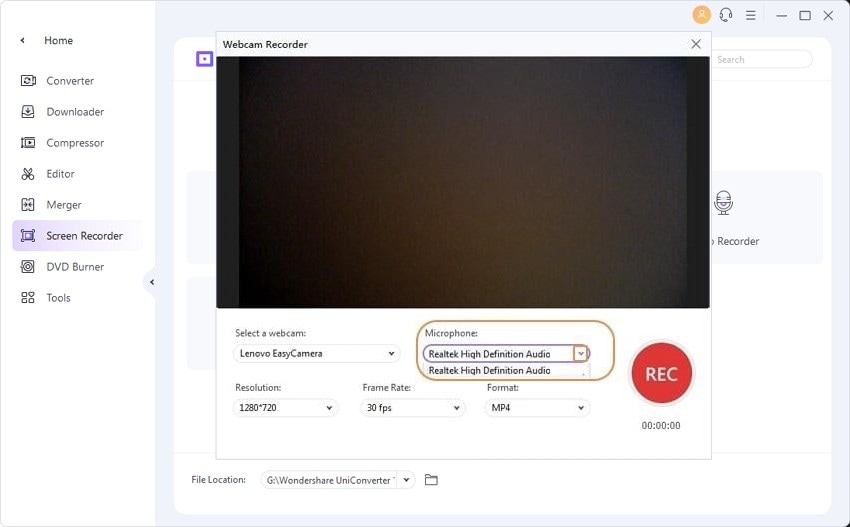
- Webcam: Open the Microphone list and select the input microphone. You can use the system’s mic or connect your external mic and select it.
- Microphone: Under this section, tap the Start manually and end after checkbox to enter your preferred recording duration. You can also click the Start and end on the schedule checkbox to input a start time and end time, depending on the date, month, and even year. Note that you can only click one checkbox at a time.
- Video Resolution: Set the output resolution under the Resolution menu. Note that the higher the resolution, the better the quality, and the bigger the file size.
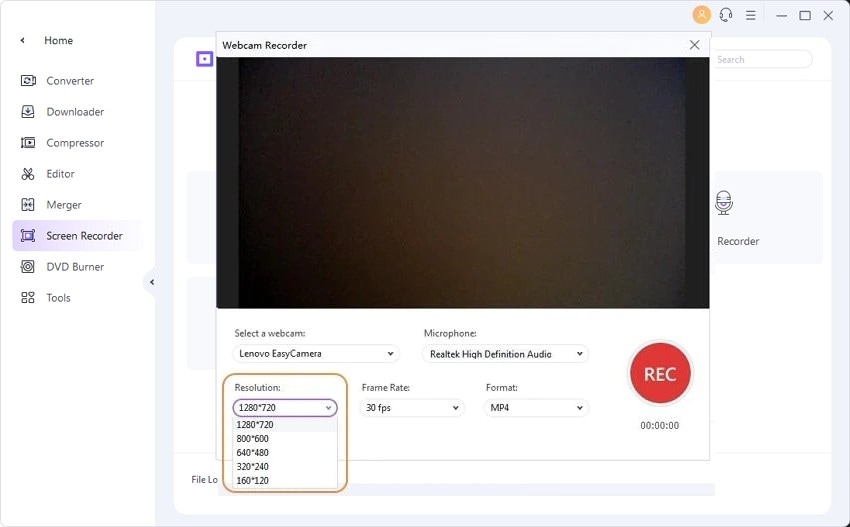
- Output Format: Finally, set an output format on the Format list. You can export the webcam video to either MP4 or AVI video formats.
Step 3 Start and stop recording.
Lastly, click the REC button and wait for three seconds to begin recording yourself on your computer. If satisfied, click the Stop and close the recording window. Preview your video by clicking the Open. You can even upload directly to Vimeo by tapping the Share icon.
Note: Optionally, you can import this footage back to Wondershare UniConverter for further edits and modifications.
 print
print
