Wondershare UniConverter
-
 Record desktop screens in fullscreen mode or select a specific recording area.
 - Add Picture-in-Picture, voice narrations, and annotations to screen recordings.
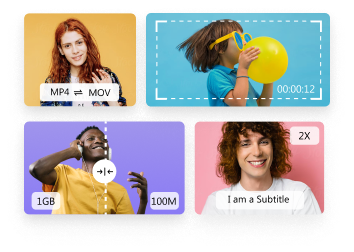
- Versatile toolbox combines screen recorder, GIF maker, fix video metadata, etc.


Screen Recorder
- 1. Top 7 Facecam Screen Recorders
- 2. How to Make a Picture-in-Picture Effect
- 3. Does Picture-in-Picture Work with Zoom
- 4. How to Record a Lecture or Game with Picture-in-Picture Effect
- 5. Record Yourself and Your Screen at the Same Time
- 6. Best and Easy Ways to Learn What is Picture-in-Picture
- 7. Make a Picture-in-Picture Video with Wondershare UniConverter
- 8. The Ultimate Guide to Create PIP Videos in Camtasia
- 9. Record Webcam and Screen at the Same Tim
- 10. How to Record Picture-in-Picture Video
All Topic
- AI Tools Tips
- DVD Users
- Social Media Users
- Camera Users
- Photography
- Creative Design
- Movie Users
- Travelling Fans
- Educational Users
- More Solutions
- Holidays
- Game Lovers
- Other Tips
How to Make a Picture-in-Picture Video with Wondershare UniConverter
by Kayla Morrison • 2024-07-20 18:27:51 • Proven solutions
Do you want to learn how to add a Picture in Picture effect and unique annotations to a video? You've clicked the right page. Take this example; you'll notice a small video overlay displaying the sign interpreter when watching TV news. It is also common is some YouTube video tutorials, where you can see the narrator's face on a little overlay video. This is called a Picture in Picture (PIP) effect. So, if you want to create an educational YouTube channel, this article will teach you how to make a Picture in Picture video on your desktop.
- Part 1. A Full Guide to Add Picture in Picture with Wondershare UniConverter
- Part 2. Tips and Tricks of Using the Recording Function on Wondershare UniConverter
Part 1. A Full Guide to Add Picture in Picture with Wondershare UniConverter
If you're still scouring the internet searching for a desktop screen recorder, search no more because Wondershare UniConverter is precisely what you need. First of all, this app is super-duper easy to install and use. After installing and running it, you will access tens of powerful file editing tools. You'll get a screen recorder, video editor, video converter, GIF maker, DVD burner, and so on. When recording a desktop screen, you can set the output quality, frame rate, and format. You can also add annotations and voice narrations easily. And most importantly, it works with most external webcams.
Wondershare UniConverter - Best Desktop App to Add Picture-in-Picture Effects
-
It boasts excellent recording capabilities for recording screen, audio, and webcam with high-quality.
-
Edit videos with features of cropping, trimming, rotating, adding watermarks, applying effects, and others.
-
Edit, enhance & personalize your video file.
-
Batch video/audio compression and conversion are allowed.
-
Toolbox with additional functions like Screen Recorder, VR Converter, GIF Maker, Fixing Media Metadata, and more.
-
Supported OS: Windows 10/8/7/XP/Vista, macOS 11 Big Sur, 10.15 (Catalina), 10.14, 10.13, 10.12, 10.11, 10.10, 10.9, 10.8, 10.7.
Below is how to make a picture in picture video using Wondershare UniConverter:
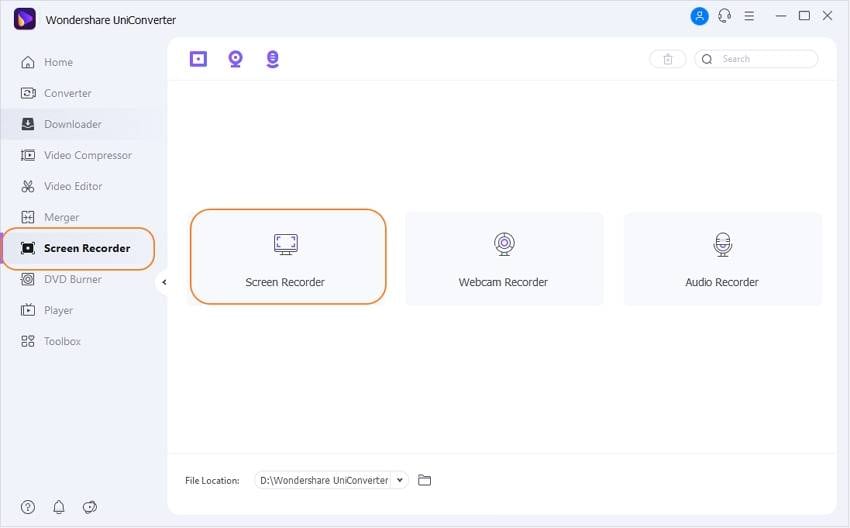
Step 1 Launch Wondershare Screen Recorder Function.
Install and run Wondershare UniConverter on your computer, then click the Screen Recorder tab on the left pane. Now tap the Screen Recorder icon in the middle of the Screen Recorder window to launch the recording tool.
Step 2 Choose a Webcam to Add Picture in Picture Video.
To record a video overlay, you must, first of all, select a webcam on the Webcam section. Next to it, you can set an input microphone under the Microphone menu. This is what you'll use to add voice narrations to your video. What's more, users can record system audio under the Speaker section.
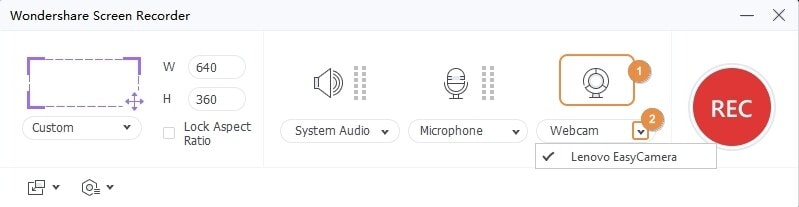
Step 3 Select a Recording Area and Start Capturing Desktop Screen.
Before you start recording, enter the capture area as either custom or fullscreen. You can set a custom recording area by dragging the cropper inwards or outwards to fit a section you want to record. Now launch the app to record, then tap the red REC button to begin recording. If satisfied, click the Stop button.
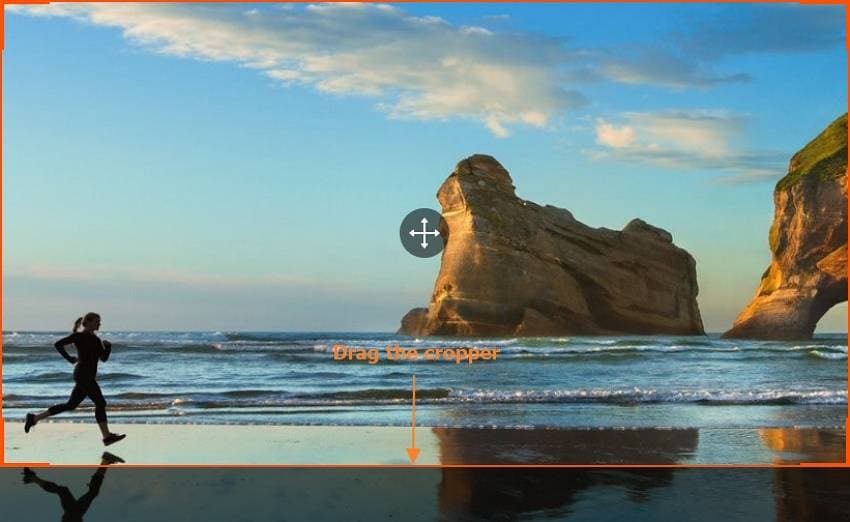
Note: After clicking the REC button, you'll see an arrow on the right side of the capture area. Click it to open the recording taskbar.

Part 2. Tips and Tricks of Using the Recording Function on Wondershare UniConverter
As said initially, the Wondershare UniConverter screen recording function is one of the most feature-rich you can find. So, without beating about the bush much, let's discuss some interesting hidden features of this tool.
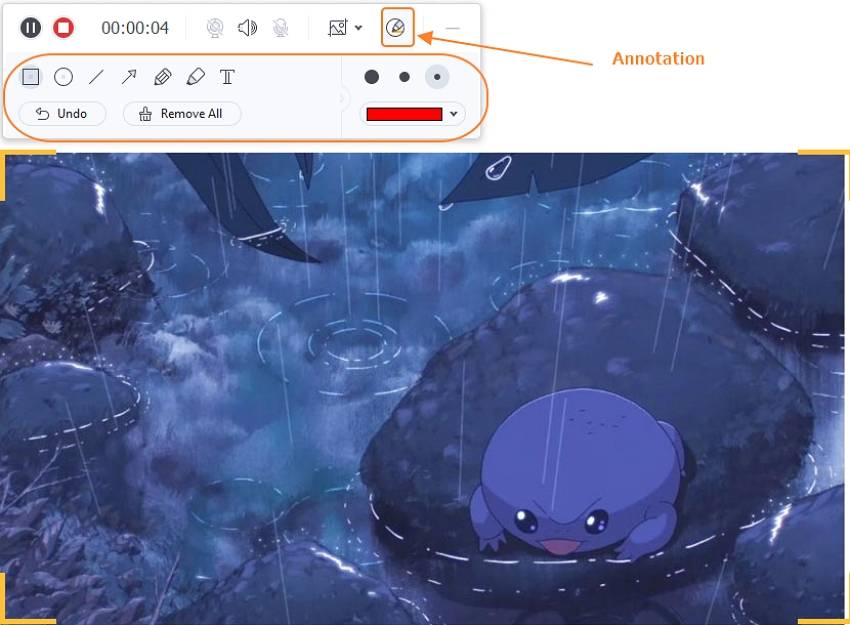
Tips 1: How to Record Screen and Add Annotation?
Sometimes you may want to direct your audience on how to do something using arrows, lines, stickers, and so on. In that case, click the Annotation feature on the toolbar. You can now add texts, arrows, drawings, shapes, colors, and more. You can even delete shapes and texts if you want.
Tips 2: How to record screen and make screencasts?
Do you want to add an overlay video of yourself narrating to viewers? Click the Webcam button. Your computer camera will launch immediately, where you'll see yourself on the overlay screen at the bottom-left corner. Interestingly, you can drag the overlay screen to change its position.

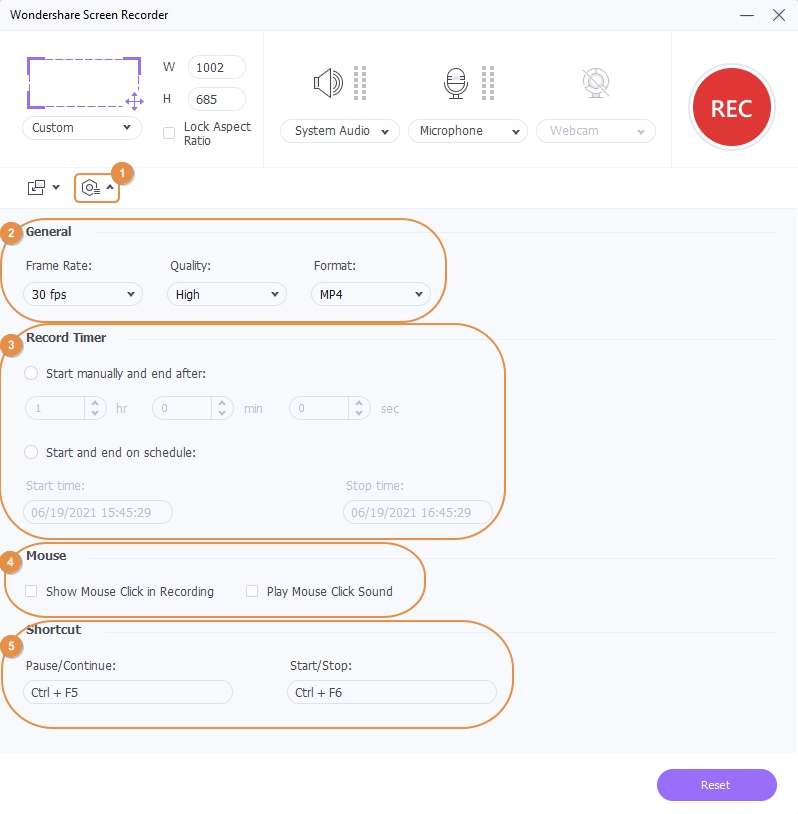
Tips 3: How to record screen with multiple output format?
Wondershare Screen Recorder also lets users set the output format of their choice. Before clicking the REC button, open the Settings button, then set a new target file format under the Format list. You can export recordings to MP4, AVI, or FLV. But of course, MP4 is the best video format if you want to watch the video on any platform or website. Users can also change the frame rate, output quality, and keyboard shortcuts.
Conclusion
This is the simplest way to add a picture in picture effect to a Mac or Windows screen recording. As you can see, users can add annotations, voice narrations, choose an output format, set the frame rate, and more. Best of all, you can use the Video Editor function to convert, crop, cut, add subtitles, etc.
Your complete video toolbox

Other popular Articles From Wondershare

Kayla Morrison
staff Editor