User Guide
How to use Wondershare UniConverter (originally Wondershare Video Converter
Ultimate)?
Learn the step-by-step guide below.

UniConverter User Guide
-
Get Started
-
Video Converter
- Convert DVD to Any Format | Wondershare UniConverter for Windows
- Add Media Files | Wondershare UniConverter for Windows
- Convert Video from Camcorder | Wondershare UniConverter for Windows
- Convert Videos for iPhone/iPad/Android Devices | Wondershare UniConverter for Windows
- Convert Videos for Social Network | Wondershare UniConverter for Windows
- Convert Videos from iOS & Android Devices | Wondershare UniConverter for Windows
- Convert Videos to Any Format | Wondershare UniConverter for Windows
- Convert Video to Audio | Wondershare UniConverter for Windows
- Mute Video | Wondershare UniConverter for Windows
- Add Audio to Video | Wondershare UniConverter for Windows
- Convert Multiple Video In Batches | Wondershare UniConverter for Windows
- Easily Convert 4K and 8K Videos | Wondershare UniConverter for Windows
- Convert Video to MP3 | Wondershare UniConverter for Windows
- Convert Video to GIF | Wondershare UniConverter for Windows
- Convert SDR Video to HDR | Wondershare UniConverter for Windows
- Convert Video to Image Sequence | Wondershare UniConverter for Windows
-
Audio Converter
-
Video Compressor
-
Downloader
-
Screen Recorder
- Record Screen | Wondershare UniConverter for Windows
- Record Webcam | Wondershare UniConverter for Windows
- Record Audio | Wondershare UniConverter for Windows
- Record Application | Wondershare UniConverter for Windows
- Geme Recorder | Wondershare UniConverter for Windows
-
Merger
-
DVD Burner
-
Media Player
-
Video Editor
- Trim Video | Wondershare UniConverter for Windows
- Add Watermark | Wondershare UniConverter for Windows
- Crop Video | Wondershare UniConverter for Windows
- Apply Effect | Wondershare UniConverter for Windows
- Add Subtitle | Wondershare UniConverter for Windows
- Audio Track Volume | Wondershare UniConverter for Windows
- Auto Video Cutter | Wondershare UniConverter for Windows
-
Tools
- Image Converter | Wondershare UniConverter for Windows
- GIF Maker | Wondershare UniConverter for Windows
- Fix Video Metadata | Wondershare UniConverter for Windows
- CD Burner | Wondershare UniConverter for Windows
- Convert CD to MP3 | Wondershare UniConverter for Windows
- Convert Video to VR | Wondershare UniConverter for Windows
- Transfer Video/Audio Files to iOS Device | Wondershare UniConverter for Windows
- Transfer Video/Audio to Android Device | Wondershare UniConverter for Windows
- Subtitle Editor | Wondershare UniConverter for Windows
- Watermark Editor | Wondershare UniConverter for Windows
- Smart Trimmer | Wondershare UniConverter for Windows
- Background Remover | Wondershare UniConverter for Windows
- Auto Crop Video | Wondershare UniConverter
- AI Portrait | Wondershare UniConverter
- Intro & Outro | Wondershare UniConverter
- Vocal Remover | Wondershare UniConverter for Windows
- Noise Remover | Wondershare UniConverter for Windows
- Video Stabilization | Wondershare UniConverter for Windows
- AI Video Enhancer | Wondershare UniConverter for Windows
- AI Image Enhancer | Wondershare UniConverter for Windows
- AI Script Generator | Wondershare UniConverter for Windows
- Text To Speech | Wondershare UniConverter for Windows
- AI Subtitle Translator | Wondershare UniConverter for Windows
- AI Thumbnail Maker | Wondershare UniConverter for Windows
- Auto Highlight | Wondershare UniConverter for Windows
- Scene Detection | Wondershare UniConverter for Windows
- Remove Watermark | Wondershare UniConverter for Windows
- Voice Changer | Wondershare UniConverter for Windows
- AI Video Enhancer | Use AI Batch Image Enhancement
- Crop Image | Wondershare UniConverter for Windows
- Rotate Image | Wondershare UniConverter for Windows
- Resize Image | Wondershare UniConverter for Windows
- Image Edit | Wondershare UniConverter for Windows
- Anime Enhancement | Wondershare UniConverter for Windows
- Face Enhancement | Wondershare UniConverter for Windows
- Adjust Speed of TTS Audio | Wondershare UniConverter for Windows
- Voice Clone | Wondershare UniConverter for Windows
- Enable NVIDIA Acceleration | NVIDIA Graphics Driver Installation Tutorial on Win
- Smart Summarizer | Wondershare UniConverter for Windows
FAQs
Video/Audio Solutions
How to record yourself and your desktop screen at the same time
If you run a software review blog or a YouTube channel, you'll occasionally need to explain things on your desktop with exact steps and voice narrations. Fortunately, you can easily do that using Wondershare UniConverter's screen recorder function. With this app, you can quickly and easily record a section or the entire desktop screen by merely cropping. Interestingly, you can add texts, fonts, colors, and shapes as you record. Plus, this app can edit the recording by cutting, adding subtitles, applying background music, and more.
Step 1 Launch Wondershare Screen Recorder.
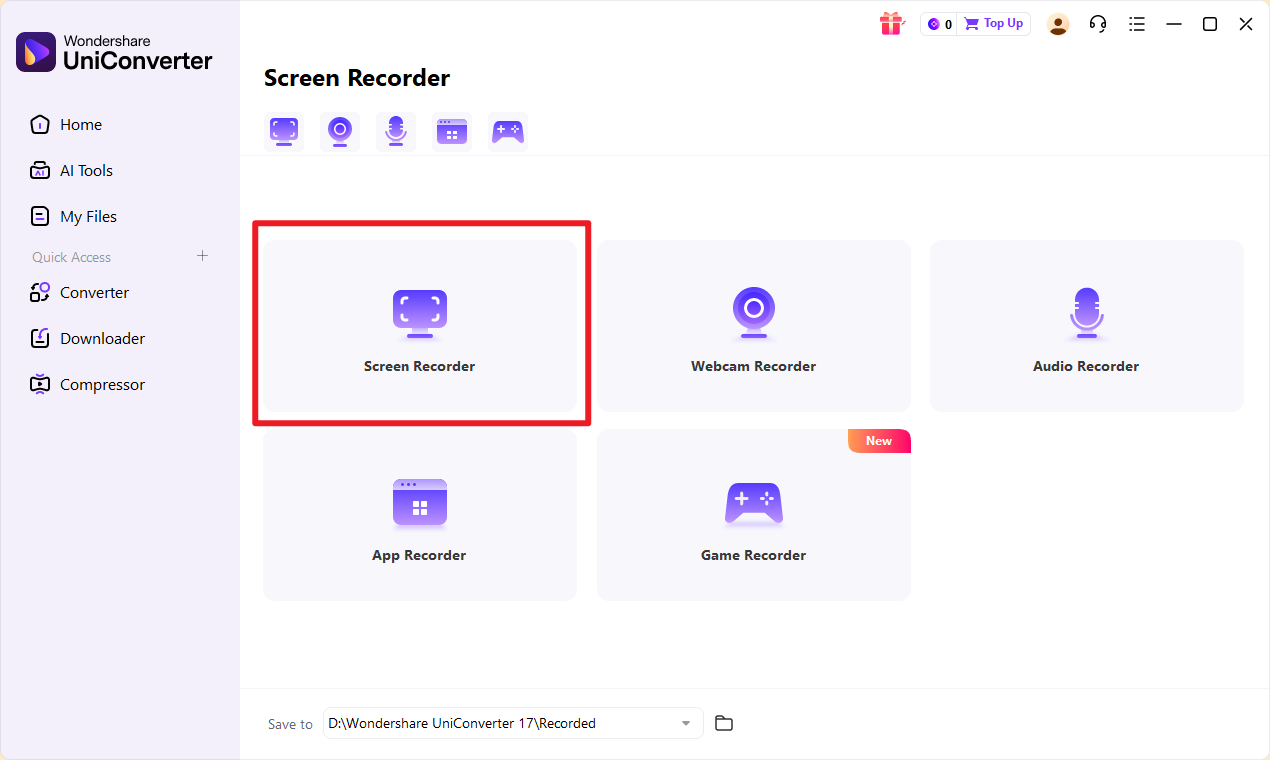
Install and open Wondershare UniConverter on your Windows PC (as used in this example) or Mac computer. Navigate to the left pane and from the Home section to find the Screen Recorder function.
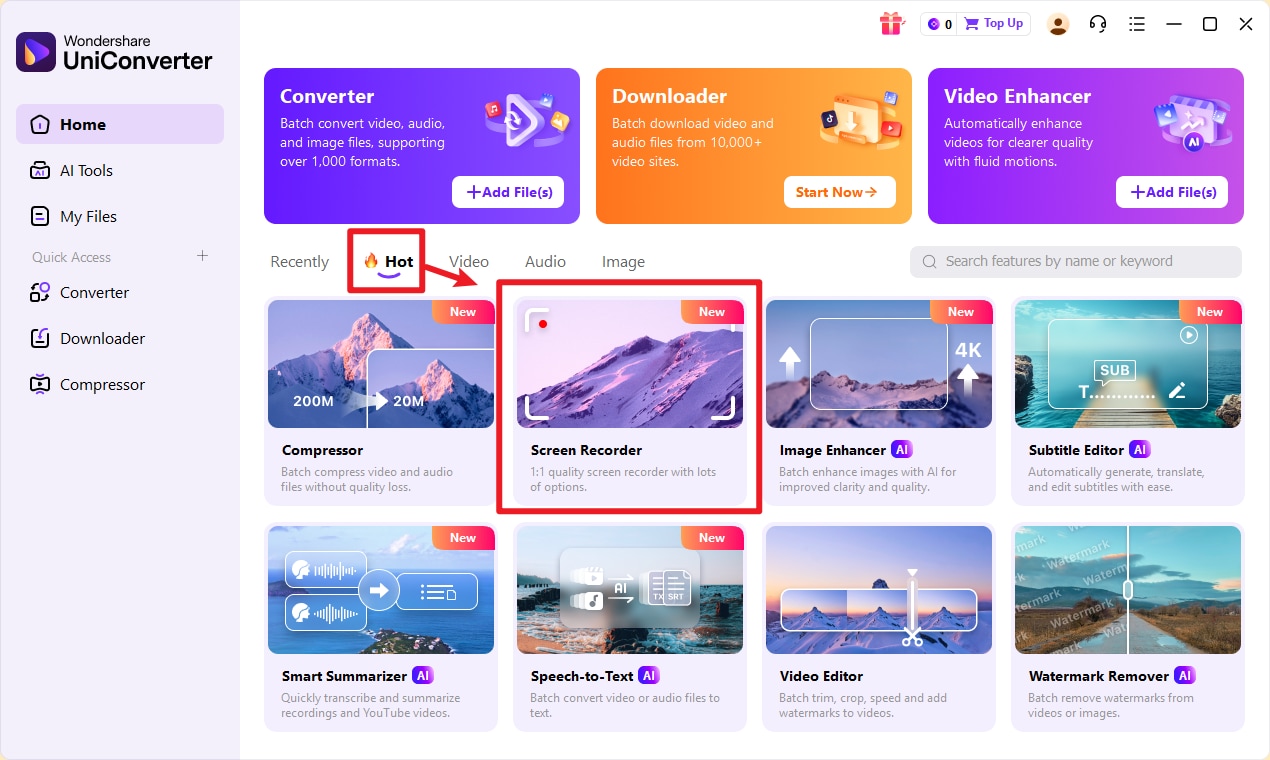
After that, tap the Screen Recorder icon at the center of the window to launch the Screen Recorder function.
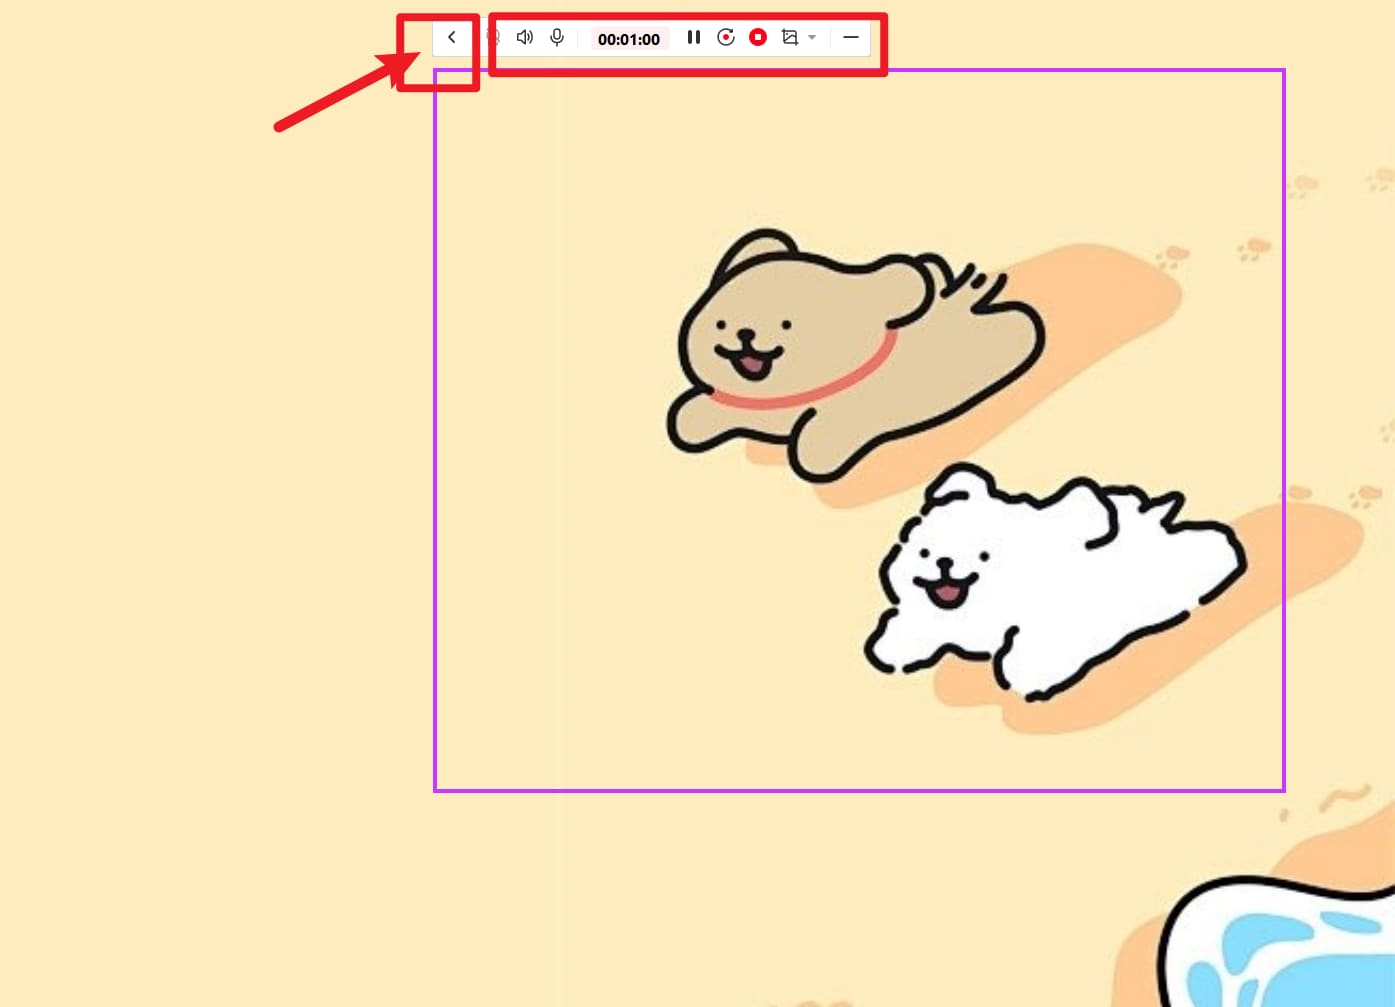
Step 2 Select the capture area and audio sources.
Open the window or app that you wish to record and then set the capture area by dragging the cropper. Just click the drop-down arrow below the cropper, choose the Custom, and select a place to record. To capture an entire screen, choose the Full-Screen mode. Another simple solution is to manually enter the Width (W) and Height (H). Note: Check the Lock Aspect Ratio box to set the capturing area proportionally.
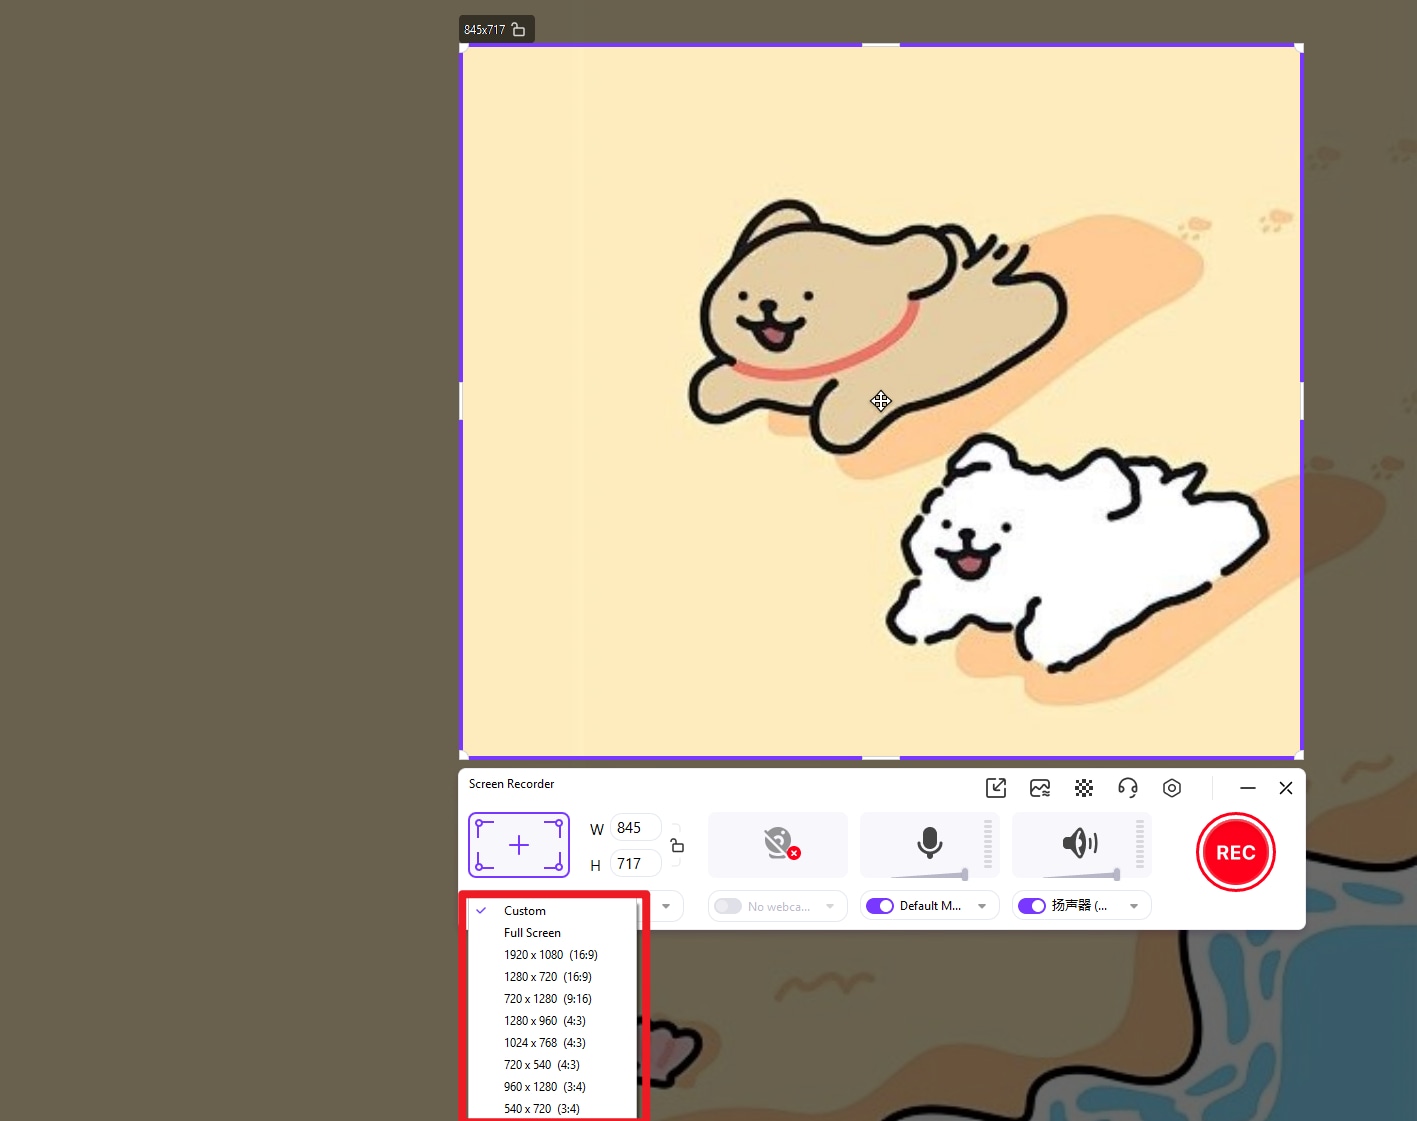
Tips: Wondershare UniConverter also supports dual-screen recording, you can switch the screen to record by clicking the Switch Screen icon beside the Gear icon. Then follow the same steps to start recording your chosen screen.
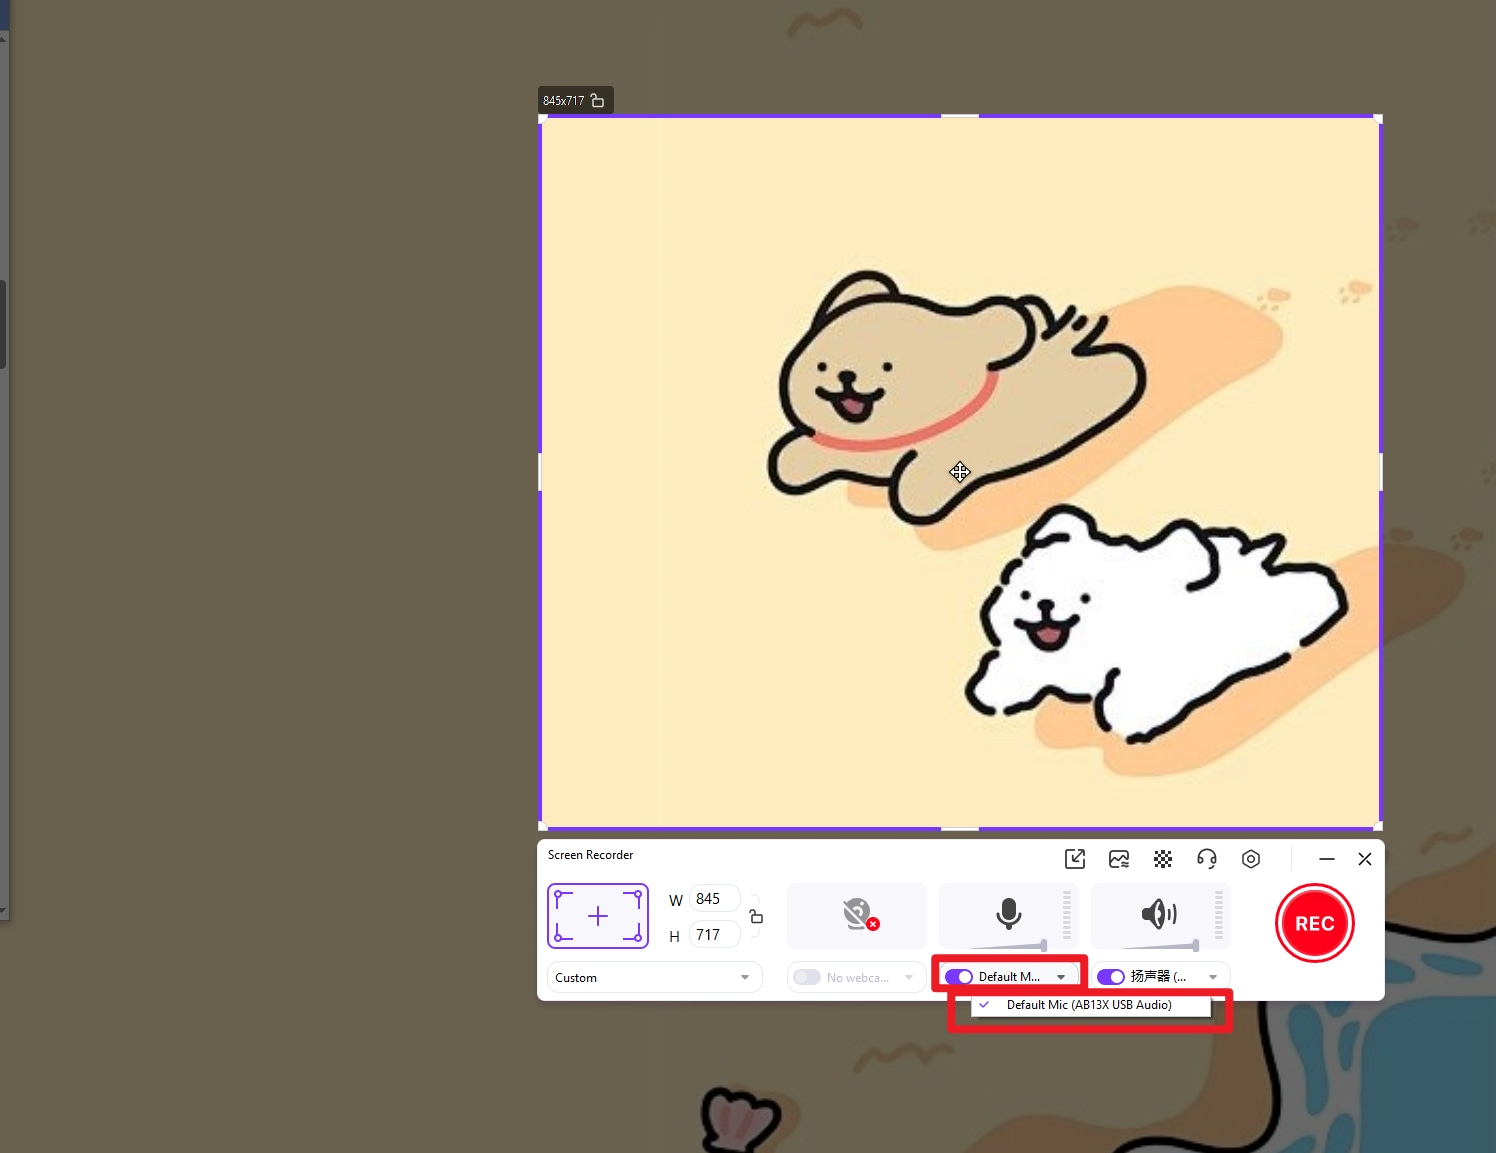
Step 3 Select the audio sources.
To record a desktop screen with voice narrations, you can use the system's internal mic or connect an external microphone and select it under the Microphone list. Click the Microphone icon to disable any voice narration while recording.
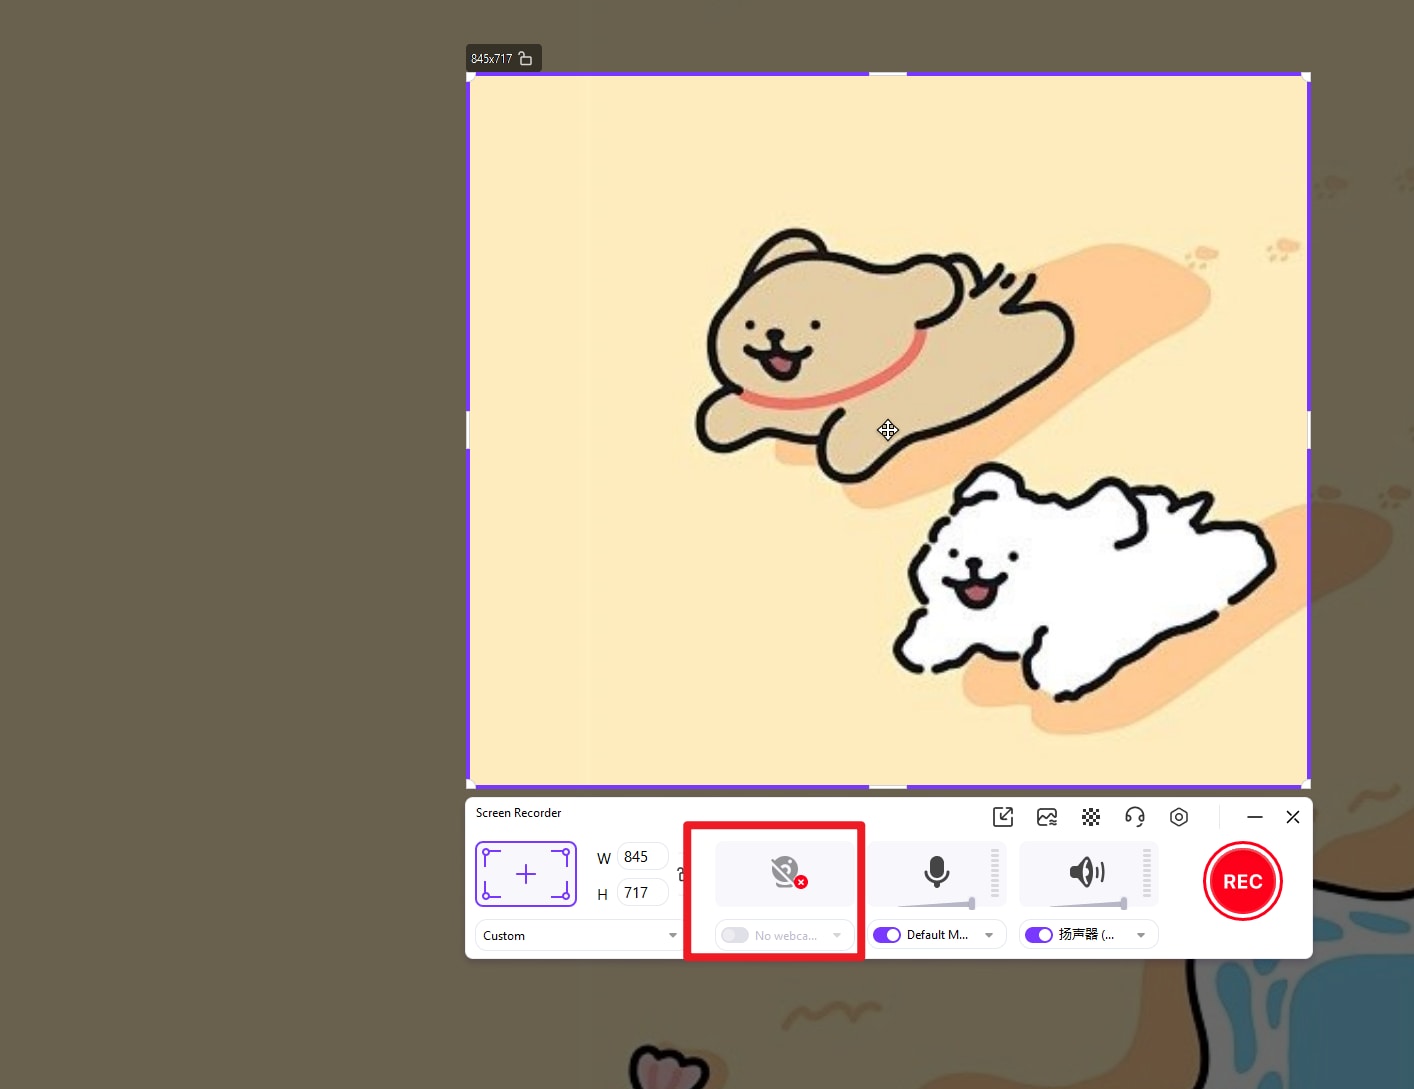
You can also open the System Audio menu and select an audio source. To prevent the Screen Recorder from capturing any sound that the system generates, click the Speaker icon above the System Audio.
Step 4 Enable the picture-in-picture mode (optional).
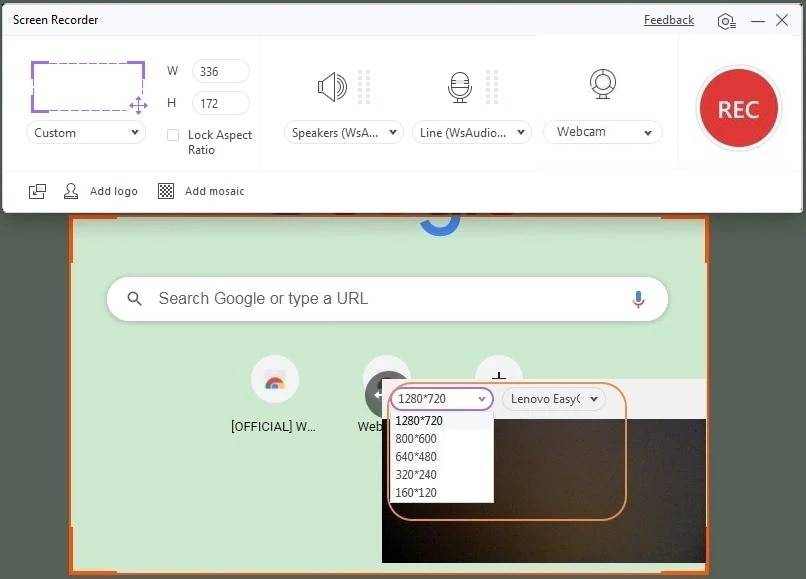
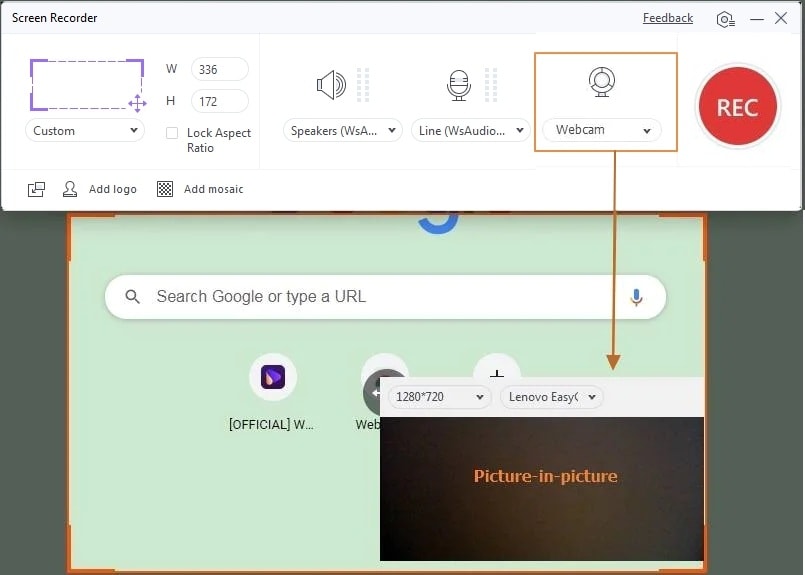
If you want to grab your viewers' attention, activate the picture-in-picture mode. In this case, you can see yourself as you record the desktop screen. Press the Webcam icon and then open the drop-down menu below it to select a camera. You can set the output resolution on the pop-up webcam window as 1280 x 720, 640 x 480, 640 x 400, and more.

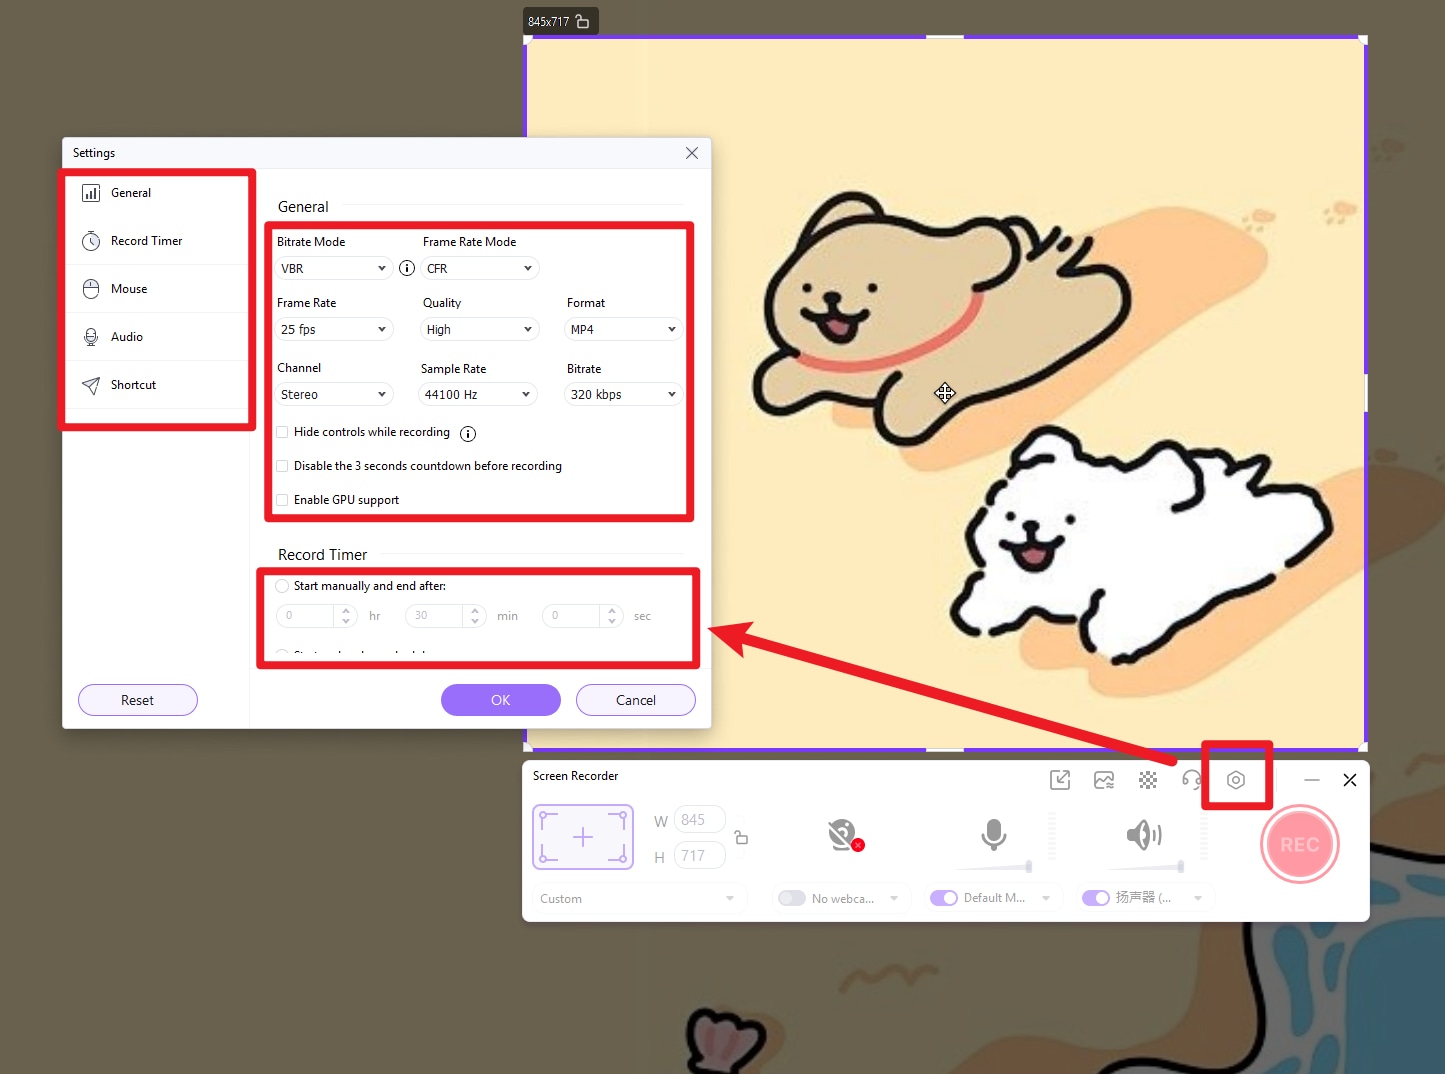
Step 5 Set the recording preferences and the destination location.
Tap the Gear icon below the REC (record) button to open the settings window. Now set the recording preferences under the following sections:
- General: Choose the output frame rate, quality, and format. Note: You can export the recorded video to MP4, AVI, or FLV.
- Record Timer: Under this section, tap the Start manually and end after checkbox to enter your preferred recording duration. You can also click the Start and end on the scheduling checkbox to input a start time and end time, depending on the date, month, and even year. Note that you can only click one checkbox at a time.
- Mouse: Check the boxes under this section to allow or disallow the mouse arrow and click sounds during the recording session.
- Shortcut: In this part, you can set the keyboard shortcuts for starting and stopping the recording session and playing and pausing the recording.
Note: You can click Reset from the bottom-right corner of the expanded interface to put all the custom preferences back to factory defaults.
Step 6 Start recording.
Click the Gear icon to close the Settings window and then press the REC button to commence the recording session. Wait until the count of three, and Wondershare UniConverter starts recording your desktop screen.

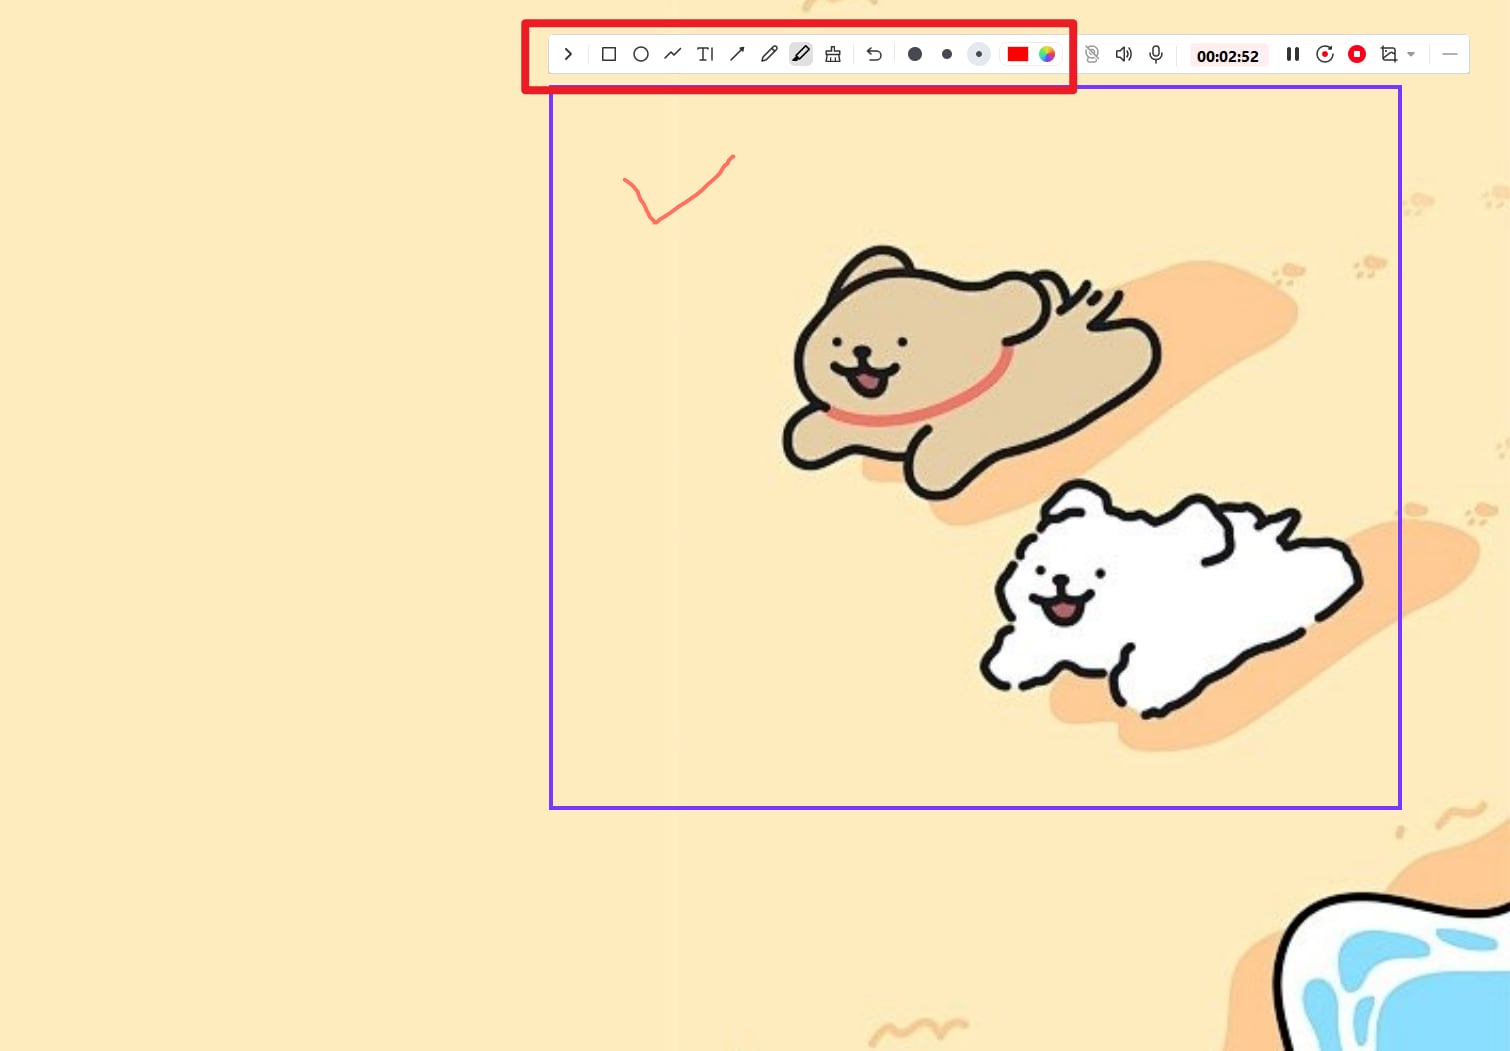
It doesn't stop there, though, because there are multiple other customizations to exploit. For instance, you can capture a screenshot by pressing the Picture icon. You can also mute your voice and disable the webcam as you continue recording by pressing the Webcam and Microphone icons.
Meanwhile, click the circle with a Pencil inside to add custom shapes, colors, drawings, lines, texts, and fonts. Don't forget the app allows you to undo and delete your creative materials.
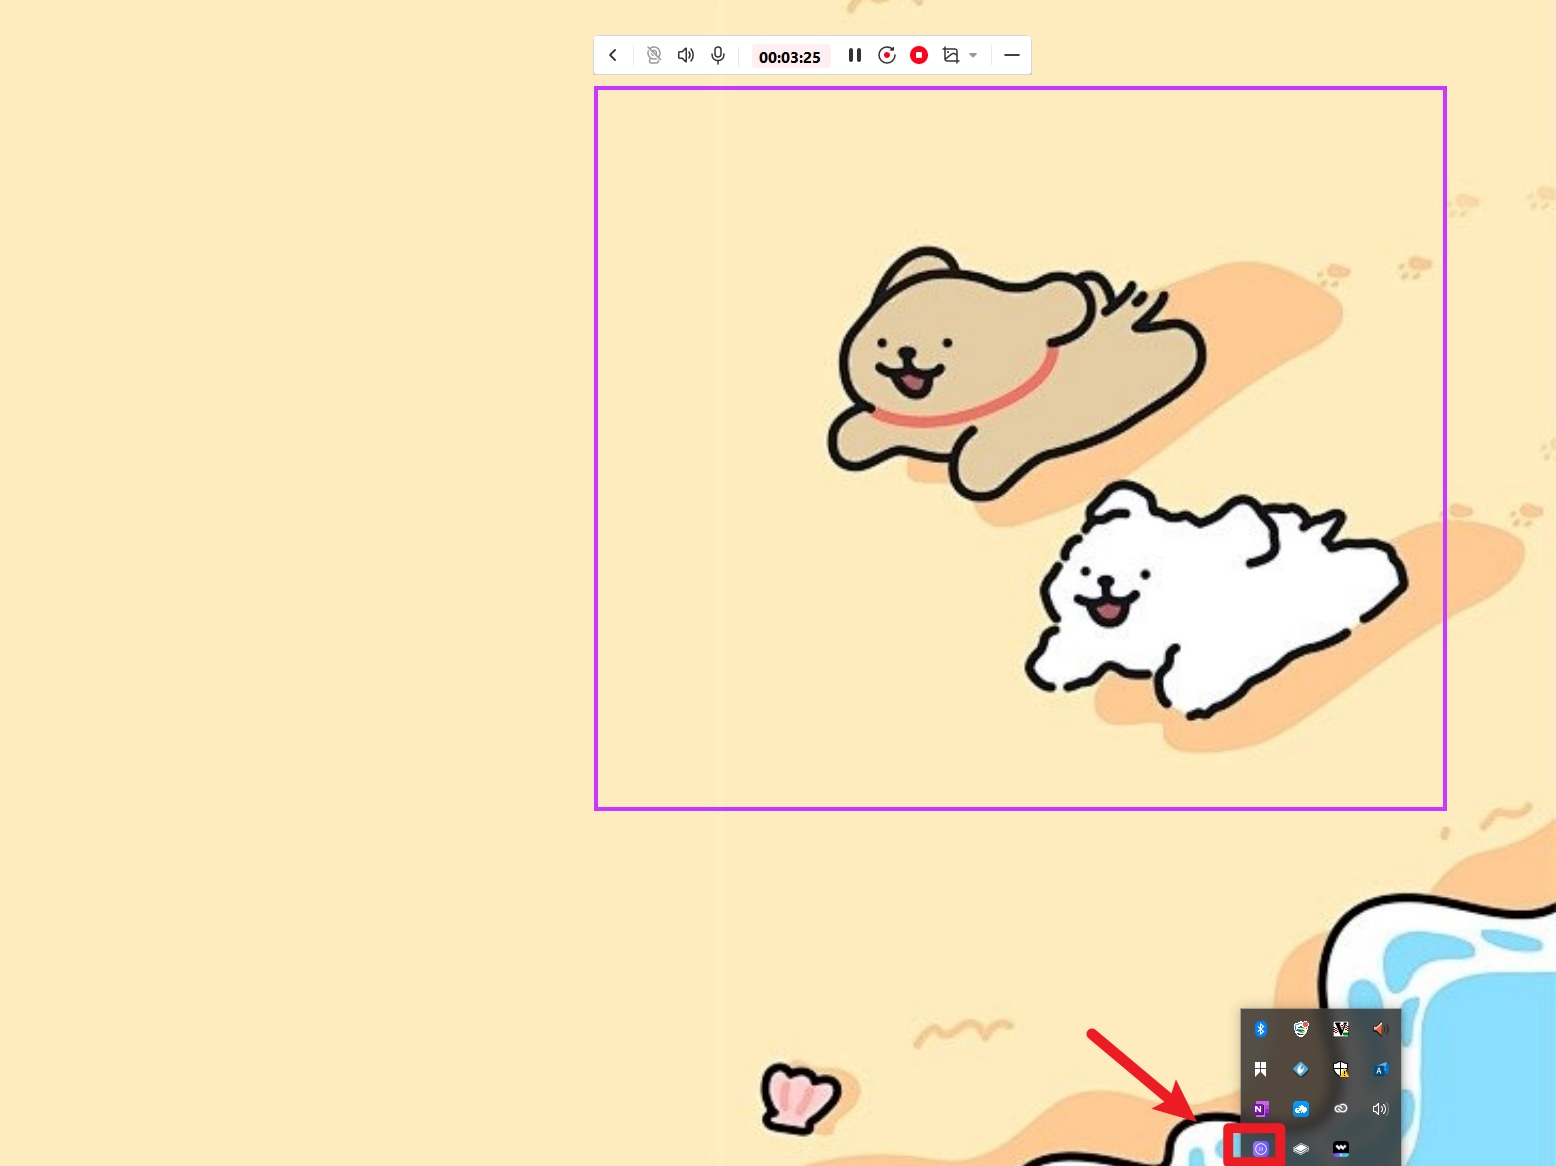
Note: You can minimize the screen recorder taskbar during the recording session if it's becoming a bother in your workspace. Open it from the Toolbars of your computer that are always in the right-bottom corner, as shown in the picture below.
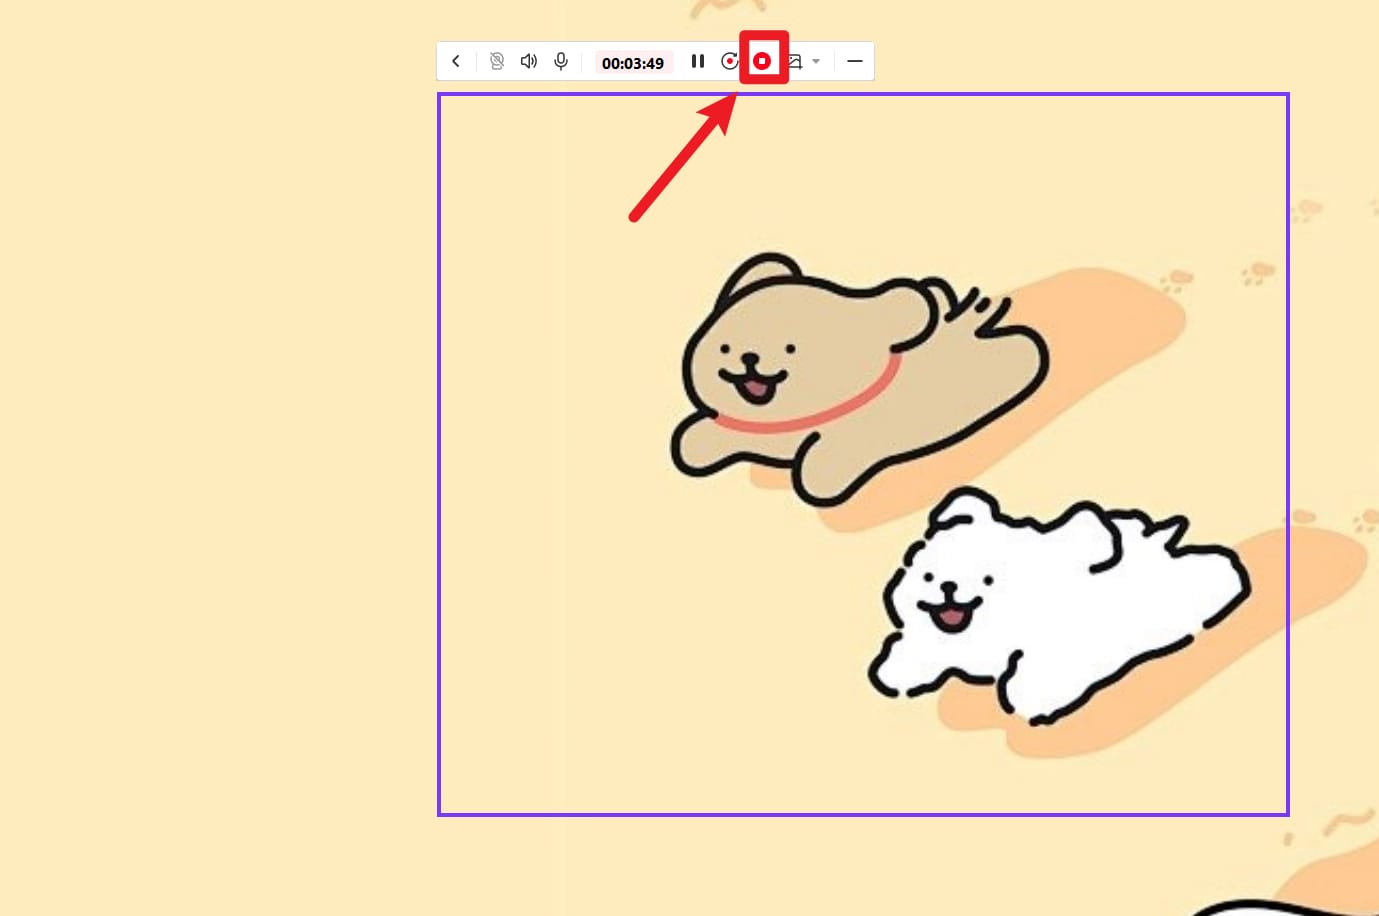
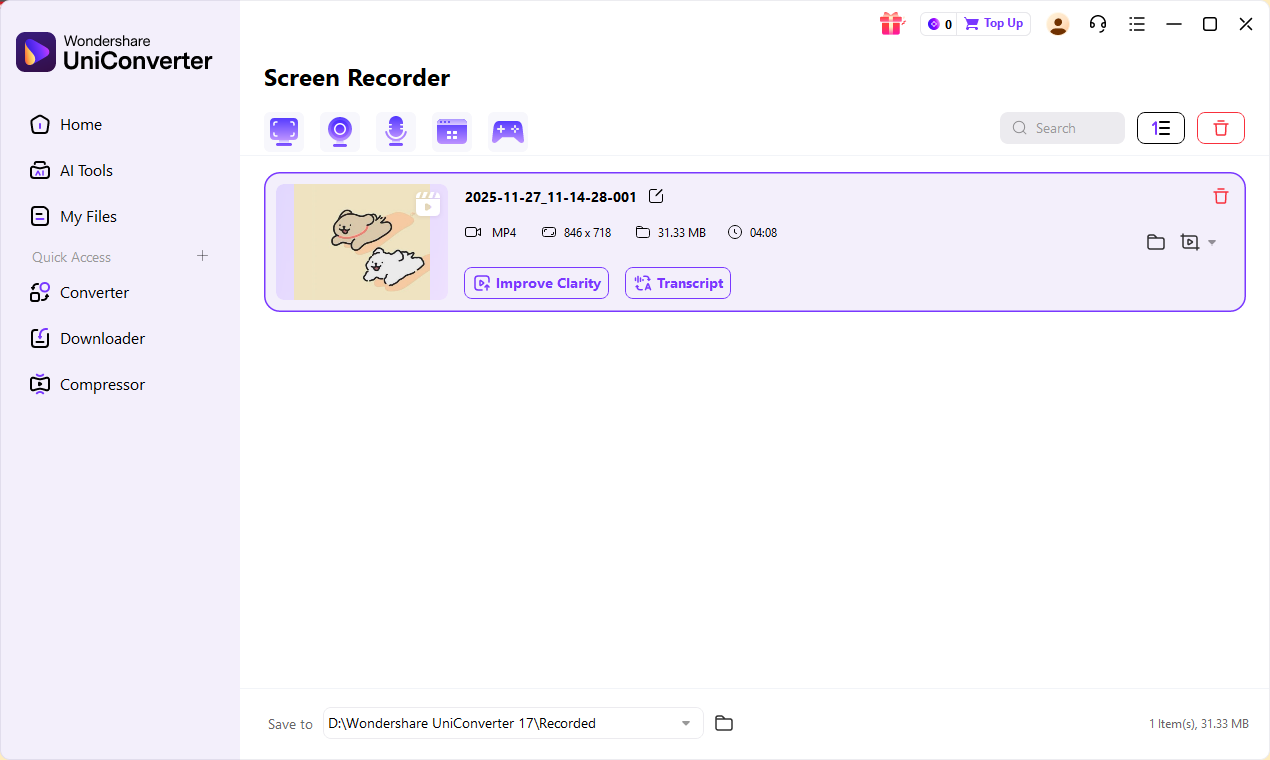
Step 7 Stop recording and preview.
Lastly, press the Stop to finish the recording session. The Screen Recorder function will close automatically.
Click the folder icon to locate your recorded file. Also, you can click on the drop-down option next to the icon to choose to transfer the file to another Converter, Editor, or other functions in UniConverter.
 print
print
