
Developed by Adobe Inc, Adobe Premiere is a widely used editing software known for its wide range of advanced features. Using this timeline-based editing tool, you can customize your videos automatically and create stunning and professional-looking clips. Learn more about automatic video editing Premiere Pro in the following parts of the topic.
Part 1. How to quickly make the video automatically sync with the beat of the sound [situation 1]
While recording videos, when the built-in mic quality is not very impressive or when multiple audios have to be recorded (as in the case of an interview), external mic and recorders are used. In such situations, the video and the audio files are saved separately, and thus the need to sync them arises.
Adobe Premiere is one of the best tools for all types of video editing, and using the software, you can automatically sync video with audio or sound beats.
How to sync audio in Adobe Premiere Pro CC
1. Open the Adobe Premiere Pro CC software on your system and add the audio and the video file to the timeline together.

2. After both the files are added to the timeline, select both of them.
3. Next, right-click on the video file and then choose the Synchronize option.

4. A new dialogue box will appear from where choose the audio file to be synced.
5. Next, click on the OK option, and the audio file will be synced to the video.

Note: Another method for automatically syncing audio to video is available as well. Using this method, both the files will be merged using the Premiere, and the audio will be synced.
To enable the process, find the audio and the video files to be synced, hold Ctrl on PC and Command on Mac to select them and then choose the Merge Clips option.
Part 2. How to smart trim video for Premiere Elements [situation 2]
Smart Trim is the feature of Adobe Premiere where the best scenes of the video are auto extracted based on several factors like action, people, screen quality, and more. The feature helps you get the trimming task done quickly and in a hassle-free manner. The auto-extracted files can also be modified by changing the slider position, and you can add more to the list or remove a few as required. There is also an option to manually add, delete, and change the duration of the scenes.
Once all the settings are done, the preview of the video can be done, after which it can be exported to the scene line.
How to auto-trim video using Adobe Premiere: (Elements 2019 Quick view)
1. On your system, launch the Adobe software, and from the Quick Goal screen, launch the Smart Trim screen. You can also open it from the Quick view scene line.

2. In the quick view scene line, choose the video clip
3. To launch the screen for Smart Trim, one of the below-listed options can be adopted:
- On your video, tap on the Edit video clip icon > Smart Trim
- Select Tools > Smart Trim
- At the right side of the screen, choose Tools icon > Smart Trim from the toolbar
The screen of the Smart trim will open with the selected video. By default, the software will automatically choose the 20% of the starting clip, and this section can be changed by dragging the handles towards the right or the left.
4. Next, pre-set can be used to mark the best scenes automatically, and you can check for these available presets by clicking on the Show Presets button. (People, Action, Mix)

5. Based on your video style, a preset can be selected, and then the software will automatically analyze the video for smart trimming and mark the segments.
6. The extracted scenes can be checked from the scene line, and the bottom of the sceneline will also show the duration of the removed video.

7. The slider can be used to manage the extracted scenes if you want more changes to be done. For extracting fewer scenes move the slider to the left while for extracting more scenes, move the slider to the right.
8. Other smart trim options like - reset, mark manually, apply transitions, preview, export, and continue editing can also be used.
9. Once the scenes are extracted in the timeline, you can remove them by simply hovering the mouse cursor over the scene and clicking on the x at the upper-right corner.
Part 3. Bonus smart trimmer alternative - Wondershare UniConverter
Majority of the tools claiming to be smart trimmers mainly cut the video parts into several segments, which can be removed as required. Though Adobe premiere has a smart trimming function that extracts the video clips based on a few attributes, the process is not very precise.
So, if you are looking for an all in one smart trimmer that is precise and fast to work with, Wondershare UniConverter should be your right choice. This is an excellent software for all types of video-related tasks, including trimming and other editing functions. The latest Smart Trimmer feature of the software allows to recognize the irregular audio parts in the video based on pre-set values and remove them automatically. Additionally, you can also manually delete the scenes not required. The process of removing clips based on audio works as a great feature for the people who make videos for YouTube and other platforms.

Wondershare UniConverter - Best Video Trimmer for Mac/Windows
The latest Smart Trimmer is based on identifying irregular audio parts for trimming videos.
There are 3 options to pre-set- Audio Volume, Audio Length, and Audio Buffer.
Quick and hassle-free process.
Clips can be adjusted manually as well.
Wide range of other functions is supported as well like video conversion, download, recording, DVD burning, and more.
Steps for smart trimming video using Wondershare UniConverter
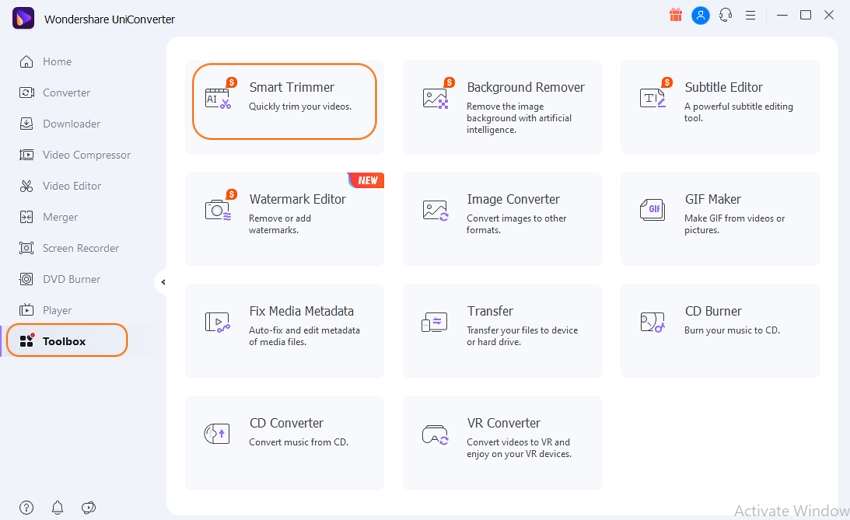
Step 1 Launch Wondershare Smart Trimmer
Open the installed software on your system, and from the Toolbox section, choose Smart Trimmer.
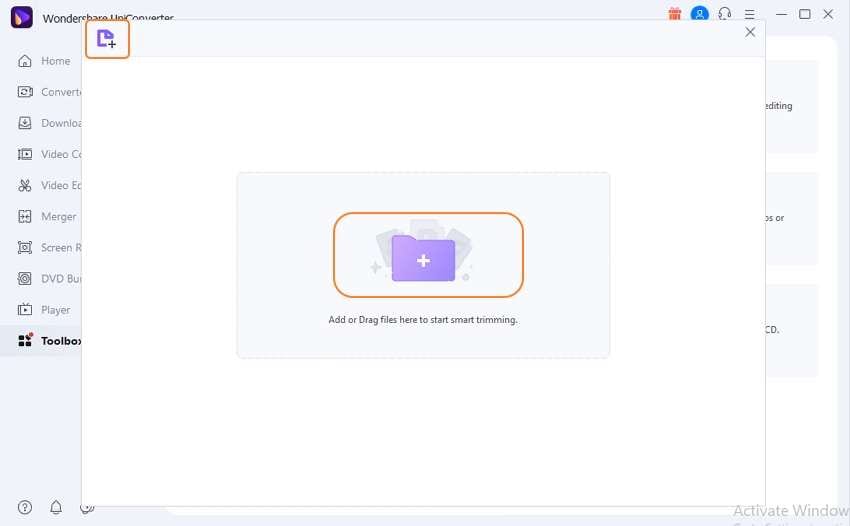
Step 2 Add video to be auto-trimmed
To add the local videos to be trimmed, click on the Add Files button or tap on the + sign at the center.
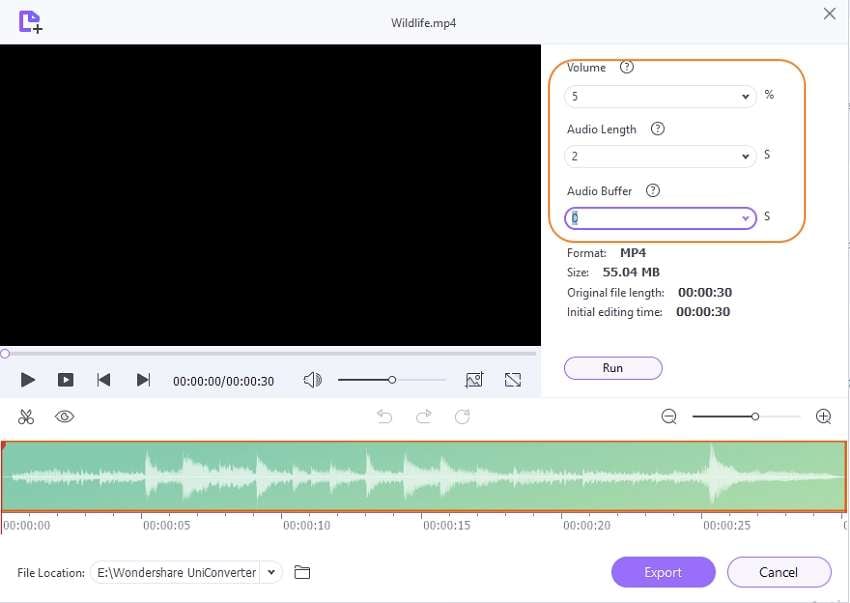
Step 3 Pre-set trimming conditions
Next, after the video is added, you need to choose the options for smart trimming as following:
- Audio Volume - With this option, you can select the parts of the video where the audio volume is less than the selected percentage compared to the original video. You can select the percentage value between 0-30%.
- Audio length - In this section, the video parts where there is no sound can be selected to be trimmed. You can choose between 1-20 seconds.
- Audio Buffer - At times, a video part may fulfill the above two conditions, but removing them can affect the video smoothness, and thus audio buffer feature between 1-5 seconds can be used to avoid removing these parts.
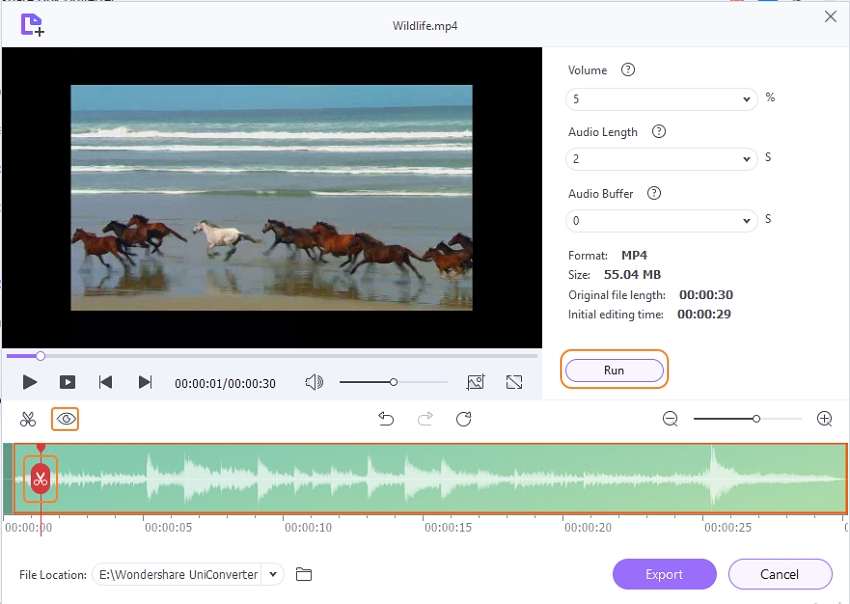
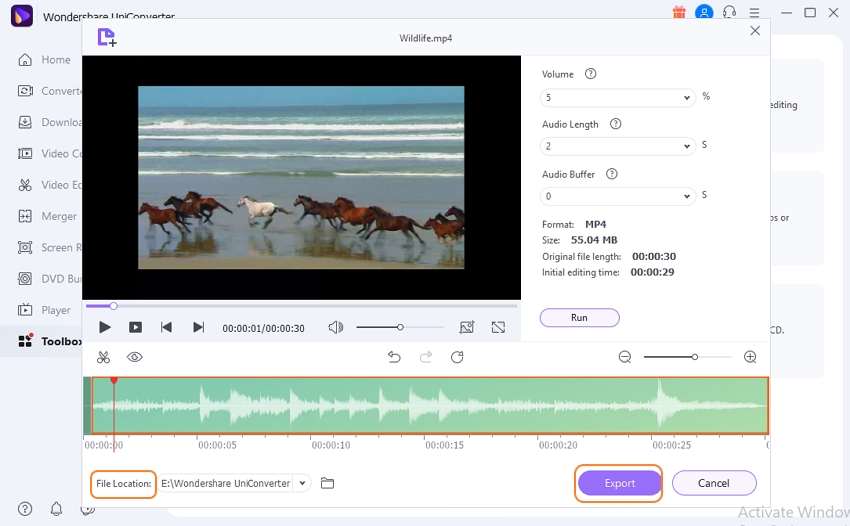
Step 4 Manually adjust the clips
To get the auto-trimmed clips based on the pre-set conditions, click on the Run button. The parts to be removed will appear in the timeline below.
Next, if you further want to remove more parts, the mark bar can be used to select them, and then click on the Scissors icon and tap on the Closed Eye icon to hide the clip. If you do not want to remove certain parts, choose them and click on the Closed Eye icon again and make it Open eye for the clip to be visible.
Step 5 Export the auto-trimmed video
At the File Location tab, choose the folder on your system to save the trimmed file, and finally, click on the Export button for the software to finally start the processing and file exporting.
Part 4. FAQs pertaining to auto video editing skills
1. Is there a way to automate video editing?
Yes, video editing can be automated using some specific tools, and one of the best in the category is Wondershare UniConverter. This professional Windows and Mac-based software allows to set the audio-based pre-sets based on which automated trimming can be done. The software also supports several other editing and other features.
2. What is algorithmic video editing?
Algorithmic editing is a process where the editing of a clip is done based on a certain plan, scheme, or pre-set conditions. Using the technique, the clips are cut and trimmed according to the selected model or outline. algorithmic video editing is a great way to edit your files quickly and in a hassle-free manner. In the above parts of the article, we have discussed two software - Adobe Premiere and Wondershare UniConverter, both of which follow the pattern of algorithmic editing.
The Adobe Premiere software allows trimming and cutting the files based on people, action, and mix. Wondershare UniConverter, on the other hand, works as a smart and intelligent tool where the parts of the video clips having irregular audio are detected and deleted automatically. Both this tool allows automatic trimming of the files based on different pre-set conditions.
3. How do you automate keyframes in Premiere Pro?
For audio and visual effects like fades, panning, and more, keyframes are used. To automate a change, multiple keyframes are used together. Using Adobe premiere, keyframes can be automatically adjusted with smooth fade-out. Steps for creating automation with keyframing using Premiere Pro are enlisted below.
- Launch the Adobe premiere software and add the clips. Then, in the timeline, double-click on the clip, and move the playhead to the required start-time of the automation.
- Next, from the window with the Source Monito, move to the Effects Controls tab.
- Tap on the icon of the stopwatch that is present next to the Scale. With this, keyframing for the Scale will be turned on, and a keyframe will be created. The created keyframe will be present at the Timeline at the right in the Effects Controls and resemble a diamond shape.
- Next, the playhead has to be moved to the required automation end, where you need to tap on the Add/Remove keyframe button that will be present at the right of the scale and resemble a circle. You will see a new keyframe at the playhead location.
- Tap on the blue Scale number whose value is 100 by default, and you need to enter 0 here, and the scale will be automatically changed from 100 % to 0% when the clip is played, and zoom-out will be automated.
Summary:
So, to help you trim and cut your files automatically, Adobe Premiere and Wondershare UniConverter are recommended tools. Though both the softwares have their set of features, if you are looking for a complete video toolbox that is effective and simple to use, Wondershare is the best in the category and works as an all-in-one smart trimmer.