
Mac users are a lucky lot. That's because Mac computers come baked with free utility tools like QuickTime Player. Apart from playing videos and audio, this tool can also help you trim video in Mac. And if this Mac video trimmer doesn't work for you, iMovie is readily available to install for free as well. But there's a problem; these free Mac programs can be basic and one-dimensional at times. For this reason, I've prepared a list featuring the best video trimmers for Mac to consider as alternatives. Let's trim videos!
Try Wondershare UniConverter Smart Video Trimmer for free now!
Over 3,591,664 people have downloaded it to try the advanced features.
Part 1. How to Trim a Video Using QuickTime on Mac
As mentioned initially, QuickTime is a handy pre-installed software for Mac OS X. It can play, trim, and record videos and audio with ease. Speaking of trimming, QuickTime Player lets you cut, split, and rearrange clips. And the process won't take you more than 20 seconds to complete.
Follow me:
Step 1. Launch the movie or video you want to trim on QuickTime Player.
Step 2. Then, click Edit and choose Trim. Or tap Command + T shortcut to launch the trimming tool. You can now drag the yellow handles on the timeline to reduce the video's playback durations.

Step 3. If satisfied, tap Trim to save your new video. It's that simple!
Part 2. How to Trim a Video on Mac with iMovie
Try iMovie instead if you're unimpressed by QuickTime's video trimming capabilities. With this free Apple program, you can trim MP4 on Mac and iPhone. Apart from cutting videos, iMovie also lets you rearrange, split, crop, add filters, apply effects, and so on. It also has a huge library with hundreds of royalty-free music and sound effects. Overall, it's the best free video trimming software for beginners who are unwilling to pay for an editing program.
Here are the simple steps:
Step 1. Search and download iMovie from Mac App Store and launch it. Then, add a New Project.
Step 2. Tap Create New, choose Movie, and then click Import Media to load the video you want to trim.
Step 3. Then, drag and drop your movie to the timeline before highlighting it. Then, drag the yellow handles at both ends of the clip. Alternatively, place the playhead where you want to start trimming and then right clip the video track and choose Trim to Playhead.
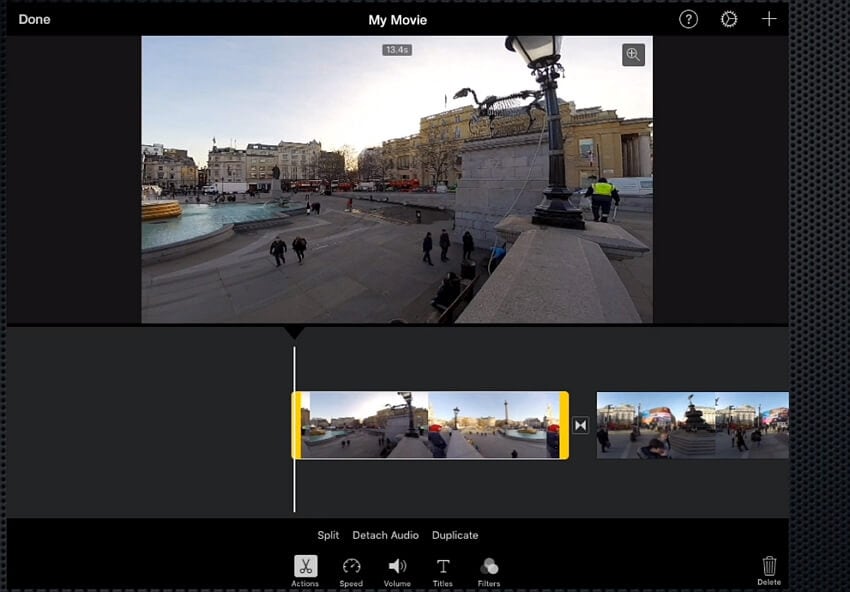
Step 3. Lastly, delete the unwanted video scenes and save your trimmed video.
Part 3. Other 4 Video Trimmers for Mac Recommended [2022]
Although free video editors are irresistible, they come with some limitations. For example, iMovie and QuickTime Player aren't for advanced users because they cannot trim exact video playback durations. In other words, you can't enter the time to start and stop time for your new video. For this reason, I recommend these four professional programs.
1. Wondershare UniConverter
Wondershare UniConverter is the best beginner and professional program to cut video on Mac and Windows. It comes with a manual video trimmer that allows you to enter the precise time to begin and stop trimming. For beginners, you can simply drag the trimming handles on each end. But that's just half the story; UniConverter boasts an AI-powered Smart Trimmer to auto-select video scenes to eliminate. In this case, you set the program to select and trim based on audio volume, buffer, and duration. And yes, it has other features for cropping, compressing, applying filters, rotating, recording, downloading, etc.
Below is how to auto-trim videos on Mac/Win with Wondershare UniConverter:
Step 1 Upload a video on the Smart Trimmer.

Install and launch Wondershare UniConverter on Mac and then open the Smart Trimmer on the home window. After that, tap Remove Silent Segments before dragging and dropping your video or clicking Add Files to upload them.
Step 2 Enter the audio presets.
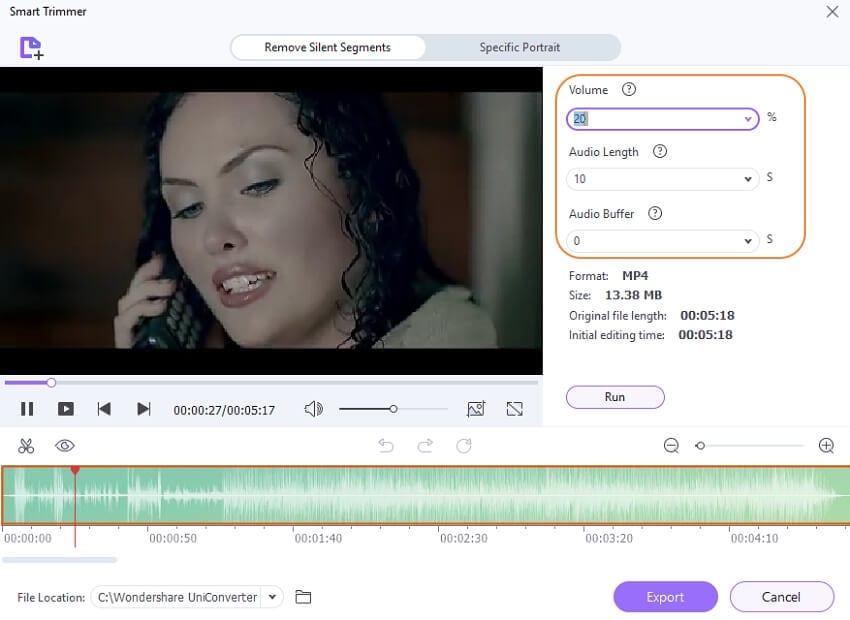
After successfully loading the video on the Smart Trimmer, enter the audio volume level, playback duration, or buffer rate. For instance, set the Smart Trimmer to auto-select video scenes with an audio playback duration of below 10 seconds.
Step 3 Trim and export the video.
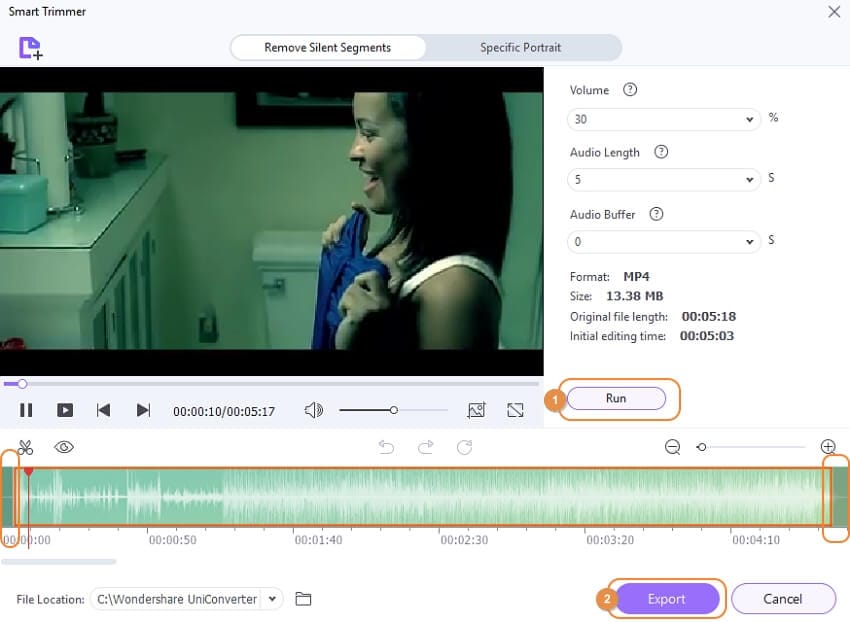
Last but not least, tap Run to see the auto-selected scenes on the audio timeline. Finally, tap Export to save your trimmed video. It can't be any easier, can it?
Pricing: 55.99/lifetime, 39.99/year
Pros
It supports 1,000+ formats.
Smooth video auto-trim function.
Change video background automatically.
Cons
Doesn't come with inbuilt templates.
Nothing else.

Wondershare UniConverter — All-in-one Video Toolbox for Windows and Mac.
Edit videos on Mac by trimming, cropping, adding effects, and subtitles.
Converter videos to any format at 90X faster speed.
Compress your video or audio files without quality loss.
Excellent smart trimmer for cutting and splitting videos automatically.
Nice AI-enabled subtitle editor for adding subtitles to your tutorial videos automatically.
Download any online video for teaching from more than 10,000 platforms and sites.
2. Adobe Premiere Elements
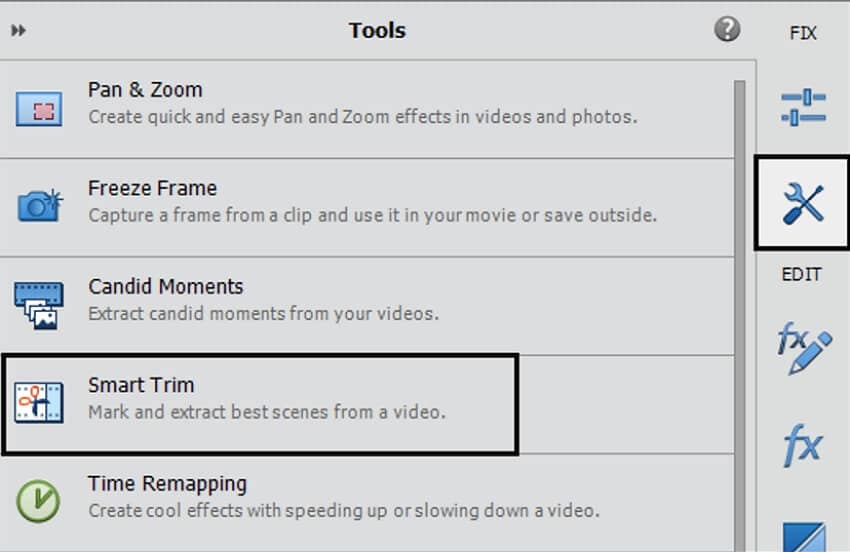
Wondershare UniConverter is not the only Mac video trimmer with machine learning capabilities. That's because you can use Adobe Premiere Elements to auto-select video scenes and delete them with a mere keyboard touch. Here, you can set the program to select and trim video scenes with lots of action, human faces, or both. Apart from cutting videos automatically, this program also lets you add eye-catching effects, animated titles, transitions, and so on. What's more, you can design beautiful slideshows, video collages, and social media posts.
Pricing: $99.99/lifetime
Pros
Excellent AI auto-trim function.
Wide variety of transition effects.
Improve grainy videos.
Cons
Slows output rendering speed.
No screen recorder.
3. Final Cut Pro X

Final Cut Pro is another Apple video editing program for Mac computers. But unlike iMovie and QuickTime Player, user must part with $299.99/lifetime fee. In return, you'll enjoy professional-grade video editing features. For example, Final Cut Pro uses powerful AI technology to auto-detect faces and objects, then match them with effects and titles. Also, you can use the keyframes to adjust the blur of a recorded video. It doesn't stop there; Final Cut Pro supports multi-cam editing with up to 64 varying angles. Should I continue?
Pricing: $299.99/lifetime
Pros
Beautiful and modern UI.
Multiple camera angles for editing.
It uses AI technology to identify and track objects.
Cons
UI can intimidate beginners.
The pricing is a bit steep.
4. Adobe Premiere Pro
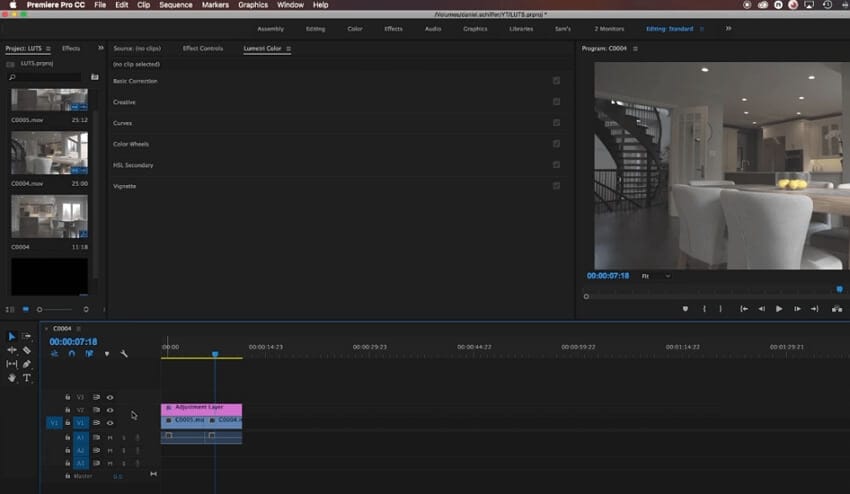
Did I save the best for last? Maybe! But that's only if you're willing to pay the hefty $20.99/month fee. That aside, Premiere Pro is widely considered the best video editor in the movie industry. It offers a non-linear video editing UI packed with powerful capabilities. It boasts auto reframe tools, advanced HDR support, a trackless timeline, and many other features. For example, you can conveniently copy-paste sound effects on another audio, a rare quality in the editing world. Overall, it's the best video editor for Mac and Windows, but only if you can pay up.
Pricing: 20.99/month.
Pros
ProRes Raw support.
Over 5,000 4K videos.
Auto-reframe videos.
Cons
Intimidating UI.
Expensive subscription plans.
For Win 7 or later (64-bit)
For macOS 10.11 or later
Conclusion
These are the best tools to cut video on Mac. If you're a freebie lover, then stick to QuickTime and iMovie, although these programs are mainly for beginners. But if you want something with advanced capabilities, Premiere Pro and Final Cut Pro will do just fine. And, of course, use Wondershare UniConverter to enjoy automated editing features at a pocket-friendly price. So, all in all, there's a video editor for everyone on this page!

