
How to Upscale 480p to 1080p in UniConverter 18

Open Video Enhancer and add the clip
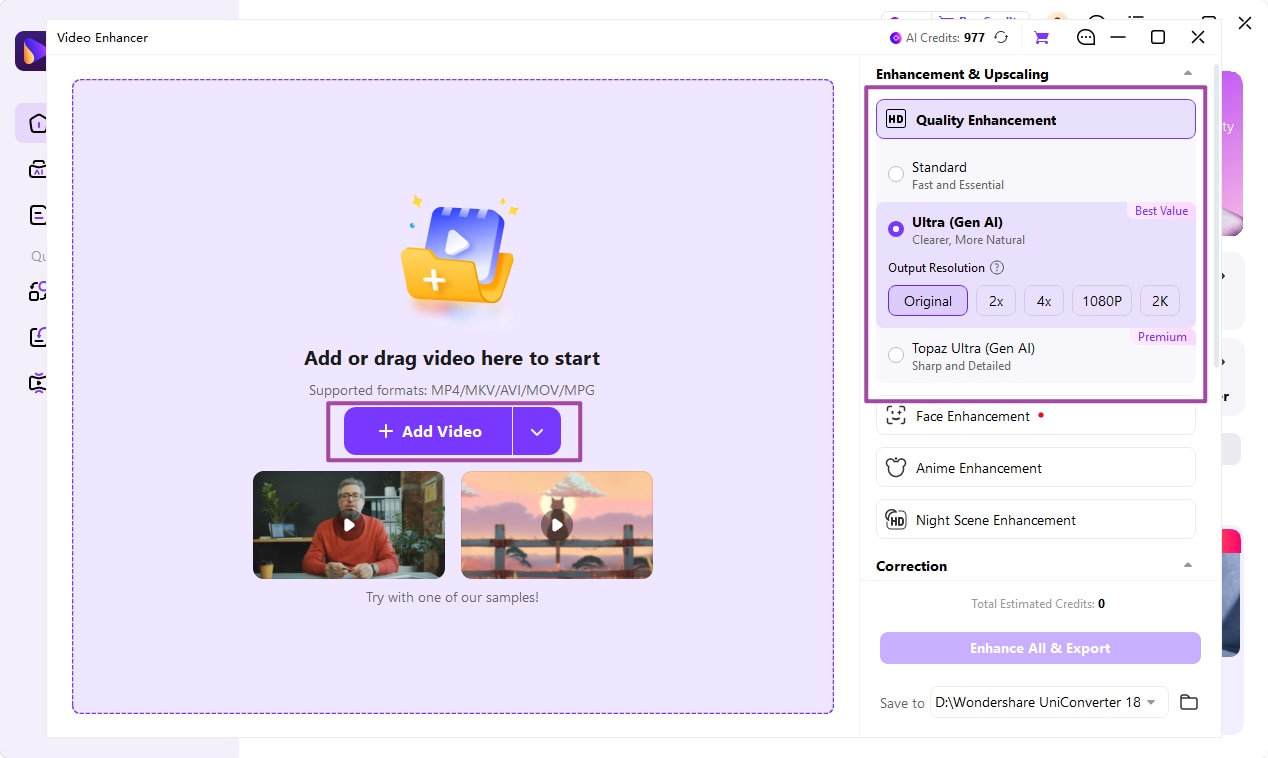
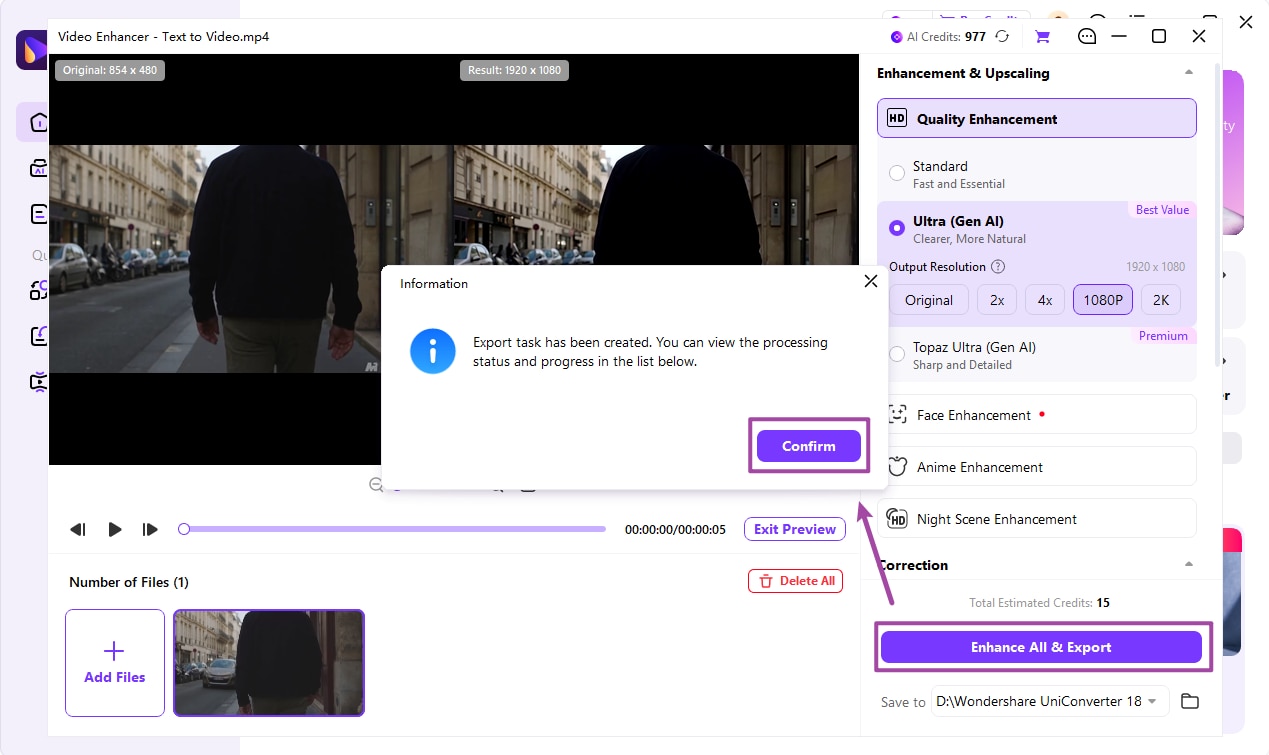
On Windows, open Enhance & Clean Up → Video Enhancer. Select Quality Enhancement under Enhancement & Upscaling, choose Ultra (Gen AI), and import the source with Add Video.

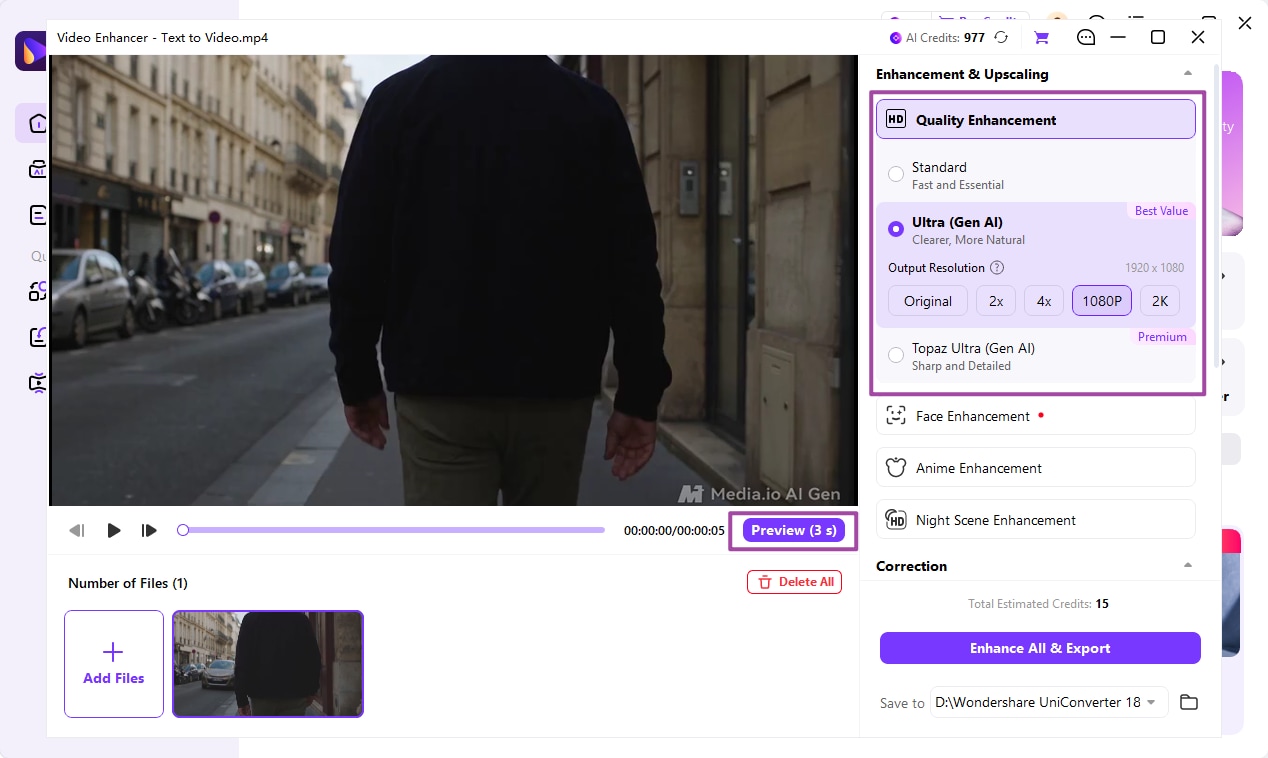
Choose 1080P and inspect the preview
Set Output Resolution to 1080P, then use Preview (3 s). Compare Original and Result around faces, moving edges and lettering. The official example enlarges an 854 × 480 clip to 1920 × 1080.

Export the enhanced video
Choose a destination under Save to, click Enhance All & Export, and confirm the export task. Review the completed video for changes in texture and motion. These labels follow the current Windows enhancement guide.
480p vs 1080p: What Upscaling Actually Changes
|
480p source
|
1080p result
|
|
|---|---|---|
| Widescreen example | 854 × 480 | 1920 × 1080 |
| 4:3 example | 640 × 480 | Preserve 4:3 or add side borders in a 16:9 delivery |
| Media type | Video, often stored as MP4 or another container | Still video; 1080p is not a file extension |
| Visible detail | Limited by capture quality and compression | Enhanced or interpolated rather than newly captured |
| Noise | May include grain or compression blocks | Can remain visible or become more noticeable |
| Best use | Small-screen viewing and original archives | Full HD playback or a Full HD editing project |
| Processing | No enhancement yet | AI processing can take additional time |
| Source preservation | Keep the original file | Export a separate enhanced copy |
Practical Choices for 480p to 1080p Upscaler
Start with the least-compressed source
Use the original camera file or the best available authorized archive. Repeatedly re-encoded clips can contain blocking and smeared faces that limit the final appearance. A sharper output cannot reliably reconstruct information that the source never captured.
Use the verified Full HD model workflow
The Windows workflow supports an explicit 1080P selection with Ultra (Gen AI). Follow the documented Video Enhancer steps rather than treating 1080p as a new format in a normal conversion menu.
Compare faces and text
A flattering change in one paused frame is not enough. Inspect eyes, mouths, signs and moving objects in the preview. Strong enhancement may create an artificial surface or unstable edges, so judge natural appearance as well as apparent sharpness.
Keep the aspect ratio
A 640 × 480 recording is 4:3, while 1920 × 1080 is 16:9. Preserve the image proportions and use borders when keeping the complete picture matters. Cropping is a separate framing decision and removes part of the original scene.
Browser alternative for a short task
UniConverter HD Video Converter provides an online HD enhancement entry point. The desktop instructions above describe the Windows app; its models and export controls should not be treated as the browser tool’s interface.
Judge value on your intended screen
View the enhanced copy at a realistic playback size beside the original. For a family archive or a training recording, stable faces and readable information matter more than a larger pixel count. Keep both versions until the result has been reviewed.
FAQs About 480p to 1080p Upscaler
Can I upscale 480p to 1080p?
Will 480p upscaled to 1080p look like native Full HD?
Is a normal converter enough?
What should I do with 4:3 footage?
Why does my enlarged video still look blurry?
Can I do the task in a browser?
What Users Say About UniConverter Video Workflows
Customer reviews cover UniConverter’s broader media workflows.

Give Archived 480p Footage a Full HD Copy