
A WFP file contains your entire Filmora timeline, but it stays locked inside the software until you convert it to a universal format like an MP4. Most creators search for a WFP to MP4 method when they need a video that plays smoothly everywhere, uploads without issues, or can be shared with clients and teammates. The process sounds simple, yet it can become stressful when the project won't open, or Filmora displays an unexpected prompt that halts the export.
This guide provides a clear, practical path through both situations. You will first learn how to load your project in Filmora and convert WFP to MP4 using the official export workflow. After that, you will see how Wondershare UniConverter works as a dependable fallback when Filmora cannot open the file or the project becomes unreliable. The goal is simple: help you turn your work into a clean, ready-to-use MP4 without any unnecessary hurdles.

UniConverter - Al-in-One Multimedia Toolkit
In this article
What Is a WFP File? Why It Isn't a Video?
A WFP file is the project format used by Wondershare Filmora to store your edits, clips, effects, transitions, and timeline structure. It acts like a container that tells Filmora how your video should look, rather than being a video itself. This is why a WFP file cannot be played on any device or platform; it can only be opened in Filmora. To share or upload your work, you must export the project into a standard video format.
Can You Convert WFP to MP4 Online?
No, you cannot convert WFP to MP4 online because WFP is not a video format. The only way to create an MP4 is to open the project in Filmora and export it directly. Since a WFP file doesn't behave like normal media, some of the major online converters cannot process it.
Export a WFP project to MP4 in Filmora
If your project opens normally in Filmora, this is the most accurate way to convert WFP to MP4. This WFP to MP4 tutorial walks you through the exact steps inside Filmora so you can export a clean, ready-to-use MP4 without confusion. The workflow is simple and gives you full control over resolution, quality, and format.
Export WFP to MP4 in Filmora step by step
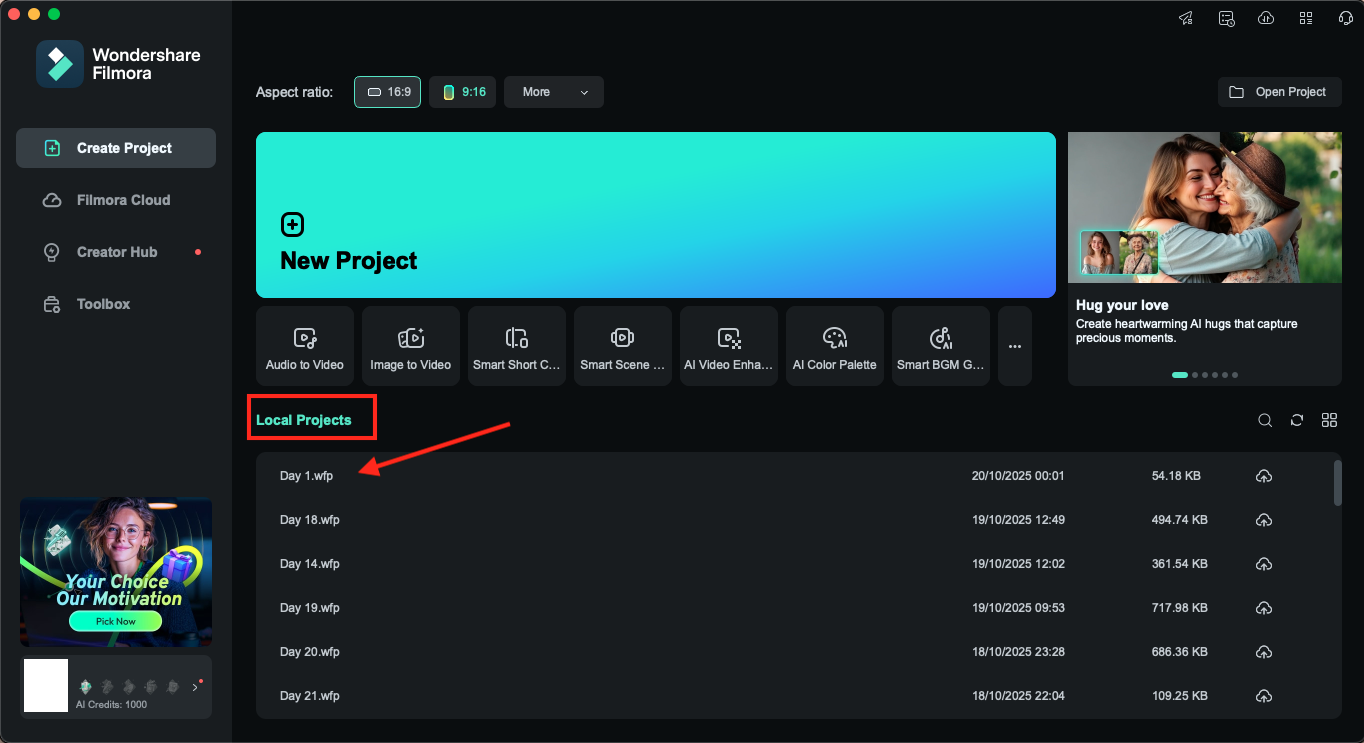
Step 1: Launch Wondershare Filmora on your system, then on the main screen, select Open Project and choose the WFP file you want to export. Filmora will load your timeline, linked media, effects, and all edits exactly as you saved them.
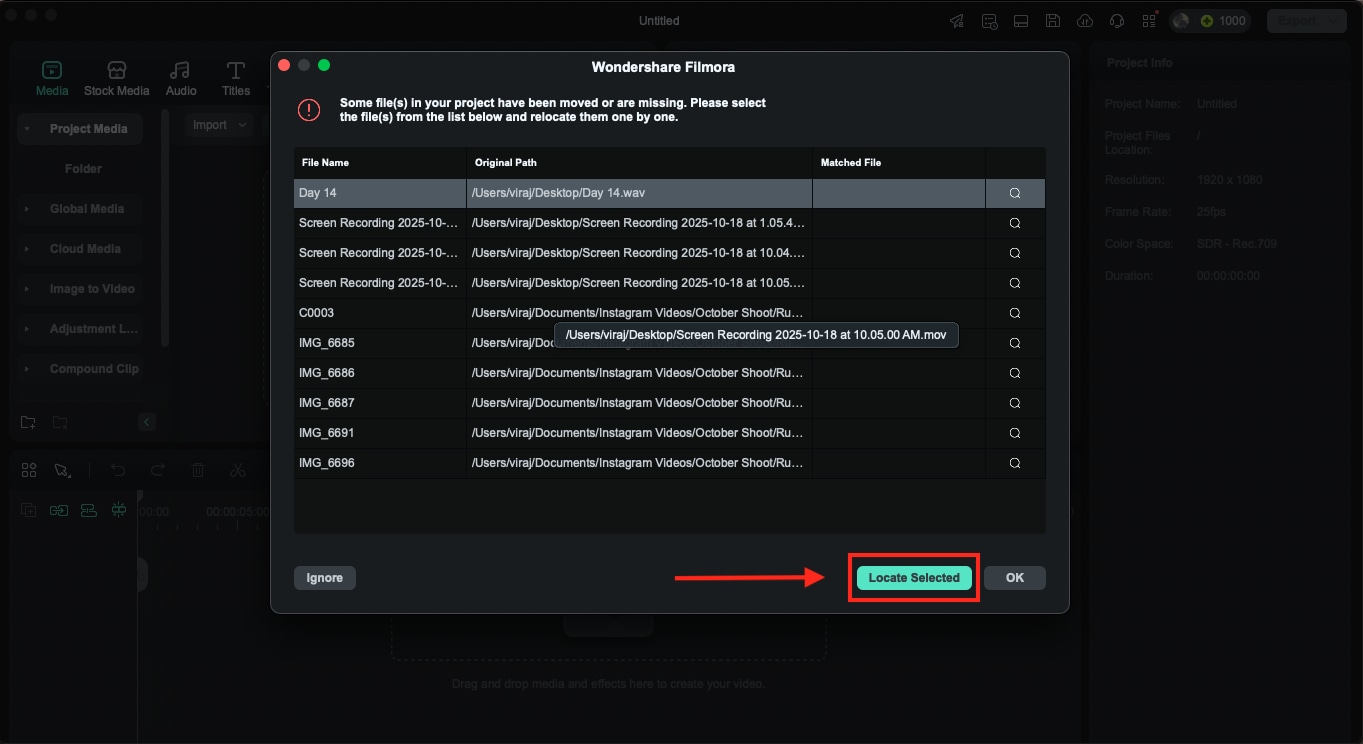
Quick Tip: If Filmora shows a "missing media" prompt, relink the files by selecting the correct folders on your device. Without this, the final MP4 may export with black frames or silent sections.
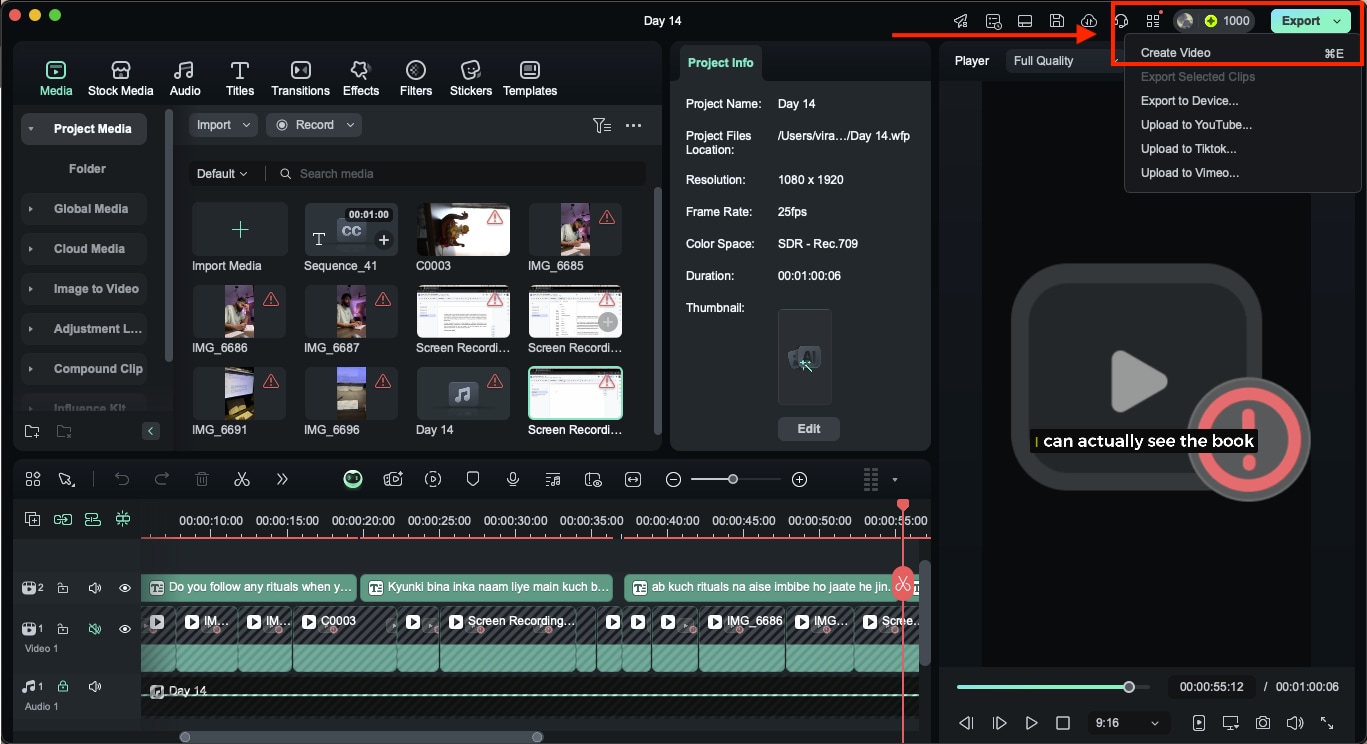
Step 2: Once your project is open, click Export in the top-right corner of the interface. This opens Filmora's export panel, where you can pick the final video format.
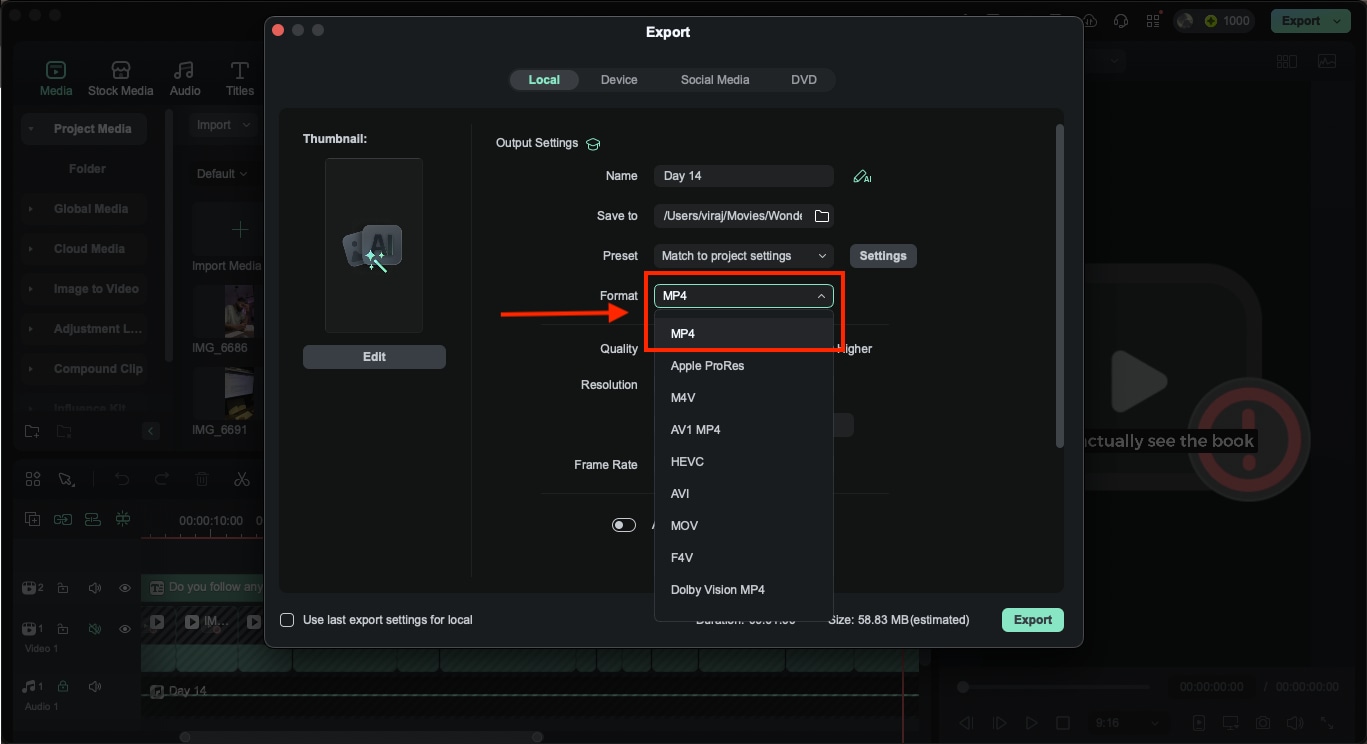
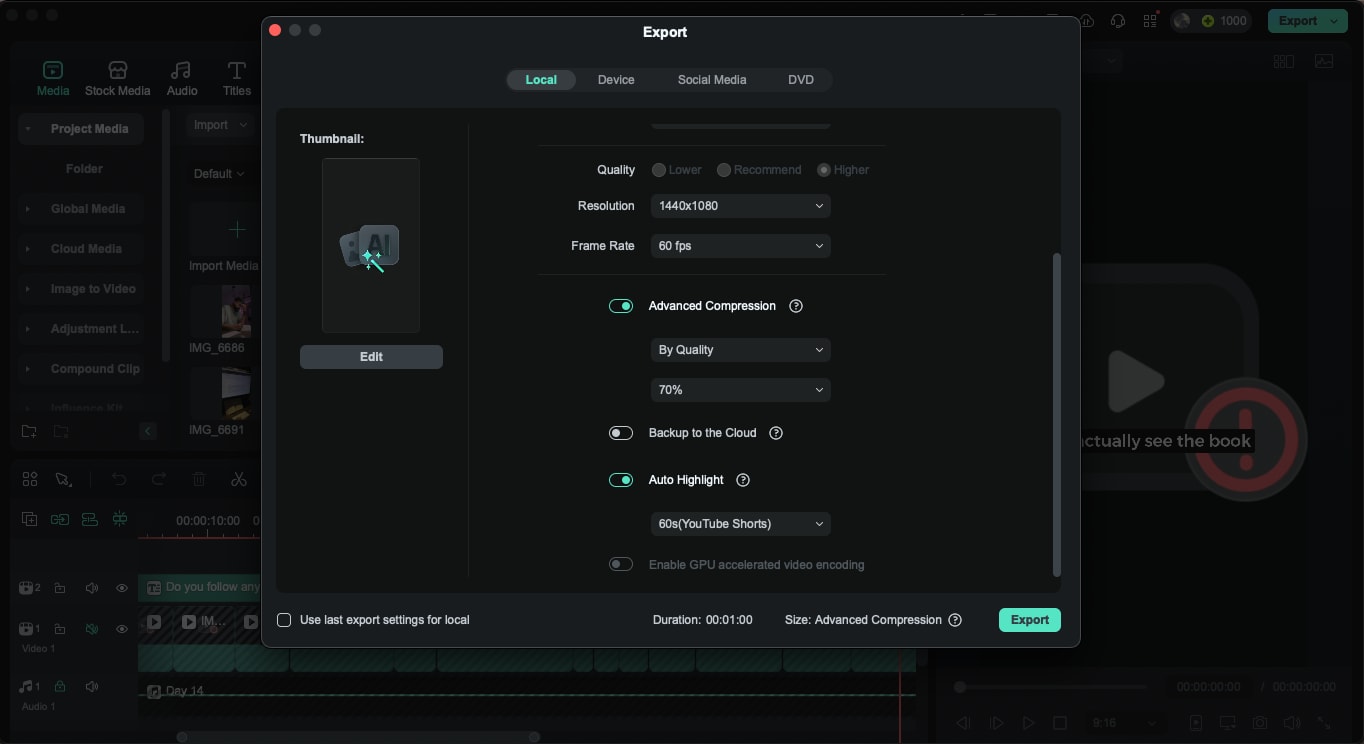
Step 3: In the Export option, stay on the Local tab for MP4 exports. Next to Format, open the dropdown menu and select MP4 (H.264). This format is ideal for playback, sharing, uploading, and embedding because it balances size and quality very efficiently.
Step 4: Once the MP4 format is selected, scroll to the Resolution dropdown. You can pick from standard options such as: 1280x720px, 1920x1080px, 3840x2160px (4K), and more. Set Quality to Recommended for balanced output, or to Higher for maximum clarity. You can even adjust the frame rate if needed.
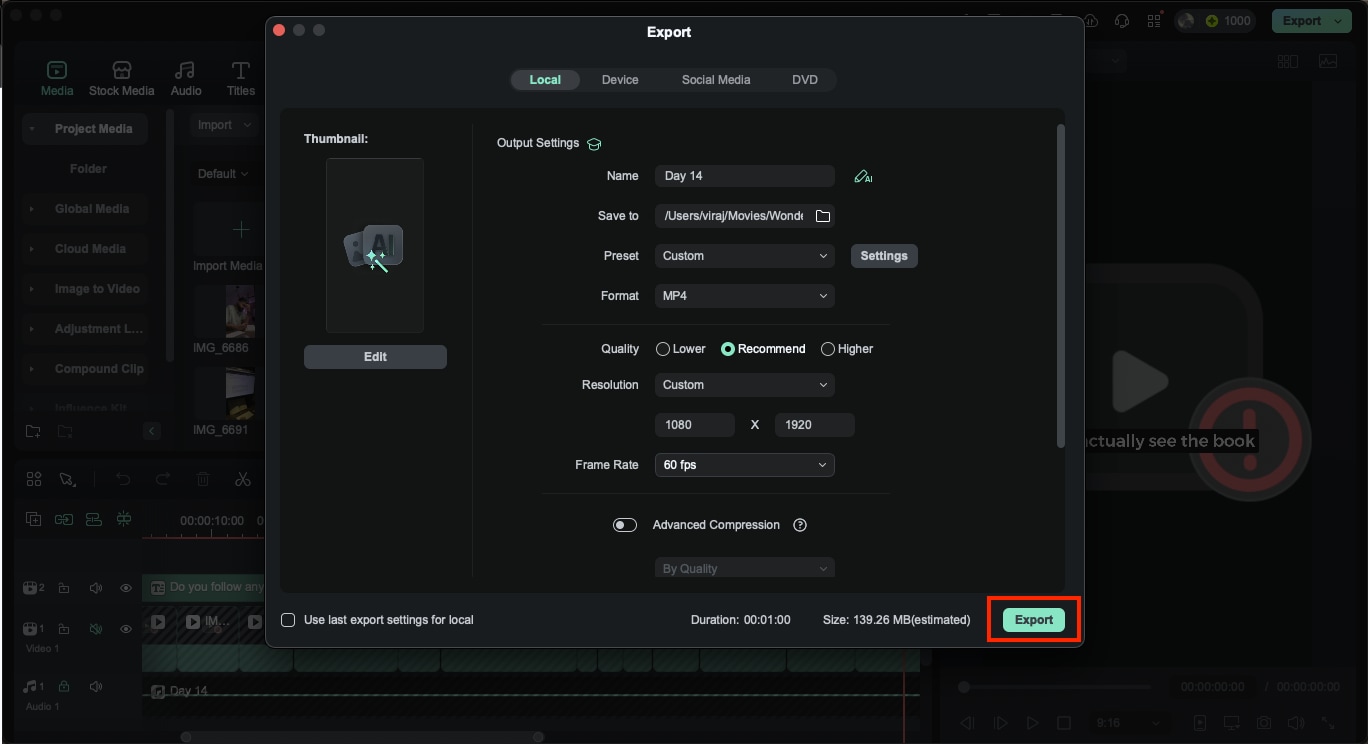
Step 5: Once the resolution and frame rate are adjusted, choose the folder where the MP4 will be saved.
Add a name for your file, review your export settings one last time, and click Export. Filmora will render your timeline and produce a clean MP4 version of your project.
Recommended WFP to MP4 Settings for Quality and Size
When you open a WFP file in Filmora and prepare to convert WFP to MP4, the right export settings play a major role in how your final video looks and how large the file becomes. A few adjustments can help you balance clarity, performance, and storage without complicating the process. Here are a few recommended export settings that would help you with your exported video files:
| Purpose | Resolution | Quality | Frame Rate | Ideal Bitrate | Notes |
| Social Media Uploads | 1280x720px | Recommended | 25 or 30 fps | 8–12 Mbps | Good balance of size and clarity |
| YouTube and General Playback | 1920x1080px | Higher | 25 or 30 fps | 12–20 Mbps | Works for most platforms and devices |
| High-Quality Edits or Client Delivery | 1920x1080px or 4K | Higher | 24, 25, or 30 fps | 20–45 Mbps | Ideal for further editing or archiving |
| Mobile-Friendly Lightweight Files | 720px | Lower or Recommended | 25 fps | 5–8 Mbps | Small file size without losing major detail |
| Motion-Heavy Footage (sports, events) | 1080px or 4K | Higher | 50 or 60 fps | 25–50 Mbps | Smoother motion with higher fps |
Fixing Common WFP to MP4 Export Problems
Export issues are common when working with Filmora projects, especially if the timeline uses many linked files or older project versions. When you open a WFP file and try to convert it to MP4, even a small mismatch in media or settings can interrupt the export. These quick checks help you resolve most problems without losing progress.
- "Missing Media" Prompts: Check the media sources from your device and relink the original video, audio, or image files.
- Version Mismatch: Update Filmora if the project was created in a newer version.
- Low Disk Space: Free storage on the drive you selected for saving the MP4.
- Corrupted Media: Replace damaged clips that fail to load during export.
- Unsupported Effects: Remove outdated plugins or transitions that Filmora cannot render.
- Incorrect Export Settings: Match frame rate and resolution to your project timeline.
- Background Apps Interfering: Close heavy programs, such as internet browsers or other editing tools, to free up system resources.
Convert WFP to MP4 If You Can't Access Filmora
There are times when a WFP file won't open, or Filmora cannot be installed on the device you are using. In such cases, you often look for a way to convert WFP to MP4 without Filmora, only to realize that the project file is not a playable video. Some pages claim to offer a WFP to MP4 online tool or a WFP to MP4 online free service, but these options are not supported because a WFP file cannot be processed by any browser-based converter.
When Filmora is unavailable, the first step is to restore access to the project if possible. In many cases, the WFP file is readable once the software reconnects with its original media or settings. Here's how to open the WFP file again without risking your edits:
Recover Access to Open WFP
When a project created in Filmora won't open, the quickest solution is to restore the editing tool's ability to read it. Most issues come from missing media, version conflicts, or changes to file paths. If you try to open a WFP file and it doesn't load, these checks often restore the project without data loss. You can also use these methods when you attempt to open a WFP file on a new system.
Try these methods to recover access:
- Install the same Filmora version that created the project
- Open AutoSave or Recent Projects to load a stable backup
- Move media files back to the folders they originally belonged to
- Restore old folder names or drive letters so Filmora finds the correct paths
- Relink missing clips through the prompt that appears at launch
- Clear Filmora's cache from Preferences and restart the software
- Update graphics drivers and codecs to prevent loading conflicts
- Create a duplicate copy of the WFP before testing any fix
If the project still refuses to open after these checks, the limits of the WFP format become clear. At this stage, the question shifts from "how to open the WFP file" to "what can be safely extracted without Filmora." For this, you need to understand what you can convert without Filmora.
What You Can Convert Without Filmora?
As mentioned earlier, a WFP file cannot be converted to an MP4 on its own because it does not contain any actual video data. It only stores instructions, references, and project settings. If Filmora is unavailable, you cannot convert the .wfp itself. However, you can work with any media that Filmora previously generated or cached. If you have exported drafts, temporary renders, or raw clips from the project folder, you can convert them to MP4 without using Filmora.
You cannot convert the WFP file, but you can still convert other files that came from the project. These include:
- Any exported video from an earlier render (MP4, MOV, AVI)
- Cached preview files are stored inside Filmora's temporary folders
- Raw clips used inside the project (.mp4, .mov, .avi, .mkv, .wav, etc.)
- Partially exported test videos you created before Filmora stopped working
- Screen captures or drafts saved during the editing process
Once you understand what can be exported without Filmora, the next step is converting any recovered or previously rendered media into a reliable MP4 format. This is where a dedicated desktop tool becomes useful.
Convert Exported Files with Wondershare UniConverter (Desktop)
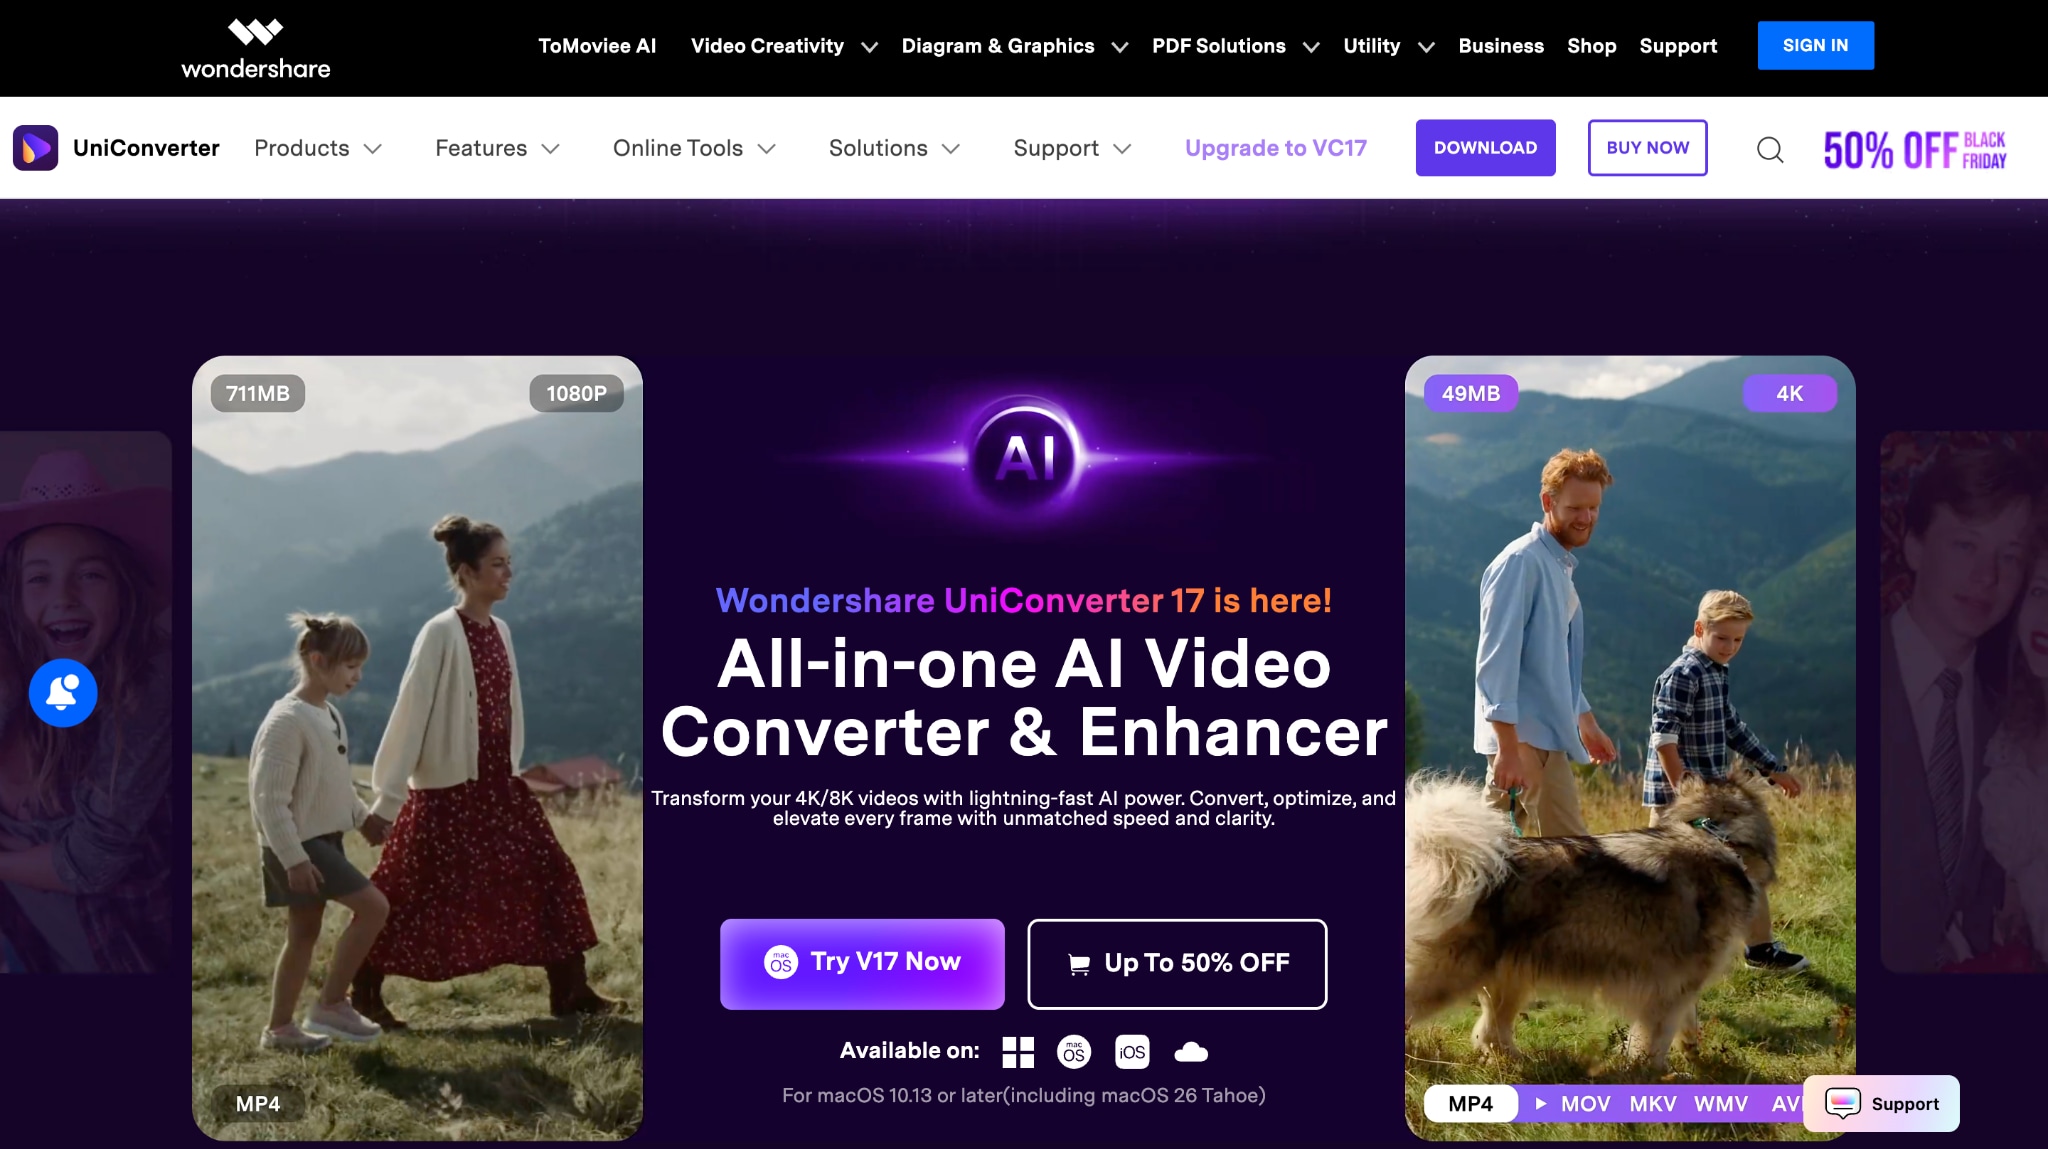
When Filmora is unavailable, you still have an exported draft or a cached video, Wondershare UniConverter converts it into a clean MP4. The desktop app supports formats like MOV, AVI, MKV, and M4V, and it gives you full control over resolution, size, and quality. You can convert the file directly or use extra tools to adjust it before sharing or uploading.
UniConverter - Al-in-One Multimedia Toolkit
Here's how to use UniConverter to export MP4 files:
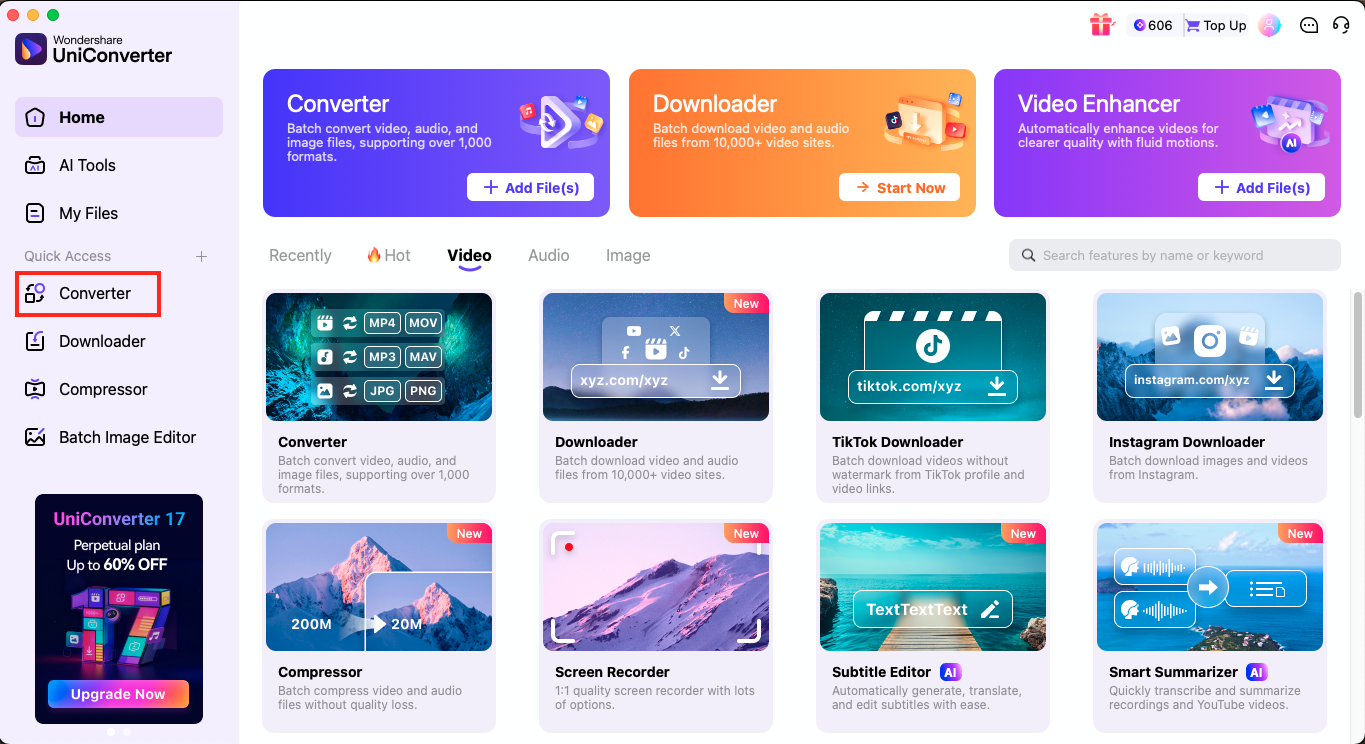
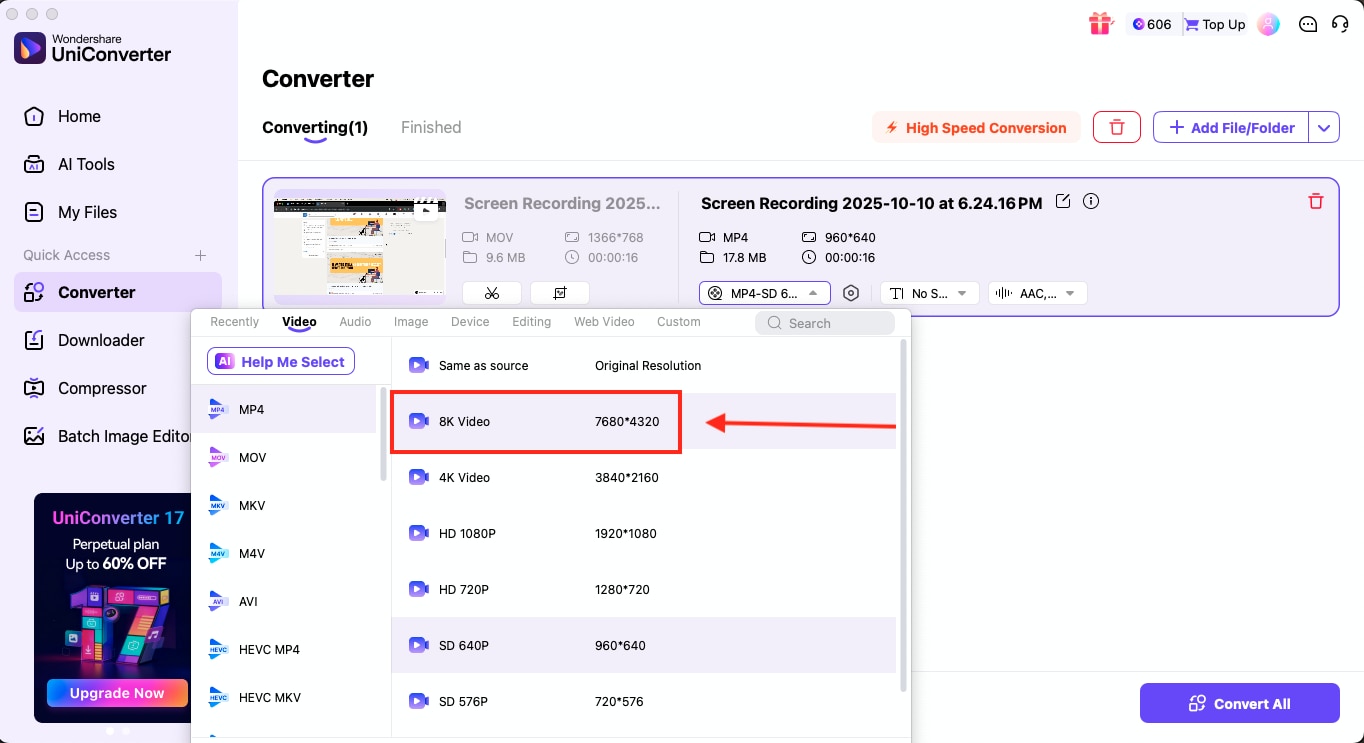
Step 1: Launch Wondershare UniConverter on your computer and open the Converter section from the top navigation or from the Quick Access panel on the left. Add your previously exported draft or cached video to the workspace so UniConverter can load the file for processing.
Step 2: After the video appears in the Converter panel, click the current format displayed near the gear icon to open the list of available output formats. Select MP4 from the Video tab and choose the resolution you prefer. Once the settings are ready, click Convert All to generate the new MP4 file.

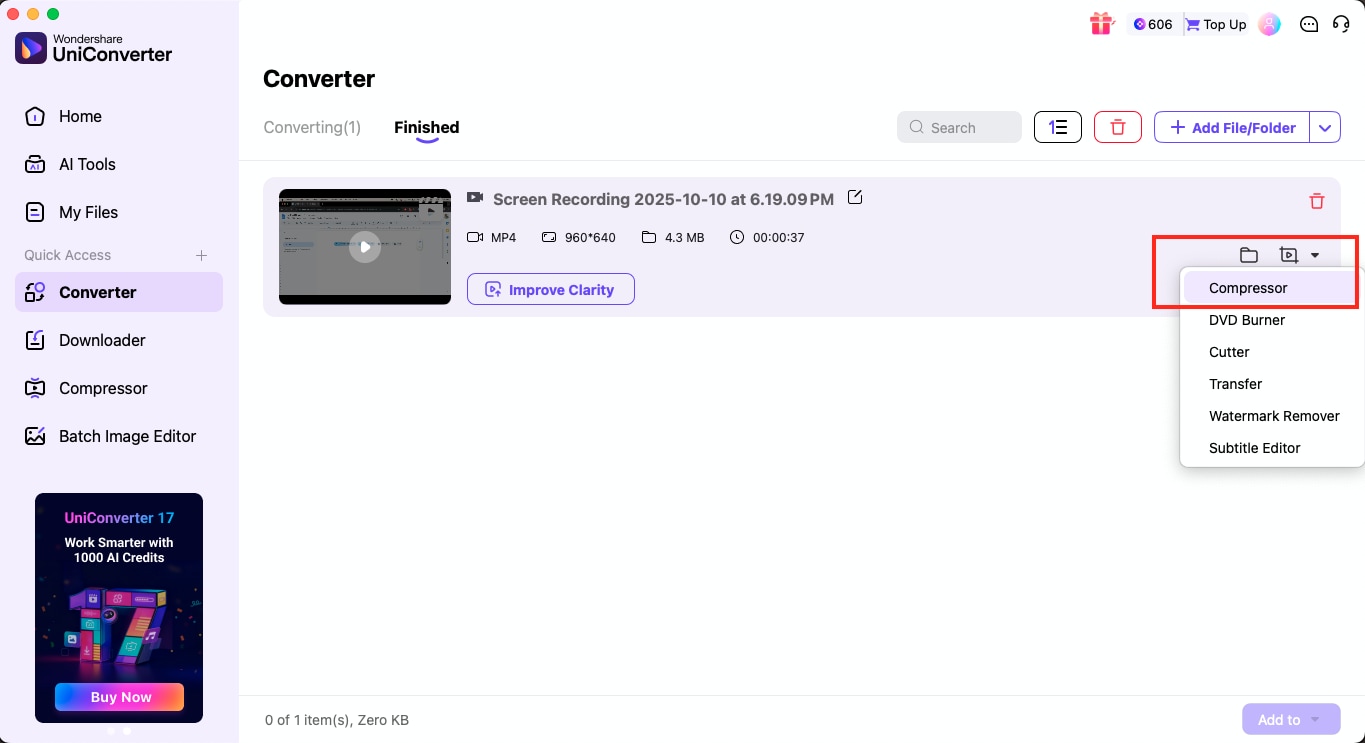
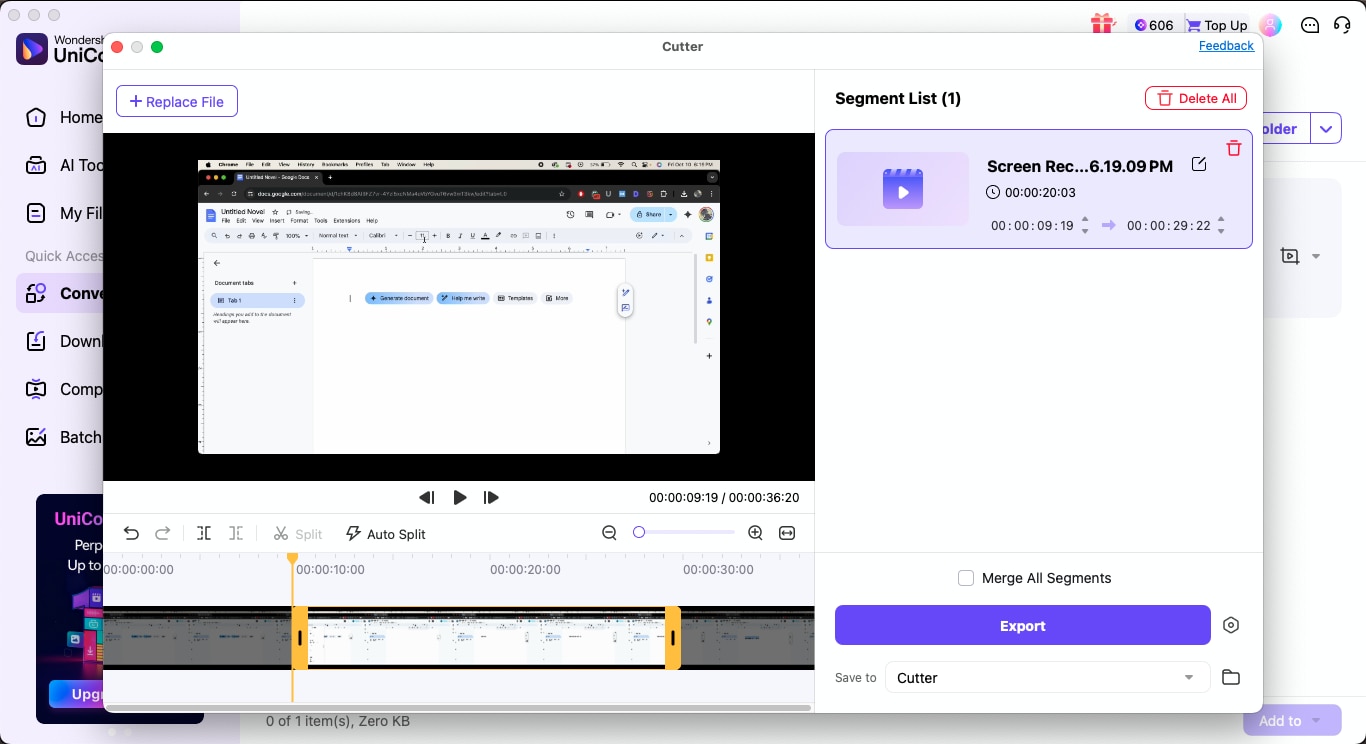
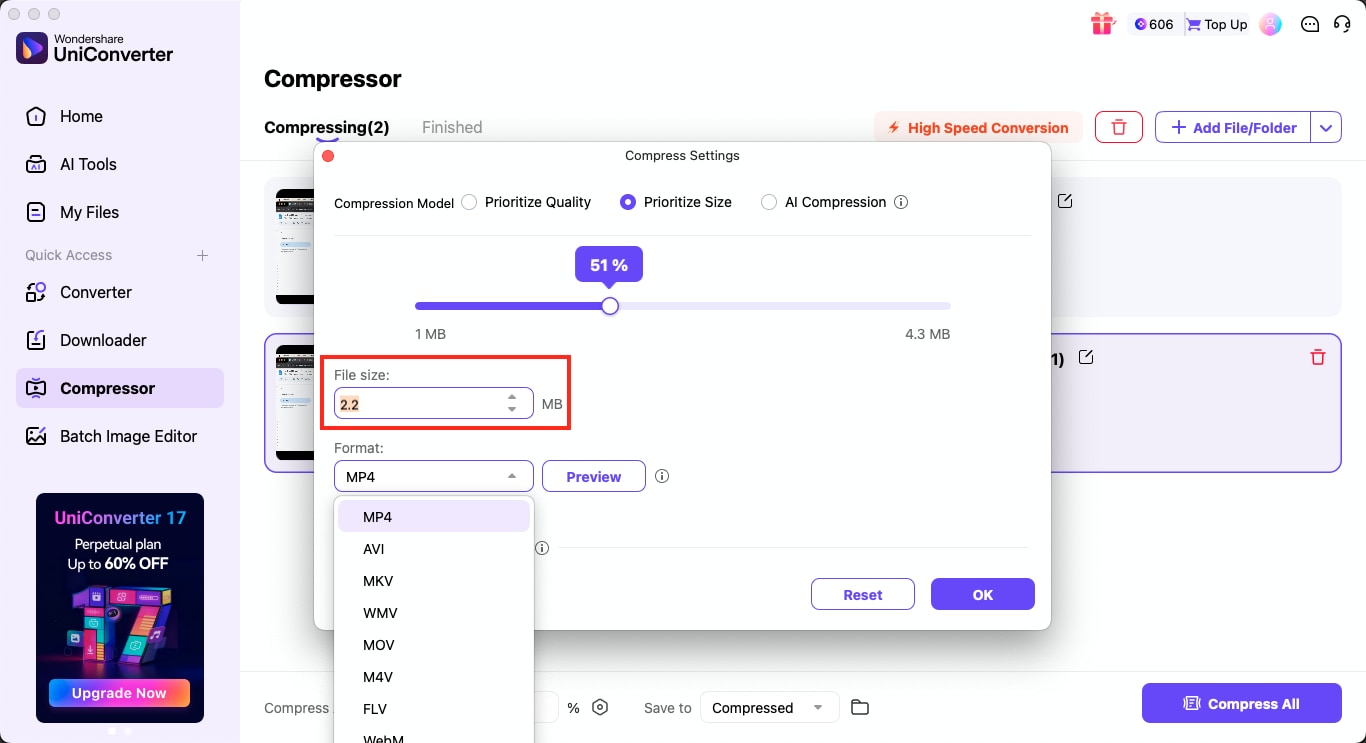
Step 3 (optional): If you want a smaller MP4, click the inverted arrow beside the file and select the Compressor to reduce the size through the percentage slider or by entering a target value. If you need to trim unwanted segments, choose the Cutter tool before converting.
Recommended Workflow: Edit in Filmora and Finish in UniConverter
A practical approach is to build and export your main project in Filmora, then handle the optimization tasks in UniConverter. This workflow helps you convert WFP to MP4 cleanly, and it works even when you later need to refine the output without Filmora. UniConverter supports batch conversion, enhancement, trimming, compression, and subtitle work, making it a reliable extension of your editing process.
Step 1: Create your full project inside Filmora as usual. Once the timeline is ready, use the Export panel and generate an MP4 using the resolution and frame rate you need. This step ensures that the WFP remains your editing file while the exported MP4 becomes your working file for optimization.
Step 2: Open the UniConverter desktop app and add your exported MP4 from Filmora. UniConverter reads the file immediately and shows its details, such as size, format, and duration, giving you a clear starting point for the next steps.
Step 3: If you want to change the video format, resolution, or output settings, open the Convert to menu and select the new format. Choosing MP4 again can also help clean up compatibility issues or adjust codecs when you convert WFP to MP4 for different platforms.
Step 4: Open Video Enhancer and apply the adjustments you need. You can use AI models for clarity restoration, denoising, or upscaling when certain clips need a boost. This step helps refine the MP4 without sending the project back to Filmora.

Step 5: Use the Cutter to remove excess sections or the Merger to combine multiple videos. You can also remove watermarks, stabilize the footage, or create GIFs directly from the MP4. Each tool updates the file without rebuilding the timeline.
Step 6: If you need a smaller file, open the Compressor and reduce the size using the slider or by entering a target value. This is useful when preparing drafts for review, uploading to social platforms, or storing multiple versions.
Step 7: Use the Subtitle Editor to add auto-generated subtitles, import an SRT file, or create manual lines. This saves time when the final MP4 needs accessibility or when you are preparing for platforms that require captions.
Step 8: Once the adjustments are ready, click Export All to finalize your optimized MP4. This completes the workflow and gives you a file that is ready for distribution, archiving, or delivery, without depending on Filmora again.
Why Does UniConverter Matters After the MP4 Export?
Once Filmora gives you an MP4, the next stage often requires adjustments that go beyond simple editing. This is where UniConverter fits naturally into the workflow. As you can see from the steps above, it works offline, handles large files quickly, and provides practical tools to refine the MP4 without reopening Filmora or touching the WFP.
Some of the key advantages of using UniConverter at this stage:
- It works fully offline, which keeps conversions and edits secure
- It can easily handle batch conversion for multiple MP4 files at once
- It supports a wide range of video, audio, and device formats
- This all-in-one media suite offers trimming, merging, cutting, and watermark removal
- It provides compression tools for lighter file sizes
- There's a video enhancement option for clarity and stabilization
- It even lets you create subtitles or import existing SRT files
- It delivers faster processing with GPU acceleration
Conclusion
As we discussed in this comprehensive guide, a WFP file acts only as your project layout, so it will never behave like a real video on its own. Exporting through Filmora is the only way to convert WFP to MP4 that any device can play. Once the MP4 is ready, you can use Wondershare UniConverter to take the next step by polishing the file, adjusting its size, or preparing clean versions for different platforms.
Try Wondershare UniConverter to handle your MP4 conversions and final edits smoothly, without complicating your workflow.

