

Ever played a song that blasts your ears, only to be followed by another that’s barely audible? That’s where sound leveling comes in. Whether you're working with podcasts, music tracks, or video content, learning how to normalize sound ensures consistent volume across all media.
In this guide, we’ll walk you through simple ways to normalize audio using popular tools like Audacity, AIMP, VLC, Audio2Edit, and UniConverter. From Audacity normalize effects to normalize audio online solutions and even FFMPEG normalize audio options for pros—this tutorial has you covered.
- [Purpose of Normalization] Audio normalization balances volume levels, reducing loud peaks and boosting quieter sections for consistent playback.
- [Tool Options] Tools like Audacity, AIMP, VLC, and online platforms provide simple ways to normalize audio across devices.
- [Playback vs Editing] Some tools like VLC normalize sound only during playback, while others apply permanent changes to files. :contentReference[oaicite:0]{index=0}
- [Efficient Solution] Wondershare UniConverter supports batch normalization with high-quality output for both audio and video files.
In this article
Part 1. How to Normalize Audio with Audacity
Audacity is a powerful, free audio editor widely used for cleaning up, editing, and enhancing audio recordings. One of its key features is the Normalize tool, which helps with sound leveling—bringing quiet and loud parts of a file to a more consistent volume. This tool is useful when you're working with podcasts, interviews, songs, or voiceovers. Whether you're a beginner or an experienced editor, the Audacity normalize tool is a simple way to improve your audio. It also works as a great free MP3 normalizer and a handy MP3 Gain Mac alternative.
Step 1: Import and Select Your Audio File
Launch Audacity and drag your audio file into the workspace, or go to File > Import > Audio to add it manually. Once the waveform appears on the timeline, press Ctrl + A (or Cmd + A on Mac) to select the entire audio.

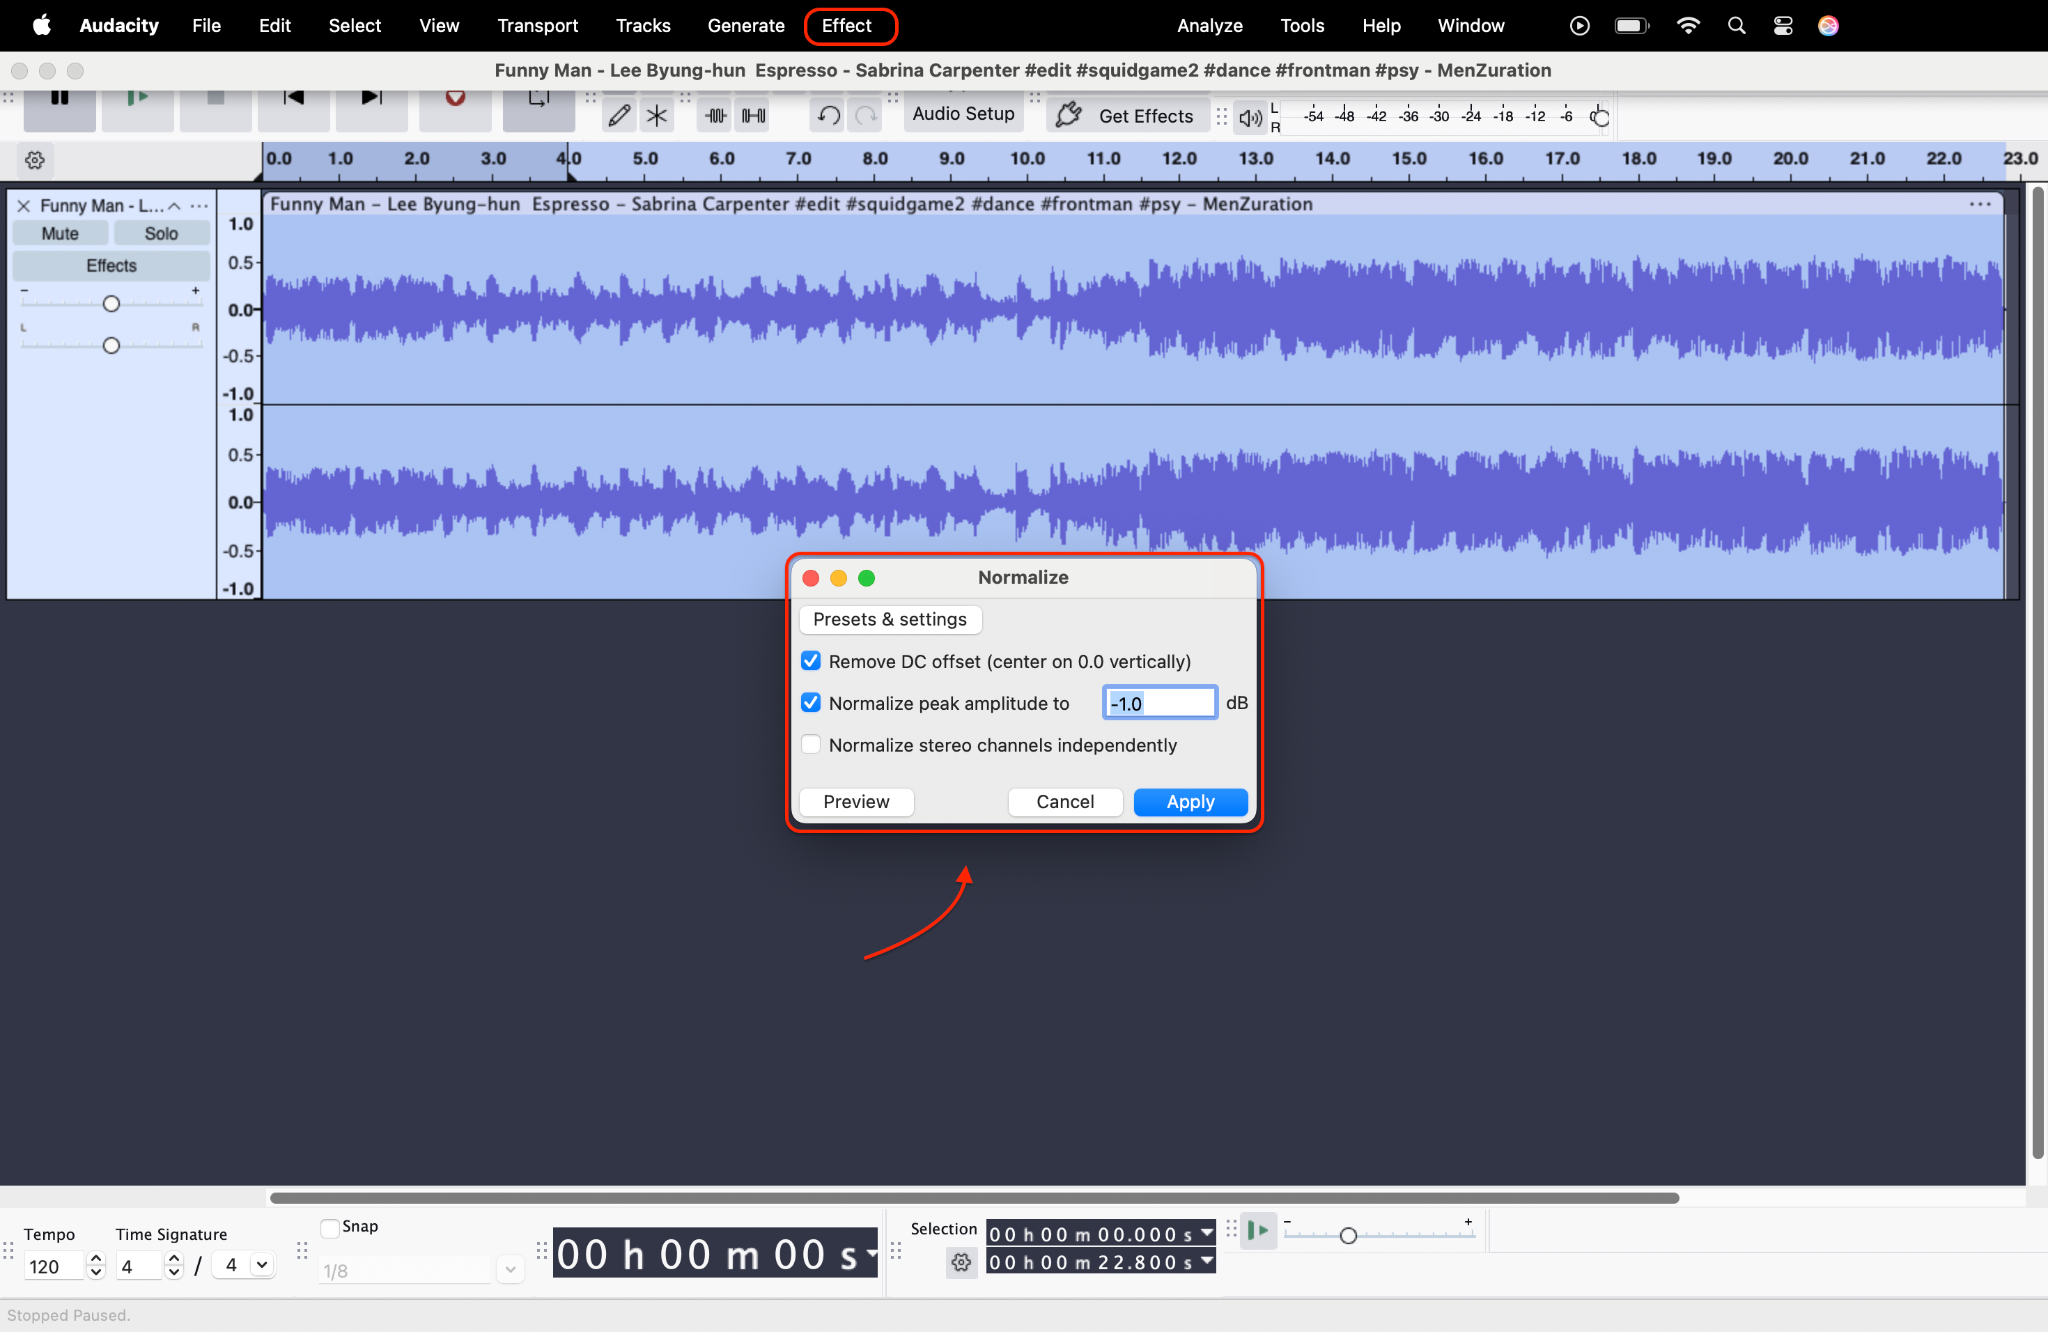
Step 2: Open and Configure the Normalize Effect
Navigate to the top menu and click Effect, then scroll down and choose Normalize—be sure not to confuse it with Amplify or Compressor. In the Normalize pop-up window, check the box for “Remove DC offset” and enable “Normalize peak amplitude” too, typically set at -1.0 dB. These settings are essential to normalize volume in Audacity accurately, improving the audio’s balance without causing clipping or distortion. Adjust the amplitude value if you prefer slightly louder or softer output, then click the apply.
Step 3: Review and Export Your Normalized Audio
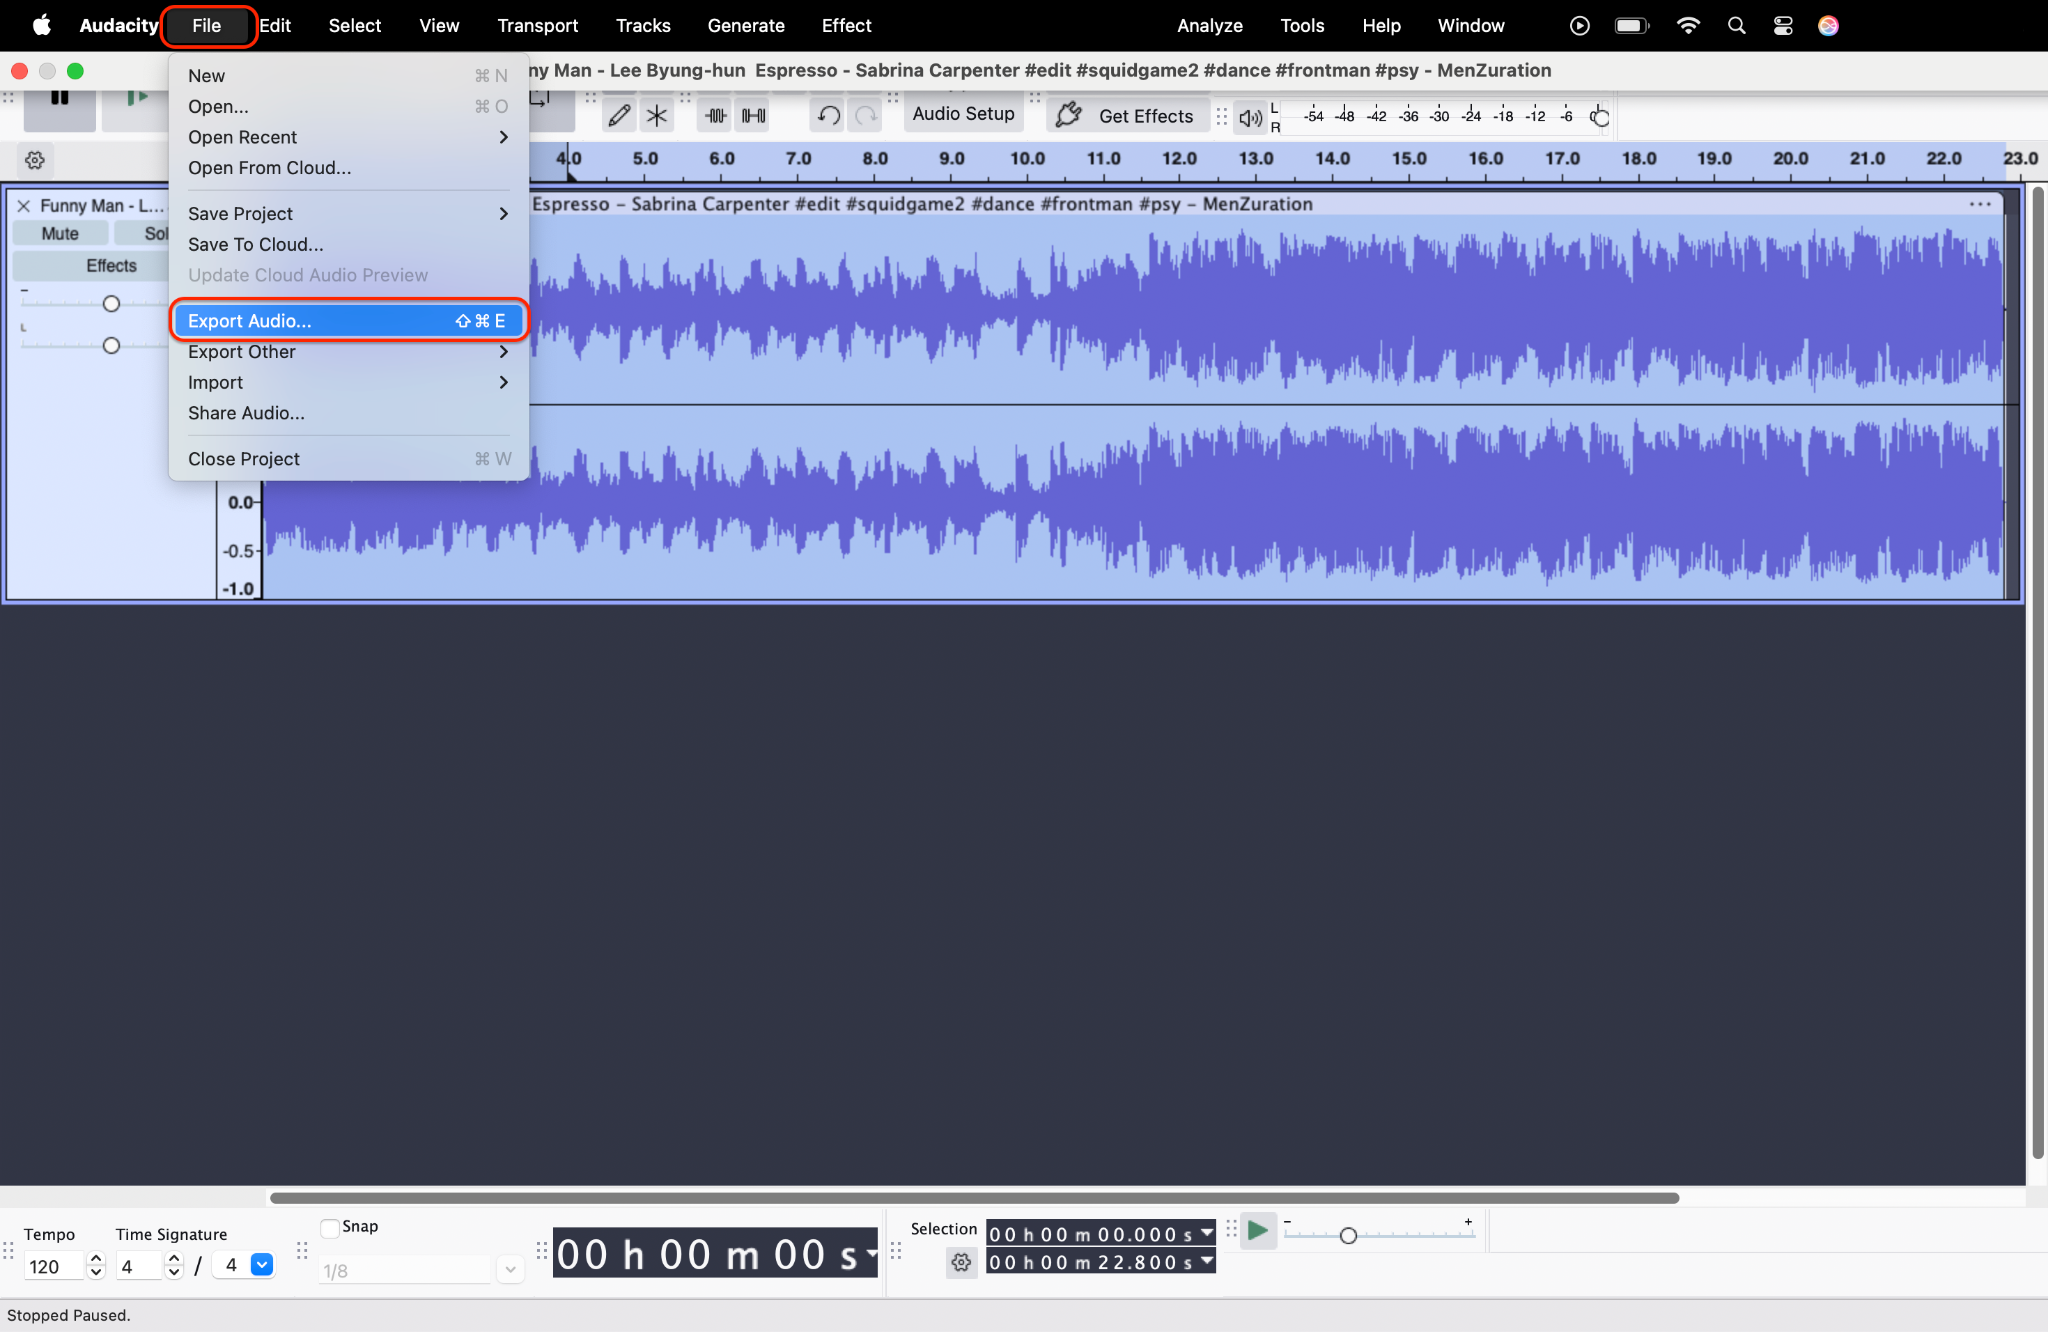
Once normalization is complete, hit play to preview the results. You should notice a smoother and more even sound level throughout. If the audio sounds clear and consistent, go to File > Export and save your file in your desired format, whether MP3, WAV, or others. This final step ensures your track is clean, polished, and ready to share, instrumental if you’re looking to normalize MP3s for online distribution or professional playback.
Part 2. How to Normalize Audio with AIMP App (Mobile)
AIMP is a lightweight but powerful music player for Android that also offers sound leveling through built-in volume normalization features. It's ideal for users who want to normalize MP3s on the go, especially when streaming or playing downloaded tracks. With its easy settings, you can normalize sound during playback without editing the actual audio file. This thing makes AIMP a handy mobile solution for casual listeners and audiophiles alike. If you're searching for a way to normalise MP3 volume easily, AIMP is a great pick.
Step 1: Install the AIMP App and Access the Audio
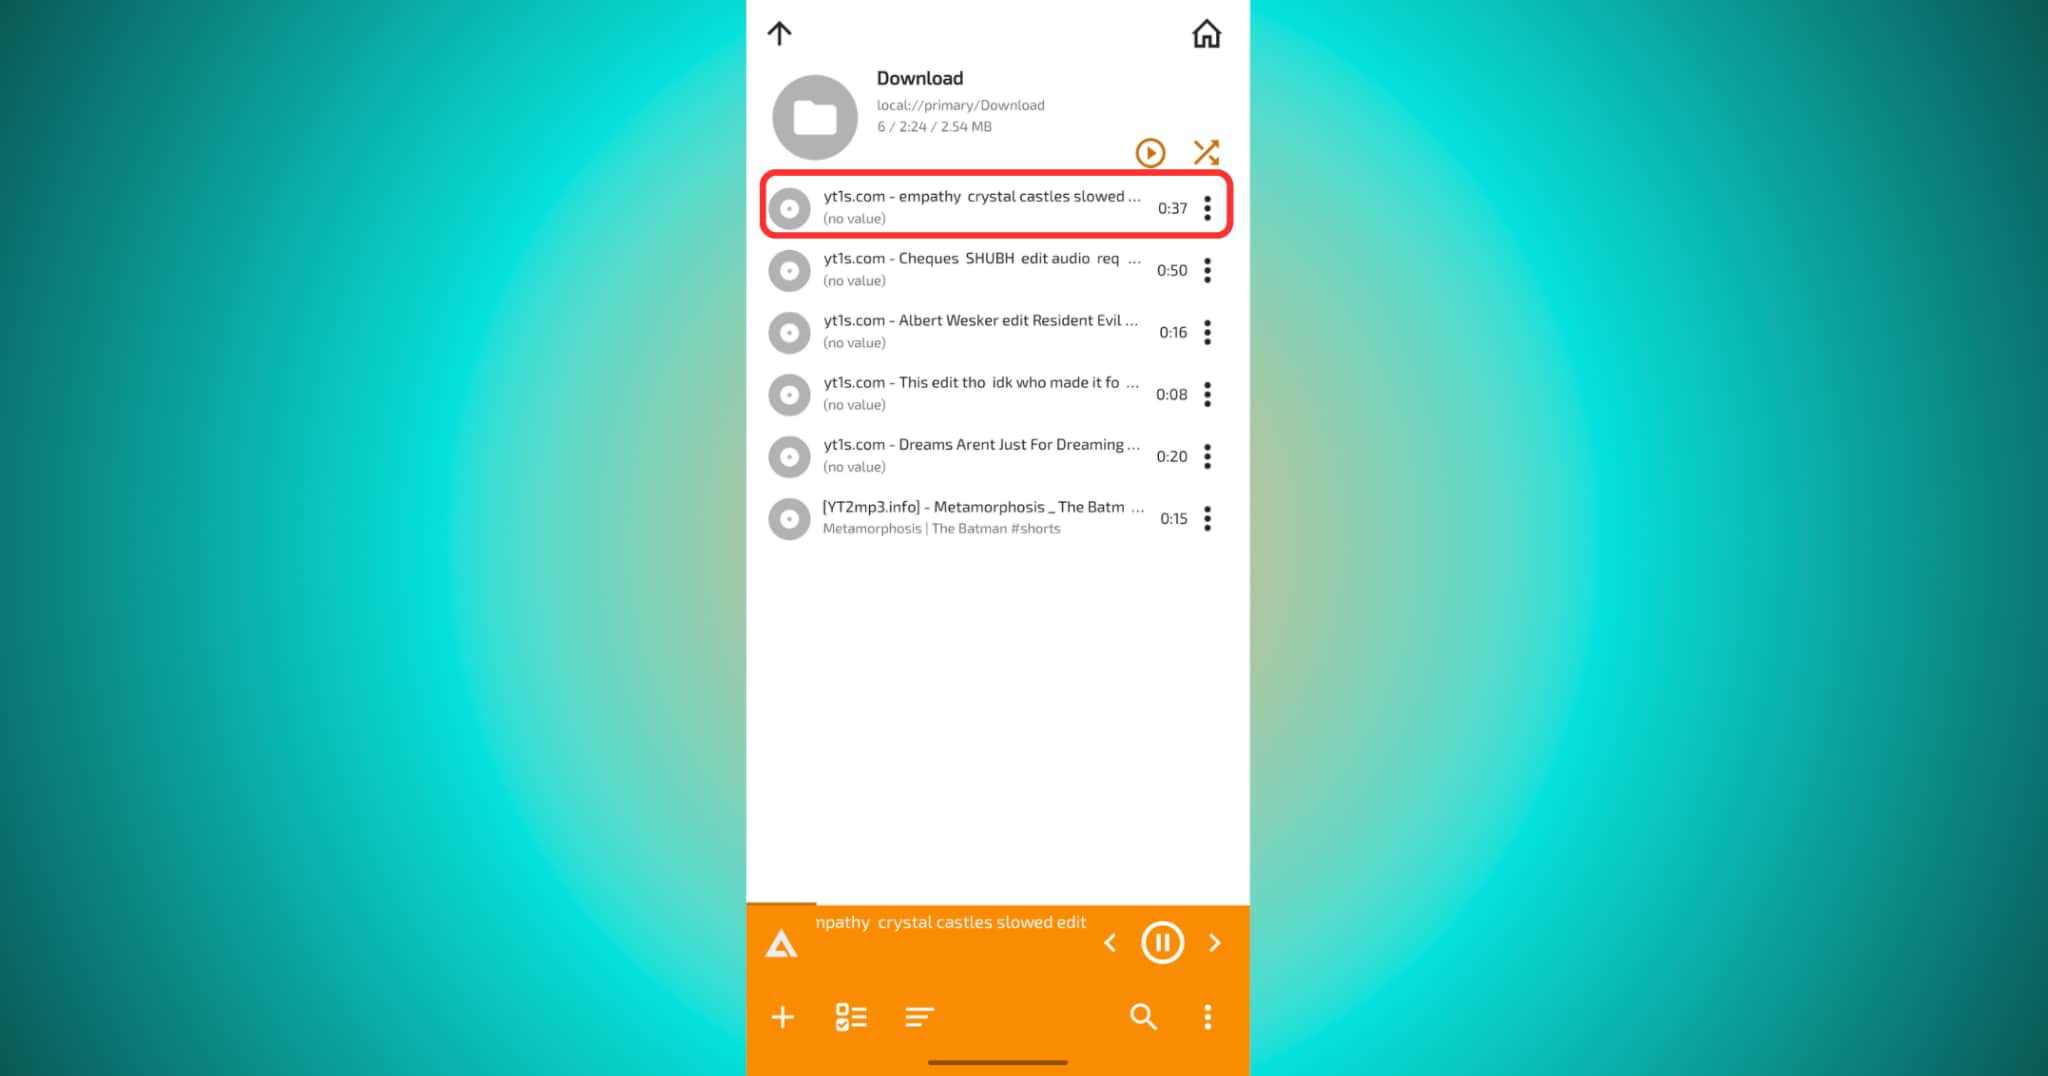
Download the AIMP app from the Google Play Store. Once installed, launch the app and allow access to your music library. AIMP supports MP3, FLAC, WAV, and other standard formats. From the home screen, tap the menu icon (☰), go to My Music, and navigate to any of the options given under it, depending on your folder. Then click to Play the audio and tap on the orange area to come on the homepage view.
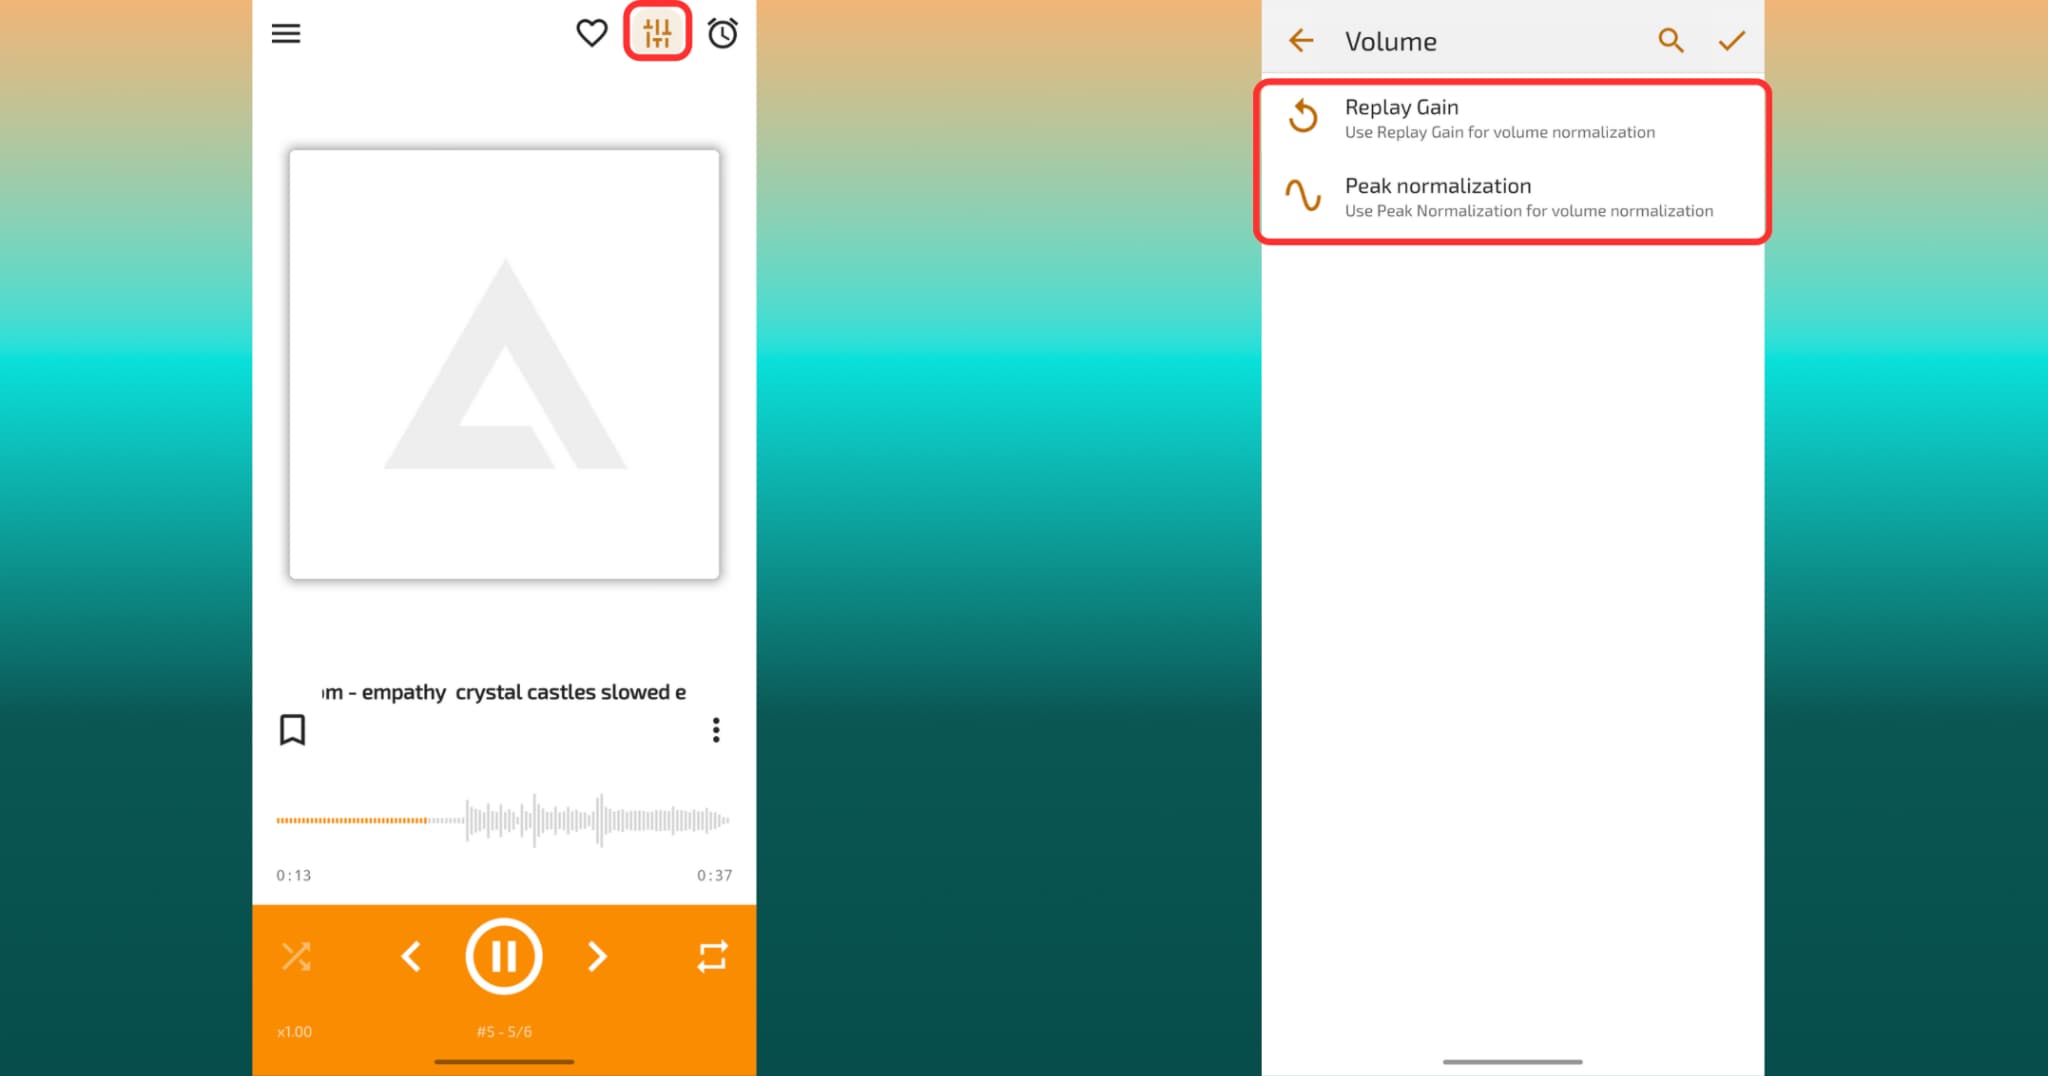
Step 2: Enable Peak Normalization or Replay Gain
Now, inside the Equilizer settings, click on 3 dots at the bottom right corner and choose Volume normalization, after that locate and toggle on Peak Normalization or Replay Gain. This option activates automatic volume leveling across all tracks, using built-in algorithms or pre-analyzed gain data. Once enabled, AIMP balances loud and soft tracks during playback, allowing you to normalize MP3s in real time, without modifying the original files like FFmpeg normalize audio would.
Step 3: Customize Gain Options and Enjoy Consistent Playback
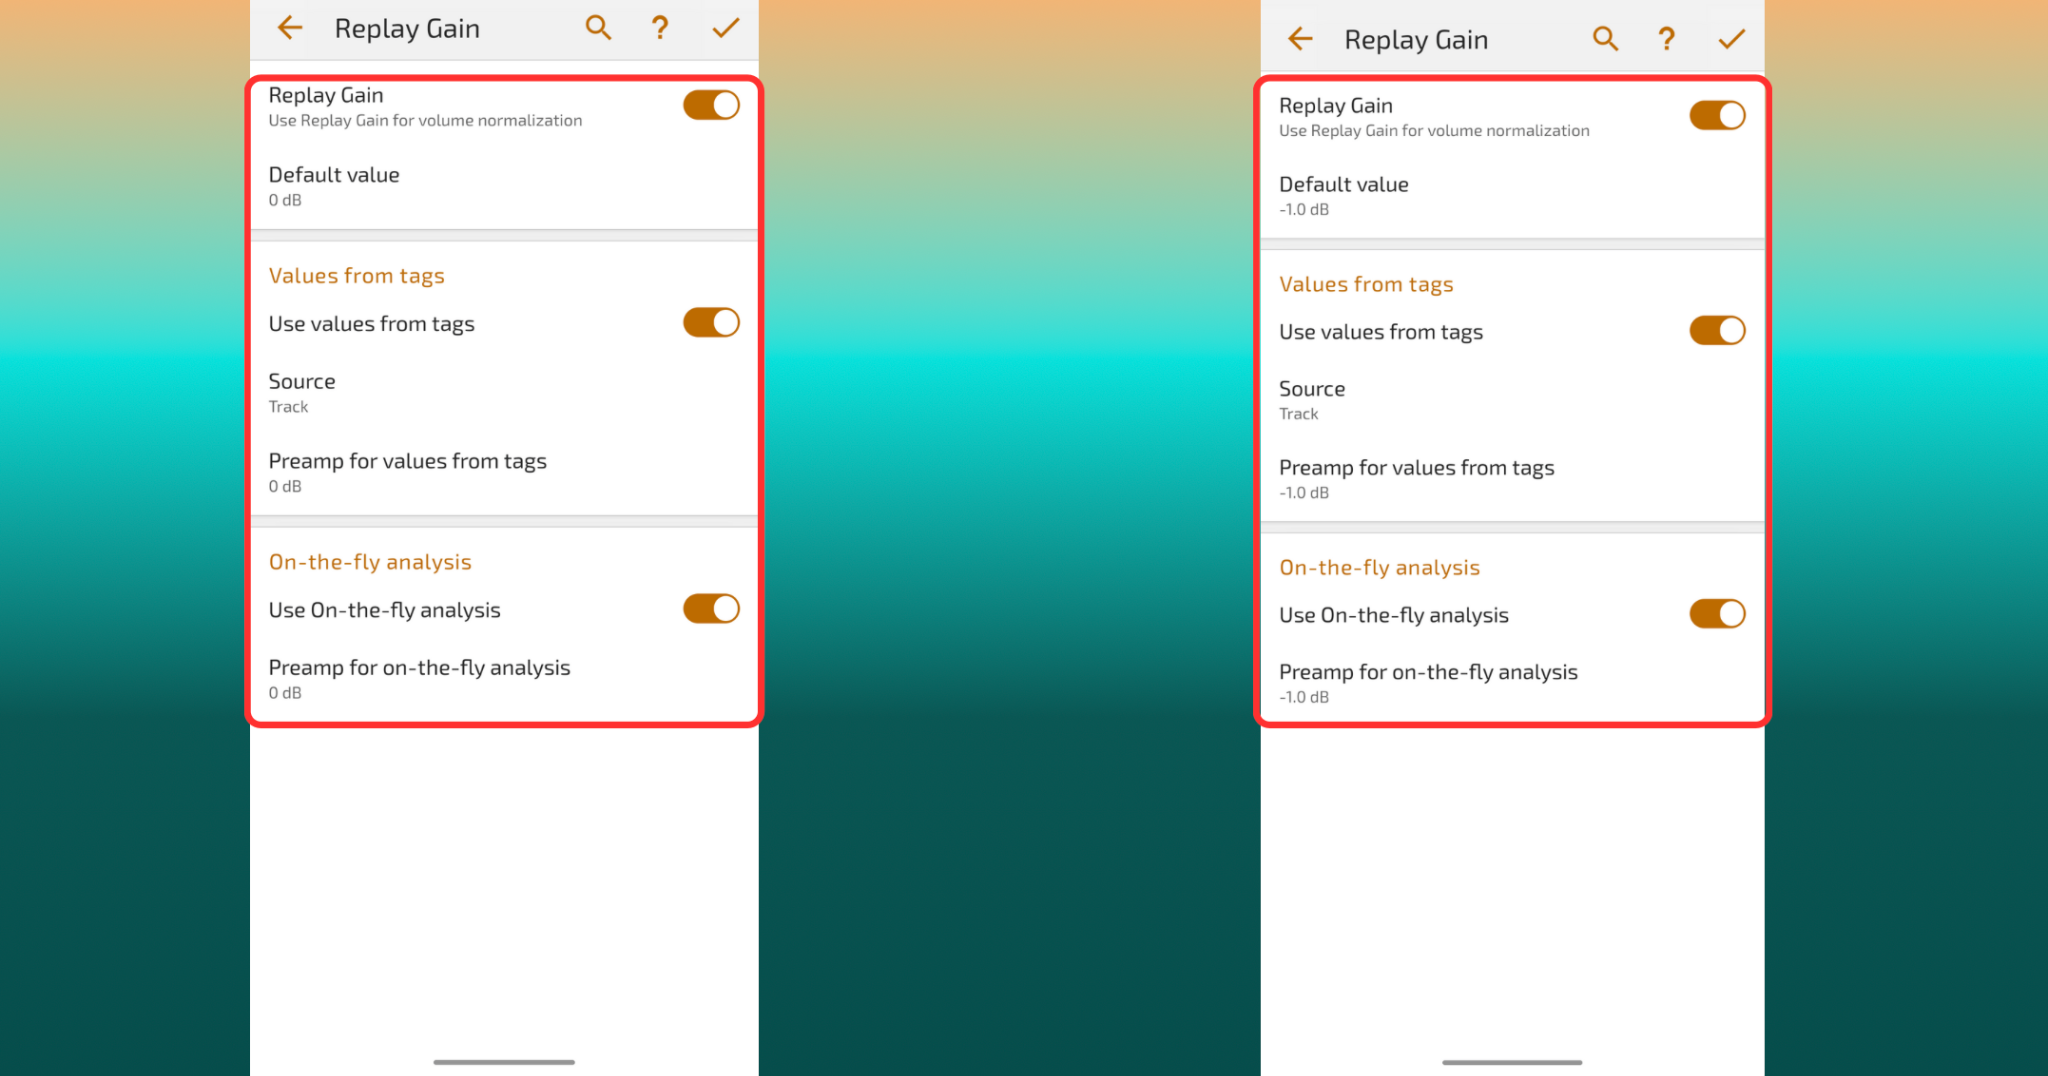
For more control, go into Replay Gain Settings and choose whether to apply gain per track or album. You can change its default value, preamp for values from tags, and also preamp for on the fly analysis. After setup, play your music through AIMP—you’ll experience smoother transitions and consistent volume levels. These all make AIMP a powerful mobile solution to normalize MP3s on Android—ideal for on-the-go listening without any need for desktop conversion or re-editing.
Part 3. How to Normalize Audio with Audio2Edit (Online Tool)
If you don’t want to download or install any software, Audio2Edit is a convenient option to normalize audio online for free. It works directly in your browser and supports formats like MP3, WAV, FLAC, and more. It’s perfect for users looking for a free MP3 normalizer to balance audio without advanced tools quickly. Whether you’re on Windows, Mac, or mobile, this site is an excellent go-to for basic sound leveling and volume correction. It’s beneficial when you're in a rush or working from a device without editing software.
Step 1: Visit Audio2Edit and Upload Your File
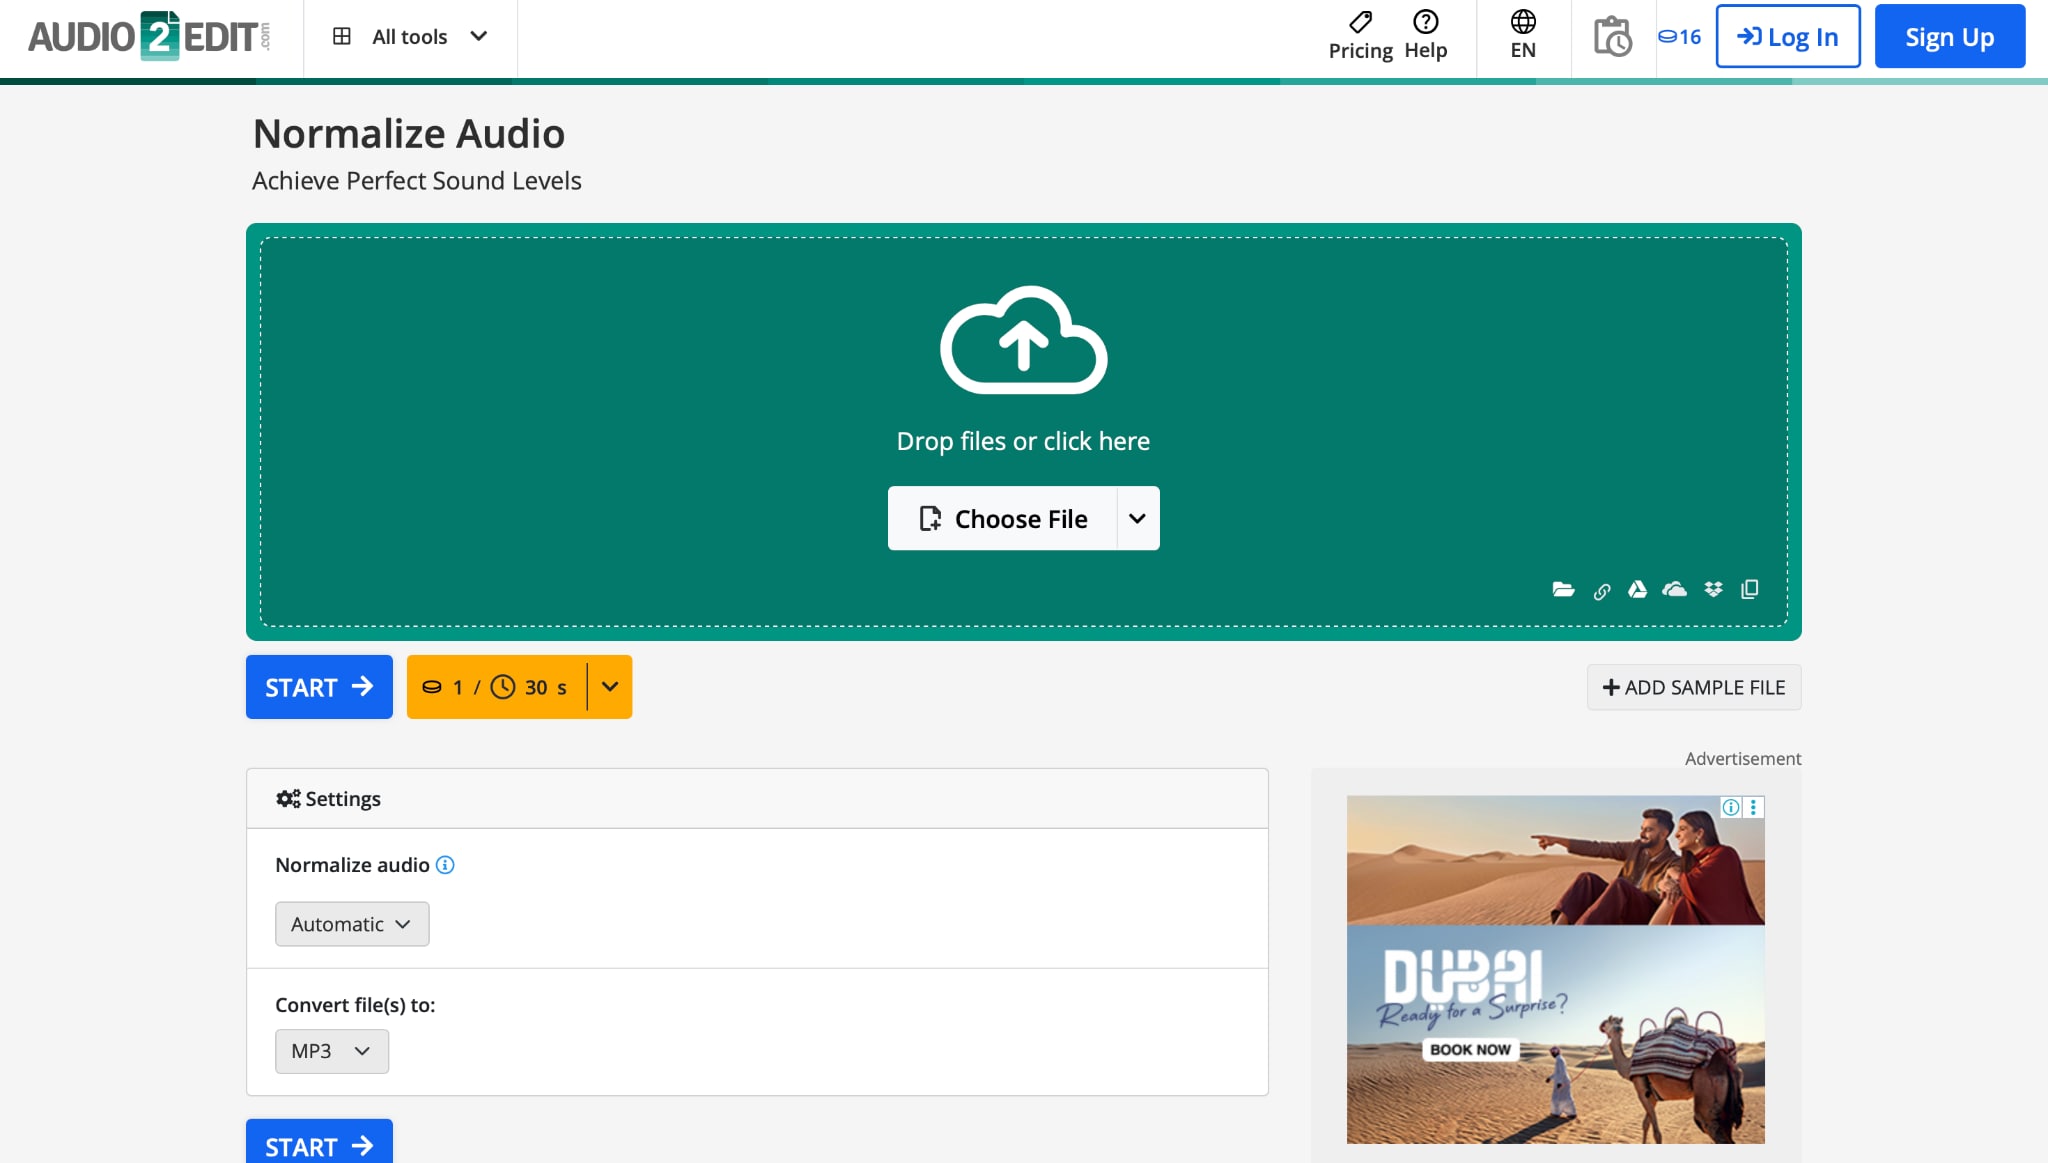
Head over to the Audio2Edit website in your browser—no account or login is required. The tool is free, user-friendly, and supports popular formats like MP3, WAV, and more. Click “Choose File” to upload your audio from your device, or import directly from Dropbox, Google Drive, or a URL. Once uploaded, the platform quickly prepares the file for processing, making it perfect if you want to normalize MP3s fast without installing software like Audacity normalize or FFmpeg normalize audio.
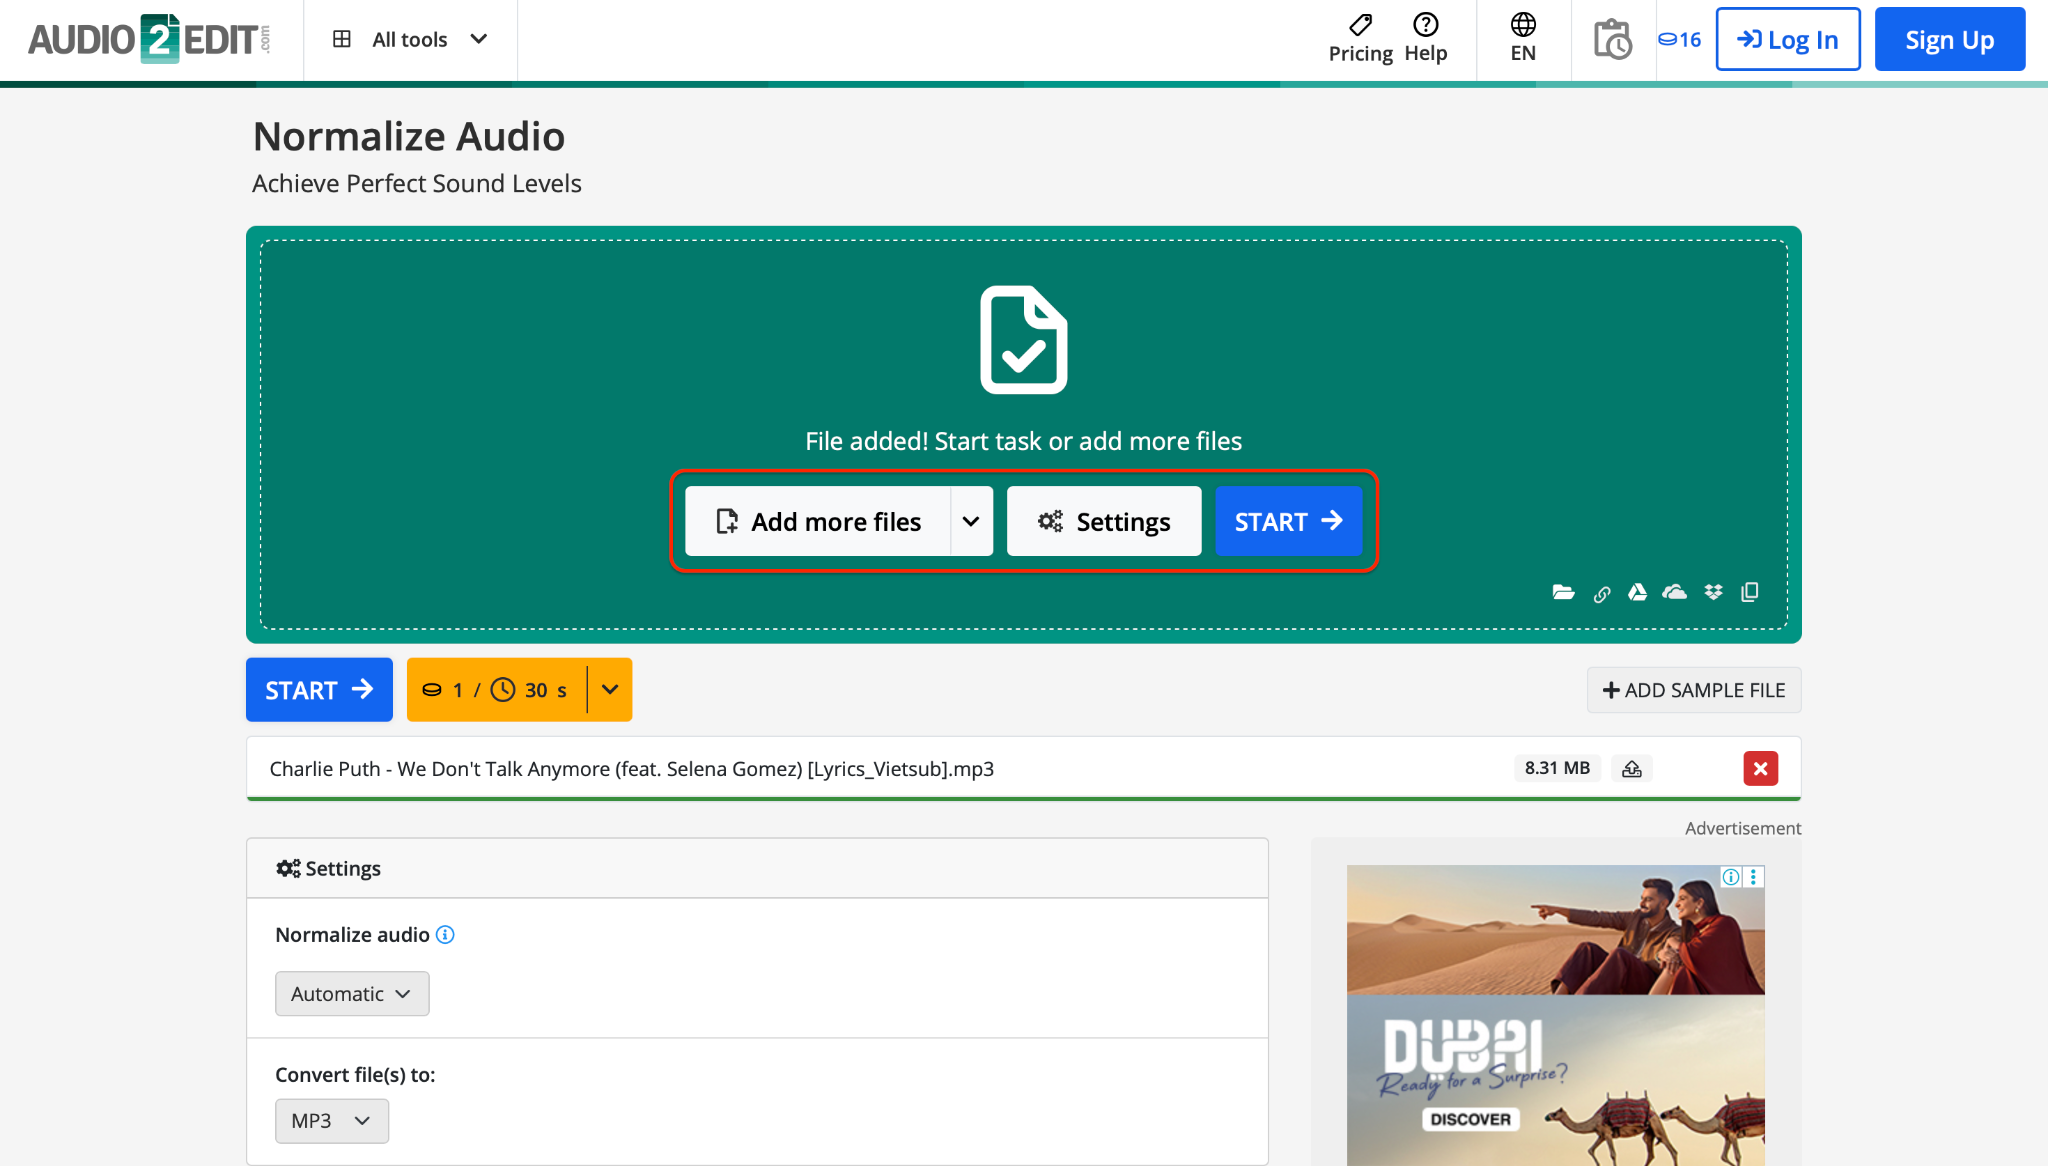
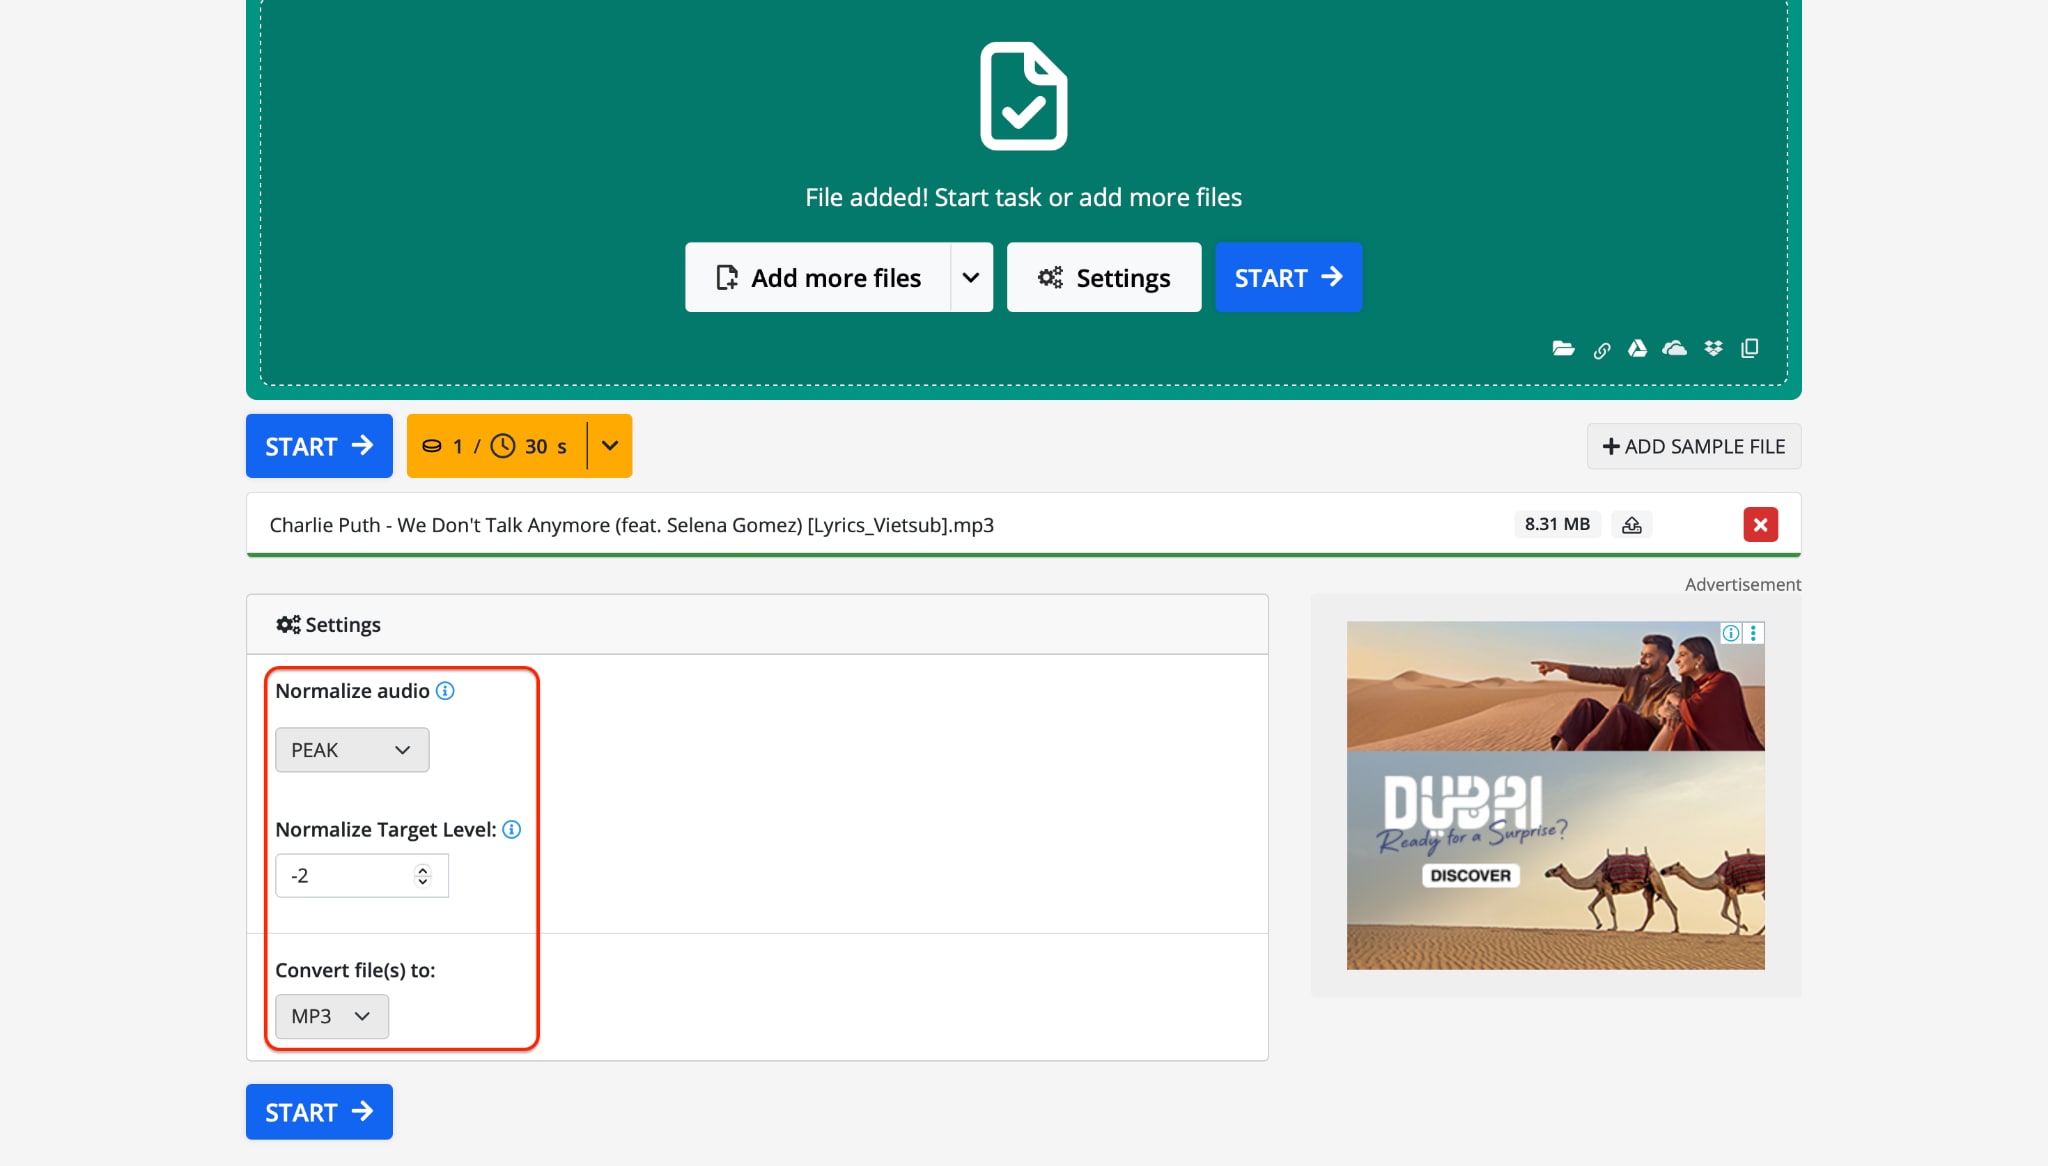
Step 2: Set Your Normalization Settings
After uploading, scroll to the settings section where you can choose how your audio will be normalized. You can choose between peak normalization and loudness normalization depending on your needs. Set your target volume -1.0 dB to -3.0 dB is ideal for music or podcast clarity. This quick setting makes it simple to normalize sound for different use cases, even if you have no technical background in tools like Audacity to normalize volume.
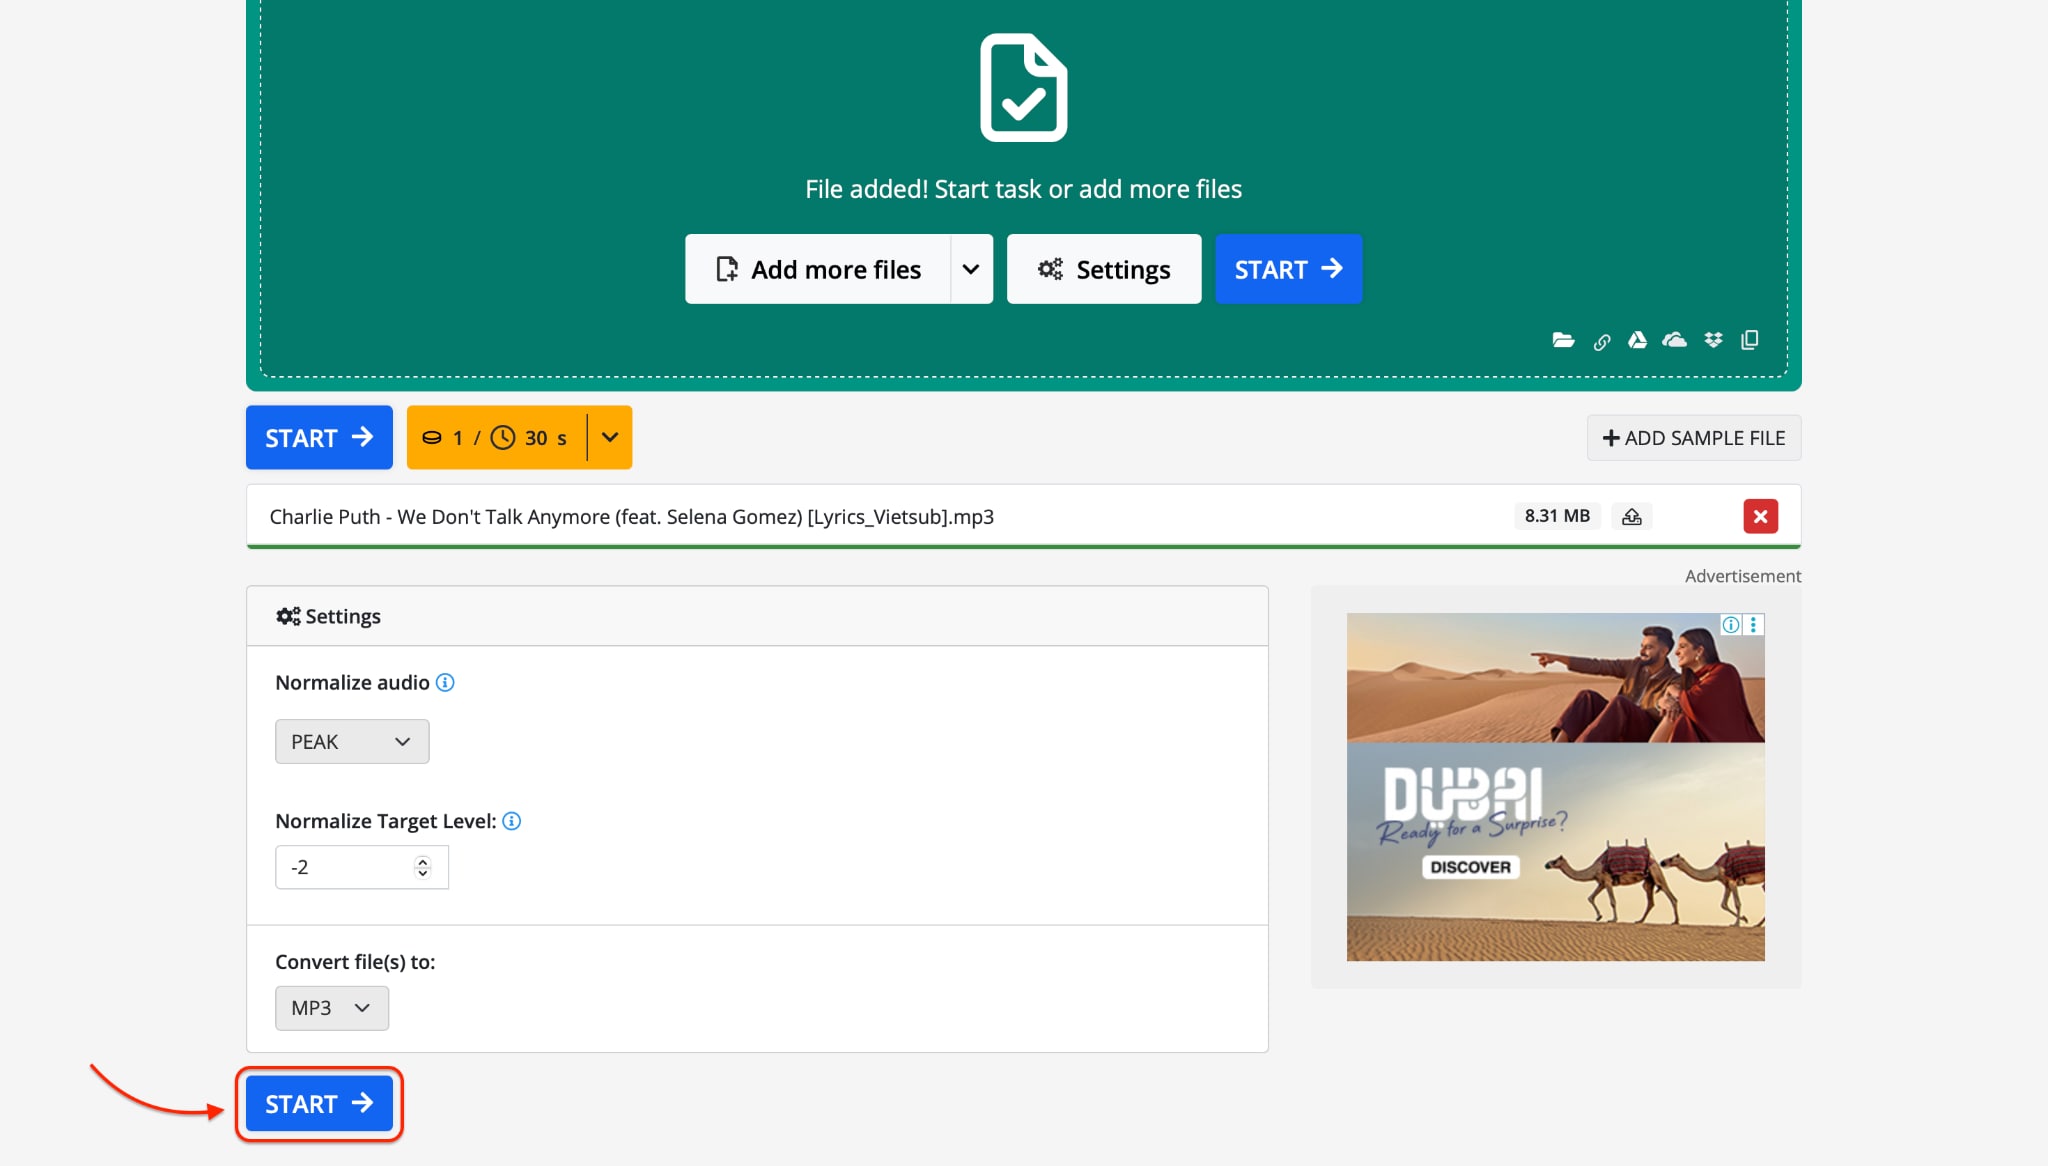
Step 3: Start and Download Your Normalized Audio
Click “Start” to begin the normalization process. In just a few seconds, the tool will process your file and show a Download button. Click it to save your newly balanced audio directly to your device. Whether you’re prepping a podcast or fixing uneven volume, Audio2Edit is a fast, cloud-based, free MP3 normalizer that works from any device, anytime—no editing experience required.
Part 4. How to Normalize Video Sound with VLC Media Player
VLC Media Player is more than just a video player—it also offers useful audio tools like volume normalization to help with sound leveling during playback. If you often find your video sound too low or too loud, VLC can help you normalize audio in video without permanently editing the file. It’s ideal for casual users who want smooth, balanced playback without needing advanced software. Whether you're watching movies, tutorials, or vlogs, VLC’s normalize volume settings can enhance your listening experience instantly.

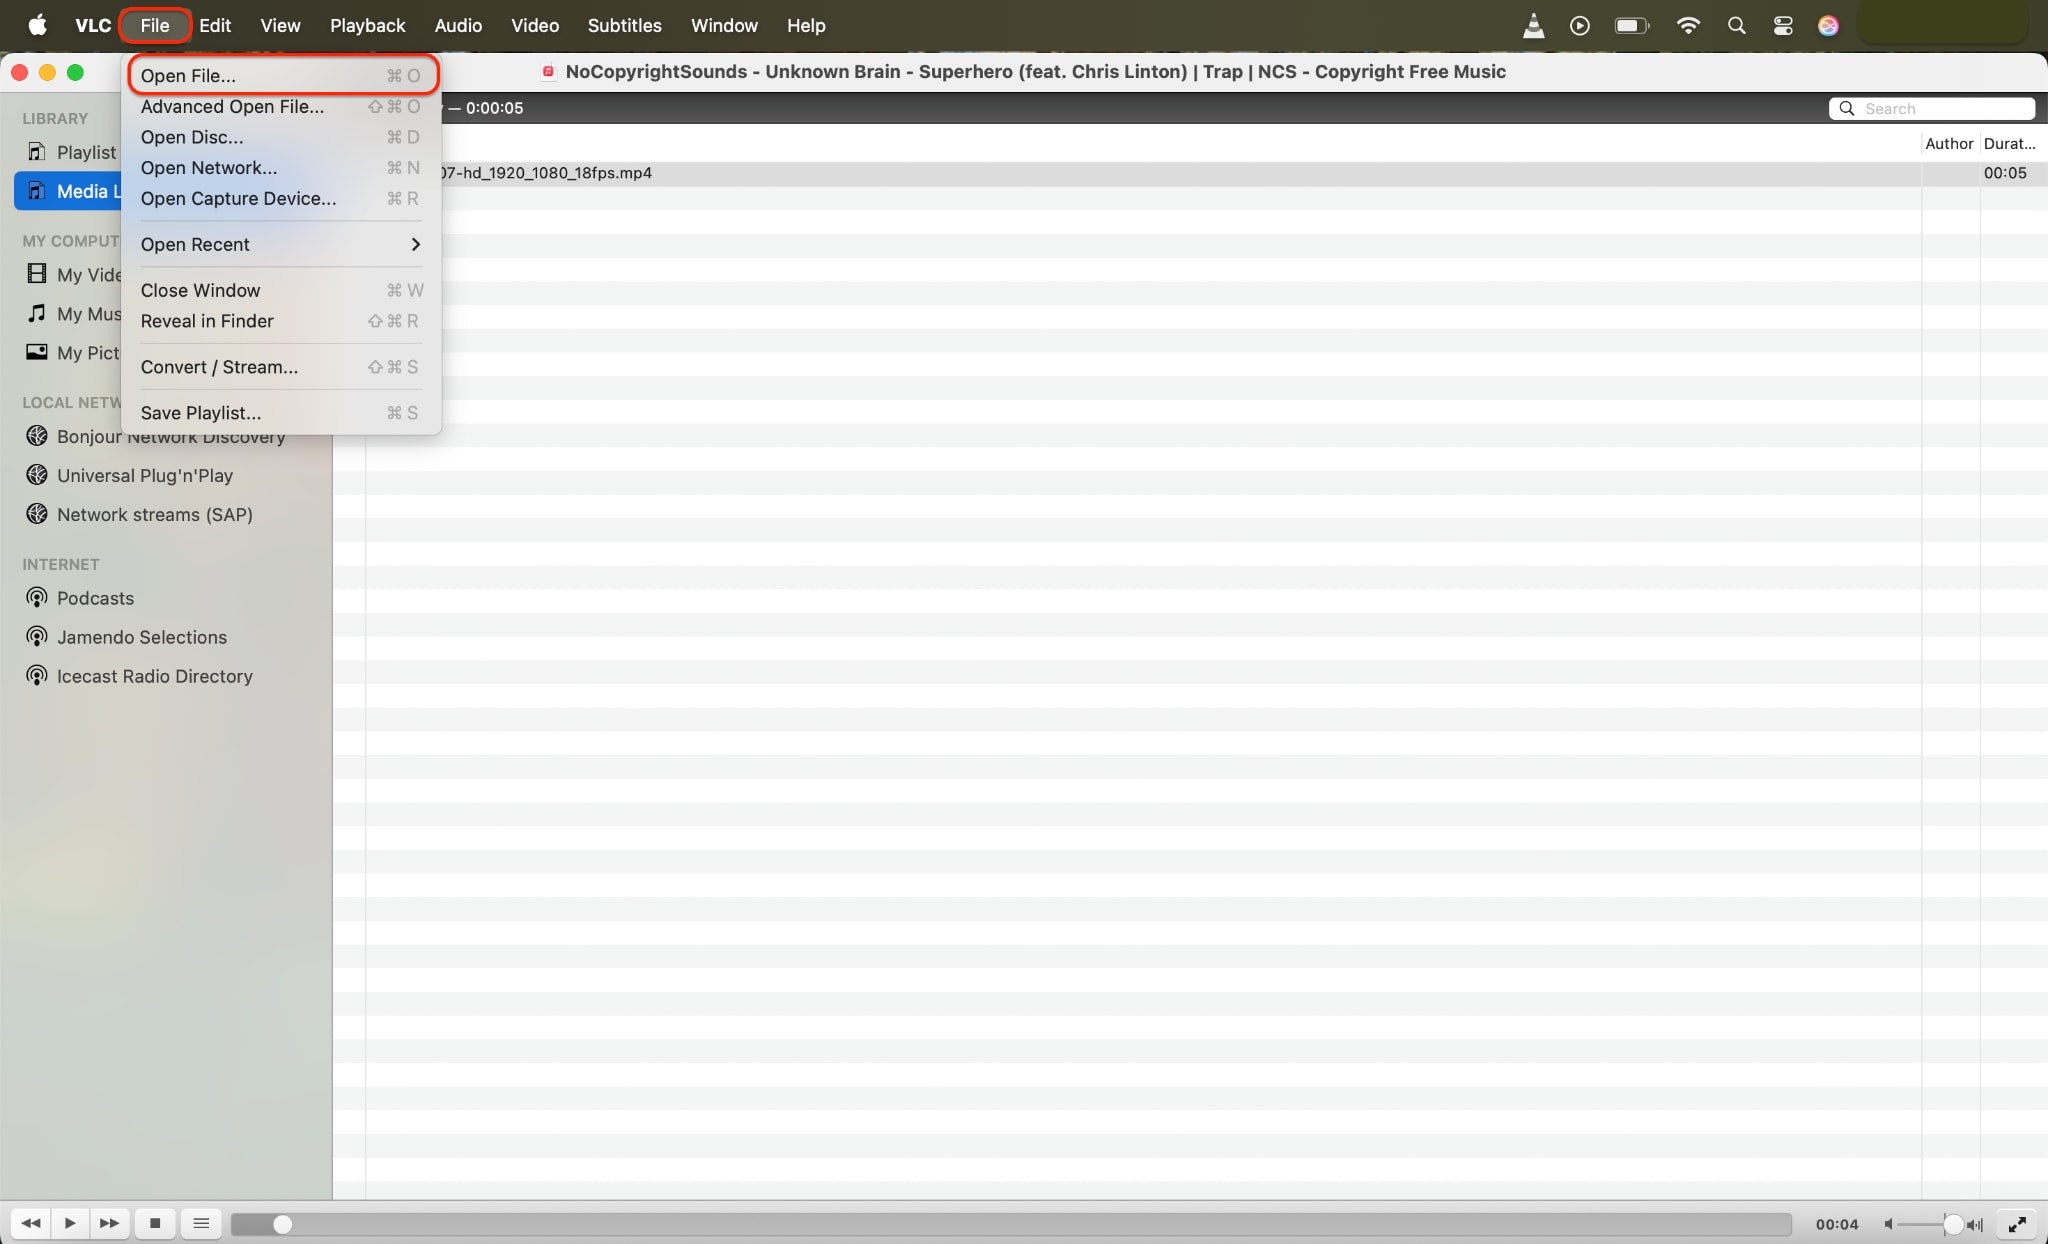
Step 1: Open VLC Media Player and Access the Audio
Launch VLC Media Player on your Windows, Mac, or Linux system. If it’s not installed, download it from the official VideoLAN website. Switch to the File tab—this is where you open your audio file.
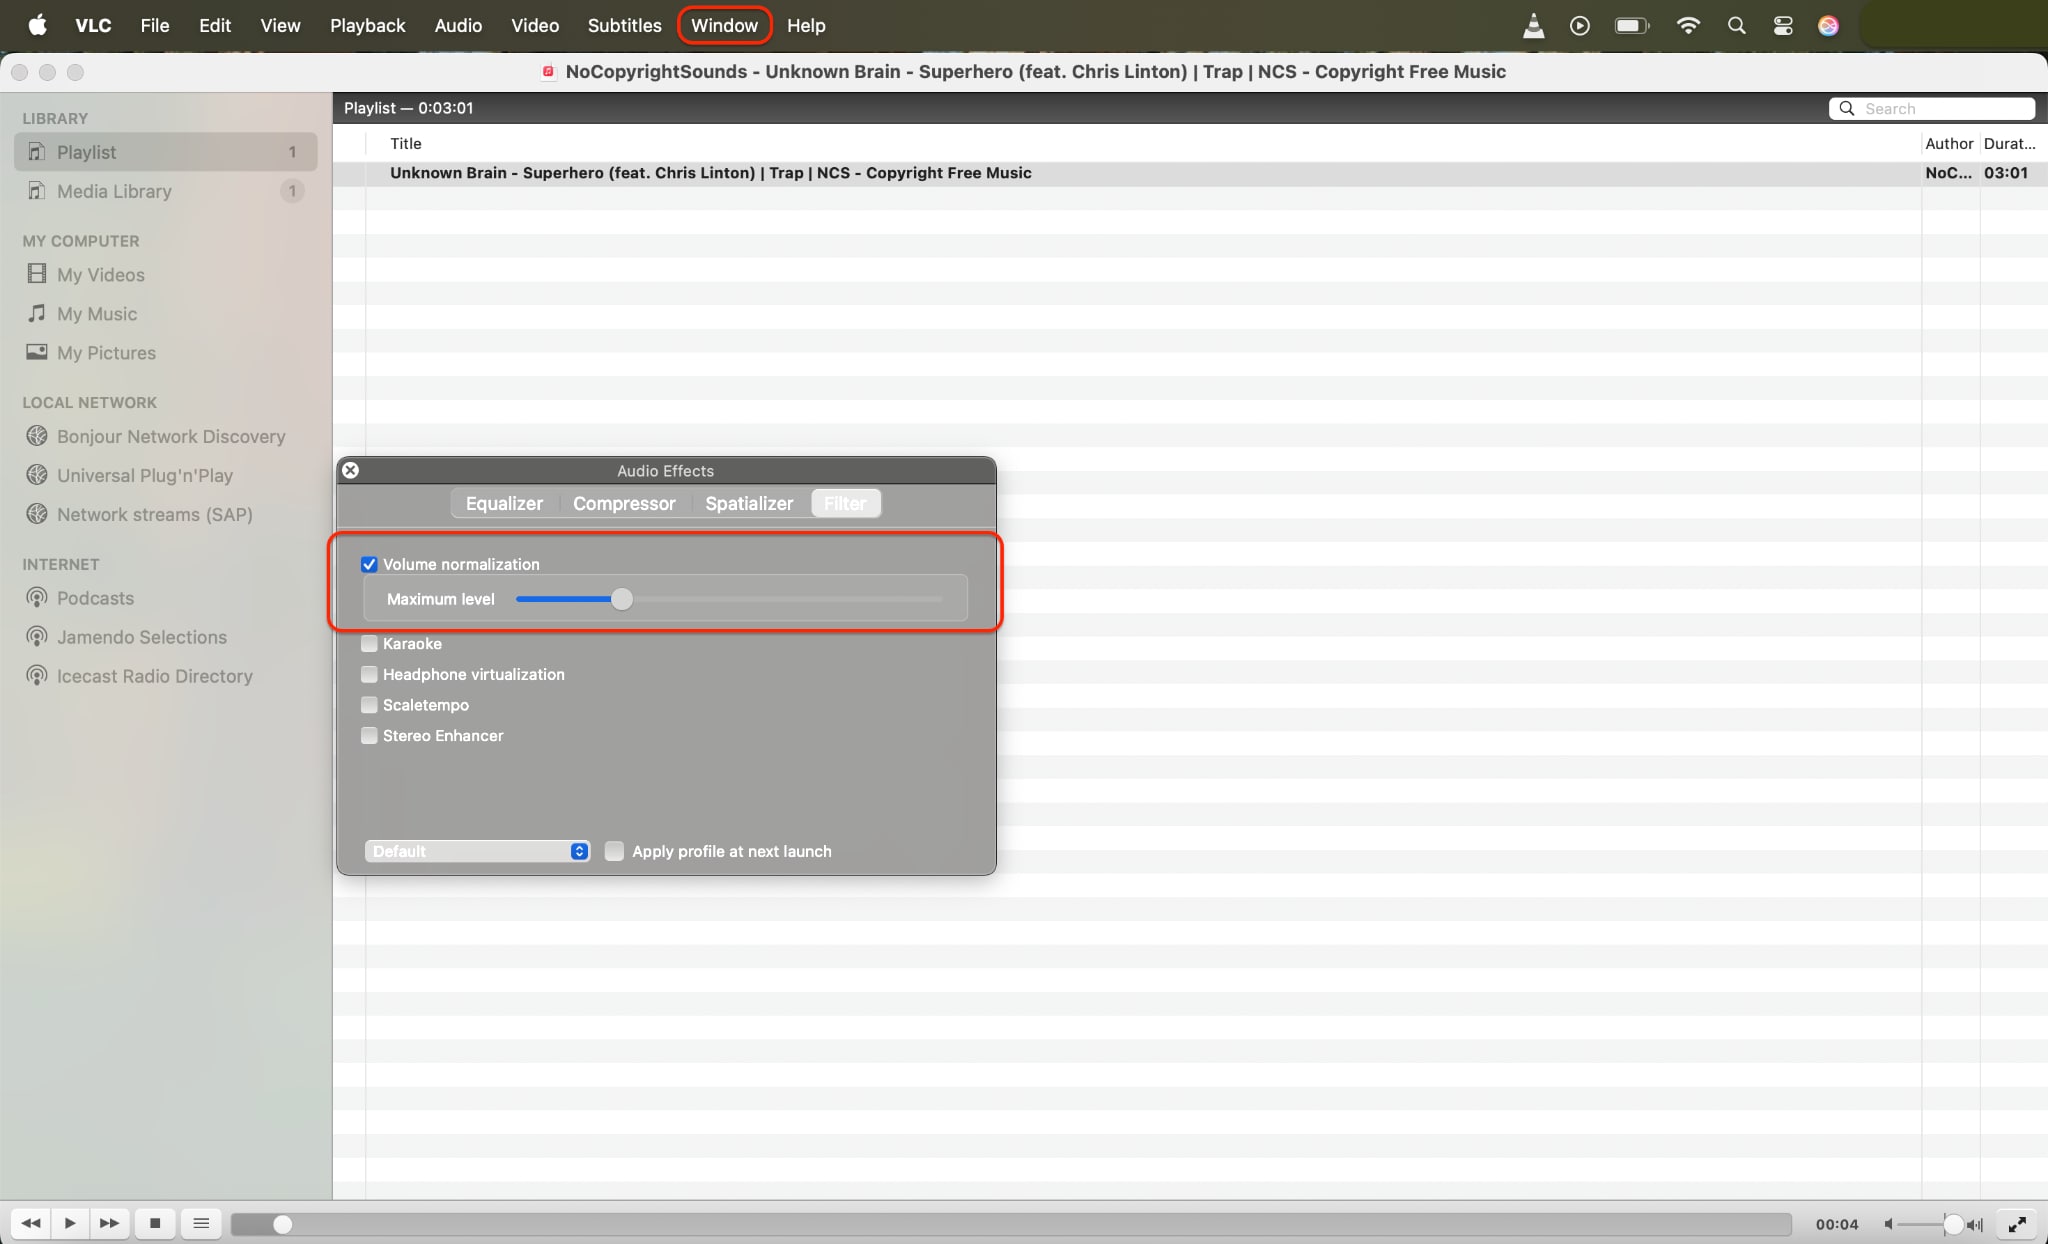
Step 2: Enable the VLC Normalize Volume Feature
Inside the Window tab, find Audio Effect and enable the checkbox labeled “Volume normalization”. Drag the slider to define the peak volume level VLC should aim for. This innovative feature automatically reduces loud spikes and boosts quieter segments, helping you normalize audio in video without editing tools like FFmpeg normalize audio or Audacity normalize.
Step 3: Save and Restart to Apply Normalized Playback
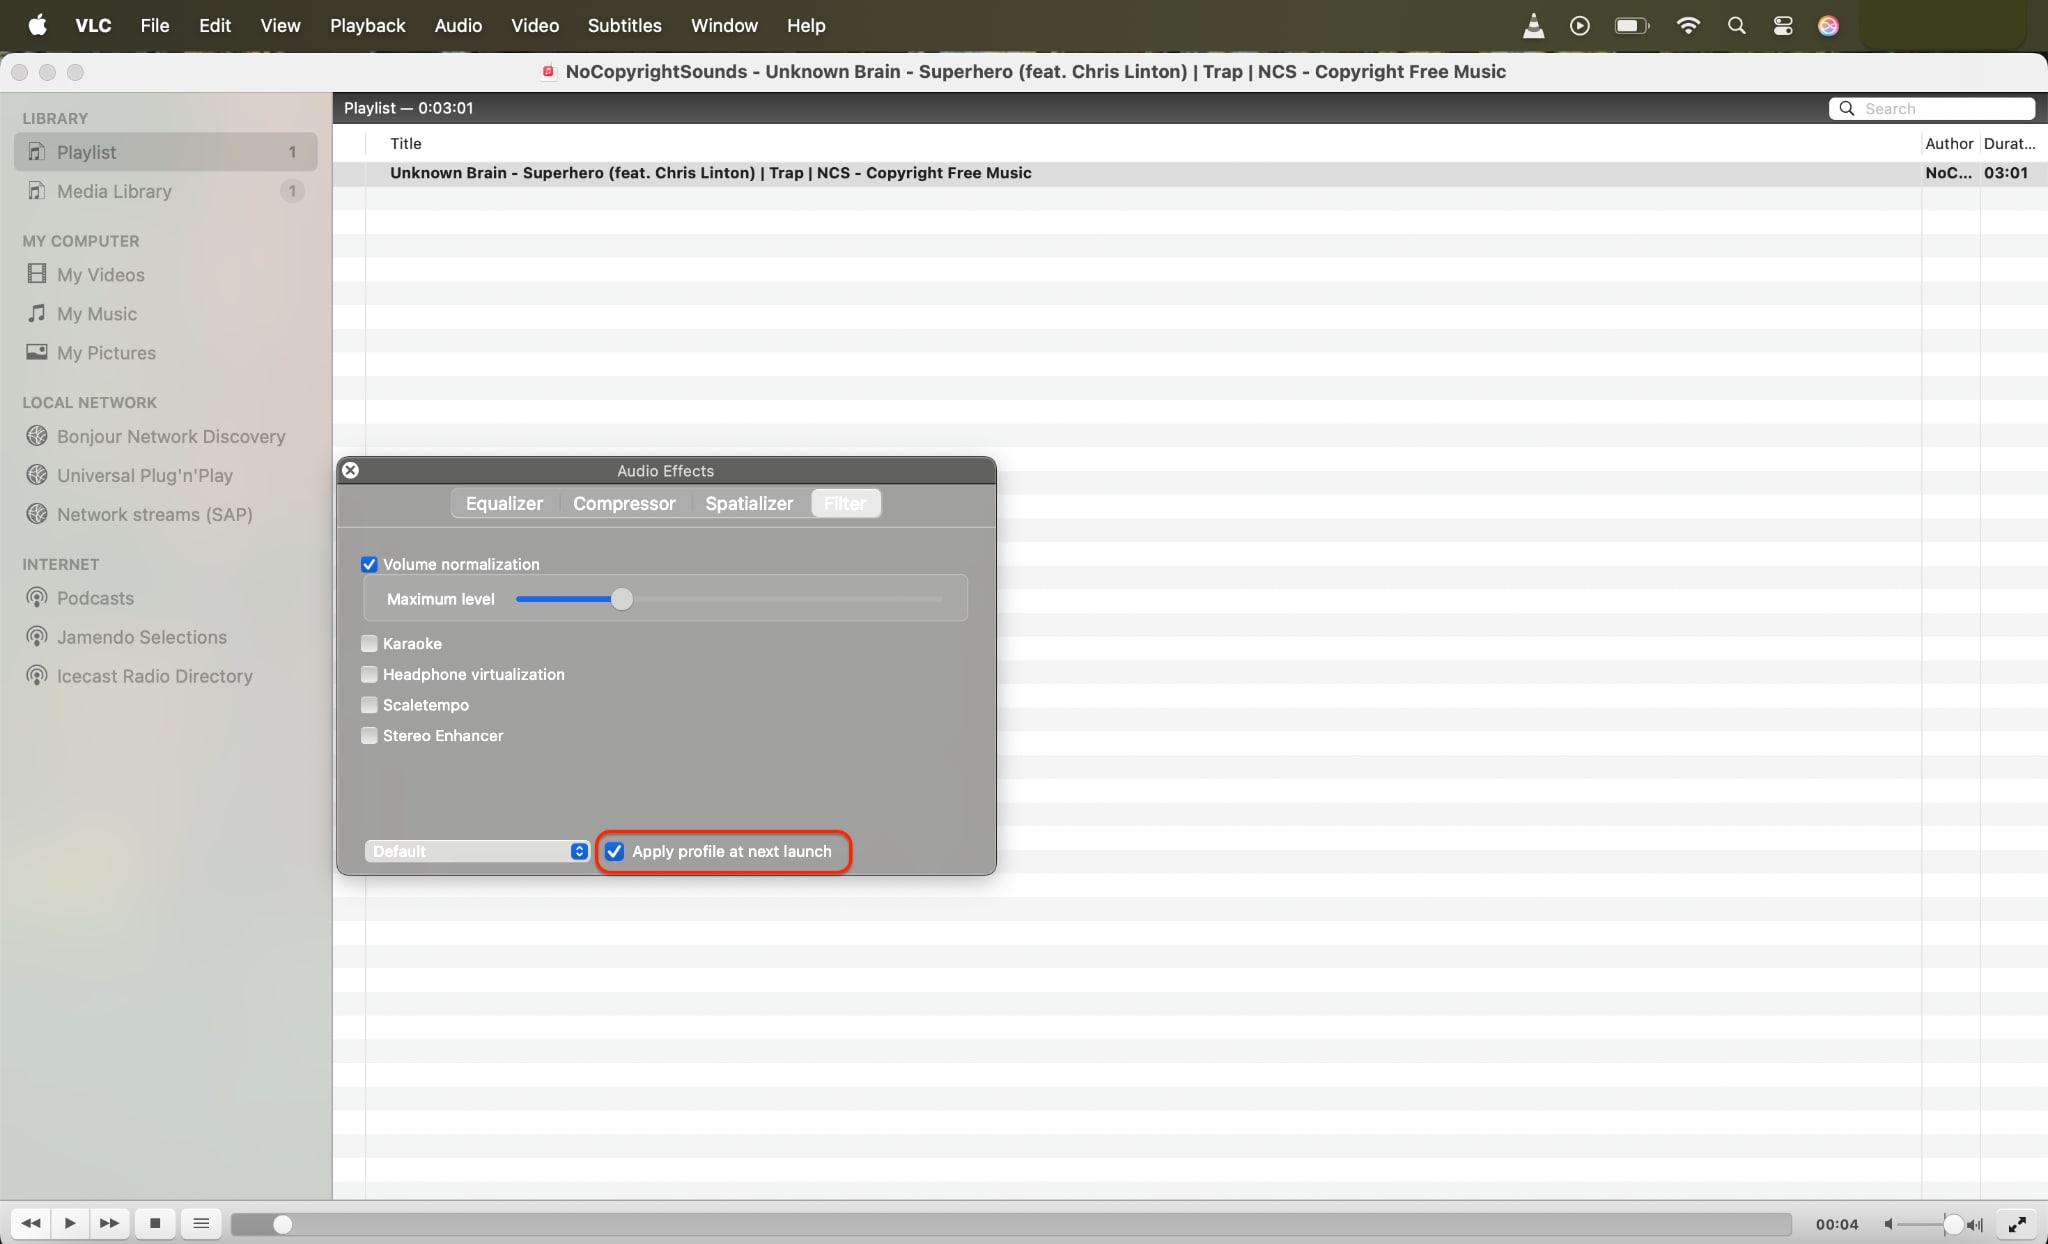
Check the “Apply profile at next launch” box. Then close and relaunch VLC for the changes to take effect. Now, any video or audio file you play will benefit from real-time normalized sound, delivering smoother, more balanced volume without the need for constant manual adjustment. It’s an efficient and lightweight solution for consistent playback, perfect for binge-watching or previewing edited content.
Part 5. Bonus: How to Batch Normalize Video Sound with UniConverter
If you're working with multiple video files and need consistent audio across them all, Wondershare UniConverter is a powerful desktop tool that simplifies the process. Unlike playback-only tools like VLC, UniConverter allows you to apply permanent sound leveling directly to your videos. It supports batch processing, making it ideal for content creators, educators, or anyone handling large video libraries. If you're intimidated by command-line tools like FFmpeg normalize audio, UniConverter offers a user-friendly visual interface to get the same results—no coding needed.
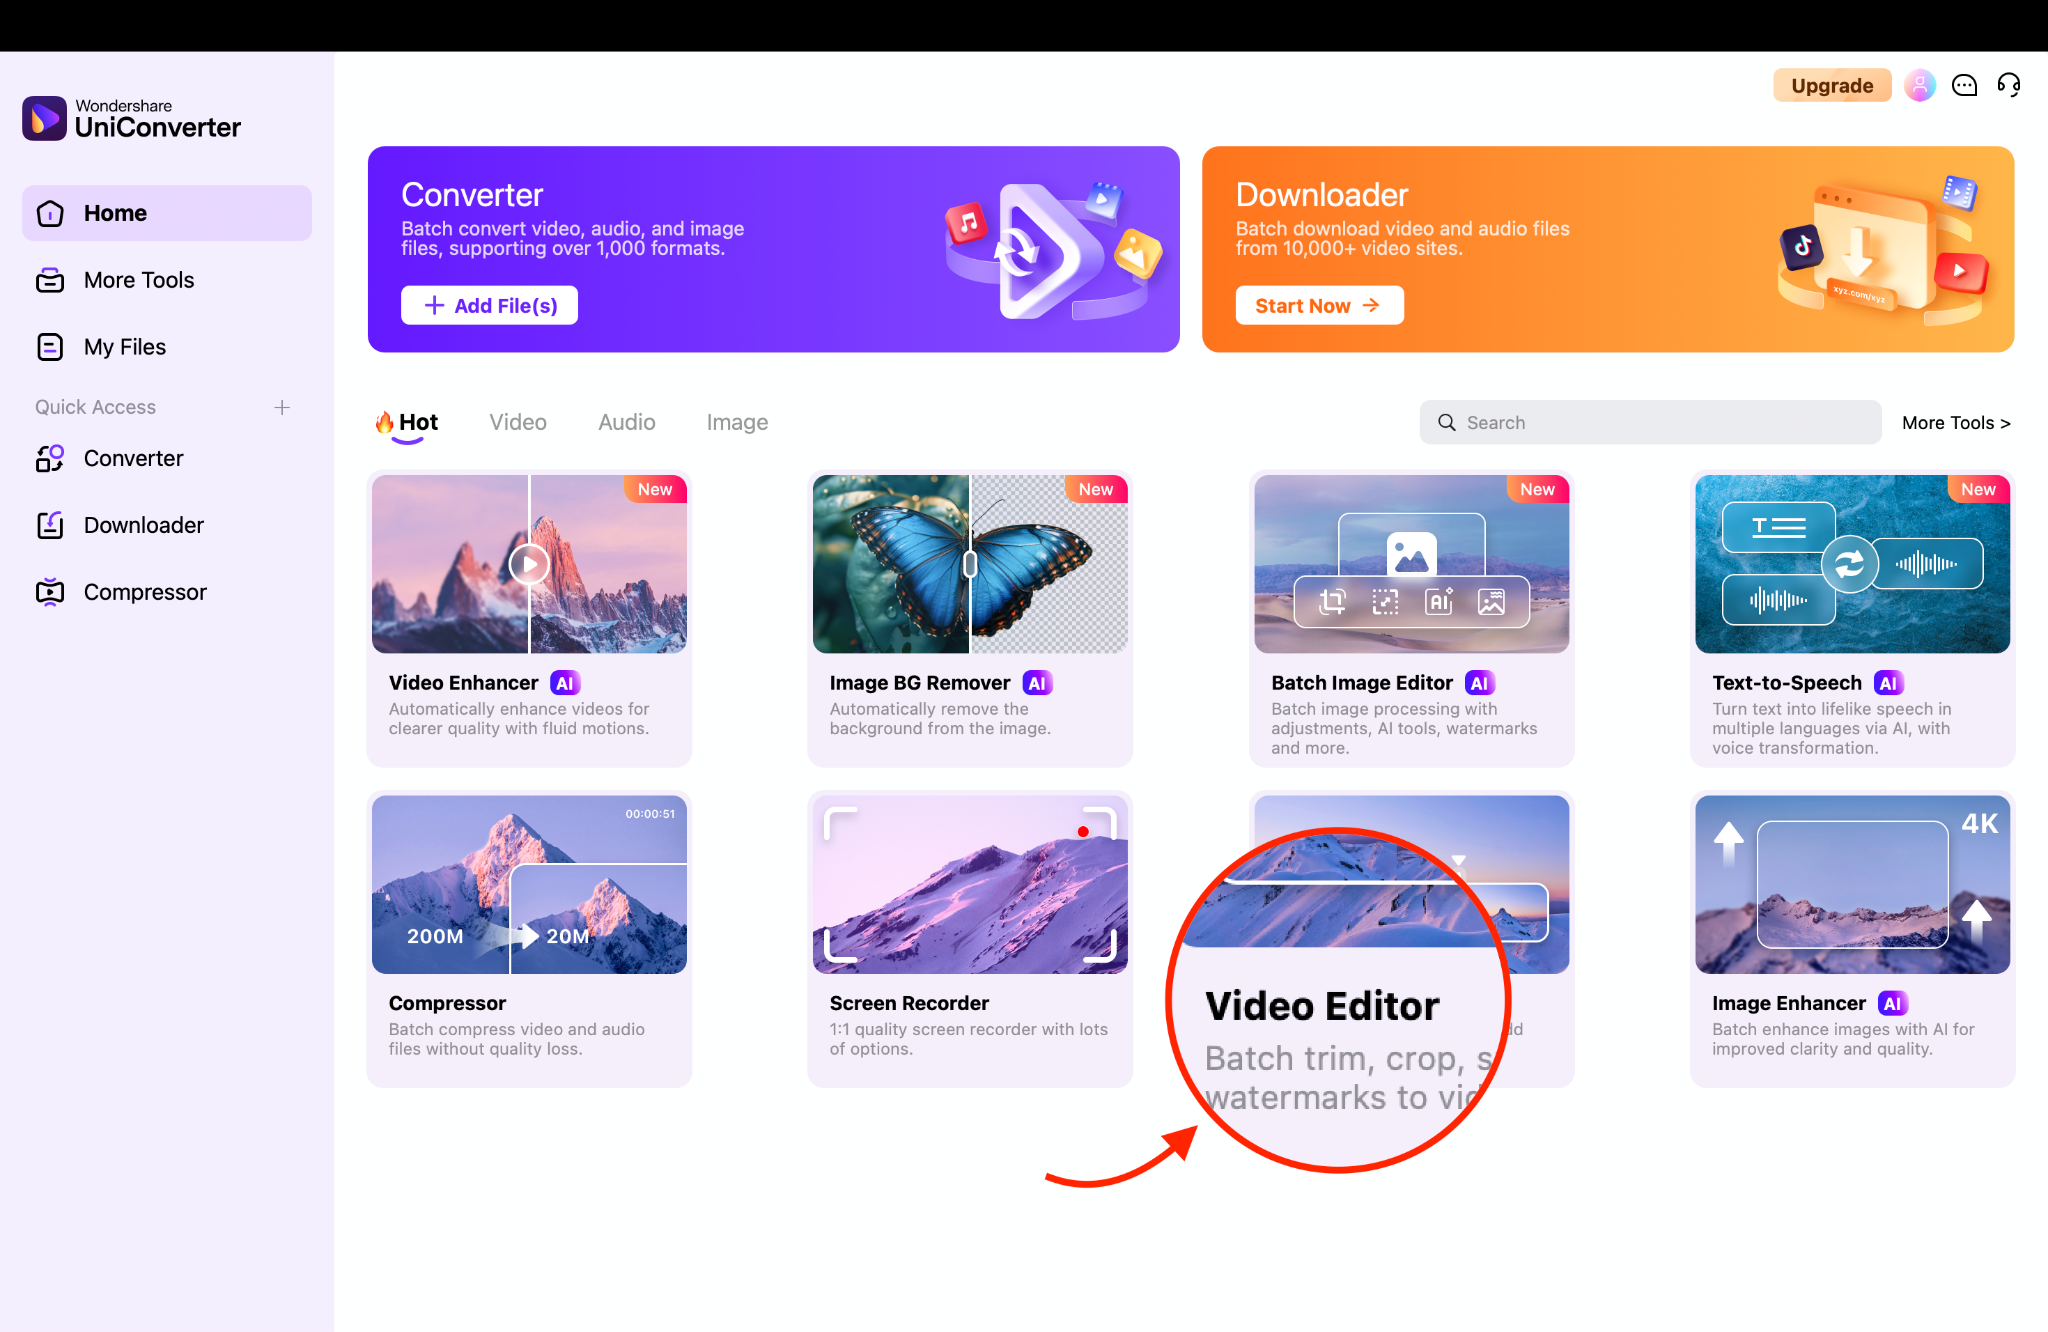
Step 1: Launch UniConverter and Open the Video Editor
Start by opening Wondershare UniConverter, then head to the Toolbox tab. From there, click on Video Editor to access audio tools that support batch volume normalization. This setup is ideal when working with multiple video files and requires a consistent audio experience across all of them.
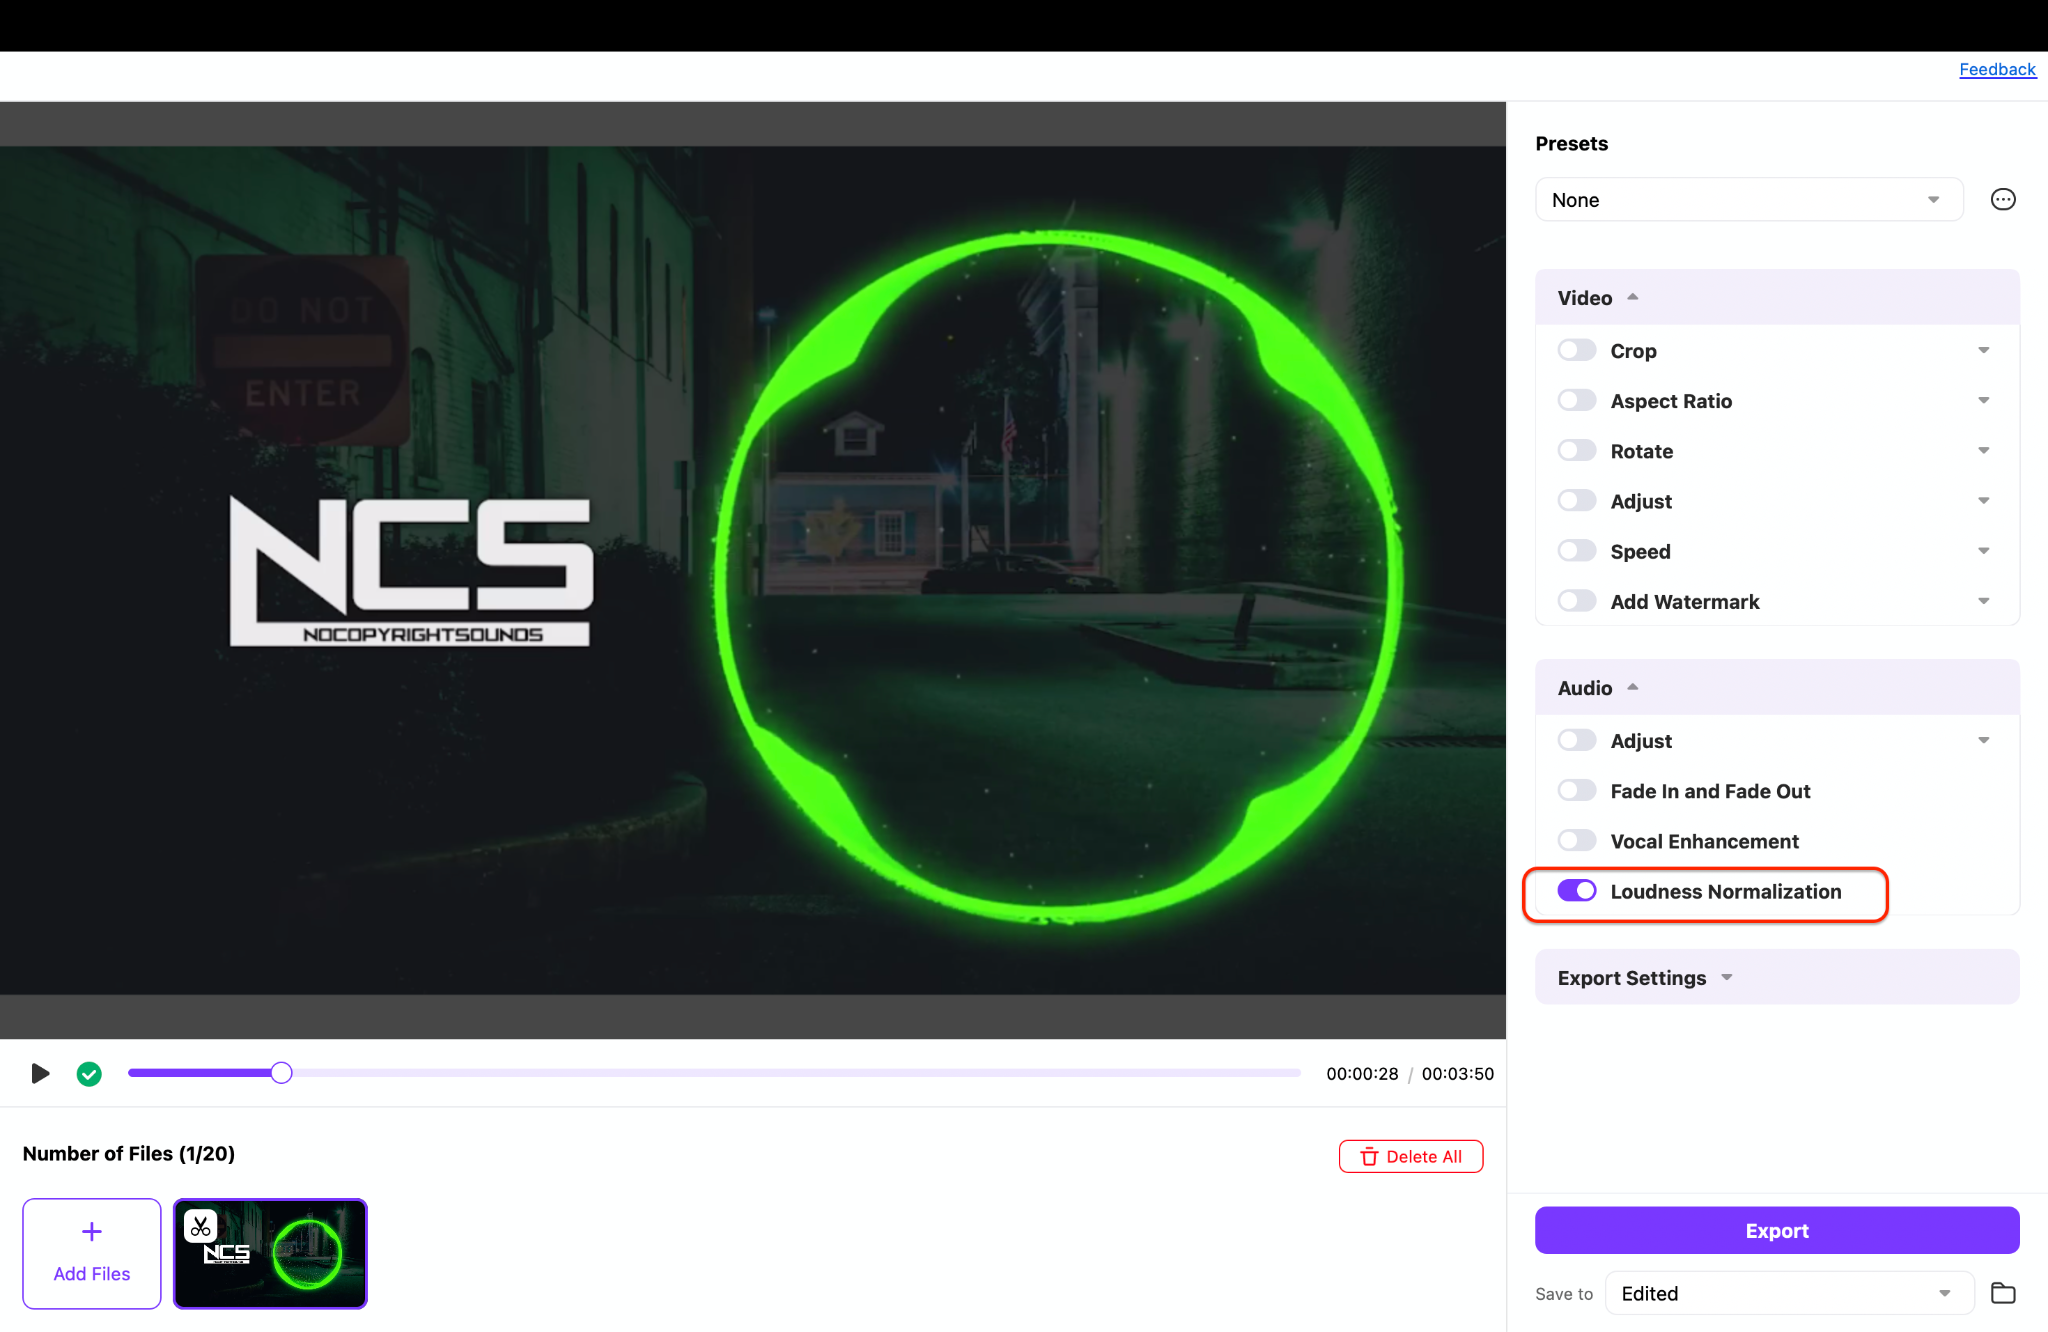
Step 2: Import Your Videos and Enable Loudness Normalization
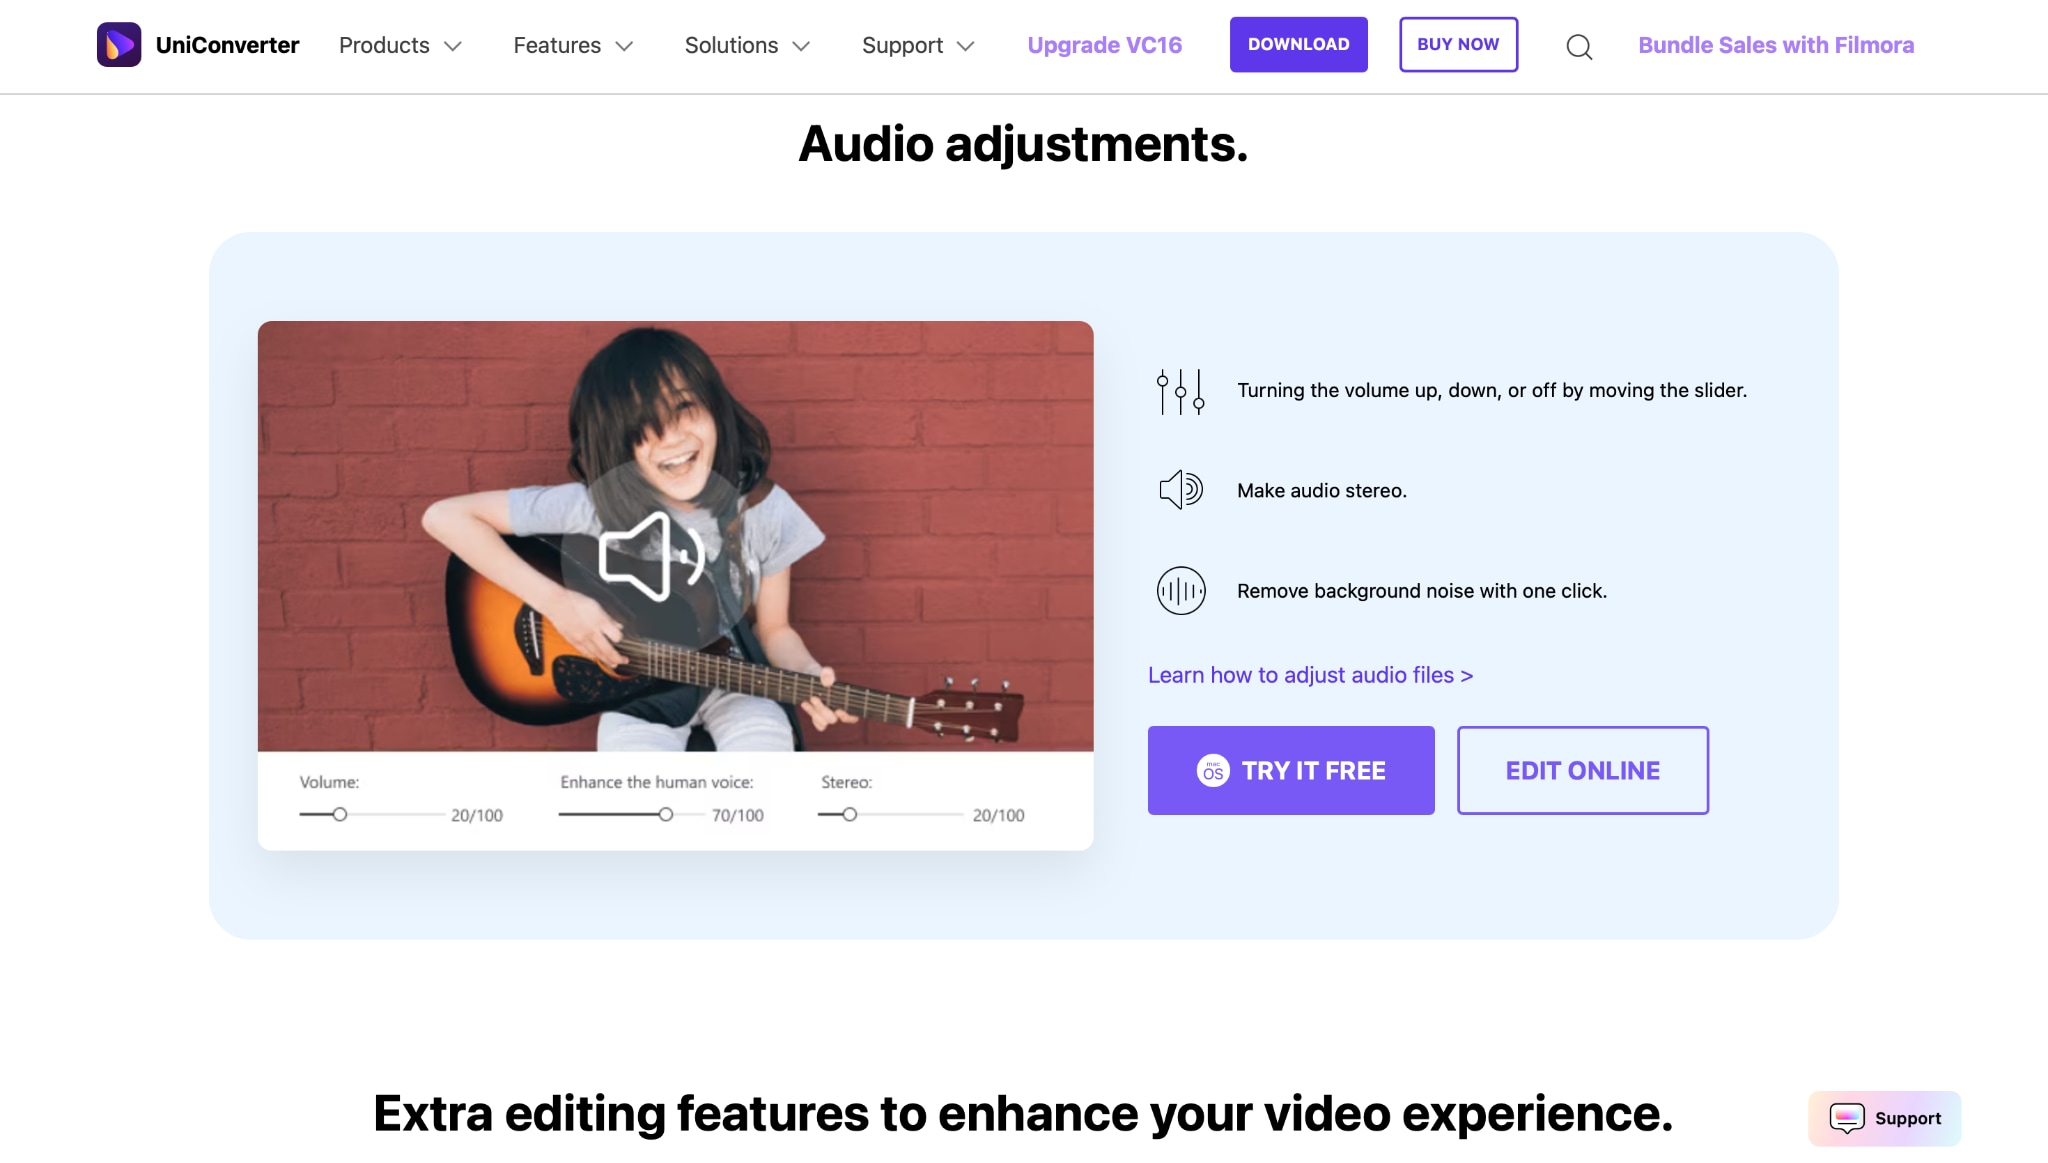
Drag and drop all your videos into the workspace. In the Audio settings panel, toggle on Loudness Normalization. You can also fine-tune the volume using the slider to get the exact sound balance you want. This feature ensures your entire batch of videos sounds clean, even, and professional, whether for YouTube, courses, or client work.
Step 3: Set Output Format and Start Export
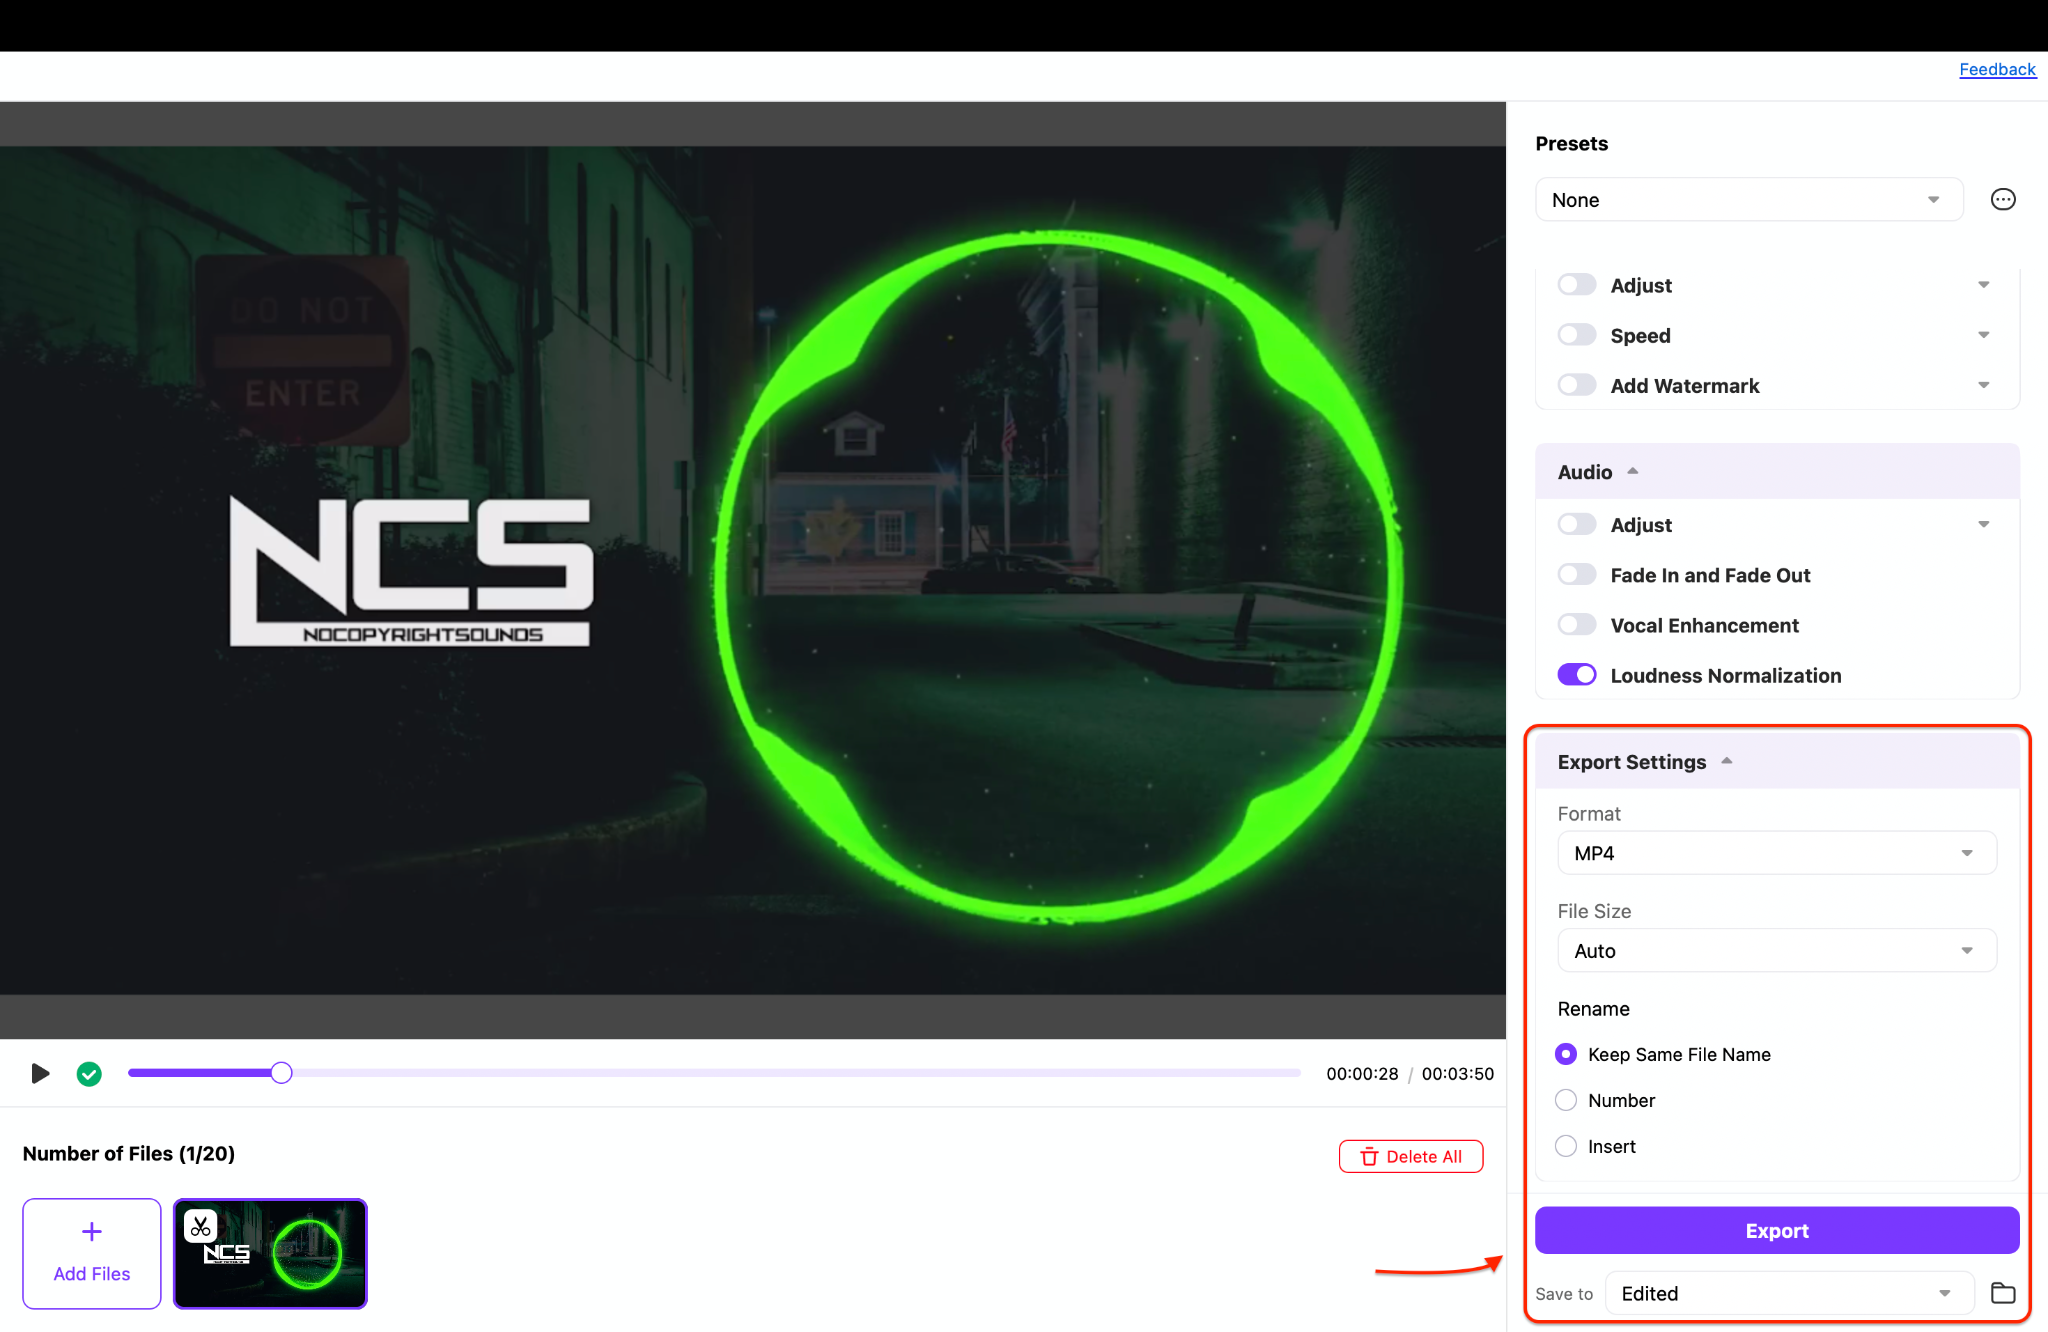
Next, navigate to the Export Settings to select your preferred output format, such as like MP4, AVI, WMV, MKV, or MOV. Set your target file size if needed, and choose where you want the final videos saved (including cloud options like Dropbox). Finally, click Export to begin the batch audio normalization process. UniConverter will process each file with your chosen settings while maintaining excellent video quality.
Final Thoughts
Normalizing audio and video is a crucial step in ensuring a smooth, professional listening and viewing experience. Whether you're editing a podcast, mastering music, or polishing video content, tools like Audacity, AIMP, Audio2Edit, VLC, and Wondershare UniConverter make it easy and accessible for users at any level.
Ready to normalize your video or audio files easily? Try Wondershare UniConverter — your all-in-one solution for fast, high-quality volume normalization across any format.
FAQs
-
1. What does audio normalization do?
Audio normalization is the process of adjusting volume levels to make your track sound consistent throughout. It smooths out loud spikes and raises quiet parts for a balanced listening experience. While tools like Audacity and Audio2Edit are great starting points, Wondershare UniConverter stands out by offering the ability to normalize audio in video seamlessly, perfect for those working with multimedia content. -
2. Can I normalize MP3s for free?
Yes, you can easily normalize MP3s using free tools. Audacity provides complete manual control, and Audio2Edit is excellent for quickly normalize audio online tasks. However, for a more polished and high-quality result, especially when working with multiple files, Wondershare UniConverter is highly recommended. It allows you to normalize MP3s directly within videos and export them in any format, all with just a few clicks. -
3. Does VLC Media Player permanently normalize audio in video?
No, VLC's volume normalization only affects playback; it doesn't modify the actual file. If you need to permanently normalize audio in video, Wondershare UniConverter is a far better solution. It applies changes directly during export, allowing you to fix volume issues without using complex tools like FFmpeg normalize audio. -
4. Is there a way to normalize video sound in batches?
Absolutely. If you want to normalize video sound in batches, Wondershare UniConverter makes it incredibly simple. You can import multiple videos, adjust their volume levels consistently, and export them with normalized sound all at once. Unlike VLC or mobile apps, UniConverter ensures that every file is professionally leveled, making it ideal for creators, educators, or content managers. -
5. What is the best tool for beginners to normalize sound?
Audacity is a great beginner option, thanks to its normalize volume feature, and Audio2Edit offers a no-download, online normalize audio experience. However, if you're looking for the perfect blend of ease and performance, Wondershare UniConverter is the ideal all-in-one tool. It's beginner-friendly, works with both audio and video, and delivers reliable, studio-grade normalization without a learning curve.

