
Have you ever needed to capture what's happening on your computer screen? Screen recorders are useful tools for various situations, such as creating video tutorials and presentations, reporting software bugs, or saving memorable gaming moments. However, with numerous options available, finding the best screen recorder for your Windows or Mac PC can be a challenge.
This guide will outline the best free screen recording software available, making it easier than ever to find the right fit for your needs. Whether you are experienced in screen recording or just starting, this article will teach you how to capture your screen efficiently.
In this article
How to Select the Best Screen Recorder for PC?
- Compatibility
Ensure the screen recorder is compatible with your PC's operating system (Windows or Mac) to avoid any compatibility issues and ensure smooth performance.
- Features
Look for essential features such as a customizable recording area, audio recording options, webcam overlay, and annotation tools to enhance your recording experience and productivity.
- Ease of Use
Opt for a screen recorder with a user-friendly interface and intuitive controls. This will make it easy to navigate and operate, even if you're new to screen recording. An uncomplicated and user-friendly design can greatly enhance your overall user experience.
- Performance
Check reviews and ratings to ensure the screen recorder delivers high-quality recordings without significant lag or slowdown, especially when recording high-resolution videos or gameplay.
- Price and Licensing
Consider your budget and whether you prefer free or paid options. Some screen recorders offer free versions with limited features, while others require a one-time purchase or subscription for full access to advanced functionalities.
5 Best Screen Recording Software for Windows
Now that you know what to look for in a screen recorder, let's explore some of the top options available for Windows PCs. We'll consider a variety of software to suit different needs, from user-friendly beginners' tools to feature-rich programs for more advanced users.
1. Uniconverter - The Ultimate Screen Recording Software for All Your Needs
Wondershare UniConverter is an all-in-one solution for easy recording and editing of your computer screen. With its intuitive interface and robust features, UniConverter makes screen recording very convenient, allowing you to capture your screen in full-screen or customized modes with high quality. Plus, you can enhance your recordings with annotations like shapes, lines, texts, and arrows, as well as add voice narrations and webcam overlays in real time.
How to Record the Screen on Windows Using Uniconverter?
Step 1Launch the Screen Recorder Tool
First,download Wondershare UniConverter for Windows and follow the installation prompts. Then, register an account to unlock the free trial. Launch the platform and locate the ‘Screen Recorder’ option. Click on it to activate the screen recorder function.

Step 2Set up a Recording Area
To set up the recording area, choose between ‘Custom’ or ‘Full-Screen’ mode. Access the recording mode menu and select your preferred capture method. If you need specific frame dimensions for your video, opt for ‘Custom mode’ and click on ‘Lock Aspect Ratio’.

Step 3Set Recording Preferences
After setting the recording zone, select a device in the System Audio section to capture all computer sounds, including mouse clicks. Then, choose a microphone from the ‘Microphone’ option and a camera from the ‘Webcam’ option to record voice narrations and a video overlay.
Next, click on the Advanced Settings button to choose MP4, FLV, or AVI as your desired format. You can also customize settings such as frame rate, quality, keyboard shortcuts, and recording timers.

Step 4Start Screen Recording
Preview the area you wish to capture, then click on the ‘REC’ button. Wondershare UniConverter will start capturing your computer screen in its original quality. Next, open the taskbar and click on the ‘Annotation’ icon to add colorful texts, shapes, lines, arrows, and drawings to your recording as you proceed.

Step 5Stop and Save the Recording
Finally, click on the 'Stop' icon to end the recording process. Once the recording is complete, UniConverter will display the recorded file. To find the recorded video on your computer, simply click on the ‘File’ icon. Alternatively, you can relocate it by selecting "open in folder" and placing it anywhere you want on your device.

Tips for High-Quality Screen Recording With UniConverter
- Ensure proper lighting around your computer screen for better visibility.
- Set your screen resolution to the highest setting for clearer recordings.
- Confirm a stable internet connection to avoid lagging or buffering issues.
- Adjust microphone settings for clear audio and test audio levels beforehand.
- Select a specific area of your screen to focus on relevant content.
2. OBS Studio
OBS Studio is considered the best free screen recorder for PCs. With its HD streaming and recording capabilities and no video length limitations, it stands out as a top choice among free screen recording software. However, be prepared for a potentially lengthy setup process and a learning curve, especially for newcomers.

3. Loom
Loom is the best screen recorder for PCs and offers more than just screen recording. With its intuitive design and sharing capabilities, it's a standout choice for creating short, impactful videos for quick explanations and feedback. However, while its easy-to-use interface and free version may appeal to many, its video limitations and the necessity of a dedicated app may pose challenges.

4. Camtasia
Camtasia is a widely used software and is considered one of the best screen recording software for Windows. It offers an easy-to-use screen recorder alongside an extensive editing studio, making it a top choice for both beginners and professionals alike. While its upfront cost may deter some, the intuitive interface and comprehensive tutorial access make it worth considering.

5. ScreenPal
ScreenPal was formerly known as Screencast-O-Matic and is one of the top picks for the best budget screen recorder. It provides a professional-grade solution with an intuitive interface and an extensive feature set, all at a budget-friendly price. While it may lack standout features compared to its competitors, its simplicity and versatility make it suitable for a range of recording needs.

5 Best Screen Recorders for Mac
Now, after exploring powerful options for Windows PCs, it's time to focus on the best screen recorders for Mac users. Whether you're a seasoned Mac user or just getting started, there's a screen recorder out there that offers unique features and functionalities to suit your recording needs.
1. UniConverter for Mac
Wondershare UniConverter, formerly known as Wondershare Video Converter Ultimate for Mac, offers advanced features to meet your recording needs. With UniConverter, you can easily capture streaming videos, FaceTime calls, Skype calls, and other desktop activities with high-quality audio and video. Additionally, UniConverter provides a Picture-in-Picture feature for enhanced recording capabilities.
How to Record the Screen on Mac Using UniConverter?
Step 1Launch the Screen Recorder Tool
Initially, Free Download Free Download Download and install Wondershare UniConverter on your Mac, following the prompts for installation. Next, open the software and navigate to the Tools section. From there, select Screen Recorder from the list of available features.

Step 2Select the Recording Preferences
After selecting the screen record option, choose between 'Custom' or 'Full-Screen' mode to set up the recording area. Access the recording mode menu to select your preferred capture method. Opt for Custom mode if you need specific frame dimensions, and click on Lock Aspect Ratio.
You can adjust the webcam window for Picture-In-Picture (PIP) by dragging its edges, and hide the PIP webcam by turning off the Webcam icon. Additional recording settings can be accessed by clicking on the setting icon, where you can select the save location, frame rate, quality, and record timer.
‘Mouse’ settings can be adjusted to show mouse clicks and play mouse click effects and sounds. Customize shortcut keys for starting and stopping the recording, and click on the Reset button to revert to the original settings if needed.

Step 3Start Recording the Screen
Once you've finalized your settings, begin recording by clicking the REC button. After a 3-second countdown, the software will start capturing your desktop activities. For additional customization, navigate to the taskbar and select the 'Annotation' icon. This allows you to insert colorful texts, shapes, lines, arrows, and drawings into your recording as you go.

Step 4Stop Recording and Locate It
In the Recording taskbar, you can monitor the duration of the ongoing recording. When you've finished recording, simply click on the ‘Red Stop’ button. When you've finished recording, simply click on the ‘Red Stop’ button. After completion, the location on your Mac containing the recorded video will be shown on your screen. From there, you can easily locate the recording on your device and manage it as desired.

2. ClickUp
ClickUp is the best free screen recording software that handles complex projects and enables team collaboration. It provides an all-encompassing suite of features to boost your recording experience, including its built-in screen recording feature and transcription capabilities for accessibility. However, accessing the free version may require contacting support, and navigating the platform could present some challenges.

3. Apowersoft
Apowersoft is the best screen recorder for Mac and is also compatible with Windows. Featuring a straightforward interface and range of functionalities, it allows easy screen capture and offers various output options, including local storage, websites like YouTube, and cloud storage. However, it requires the installation of a launcher and may not be suitable for game recording.

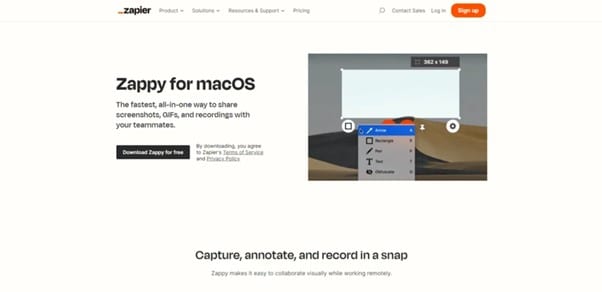
4. Zappy
Zappy is a simple and free screen recording tool that gets the job done swiftly. With Zappy, you can easily create GIFs, record your screen, add voiceovers, and even capture your webcam footage if needed. However, its feature set is relatively limited, and there's no editing capability.
5. Movavi Screen Recorder
Movavi Screen Recorder is a flexible screen recording tool that includes the added convenience of scheduled captures. With its easy setup and intuitive interface, Movavi offers an alternative to OBS with built-in editing capabilities. However, it lacks a monthly pricing option, and more in-depth editing requires a separate Movavi app.

Conclusion
In conclusion, finding the best screen recorders depends on your needs and budget. Whether your focus is on simplicity, advanced functionalities, or cost-effectiveness, there's a screen recorder tailored to your needs. However, if you seek an all-encompassing solution with various features like screen recording, video editing, conversion, and beyond, UniConverter emerges as a standout choice. This versatility makes it a valuable tool for anyone who creates and edits videos.

