

Whether you’re sharing a memory, promoting a product, or just adding flair to your daily moments, music can elevate your content on Facebook. It draws attention, evokes emotion, and turns a basic post into an engaging story. If you're wondering how to add music to a Facebook story, upload your own songs, or even improve audio quality before posting — you're in the right place.
In this guide, we’ll explore multiple ways to add music to Facebook stories and posts, both using Facebook's built-in features and third-party tools like UniConverter Video Editor.
In this article
Part 1. How to Add Music To Facebook Story on Mobile with Built-in Resources
If you're on mobile and want to quickly create a Facebook story with music, Facebook offers a built-in music library that’s easy to access. This method is ideal when you don’t need custom tracks and want to choose from licensed options.
Step-by-Step Guide
Step 1: Launch the Facebook App
Open the Facebook app on your iOS or Android device. Tap “Create Story” from the home screen or your profile page.
Step 2: Choose “Music” as Your Story Type
Swipe left on the story creation options and select “Music”. This opens Facebook’s music library where you can browse trending songs or search by title, mood, or genre.
Step 3: Pick Your Track and Customize
Once you select a song, use the slider to choose the portion you want to play. Facebook allows up to 15 seconds of music per story. You can also add text, GIFs, or effects on top of the music layer.
Step 4: Post Your Story
Tap “Share to Story” and the music-enhanced story is live for your friends and followers.
This built-in method works well when you're wondering how to add music to my Facebook story using Facebook's official resources.
Part 2. How to Add Your Own Music To Facebook Story on Desktop
Wondershare UniConverter Video Editor is an all-in-one video and audio editing tool designed for creators who want more control over their content. Whether you're adding background music, syncing voiceovers, or preparing polished story videos for social media, this tool makes the process simple. Its drag-and-drop timeline, format compatibility, and export presets are perfect for Facebook content creation. You can work with multiple media layers, preview changes in real-time, and export directly in Facebook-friendly formats. It’s ideal for users looking to add their own music to Facebook stories with professional-level results.
Key Features of UniConverter Video Editor
- Audio Layering & Syncing – Add music tracks, voiceovers, or effects and align them easily with your video timeline.
- Support for Multiple Formats – Works with MP3, WAV, AAC, and video formats like MP4, MOV, and more.
- Fade In/Out Effects – Smoothly transition audio for polished sound output without abrupt starts or stops.
- Trim and Loop Audio – Cut or repeat sections of music to match your video’s duration perfectly.
- High-Quality Export Presets – Export in full HD or mobile-friendly formats optimized for Facebook Story uploads.
Step-by-Step Guide to Add Your Own Music
Part 3. How to Batch Enhance Your Own Music Quality for Facebook
If your music sounds dull, flat, or inconsistent, enhancing the audio before adding it to Facebook can make a huge difference. UniConverter offers Audio Enhancement tools that help improve clarity, balance volume, and optimize for mobile playback.
Key Features of UniConverter’s Audio Enhancer
- Auto volume leveling for consistent loudness
- Equalizer presets for music types (bass boost, vocal clarity, etc.)
- Batch processing of multiple music files
- Real-time preview of enhancements
- Easy export in Facebook-friendly formats
Step-by-Step: Enhance Audio in Batch
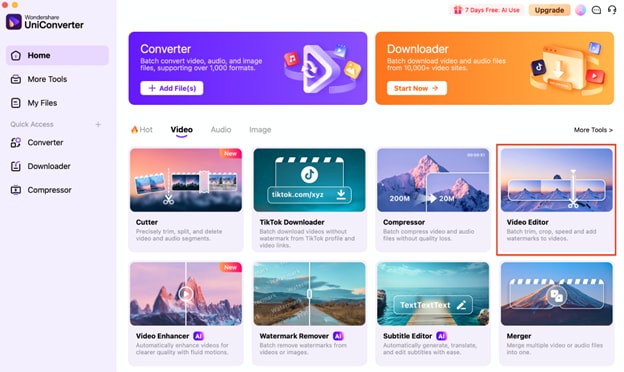
Step 1: Open UniConverter and Access Audio Enhancer
Launch Wondershare UniConverter on your desktop. From the left sidebar, select More Tools, then choose Video Editor to open the batch audio enhancement interface.
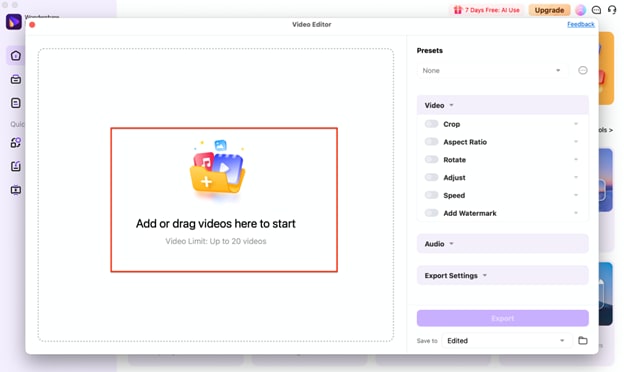
Step 2: Add Your Audio Files
Click the Add Files button or drag and drop your audio or video files into the window. You can add multiple files at once to enhance them in batch mode, saving time on repetitive edits.
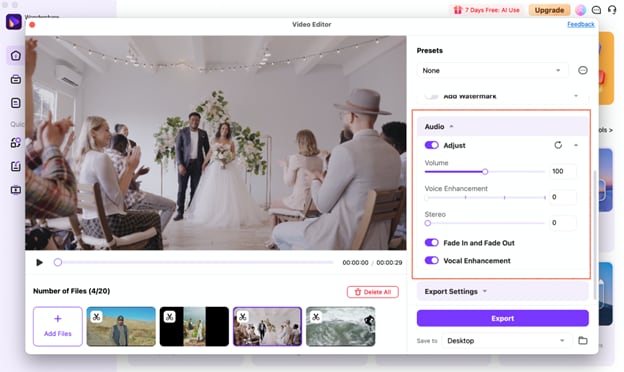
Step 3: Adjust Enhancement Settings
Use the audio adjustment options such as Voice Enhancement, and toggle Fade In and Fade Out or Vocal Enhancement as needed. Preview the changes to ensure your audio sounds balanced and clear.
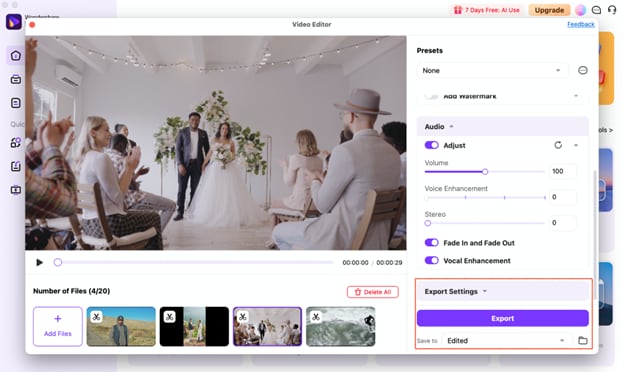
Step 4: Export Enhanced Audio Files
Select the output folder by clicking the folder icon next to Save to. Once you’re satisfied with all adjustments, click the purple Export button to process and save all enhanced files to your chosen location.
Part 4. How to Batch Remove Noise from Your Own Music for Facebook
Sometimes, your music or voice recordings may contain unwanted background noise — fans, hums, clicks, or static. If you're using your own recordings for Facebook, it's a good idea to clean them up first. UniConverter’s Noise Remover tool makes this easy and fast — even when working with multiple files.
Benefits of Using UniConverter’s Noise Remover
- Removes background hum, wind, buzz, and static
- Batch processing for multiple tracks
- AI-powered detection and cleanup
- Supports both audio and video noise removal
- Preserves original voice and instrument clarity
Step-by-Step: Remove Noise from Music Files
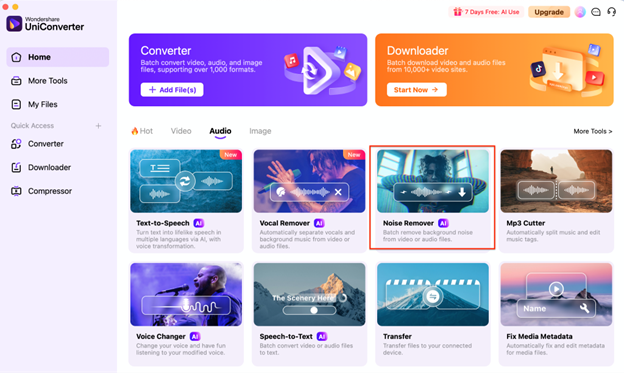
Step 1: Open UniConverter and Launch Noise Remover
Go to the Toolbox tab and click on Noise Remover. This opens the noise cleanup dashboard.
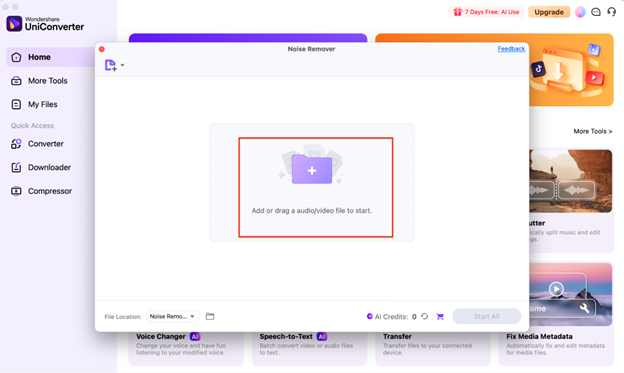
Step 2: Add Your Audio or Video Files
Click the center + icon or drag your music files into the window. You can load multiple tracks at once.
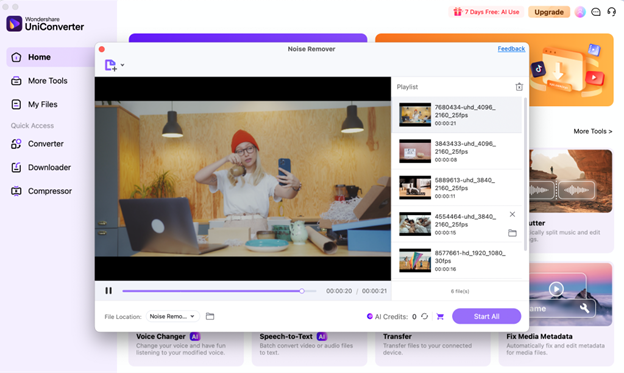
Step 3: Apply Noise Removal
UniConverter uses AI to automatically detect and eliminate noise. You can preview each cleaned file and adjust the noise reduction level if needed.
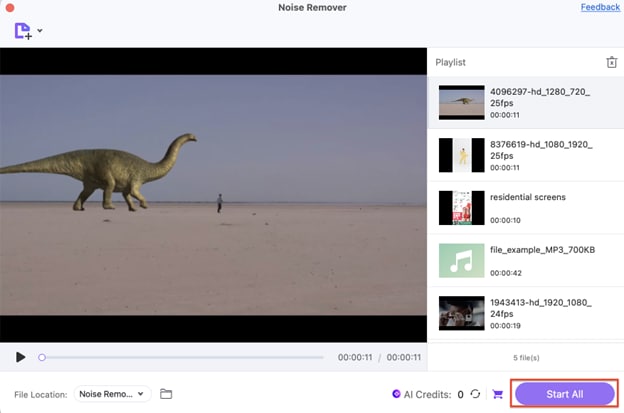
Step 4: Export and Use in Facebook Content
Click Start All to export noise-free versions of your music. You can now add them to videos or upload them as audio posts or background for Facebook stories.
This solves a common issue people face when asking how do I add music to my Facebook post or how to add music to your FB post with clean, professional sound.
Conclusion
Adding music to your Facebook story or post is easier than ever — whether you're using Facebook's built-in music library or uploading your own tracks. While the mobile app allows quick selection of trending tunes, using UniConverter gives you more freedom to customize, enhance, and clean your music files. From syncing custom songs to enhancing sound quality and batch noise removal, UniConverter empowers you to create professional, audio-rich content. So next time you think about how to add music in Facebook stories or posts — remember you have more than one way to do it right.
FAQs
-
1. Can I use copyrighted music in my Facebook story?
Facebook provides a library of licensed music for stories, which you can use without issues. If you're uploading your own music, ensure you have the rights or use royalty-free tracks to avoid content removal or restrictions. -
2. How long can the music be in a Facebook story?
Facebook stories support music clips of up to 15 seconds in length. If your video is longer, only a portion of the selected song will play during the story. -
3. Can I adjust the volume of music added to my Facebook story?
Facebook’s built-in music tool doesn’t allow manual volume control. However, if you pre-edit your video using UniConverter, you can control both music and video volume levels before uploading. -
4. Does Facebook compress audio quality when uploading stories?
Yes, Facebook compresses both video and audio to reduce file size for faster delivery. To retain the best quality, upload in Facebook-recommended formats and keep audio levels optimized.

