

Cropping is essential when you want to remove unwanted edges, highlight a subject, or optimize a video for social media. While QuickTime Player is a go-to tool for Mac users, it doesn’t offer native cropping features. But with a few smart workarounds and the help of tools like UniConverter, you can still get the job done.
This guide will walk you through how to crop video in QuickTime, explore alternatives, and show you how to batch crop easily on Mac.
In this article
Part 1. How to Crop Videos in QuickTime
Although QuickTime Player crop video functionality isn’t available directly within the app, there’s a clever workaround using QuickTime Player combined with Preview or Photoshop for dimension referencing and external editors like iMovie or online cropping tools to finish the job.
Option 1: QuickTime + Preview (Manual Cropping Assistance)
Step 1: Capture a Reference Frame in QuickTime
Open your video in QuickTime Player and pause at the frame where cropping is needed. Take a screenshot using Shift + Command + 4 to capture the visible area for reference.
Step 2: Mark Crop Area in Preview or Photoshop
Open the screenshot in Preview or Photoshop and use the rectangular selection tool to highlight the part you want to keep. Note the pixel dimensions and coordinates of your selection.
Step 3: Crop Using an Online Tool
Go to an online cropping tool like Clideo or Kapwing. Upload your QuickTime video, apply the crop based on your reference dimensions, and export the final cropped video.
Option 2: Use iMovie for Cropping Instead of QuickTime
If you want to stay within Apple’s ecosystem but need native cropping features, iMovie is a better alternative than QuickTime.
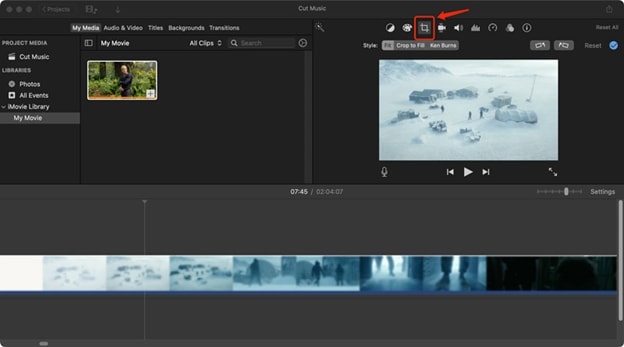
Step 1: Import Your Video into iMovie
Open iMovie on your Mac and create a new project. Drag and drop your QuickTime video into the timeline to begin editing.
Step 2: Apply Crop to Fill
Select the video clip in the timeline, then click the Crop to Fill button above the preview window. Adjust the crop frame to focus on the desired area.
Step 3: Apply and Export
Click Apply to set the crop, then go to File > Share > Export File to save your newly cropped video. This method works well for cropping QuickTime videos on Mac for social platforms or presentations.
Option 3: Use Free Online Cropping Tools
If you’re looking for a fast and easy way to crop your Quicktime MOV videos without installing software, several free online tools can help. These platforms let you upload your video, visually crop the frame, and export the final result. This method is especially useful for casual users or quick edits and works well with Quicktime screen recordings.
Here are three reliable tools you can try:
1. Clideo
Clideo is a user-friendly platform that allows you to crop videos in just a few clicks. It supports MOV, MP4, and other formats commonly used by Quicktime. After uploading your video, you can drag the crop box to select the visible area, choose an aspect ratio (1:1, 16:9, etc.), and preview the result. Once you're satisfied, export and download the cropped file.

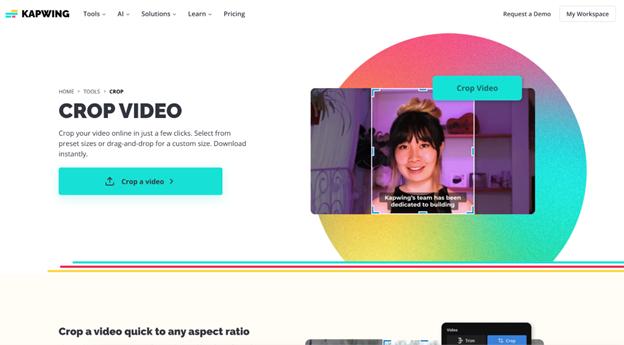
2. Kapwing
Kapwing is a powerful online video editor with a dedicated crop tool. Upload your Quicktime video and use the crop handles to adjust the frame visually. You can also input custom dimensions, making it ideal for platform-specific crops (like Instagram or YouTube). Kapwing supports batch edits and team collaboration.
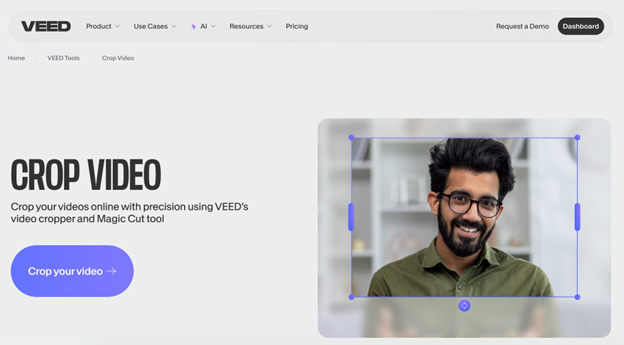
3. VEED.io
VEED.io offers a clean interface and quick cropping tools. After uploading your Quicktime MOV file, use the crop and resize section to manually crop or use preset dimensions. VEED also provides basic enhancements like subtitles, filters, and background removal for more refined edits.
Part 2. How to Crop Recording Videos in QuickTime
Many users confuse trimming with cropping in Quicktime. While trimming removes parts of a video along the timeline (beginning or end), cropping removes unwanted areas from within the video frame—such as top, bottom, or side content. Unfortunately, Quicktime Player does not support video cropping, but you can still trim recordings easily and crop them using a workaround or third-party tool.
How to Trim a Recording in QuickTime:
If you’ve just finished a screen recording or webcam capture and want to cut unwanted parts from the beginning or end, follow these steps.
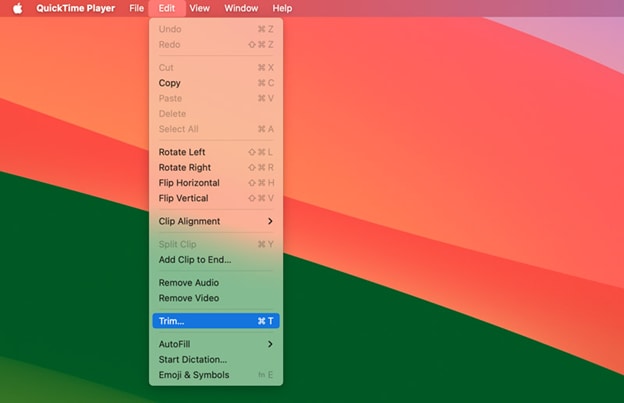
Step 1: Open QuickTime and Access the Trim Tool
Launch QuickTime Player on your Mac and open the video you want to trim. From the top menu bar, click Edit > Trim, or use the keyboard shortcut Command + T to activate the trimming tool.
Step 2: Adjust the Trimming Handles
A yellow trimming bar will appear at the bottom of the video window. The section between the two yellow sliders indicates the portion that will be kept. To begin trimming video in QuickTime, drag these handles to define the exact start and end points. For frame-accurate edits, press and hold a handle to scrub slowly through the video.
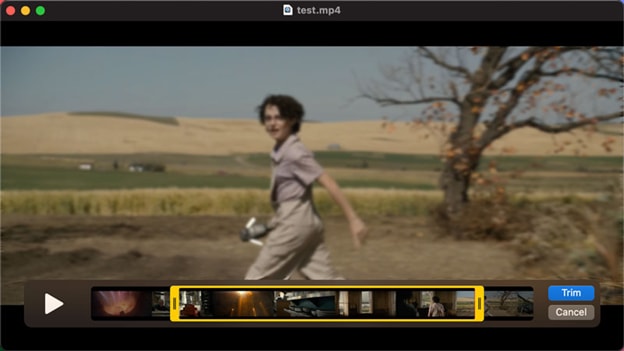
Step 3: Trim and Save Your Video
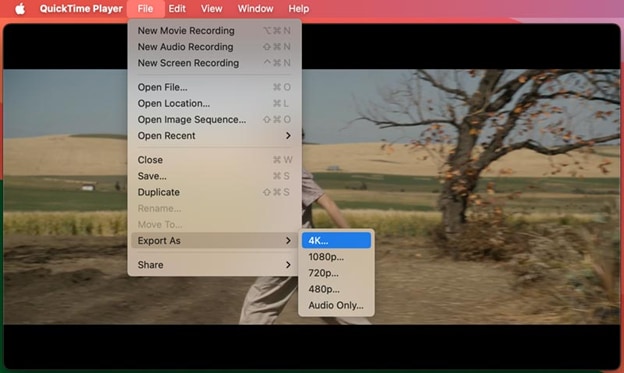
Once you've selected the section to keep, click the Trim button on the far right of the bar. This will cut away all footage outside the highlighted area. To finalize, go to File > Export As, choose your desired resolution (e.g., 1080p or 4K), and save your newly trimmed file.
This method doesn't crop video in QuickTime, but it's ideal for removing intro/outro footage or silent sections.
Part 3. How to Batch Crop QuickTime Video on Mac
If you need to crop multiple QuickTime videos at once, Wondershare UniConverter is one of the most efficient tools available for Mac users. It supports a wide range of video formats, including MOV, and offers batch cropping, trimming, and export capabilities. Whether you're preparing videos for social media or professional use, UniConverter streamlines the process and saves valuable editing time.
Key Features
- Batch Video Cropping – Crop multiple QuickTime videos in one go, perfect for large editing workflows.
- MOV Format Support – Fully compatible with QuickTime’s native .mov files.
- Aspect Ratio Adjustment – Easily switch between standard aspect ratios or use custom crop areas.
- Built-in Video Preview – View and adjust crops in real time before exporting.
- Fast Export with GPU Acceleration – Speeds up rendering and batch processing without quality loss.
Step Guide to Batch Crop QuickTime Videos on Mac
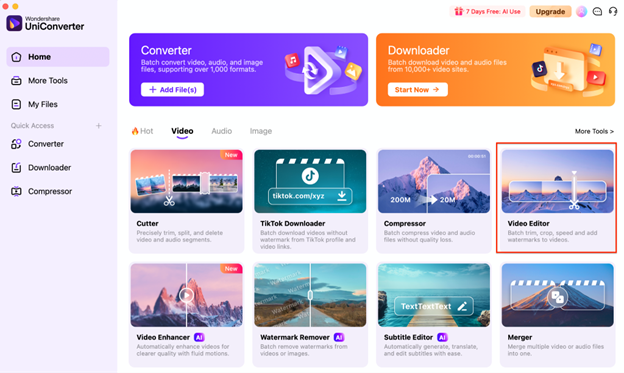
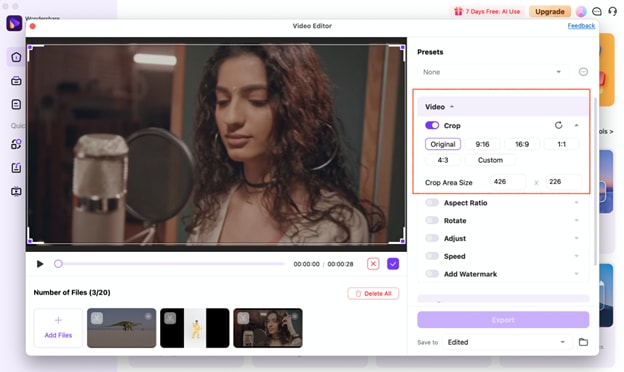
Step 1: Launch UniConverter and Open Video Editor
Download and install Wondershare UniConverter on your Mac. Open the app, navigate to the Video Editor section, and choose the Crop option to get started.
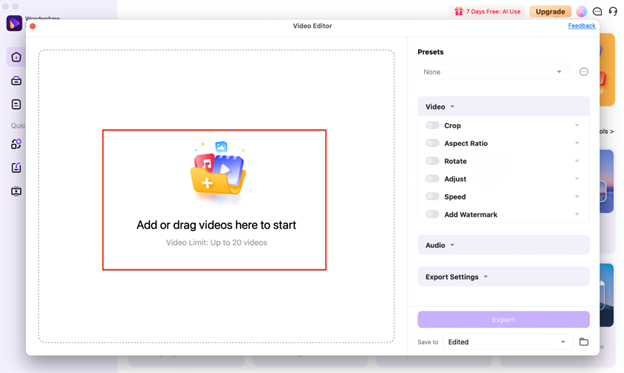
Step 2: Add Your QuickTime Videos
Click Add Files to import your QuickTime MOV videos or drag and drop them into the interface. You can add multiple videos at once for batch cropping.
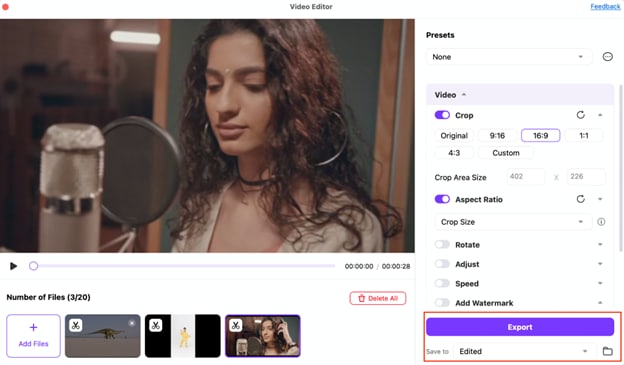
Step 3: Set Crop Area and Apply to All
Click the Crop icon beside a video to adjust the frame. Define the crop region manually or by aspect ratio. If cropping multiple videos the same way, use the Apply to All option.
Step 4: Export Cropped Videos
Choose your desired output format (MOV or MP4), select the destination folder, and click Start All. UniConverter will process and export all cropped videos quickly.
Conclusion
While QuickTime Player is a great native tool for Mac users, it lacks direct video cropping functionality. However, with a little help—whether using Preview to plan your crop, switching to iMovie, or taking advantage of online cropping tools—you can still manage to crop video in QuickTime workflows with minimal effort. For those working with multiple files, batch cropping QuickTime video on Mac using Wondershare UniConverter is the most time-efficient and powerful option. With additional features like audio enhancement, format conversion, and compression, UniConverter becomes more than just a cropping tool—it’s your all-in-one video toolkit.
FAQs
-
1. How can I crop a QuickTime MOV file without losing quality?
Use a tool like UniConverter or iMovie. Both allow cropping while maintaining original resolution and minimizing quality loss. -
2. How do I crop vertical or square videos for social media using QuickTime files?
Import the QuickTime file into UniConverter or iMovie. Then manually adjust the crop ratio (1:1 or 9:16) based on the platform requirements (e.g., Instagram or TikTok). -
3. Can I crop a screen recording made in QuickTime after saving it?
Yes, but you’ll need to import it into another tool like UniConverter, iMovie, or an online crop editor to define and apply the crop frame. -
4. Is UniConverter safe to use for Mac?
Yes. Wondershare UniConverter is widely used, frequently updated, and considered safe for video editing on both Mac and Windows.

