All Topic
- AI Tools Tips
- DVD Users
- Social Media Users
- Camera Users
- Photography
- Creative Design
- Movie Users
- Travelling Fans
- Educational Users
- More Solutions
- Holidays
- Game Lovers
- Other Tips
Top 6 Ways to Convert FLAC to M4A Recommended
by Christine Smith • 2025-01-13 09:24:30 • Proven solutions
FLAC is a lossless audio format that is comparatively large in size. So, if you have multiple FLAC files to be stored, space might be an issue and thus converting them to a smaller size format like M4A makes sense. Moreover, if your player does not support playing FLAC files conversion can help to access them. The article below will help you know the best FLAC to M4A conversion tools.
- Part 1. The best way to convert FLAC to M4A
- Part 2. How to convert FLAC to M4A free online
- Part 3. Other 4 ways to convert FLAC to M4A
Part 1. The best way to convert FLAC to M4A
It is important to pick-up the right conversion tool to not only make the task hassle-free but for quality conversion as well. Wondershare UniConverter is one such excellent tool that will look after all your conversion and an array of other tasks as well. Supporting over 1000 formats, conversion in all key formats including FLAC to M4A can be quickly done and in lossless quality. With multiple files, batch processing is helpful for fast processing and the editor supports change in major parameters and file customization as well.
Wondershare UniConverter - Best Video Converter for Mac/Windows
-
Allows lossless quality conversion in more than 1000 formats
-
Batch processing support at a super-fast speed.
-
Built-in editor to trim, crop, cut, add effects, and add watermark to the files.
-
Video recording, compression, transfer, and other additional features supported.
-
Supported OS: Windows 10/8/7/XP/Vista, macOS 11 Big Sur, 10.15 (Catalina), 10.14, 10.13, 10.12, 10.11, 10.10, 10.9, 10.8, 10.7.
Steps to convert FLAC to M4A using Wondershare UniConverter:
Step 1 Load FLAC files to Wondershare FLAC to M4A converter.
At the Audio Converter tab on the main software interface browse and add the FLAC files by clicking on the + sign or  icon. Alternatively, you can also drag and drop the files,
![]()
Step 2 Choose M4A as the target format.
The list of the target formats can be opened from the drop-down menu at the Output Format tab. Choose M4A from the Audio list. The quality can be kept as the source file or can be chosen from the options given.
![]()
Step 3 Convert FLAC to M4A.
Clicking on the Start All button will start converting all the added files to the M4A format. Check the processed files on the computer from the folder selected at the File Location tab and on the interface from the Finished tab.
![]()
The above steps can be used to convert FLAC to M4A Mac as well as using Wondershare software.
Part 2. How to convert FLAC to M4A free online
When software installation is not an option or if you are looking for a pocket-friendly option to convert your files, online tools can be a good choice. These programs are free to use and require no software installation. Wondershare UniConverter is one such widely used tool that supports key video, image, and audio formats for the conversion. Two concurrent conversions at a time can be done using the program and the converted files can be saved to the computer or Dropbox. There is also an option to add the files from Google Drive and Dropbox after you sign-up for free with the tool.
Part 3. Other 4 ways to convert FLAC to M4A
A Round-up of the 4 other tools that can be considered for converting FLAC to M4A is given below.
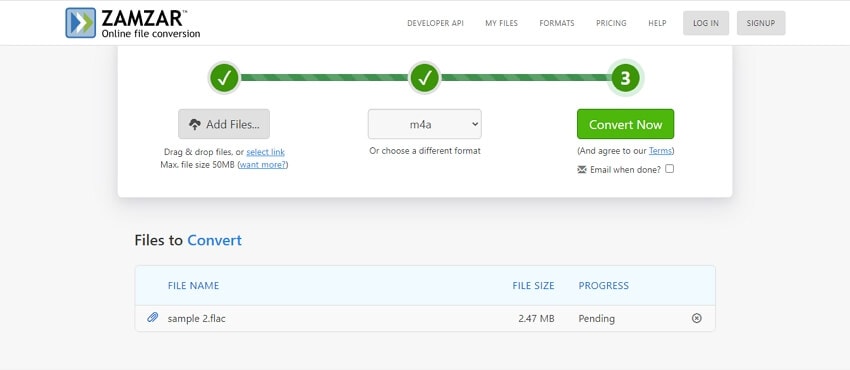
1. Zamzar
Apt for all types of basic conversions, Zamzar is a widely used tool that allows adding local and online files up to 50MB. The interface is simple and the converted files can be either saved to the computer or its download link can be received in an email.

Pros:
- Add local and online files
- User-friendly and simple interface
- Get converted file download link on an email
Cons:
- Only files up to 50MB can be added
- No option for file editing
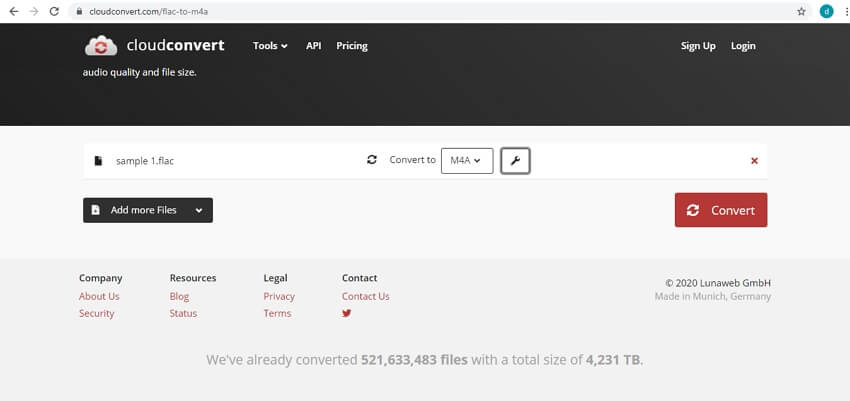
2. CloudConvert
Import files from the computer, Google Drive, Dropbox, URL, and One Drive using this browser-based tool. After the files are added you can trim their starting or the end if needed and there is also the option to edit their codec, quality, and bitrate from the available options. You can preview the processed file after the conversion and then save them locally or in cloud storage.

Pros:
- Option to import files for conversion from multiple sources
- Preview the converted files before downloading
- Edit basic file parameters
Cons:
- Dependency on the internet connection
- Download converted file
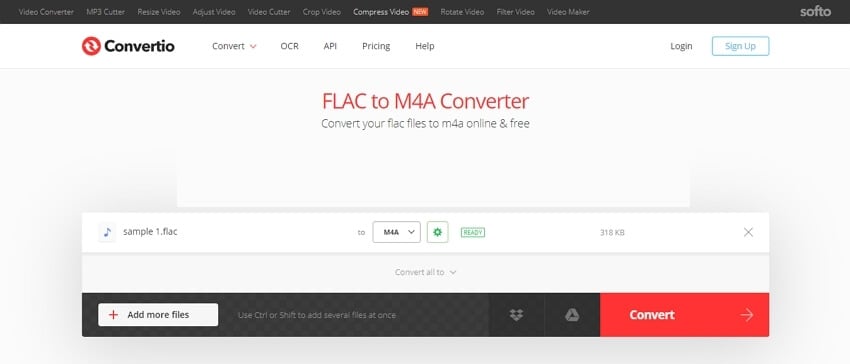
3. Convertio
Conversion is simple using this online tool that allows adding files up to 100MB to the interface from multiple sources. You can edit the file parameters lie volume, bitrate, codec, and others using the program. Removing unwanted file parts is also possible with the cut feature. Save the files to the cloud or the local system as needed.

Pros:
- Files to be converted can be added from the cloud as well as the local system
- Option to edit file parameters
- Cut the unwanted file parts
Cons:
- File size limitation to 100MB
- Dependency on the internet connection
- Limited additional features
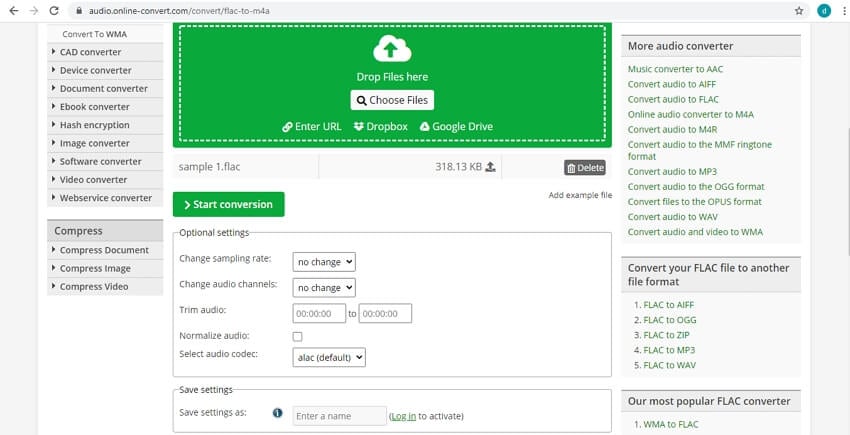
4. Online Convert
This online tool can be used from the browser window or its chrome extension can also be added. Files can be added from Google Drive, Dropbox, URL, and the local system. Sample rate codec and audio channels of the added files can be changed and there is an option for trimming the file and normalizing it.

Pros:
- Edit the file parameters
- Save the conversion settings for future files
Cons:
- Download the converted files
- Lack of additional features
Conclusion:
Online tools are good for basic conversion but to get high quality, conversion install Wondershare UniConverter on your Windows or Mac. The software is easy to use and in addition to file conversion, looks after an array of other tasks as well like video download, recording, compression, transfer, and more.
 Convert FLAC format to M4A or other 1,000+ formats, including MKV, MPG, AVI, etc.


Christine Smith
chief Editor