

Have you felt something is missing while watching a silent slideshow? That's because visuals alone can only go so far, but adding audio can be a show lifter. Imagine about a Google Slides with your voice, setting the mood with gentle background music. Even if you’re an instructor or a presenter, a slide with sound helps you deliver the message with more power and personality.
It's no surprise that people often ask how do I add audio to Google Slides. They don't want to leave their slides silent as soon as they realize what an audio can do. If you’re among those, read the article below because it's a complete guide to adding audio on your Google Slides. From different audio adding approaches to customizable hidden settings, you’ll learn everything to be a professional presenter.
In this article
- Why We Add Audio to Google Slides?
- Requirements to Confirm Before Adding Audio to Google Slides
- How to Add Audio to Google Slides with Google Drive?
- How to Add Audio to Google Slides with a URL?
- How to Add Audio to Google Slides by Online Recording?
- Customizable Hidden Settings in Audio of Google Slides
- Conclusion
- FAQs
Part 1. Why We Add Audio to Google Slides?
When determining how to add audio to Google Slides, understanding the “why” is equally important as the “how.” Therefore, each of the listed point explains why adding an audio can completely transform your presentation:
Improves Overall Engagement
Instead of reading through bullet points, your audience gets to hear your tone and emphasis. A background music setting the scene or a voiceover guiding the flow grabs viewers' attention from start to finish.
Supports Asynchronous Learning
In remote learning, audio offers context and clarity when you’re not there to explain things in person. Plus, when you narrate key points and add verbal instructions, it guarantees that your audience gets a guided, informative experience.
Clarifies Complex Information
Some topics become easier to understand when explained aloud because a spoken walkthrough can break down complex concepts. A well-spoken slide highlighting significant trends is better than an overloaded slide with text.
Embarks a Professional Impression
An audio in a slide shows you’ve incorporated extra thoughts and effort in your presentation. Besides this, it elevates the quality of your work, delivering content that looks and feels more polished.
Add Personalization
Your voice can humanize your slide, helping the message resonate more deeply. When presenting data, your tone and pacing make the experience more relatable that plain text cannot deliver.

Batch Convert or Compress Audios on Win and Mac
Part 2. Requirements to Confirm Before Adding Audio to Google Slides
To determine how to add music in Google Slides, you’ll need to start with the correct file type and size to avoid playback issues. For this, we’ve compiled a quick reference to the file requirements that Google Slides supports:
|
Requirement Type |
Details |
|
Supported Format |
MP3 and WAV |
|
Maximum File Size |
Up to 100MB (depends on Google Drive general upload limits) |
|
Storage Location |
Audio should be stored in Google Drive |
|
Access Settings |
Set to "Anyone with the link can view" for shared presentations |
Wondershare UniConverter to Prepare Your Audio - A Simple Solution
Suppose your audio falls short of the abovementioned requirements; remember, Wondershare UniConverter is there for you. This platform allows multiple audio files simultaneously and spits out perfectly sized MP3 or WAV files in record time. Besides this, it provides an ultimate compressor mode for 4K/8K audio and video compression. While supporting more than 1000 formats, you can either drop or insert your audio from your device.
To understand how do you put music on Google Slides, you should ensure the audio file is in its supported format. For conversion, UniConverter allows users to choose the output format while displaying the original file information on the screen. However, its compressor provides a slider to select the compression size accordingly. In advanced settings, you can manually resize your audio file before converting it into your desired format.
Other Key Features
- Noise Remover: Before converting or compressing, presenters can opt for this noise remover tool to delete background noises in bulk.
- Vocal Remover: With its vocal removal capability, the platform automatically isolates voices and instruments in any song through AI.
- Voice Changer: It allows users to change or modify their voices into any male, female, or transformer style for any occasion.
Tutorial on How to Convert Audio Format To Appropriate Option
An unsupported format can sometimes hinder your learning process for how to put audio in Google Slides. Therefore, a detailed stepwise tutorial is given below to ensure a smooth conversion for seamless insertion later:
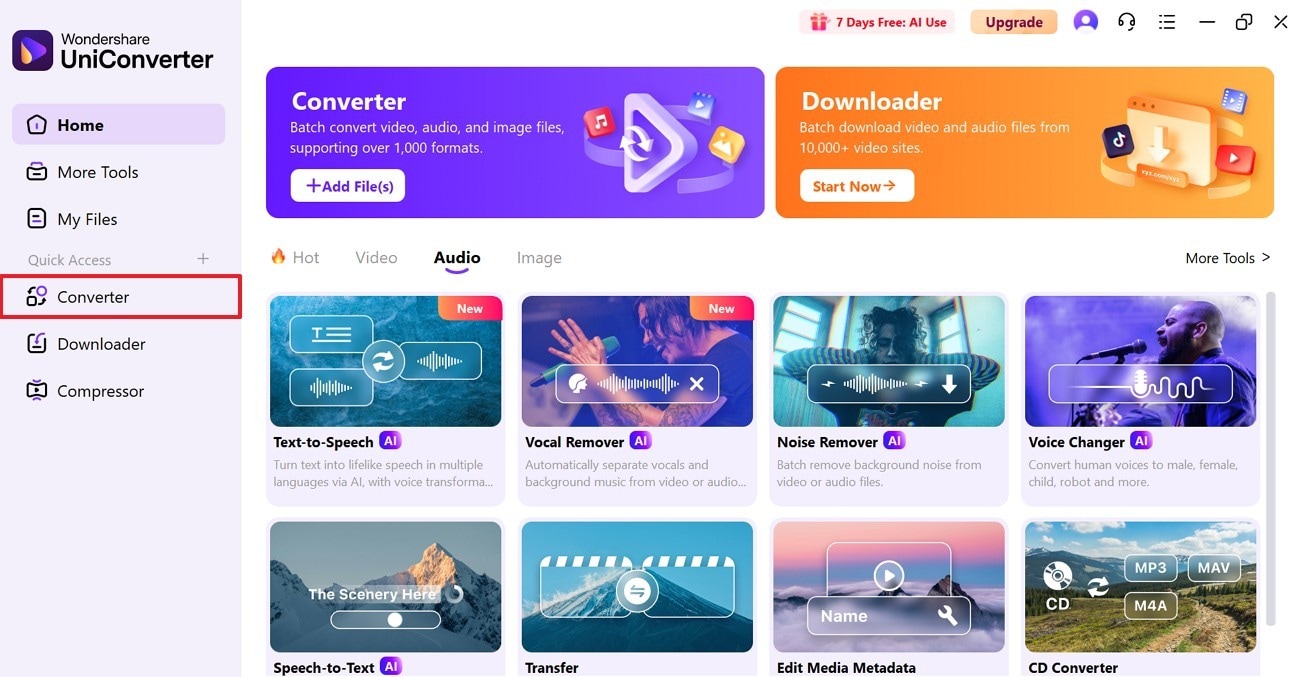
Step 1. Install UniConverter and Enable the Converter Mode
First, install UniConverter on your device, and later access the “Converter” tool from the left side panel.
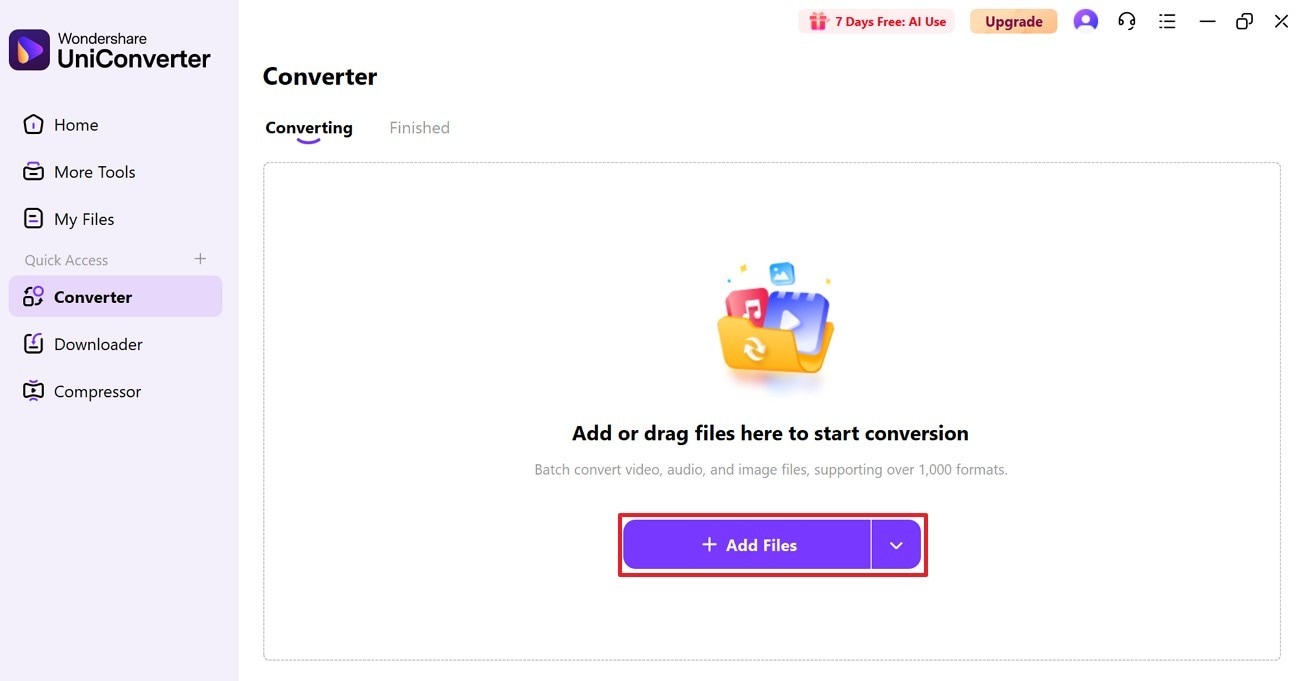
Step 2. Import Your Recorded Audio File
Move ahead and press the “+ Add Files” button to import your unsupported audio file to the tool for conversion.
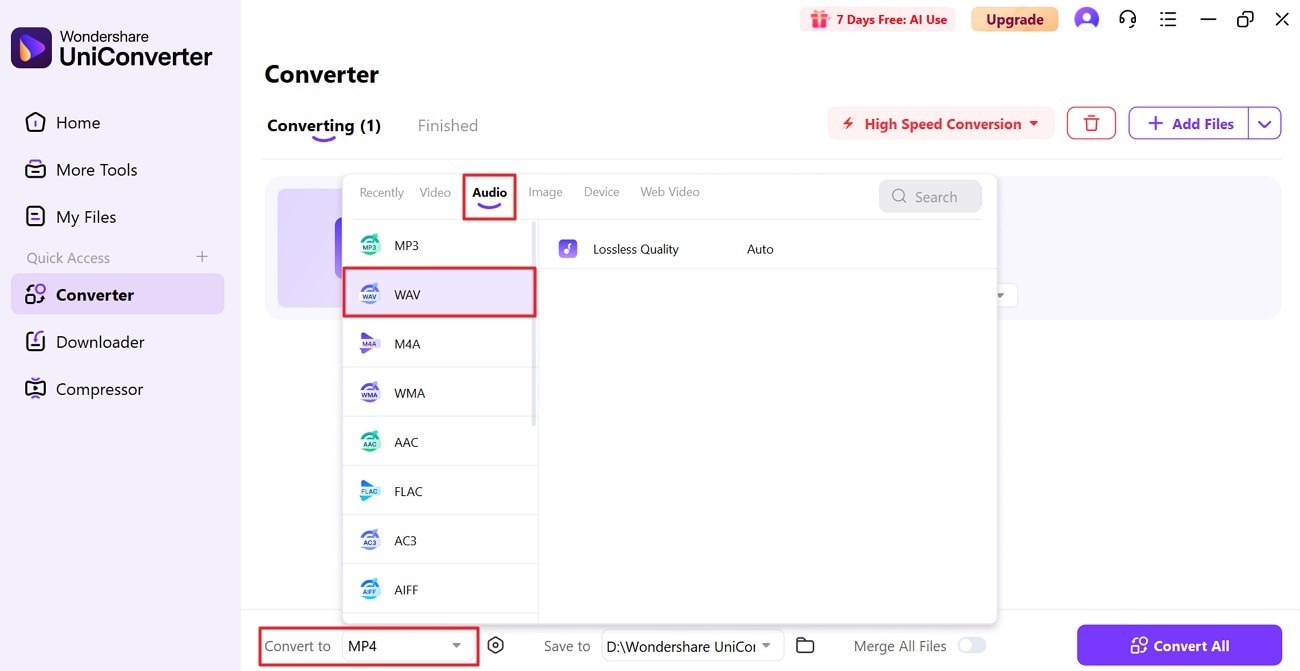
Step 3. Choose your Preferred Output Format for Audio
Once the audio is added, extend the menu to “Convert To” and open the “Audio” section in the new window. Now, choose your desired format from the options provided and proceed ahead.
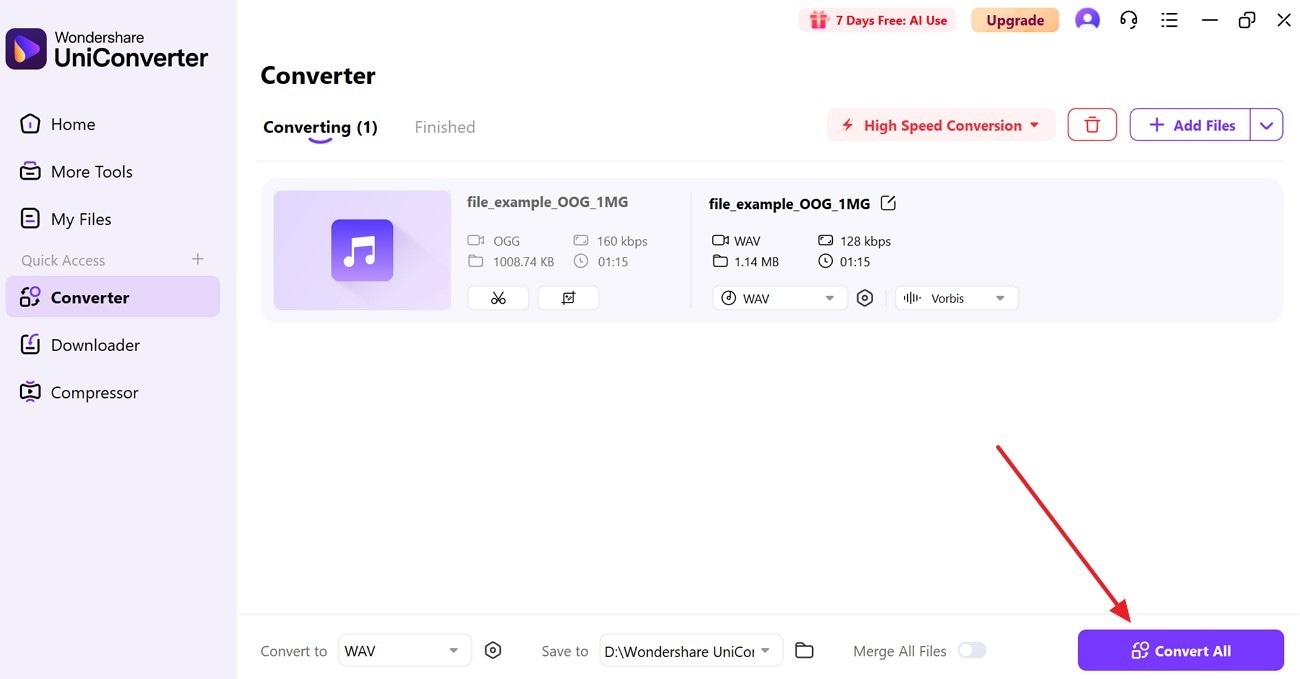
Step 4. Convert your Audio in the Chosen Format
Later on, hit the “Convert All” button in the bottom right corner to convert audio for later insertion in your presentation.
Stepwise Guide to Compress Your Audio File
Large audio files can occasionally slow your presentation or even fail to load properly during playback. Before you know how to insert audio into Google Slides, follow the tutorial to compress it first through UniConverter:
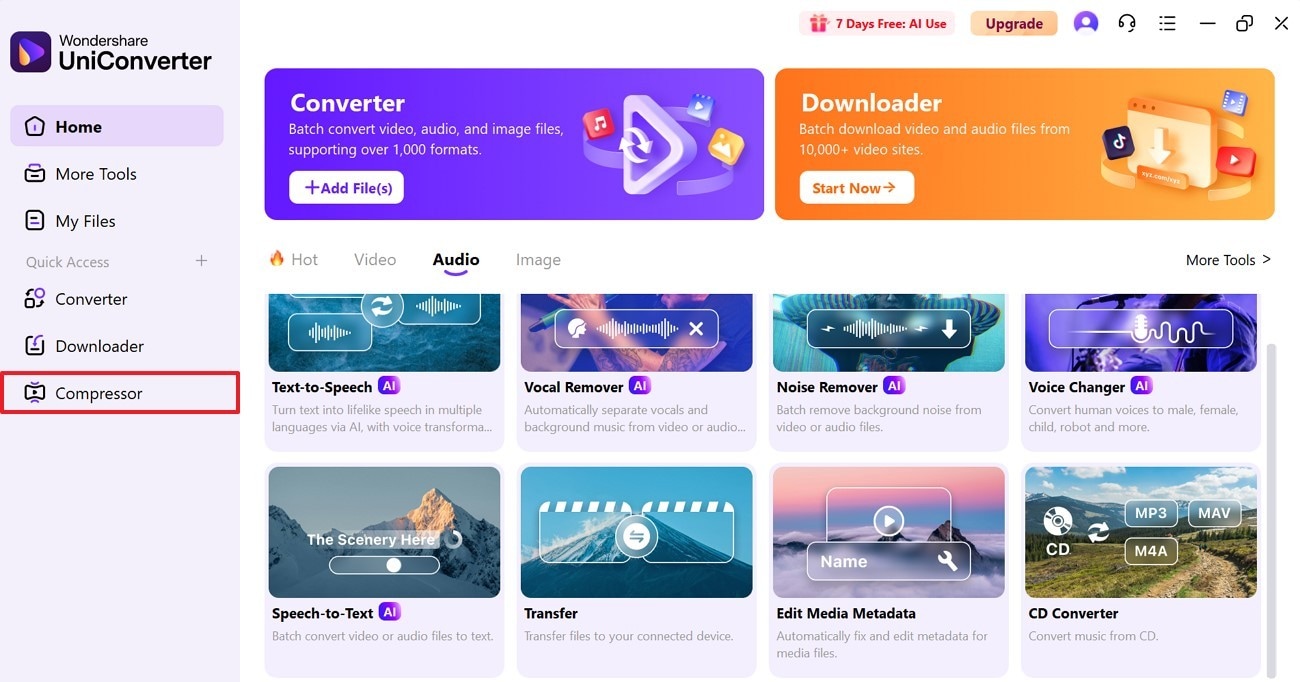
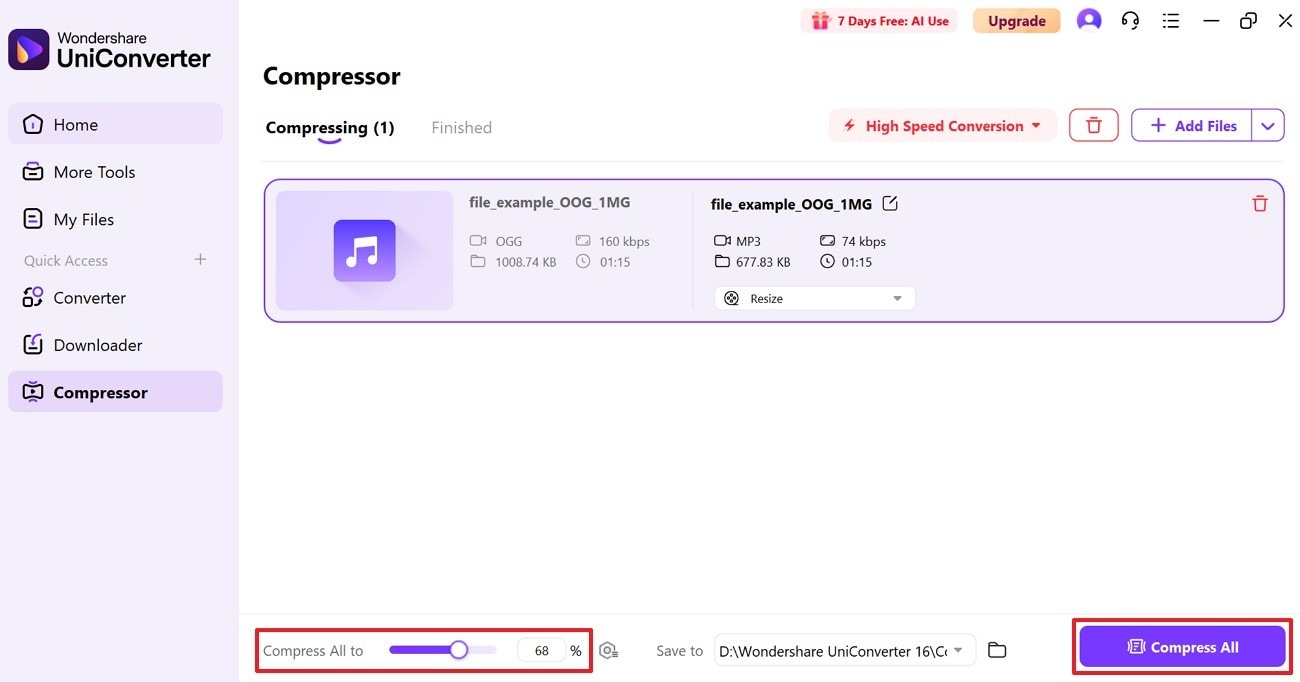
Step 1. Launch the Software and Open its Compressor Mode
First, launch the updated version of UniConverter on your device and access the “Compressor” feature from the left side panel.
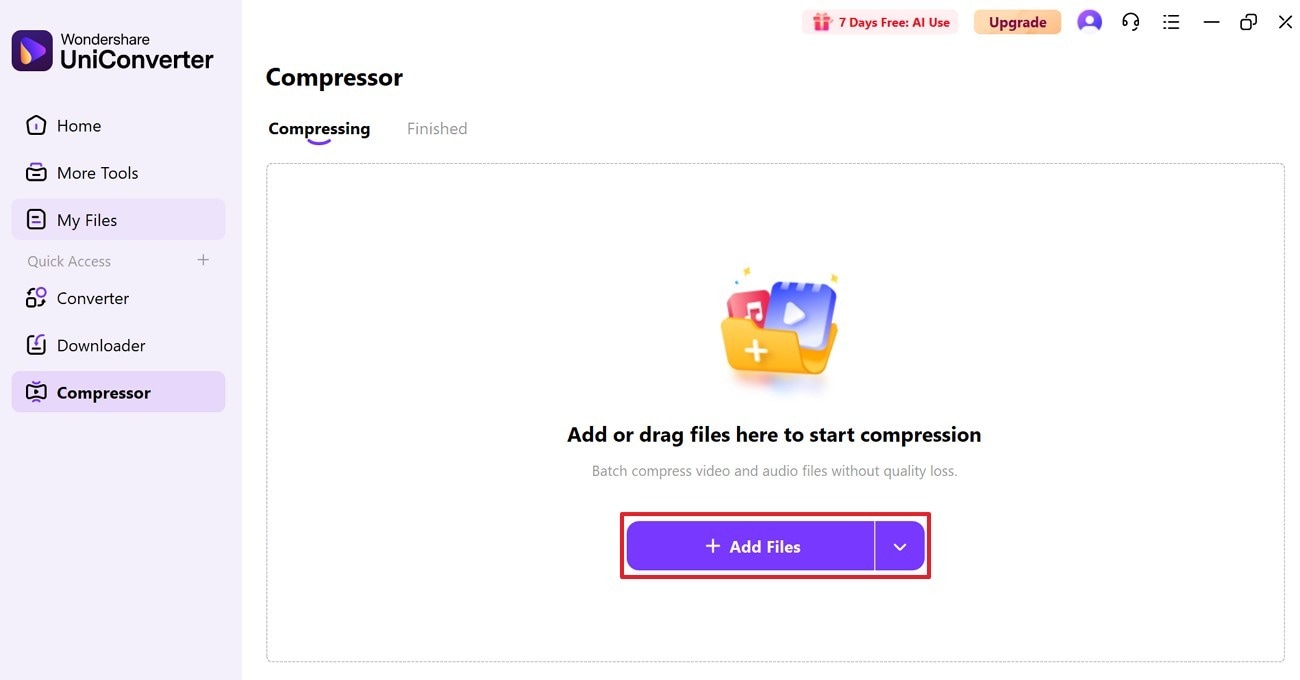
Step 2. Add Your Large Audio Files to the Tool
Now, press the “+ Add Files” button to import your big audio file and compress it as per your preference.
Step 3. Compress Your Added Audio for Google Slides
Once done, move the slider for “Compress All To” or adjust the percentage to manage your audio’s compression level. In the end, proceed to the “Compress All” button to complete the compression process of the added audio file.
Batch Convert or Compress Audios on Win and Mac
Part 3. How to Add Audio to Google Slides with Google Drive?
The easiest approach to add audio is through Google Drive, which allows users to insert audio saved in their drives. Once inserted, you can enable basic formatting for your sound, including controlling reflection and shadow volume. When planning to share Google Slides with team, give them access to your audio file from Google Drive separately. To know how to add sound to Google Slides, master the given tutorial, and create professional presentations:
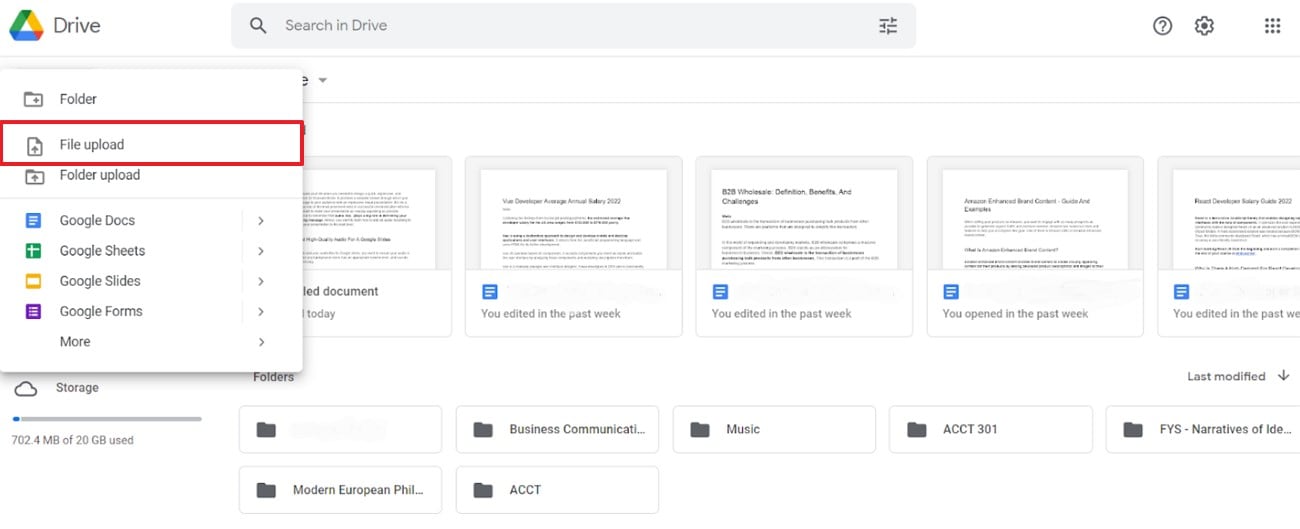
Step 1
To initiate the procedure, navigate to the “New” button on the top left of your Google Drive account page. Move ahead and choose the “File Upload” button to add your audio from your device to Google Drive.
Step 2
Open your Google Slides window and head to the “Insert” tab from the top toolbar. Choose the “Audio” option from the drop-down menu and select the audio you’ve already uploaded to your Google Drive. Adjust the “Audio” icon once your audio is added to make it look more synchronized with your presentation.

Part 4. How to Add Audio to Google Slides With a URL?
Another technique to learn how to insert audio in a Google Slides presentation is by linking audio through a URL. When a link is added to your slide, it becomes a clickable element that opens in a new browser tab upon accessing. Although this method doesn’t insert audio directly into your slide, it does provide an alternative to accessing external audio content.
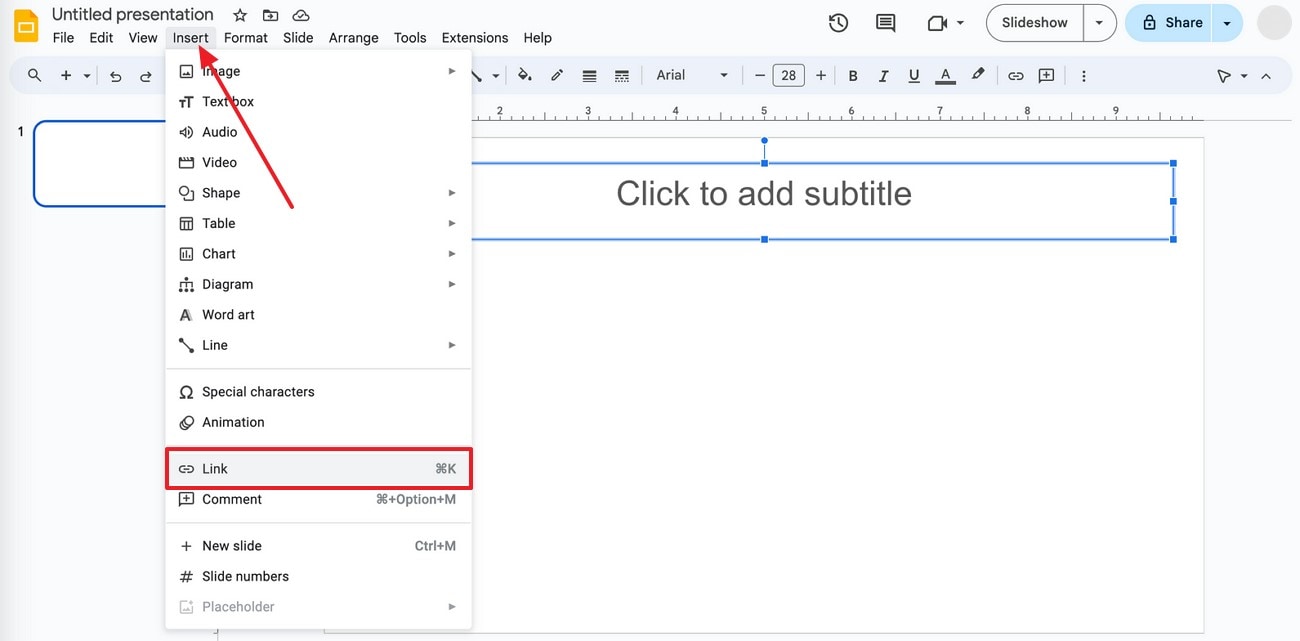
Step 1.
To begin, choose the audio you want to use and track the sound. Press the “Copy Link” button to copy the URL. Open your Google Slides presentation and spot the location to add the audio. Once done, press the “Insert” tab from the top toolbar and choose the “Link” option from the drop-down menu.
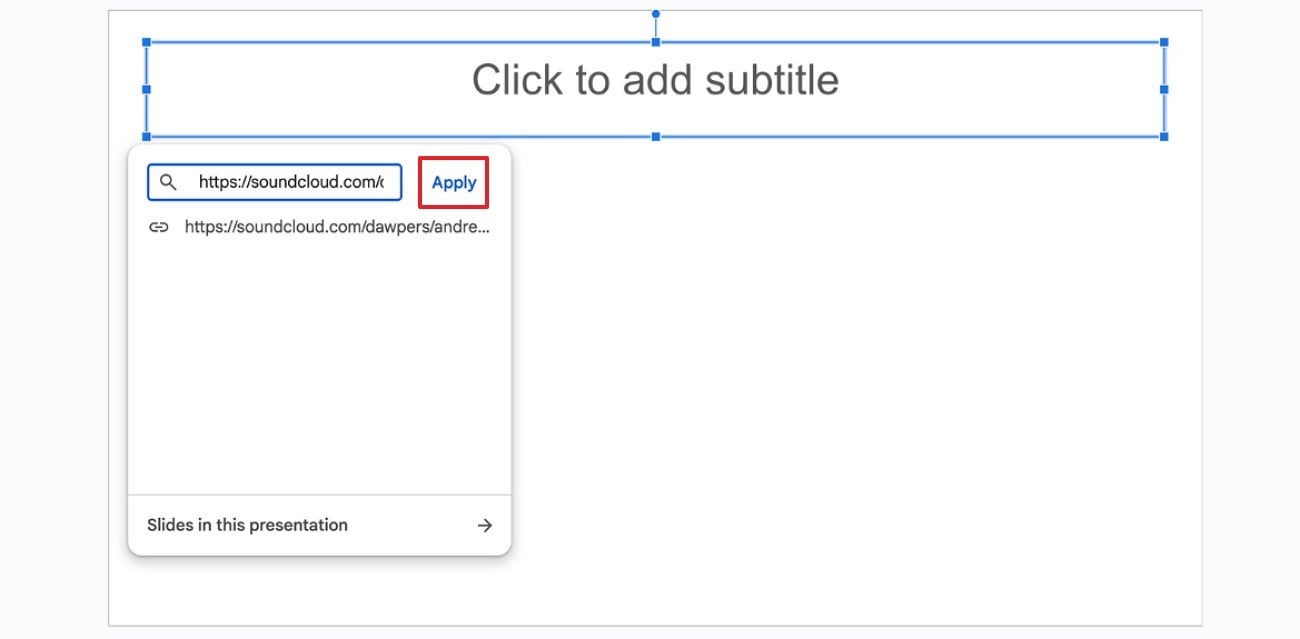
Step 2.
In the revealing “Link” dialogue box, paste your copied URL and hit the “Apply” button. Following this, a link will be inserted in your slide, which will be opened in a new tab when clicked during presentation.
Batch Convert or Compress Audios on Win and Mac
Part 5. How to Add Audio to Google Slides by Online Recording?
When you don’t have a pre-recorded audio file, an online recorder like 123APPS offers a convenient way to create custom audio. It allows users to record their voices on the go while adjusting microphone settings using standard Adobe Flash Player. Once done recording, save it on your device and embed it in Google Slides through insert tab. For how to insert music in Google Slides, follow the tutorial below:
Step 1.
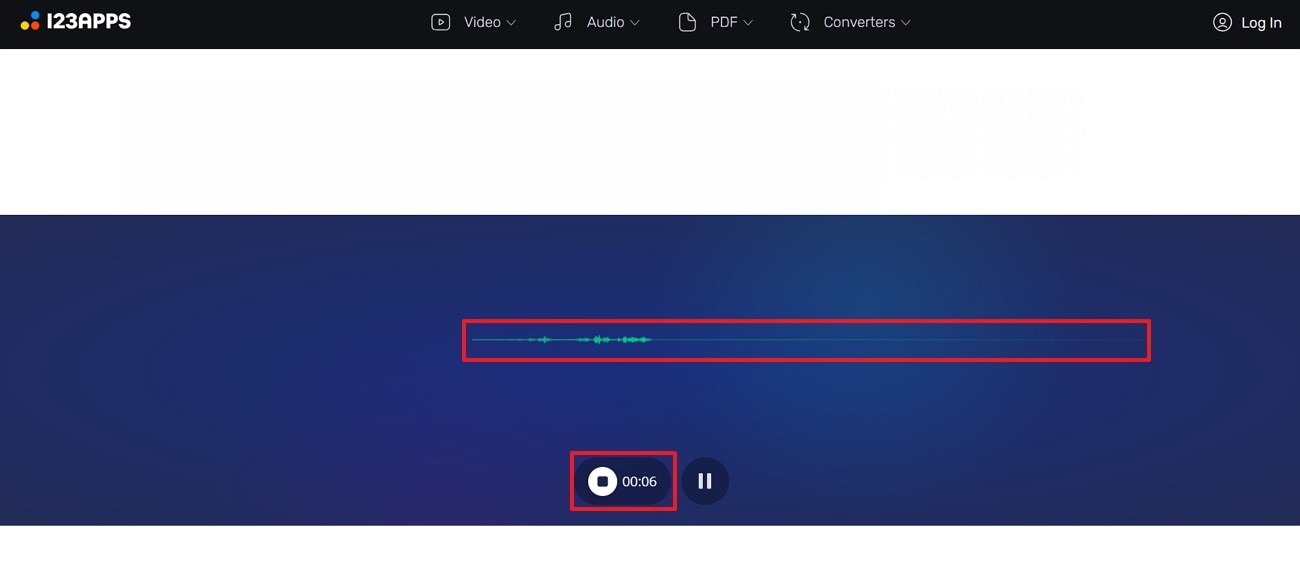
For an online audio recording, browse 123APPS on your browser and press the “Record” button to start recording your voice.

Step 2.
Now, keep recording and hit the “Stop” button once you’re done recording your audio.
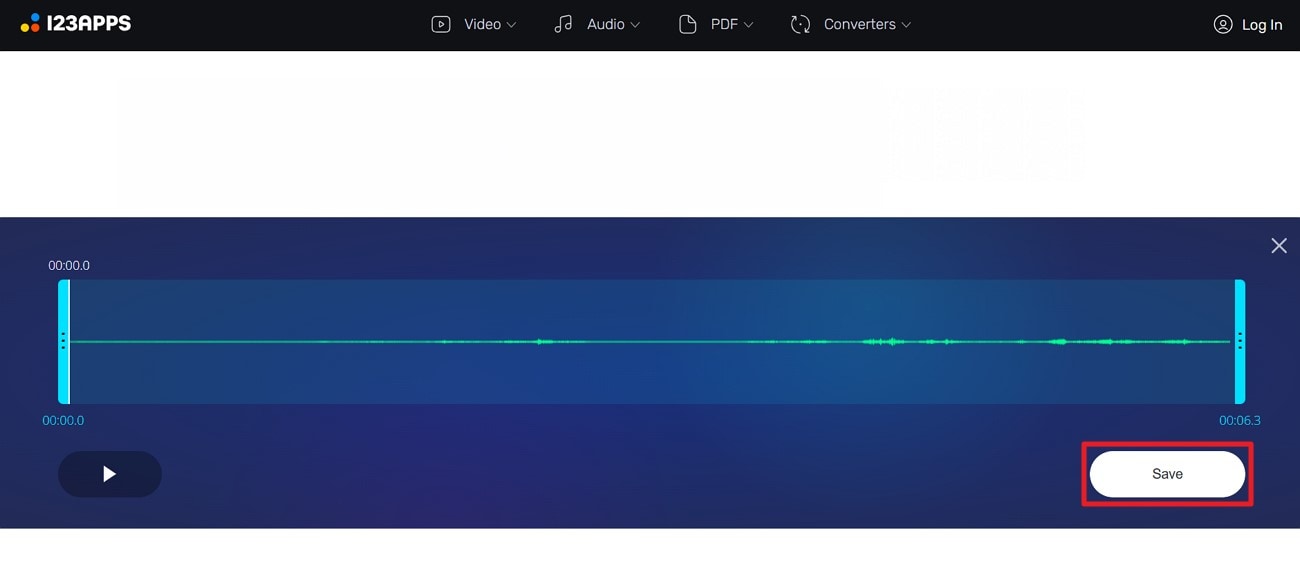
Step 3.
After this, navigate to the “Save” button on the right side of your screen to download your recorded audio to your device. Once done, access your Google Slides and choose a specific slide to add your recorded audio. From the “Insert” tab at the top, select the “Audio” option to incorporate your sound on the particular slide.
Part 6. Customizable Hidden Settings in Audio of Google Slides
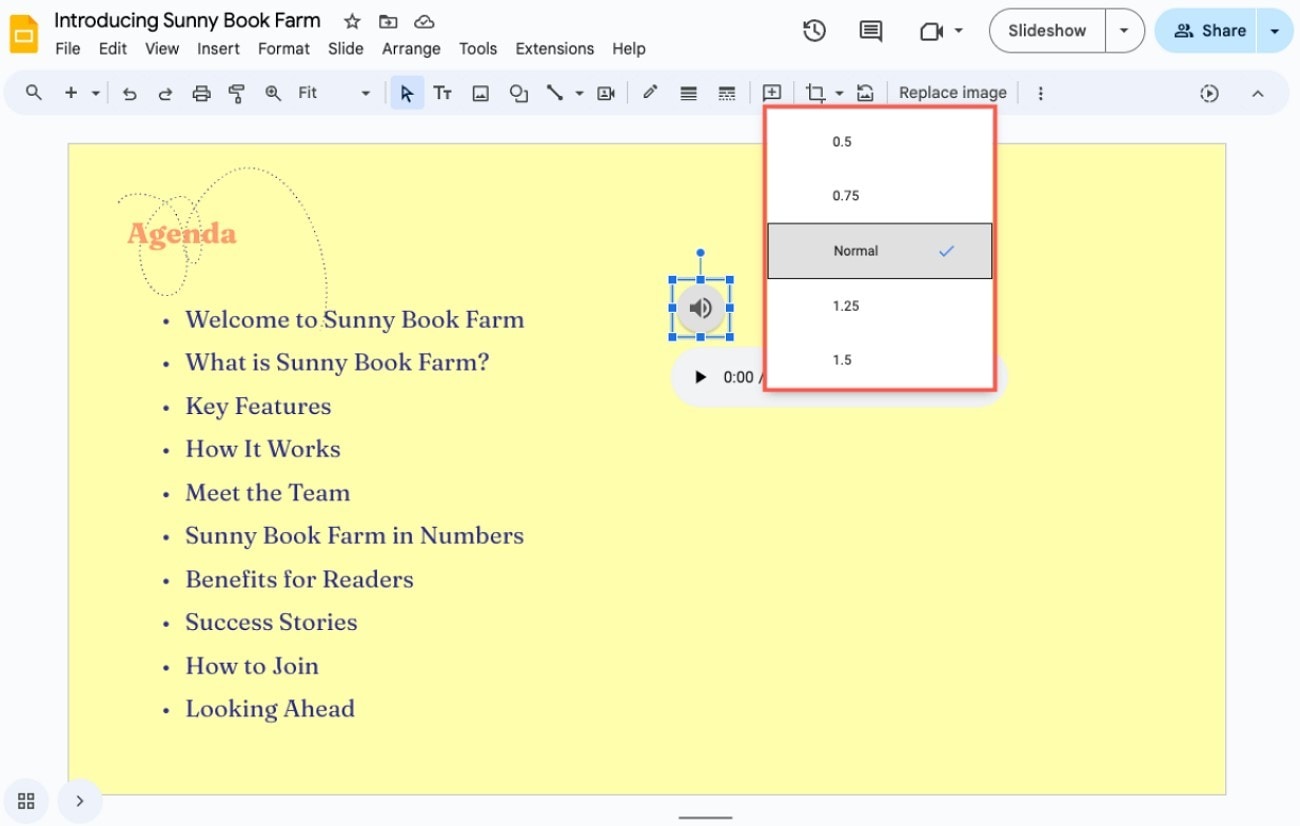
Wherever an audio is inserted, Google Slides serves more than a basic playback; it includes a range of hidden customization options. You’ll see a “Speaker” display on your slide when audio is added, which can be dragged anywhere. Clicking the “three-dot” icon on the audio allows you to manage the “Playback Speed” with various options.
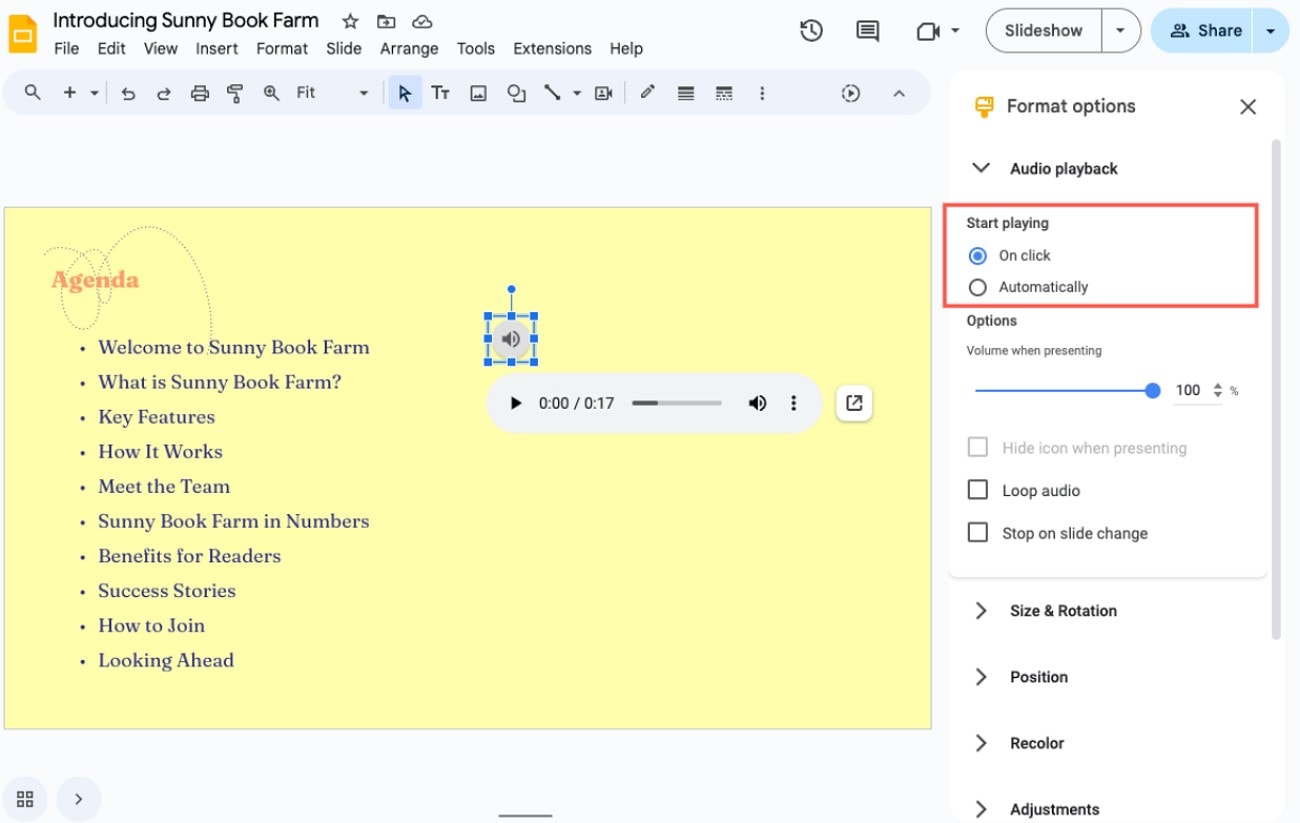
Once learned how do I add music to a Google Slides, you can access the “Format” tab to reveal the format menu for audio settings. From the menu, presenters can adjust the volume of their sound and choose “Start Playing” options, such as “On Click” and “Automatically.” Besides this, it enables one to modify the speaker icon with Recolor, Adjustment, and Drop Shadow options.
Conclusion
How do I add audio to Google Slides is the most asked question when planning to prepare a presentation. Many presenters prefer to add voiceovers and background music to turn static slides into an expressive experience. For such users, we’ve shared several methods to insert audio or a recording into Google Slides for professional presentations. If you have an audio that is too long or in an unsupported format, consider Wondershare UniConverter for conversion or compression.
Batch Convert or Compress Audios on Win and Mac
FAQs
-
1. Can I record audio directly in Google Slides?
No, the Google Slides itself does not have any built-in capability to record and requires an external platform for recording. Then, you can upload it to the Google Drive before you add it to your slides. -
2. Can I add different audio to multiple slides?
You can definitely add separate audio files to different slides by simply accessing each file and inserting audio or a link. When you learn how to put audio into Google Slides, this addition to each slide is valuable for voiceovers and narrations. -
3. Why isn't my audio playing during the presentation?
Many reasons could be associated with this problem, including incorrect file permissions or unsupported file formats. Besides this, the audio settings are not configured correctly, which might affect the automatic playing of sound during presentation.

